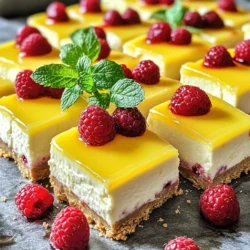
Looking for a quick and tasty dessert? Try my No-Bake Lemon Raspberry Cheesecake Bars! These treats are simple to make and bursting with fresh flavors. You won’t need to turn on the oven, and they come together in no time. I’ll guide you through every step, from the zesty crust to the creamy filling packed with juicy raspberries. Let’s dig into this sweet delight together!
Ingredients
Main Ingredients
- 1 ½ cups graham cracker crumbs
- ½ cup unsalted butter, melted
- 2 cups cream cheese, softened
- 1 cup powdered sugar
To start, you need graham cracker crumbs for the crust. They give a nice crunch. Melted unsalted butter binds the crumbs together. Then, for the filling, use softened cream cheese for a smooth texture. Powdered sugar adds sweetness, making it taste great.
Flavor Enhancers
- Zest of 1 lemon
- ⅓ cup fresh lemon juice
- 1 teaspoon vanilla extract
Next, lemon zest adds a bright flavor. Fresh lemon juice brings tartness. Vanilla extract gives a nice depth to the taste. These three elements make the cheesecake bars refreshing and delightful.
Additions
- 1 cup fresh raspberries
- 1 cup whipped cream (for folding in)
- Extra raspberries for topping
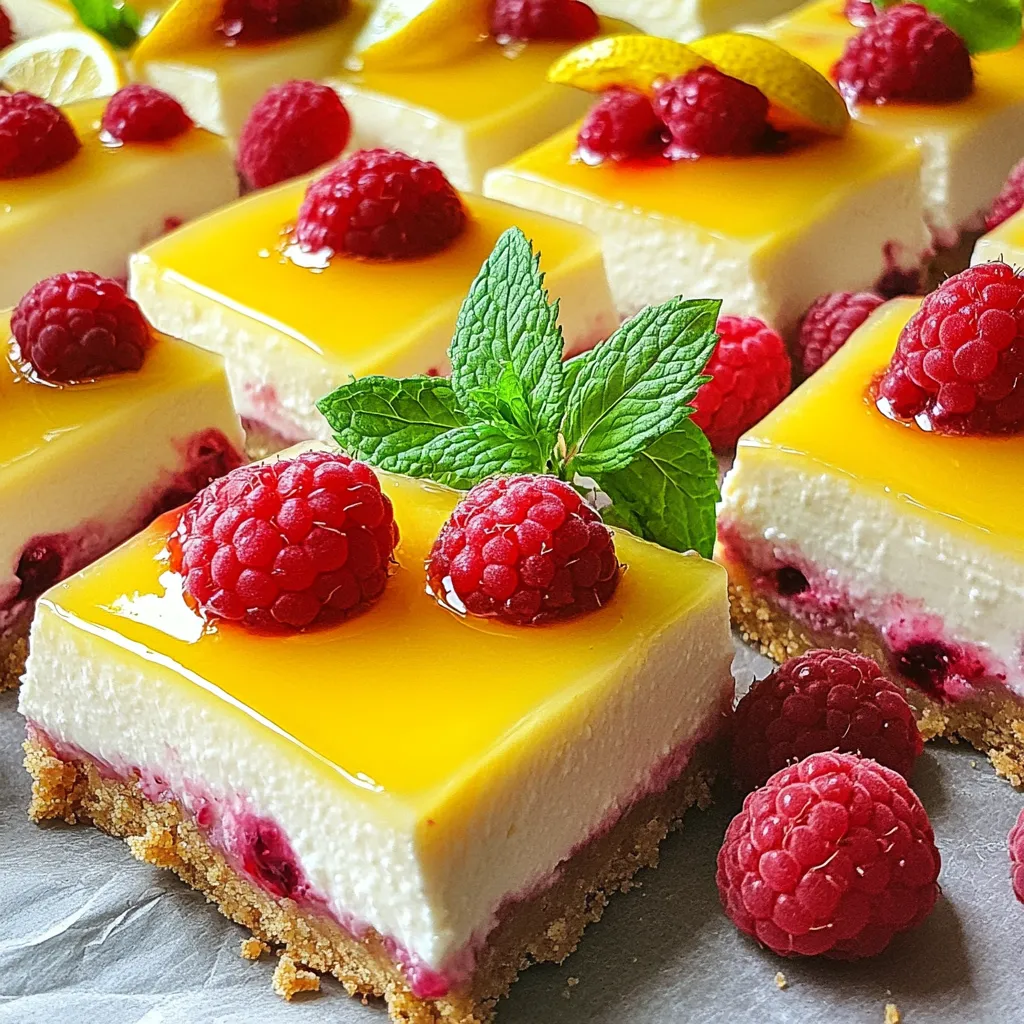
Finally, fresh raspberries give a burst of flavor and color. Whipped cream makes the filling light and airy. Save some raspberries to top the bars for a pretty finish. These ingredients come together to create a treat that looks and tastes amazing.
Step-by-Step Instructions
Prepping the Crust
First, you need to make the crust. In a medium bowl, combine 1 ½ cups of graham cracker crumbs with ½ cup of melted unsalted butter. Mix until the texture feels like wet sand. This mixture creates a tasty base for our cheesecake bars.
Next, take an 8×8 inch baking dish and line it with parchment paper. Leave some paper hanging over the edges. This helps you lift the bars out later. Now, press the graham cracker mixture firmly into the bottom of the dish. Make sure it is even and compact. Set it aside to chill while you work on the filling.
Creating the Filling
Now, let’s make the filling. In a large bowl, beat 2 cups of softened cream cheese with an electric mixer until it’s smooth. This step is key for a creamy texture. Gradually add in 1 cup of powdered sugar, the zest of 1 lemon, ⅓ cup of fresh lemon juice, and 1 teaspoon of vanilla extract. Mix this until everything is fully combined. The fresh lemon juice adds a nice zing.
Assembling and Chilling
It’s time to bring it all together. Gently fold in 1 cup of whipped cream to the cream cheese mixture. This makes the filling light and airy, which is what we want. Next, carefully fold in 1 cup of fresh raspberries. Be gentle to keep their shape.
Pour the raspberry cream cheese mixture over the chilled crust. Use a spatula to spread it evenly. Now, cover the dish with plastic wrap and refrigerate. Let it chill for at least 4 hours, or until the filling is firm enough to slice. Once set, lift the bars out using the parchment paper. Cut into squares and enjoy!
Tips & Tricks
Achieving the Perfect Texture
To get the right texture in your cheesecake bars, start with softened cream cheese. Cold cream cheese will create lumps. Leave it out for about an hour before using. This makes mixing much easier.
When folding in the whipped cream, be gentle. Use a spatula and a light touch. This keeps the mixture airy and fluffy. If you mix too hard, you risk losing that light texture.
Serving Suggestions
For a beautiful presentation, serve the bars on a decorative platter. You can garnish each piece with a sprig of mint or a few whole raspberries. This adds color and makes the dessert pop.
Pair these bars with a refreshing drink. Lemonade, iced tea, or sparkling water work well. The bright flavors in the dessert go nicely with these beverages.
Common Mistakes to Avoid
One common mistake is not chilling the bars long enough. They need at least 4 hours in the fridge. If you skip this, the filling won’t set properly.
Another mistake is overmixing the filling. You want everything combined, but don’t beat it too much. This can make the filling dense instead of light and creamy.
Variations
Fruit Substitutes
You can easily swap raspberries for other fruits. Strawberries work great. They add sweetness and color. Blueberries also make a tasty choice. They bring a nice burst of flavor. You can mix different fruits for fun. This lets you create your own unique twist.
Flavor Enhancements
Want to change the flavor? Try adding lime or orange zest. Lime gives a fresh, tangy kick. Orange adds a sweet, citrusy depth. Both options can brighten up the bars. Just replace some lemon juice for these flavors. Your cheesecake bars will be vibrant and exciting.
Dietary Adjustments
For a gluten-free crust, use gluten-free graham cracker crumbs. They work just as well in the recipe. If you need a dairy-free option, look for dairy-free cream cheese. Many brands offer great choices. These adjustments keep the taste while meeting dietary needs. Enjoy your cheesecake bars without worry!
Storage Info
Best Storage Methods
To keep your no-bake lemon raspberry cheesecake bars fresh, refrigerate them. Place the bars in an airtight container. This helps prevent them from absorbing any odors from your fridge. If you don’t have an airtight container, cover the dish tightly with plastic wrap.
Freezing Instructions
If you want to save some bars for later, you can freeze them. First, cut the bars into squares. Then, wrap each square tightly in plastic wrap. Place the wrapped bars in a freezer-safe bag or container. This method helps keep them fresh and tasty for up to two months.
Shelf Life
In the fridge, these cheesecake bars stay fresh for about 5 to 7 days. If you freeze them, they can last up to two months. However, for the best taste, enjoy them within a month. Always check for any signs of freezer burn or off smells before eating.
FAQs
Can I use frozen raspberries instead of fresh?
Yes, you can use frozen raspberries! They work well in this recipe. However, they may make the filling a bit runny. When you fold in frozen raspberries, be gentle. This helps keep their shape. If you want a thicker filling, drain excess juice before adding them.
How long should I let the bars chill?
You should chill the bars for at least 4 hours. This time helps the filling set properly. If you can, let them chill overnight. This makes them even firmer and easier to slice. A well-chilled bar cuts cleanly and looks great on a plate.
Can this recipe be doubled?
Yes, you can double this recipe easily. Just use a 9×13 inch baking dish instead of an 8×8 inch one. Also, double each ingredient. This way, you’ll have more delicious bars to share! Just remember to adjust the chilling time if needed.
This blog post covered how to make delicious cheesecake bars. You learned about essential ingredients and flavor enhancers, like lemon and raspberries. I shared step-by-step instructions for prepping, mixing, and chilling. You discovered tips for texture and serving, plus common mistakes to avoid. Variations let you customize the recipe to fit your tastes. Finally, we discussed storage methods and answered frequent questions. With this guide, you can make tasty bars your friends will love. Enjoy your baking!