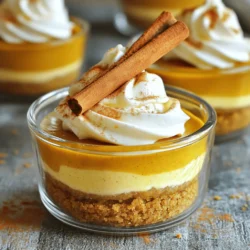
Get ready for a treat that requires no baking! My No Bake Pumpkin Cheesecake Cups are a simple and delicious way to enjoy fall flavors. Perfect for any occasion, these creamy cups are easy to whip up. Today, I’ll share the ingredients, step-by-step assembly, and pro tips to make your dessert shine. Whether you’re a seasoned chef or a kitchen novice, you’ll love how quick and satisfying these treats are!
Ingredients
List of Ingredients
To make the no bake pumpkin cheesecake cups, gather these ingredients:
- 1 cup graham cracker crumbs
- 1/4 cup melted unsalted butter
- 2 tablespoons sugar
- 1 (8 oz) package cream cheese, softened
- 1 cup pumpkin puree
- 1/2 cup powdered sugar
- 1 teaspoon vanilla extract
- 1 teaspoon pumpkin pie spice
- 1 cup heavy whipping cream
- Whipped cream for topping
- Cinnamon stick for garnish (optional)
Choosing quality ingredients makes a big difference. For the cream cheese, pick a brand that is full-fat for the best taste. Use fresh pumpkin puree for a richer flavor. If you can, select organic graham crackers. They often taste better and add more to your dessert.
Substitutions and Alternatives
If you want a different crust, try using crushed cookies or nuts instead of graham crackers. Chocolate sandwich cookies also make a great base. For those who need dairy-free options, use vegan cream cheese. You can whip coconut cream instead of heavy cream. This gives a nice texture while keeping it dairy-free.
Step-by-Step Instructions
Preparation Steps
To start, we need to prep the crust and base mixture. In a medium bowl, combine these ingredients:
- 1 cup graham cracker crumbs
- 1/4 cup melted unsalted butter
- 2 tablespoons sugar
Mix until the crumbs look like wet sand. This is your crust. Next, we make the cheesecake filling. In another bowl, beat one package of softened cream cheese until smooth.
Then, add:
- 1 cup pumpkin puree
- 1/2 cup powdered sugar
- 1 teaspoon vanilla extract
- 1 teaspoon pumpkin pie spice
Beat this mixture until it’s fully combined and smooth. Now, we need to fold in some whipped cream. In a separate bowl, whip 1 cup of heavy cream until stiff peaks form. Gently add it to the pumpkin mixture. Be careful not to deflate the whipped cream!
Assembly Instructions
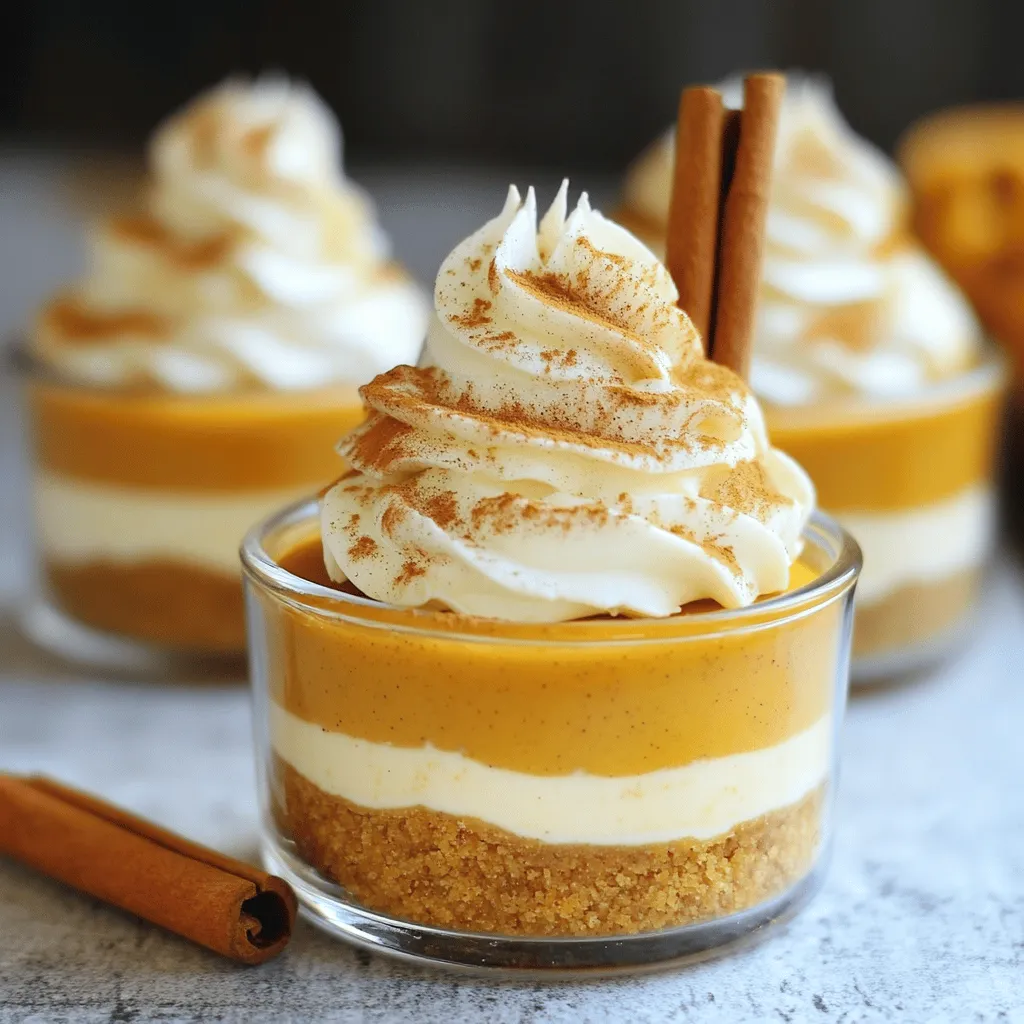
Now we assemble our cups. Spoon about 2 tablespoons of the crust mixture into the bottom of each serving cup. Press it down gently to form a nice layer. Next, take the creamy pumpkin mixture and spoon it on top of the crust, filling each cup until it’s about 3/4 full.
For smooth layering, make sure to spread the filling evenly. You can use the back of a spoon or a small spatula to help.
Setting and Storage
Refrigerate the cups for at least 4 hours. If you can, leave them overnight. This lets the flavors blend and the cheesecake set nicely.
For best practices, cover the cups with plastic wrap or a lid while they chill. This keeps them fresh and prevents any unwanted odors from your fridge. Enjoy the tasty treat once they are set!
Tips & Tricks
Ensuring Perfect Texture
To avoid lumps in your cream cheese mixture, make sure to soften the cream cheese well. I suggest letting it sit at room temperature for about 30 minutes. This helps it blend smoothly. If you forget, you can microwave it for 10 seconds. Just be careful not to melt it.
The best temperature for all ingredients is room temperature. Both the cream cheese and pumpkin puree should be warm. This helps them mix together better, creating a creamy texture. If the heavy cream is cold, whip it until stiff peaks form. Cold cream whips up light and fluffy, adding volume to your cheesecake cups.
Serving Suggestions
You can get creative with how you present these dessert cups. Use clear glass jars or pretty ramekins to show off the layers. Top each cup with a generous dollop of whipped cream. A sprinkle of cinnamon adds a nice touch. You can also add a cinnamon stick for a lovely garnish.
These no-bake pumpkin cheesecake cups are great for many occasions. They shine at fall parties, Thanksgiving, or even cozy family dinners. Kids love them too! You can make them ahead of time, which saves you stress on special days.
Common Mistakes to Avoid
One common mistake is over-mixing the cream cheese and pumpkin mixture. This can make it too runny. Mix just until smooth; don’t go beyond that. Another error is not letting the cups chill long enough. They need at least four hours to set properly.
When adjusting sweetness, taste your mixture first. If it’s too sweet, add a pinch of salt. This can balance the flavors well. If you want more spice, add a bit more pumpkin pie spice. Just remember, a little goes a long way!
Variations
Flavor Variations
You can easily change the flavor of these no-bake pumpkin cheesecake cups. One fun option is to add chocolate or caramel. Just swirl in some chocolate sauce or drizzle caramel on top. This twist adds a rich flavor and makes the cups even more special.
If you’re not a fan of pumpkin, there are other choices. You can use sweet potato puree or butternut squash puree. Both will give you a similar texture and flavor. You can also try mixing in spices like ginger or nutmeg for a new taste.
Dietary Variations
If you need gluten-free options, it’s simple to adapt the crust. Use gluten-free graham crackers or ground nuts instead. Both work well and keep the crust tasty.
For vegan adaptations, swap the cream cheese with a dairy-free version made from nuts or tofu. Use coconut cream instead of heavy cream for the filling. This way, everyone can enjoy the dessert, no matter their diet.
Storage Info
Best Practices for Storage
To keep your no-bake pumpkin cheesecake cups fresh, store them in the fridge. Use an airtight container to prevent them from drying out. If you plan to eat them later, cover each cup with plastic wrap or a lid. These cups will stay fresh for up to 3 days in the fridge. After that, the texture may change, and they may lose some flavor.
Freezing Instructions
Yes, you can freeze the cheesecake cups! This is a great way to save some for later. To freeze, simply cover each cup tightly with plastic wrap, then aluminum foil. They will keep for about 2 months in the freezer. When you’re ready to enjoy them, take them out and let them thaw in the fridge overnight. This helps the texture stay smooth when you serve them. Enjoy these delightful treats anytime!
FAQs
How long do no-bake pumpkin cheesecake cups last?
No-bake pumpkin cheesecake cups last about 4 to 5 days in the fridge. Store them in an airtight container to keep them fresh. The flavors get better over time, but they are best enjoyed within that time frame.
Can I make these cups ahead of time?
Yes, you can make these cups up to two days in advance. This makes them great for parties or busy days. Just store them in the fridge until you’re ready to serve. If you add any toppings, do that right before serving for the best look.
What can I substitute for pumpkin pie spice?
If you don’t have pumpkin pie spice, mix these spices instead:
- 1 teaspoon cinnamon
- 1/4 teaspoon nutmeg
- 1/4 teaspoon ginger
- 1/4 teaspoon allspice
This mix gives a warm flavor similar to pumpkin pie spice.
Are there any easy ways to decorate the cups?
Sure! Here are some fun ideas:
- Add a dollop of whipped cream on top.
- Sprinkle with cinnamon or nutmeg.
- Add a small cookie or chocolate on the side.
- Use a cinnamon stick as a garnish.
These little touches make the cups look special.
Can I use low-fat cream cheese for this recipe?
Yes, you can use low-fat cream cheese. This option will still work well in the recipe. The cups may be a bit lighter but will still taste great. Just make sure it is softened for easy mixing.
In this blog post, we explored the basics of making no-bake pumpkin cheesecake cups. We broke down the ingredients and provided tips for selecting the best ones. You learned about substitutes and alternatives that fit different diets. The step-by-step instructions guide you through preparation, assembly, and storage.
Remember, practice makes perfect. Don’t be afraid to try variations to match your taste. With these simple tips, you’ll create a delicious dessert that impresses everyone. Enjoy your cheesecake cups, and share your success!