Skip to content
DisclaimerTerms Of UseGDPR PolicyCookie Policy

Cooking Wells

  • Home
  • Drinks
  • Appetizers
  • Dinner
  • Dessert
  • About
  • Contact
  • Privacy Policy
DisclaimerTerms Of UseGDPR PolicyCookie Policy

Mia

- 1 large baguette or ciabatta loaf: This is the base of your garlic bread. It should be fresh and crusty. I recommend using a French baguette or a good quality ciabatta for the best texture. - 1/2 cup unsalted butter, softened: Butter adds richness and moisture. Softened butter spreads easily, blending well with garlic. Look for high-quality European-style butter for a creamier taste. - 4 cloves garlic, minced: Fresh garlic gives a bold flavor. You can use more or less, depending on your love for garlic. Organic garlic often has a stronger taste. - 1 cup fresh mozzarella cheese, diced: Mozzarella melts beautifully and provides a gooey texture. Aim for fresh mozzarella from the deli section for the best flavor. - 1 cup cherry tomatoes, halved: These add sweetness and freshness. Use ripe, firm tomatoes. Organic varieties usually taste better. - 1/4 cup fresh basil leaves, chopped: Basil gives a fragrant aroma and bright flavor. Look for vibrant green leaves with no browning. - 2 tablespoons balsamic glaze (for drizzling): This adds a sweet tang. You can find good balsamic glaze at most grocery stores or make your own for a fresher taste. - Salt and pepper to taste: These are essential for enhancing all the flavors. Use sea salt for a more complex taste. Using fresh ingredients makes a big difference in flavor. Fresh garlic, tomatoes, and herbs have a brightness that dried ones lack. They also add better texture and color to the dish. When choosing fresh ingredients, look for: - Vibrant colors: Choose tomatoes that are bright and firm. - Aromas: Smell your herbs. Fresh basil should have a strong, sweet scent. - Condition: Avoid any browning or wilting in your herbs and vegetables. These tips help ensure that your Caprese Garlic Bread shines with flavor and looks appealing. Fresh ingredients do not just taste better; they also elevate the whole dish. For the complete recipe, refer to the Full Recipe section above. To make Caprese Garlic Bread, start with the ingredients. Here’s what you need: - 1 large baguette or ciabatta loaf - 1/2 cup unsalted butter, softened - 4 cloves garlic, minced - 1 cup fresh mozzarella cheese, diced - 1 cup cherry tomatoes, halved - 1/4 cup fresh basil leaves, chopped - 2 tablespoons balsamic glaze (for drizzling) - Salt and pepper to taste Slice the baguette or ciabatta in half lengthwise. Make sure you cut straight down the middle. This creates two long pieces of bread perfect for garlic goodness. In a bowl, mix the softened butter and minced garlic. Use a fork or spoon to blend them well. You want a smooth mix. Spread this garlic butter on the cut sides of the bread. Don't hold back! Cover it all for the best flavor. Next, prepare the topping. In a separate bowl, combine the diced mozzarella, halved cherry tomatoes, and chopped basil leaves. Sprinkle in some salt and pepper. This mix adds a fresh burst of flavor to your bread. Now it’s time to bake! Preheat your oven to 375°F (190°C). Place the buttered bread on a baking sheet, cut side up. Bake it for about 10-12 minutes. Look for golden edges. This means the bread is getting crispy. After that, take the bread out of the oven. Spread the cheese and tomato mix evenly over the garlic bread. Return it to the oven for another 5-7 minutes. The cheese should melt and bubble, creating a perfect topping. Once it’s ready, remove the bread from the oven. Drizzle balsamic glaze over the top for added flavor. Let it cool for a minute before cutting it into pieces. Serve warm and enjoy your Caprese Garlic Bread! To make your Caprese garlic bread shine, use fresh ingredients. Fresh garlic gives a strong flavor. I recommend using garlic that is firm and has a strong smell. Fresh herbs, like basil, add a bright touch. You can also try adding a pinch of oregano for depth. For a crispy crust, consider these tips: - Broil at the end: After baking, switch to broil for a minute. This gives you a golden top. - Use a baking stone: It helps heat evenly and gets the bread nice and crispy. One common mistake is not measuring the butter and garlic right. Too much butter can make it greasy, while too little makes it dry. Stick to the recipe for best results. Also, watch your baking time. If you pull the bread out too soon, the cheese won’t melt. If you leave it too long, it can burn. Look for golden edges and bubbly cheese as signs it’s ready. For more tips and the full recipe, check out the complete guide to Caprese garlic bread. {{image_2}} You can switch the cheese in this recipe. Feta cheese adds a salty kick. Goat cheese gives a tangy flavor. Both work well with the fresh tomatoes and basil. For added texture, think about adding veggies. Sliced bell peppers or spinach boosts flavor and color. You can even add olives for a briny taste. These swaps keep the dish fresh and exciting. Caprese Garlic Bread pairs well with many sides. A light salad with vinaigrette balances the rich flavors. Roasted vegetables also make a great side. They add a healthy touch to your meal. You can turn this dish into a main course easily. Pair it with a hearty soup, like tomato basil. This combo makes a filling lunch or dinner. You can also serve it with grilled chicken or shrimp for protein. Enjoy experimenting with different sides and main dishes! To keep your Caprese garlic bread fresh, wrap it tightly in plastic wrap or foil. You can also place it in an airtight container. This method keeps the bread moist and tasty. If you want to freeze it, cut the bread into pieces first. Store the pieces in a freezer bag. You can keep it in the fridge for about 3 days. If frozen, it stays good for up to 3 months. When reheating, use the oven for the best results. Preheat your oven to 350°F (175°C). Place the bread on a baking sheet and cover it with foil. This helps to keep the bread from getting too hard. Bake for about 10 minutes or until warm. Avoid using the microwave. It can make the bread chewy and lose its crispiness. Yes, you can prepare Caprese Garlic Bread in advance. I suggest making the garlic butter and mixing the toppings a day ahead. Store the garlic butter in the fridge. Keep the tomato and cheese mix in a sealed container. When you're ready, spread the butter on the bread and add the topping. Bake it fresh for the best taste. Absolutely! You can use sourdough or whole wheat. Each type gives a unique taste. A crusty bread adds more crunch. A softer bread, like brioche, offers a fluffier bite. Choose what you like best for your Caprese Garlic Bread! Caprese Garlic Bread pairs well with many dishes. Serve it alongside a fresh salad for a light meal. It also goes great with soups, like tomato basil. For drinks, try a light white wine or sparkling water. These options enhance the flavors of your bread. This blog post covered key aspects for making Caprese Garlic Bread. We explored the best ingredients and brands, ensuring fresh choices improve taste. Detailed steps helped you prepare and bake it perfectly, avoiding common mistakes. We also shared tips for variations and perfect storage methods. Now, you have all the tools needed for a delicious garlic bread. Enjoy your cooking and impress everyone with your skills. Happy baking!

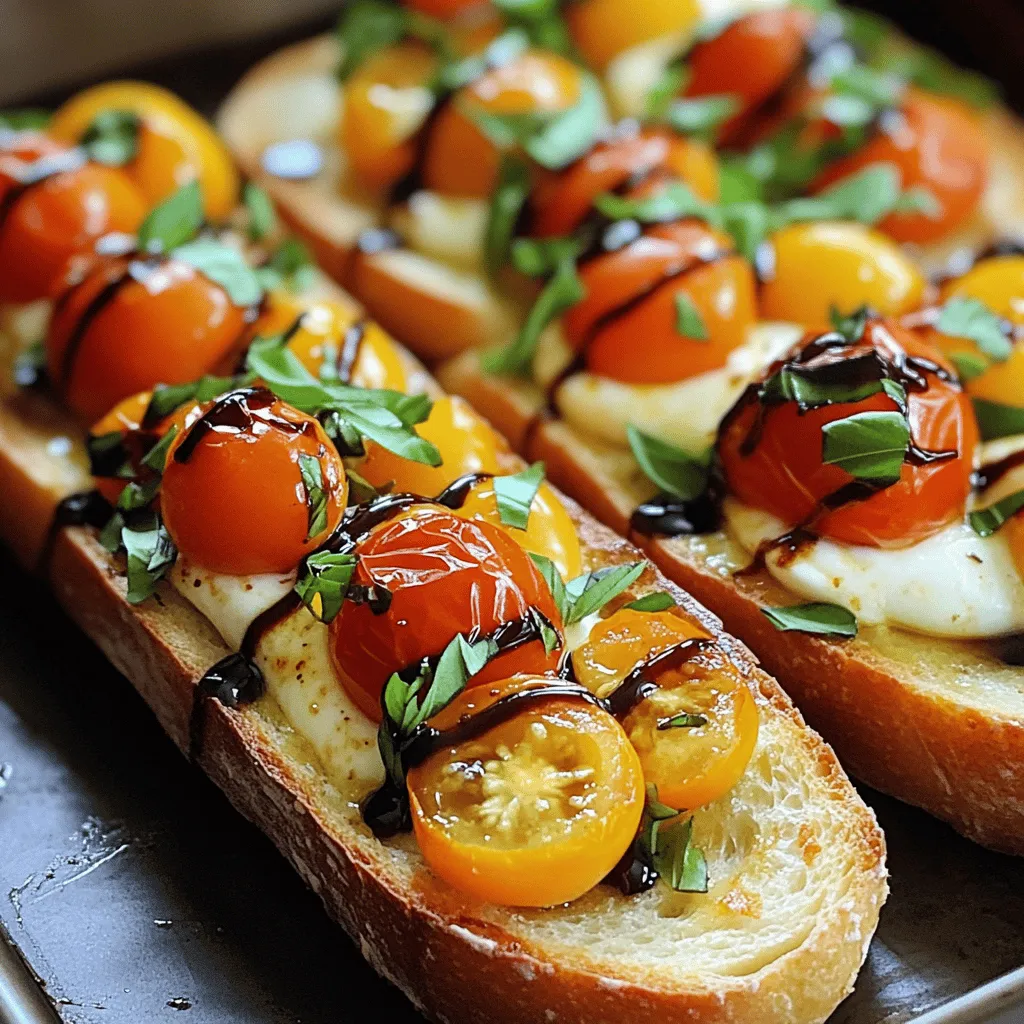
Caprese Garlic Bread Savory and Flavorful Treat

Are you ready to take your garlic bread to the next level? My Caprese Garlic Bread is not just any

For this tasty dish, you will need: - 1 pound sirloin steak, cut into bite-sized cubes - 4 tablespoons unsalted butter - 4 cloves garlic, minced - 1 tablespoon fresh parsley, chopped - Salt and black pepper to taste - 1 teaspoon olive oil - ½ teaspoon red pepper flakes (optional) These ingredients blend perfectly to create a rich and savory flavor. The sirloin steak gives a nice texture, while the garlic and butter add depth. You can enhance your steak bites with these extras: - Fresh herbs like thyme or rosemary - A squeeze of lemon juice for brightness - Worcestershire sauce for a tangy kick Using these options can elevate your dish. They allow you to play with flavors and make the recipe your own. To make Garlic Butter Steak Bites, gather these tools: - A large skillet for cooking - A sharp knife for cutting steak - A cutting board to prep ingredients - A spatula or tongs for flipping steak Having the right tools makes cooking easier. It helps you work quickly and safely. For the full recipe, check the details above. First, take your sirloin steak and cut it into bite-sized cubes. The pieces should be about one inch thick. This size helps them cook evenly. Next, season the steak cubes with salt and black pepper. Make sure each piece is coated well. This simple step brings out the meat's natural flavor. Heat a large skillet over medium-high heat. Add a teaspoon of olive oil and let it warm for about a minute. Once hot, add the steak bites in a single layer. Do not overcrowd the pan; this keeps the meat from steaming. Cook the steak for about 2-3 minutes on each side. You want them browned and cooked to your liking. If you prefer medium-rare, aim for an internal temp of about 130°F. Once done, remove the steak bites and set them aside. In the same skillet, lower the heat to medium and add 4 tablespoons of unsalted butter. Let it melt slowly. After the butter melts, add 4 minced garlic cloves and red pepper flakes if you want a bit of heat. Sauté for 1-2 minutes. Keep an eye on the garlic; you want it fragrant but not brown. Now, return the steak bites to the skillet and toss them in the garlic butter. Cook for another 1-2 minutes to heat everything through. Finally, sprinkle fresh parsley for color and flavor. Enjoy your garlic butter steak bites, perfect for sharing! For the full recipe, check the earlier sections. To get the perfect steak doneness, use a meat thermometer. For medium-rare, aim for 130°F. Insert the thermometer into the thickest part of the meat. If you don’t have one, check the steak by touch. A medium-rare steak feels like the fleshy part of your thumb when your hand is relaxed. Cook the steak bites for 2-3 minutes per side for a good sear. Don't rush this step; browning adds flavor. Seasoning is key to great flavor. Use salt and black pepper generously. Coat each steak bite evenly for the best taste. I recommend seasoning just before cooking. This helps the salt stick better. If you have time, let the seasoned steak rest for 15 minutes. This allows the flavors to soak in. Want to kick it up a notch? Add red pepper flakes for some heat. Just a half teaspoon is enough for a nice kick without overpowering the dish. Fresh herbs can elevate your steak bites even more. Try adding rosemary or thyme when cooking. You can also sprinkle chopped parsley before serving for a fresh touch. These enhancements make each bite even more delicious. For a full recipe, you can find it [here](Full Recipe). {{image_2}} You can use many cuts for steak bites. Sirloin is great but try ribeye for more flavor. Flank steak offers a nice chew and cooks fast. Tenderloin is fancy and melts in your mouth. Always cut against the grain for the best texture. For a meat-free option, use mushrooms. Portobello caps work well when cut into bite-sized pieces. You can also try tofu. Marinate it in soy sauce and garlic for extra taste. Cauliflower bites are another fun choice. They soak up flavors nicely and offer a hearty texture. Switch up the flavors with herbs and spices. Rosemary and thyme add a fresh taste. For heat, add more red pepper flakes or use cayenne. You might also try a bit of smoked paprika for a smoky kick. Lemon zest can brighten the dish. Mix and match to find your favorite combo! To store leftover Garlic Butter Steak Bites, place them in an airtight container. Make sure they cool down before sealing the container. Store in the fridge for up to three days. If you plan to eat them later, it is best to store them right away. This keeps them fresh and tasty. When reheating steak bites, use a skillet. Heat it on medium heat and add a little butter or oil. Place the steak bites in the skillet. Cook for about 2-3 minutes, stirring gently. This method helps keep the meat juicy and flavorful. Avoid using the microwave, as it can make the steak tough. If you want to freeze Garlic Butter Steak Bites, start by cooling them completely. Then, place them in a freezer-safe bag or container. Squeeze out as much air as possible. You can freeze them for up to three months. When ready to eat, thaw them in the fridge overnight before reheating. This way, they taste fresh like the first time you made them. For the full recipe, check out the earlier section. The best steak cut for steak bites is sirloin. It has good flavor and tenderness. Ribeye is also a great choice if you want more fat. Tenderloin works well too but can be pricier. Aim for cuts that cook quickly and are easy to chew. To make this recipe keto-friendly, focus on low-carb ingredients. Use sirloin steak, as it is low in carbs. Skip any starchy sides. Pair the steak bites with non-starchy veggies like broccoli or zucchini. You can also add more butter for healthy fats. Yes, you can use garlic powder instead of fresh garlic. Use about 1 teaspoon of garlic powder for each clove. Fresh garlic gives a stronger flavor, but powder is more convenient. Just remember, it won’t have the same fresh taste as minced garlic. Some great side dishes include: - Roasted vegetables - Mashed cauliflower - Salad with a light dressing - Garlic bread - Creamy spinach These sides balance the rich flavor of the steak bites. They also add freshness to your meal. You can find more ideas in the Full Recipe. Garlic Butter Steak Bites offer a tasty way to enjoy steak with simple steps. We covered the main and optional ingredients, tools, and detailed cooking instructions. You now have tips for perfect doneness and seasoning. Plus, explore fun variations and find out how to store leftovers. With these insights, you can create a delicious meal and impress everyone. Enjoy your cooking adventure!

Garlic Butter Steak Bites Flavorful and Easy Recipe

If you crave a quick, tasty meal, you’ve found the right recipe! Garlic Butter Steak Bites are flavorful, easy to

To make delicious raspberry lemonade bars, you will need the following ingredients: - 1 cup all-purpose flour - 1/4 cup powdered sugar - 1/2 cup unsalted butter, softened - 1/4 teaspoon salt - 2 large eggs - 1 cup granulated sugar - 1/4 cup fresh lemon juice (about 2 lemons) - Zest of 1 lemon - 1 cup fresh raspberries (or frozen, thawed) - 1 tablespoon cornstarch - Additional powdered sugar for dusting These ingredients blend to create a tart and sweet treat perfect for any occasion. If you have dietary restrictions, some swaps work well. For gluten-free bars, use a gluten-free flour blend in place of all-purpose flour. If you want a dairy-free option, substitute the butter with coconut oil or a vegan butter. For a lower sugar version, consider using a sugar substitute. Keep in mind that this can affect texture and taste. Using fresh raspberries gives your bars a vibrant flavor and beautiful color. Fresh raspberries are also high in antioxidants. If you can’t find fresh, frozen raspberries are a great choice too. Just make sure to thaw them and drain excess juice. This helps keep your filling from getting too watery. Both options work well, so choose what suits you best. First, set your oven to 350°F (175°C). This step is key for even baking. Line an 8x8 inch baking dish with parchment paper. Leave some paper hanging over the edges. This makes it easy to lift out the bars later. In a medium bowl, mix these ingredients: - 1 cup all-purpose flour - 1/4 cup powdered sugar - 1/2 cup unsalted butter, softened - 1/4 teaspoon salt Use a fork or your fingers to blend until it looks like coarse crumbs. Press the mixture firmly into the bottom of your dish. Make sure it is even. This crust is the base for your tasty bars. In another bowl, whisk together: - 2 large eggs - 1 cup granulated sugar - 1/4 cup fresh lemon juice (about 2 lemons) - Zest of 1 lemon Mix until it is smooth and well combined. Next, gently fold in: - 1 cup fresh raspberries (or frozen, thawed) - 1 tablespoon cornstarch The cornstarch helps keep the raspberries from sinking. Carefully pour this mixture over your baked crust, spreading it evenly. Bake your bars for 20-25 minutes. Look for the filling to be set and slightly firm on top. This means it’s ready. Once done, let the bars cool completely in the pan. This step is important for the best texture. After cooling, lift them out using the parchment paper. Dust with powdered sugar before serving for a sweet touch. For the full recipe, check the section above. To make sure your raspberry lemonade bars are set, check the filling. It should be firm to the touch. If it jiggles too much, it needs more time. Bake it until the edges look slightly puffed. This will help avoid a gooey center. Let the bars cool completely before cutting. Cooling helps them firm up even more. One common mistake is not dusting the raspberries with cornstarch. This step is key to keeping them from sinking. Another mistake is not letting the crust cool before adding the filling. A warm crust can make the filling runny. Lastly, do not skip the cooling time after baking. Cutting too soon can lead to messy bars. These bars are perfect for summer picnics or parties. Serve them chilled or at room temperature. Adding a dollop of whipped cream on top makes them even better. Fresh mint leaves can add a nice touch, too. For a fun twist, pair them with a scoop of vanilla ice cream. You can find the full recipe in the article to make these tasty treats! {{image_2}} You can change the flavors in your raspberry lemonade bars. Try other fruits like blueberries or blackberries. These fruits can add a nice color and taste. You can also mix in some herbs. Fresh mint or basil gives a fun twist to the bars. For a tart kick, add some lime juice instead of lemon juice. These simple swaps can make your bars unique and fun! If you need a gluten-free option, swap the all-purpose flour for almond flour or a gluten-free blend. Make sure the blend includes xanthan gum for the best texture. The taste remains just as delightful, and you can still enjoy the sweet and tangy treat. Just follow the same steps in the Full Recipe for a gluten-free version that everyone will love! To make mini bars or bites, use a smaller baking dish, like a 9x13 inch. Adjust the baking time to about 15-20 minutes. Watch closely to avoid over-baking. You can slice these into bite-sized pieces for easy serving. These mini treats are great for parties or snacks, making them a fun way to share the deliciousness! To store your raspberry lemonade bars, first, let them cool completely. Once cool, cut them into squares. Place the bars in an airtight container. You can layer parchment paper between the bars to prevent sticking. Store the container in the fridge. This keeps the bars fresh and zesty for later enjoyment. You can also freeze raspberry lemonade bars for longer storage. After cooling and cutting, wrap each bar tightly in plastic wrap. Place the wrapped bars in a freezer-safe bag or container. Label the bag with the date. They can last up to three months in the freezer. When you want to enjoy them, simply thaw them in the fridge overnight. Raspberry lemonade bars can last about five days in the fridge. After five days, they may lose some freshness. To serve after storage, simply take them out of the fridge. If you like, dust them with powdered sugar again. This adds a nice touch and makes them look great! For frozen bars, thaw them in the fridge before serving. Enjoy your tasty treat! You can use bottled lemon juice. However, fresh lemon juice tastes better. Fresh juice has a bright flavor that really shines in these bars. If you choose bottled juice, look for one with no added sugar. The bars are done when the filling is set. It should feel slightly firm to the touch. You can also check for a light golden color around the edges. A toothpick inserted in the center should come out clean. Raspberry Lemonade Bars pair well with many treats. You can serve them with whipped cream or a scoop of vanilla ice cream. Fresh berries on the side add a nice touch, too. A cup of tea or lemonade complements the sweet and tangy flavor. Yes, you can adjust the sweetness. Try using less granulated sugar. You can also swap some sugar for a sugar substitute. Adding more lemon juice can balance out the sweetness and enhance the flavor. For the full recipe, check out the detailed instructions above! Raspberry lemonade bars are a treat anyone can enjoy. We covered ingredients, from fresh to frozen raspberries and their substitutes. I shared easy steps for the crust, filling, and baking. I also covered common mistakes and storage tips to keep your bars fresh. Lastly, we explored fun variations and serving ideas. Enjoy making these quick, sweet, and tangy delights. You can impress friends and family with your baking skills!

Raspberry Lemonade Bars Tasty Sweet Treat Recipe

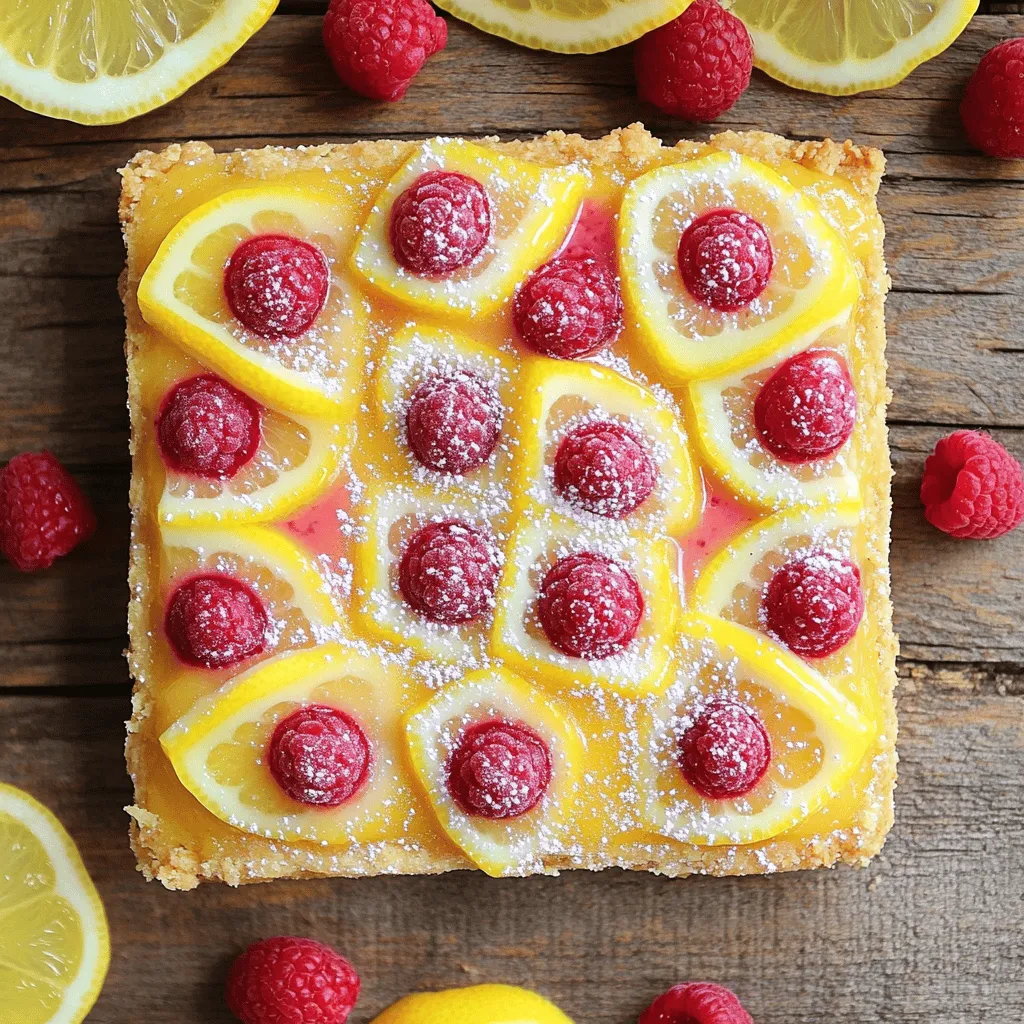
Craving a sweet and tangy treat? Raspberry Lemonade Bars offer the perfect balance of flavors that dance on your tongue.

- 1 medium butternut squash, peeled, seeded, and cubed - 3 tablespoons pure maple syrup - 2 tablespoons olive oil - 1 teaspoon cinnamon - 1/2 teaspoon nutmeg - Salt and pepper to taste - 2 tablespoons pumpkin seeds - Fresh thyme leaves When making maple roasted butternut squash, you need simple, fresh ingredients. The star is the butternut squash. Choose one that feels heavy for its size. The skin should be smooth and free of blemishes. Maple syrup adds sweetness and depth. Use pure maple syrup for the best taste. Olive oil helps the squash roast nicely. It also brings flavor. Cinnamon and nutmeg add warmth. Don’t forget salt and pepper; they enhance all the flavors. For a crunchy finish, consider pumpkin seeds. They add texture and a nutty flavor. Fresh thyme leaves can brighten the dish. These garnishes are optional, but they make your dish look and taste even better. For the full recipe, including detailed steps, check out the complete guide. - Preheat the oven to 400°F (200°C). - In a large bowl, combine the cubed butternut squash, maple syrup, olive oil, cinnamon, nutmeg, and salt. Toss well to coat the squash evenly with the seasoning. Starting with the right temperature is key. Preheating the oven helps the squash cook evenly. Mixing the flavors in a bowl makes the squash tasty. The maple syrup adds a sweet touch, while the spices bring warmth. - Spread the seasoned squash on a baking sheet in a single layer. - Roast for about 25-30 minutes, stirring halfway through. Check for tenderness. When you spread the squash out, it cooks better. Stirring during roasting helps it brown nicely. You want it to be golden and soft. If you want a crunch, add pumpkin seeds in the last five minutes. - Let the squash cool slightly before serving. - Garnish with fresh thyme if desired. Cooling a bit makes it easier to handle. Fresh thyme adds a nice touch and flavor. You can serve it as a side dish or on its own. This maple roasted butternut squash is a real treat! For the full recipe, check the earlier section. When choosing butternut squash, look for one that feels heavy. The skin should be smooth and free of cracks. A good squash has a tan color and a firm stem. If it is too soft, it may be overripe. To peel and cube, use a sharp knife. Cut off both ends first. Then, slice the squash in half lengthwise. Scoop out the seeds with a spoon. Finally, peel the skin with a vegetable peeler and cube the flesh. To add depth to your maple roasted butternut squash, try extra spices. Paprika or garlic powder can bring a nice punch. For a touch of heat, add a pinch of cayenne. You can also adjust the sweetness. If you like it sweeter, add more maple syrup. For a more savory note, reduce the syrup slightly. Always taste the mix before roasting to find your perfect balance. Even cooking is key for great results. Spread the squash in a single layer on the baking sheet. This helps each piece cook evenly. Stir halfway through to ensure all sides get nice and golden. I also recommend using parchment paper. It makes cleanup easy and prevents sticking. Plus, it helps the squash roast rather than steam. For the full recipe, check the section above. {{image_2}} You can play with flavors when making maple roasted butternut squash. One fun mix is maple rosemary butternut squash. Just add fresh rosemary to the squash before roasting. This herb gives a nice earthy taste that goes well with the sweet maple. Another great option is mixing sweet potatoes with butternut squash. The sweet potato adds creaminess and a richer flavor. You can roast them together in the same pan. Just make sure to cut them into even pieces so they cook well. If you want a vegan version, skip the honey and stick with maple syrup. This recipe is already vegan-friendly, so it’s easy to adjust. You can also swap out olive oil for coconut oil if you prefer. For those with nut allergies, just leave out any nuts or seeds. The dish will still taste great without them. You can replace pumpkin seeds with sunflower seeds for a safe crunch. Maple roasted butternut squash works well in many dishes. One idea is to make a salad. Toss the roasted squash with greens, nuts, and a simple dressing. This gives a warm and filling salad that is perfect for lunch or dinner. You can also serve it as a side dish or even a main course. Pair the squash with grains like quinoa or rice for a hearty meal. It's a great way to enjoy this tasty dish in different ways. For the full recipe, check the ingredients and steps shared above! After you enjoy your maple roasted butternut squash, store any leftovers in an airtight container. Refrigerate them within two hours of cooking. This helps keep the squash fresh. It can stay in the fridge for up to four days. If you want to save it for longer, consider freezing. To freeze, let the squash cool completely. Then, spread it on a baking sheet in a single layer. Once frozen, transfer the squash to a freezer-safe bag. It can last up to three months in the freezer. Just label the bag with the date to keep track. You can reheat your maple roasted butternut squash in the oven or microwave. For the best taste and texture, use the oven. Preheat it to 350°F (175°C). Spread the squash on a baking sheet and heat for about 10-15 minutes or until warm. This method keeps the squash crispy. If you're short on time, use the microwave. Place the squash in a microwave-safe dish. Cover it loosely with a lid or plastic wrap. Heat on high for 1-2 minutes, checking often. This method is quicker but may make the squash a bit softer. No matter how you reheat it, your squash will still taste delicious! Check out the Full Recipe for more tips. You can tell butternut squash is done when it turns golden brown and feels soft. Use a fork to poke it. If it goes in easily, your squash is ready. Look for these signs: - Golden brown color - Tender texture - Sweet aroma These signs mean you achieved perfect roasting. Yes, you can swap maple syrup for other sweeteners. Here are some great options: - Honey: Adds a floral note. - Agave nectar: A lighter flavor. - Brown sugar: Gives a richer sweetness. - Coconut sugar: Adds a caramel-like taste. Each sweetener changes the taste slightly. Choose one that you enjoy! Maple roasted butternut squash pairs well with many dishes. Here are some ideas: - Quinoa salad: Adds protein and texture. - Roasted Brussels sprouts: Offers a nice crunch. - Grilled chicken: Complements the sweetness. - Spinach salad: Brings a fresh, green element. These sides create a balanced meal. Use the full recipe to make this delicious dish! In this blog post, we explored how to make flavorful maple roasted butternut squash. I shared the best ingredients, from fresh squash to spices. We went through easy steps for prep and roasting. I included tips for selecting squash and enhancing flavor. Don’t forget the variations and storage advice. You can enjoy this dish in many ways. I hope you find joy in cooking this tasty recipe for yourself or others!

Maple Roasted Butternut Squash Savory Side Dish

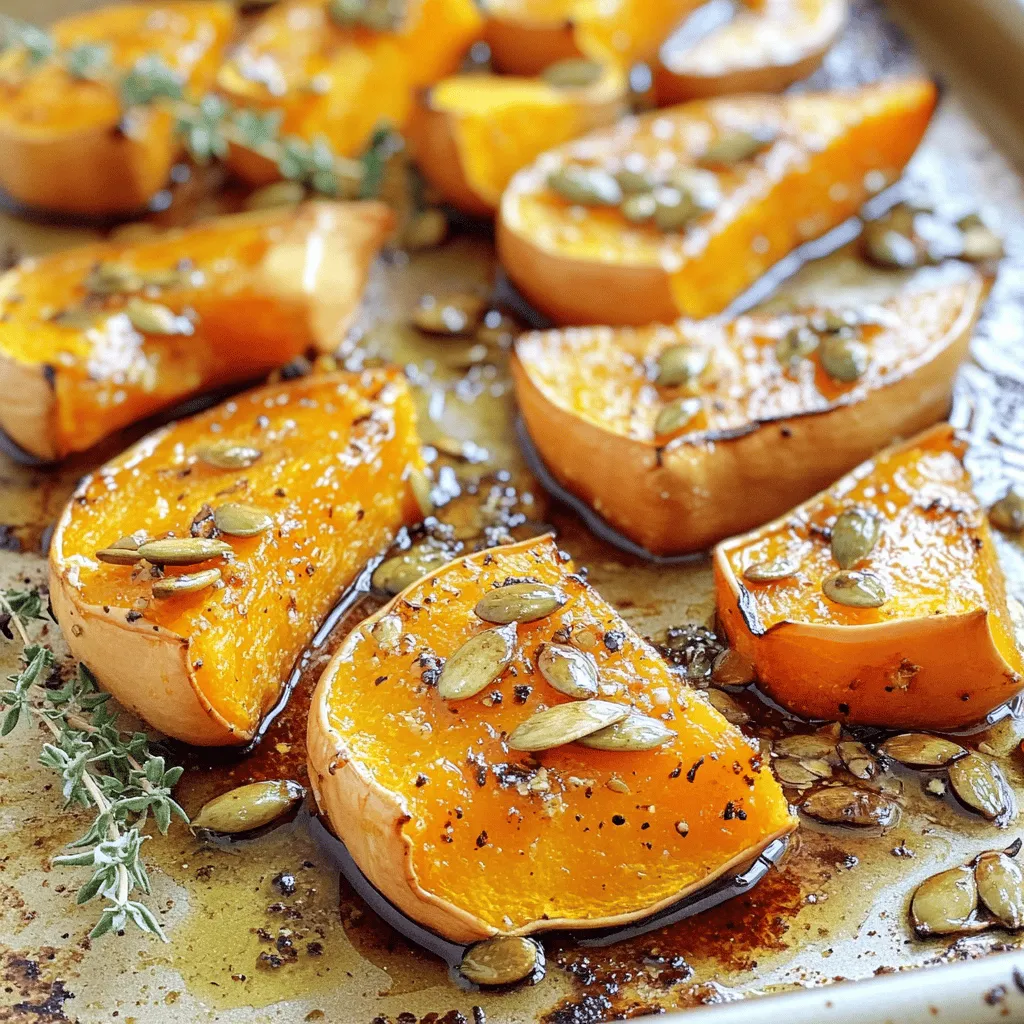
If you’re looking for a warming side dish that bursts with flavor, look no further! Maple roasted butternut squash combines

To make the perfect Cranberry Pecan Chicken Salad, gather these simple items: - 2 cups cooked chicken breast, shredded - 1 cup celery, finely chopped - 1/2 cup red onion, finely diced - 1/2 cup dried cranberries - 1/2 cup pecans, chopped - 1/2 cup Greek yogurt - 1 tablespoon honey - 1 tablespoon Dijon mustard - Salt and pepper to taste - 2 tablespoons fresh parsley, chopped (for garnish) You can adjust the amounts to fit your taste. If you want less chicken, use 1 cup. For more crunch, add an extra 1/4 cup of pecans. If you like it sweeter, add more honey. You can swap Greek yogurt for mayonnaise if you prefer. That will change the flavor but still taste good. Using fresh ingredients makes a big difference. Fresh celery adds a nice crunch, while fresh parsley gives a bright taste. Dried cranberries bring sweetness and chewiness. If you can, choose fresh chicken, but rotisserie chicken works well too. It saves time and still tastes great. Just make sure to shred it before mixing. This blend of fresh and dried makes the salad fresh and flavorful. To make the cranberry pecan chicken salad, you need to gather all your ingredients. This recipe takes about 15 minutes to prep and 30 minutes to chill. You will enjoy a fresh and flavorful dish that serves four people. Use cooked chicken breast, as it saves time and adds great taste. Start by shredding 2 cups of cooked chicken breast. Place it in a large mixing bowl. Next, finely chop 1 cup of celery and add it to the bowl. Then, finely dice 1/2 cup of red onion. This onion brings a nice crunch and sharp taste. Now, add 1/2 cup of dried cranberries and 1/2 cup of chopped pecans. The cranberries add sweetness, while the pecans bring a rich flavor. Mix all these ingredients well. In a small bowl, whisk together 1/2 cup of Greek yogurt, 1 tablespoon of honey, and 1 tablespoon of Dijon mustard. This dressing is creamy and tangy, perfect for our salad. Make sure to blend it until smooth. Once the dressing is ready, pour it over the chicken mixture. Gently fold the dressing into the salad until every piece is coated. Season with salt and pepper to taste. Cover the bowl and refrigerate for at least 30 minutes. This step helps the flavors meld beautifully. When you're ready to serve, stir the salad gently and garnish with 2 tablespoons of fresh parsley. Enjoy your cranberry pecan chicken salad on leafy greens, in a sandwich, or with whole-grain crackers. For the full recipe, check out the details above! To make your cranberry pecan chicken salad burst with flavor, use fresh ingredients. Fresh chicken gives a better taste than frozen. Add crispy celery for crunch. Use sweet, plump dried cranberries. Toast your pecans lightly for a deeper flavor. When mixing, fold gently to keep the chicken tender. This salad improves after chilling. Let it sit for at least 30 minutes. This time allows the flavors to blend well. Meal prep helps save time and makes cooking easier. Cook and shred chicken ahead of time. Store it in the fridge for up to three days. Chop celery and onion in advance to speed up your process. I suggest making a big batch of the salad. Store it in an airtight container. This keeps it fresh for lunch or dinner. If you plan to serve it later, wait to add the dressing. This way, the salad stays crisp. This salad is very versatile. You can serve it on a bed of leafy greens. It also works well in a sandwich or wrap. Try it with whole-grain crackers for a crunchy snack. For a festive touch, sprinkle with extra parsley. To add a twist, serve it with a side of fruit. A fresh fruit salad pairs nicely with this dish. You can find the full recipe in the article. {{image_2}} You can switch up the protein in this salad for variety. If you want a different taste, use turkey instead of chicken. You can also try shredded rotisserie chicken. It adds great flavor and saves time. For a twist, use canned tuna or salmon. Both options work well and add a nice touch to the dish. Adding extra ingredients can take your salad to the next level. Consider adding diced apples or grapes for a sweet crunch. You can also toss in some shredded carrots for color and texture. Want some spice? Try adding chopped jalapeños or a dash of cayenne pepper. These small changes can make a big flavor difference. If you want a vegan version, replace chicken with chickpeas or tofu. Mash the chickpeas slightly for better texture. You can also use vegan yogurt in place of Greek yogurt. This keeps the dish creamy and delicious. For a vegetarian twist, add roasted vegetables. Think zucchini or bell peppers for added flavor and nutrients. Feel free to mix and match these ideas to make your perfect Cranberry Pecan Chicken Salad. For the complete recipe, refer to the Full Recipe section above. To keep your cranberry pecan chicken salad fresh, store it in an airtight container. This helps prevent moisture loss and stops other smells from getting in. Place it in the fridge right after making it. It tastes best after it sits for at least 30 minutes. This allows the flavors to mix well. You can freeze the chicken salad, but it may change texture. If you plan to freeze it, leave out the pecans and Greek yogurt before freezing. Use a freezer-safe container and label it with the date. This way, you can enjoy it later. When ready to eat, thaw it overnight in the fridge. Add the yogurt and pecans just before serving. The chicken salad stays good in the fridge for about 3 to 4 days. After that, it may not taste as good. If you notice any off smells or colors, it's best to throw it away. Individually, the ingredients have different shelf lives: - Cooked chicken: 3 to 4 days - Celery: 1 to 2 weeks - Red onion: 1 to 2 months - Dried cranberries: up to 1 year - Pecans: 6 months to 1 year if stored properly Always check the dates on your ingredients. This helps ensure your cranberry pecan chicken salad remains safe and tasty. For the full recipe, check the earlier section. You can make this salad ahead of time. Just follow these steps: - Prepare the salad as directed. - Mix all the ingredients well. - Store it in an airtight container. - Place it in the fridge for up to two days. The flavors deepen as it sits. This makes it even tastier! When serving, stir it gently. You can also add fresh parsley for a bright touch. Yes, you can use store-bought rotisserie chicken. It saves time and adds great flavor. Just shred the chicken into bite-sized pieces. Rotisserie chicken is often juicy and well-seasoned. This can enhance your salad. Remember to remove the skin if you prefer less fat. Using rotisserie chicken makes this dish quick and easy. Many side dishes go well with cranberry pecan chicken salad. Here are a few ideas: - Leafy green salad - Fresh fruit platter - Whole-grain crackers - Vegetable sticks with hummus - Quinoa salad These sides add texture and balance to your meal. You can mix and match them based on what you have. For a full meal, try serving the salad in a sandwich. Enjoy the flavors together! You can find the full recipe for cranberry pecan chicken salad above. This blog post covered how to make a delicious chicken salad. We explored the best ingredients, measures, and substitutions. I shared step-by-step instructions to mix your salad and create a tasty yogurt dressing. You learned tips for flavor, meal prep, and serving ideas. We also discussed variations with different proteins and adaptations for dietary needs. Finally, I provided storage tips and answered common questions. Use these insights to make your meal prep easy and fun! Enjoy your chicken salad journey!

Cranberry Pecan Chicken Salad Fresh and Flavorful Dish

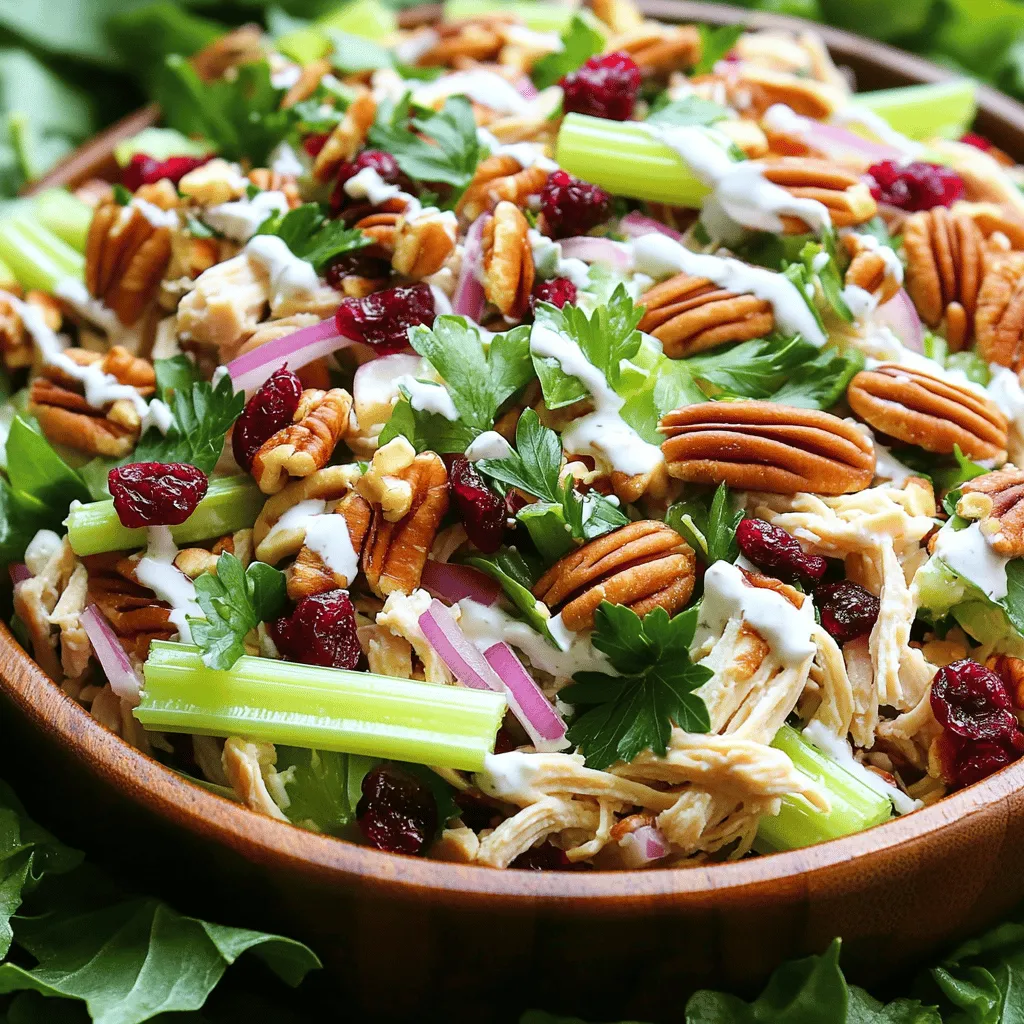
Are you looking for a fresh and tasty idea for lunch or dinner? This Cranberry Pecan Chicken Salad is a

Here’s what you need for Thai Basil Beef Stir-Fry: - 1 lb (450g) beef sirloin, thinly sliced - 2 cups fresh basil leaves (Thai basil preferred) - 1 red bell pepper, sliced - 1 cup green beans, trimmed and cut into 2-inch pieces - 4 cloves garlic, minced - 2 tablespoons fish sauce - 1 tablespoon soy sauce - 1 tablespoon oyster sauce - 1 teaspoon sugar - 1 tablespoon vegetable oil - 1 teaspoon crushed red pepper flakes (adjust to taste) - Steamed jasmine rice (for serving) If you can't find something, don’t worry! Here are some swaps: - For beef sirloin, try flank steak or chicken. - You can use regular basil if Thai basil is hard to find. - Swap green beans with snap peas or broccoli florets. - Use tamari or coconut aminos instead of soy sauce for a gluten-free option. When you shop, look for fresh, vibrant colors. - Choose beef that is bright red and firm to the touch. - Fresh basil should smell fragrant and have no wilting leaves. - Bell peppers should feel firm and shiny, without blemishes. - Green beans should snap easily and look bright green. These tips help ensure your stir-fry tastes great. Check out the Full Recipe for more details! To start, you need to marinate the beef. Take 1 pound of thinly sliced beef sirloin. In a bowl, mix the beef with 2 tablespoons of fish sauce, 1 tablespoon of soy sauce, 1 tablespoon of oyster sauce, and 1 teaspoon of sugar. This mix gives the beef amazing flavor. Let the beef sit for about 15 minutes. This helps it soak up the taste. While the beef marinates, you can prepare the vegetables. Slice 1 red bell pepper into thin strips. Trim the ends of 1 cup of green beans and cut them into 2-inch pieces. Next, mince 4 cloves of garlic. Fresh garlic adds a great taste. Keep the vegetables ready for the stir-fry. Now it's time to cook! Heat 1 tablespoon of vegetable oil in a large skillet or wok over medium-high heat. Wait until the oil is hot and shimmering. Add the minced garlic and sauté for about 30 seconds. You want it fragrant but not burned. Increase the heat to high and add the marinated beef. Stir-fry it for 2-3 minutes until the beef turns brown but stays tender. Next, toss in the sliced bell pepper and green beans. Stir-fry for another 2-3 minutes until the vegetables are crisp-tender. For a spicy kick, sprinkle 1 teaspoon of crushed red pepper flakes over the stir-fry. Finally, add the fresh basil leaves. Stir-fry just until the basil wilts, which takes about 1 minute. Remove from heat and serve it hot over steaming jasmine rice. Enjoy your flavorful Thai Basil Beef Stir-Fry! For the full recipe, check the complete list above. To get great texture, start with hot oil. Heat your skillet or wok until it shines. Add the garlic first and let it sizzle. Then, add the beef quickly. Don’t overcrowd the pan; this keeps the beef from steaming. Stir-fry in small batches if needed. This method keeps the beef juicy and tender. Seasoning is key in Thai basil beef stir-fry. Use fish sauce, soy sauce, and oyster sauce for depth. Each adds a unique flavor. Taste as you cook. If you like it sweeter, add a pinch of sugar. For heat, adjust the crushed red pepper flakes. The goal is to create a balanced dish that sings with flavor. One common mistake is overcooking the beef. It should be browned but still tender. Another mistake is not using enough sauce. The sauce gives flavor and moisture. Lastly, don’t skip the basil. It adds freshness and aroma. For the full recipe, refer back to the cooking instructions. {{image_2}} You can easily make this dish vegetarian or vegan. Replace the beef with tofu or tempeh. Use soy sauce or tamari instead of fish sauce. Add more colorful veggies like carrots or mushrooms. This way, you keep the flavor and make it plant-based. Even without meat, it stays tasty and satisfying. If you want to switch proteins, try chicken or shrimp. Thinly slice chicken breast for a similar cook time. Shrimp cooks quickly, about 2-3 minutes. For a fun twist, use seitan for a meaty texture. Each option brings a unique taste to the dish. To change the spice level, start with fewer crushed red pepper flakes. You can always add more if you like it hot. For a milder flavor, omit the flakes and use sweet bell peppers. If you love heat, add fresh chilies or a dash of hot sauce. Adjust to your taste for the perfect kick. After your meal, let the Thai basil beef cool down. Use an airtight container to keep the leftovers. This helps maintain their flavor and freshness. Store them in the fridge for up to three days. If you have a lot, divide into smaller portions. This way, it’s easier to reheat just what you need. To reheat, use a skillet over medium heat. Add a splash of water or broth to keep it moist. Stir often to ensure even heating. You can also use the microwave. Place it in a microwave-safe dish, cover it, and heat for one to two minutes. Check if it’s hot throughout before eating. If you want to store it longer, freezing is a great option. Place the leftovers in a freezer-safe container. Make sure to leave some space for expansion. Label the container with the date. You can freeze it for up to three months. When ready to eat, thaw it overnight in the fridge. Then, reheat as mentioned above. Enjoy your Thai basil beef stir-fry again! You can serve Thai Basil Beef Stir-Fry with steamed jasmine rice. This rice soaks up the sauce well. You may also add a side of fresh cucumber salad. This salad adds a nice crunch and coolness. Another option is a simple stir-fried vegetable mix. Broccoli, carrots, and snap peas work great here. Yes, you can make this dish ahead of time. Cook the beef and vegetables, then store them in the fridge. Just keep the basil separate until you serve it. The basil wilts quickly and loses flavor. You can reheat the dish on the stove or in the microwave when ready to eat. The beef should be browned on the outside but still tender. It should take about 2-3 minutes to cook. Use a thin slice to check the center. It should not be pink. If it is, cook it for another minute or two. Always aim for a temperature of 145°F (63°C) for safety. In this blog post, I covered key elements for making a tasty Thai Basil Beef Stir-Fry. You learned about essential ingredients, cooking steps, and tips for perfect seasoning. I shared ways to make it vegetarian, suggested protein swaps, and outlined storage methods. Remember, fresh ingredients make a big difference. Experiment with flavors and enjoy your dish. With these tips, you can create a delicious meal that pleases everyone. Happy cooking!

Thai Basil Beef Stir-Fry Flavorful and Easy Recipe

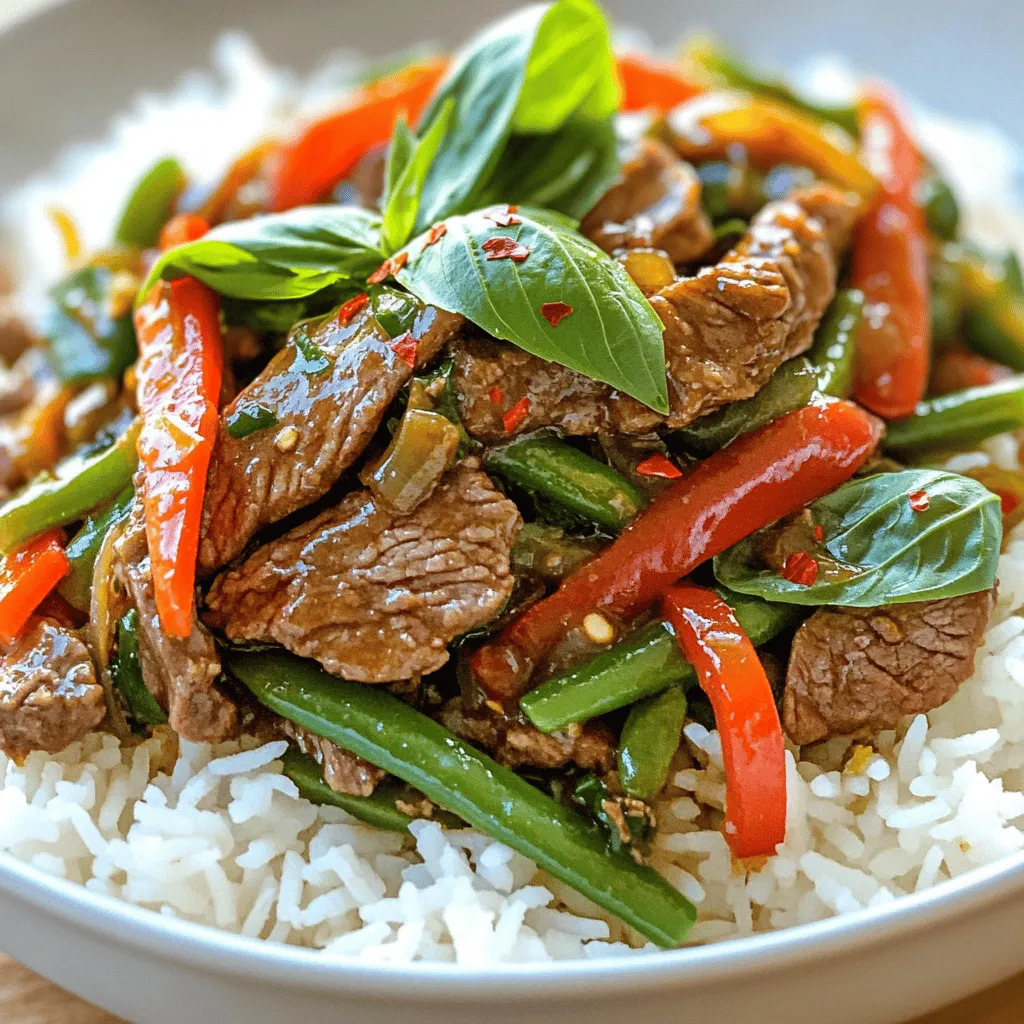
Ready to spice up your dinner table? This Thai Basil Beef Stir-Fry is packed with flavor and super easy to

To make these tasty air fryer stuffed mushrooms, you need: - 12 large cremini or button mushrooms - 1 cup cream cheese, softened - 1/2 cup fresh spinach, chopped - 1/4 cup sun-dried tomatoes, finely chopped (not packed in oil) - 1/2 cup grated Parmesan cheese - 1 teaspoon garlic powder - 1/2 teaspoon onion powder - 1/4 teaspoon red pepper flakes (optional) - Salt and pepper to taste - 1 tablespoon olive oil - Fresh parsley for garnish You can swap some ingredients if needed. Try these options: - Use goat cheese instead of cream cheese for a tangy taste. - Kale can replace spinach for a different green. - Fresh tomatoes can work in place of sun-dried tomatoes. - Use nutritional yeast instead of Parmesan for a dairy-free option. - If you want less heat, skip the red pepper flakes. These stuffed mushrooms are not just tasty; they are also nutritious. Each serving has: - Calories: 220 - Protein: 7g - Fat: 18g - Carbohydrates: 8g - Fiber: 2g - Sugars: 2g This recipe is a great choice for a light meal or snack. The mix of cream cheese and vegetables gives lots of flavor without being heavy. You can enjoy these air fryer stuffed mushrooms guilt-free! For the full recipe, check out the section above. Start by washing the mushrooms. Use a damp cloth to clean them well. Next, twist off the stems gently. Set the caps aside. Finely chop the stems and put them in a bowl. This step helps bring out the mushroom flavor in the stuffing. In the bowl with chopped stems, add the softened cream cheese. Then, mix in the chopped spinach and sun-dried tomatoes. Add grated Parmesan cheese, garlic powder, onion powder, and red pepper flakes. Season with salt and pepper. Mix everything until smooth and creamy. This stuffing is rich and full of flavor. Preheat your air fryer to 375°F (190°C). Take your mushroom caps and fill them with the creamy stuffing. Press down gently to pack it in. Drizzle some olive oil on top for moisture. Place the stuffed mushrooms in the air fryer basket. Make sure they are in a single layer. Cook them for 10-12 minutes. They should be tender and golden on top. Once done, take them out and garnish with fresh parsley. Enjoy your tasty air fryer stuffed mushrooms! For the full recipe, check out the link. To make stuffed mushrooms that wow, start with fresh mushrooms. Look for large cremini or button mushrooms. They hold the stuffing well. Clean them gently with a damp cloth. Avoid soaking them in water. Next, remove the stems carefully but keep them. Chop the stems finely and mix them into the stuffing. This adds flavor and helps bind the filling. Pack the stuffing into the caps tightly. This ensures they hold together while cooking. A drizzle of olive oil helps them crisp up nicely in the air fryer. A few mistakes can ruin your stuffed mushrooms. First, don’t overcrowd the air fryer basket. If they are too close, they won’t cook evenly. Second, avoid using too much water in your stuffing. This makes it soggy. Also, don’t skip on seasoning. Salt and pepper enhance the flavors. Lastly, be careful not to overcook them. Mushrooms can become rubbery if left too long in the air fryer. Cooking times can vary based on your air fryer model. Generally, 10 to 12 minutes works well at 375°F. If your mushrooms are larger, you may need a few extra minutes. Check them after 10 minutes. Look for tender mushrooms and a golden top. If they need more time, add a minute or two. Always remember to check them often to avoid overcooking. {{image_2}} You can make these stuffed mushrooms vegetarian by using plant-based cream cheese. Replace the Parmesan cheese with nutritional yeast for a cheesy flavor. Add more veggies like bell peppers or zucchini for extra texture. You can even include beans for added protein. Want to spice things up? Try adding cooked sausage or bacon bits to the stuffing mix. You can also mix in herbs like thyme or basil for a fresh taste. A sprinkle of smoked paprika can give your mushrooms a nice smoky flavor. To make this recipe gluten-free, check your cream cheese and other ingredients for gluten. Use gluten-free breadcrumbs instead of regular ones if you want more crunch. You can also try almond flour for a low-carb option. This way, everyone can enjoy these tasty bites! To keep your stuffed mushrooms fresh, place them in an airtight container. Layer them gently to avoid squishing. Store them in the fridge for up to three days. If you want to keep them longer, consider freezing. When it's time to enjoy leftovers, reheat them in the air fryer. Set it to 350°F (175°C) and warm for about 5 minutes. This will keep the mushrooms crispy and delicious. You can also use a microwave, but they may lose some texture. You can freeze your stuffed mushrooms if you have extras. First, let them cool completely. Then, place them in a single layer on a baking sheet. Freeze until solid, then move them to a freezer bag. They can last up to three months. To cook from frozen, air fry at 375°F (190°C) for about 15 minutes. This method keeps the flavors intact. For the full recipe, check the earlier section. I recommend using large cremini or button mushrooms. They hold up well during cooking. Their shape makes them perfect for stuffing. You can also use portobello mushrooms for a heartier option. Choose mushrooms that are firm and free of blemishes. This ensures they will cook evenly and taste great. Yes, you can prepare the stuffed mushrooms ahead of time. Make the filling and stuff the mushrooms. Place them in the fridge until you are ready to cook. This saves time and makes serving easy. Just remember to let them sit at room temperature for about 15 minutes before air frying. You will know the mushrooms are done when they are tender. The tops should look golden and slightly crispy. A good cooking time is around 10 to 12 minutes at 375°F (190°C). If you want, you can check them halfway through. This helps to ensure they cook evenly. To make Air Fryer Stuffed Mushrooms, gather these ingredients: - 12 large cremini or button mushrooms - 1 cup cream cheese, softened - 1/2 cup fresh spinach, chopped - 1/4 cup sun-dried tomatoes, finely chopped (not packed in oil) - 1/2 cup grated Parmesan cheese - 1 teaspoon garlic powder - 1/2 teaspoon onion powder - 1/4 teaspoon red pepper flakes (optional) - Salt and pepper to taste - 1 tablespoon olive oil - Fresh parsley for garnish Steps: 1. Preheat your air fryer to 375°F (190°C). 2. Remove the stems from the mushrooms and set the caps aside. Finely chop the stems and put them in a bowl. 3. Add cream cheese, spinach, sun-dried tomatoes, Parmesan, garlic powder, onion powder, red pepper flakes, salt, and pepper to the bowl. Mix until creamy. 4. Fill each mushroom cap with the mixture. Pack it in firmly. 5. Drizzle the stuffed mushrooms with olive oil for flavor. 6. Place the mushrooms in the air fryer basket in a single layer. 7. Cook for 10-12 minutes. They are done when tender and golden. 8. Carefully take them out and put them on a plate. 9. Garnish with parsley before serving. These stuffed mushrooms make a tasty appetizer. Serve them warm or at room temperature. They shine at parties and gatherings. Pair them with a fresh salad for a light meal. You can also serve them with crusty bread to soak up the flavors. Enjoy your stuffed mushrooms with a glass of white wine. A crisp Sauvignon Blanc suits their rich flavors well. You might also like to pair them with a light pasta dish. A simple garlic and olive oil pasta complements the mushrooms perfectly. For a cozy night, serve them alongside a warm soup. We covered a lot about stuffed mushrooms. You learned the best ingredients and how to prep them. We talked about cooking methods, tips for success, and tasty variations. You now know how to store leftovers and reheat them well. Remember, stuffed mushrooms are fun and easy to make. With practice, you can make them your own. Enjoy creating delicious bites that everyone will love!

Air Fryer Stuffed Mushrooms Tasty and Easy Recipe

If you’re searching for a quick and tasty appetizer, look no further! This Air Fryer Stuffed Mushrooms recipe combines rich

- 4 cups fresh or canned peaches, drained and sliced - 1 cup granulated sugar - 1 cup all-purpose flour Fresh or canned peaches are the heart of this dish. They bring juicy sweetness and a lovely texture. I often use fresh peaches when they are in season. If not, canned peaches work just fine. Just be sure to drain them well. Granulated sugar adds a nice sweetness. You can adjust this based on your taste. If the peaches are very sweet, you might even use less. All-purpose flour helps bind the cake together. It gives the dish its structure to hold all those delicious flavors. - 1 cup almond milk (or any milk of your choice) - 1 cup unsalted butter, melted - 1 teaspoon vanilla extract - 1 tablespoon baking powder Almond milk adds moisture without overpowering the peach flavor. You can swap it for any milk you like. Unsalted butter makes the cake rich and smooth. Melting it helps it mix well with other ingredients. Vanilla extract adds depth to the flavor. It enhances the sweetness of the peaches and sugar. Baking powder is key for making the cake rise. It helps create a light and fluffy texture. - 1 cup crumbled vanilla cake mix (or yellow cake mix) - Ice cream or whipped cream, for serving (optional) Crumbling vanilla cake mix on top gives a nice crunch. It adds a sweet layer that contrasts with the tender peaches. Ice cream or whipped cream is a great way to serve this dish. The cold creaminess pairs perfectly with warm cobbler. You can’t go wrong with a scoop on top! For the full recipe, check out the complete Peachy Paradise Dump Cake recipe. Start by setting your oven to 350°F (175°C). This temperature is perfect for baking. Make sure to give your oven time to heat up fully. In a mixing bowl, combine 4 cups of peaches and 1 cup of granulated sugar. Toss them well so the sugar coats the peaches. Let this mix sit for about 10 minutes. This helps the peaches release their juices, making them tasty. In another bowl, whisk together these dry ingredients: - 1 cup all-purpose flour - 1 tablespoon baking powder - 1 teaspoon cinnamon - 1/4 teaspoon salt Next, add in 1 cup of almond milk and 1 cup of melted unsalted butter. Don’t forget to add 1 teaspoon of vanilla extract. Stir until the batter is smooth and creamy. Grab a greased 9x13 inch baking dish. First, spread the peach mixture evenly over the bottom. Next, gently pour the batter over the peaches. Make sure it covers them well. Now, sprinkle 1 cup of crumbled vanilla cake mix on top. Do not stir; just let it sit there. Bake for 35-45 minutes. The dump cake is done when the top is golden brown. A toothpick inserted should come out clean. After baking, let it cool slightly before serving. Enjoy it warm, or at room temperature. You can add ice cream or whipped cream on top for extra delight! To get the right texture for your Peach Cobbler Dump Cake, focus on the batter. Mix the dry ingredients well, so everything blends smoothly. When you add the milk and melted butter, stir gently. You want a thick but pourable batter. If it feels too thick, add a bit more milk. This keeps your cake moist and fluffy. This cake shines when served warm. Try adding a scoop of ice cream on top. Vanilla pairs great with the sweet peaches. You can also use whipped cream for a lighter touch. For a fun twist, drizzle some caramel sauce over the top. It adds sweetness and richness to each bite. Want to boost the flavor? Consider adding a pinch of nutmeg along with the cinnamon. You could also mix in a splash of almond extract for a nutty taste. For a citrus twist, try adding the zest of a lemon or orange. These small changes can make your dump cake even more delicious! {{image_2}} You can change up the fruit in this dump cake. Try using blueberries, cherries, or apples. Each fruit brings its own flavor. This way, you can enjoy a new taste each time. If you like, mix several fruits together. This makes a fun and colorful dessert. If you need a gluten-free version, it is easy! Substitute all-purpose flour with a gluten-free flour blend. Make sure to check the baking powder for gluten-free labels. You can also use gluten-free cake mix for the topping. This way, everyone can enjoy this dessert. Mixing flavors can enhance your peach cobbler dump cake. Add almond extract for a nutty twist. You can also sprinkle in some nutmeg or cardamom for a warm spice. Lemon zest adds a nice zing. These flavors create a unique taste that will surprise your guests. To keep your peach cobbler dump cake fresh, store leftovers in an airtight container. This helps keep moisture in and prevents it from drying out. You can leave it at room temperature for one day. If you want it to last longer, put it in the fridge. It will stay good for about three days in the fridge. Reheating your dump cake is easy. Place the desired portion in a microwave-safe dish. Heat it for 30 seconds to one minute. Check if it is warm enough. You can also reheat it in the oven. Preheat the oven to 350°F (175°C). Put the dump cake in for about 10 to 15 minutes. This makes it crispy on top again. If you want to freeze your dump cake, make sure it is completely cool. Cut it into pieces and wrap each piece tightly in plastic wrap. Then, place them in a freezer-safe bag or container. It can stay frozen for up to three months. When you are ready to eat it, let it thaw in the fridge overnight before reheating. Enjoy your delicious dessert anytime! Yes, you can use frozen peaches. They work well in this recipe. Just thaw them first. Drain any excess juice to avoid a watery cake. Frozen peaches save time and still taste great. If using fresh, slice them and let the sugar bring out the juices. If your dump cake is dry, don’t worry! You can add more almond milk. Drizzle milk on top before serving. Another option is to serve it warm with a scoop of ice cream. The creaminess will help balance the dryness. You can also try baking it for a shorter time next time. To make Peach Cobbler Dump Cake ahead, prepare the layers. You can combine the peach mixture and batter in advance. Cover and store it in the fridge for up to a day. When ready, bake it just before serving. This way, you have a warm dessert without much last-minute work. For the complete Peachy Paradise Dump Cake recipe, click [Full Recipe]. You now have all the tools to create a delicious Peachy Paradise Dump Cake. We explored the key ingredients, detailed step-by-step instructions, and helpful tips for the best results. You can even try variations to match your taste. Don't forget about storage options to keep leftovers fresh. Enjoy making this treat any time, and remember, baking is all about having fun in the kitchen. Get ready to share your creation with family and friends!

Peach Cobbler Dump Cake Simple and Delicious Treat

Are you ready to whip up a sweet treat that saves time and tastes amazing? This Peach Cobbler Dump Cake

- 4 frozen lobster tails (thawed) - 1/2 cup unsalted butter - 4 cloves garlic, minced - 1 tablespoon fresh parsley, chopped - 1 tablespoon lemon juice - 1 teaspoon paprika - Salt and pepper to taste - Lemon wedges, for serving When you make garlic butter lobster tails, fresh ingredients matter. You want the best taste. Start with lobster tails. Look for ones that are firm and have a fresh smell. Frozen tails are fine too, just make sure to thaw them correctly. Next, unsalted butter adds richness to your dish. I love using fresh garlic for a punchy flavor. Mince it finely so it blends well. Fresh parsley gives a nice color and taste. Don't skip the lemon juice! It brightens the dish and balances the butter. Paprika adds a touch of warmth and color. Use salt and pepper to enhance all the flavors. Finally, have lemon wedges ready for serving. They add a fresh squeeze that elevates the dish. Once you gather all these ingredients, you're ready to create a stunning meal. For the full recipe, check out the complete instructions in the article. Prepping lobster tails Start with your lobster tails. Use kitchen scissors to cut the shell. Cut down the top side, stopping before the tail fin. Gently pull the shell apart to show the meat inside. This helps the lobster cook evenly. Making garlic butter mixture Next, melt your butter in a small pan over medium heat. Add the minced garlic and stir for about 1-2 minutes. You want it fragrant but not browned. Now, mix in parsley, lemon juice, paprika, salt, and pepper. This garlic butter will make your lobster tasty. Baking the lobster tails Preheat your oven to 375°F (190°C). Place the lobster tails on a baking sheet. Make sure the meat side is up. Brush the garlic butter mixture over each tail. Coat them well for great flavor. Check for doneness Bake the lobster tails for 12-15 minutes. They are done when the meat is opaque. If you are unsure, look for firm, white meat. Remove them from the oven and drizzle any extra garlic butter over the tails. Plating your dish Serve your lobster tails hot. Place them on a nice dish. Garnish with lemon wedges for a fresh touch. This adds a pop of color and flavor. Pairing with side dishes Garlic butter lobster tails go well with many sides. Try a fresh salad or creamy mashed potatoes. You can also serve them with grilled veggies. These sides will enhance your meal and make it complete. When choosing lobster tails, look for a few key signs. Fresh tails should feel firm and not mushy. The shells should be hard and shiny. If you can, smell the tails; they should have a clean, ocean-like scent. You can choose between fresh or frozen lobster tails. Fresh tails offer great taste but may be harder to find. Frozen options are usually high-quality and more accessible. Just thaw them properly for the best results. Cooking lobster is simple, but timing is key. Start by preheating your oven to 375°F (190°C). Always cut the shells carefully, so you don’t damage the meat. This lets the butter soak in and adds flavor. Avoid overcooking lobster; it can turn tough. Cook until the meat is opaque and firm. A good rule is 12-15 minutes in the oven. If you’re unsure, use a fork to check the meat. It should flake easily when done. To make your garlic butter lobster even better, try adding a few extras. You can mix in some herbs like thyme or dill for a fresh taste. A bit of red pepper flakes adds a nice kick! Seasonings are also important. Besides salt and pepper, consider adding a sprinkle of Old Bay or seafood seasoning. These can elevate the dish and make it even more delicious. For the full recipe, click [here](#). {{image_2}} You can switch up how you make garlic butter lobster tails. Two popular methods are grilling and broiling. - Grilled garlic butter lobster tails: Grilling adds a smoky taste. Start by preheating your grill on medium heat. Brush the lobster tails with garlic butter. Cook them shell-side down for about 5-7 minutes. Flip them and cook for another 5 minutes until the meat is opaque. - Broiled garlic lobster tails: Broiling is quick and gives a nice char. Preheat your broiler. Place the lobster tails on a baking sheet, meat side up. Brush with garlic butter. Broil for 6-8 minutes until cooked through. Keep an eye on them to avoid burning. You can enhance the taste of your garlic butter lobster tails by adding herbs and spices or pairing them with sauces. - Adding herbs and spices: Mix in fresh herbs like thyme or dill. A pinch of red pepper flakes adds heat. You can also try lemon zest for a bright flavor. - Pairing with different sauces: Serve with a tangy cocktail sauce or herbed aioli. A drizzle of garlic lemon sauce adds extra moisture and flavor. You can adjust this dish for different diets without losing taste. - Making it gluten-free: The recipe is already gluten-free. Just ensure your butter and any sauces are gluten-free. - Vegan alternatives: For a plant-based option, use vegan butter and replace lobster with king oyster mushrooms. Cook them the same way to enjoy a similar taste. Explore these variations to make your garlic butter lobster tails fun and unique. For the full recipe, check out the Garlic Butter Lobster Tails section. To store leftovers, put the lobster tails in an airtight container. Make sure to cool them to room temperature first. Place the container in the fridge. Leftover garlic butter lobster tails can last for about two days. If you want to save them longer, freezing is a great option. For freezing, wrap each tail tightly in plastic wrap, then place them in a freezer bag. Try to remove as much air as possible. This helps to prevent freezer burn. When stored this way, they can last up to three months. When it’s time to reheat, the safest way is in the oven. Preheat your oven to 350°F (175°C). Place the lobster tails in an oven-safe dish. Add a little garlic butter on top to keep them moist. Cover the dish with foil to keep the heat in. Heat for about 10 minutes or until warm. You can also use a microwave, but be careful. Heat in short bursts to avoid overcooking. Reheat for 30 seconds and check. If they need more time, add another 15 seconds. Be sure to keep an eye on them. How long does garlic butter lobster last? In the fridge, it stays good for about two days. In the freezer, it can last up to three months. Look for signs of spoilage. If the lobster has an off smell or a slimy texture, it’s best to throw it away. Always trust your senses. If you’re unsure, it’s better to be safe. The best way to cook lobster tails is baking. Baking gives a nice flavor and keeps the meat juicy. You can also grill or broil them for a smoky touch. Each method works well. Just make sure not to overcook them. Yes, you can use frozen lobster tails. Thaw them first for best results. Place them in the fridge overnight, or use cold water for a quick thaw. Make sure they are fully thawed before cooking. This helps the meat cook evenly. Lobster tails are done when the meat turns opaque. Check the color; it should be white, not translucent. The shell will also turn bright red. A good rule is to cook them for 12-15 minutes at 375°F (190°C). Use a fork to test the meat; it should be firm. Garlic butter lobster can be healthy in moderation. Lobster is low in fat and high in protein. It also contains vitamins like B12 and minerals such as zinc. However, butter adds extra calories and fat. You can use less butter or a substitute to make it lighter. You learned how to prepare delicious garlic butter lobster tails. We covered key ingredients, step-by-step cooking methods, and tips for freshness. You also discovered ways to enhance flavor and variations to try. Remember to store leftovers properly and reheat them with care. Enjoy this dish with your family or friends. Cooking lobster can be fun and rewarding. With practice, you'll impress everyone with your skills!

Garlic Butter Lobster Tails Quick and Tasty Recipe

Craving a delicious seafood dish? Try my Garlic Butter Lobster Tails for a quick and tasty treat! With just a

For this dish, I love using fresh ingredients. They add vibrant flavors and colors. Here’s what you need: - 2 medium eggplants - 1 cup couscous - 1 small red onion, finely chopped - 2 cloves garlic, minced - 1 cup cherry tomatoes, halved - 1/2 cup Kalamata olives, pitted and chopped - 1/2 cup feta cheese, crumbled - Fresh parsley, chopped (for garnish) You also need some pantry staples. These items make the dish tasty and easy to prepare. Grab these: - 1 1/4 cups vegetable broth - 1 teaspoon dried oregano - 1 teaspoon smoked paprika - 2 tablespoons olive oil - Salt and pepper to taste Choosing the right eggplant is key. Look for eggplants that are firm and shiny. They should feel heavy for their size. Avoid any with soft spots or wrinkles. The skin should be smooth and bright. Fresh eggplants have a mild smell, which is a good sign. With these tips, you will select the best eggplants for your Mediterranean Couscous Stuffed Eggplant. Check out the Full Recipe for more details! Start by preheating your oven to 400°F (200°C). Take your two medium eggplants and cut them in half lengthwise. Use a spoon to scoop out the flesh, but leave a half-inch border. This will hold your filling later. Set the scooped-out flesh aside for the filling. Drizzle one tablespoon of olive oil on the eggplant halves. Sprinkle some salt and pepper over them. Place them cut-side down on a baking sheet. Roast them for about 20 minutes until they become soft. In a medium saucepan, heat one tablespoon of olive oil on medium heat. Add the finely chopped red onion and minced garlic. Sauté them until the onion turns clear, which takes about 3 to 4 minutes. Then, add the reserved eggplant flesh and cook for another 5 minutes, stirring now and then. Next, stir in the couscous, vegetable broth, halved cherry tomatoes, chopped Kalamata olives, dried oregano, and smoked paprika. Bring this mixture to a boil. Once it boils, cover the pan and take it off the heat. Let it sit for about 5 minutes. This allows the couscous to soak up the liquid. After that, fluff the couscous with a fork and gently mix in the crumbled feta cheese. Taste it and add salt and pepper if needed. After roasting the eggplant halves, carefully flip them over. Now, fill each half with the couscous mixture. Pack it gently but firmly. Place the stuffed eggplants back in the oven and bake them for another 10 to 15 minutes. This will make the tops golden. Once done, remove them from the oven and let them cool for a few minutes. Before serving, sprinkle fresh parsley on top. You can find the full recipe in the previous section for all the details. Enjoy your Mediterranean Couscous Stuffed Eggplant! To get the best roasted eggplants, choose firm ones. They should feel heavy and have smooth skin. Cut them in half lengthwise and scoop out the insides. Leave about half an inch of flesh. This helps them hold their shape. Drizzle with olive oil and sprinkle with salt and pepper. Roast them cut-side down at 400°F for 20 minutes. This method makes them tender and full of flavor. For a tasty couscous mix, use vegetable broth instead of water. This adds depth to the dish. Sauté onions and garlic in olive oil first. This step wakes up their flavors. Add diced cherry tomatoes for sweetness. Mix in olives for a salty kick and feta for creaminess. Don’t forget spices! Dried oregano and smoked paprika give it that Mediterranean touch. Let the couscous sit after boiling. This allows the flavors to blend well. When serving, place the stuffed eggplants on a nice platter. Garnish with chopped fresh parsley for color and flavor. You can also drizzle a bit of olive oil on top. For a crunchy texture, add some toasted pine nuts. Pair these with a fresh salad or crusty bread. These sides balance the meal and add freshness. This Mediterranean Couscous Stuffed Eggplant is sure to impress! For the full recipe, check out the details above. {{image_2}} If you want a vegetarian option, skip the feta cheese. Use a mix of your favorite veggies instead. Try adding spinach, zucchini, or bell peppers. If you are vegan, use plant-based cheese or nutritional yeast for a cheesy flavor. You can also add beans for protein. This keeps the dish filling and tasty. Couscous is a great base, but you can switch it up. Use quinoa or farro for a nutty flavor. For a gluten-free option, try rice or millet. If you want more protein, add chickpeas or lentils. These swaps keep the dish healthy and satisfying. Herbs and spices make all the difference. Instead of oregano, use basil or thyme for a fresh taste. You can add a pinch of cumin or coriander for warmth. A dash of lemon juice brightens the dish. Experiment with your favorites to create a unique flavor. For the full recipe, check out the Mediterranean Couscous Stuffed Eggplant. To keep your stuffed eggplants fresh, let them cool. Place them in an airtight container. Store them in the fridge. They will last for 3 to 5 days. This keeps them tasty and safe to eat. When you’re ready to enjoy your leftovers, preheat your oven to 350°F (175°C). Place the stuffed eggplants on a baking tray. Cover them with foil to keep moisture in. Heat them for 15 to 20 minutes. This helps keep the filling warm and the eggplants soft. You can freeze stuffed eggplants for later. First, let them cool completely. Wrap each stuffed half in plastic wrap. Then, place them in a freezer bag. They can stay fresh for up to 3 months. When you want to eat them, thaw them in the fridge overnight. Reheat in the oven as mentioned earlier. This way, you can enjoy this dish anytime! Yes, you can use other grains. Quinoa, rice, or bulgur work well. Each grain adds a unique taste and texture. Quinoa is a great choice for added protein. Rice offers a mild flavor that complements the dish. Just adjust cooking times based on the grain you choose. Eggplants are fully cooked when they are soft and tender. You can check by gently pressing them with a fork. If they yield easily, they are done. They should also have a slightly golden color on the outside. This ensures they will hold the filling well. Serve a simple salad for freshness. A side of grilled veggies also pairs nicely. You can try tzatziki for a cool, creamy dip. Pita bread is a great choice, too, for a complete meal. These sides enhance the Mediterranean flavors and make the meal more filling. Yes, this dish is quite healthy! It has lots of veggies, whole grains, and healthy fats. Eggplants are low in calories and high in fiber. Couscous provides carbs for energy. The olives and feta add flavor and healthy fats. This recipe is balanced and nutritious. For the full recipe, check out the details above. In this blog post, we explored how to make delicious Mediterranean Couscous Stuffed Eggplants. We discussed fresh ingredients, pantry staples, and tips for choosing the best eggplants. The step-by-step instructions guide you from prepping the eggplants to serving them hot and tasty. We shared tips for roasting, enhancing flavor, and offered variations to suit your taste. Proper storage and reheating methods help to keep your dish fresh. Remember, with some creativity, this dish can adapt to your needs and preferences. Enjoy cooking and savor every bite!

Mediterranean Couscous Stuffed Eggplant Delight

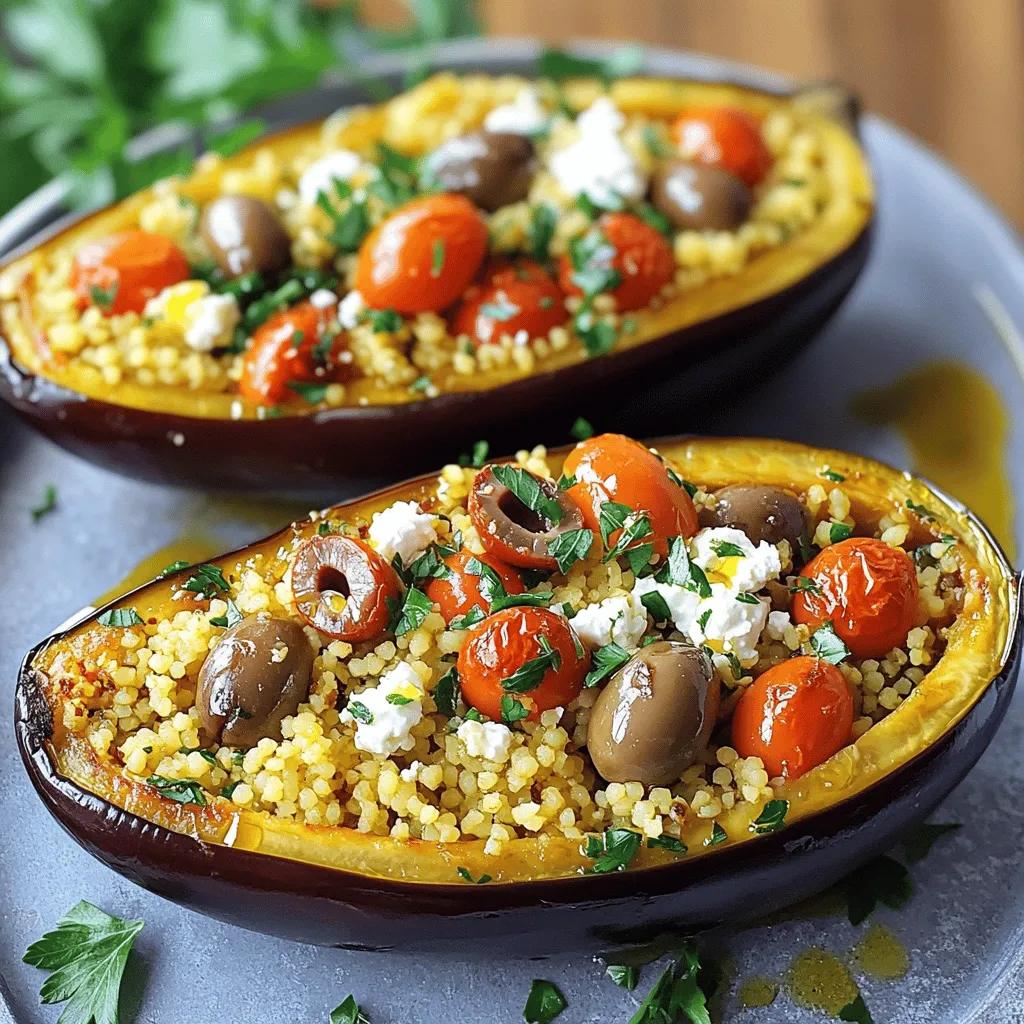
Are you ready to make a dish that’s both tasty and simple? Mediterranean Couscous Stuffed Eggplant is your answer. This

Older posts
Newer posts
← Previous Page1 Page2 Page3 Page4 … Page76 Next →

dsad

© 2025 Cooking Wells • Built with GeneratePress

Our Policies

  • Copyright Policy
  • Cookie Policy
  • GDPR Policy
  • Privacy Policy
  • Disclaimer
  • Terms Of Use

More Information

  • Home
  • About
  • Contact
  • Appetizers
  • Dessert
  • Dinner
  • Drinks
©2025, Cooking Wells About Back To Top