Skip to content
DisclaimerTerms Of UseGDPR PolicyCookie Policy

Cooking Wells

  • Home
  • Drinks
  • Appetizers
  • Dinner
  • Dessert
  • About
  • Contact
  • Privacy Policy
DisclaimerTerms Of UseGDPR PolicyCookie Policy

Mia

Loaded Greek fries are a tasty twist on classic fries. Here’s what you need for this dish: - 4 large russet potatoes, cut into thick fries - 3 tablespoons olive oil - 1 teaspoon garlic powder - 1 teaspoon paprika - Salt and pepper to taste - 1 cup crumbled feta cheese - 1 cup cherry tomatoes, halved - ½ cup kalamata olives, pitted and sliced - ½ cup red onion, thinly sliced - 1 cup tzatziki sauce (store-bought or homemade) - Fresh parsley, chopped (for garnish) Each ingredient adds its own flavor. The olive oil helps the fries crisp up nicely. Garlic powder and paprika give them warmth and spice. Feta cheese adds a creamy, salty bite. The fresh veggies and tzatziki provide a cool crunch and tang. When you gather these ingredients, you prepare for a delightful mix of tastes. The fries serve as a canvas, and the toppings create a beautiful dish. For the full recipe, check out the instructions below. To start, you need to preheat your oven to 425°F (220°C). This step is key for crispy fries. Next, grab a large bowl and toss in your cut potatoes. Add three tablespoons of olive oil. Sprinkle in one teaspoon of garlic powder, one teaspoon of paprika, salt, and pepper to taste. Mix it all well until the fries are coated evenly. Now, spread the fries out on a baking sheet. Make sure they are in a single layer for even cooking. Bake them for 25 to 30 minutes. Flip the fries halfway through to get that perfect golden color and crispiness. While the fries are baking, it’s time to prepare your toppings. In a separate bowl, mix together one cup of halved cherry tomatoes, half a cup of sliced kalamata olives, and half a cup of thinly sliced red onion. Add a pinch of salt and pepper for flavor. When the fries finish baking, take them out of the oven. Sprinkle one cup of crumbled feta cheese on top while they are hot. Then, add your tomato-olive-onion mix. Drizzle tzatziki sauce over everything. Lastly, don’t forget to add some fresh chopped parsley for a splash of color! For the full recipe, you can refer back to the ingredient list. To get crispy fries, start with the right oil. Olive oil helps fries become golden and crisp. Use enough oil to coat each fry well. Don’t skimp on seasoning either; it adds flavor. Spread the fries out on the baking sheet. Make sure they are not touching. This way, they cook evenly and do not steam. Pair your Loaded Greek Fries with cool dips. Tzatziki is a classic choice that complements the flavors. You can also serve them with a light salad or grilled meat. For drinks, a refreshing iced tea or a light beer works well. These fries are a great snack or side dish for any meal. Want to boost the taste? Try adding some roasted peppers or creamy avocado on top. These additions bring more texture and taste. You can also customize your tzatziki. Mix in fresh herbs like dill or mint for a twist. Spices like cumin or a dash of lemon juice can also make it special. {{image_2}} If you want to switch things up, try sweet potatoes. They add a nice sweetness to each bite. You can also use Yukon Gold potatoes for a creamier texture. Each type of potato brings its own flavor. You may also consider using other starches like parsnips or even zucchini for a lighter version. These alternatives can give you a new take on loaded fries while keeping it delicious. To make loaded Greek fries vegan-friendly, you can replace feta cheese with vegan cheese. Look for brands made from nuts or soy. For tzatziki, swap out dairy yogurt with a plant-based one. You can use coconut or almond yogurt. These changes keep the flavor bold and fresh while being kinder to your diet. Want some heat? Add sliced jalapeños or a splash of hot sauce to your fries. This adds a spicy kick that many will love. For a Mediterranean twist, try using different cheeses like goat cheese or ricotta. You can also mix in green olives or capers for a briny taste. Each variation opens up new flavors, making your loaded Greek fries even more fun to eat. For the full recipe, check out the details above. To keep your loaded Greek fries fresh, store leftovers in the fridge. Place them in an airtight container. Make sure they cool down before sealing. This helps to avoid steam buildup, which can make fries soggy. When you want to enjoy leftover fries, reheating properly is key. Use an oven or an air fryer to keep them crispy. Preheat the oven to 375°F (190°C). Spread the fries on a baking sheet and heat for about 10-15 minutes. In an air fryer, cook at 350°F (175°C) for about 5-7 minutes. This will give you that crunch again. If you want to freeze your loaded Greek fries, do it wisely. You can freeze the fries before adding toppings. Let them cool and then place them in a freezer bag. For best results, freeze them flat. This way, they won’t stick together. When you're ready to eat, bake directly from the freezer. You can also freeze toppings like the tomato and olive mix separately. Just thaw and add when you're ready to enjoy! Loaded Greek fries are a fun twist on classic fries. They start with thick-cut russet potatoes. You bake them until they are crispy and golden. Then, you load them up with delicious toppings. The dish hails from Greek cuisine, featuring flavors like feta cheese, olives, and tzatziki. This dish brings a taste of Greece right to your kitchen. It’s a great way to enjoy fries with a Mediterranean flair. Yes, you can prep some parts in advance. You can cut the potatoes and soak them in water. This helps remove excess starch and keeps them fresh. You can also mix the toppings, like tomatoes and olives, and store them in the fridge. Just remember to bake the fries fresh for the best crispiness. This way, everything stays flavorful and yummy. Absolutely! Using an air fryer can make these fries even crispier. To air fry, toss the potatoes with oil and seasonings. Spread them in a single layer in the air fryer basket. Cook them at 400°F for about 15-20 minutes. Shake the basket halfway through for even cooking. After they are done, follow the same steps for adding toppings. Enjoy a quick and healthy version of this tasty dish. Loaded Greek fries are a tasty and fun dish. You can make them with simple ingredients and steps. Start with crispy fries and add fresh toppings. Customize with your favorite flavors or make it vegan. Store leftovers easily and reheat for later. Make these fries for a snack or sharing. Enjoy every bite, and your friends will love them too!

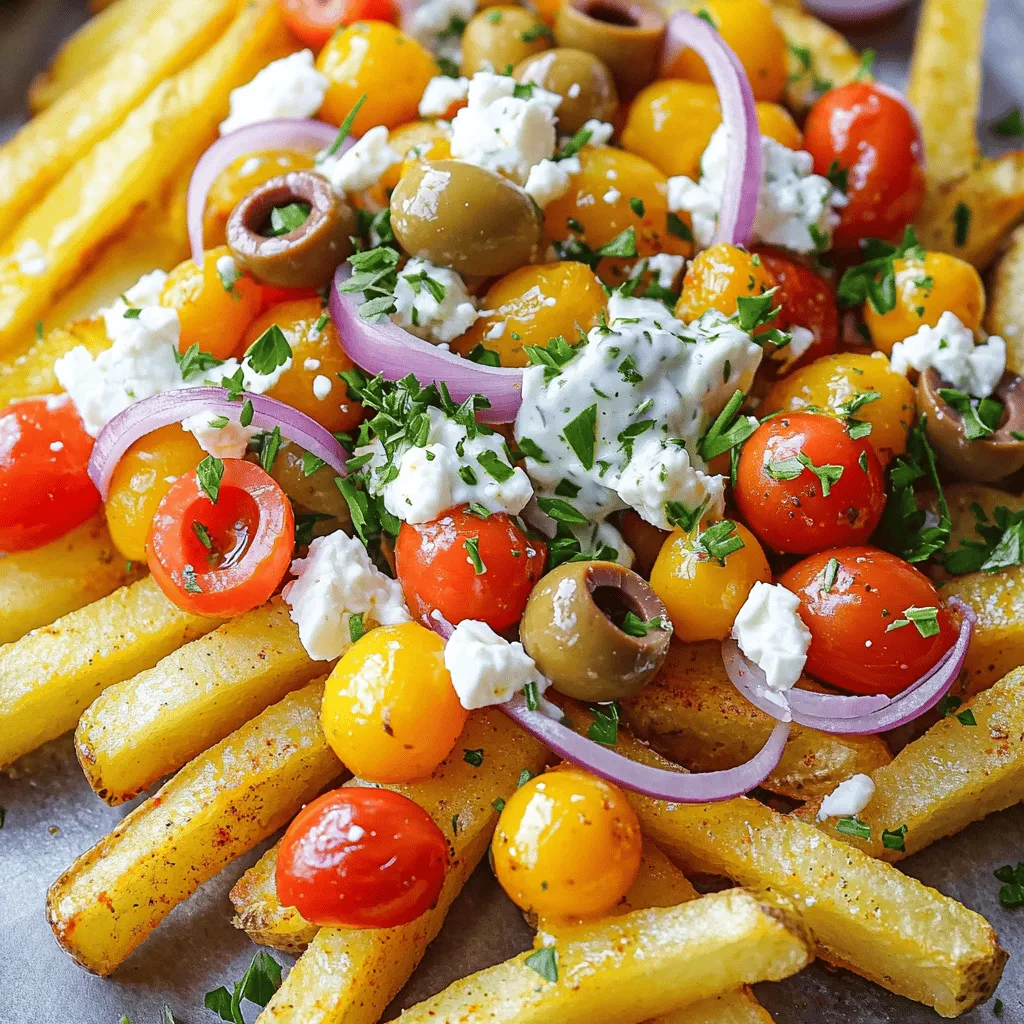
Loaded Greek Fries Savory and Flavorful Delight

Are you ready to elevate your fry game? Loaded Greek Fries are the perfect combination of crispy fries and fresh

When you want to make honey mustard chicken wraps, having the right ingredients is key. Here’s what you need: - 2 large chicken breasts, grilled and sliced - 4 whole wheat tortillas - 1/2 cup honey mustard dressing - 1 cup baby spinach leaves - 1 ripe avocado, sliced - 1 bell pepper (red or yellow), sliced - 1/2 cup shredded carrot - Salt and pepper to taste - Optional: 1/4 cup crumbled feta cheese These ingredients come together to create a delightfully tasty wrap. You can adjust the amount of honey mustard dressing based on your taste. I love adding extra veggies for crunch and flavor. The feta cheese is optional, but it adds a nice creamy texture. Feel free to mix and match your favorite vegetables. You can use sliced cucumbers, cherry tomatoes, or even radishes. Remember, fresh and colorful ingredients make your wraps not just tasty but also visually appealing. For the full recipe, check out the section above. Enjoy your cooking! - Season the chicken Start with the grilled chicken. I like to season it with salt and pepper. This simple step adds great taste. - Prepare the tortillas Next, lay out the whole wheat tortillas on a clean surface. Make sure they are flat and ready to fill. - Layer the fillings Drizzle honey mustard dressing on each tortilla. Spread it evenly to cover the whole surface. Now, in the center, layer baby spinach, sliced chicken, avocado, bell pepper, and shredded carrots. If you want a little more flavor, add crumbled feta cheese. - Folding sides Take the sides of the tortilla and fold them in. This keeps all the fillings inside. - Rolling from the bottom up Start rolling the wrap from the bottom. Roll tightly to make sure everything stays together. - Serving suggestions Serve the wraps on a nice platter. You can cut each wrap in half for easy eating. - Optional garnishes Add fresh herbs or radish slices for a colorful touch. You can also offer extra honey mustard dressing on the side for dipping. For the full details, you can check the Full Recipe. Enjoy your tasty honey mustard chicken wraps! To make your honey mustard chicken wraps really shine, focus on two things: seasoning and the right honey mustard. Start by seasoning your chicken well with salt and pepper. This simple step brings out the chicken's taste. You can also add garlic powder or paprika for a tasty kick. For honey mustard, choose a brand that balances sweetness and tanginess. If you prefer a stronger flavor, look for a spicy version. This makes a big difference in taste and elevates your wraps. You can make these wraps ahead of time. Simply prepare all the fillings, and store them separately. This keeps everything fresh. When you are ready to eat, just assemble the wraps. For storage, wrap them tightly in foil or plastic wrap. Keep them in the fridge for up to three days. If you need to reheat, place them in the microwave for about 30 seconds. This warms them without making them soggy. If you want to switch up the protein, use turkey or tofu instead of chicken. Both options work well and taste great. For a vegan wrap, replace chicken with grilled veggies or chickpeas. You can also skip the honey mustard dressing if you want a lighter option. Instead, try a yogurt or hummus spread. These swaps keep your wraps delicious and exciting. For the full recipe, check the earlier section. {{image_2}} You can mix up your honey mustard chicken wraps by adding unique veggies. Try cucumber slices for crunch. Radishes add a nice peppery flavor. You can also use sprouts for a fresh touch. For cheeses, feta gives a tangy kick. Cream cheese works well for a creamy texture. You can also try goat cheese for a different taste. Spreads like hummus or tzatziki can also add flavor and moisture. If you like heat, add some chopped jalapeños for a spicy twist. You can also spread sriracha on the tortilla before adding fillings. This adds a nice kick. Citrus can brighten your wraps. Squeeze fresh lime juice over the veggies. You can also mix some lemon zest into the honey mustard dressing. This will give your wraps a zesty kick that is refreshing. If you want gluten-free wraps, try using lettuce leaves instead. They hold fillings well and are very healthy. You can also use rice paper for a fun, different texture. Experimenting with different flatbreads can change your wrap game. Pita bread adds a soft chewiness. Whole grain wraps offer a nutty flavor. You can even use naan for a unique taste that pairs well with the honey mustard chicken. For the full recipe, check out the Honey Mustard Chicken Wraps. To keep your honey mustard chicken wraps fresh, follow these tips: - Refrigeration tips: Store wraps in the fridge. Use an airtight container to avoid drying out. - Wrapping techniques for freshness: Wrap each individual wrap tightly in plastic wrap or foil. This keeps them from getting soggy. - Shelf life in the refrigerator: When stored properly, wraps last about 3 to 4 days in the fridge. - Freezing options for wraps: You can freeze them for longer storage. They stay good for about 2 months in the freezer. Just remember to wrap them well to avoid freezer burn. - Best methods for keeping texture: To reheat, unwrap the wrap and place it in a skillet over medium heat. Heat for about 3 to 5 minutes on each side. This keeps the tortilla crispy. You can also use an oven set to 350°F for 10 minutes. Enjoy your warm, tasty wraps! You can serve honey mustard chicken wraps with simple side dishes. Some great options are: - Fresh fruit: Try apple slices or grapes for a sweet touch. - Veggie sticks: Carrot and cucumber sticks add crunch and color. - Chips: Whole grain or veggie chips pair well for a fun crunch. - Salad: A light green salad with vinaigrette adds freshness. These sides will make your meal more balanced and colorful. Yes, you can make honey mustard chicken wraps ahead of time! Here are some tips: - Prep and store: Assemble the wraps, then wrap them in foil. - Refrigerate: Keep them in the fridge for up to 2 days. - Avoid sogginess: Store the honey mustard dressing separately. Add it just before eating to keep the wrap fresh. This way, you save time and enjoy a quick meal later. Making honey mustard dressing is easy! Here’s a quick recipe: - Ingredients: - 1/4 cup honey - 1/4 cup Dijon mustard - 1 tablespoon apple cider vinegar - Instructions: 1. Mix all the ingredients in a bowl. 2. Whisk until smooth and well combined. 3. Taste and adjust sweetness or tanginess as needed. This homemade dressing adds a personal touch to your wraps! Yes, honey mustard chicken wraps can be healthy! Here are some points to consider: - Lean protein: Grilled chicken offers good protein without extra fat. - Fresh veggies: Spinach, avocado, and bell peppers provide vitamins and fiber. - Whole wheat tortillas: They add more nutrition than regular tortillas. - Moderation with dressing: Use honey mustard dressing in moderation for flavor. Overall, these wraps are a tasty and nutritious choice for meals. Honey mustard chicken wraps are easy to make and tasty. We covered key ingredients, like chicken, whole wheat tortillas, and fresh veggies. You learned step-by-step prep, tips for flavor, and how to store wraps. Plus, we explored variations, including vegan options and unique ingredients. Try these wraps for a quick meal or snack. They are fun to customize. Enjoy making them your own, and share with family or friends. Eating healthy can be simple and delicious!

Honey Mustard Chicken Wraps Tasty and Easy Recipe

Looking for a quick and tasty meal? You’ll love these Honey Mustard Chicken Wraps! This easy recipe packs flavor and

- 1 can of chickpeas - Olive oil and spices - Nuts, seeds, and dried fruit additions The main star of this snack mix is the chickpeas. They provide a great base. You can use one can of chickpeas, which is about 15 ounces. Make sure to drain and rinse them well. This helps remove excess salt and gives a clean taste. Next, we need olive oil and spices. Olive oil adds richness and helps the spices stick. I love using garlic powder, smoked paprika, cumin, salt, and black pepper. These make the chickpeas full of flavor. Finally, add nuts, seeds, and dried fruit. I like using a cup of mixed nuts, like almonds and cashews. They add crunch and healthy fats. For sweetness, you can add dried cranberries or raisins. Pumpkin seeds give a nice texture too. - Sweeteners like honey or maple syrup - Different seasoning blends You can also add a touch of sweetness with honey or maple syrup. This is optional but can balance the flavors. You can mix in different seasoning blends for variety. Try chili powder for a spicy kick or cinnamon for a sweet twist. - High in protein and fiber - Vitamins and minerals Chickpeas are not just tasty; they are also healthy. They are high in protein and fiber, making them filling. This means they can keep you satisfied longer. Chickpeas also provide essential vitamins and minerals. They support overall health and energy. Enjoy this snack mix as a tasty boost to your day! 1. Preheat your oven to 400°F (200°C). This step is key for that perfect crunch. 2. Prepare the chickpeas. After draining and rinsing them, use paper towels to pat them dry. This removes extra water. Drying is vital. It helps achieve that crispy texture. 1. Roast the chickpeas. In a bowl, mix the chickpeas with olive oil, garlic powder, smoked paprika, cumin, salt, and black pepper. Toss them well. Spread the chickpeas on a baking sheet in one layer. Bake for 20-25 minutes. Shake the pan halfway through for even cooking. They should be golden brown and crispy when done. 2. Combine with other ingredients. While the chickpeas roast, mix nuts, dried cranberries, pumpkin seeds, and honey or maple syrup in another bowl. Once the chickpeas are ready, let them cool for a few minutes. Then, add them to the nut mixture. Toss gently to combine everything. - Achieving maximum crispiness: Ensure your chickpeas are very dry before roasting. The drier, the crispier. - Mixing ratios for flavors: Balance the chickpeas with nuts and dried fruit. Adjust the spices to match your taste. A little more spice can bring extra flavor to the mix. For the full recipe, refer to the Crispy Chickpea Snack Mix section. To make your crispy chickpea snack mix even better, try adding more spices or herbs. Some great options include: - Cayenne pepper for heat - Dried oregano for a fresh taste - Curry powder for a unique twist You can also explore different seasoning blends. A taco seasoning mix can give your snack a fun flair. Just remember to mix it well with the chickpeas and oil. One common mistake is not drying the chickpeas enough. If they are too wet, they won’t get crispy. Use paper towels to pat them dry after rinsing. Another issue is overcooking. Keep an eye on the time while roasting. Check for a golden brown color, which means they are done. If they burn, they will taste bitter. You can choose between baking and frying for this snack. Baking is easier and healthier. Just spread the chickpeas on a baking sheet and roast them. If you want to use an air fryer, it’s quick and still gets them crispy. Set the air fryer to 375°F (190°C) and cook for about 15 minutes. Shake the basket halfway through for even cooking. For the full recipe, check out the details above. {{image_2}} You can change the flavor of your crispy chickpea snack mix easily. For a spicy version, add chili powder. Start with one teaspoon and adjust to your taste. This will give your mix a nice kick. If you prefer a sweet snack, try cinnamon and sugar. Mix one teaspoon of cinnamon with one tablespoon of sugar. This combo adds warmth and sweetness, perfect for those who enjoy treats. Mixing different nuts or seeds can create unique tastes. Use almonds, cashews, or walnuts for crunch. You can also add sunflower seeds or sesame seeds if you want variety. Incorporating other legumes can add more texture. Try using roasted lentils or edamame. They will give your snack mix different flavors and keep it fun. You can change your mix based on the season. For holiday-specific mixes, add festive spices like nutmeg or cloves. You can even include dried fruits like apricots or figs for a holiday touch. During summer, focus on lighter ingredients. Use fresh herbs such as basil or mint. You might also swap in dried fruit like mango or pineapple for a tropical flavor. These variations keep your crispy chickpea snack mix exciting and fun to make. Feel free to experiment! For the full recipe, refer to the Crispy Chickpea Snack Mix section. For the best storage, use an airtight container. Glass jars or plastic containers with tight lids work well. Keep the mix in a cool, dry place. Avoid areas with high humidity or heat. This helps maintain its crunchy texture. Your crispy chickpea snack mix can last up to two weeks. Keep it stored properly to extend its freshness. Look for signs of spoilage, like a stale smell or soft texture. If the mix begins to lose its crunch, it’s best to discard it. If your snack mix loses its crunch, don’t worry! You can easily revive it. Spread the mix on a baking sheet and bake at 350°F for about 10 minutes. Check it often to avoid burning. If it still doesn’t get crispy, it may be time to toss it out. To get extra crispy chickpeas, start by drying them well. After rinsing, pat them with paper towels. This removes moisture. A dry surface helps them crisp up better. Next, roast them at a high heat, around 400°F (200°C). Bake them for 20-25 minutes. Shake the pan halfway through to ensure even cooking. For even better results, consider using an air fryer. This method gives a crunchier texture. Yes, Crispy Chickpea Snack Mix is a healthy option. Compared to chips or cookies, it has more protein and fiber. Chickpeas provide essential nutrients. They are low in fat and high in vitamins. Nuts add healthy fats, while dried fruits add natural sweetness. This mix can satisfy cravings without added sugars or unhealthy fats. It’s a great snack for anyone looking for a nutritious boost. You can use canned chickpeas for this recipe. They are quick and easy. Just drain and rinse them before use. If you prefer dry chickpeas, soak and cook them first. Canned chickpeas save time and work well for roasting. Both options can create a tasty snack mix. The choice depends on your time and preference. You can find store-bought crispy chickpea snacks in many grocery stores. Look for brands like Biena and The Good Bean. They offer different flavors, such as spicy or sweet. Check the snack aisle or health food section. Some online retailers sell these snacks, too. You can easily find tasty options without making them at home. Crispy chickpea snack mix is fun and easy to make. You learned about essential ingredients, preparation steps, and cooking methods. You can mix flavors and create your favorite version. Storing and reviving your snack is simple, too. Now, you can enjoy a healthy treat anytime. This snack is packed with protein and fiber. With a few tips, you can avoid common mistakes and enjoy great taste. Experiment with different ingredients and flavors. Your crispy chickpea mix will impress everyone. Enjoy your delicious, crunchy snack!

Crispy Chickpea Snack Mix Flavorful and Nutritious Boost

Looking for a snack that’s both tasty and healthy? Let me introduce you to Crispy Chickpea Snack Mix! This crunchy

Creating a Taco Zoodle Skillet starts with fresh, vibrant ingredients. Each item adds flavor and nutrients. Here’s what you’ll need: - Zucchini and Vegetables - 3 medium zucchinis, spiralized (zoodles) - 1 small red onion, diced - 1 bell pepper, diced (any color) - 2 cloves garlic, minced - Protein Options - 1 lb ground turkey or beef - 1 can (15 oz) black beans, rinsed and drained - Seasonings and Garnishes - 2 tbsp taco seasoning (store-bought or homemade) - 1 cup corn kernels (fresh or frozen) - 1 cup diced tomatoes (fresh or canned) - Olive oil for cooking - Salt and pepper to taste - Fresh cilantro, chopped (for garnish) - Lime wedges (for serving) Using these ingredients, you can create a meal that is not just quick but also full of color and taste. The zoodles make it light and fresh. The protein adds heartiness, while the spices bring everything to life. For the full experience, check out the Full Recipe. 1. Skillet Heating and Olive Oil Addition Start by heating a large skillet over medium heat. Pour in a drizzle of olive oil. This helps cook the veggies and meat without sticking. 2. Sautéing Onions and Bell Peppers Next, add diced red onion and bell pepper to the skillet. Sauté for about 3-4 minutes. You want the veggies to soften and release their flavors. 3. Cooking Ground Turkey or Beef Now, stir in minced garlic and let it cook for a minute. Then, add the ground turkey or beef. Cook until it is browned, about 5-7 minutes. Break it apart using a spatula. Drain any excess fat if needed. 1. Mixing in Taco Seasoning and Vegetables Sprinkle taco seasoning over the cooked meat. Stir in diced tomatoes, black beans, and corn. Mix everything well and let it simmer for about 5 minutes. 2. Folding in Zucchini Noodles Gently fold in the spiralized zucchini. Cook for another 2-3 minutes. You want the zoodles to be tender but still crisp. Season with salt and pepper to taste. 1. Seasoning and Garnishing Remove the skillet from heat. Serve hot, garnished with fresh cilantro. Add lime wedges on the side for a fresh burst of flavor. Enjoy this easy and flavorful meal, perfect for busy weeknights! You can find the Full Recipe to make it at home. - Avoiding Soggy Zoodles To keep zoodles firm, do not overcook them. Cook them for only 2-3 minutes. Stir gently to avoid breaking them. Let them sit for a short time before adding to the dish. This helps remove excess moisture. - Cooking Time Recommendations Start cooking zoodles when the other ingredients are almost ready. This way, they stay crisp. If you cook them too long, they will turn mushy and lose flavor. - Adding Heat with Jalapeños For a spicy kick, add diced jalapeños. You can add them with the onions at the start. Adjust the amount based on your spice level. This adds great depth to the dish. - Cheese Options for Topping Top your Taco Zoodle Skillet with cheese for extra flavor. Cheddar, pepper jack, or even feta work well. Sprinkle cheese on top right before serving. This melts beautifully and adds creaminess. Using these tips, you can boost the taste and texture of your dish. For the full recipe, check out the details above. {{image_2}} You can switch up the protein in your Taco Zoodle Skillet. Ground turkey or beef works well. You can try chicken for a lighter option. Tofu is a great meat alternative for a vegetarian dish. For those who prefer plant-based options, use lentils or chickpeas. These swaps keep your meal exciting and full of flavor. Feel free to add more veggies to your skillet. Spinach adds a nice touch and boosts nutrition. You can toss in mushrooms for a savory depth. Carrots or zucchini can also enhance the dish's texture. The more colorful your skillet, the better it looks and tastes! If you need gluten-free options, simply check your taco seasoning. Many brands offer gluten-free blends. For low-carb choices, you can use cauliflower rice instead of zoodles. This keeps the dish light and satisfying. You can also skip the corn or beans to reduce carbs further. These variations let you customize your Taco Zoodle Skillet to fit your needs and tastes. The Full Recipe gives you a solid base, but the fun lies in making it your own! To keep your Taco Zoodle Skillet fresh, store it in an airtight container. You can refrigerate it for up to 3 days. The flavors will blend nicely as it sits in the fridge. If you want to save it longer, freeze it. Use a freezer-safe container and it will last up to 3 months. Just remember, the zoodles may lose some crunch once thawed. When it’s time to eat again, you need to reheat your zoodle skillet carefully. The best way is to use a skillet over medium heat. Add a splash of water or broth to help steam the zoodles. This keeps them from turning mushy. Stir gently until everything is heated through. If you use a microwave, heat it in short bursts. Stop to stir every minute. This way, you maintain the best texture possible. For the full recipe, check out the details above. It takes about 30 minutes to make the Taco Zoodle Skillet. You spend 15 minutes prepping the ingredients. The cooking time is also around 15 minutes. This makes it a quick weeknight meal. Yes, you can use store-bought zoodles. They save time and effort. Just check the package for freshness. Store-bought zoodles cook quickly, so watch them closely. You can make your own taco seasoning. Combine chili powder, cumin, garlic powder, and paprika. Adjust the spice level to your taste. You can also use other spice blends if you like. Yes, Taco Zoodle Skillet is great for meal prep. It stores well in the fridge for a few days. You can reheat it easily for lunch or dinner. Just keep the zoodles separate if you want them fresh. Absolutely! You can swap the meat for black beans or lentils. This keeps the meal hearty and tasty. You can also add more vegetables for extra flavor and nutrition. Check the full recipe for ideas. This blog post covers all you need for a tasty taco zoodle skillet. We explored the ingredients, from fresh veggies to protein options. I shared step-by-step instructions to make cooking easy. You learned tips for perfect zoodles and flavor boosts. We've also looked at delicious variations to fit your needs. Finally, I gave storage and reheating advice to keep meals fresh. Enjoy trying out this healthy and scrumptious dish!

Taco Zoodle Skillet Easy and Flavorful Weeknight Meal

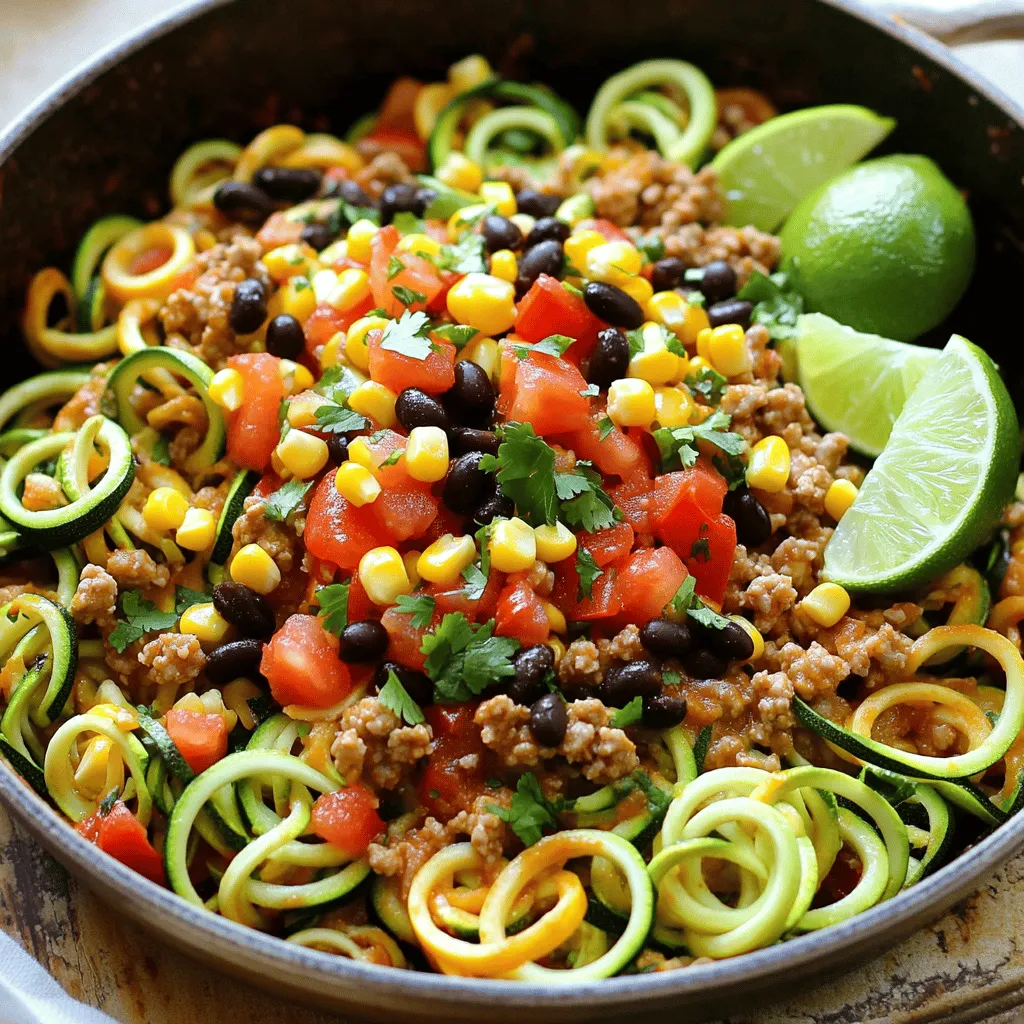
Looking for a quick and tasty dinner idea? My Taco Zoodle Skillet is the answer! This easy dish packs all

To make crispy zucchini carrot fritters, you need these key items: - 2 medium zucchinis, grated - 2 large carrots, grated - 1/2 cup all-purpose flour - 1/4 cup grated Parmesan cheese - 1/4 cup fresh parsley, chopped - 2 large eggs, lightly beaten - 1 teaspoon garlic powder - 1/2 teaspoon onion powder - Salt and pepper to taste - Vegetable oil for frying You can make your fritters even tastier with these options: - A pinch of red pepper flakes for heat - Chopped green onions for a fresh bite - A dash of smoked paprika for depth - Crumbled feta cheese for a tangy twist Each serving packs a nutritious punch: - Calories: 180 - Protein: 6g - Fat: 8g - Carbohydrates: 22g - Fiber: 2g - Sugar: 2g These fritters are not just delicious; they also provide a good mix of vitamins and minerals. Enjoy them as a snack or a side dish! For the full recipe, check the link above. First, wash the zucchinis and carrots well. I like to use a box grater for this. Grate them until they are fine. You can also use a food processor if you have one. Next, take a clean kitchen towel and place the grated veggies inside. Squeeze out as much moisture as you can. This step is key to making crispy fritters. Too much water will make them soggy. In a large mixing bowl, combine the grated zucchini and carrots. Add the flour, Parmesan cheese, chopped parsley, garlic powder, onion powder, salt, and pepper. Mix everything well until all the ingredients are evenly spread. This ensures every bite is tasty. Now, pour in the beaten eggs. Stir until the mixture becomes a smooth batter. It should hold together nicely. Heat about 1/4 inch of vegetable oil in a large skillet over medium heat. You can test if the oil is ready by dropping a small bit of batter in; it should sizzle. Use a tablespoon to scoop out the fritter mixture and drop it into the skillet. Flatten each scoop a bit with the back of the spoon. Cook for about 3-4 minutes on each side. Look for a golden-brown color to know they are done. Avoid overcrowding the pan; cook them in batches if needed. Once cooked, place them on a plate with paper towels to soak up extra oil. Serve warm with your favorite dipping sauce, like yogurt or tomato salsa. To make crispy fritters, the key is moisture. After grating the zucchini and carrots, remove excess water. Use a clean kitchen towel to squeeze out the liquid. This step is very important. If you skip it, your fritters might be soggy. You can also add a bit more flour if the batter seems too wet. You can fry or bake these fritters. Frying gives a golden, crispy outside. It’s quick but needs oil. Baking is healthier and less messy. To bake, preheat your oven to 400°F. Place the fritters on a lined baking sheet. Bake for about 20 minutes, flipping halfway through. They may not be as crispy, but they will still taste great! The oil you choose can change the flavor. Vegetable oil is common because it has a neutral taste. Canola oil works well too. If you want a flavor boost, try olive oil. Just remember, olive oil has a lower smoke point. Make sure your oil is hot before adding the fritters. This helps them cook evenly and get crispy. For the full recipe, check out the detailed steps. {{image_2}} You can make zucchini carrot fritters gluten-free. Simply replace all-purpose flour with a gluten-free blend. Look for a mix that includes xanthan gum for better binding. This way, you can enjoy a crispy texture without gluten. If you want a vegan version, swap the eggs for flaxseed meal. Mix 1 tablespoon of flaxseed meal with 3 tablespoons of water. Let it sit for five minutes until it thickens. This will help bind the fritters together without using eggs. To spice things up, try adding different cheeses or spices. Feta cheese gives a tangy flavor. You can also add chili flakes for heat or fresh herbs like dill or basil for freshness. Experiment with seasonings to find your favorite combo! For the full recipe, check the earlier section. To keep your zucchini carrot fritters fresh, place them in an airtight container. Line the bottom with paper towels to absorb moisture. This helps maintain their crispiness. Store them in the fridge for up to three days. If you want to keep them longer, consider freezing. For the best taste and texture, reheat fritters in a skillet. Heat a little oil over medium heat. Cook each fritter for about two minutes on each side until hot and crispy. You can also use an oven. Set it to 350°F (175°C) and place fritters on a baking sheet for about 10 minutes. To freeze these tasty fritters, allow them to cool completely. Place them in a single layer on a baking sheet. Freeze for about two hours until solid. Then, transfer them to a freezer bag. They can last up to three months. When you’re ready to enjoy, reheat from frozen in a skillet or oven. Full Recipe is available for those who want detailed steps. Zucchini carrot fritters can stay fresh in the fridge for about three to four days. Store them in an airtight container. This keeps them from drying out and helps maintain their taste. Yes, you can make these fritters ahead of time. Prepare the batter and store it in the fridge for up to 24 hours. This way, you can fry them just before serving. You can also cook them fully and reheat later. There are many tasty sauces that go well with zucchini carrot fritters. Here are some popular choices: - Yogurt dip - Tangy tomato salsa - Ranch dressing - Hummus - Garlic aioli These dips add flavor and make your fritters even more enjoyable. For the full recipe, check out the section above. We covered all the key parts of making zucchini carrot fritters. You learned about the main ingredients, cooking steps, and tips for crispiness. We explored fun variations and how to store leftovers. You can now enjoy these tasty fritters at any meal. Remember, cooking is about experimenting and having fun. Feel free to tweak the recipe to make it your own! Enjoy every bite and share with friends. Your healthy cooking journey has just begun!

Zucchini Carrot Fritters Simple and Tasty Recipe

Looking for a simple yet delicious way to enjoy veggies? These zucchini carrot fritters are your answer! Packed with flavor

To make these easy veggie spring rolls, gather these key ingredients: - 10 rice paper wrappers - 1 cup cooked vermicelli noodles - 1 cup shredded carrots - 1 cup cucumber, julienned - 1 cup red bell pepper, julienned - 1 cup fresh mint leaves - 1 cup fresh cilantro leaves - 1 avocado, sliced - 1/4 cup soy sauce (or tamari for gluten-free) - 2 tablespoons sesame oil - 1 tablespoon rice vinegar - 1 tablespoon honey or agave syrup These ingredients create a fresh and crunchy experience. The rice paper wrappers hold everything together nicely. You can enhance your spring rolls with optional ingredients: - Sesame seeds for garnish - Sliced jalapeños for heat - Sliced radishes for crunch - Chopped green onions for extra flavor These additions give you more ways to make your rolls unique. Feel free to mix and match based on what you like! If you need to swap out an ingredient, here are some ideas: - Use quinoa instead of vermicelli for a gluten-free option. - Try other herbs like basil or parsley for different flavors. - Change up the veggies based on what you have on hand. Always remember, fresh ingredients make the best spring rolls. Keep your veggies crisp for a satisfying bite. Want to see the full recipe? Check out the [Full Recipe] for all the details! To make the dipping sauce, grab a small bowl. Whisk together the soy sauce, sesame oil, rice vinegar, and honey. Mix well until combined. This sauce adds a great flavor to the spring rolls. Set it aside for later. Fill a large dish with warm water. Dip one rice paper wrapper into the water. Hold it for 15 to 20 seconds. You want it soft but not too mushy. Once it's ready, lay the wrapper flat on a clean surface. Start by adding filling to the center of the wrapper. Place a small handful of cooked vermicelli noodles. Next, add shredded carrots, julienned cucumbers, and red bell peppers. Then, layer fresh mint and cilantro leaves. Finally, add a slice of avocado. - Rolling Techniques for Perfect Spring Rolls Carefully fold the sides of the rice paper over the filling. Then, roll from the bottom up. Tuck in the filling as you roll. This makes a tight and neat spring roll. - Serving Suggestions for Presentation Arrange the spring rolls on a large platter. Sprinkle sesame seeds on top if you like. You can also add extra mint leaves for a fresh look. Serve the rolls with the dipping sauce in a small bowl nearby. When making veggie spring rolls, avoid over-soaking the rice paper. It should be soft but not too mushy. If you soak it too long, the wrapper may tear. Use a clean surface to roll the spring rolls. If your surface is sticky, your rolls may not come out well. Lastly, don't overfill your rolls. A small amount of filling works best for a tight roll. To keep your spring rolls fresh, store them in an airtight container. Place a damp paper towel between layers to maintain moisture. Avoid stacking them directly on top of each other. If you plan to eat them later, keep the dipping sauce separate. This will help the rolls stay crisp and tasty. When rolling spring rolls, start with the filling in the center. Fold the sides over the filling first. Then, roll from the bottom up, tucking in the filling as you go. This method helps keep everything inside. Make sure to roll tightly but gently. If you roll too hard, the rice paper may break. Practice makes perfect, so don’t worry if your first few rolls don’t look perfect! For a detailed guide, check the Full Recipe. {{image_2}} You can easily make these spring rolls vegan and gluten-free. Start by using rice paper wrappers, which are naturally gluten-free. For the dipping sauce, swap soy sauce with tamari to keep it gluten-free. Honey can be replaced with agave syrup to make the dish fully vegan. This way, everyone can enjoy the tasty rolls! Feel free to get creative with your fillings! You can add cooked tofu or tempeh for protein. Try using other veggies like bell peppers, bean sprouts, or even shredded cabbage. You can also toss in some fruits like mango or pineapple for a sweet twist. The key is to use fresh and colorful ingredients to make your rolls pop! The dipping sauce is where you can add your personal touch. You can mix up the base by adding peanut butter for a richer flavor. If you like heat, add sriracha or chili flakes. Fresh lime juice can brighten the sauce and add zing. Experiment with these options to find your perfect dip! For the full recipe, check out the Deliciously Fresh Veggie Spring Rolls above. To store leftover spring rolls, wrap them in a damp paper towel. Place them in an airtight container. This keeps them fresh and prevents them from drying out. You can also layer them between parchment paper. This method helps avoid sticking. The best storage containers for spring rolls are glass or plastic containers with tight lids. Make sure they are clean and dry before adding the rolls. If you use plastic wrap, ensure it covers all parts of the rolls well. Avoid metal containers, as they may affect the taste. To freeze spring rolls, first wrap each one in plastic wrap. Then, place them in a freezer bag. Make sure to remove as much air as possible. They can last up to three months in the freezer. When ready to eat, thaw them in the fridge overnight. You can then serve them cold or quickly warm them in a pan. For more tips on making the most of your veggie spring rolls, check out the Full Recipe. To prevent spring rolls from sticking, use warm water. Dip each rice paper wrapper in the water for 15-20 seconds. This makes the wrappers soft and easy to handle. Lay them flat on a clean surface. Keep them moist by covering with a damp cloth. Avoid stacking them directly on top of each other. This helps keep them from sticking together. Yes, you can prepare spring rolls ahead of time. Make them a few hours before serving. Keep them in a single layer on a plate. Cover them with a damp cloth or plastic wrap. This keeps them fresh. Avoid leaving them out too long, as they can dry out. I love a simple soy sauce mix for dipping. Combine soy sauce, sesame oil, rice vinegar, and honey. This gives a sweet and salty taste. For a spicy kick, add some chili flakes or sriracha. Serve the dipping sauce in a small bowl alongside your spring rolls for easy access. For the full recipe, check the details above. Making veggie spring rolls is fun and simple. We covered the key ingredients you need, from essential staples to tasty options. I shared steps for making the perfect dipping sauce, softening rice wrappers, and assembling rolls with ease. Remember to avoid common mistakes and use my tips to keep your rolls fresh. You can also customize your filling and dipping sauce to suit your taste. With these insights, you can now make delicious veggie spring rolls anytime! Enjoy the process and share your creations!

Easy Veggie Spring Rolls Simple and Tasty Recipe

Looking for a fun and healthy snack? You’ll love my Easy Veggie Spring Rolls! They are simple to make and

To make delicious air fryer pretzel bites, you need a few key items: - 1 ½ cups warm water (110°F to 115°F) - 1 packet (2 ¼ teaspoons) active dry yeast - 1 tablespoon granulated sugar - 4 cups all-purpose flour - 2 teaspoons salt - ½ cup baking soda - 1 large egg, beaten (for egg wash) - Coarse sea salt for topping These main ingredients create a rich and chewy texture for your bites. The warm water activates the yeast, while the flour gives structure. Sugar feeds the yeast, and salt adds flavor. You can enhance your pretzel bites with some extra touches: - Melted butter for brushing - Dipping sauces like mustard or cheese dip - Variations on toppings, such as garlic powder or sesame seeds Melted butter adds richness. Dipping sauces offer a fun way to enjoy the bites. You can even use different toppings for a unique twist. For example, try a sprinkle of cheese or herbs for added flavor. For the full recipe, check out the link provided. 1. In a large mixing bowl, combine 1 ½ cups of warm water, 1 packet of active dry yeast, and 1 tablespoon of sugar. Let it sit for about 5 minutes until it gets frothy. 2. Add 4 cups of all-purpose flour and 2 teaspoons of salt to the yeast mix. Stir until a dough starts to form. 3. Transfer the dough to a floured surface. Knead for about 5 minutes until it feels smooth and elastic. 1. Place the dough in a lightly oiled bowl. Cover it with a towel. Let it rise in a warm spot for 1 hour or until it doubles in size. 2. Keep the dough at a temperature around 75°F to 80°F. This helps the yeast work well. 1. Once the dough has risen, punch it down. Roll it into a long rope, about 1 inch thick. 2. Cut the rope into small pieces, each about 1 inch long, to make your pretzel bites. 3. In a large pot, bring 10 cups of water to a boil. Add ½ cup of baking soda. Carefully drop the bites in a few at a time. Boil for 30 seconds, then remove them with a slotted spoon. 1. Preheat your air fryer to 375°F (190°C). 2. Brush the boiled pretzel bites with a beaten egg and sprinkle with coarse sea salt. 3. Place the bites in the air fryer basket in a single layer. You may need to do this in batches. Air fry for 7-8 minutes or until golden brown. 4. If you want, brush the hot bites with melted butter for extra flavor. Enjoy these quick and tasty snacks! For the full recipe, check the details provided. Kneading is key for great pretzel bites. It helps develop gluten, giving the bites their chewy texture. Knead the dough for about five minutes. You want it smooth and elastic. For the best rise, find a warm spot in your kitchen. Cover the dough with a towel to keep it cozy. Let it rise until it doubles in size, about one hour. This step is crucial for fluffy bites. Toppings can change the game for your pretzel bites. Try using coarse sea salt for the classic taste. You can also sprinkle on garlic powder, onion flakes, or even everything bagel seasoning. Brushing with melted butter adds a rich flavor. Do this right after air frying for the best taste. It makes the bites shiny and even tastier. Serve your pretzel bites warm for the best experience. Pair them with dips like spicy mustard or creamy cheese sauce. This combo is always a crowd-pleaser. For a fun presentation, arrange the bites on a rustic wooden board. You can add small bowls of dips around them. This makes a lovely spread for parties or movie nights. {{image_2}} You can play with flavors in your pretzel bites. One fun idea is to make cheese-stuffed pretzel bites. Just take small pieces of dough and wrap cheese inside. When they cook, the cheese melts and gives a nice surprise inside. Another option is herb-infused dough. You can add chopped fresh herbs like rosemary or thyme to the dough. This adds a fresh flavor that pairs well with many dips. If you need gluten-free options, use gluten-free flour. It works well for this recipe. You might need to adjust the water amount to help the dough stick together. For vegan substitutes, replace the egg wash with a mixture of plant-based milk and a little oil. This gives a nice color and helps the salt stick. You can also skip the cheese or use plant-based cheese for stuffing. You can make sweet pretzel bites too. Just sprinkle cinnamon sugar on top after they cook. This makes for a tasty treat that’s fun for dessert. For a savory twist, brush the pretzel bites with garlic butter right after they come out of the air fryer. This adds a rich flavor that many people love. Explore these variations to find your favorite way to enjoy your air fryer pretzel bites. For a complete guide on making these treats, check the Full Recipe. To keep your pretzel bites fresh, store them in an airtight container. Place a paper towel inside to absorb moisture. This helps maintain their texture. They will last for 2 to 3 days in the fridge. After that, they may dry out or become tough. The air fryer is the best way to reheat pretzel bites. Set your air fryer to 350°F (175°C). Heat them for about 3 to 5 minutes. This keeps them crispy. Avoid using the microwave. It makes them soggy and chewy. You can freeze pretzel bites before or after cooking. If freezing before cooking, shape and place them on a baking sheet. Freeze them for about 1 hour. Once solid, transfer them to a freezer bag. They can stay frozen for up to 2 months. If freezing after cooking, let them cool first. Then follow the same steps. When ready to eat, just reheat in your air fryer. Enjoy fresh-tasting pretzel bites anytime! To get that perfect golden brown color, follow these tips: - Preheat your air fryer to 375°F (190°C). - Make sure to space the pretzel bites out in the basket. This helps them cook evenly. - Brush the bites with the beaten egg wash. This creates a nice, shiny finish. - Keep an eye on them while cooking. They usually take 7-8 minutes. If they look too pale, give them a minute more. Yes, you can prepare pretzel bites ahead of time. Here’s how: - Make the dough and shape the bites. - Instead of boiling them, place them on a baking sheet. - Cover and freeze them for later. - When you’re ready to enjoy, boil them straight from the freezer. Then, air fry as normal. You can also store boiled bites in the fridge for 1-2 days. You can easily add flavor to your pretzel bites. Here are some ideas: - Mix spices into the dough, like garlic powder or Italian herbs. - Add cheese into the center for a cheesy surprise. - Try different toppings, like everything bagel seasoning or cinnamon sugar. - Serve with unique dips, like spicy mustard or ranch for a fun twist. For the full recipe, check out the Air Fryer Pretzel Bites! Making pretzel bites at home is fun and easy. We covered key ingredients, step-by-step instructions, and different ways to customize your bites. From rising the dough to perfect air frying, it's all about technique. Experiment with toppings and flavors to find what you love. Store your leftovers properly to keep them fresh. With these tips and tricks, you’ll impress family and friends with tasty pretzel bites. Enjoy your baking journey!

Air Fryer Pretzel Bites Quick and Tasty Snack Recipe

Looking for a quick and tasty snack? These Air Fryer Pretzel Bites are just what you need! Perfectly soft, warm,

- 2 cups cooked jasmine rice - 1 cup cooked chicken - 2 tablespoons vegetable oil - 1 medium onion - 2 cloves garlic - 1 cup mixed vegetables - 3 green onions - 2 eggs - 3 tablespoons soy sauce - 1 tablespoon sesame oil - Salt and pepper When I make chicken fried rice, I love using jasmine rice. The grains are fluffy and hold up well. Using day-old rice is best. It helps avoid clumps when cooking. Fresh cooked chicken works great, but you can use rotisserie chicken too. It saves time and adds flavor. If you want to switch up the rice, you can use brown rice or even cauliflower rice. Each brings a unique taste and texture to the dish. For the mixed vegetables, feel free to use what you have on hand. Peas, carrots, and corn are classic, but bell peppers and broccoli work too. - Alternatives for chicken: tofu, shrimp, or beef - Different types of rice to use: brown rice, cauliflower rice - Vegetable variations: bell peppers, zucchini, or broccoli You can replace chicken with tofu or shrimp for a different protein. If you want a veggie version, just skip the meat. Add in more vegetables to make it hearty. - Benefits of fresh ingredients: better flavor and nutrition - Using frozen vegetables in a pinch: quick and easy Using fresh vegetables gives your dish more flavor. They add crunch and color. But frozen vegetables are a great option too. They are convenient and often just as nutritious. When life gets busy, frozen veggies can save the day! How to prepare the rice To make great chicken fried rice, start with cold, cooked jasmine rice. Day-old rice works best. If you don’t have any, cook it and let it cool. Spread it out on a plate to dry. Chopping vegetables and chicken Next, chop your vegetables and chicken. Use about one cup of mixed vegetables. Peas, carrots, and corn are great choices. For chicken, you can shred or cube it. Aim for small, even pieces so they cook fast. Heat oil and sautéing onions In a large skillet or wok, heat two tablespoons of vegetable oil over medium-high heat. Add one finely chopped onion and sauté it for about two to three minutes. The onion should become soft and slightly clear. Incorporating garlic and vegetables Once the onions are ready, add two minced garlic cloves. Cook them for about thirty seconds until they smell great. Then, toss in your mixed vegetables. Stir-fry them for three to four minutes until they are tender and hot. Scrambling eggs and combining ingredients Now, push the veggies to one side of the skillet. Pour two beaten eggs into the empty space. Scramble the eggs until cooked, then mix everything together. Add one cup of cooked chicken to the skillet and stir it in well. Mixing in rice and sauces Add the cold, prepared rice to the skillet. Pour in three tablespoons of soy sauce and one tablespoon of sesame oil. Stir everything well, breaking up any rice clumps. Achieving the ideal texture Cook the mixture for an additional four to five minutes. Stir occasionally, allowing the rice to heat through and brown slightly. Finally, fold in three sliced green onions. Season with salt and pepper to taste. For the full recipe, check out the details above! Using day-old rice is key. Fresh rice is too sticky. Cold rice breaks apart easily. This keeps your fried rice fluffy. When you stir-fry, use high heat. It helps to keep the rice crisp. Move ingredients quickly in the pan. This prevents burning and clumping. For extra taste, add these optional seasonings: - Garlic powder - White pepper - Oyster sauce If you want to marinate the chicken, try this mix: - Soy sauce - Ginger - Honey Let the chicken soak for at least 30 minutes. To get that nice crunch, cook the rice longer. Stir it less as it cooks. This allows some rice to brown. For a beautiful look, serve the fried rice in a bowl. Top it with more green onions and sesame seeds. It adds color and texture. {{image_2}} For a meat-free version, swap the chicken for plant-based protein. You can use: - 1 cup of firm tofu, diced - 1 cup of tempeh, crumbled Tofu is light and absorbs flavors well. It adds protein and texture. Tempeh has a nutty taste and is packed with nutrients. Both add great taste! Want to add some heat? Try a splash of chili sauce. It enhances the flavor and gives it a kick. You can also add unique ingredients like: - 1 cup of diced pineapple - 1 tablespoon of sriracha Pineapple adds sweetness and tang. Sriracha brings a bold flavor. Mixing these will create a vibrant dish. Fried rice is loved worldwide! You can try different styles, like: - Korean-style fried rice with gochujang - Thai-inspired fried rice with basil and lime Korean-style adds a spicy depth with gochujang. Thai-style brings freshness with herbs and citrus. These variations will keep your fried rice exciting. For the complete dish, check out the Full Recipe! To keep chicken fried rice fresh, store it in an airtight container. Make sure it cools down first. Place it in the fridge within two hours of cooking. Fried rice stays good for about three to four days. After that, it may lose taste and texture. You can reheat fried rice in two main ways: the microwave or stovetop. The microwave is quick and easy. Just cover the rice with a damp paper towel to keep it moist. Heat it in short bursts, stirring in between. The stovetop method is better for texture. Heat a skillet with a bit of oil. Add the rice and stir-fry until hot. This method keeps the rice from getting too dry. To freeze chicken fried rice, let it cool completely. Portion it into freezer-safe bags. Remove as much air as possible before sealing. You can freeze it for up to three months. When ready to eat, thaw the rice in the fridge overnight. Reheat it on the stovetop or microwave for a quick meal. I recommend using jasmine rice for chicken fried rice. It has a nice texture and flavor. Day-old rice works best. It allows the grains to dry out. This helps prevent clumping during cooking. You can also use other types like basmati or long-grain white rice. Each type brings a unique taste to your dish. No, you should not use uncooked rice. Raw rice needs to cook longer than the other ingredients. This will leave the rice hard and uncooked. Instead, always start with cooked rice. It makes the dish quick and easy to prepare. Yes, you can make chicken fried rice ahead of time. Just cook it, let it cool, and store it in the fridge. When you are ready to eat, reheat it in a skillet or microwave. Add a little oil or water to keep it moist. This way, you save time on busy days. You can skip soy sauce and still enjoy great flavor. Try using tamari or coconut aminos. Both are good soy sauce alternatives. You can also use teriyaki sauce or oyster sauce. Each option will change the taste a bit but still keep it tasty. In this article, we explored how to make chicken fried rice. We covered the key ingredients, preparation steps, and cooking techniques. You learned about ingredient swaps and the best ways to store leftovers. Remember, using day-old rice makes a big difference in texture. Experiment with flavors and variations to find what you love. Fried rice is versatile and fun to make, so enjoy your cooking journey!

Classic Chicken Fried Rice Flavorful and Easy Recipe

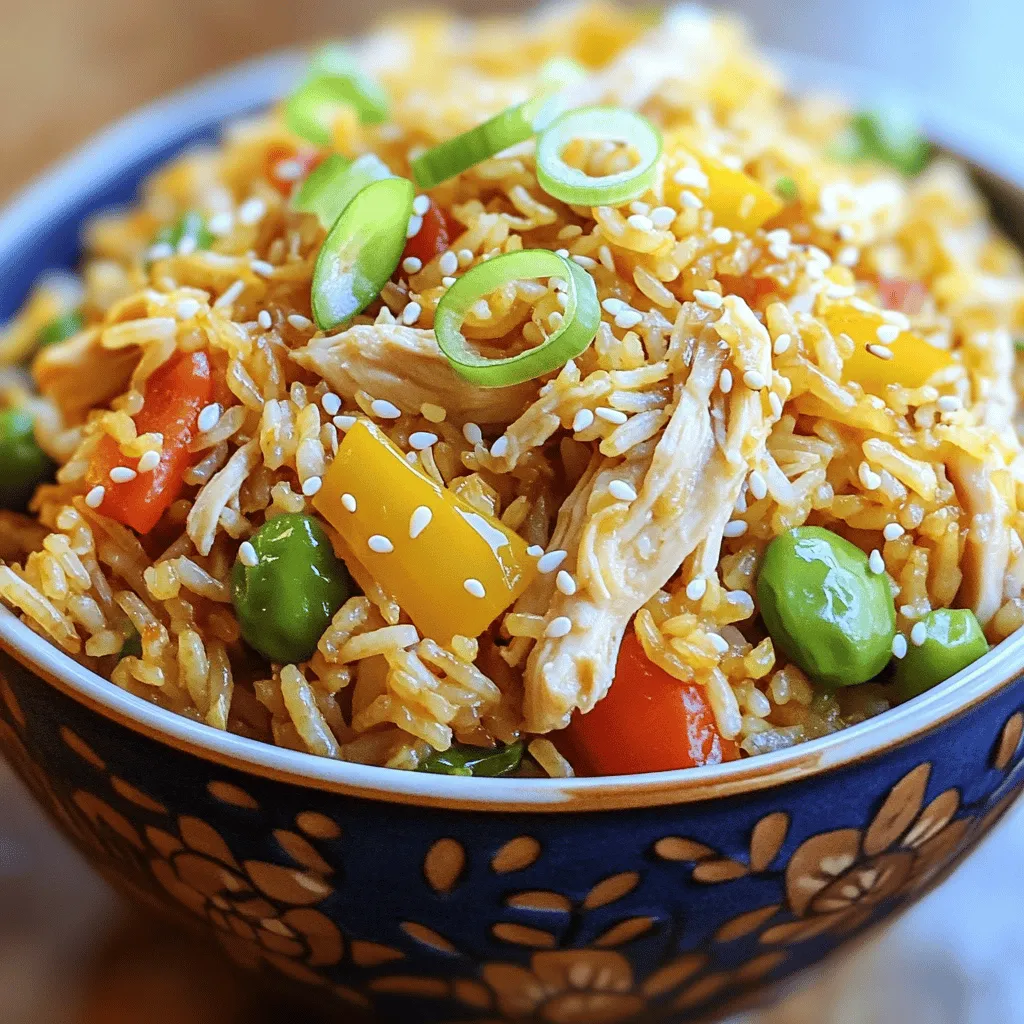
Are you ready to whip up a dish that’s both easy and delicious? This Classic Chicken Fried Rice recipe will

- 2 cups rotini pasta - 2 tablespoons olive oil - 2 boneless, skinless chicken breasts, diced - Salt and pepper to taste - 1 cup basil pesto - 1 cup cherry tomatoes, halved - ½ cup grated Parmesan cheese - Fresh basil leaves for garnish The first step to making Easy Chicken Pesto Pasta is gathering your ingredients. Each item plays a key role in creating a tasty dish. Can I use other types of pesto? Yes, you can! If you don’t have basil pesto, try sun-dried tomato or arugula pesto. Each adds a unique twist to the dish. What if I want different pasta? You can swap rotini for penne or farfalle. These types hold sauce well, making your meal delicious. Can I use a different cheese? Absolutely! If you don't have Parmesan, try Pecorino Romano or even mozzarella. Both add great flavor. These substitutions keep the recipe flexible and fun. You can make Easy Chicken Pesto Pasta in a way that suits your taste. For the full recipe, check out the earlier section. To boil rotini pasta, fill a large pot with water. Add a good amount of salt. Bring the water to a boil over high heat. Once boiling, add the rotini. Cook it for about 8-10 minutes. You want it to be al dente, which means it should be firm yet tender. Stir the pasta occasionally to prevent sticking. Once done, drain the pasta and set it aside. To achieve al dente pasta, check it a minute or two before the time on the package. The pasta should have a slight bite to it. You can taste a piece to see if it’s ready. For the best chicken, start with boneless, skinless breasts. Cut them into small, even pieces. This helps them cook evenly. Heat the olive oil in a large skillet over medium heat. Once hot, add the diced chicken. Season it with salt and pepper. Cook for about 7-10 minutes, stirring often. You want the chicken to turn golden brown and fully cooked. Seasoning is key to flavor. You can add garlic powder or Italian herbs for extra taste. Make sure the chicken is cooked through; it should not be pink inside. Now, it’s time to mix everything. Add the cooked rotini to your skillet with the chicken. Pour in the basil pesto. Toss everything together gently. Make sure each piece of pasta is well coated with the pesto. Even coating is important. It ensures every bite is flavorful. If you skip this step, some pasta might taste plain. After mixing, fold in the halved cherry tomatoes and grated Parmesan cheese. This will add freshness and creaminess to your dish. For the full recipe, check out the details above. To make your Easy Chicken Pesto Pasta quick, timing is key. Start with the pasta. Boil it first. Use a large pot with salted water. Cook the rotini for about 8-10 minutes until al dente. Once you drain it, set it aside. While the pasta cooks, heat olive oil in a skillet. Add the diced chicken next. Cook it for 7-10 minutes. This timing works well with the pasta. This way, you save time and keep everything fresh. To boost the flavor of your dish, think about spices. A pinch of garlic powder adds depth. You can also try red pepper flakes for some heat. If you love zest, squeeze in a little lemon juice. Adding extra ingredients can take your dish to the next level. Consider tossing in spinach or bell peppers for color and nutrition. Cherry tomatoes add sweetness and freshness. Mix them in just before serving for the best taste. Plating your dish well can make it look gourmet. Start with a swirl of pasta in the center of the plate. This creates a nice base. Then, pile the chicken and tomatoes on top. Garnishing is key to a lovely presentation. Use fresh basil leaves for a pop of color. Sprinkle some extra Parmesan cheese for a finishing touch. This simple step makes your meal look as good as it tastes. For the full recipe, be sure to check out the details above. {{image_2}} You can make Easy Chicken Pesto Pasta even better with some tasty add-ins. Here are some vegetables you might like: - Spinach: Adds a nice color and lots of vitamins. - Broccoli: Great for crunch and health. - Bell peppers: Choose any color for sweetness. - Zucchini: A fun way to sneak in more veggies. If you have special diet needs, try these protein swaps: - Tofu: A great choice for plant-based diets. - Shrimp: Cooks fast and adds a seafood twist. - Turkey: Leaner than chicken but still tasty. - Beans: Black beans or chickpeas boost fiber. You can make your own pesto at home if you want. Here's a simple way to do it: 1. Blend 2 cups of fresh basil. 2. Add 1/4 cup of nuts like pine nuts or walnuts. 3. Mix in 1/2 cup of olive oil for creaminess. 4. Add 1/4 cup of Parmesan cheese for flavor. 5. Season with salt and pepper. Feel free to switch herbs. You can try: - Arugula for a peppery taste. - Cilantro for a fresh kick. - Sun-dried tomatoes for a unique flavor. Pair Easy Chicken Pesto Pasta with these sides for a full meal: - Garlic bread: Perfect for soaking up sauce. - Mixed salad: A light, fresh option. - Roasted veggies: Adds more nutrients and flavor. You can also add sauces or dressings on top: - A drizzle of balsamic glaze for sweetness. - A sprinkle of lemon juice for brightness. - Extra olive oil for richness. For the full recipe, check out the detailed steps above. To keep your chicken pesto pasta fresh, use an airtight container. This will stop moisture and air from ruining the dish. Place the pasta in the container and seal it tightly. It can last in the fridge for up to three days. Always check for any signs of spoilage before eating leftovers. When reheating, I prefer using the stove top. This method keeps the pasta from drying out. Add a splash of water or extra pesto to help with moisture. Heat it on medium-low, stirring gently until warmed. If you use a microwave, cover the pasta to trap steam. Heat in short bursts, stirring in between to ensure even warming. Yes, you can freeze chicken pesto pasta! Just make sure to cool it completely first. Use a freezer-safe container or bag, removing as much air as possible. It can last for up to three months in the freezer. When you want to eat it, thaw overnight in the fridge. Reheat it on the stove for the best texture. Yes, you can use grilled chicken for this recipe. Grilled chicken adds a nice smoky flavor. Just chop it into bite-sized pieces. Mix it with the pasta and pesto as you normally would. If you don’t have basil pesto, don’t worry! You can try sun-dried tomato pesto or make a quick homemade version. Blend nuts, garlic, and olive oil with any green herbs you have. This will add a fresh twist to the dish. To make this dish vegetarian, skip the chicken. You can add more veggies instead. Spinach, bell peppers, or zucchini work well. This keeps the meal full of flavor and texture. Pair this pasta with a simple green salad or garlic bread. A light white wine also complements the flavors. For extra color, add some roasted veggies on the side. Enjoy this quick and tasty meal! You now have a simple and tasty guide for making Easy Chicken Pesto Pasta. We covered all the important steps, from ingredients to cooking tips. This dish can be made your own with different flavors and options. Don't forget to play around with add-ins and presentation ideas to make it special. Finally, remember to store and reheat leftovers properly for later enjoyment. Enjoy your cooking and share this fun meal with friends and family!

Easy Chicken Pesto Pasta Quick and Tasty Meal

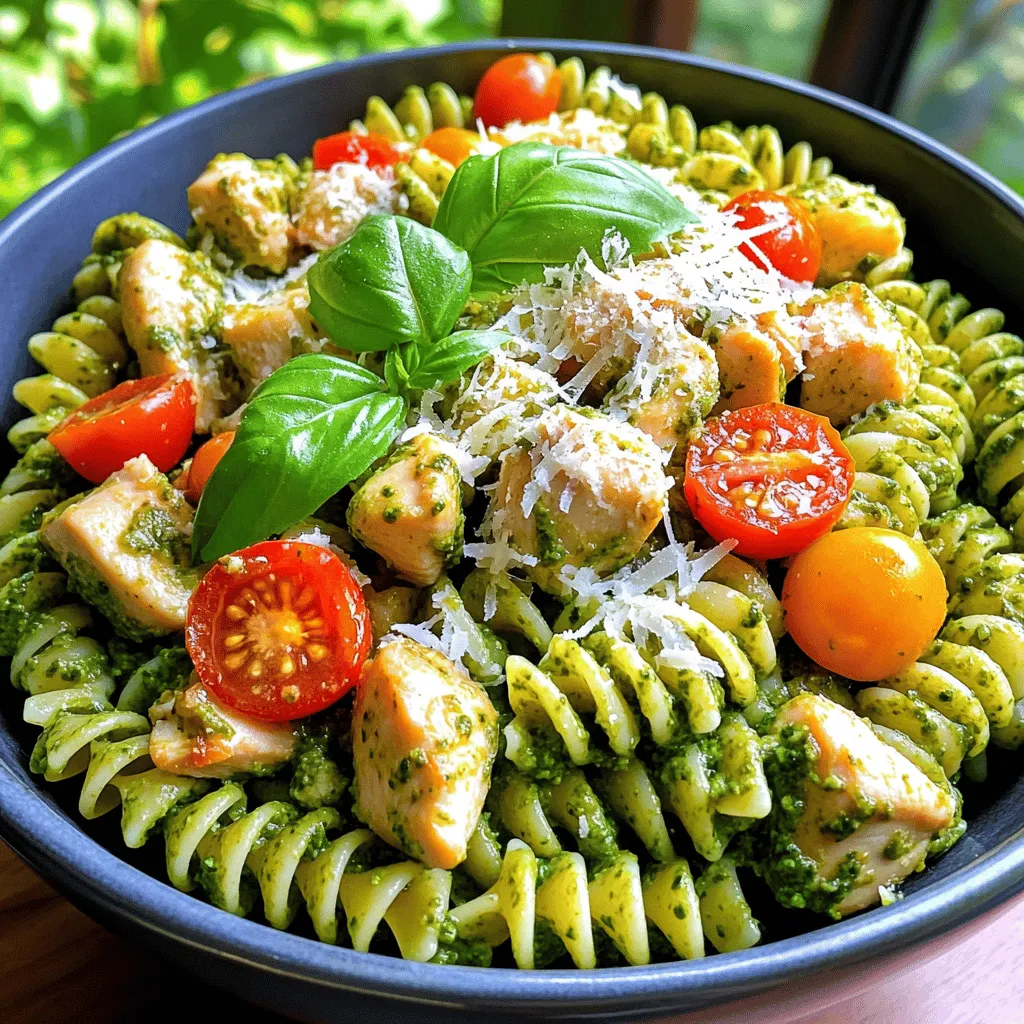
Looking for a quick and tasty meal? This Easy Chicken Pesto Pasta will be your new favorite! With simple ingredients

- 1 pound of fresh button or cremini mushrooms, cleaned and halved - 4 cloves of garlic, minced - 3 tablespoons olive oil - 1 teaspoon dried thyme - 1 teaspoon dried rosemary - Salt and pepper to taste - Fresh parsley, chopped for garnish Choosing the best mushrooms for roasting: For this dish, I like using button or cremini mushrooms. They have a nice flavor and texture. Choose mushrooms that feel firm and are free of dark spots. Fresh mushrooms will give you the best taste. Fresh vs. dried herbs: Using fresh herbs adds a bright flavor. However, dried herbs work well too. If you use dried herbs, remember they are stronger. You need less of them. I suggest using one-third the amount of dried herbs compared to fresh. This way, your dish won’t taste too strong or overpowering. For more details and step-by-step instructions, check out the Full Recipe. 1. Preheat the oven and prepare the baking sheet. Start by setting your oven to 400°F (200°C). This heat gets your mushrooms nice and crispy. Next, take a baking sheet and line it with parchment paper. This step helps with easy cleanup. 2. Mixing the mushrooms and seasonings. In a large bowl, add 1 pound of halved mushrooms. Then, toss in 4 minced garlic cloves, 3 tablespoons of olive oil, 1 teaspoon of dried thyme, and 1 teaspoon of dried rosemary. Sprinkle in salt and pepper to taste. Use your hands or a spoon to mix everything well. Make sure the mushrooms are evenly coated with the oil and spices. 1. Proper roasting technique for even cooking. Spread the mushrooms out in a single layer on the baking sheet. Avoid crowding them. If they are too close, they will steam instead of roast. Stir the mushrooms halfway through cooking. This step helps them cook evenly and get that golden brown look. 2. Times and temperatures for perfect results. Roast the mushrooms in the oven for about 20-25 minutes. You want them tender and nicely browned. Keep an eye on them as they roast. The right timing helps achieve that perfect texture. 1. Ideas for presenting Garlic Roasted Mushrooms. Once the mushrooms are done, remove them from the oven. Garnish with fresh parsley for color. Serve them warm as a side dish or top them on toast for a tasty appetizer. Enjoy the rich flavors and share with friends or family! For the complete details of making these delicious mushrooms, check the Full Recipe. To make the best garlic roasted mushrooms, avoid overcrowding the baking sheet. If mushrooms are too close, they will steam instead of roast. This can lead to soggy mushrooms. Spread them out in a single layer. Next, ensure your mushrooms soak up all that great flavor. Start by mixing them well with garlic, oil, and herbs. This helps the garlic infuse into the mushrooms. Try to use fresh garlic for a stronger taste. Also, don’t skip the seasoning. Salt and pepper are key. They enhance the natural flavor of the mushrooms. Add them to your mix before roasting. To make your dish even more exciting, consider adding extra seasonings. A pinch of red pepper flakes can add heat. A splash of balsamic vinegar can bring a nice tang. You can also experiment with different herbs. Fresh thyme or basil can change the whole taste. For a cheesy twist, sprinkle some grated Parmesan before serving. These simple changes can elevate your garlic roasted mushrooms to a new level. For the complete recipe, check out the Full Recipe. {{image_2}} You can switch up the mushrooms in this dish. While I love using button or cremini mushrooms, try shiitake or portobello for a deeper flavor. Each type brings its own unique taste and texture. You can also mix different mushrooms for fun. Adding other vegetables can boost flavor and color. Try bell peppers, zucchini, or cherry tomatoes. Just cut them into similar sizes so they cook well together. A mix of veggies makes the dish more vibrant and healthy. Experimenting with herbs and spices can change the dish completely. Try adding fresh basil, oregano, or parsley. A sprinkle of red pepper flakes can add heat. For a twist, add a pinch of smoked paprika for a rich taste. If you love cheese, try the cheesy garlic roasted mushrooms alternative. Just add grated Parmesan or feta cheese before roasting. The cheese melts and creates a nice, savory crust. You can find the full recipe above. To keep your garlic roasted mushrooms fresh, store them in an airtight container. This helps lock in the flavor and moisture. Place the container in the fridge. The mushrooms will stay good for up to three days. If you want to store them longer, freeze them. Use a freezer-safe bag or container. Just remember to label it with the date. Reheating garlic roasted mushrooms can be tricky. You don't want them to turn soggy. The best way is to use a skillet. Heat a small amount of oil over medium heat. Add the mushrooms and cook for about five minutes. Stir them often to make sure they heat evenly. You can also use an oven. Preheat it to 350°F (175°C) and place the mushrooms on a baking sheet. Heat for about 10 minutes, until warm. This keeps the texture nice and firm. Enjoy your leftovers just as you did the first time! How long do roasted mushrooms last in the fridge? Roasted mushrooms last about 3 to 5 days in the fridge. Store them in an airtight container. They stay fresh and tasty this way. Can I use dried mushrooms for this recipe? You can use dried mushrooms, but they need soaking first. Soak them in warm water for about 20 minutes. This helps them rehydrate and adds flavor. What to do if my mushrooms are soggy after roasting? If your mushrooms are soggy, it might be due to too much moisture. Make sure to dry the mushrooms well before cooking. You can also roast them longer to help them crisp up. Can I make garlic roasted mushrooms in an air fryer? Yes, you can! Air fryers work great for garlic roasted mushrooms. Set your air fryer to 375°F (190°C) and cook for about 10-12 minutes. Shake the basket halfway through for even cooking. What dishes pair well with garlic roasted mushrooms? Garlic roasted mushrooms go well with many dishes. Try them with pasta, risotto, or steak. They also make a great side for veggie dishes. Caloric content and health benefits of roasted mushrooms Roasted mushrooms are low in calories, with about 35 calories per cup. They are rich in vitamins and minerals. They provide B vitamins, selenium, and antioxidants. These nutrients support your immune system and overall health. Enjoying mushrooms can also help with heart health. You’ve learned how to make tasty Garlic Roasted Mushrooms step by step. From picking the right mushrooms to using fresh herbs, each detail matters. You can avoid common mistakes and bring out the best flavor. Remember, experimenting with different variations can make the dish even more exciting. Store and reheat your leftovers properly to enjoy this dish again. With these tips, you can impress anyone with your cooking skills. So grab your mushrooms, and let’s get roasting!

Simple Garlic Roasted Mushrooms Flavorful and Easy Dish

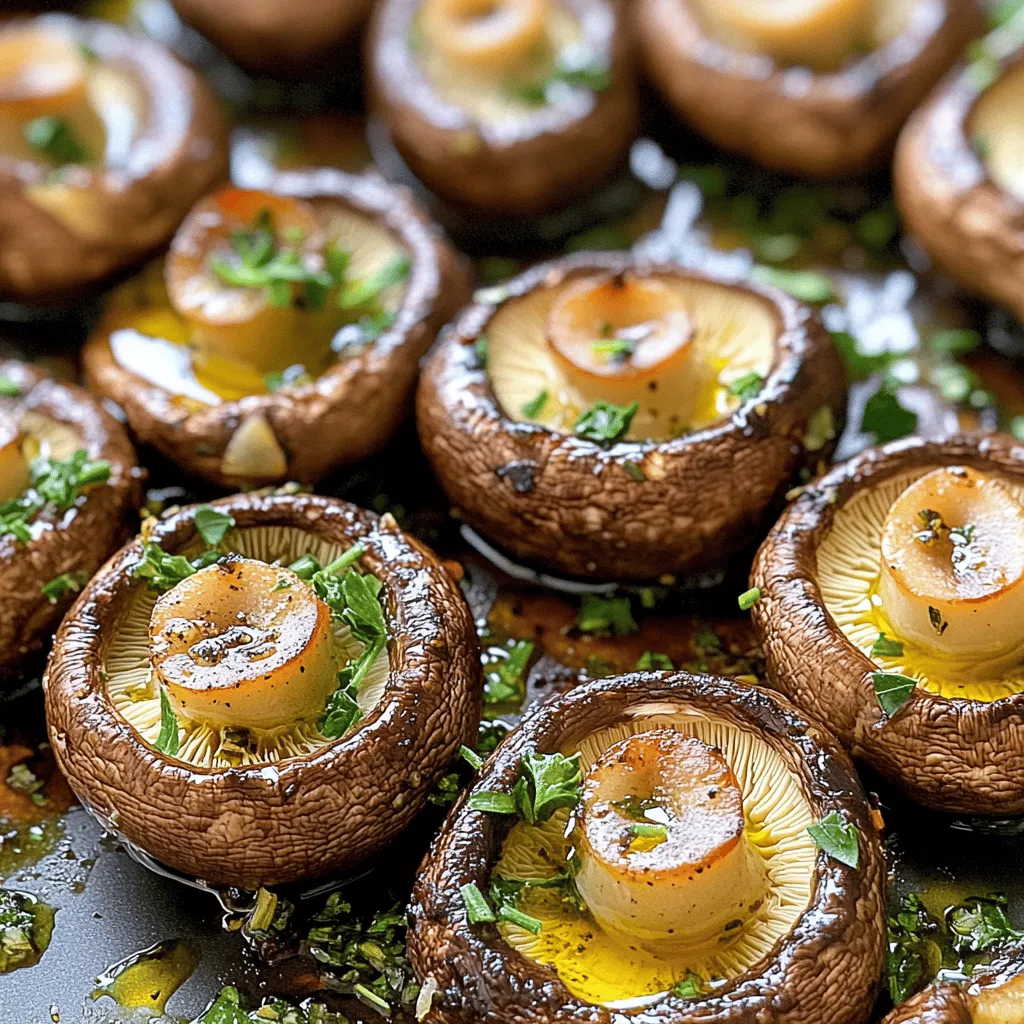
Ready to brighten your dinner table? Simple Garlic Roasted Mushrooms are here to impress! With just a few ingredients, you

Older posts
Newer posts
← Previous Page1 … Page15 Page16 Page17 … Page65 Next →

dsad

© 2025 Cooking Wells • Built with GeneratePress

Our Policies

  • Copyright Policy
  • Cookie Policy
  • GDPR Policy
  • Privacy Policy
  • Disclaimer
  • Terms Of Use

More Information

  • Home
  • About
  • Contact
  • Appetizers
  • Dessert
  • Dinner
  • Drinks
©2025, Cooking Wells About Back To Top