Skip to content
DisclaimerTerms Of UseGDPR PolicyCookie Policy

Cooking Wells

  • Home
  • Drinks
  • Appetizers
  • Dinner
  • Dessert
  • About
  • Contact
  • Privacy Policy
DisclaimerTerms Of UseGDPR PolicyCookie Policy

Mia

- Greek yogurt and its types: Greek yogurt is thick and creamy. It has more protein than regular yogurt. You can choose full-fat, low-fat, or non-fat. Each type has a unique taste and texture. Full-fat yogurt is rich and creamy. Low-fat yogurt is lighter but still tasty. Non-fat yogurt is the lightest option. It is great for lower calories. - Fruit options for parfaits: Fresh fruits add flavor and color. You can use mixed berries, bananas, apples, or peaches. Berries like strawberries, blueberries, and raspberries are my favorites. They are sweet and juicy. You can also try seasonal fruits for variety. Just make sure the fruit is ripe and fresh. - Granola and sweeteners: Granola adds crunch to your parfait. Choose granola with nuts and seeds for extra flavor. You can find many types in stores. If you want a sweeter taste, honey is a great choice. Maple syrup is another option. Both add a lovely sweetness to your parfait. Check out the Full Recipe for step-by-step details on making this tasty treat! To make the yogurt mixture, take a mixing bowl. Add 2 cups of plain Greek yogurt. Pour in 1/4 cup of honey and 1 teaspoon of vanilla extract. Use a whisk or spoon to mix. Stir until the mixture is smooth and creamy. This step is key. A smooth texture makes your parfaits more enjoyable. When layering your parfait, use clear glasses or bowls. This way, you can see the pretty layers. Start with a generous scoop of the yogurt mixture at the bottom. Then, add a layer of mixed berries. I love using strawberries, blueberries, and raspberries. After the berries, sprinkle a layer of granola. Repeat these layers until the glasses are nearly full. Finish with another scoop of yogurt on top. This method helps balance flavors and textures. For portion control, aim for smaller servings. This helps you enjoy the parfait without overindulging. Presentation is important for your parfaits. You can use fresh mint leaves for garnish. A pinch of cinnamon on top adds a nice touch. Serve these parfaits for breakfast, snacks, or dessert. They work well for both casual meals and fancy gatherings. If you want the flavors to meld, refrigerate them for about 30 minutes before serving. This allows the ingredients to blend beautifully. For the full recipe, refer to the Creamy Berry Bliss Greek Yogurt Parfaits. When picking Greek yogurt, know that brands differ. Some are thicker, while others are creamier. Check labels for added sugars and fillers. I prefer plain yogurt. It has no added flavors and offers the best taste for parfaits. You can choose between full-fat and low-fat options. Full-fat yogurt is rich and creamy. It gives a satisfying feel. Low-fat yogurt is lighter but still tasty. Both work well in recipes. To add more flavor, try spices and extracts. A pinch of cinnamon can make a big difference. Vanilla extract adds warmth and depth. You can also use almond extract for a nutty twist. Incorporating seasonal fruits makes your parfait fun and fresh. Strawberries, blueberries, and peaches are great choices. They add color and natural sweetness. Mix and match fruits for a vibrant look. If you want a dairy-free option, there are many alternative yogurts. Look for coconut or almond-based yogurts. These can provide creamy textures without dairy. For sweeteners, you can substitute honey with maple syrup or agave. Both add a nice sweetness and flavor. You can also use stevia for a low-calorie option. For the full recipe, check out Creamy Berry Bliss Greek Yogurt Parfaits. {{image_2}} You can create fun fruit combinations for your Greek yogurt parfaits. One tasty option is the tropical fruit parfait. This version includes pineapple, mango, and banana. These fruits add bright colors and sweet flavors. They also bring a refreshing taste that brightens your day. Another great choice is the stone fruit parfait. Use peaches, nectarines, or plums for your parfait. These fruits have a juicy bite and a unique flavor. Just slice them up and layer with yogurt and granola. The mix of creamy and fruity makes a delightful treat. If you need gluten-free options, you can easily adapt your parfait. Look for certified gluten-free granola at the store. It gives you the same crunch without the gluten. You can find many brands that make this. You might also enjoy making your own granola. For a simple recipe, mix oats, nuts, seeds, and honey. Bake until golden brown for a warm, crunchy topping. This DIY granola adds a personal touch to your parfait. Adding protein boosts your parfait's health benefits. Consider adding protein powder to the yogurt mix. Just stir in a scoop for extra nutrition. This option is great for breakfast or a post-workout snack. You can also use nut butters to increase protein. Almond or peanut butter blends well with Greek yogurt. Just swirl it in for a rich, nutty flavor. This adds more creaminess while keeping it healthy. Explore these variations to make your parfaits even more exciting! For the full recipe, check out the Creamy Berry Bliss Greek Yogurt Parfaits. To keep your parfaits fresh, store them in an airtight container. If you plan to eat them later, it’s best to store the ingredients separately. This way, the granola stays crunchy. You can store the assembled parfaits in the fridge for up to 2 days. If you keep the yogurt, fruit, and granola separate, they can last longer. Mixed berries can last 3 to 5 days in the fridge. Granola can stay fresh for weeks if sealed well. Enjoy your parfaits within two days for the best taste. After this time, the yogurt can lose its creaminess. The fruit can also get mushy and spoil. Look for signs of spoilage, like a sour smell or off-color yogurt. If the berries look slimy or dark, it’s time to toss them out. Always check for freshness before eating. Keeping these tips in mind ensures your parfaits taste great every time. For detailed steps on making these delicious treats, check out the Full Recipe. Greek yogurt is rich in protein, which helps you feel full. It has live cultures that support gut health. This yogurt also contains calcium, great for strong bones. Plus, it is lower in sugar than regular yogurt. The antioxidants in berries boost your immune system. Yes, you can prep these parfaits in advance! Just layer the yogurt, berries, and granola in jars. Store them in the fridge. They stay fresh for about 24 hours. If you want crunch, add granola just before serving. This keeps it from getting soggy. To cut down on sugar, swap honey for a low-calorie sweetener. Stevia or monk fruit work well. You can also use unsweetened Greek yogurt. It still tastes great with the fruit. Choose berries, which are naturally lower in sugar than other fruits. For the complete recipe, check out the Creamy Berry Bliss Greek Yogurt Parfaits. This article covered how to create tasty Greek yogurt parfaits. We explored ingredients like yogurt, fruits, and granola. You learned step-by-step preparation, layering tips, and serving ideas. I shared advice on choosing yogurt, enhancing flavors, and making dairy-free versions. There are also variations for different tastes and storage tips to keep them fresh. Now, you can make delicious parfaits with ease. Enjoy crafting your own unique blends, and have fun with each layer!

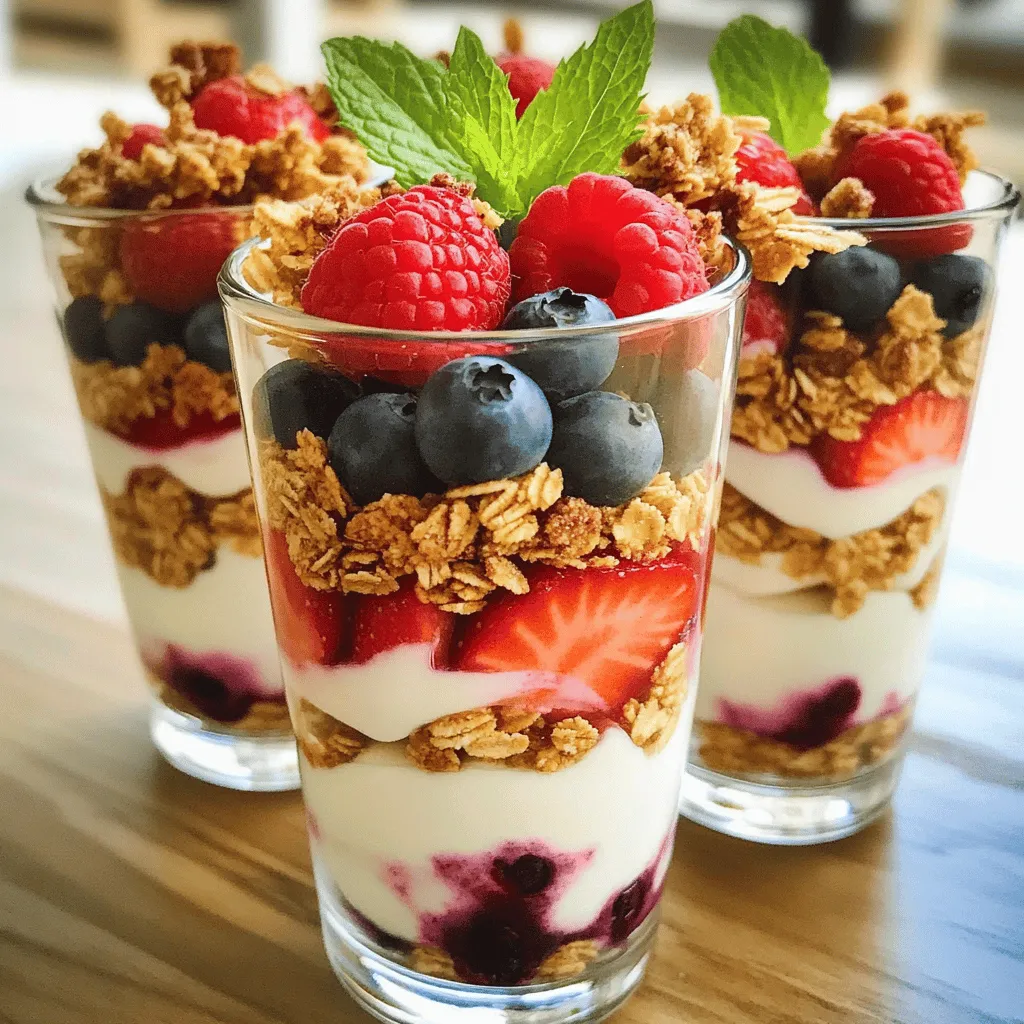
Healthy Greek Yogurt Parfaits Packed with Flavor

If you’re looking for a tasty and healthy treat, Greek yogurt parfaits are a perfect choice. They are easy to

- 1 ½ cups all-purpose flour - ½ cup granulated sugar - 1 ½ teaspoons baking powder - ½ teaspoon baking soda - ½ teaspoon salt - 1 teaspoon ground cinnamon (plus extra for coating) - ½ teaspoon ground nutmeg - 1 large egg - ½ cup buttermilk (or milk with a splash of vinegar) - ¼ cup unsalted butter, melted - 1 teaspoon vanilla extract These ingredients work together to create soft, fluffy donuts. Each one plays a key role: - All-purpose flour gives the donuts structure. It helps them rise and hold shape. - Granulated sugar adds sweetness. It also helps create a nice crust. - Baking powder and baking soda are leavening agents. They make the donuts light and airy. - Salt enhances flavors. It balances the sweetness. - Ground cinnamon and nutmeg add warmth and spice. They make your donuts taste cozy and comforting. - Egg binds the ingredients. It helps the donuts to rise. - Buttermilk provides moisture. It keeps the donuts tender and adds a slight tang. - Melted butter gives richness. It adds flavor and helps with texture. - Vanilla extract boosts the overall flavor. It adds a nice, sweet note. If you need substitutes, consider these options: - Use whole wheat flour for a healthier version. - Replace granulated sugar with brown sugar for a deeper flavor. - If you don’t have buttermilk, mix regular milk with a splash of vinegar to create a similar effect. - You can swap butter with coconut oil or a vegan butter for a dairy-free treat. Check out the Full Recipe to see how these ingredients turn into delightful baked cinnamon sugar donuts. Preheating the Oven First, set your oven to 350°F (175°C). This is the right heat for soft donuts. Preparing the Donut Pan Grab your donut pan and spray it with non-stick spray. This helps the donuts come out easily. Mixing Dry Ingredients In a large bowl, whisk together the dry ingredients. You’ll need: - 1 ½ cups all-purpose flour - ½ cup granulated sugar - 1 ½ teaspoons baking powder - ½ teaspoon baking soda - ½ teaspoon salt - 1 teaspoon ground cinnamon (plus extra for coating) - ½ teaspoon ground nutmeg Make sure everything blends well. This step makes your donuts light and fluffy. Whisking Wet Ingredients In another bowl, beat one large egg. Add in the buttermilk, melted butter, and vanilla extract. Stir until smooth. Merging Wet and Dry Mixtures Now, pour the wet mix into the dry mix. Gently stir until the ingredients come together. Do not overmix; this keeps your donuts tender. Filling the Donut Pan Grab a piping bag or a zip-top bag with a corner cut off. Fill each donut cavity about ¾ full with batter. This allows room for rising. Optimal Baking Time and Temperature Place your filled pan in the oven. Bake for 10-12 minutes. The donuts should spring back when touched. Checking Doneness To check if they are done, insert a toothpick into a donut. It should come out clean. This means your donuts are ready to enjoy! For the complete recipe, check [Full Recipe]. - Avoid Overmixing: When you mix your batter, do it gently. Overmixing makes donuts tough. Stir until just combined. A few lumps are okay. This keeps your donuts light and airy. - Temperature Tips for Ingredients: Use room temperature ingredients for better mixing. If your butter is too cold, it won’t blend well. Take the egg and buttermilk out early. This helps them blend smoothly into the batter. - Variations on Cinnamon: While cinnamon is the star, you can mix it up. Try using different types of cinnamon, like Ceylon. It has a sweeter taste. This adds a unique twist to your donuts. - Adding Other Spices or Extracts: Feel free to get creative! A pinch of cardamom or allspice can elevate the flavor. You can also add vanilla or almond extract for extra depth. Just a little goes a long way. - Pairing with Coffee or Milk: Baked cinnamon sugar donuts go great with coffee or milk. The warm donuts and cool drinks create a perfect balance. Enjoy them fresh for a cozy treat. - Creative Presentation Ideas: Serve your donuts on a colorful plate or a cake stand. Dust extra cinnamon sugar on top for a beautiful look. You can also add fresh fruit or a drizzle of chocolate for fun. {{image_2}} You can switch up the coating on your donuts for fun. If you want glazed donuts, use a simple glaze made from powdered sugar and milk. Mix about 1 cup of powdered sugar with 2 tablespoons of milk. Stir until smooth. Dip each warm donut into the glaze and let them set on a rack. For more flavors, try adding citrus zest or vanilla to your glaze. You can add cocoa powder to make a chocolate glaze. The options are endless! If you want a healthier donut, consider using whole wheat flour instead of all-purpose flour. This change boosts fiber and gives a nutty taste. You can also try oat flour for a gluten-free option. For sugar, you can use honey or maple syrup. These sweeteners offer a natural flavor. You can also use coconut sugar or stevia for lower-calorie choices. Adjust the liquid in your recipe to keep your batter right. Donuts aren't just for any time of year. You can make seasonal flavors to match the seasons. For fall, add pumpkin spice to your batter. Just add 1 cup of pumpkin puree and 1 teaspoon of pumpkin pie spice to the mix. In winter, try chocolate-covered donuts. Dip your cooled donuts in melted chocolate. Allow them to set before serving. These little twists keep your baking fresh and exciting. For the full recipe, check out the complete guide on making baked cinnamon sugar donuts. For short-term storage, keep your baked cinnamon sugar donuts at room temperature. Place them in an airtight container. They stay fresh for about 2 to 3 days. If you want to store them longer, consider freezing. For long-term storage, wrap each donut in plastic wrap. Then, place them in a freezer bag. This helps keep them tasty for up to 3 months. To reheat your donuts, use the oven. Preheat it to 350°F (175°C). Place the donuts on a baking sheet and warm them for about 5 minutes. This gives them a fresh taste and soft texture. For leftover donuts, you can upgrade them! Try dipping them in melted chocolate or drizzling icing on top. This adds a fun twist and makes them feel special. Baked and fried donuts differ mainly in cooking method. - Health Considerations: Baked donuts use less oil. This makes them lower in calories and fat. They are often seen as a healthier choice. Fried donuts absorb oil, which adds more fat and calories. - Texture Differences: Baked donuts are soft and cake-like. They feel light and airy. Fried donuts are often denser and have a crisp outer layer. This gives them a richer taste. Yes, you can freeze baked donuts. Freezing is a great way to keep them fresh. - Freezing Process: After the donuts cool, place them in a single layer on a baking sheet. Freeze them for about an hour. Once frozen, transfer them to a zip-top bag or container. This keeps them from sticking together. - Thawing Instructions: To thaw, take the donuts out and leave them at room temperature. They will be ready in about 30 minutes. You can also warm them in the oven for a few minutes for a fresh taste. Knowing when donuts are done is easy with the right cues. - Visual Cues: Look for a golden-brown color. The donuts should spring back when gently touched. If they look pale, they need more time. - Testing with a Toothpick: Insert a toothpick into the center of a donut. If it comes out clean or with a few crumbs, the donuts are done. If it comes out wet, give them a few more minutes in the oven. In this post, we covered how to make baked cinnamon sugar donuts, from ingredients to storage. You learned about key ingredients, their functions, and healthy substitutes. We shared step-by-step instructions for perfect donuts, plus tips to enhance texture and flavor. Try out variations for seasonal treats or healthy options as you bake. Store your donuts properly to keep them fresh. Don’t hesitate to experiment with flavors. Enjoy your delicious creations. Happy baking!

Baked Cinnamon Sugar Donuts Simple and Soft Treat

Craving a sweet treat that’s both simple and soft? You’re in the right place! Baked cinnamon sugar donuts are my

- Apples - Nut Butter Options - Sweetener Choices - Toppings and Garnishes To make Healthy Apple Nachos, you need a few simple ingredients. First, choose your apples. I love using crisp varieties like Granny Smith or Honeycrisp. They add a nice crunch and flavor. Next, pick your nut butter. Almond butter works great, but peanut butter is tasty too. Both add protein and creaminess. For sweeteners, you can use honey or maple syrup. They give a touch of sweetness without being too much. Finally, let’s talk toppings. Granola adds crunch, while mini chocolate chips bring a sweet twist. Unsweetened shredded coconut gives a tropical flair. A pinch of cinnamon adds warmth. You can also add fresh berries for color and extra flavor. You can find the full recipe below for more details. Start by washing your apples under cool water. This removes any dirt or wax. Next, dry them with a clean towel. Slice the apples into thin rounds. Aim for about 1/4 inch thick. You can remove the core, but leaving it adds a nice crunch. Once sliced, arrange the apple pieces on a plate. You can place them in a circle or a fun pattern. Make it colorful and inviting for everyone! Grab a small bowl for the drizzle. Add 1/4 cup of almond butter to the bowl. Then, mix in 2 tablespoons of honey or maple syrup. Stir well until it’s smooth. This sweet and creamy mix will be the star of your nachos. You want it to be easy to drizzle over the apples. Now it’s time to layer your toppings! Drizzle the almond butter mix evenly over the apple slices. Each piece needs a little touch of sweetness. Next, sprinkle 1/4 cup of granola on top for that perfect crunch. Then, add 2 tablespoons of mini chocolate chips and 1/4 cup of shredded coconut. For a warm touch, finish with a pinch of cinnamon sprinkled over everything. If you want, add fresh berries on top for color and taste. For the full recipe, check out the details above. Enjoy the fun and tasty experience of healthy apple nachos! To make your apple nachos even better, try adding spices. A dash of nutmeg or ginger can bring warmth. You can also sprinkle chili powder for a fun kick. Mixing toppings can change the taste. Try using dried fruits like raisins or cranberries. You can also switch the chocolate chips for crushed nuts or seeds. This way, you can create your own unique flavor combo. Presentation matters! Arrange your apple slices in a fun pattern. Use a bright plate to make the colors pop. You can serve the apple nachos with a small bowl of almond butter for dipping. Fresh mint leaves on top add color and a nice aroma. For drinks, pair with a light herbal tea or sparkling water. These drinks will balance the sweetness of the nachos. {{image_2}} You can swap apples for other fruits. Pears, bananas, or peaches work great too. Each fruit adds a unique taste. For a seasonal twist, try using berries in summer or citrus fruits in winter. These fruits are sweet and juicy, making them perfect for nachos. I understand some people have dietary needs. For nut-free options, use sunbutter or soy nut butter. Those on a vegan diet can replace honey with maple syrup. If you are gluten-free, choose gluten-free granola. If you want to make it healthier, use ripe bananas or dates instead of sweeteners. These fruits add natural sweetness and flavor. You can still enjoy a tasty treat while sticking to your diet! For the full recipe, check out the Healthy Apple Nachos section above. To store leftover apple nachos, first separate the toppings from the apple slices. This keeps the apples from getting soggy. Place apple slices in an airtight container. Cover the container tightly to keep air out. For toppings, use small bags or containers. Store them in the fridge. To keep the ingredients fresh, try to use them within a day. Apples can brown quickly, so it’s best to eat them soon. You can also add a little lemon juice to the apple slices. This helps them stay bright and fresh for a bit longer. You can keep apple nachos for about one day in the fridge. After this time, the apples may lose texture and taste. Signs of freshness include crispness and bright color. If the apples feel mushy or look brown, it’s time to toss them. For best results, enjoy your apple nachos right after making them. You will get the best flavor and crunch that way. If you want to prepare ahead, keep the toppings separate. This keeps everything fresh and ready for a tasty treat. For more details, check out the Full Recipe for Healthy Apple Nachos. Yes, you can try other nut butters. Peanut butter works well with apples. Cashew butter or sunflower seed butter also makes a great choice. Each nut butter adds its own flavor and texture. If you want a different taste, go for it! To make this recipe vegan, swap honey for maple syrup. Use a plant-based nut butter like almond or peanut. Check that your granola is vegan-friendly too. These small changes keep the dish tasty and vegan. Apple nachos pair well with yogurt or cottage cheese. You can also serve them with a fresh fruit salad. Nuts or seeds on the side add healthy crunch. These options balance the sweetness of the nachos. For a fun twist, try serving with a smoothie! Apple nachos are a fun and tasty snack. You learned about ingredients like apples and nut butter. The steps showed how to prepare and assemble this dish. We shared tips on flavors and serving ideas, plus variations for different tastes and diets. You can store these nachos for later, keeping them fresh and delicious. Try new fruits or nut butters to mix it up. Enjoy making this tasty treat that fits your style and needs!

Healthy Apple Nachos Tasty and Fun Dessert Idea

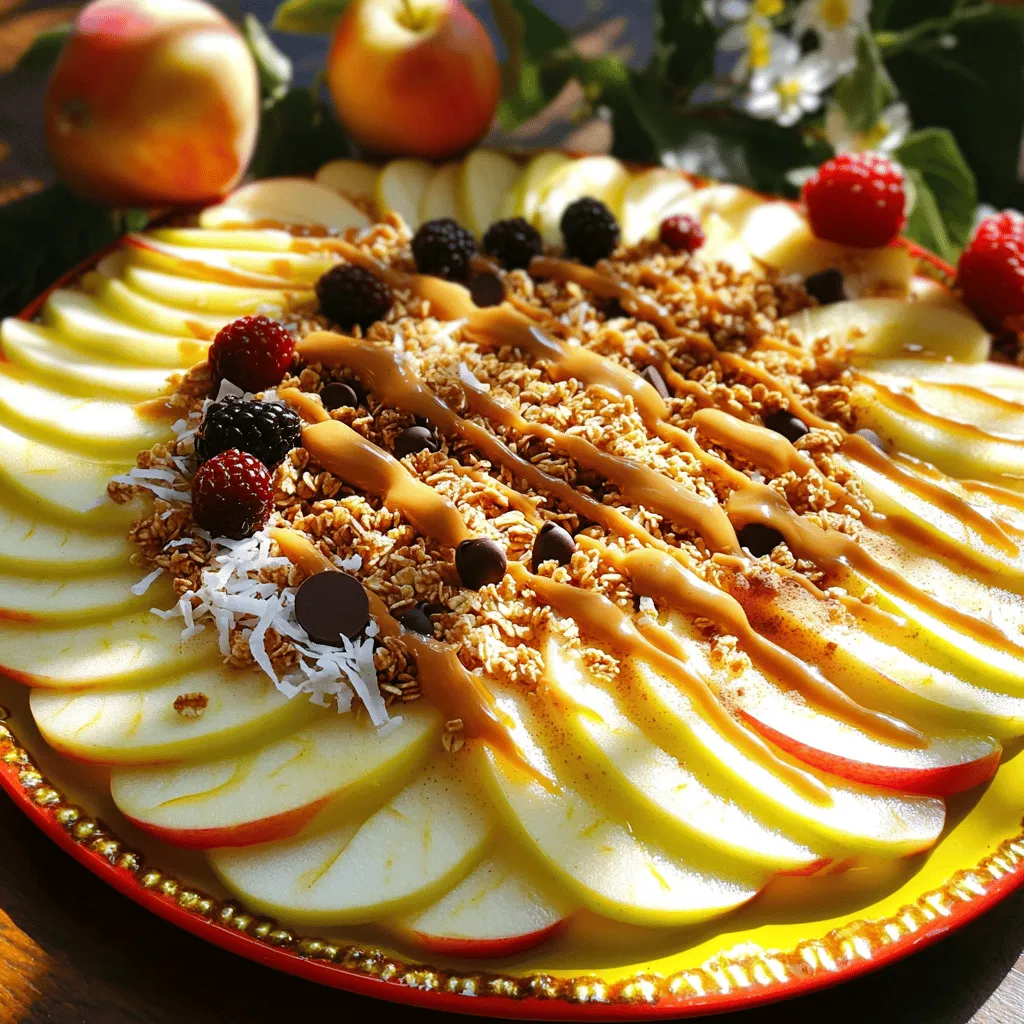
Looking for a fun and healthy dessert? Try making Healthy Apple Nachos! This sweet treat is not only yummy but

Making Greek Lemon Rice Soup is simple and fun. You need fresh, quality ingredients to get the best flavor. Here is the list of ingredients you will need: - 1 cup long-grain rice - 6 cups vegetable or chicken broth - 1 medium onion, finely chopped - 2 cloves garlic, minced - 2 large lemons, juiced and zested - 3 large eggs - 2 tablespoons olive oil - Salt and black pepper to taste - Fresh dill or parsley for garnish Each ingredient plays a key role in the soup. The rice adds heartiness, while the broth brings warmth. Onions and garlic provide a strong base, giving depth to the flavor. Lemons add bright, zesty notes. Eggs make the soup creamy and rich. Olive oil adds a touch of smoothness. Finally, fresh herbs like dill or parsley add a pop of color and freshness. For the Full Recipe, follow the steps carefully to create a delicious bowl of soup. Enjoy the process, and feel free to experiment with the ingredients! 1. First, heat 2 tablespoons of olive oil in a large pot over medium heat. 2. Add 1 medium chopped onion. Sauté it for about 5 minutes until it turns soft and clear. 3. Next, stir in 2 minced garlic cloves and cook for 1 more minute. 4. Now, add 1 cup of long-grain rice to the pot. Stir the rice for about 2 minutes. This helps to toast the rice slightly and enhance its flavor. 1. Pour in 6 cups of vegetable or chicken broth. Bring this mixture to a boil. 2. Once boiling, reduce the heat and let it simmer for 15 to 20 minutes. The rice should be tender at this point. 3. In a separate bowl, whisk together 3 large eggs, the juice of 2 lemons, and the zest from those lemons. This creates a creamy mixture. 4. To prevent the eggs from scrambling, ladle 1 cup of hot broth into the egg mixture while whisking quickly. This is called tempering the eggs. 1. Slowly pour the tempered egg mixture back into the pot of soup while gently stirring. 2. Heat the soup for a couple more minutes. Ensure it’s hot, but do not let it boil. Boiling can curdle the eggs. 3. Finally, season with salt and black pepper to taste. 4. Serve the soup warm, garnished with fresh dill or parsley for a lovely touch of color. For the full recipe, please refer to the Greek Lemon Rice Soup section above. Enjoy your cooking! To make the best Greek Lemon Rice Soup, pick the right rice. Long-grain rice works well. It cooks evenly and stays fluffy. Avoid sticky rice types like jasmine or sushi rice. Next, control the temperature for the egg mixture. This step is crucial. If it’s too hot, the eggs may scramble. Always whisk and add hot broth slowly to the eggs. This helps temper them. You can choose between sautéing and boiling. Sautéing the onion and garlic first adds depth. It gives the soup a richer flavor. After sautéing, you’ll boil the broth with rice to cook it through. Whisking is vital in this recipe. It helps blend the egg mixture smoothly into the hot soup. If you skip this, you may end up with chunks of cooked egg. Pair the soup with fresh bread or a simple salad. A Greek salad works great because it complements the soup's flavors. For a meal, serve it with grilled chicken or fish. This adds protein and makes the meal heartier. Enjoy your delicious and nourishing soup! {{image_2}} You can switch out the rice for other grains. Quinoa or barley work well. They add unique flavors and textures. For those who prefer a protein boost, try shredded chicken or cooked lentils. Both options add heartiness to the soup. When it comes to broth, you have choices. Use vegetable broth for a lighter taste. Chicken broth offers a richer flavor. You can also mix both for a balanced taste. Looking to spice things up? Adding spices like cumin or paprika can change the flavor. Fresh vegetables like carrots or spinach can also enrich the soup. They add more nutrients and color. Herbs can elevate this recipe too. While dill and parsley are classic choices, try thyme or oregano for a new twist. Each herb brings its own unique taste. If you need a gluten-free option, use rice as your only grain. This soup is naturally gluten-free, so you can enjoy it worry-free. For vegan options, replace the eggs with silken tofu. Blend it until smooth before adding it to the soup. You can also skip the chicken broth and use vegetable broth instead. This keeps the soup rich and tasty. For more details, check the Full Recipe. You can store leftovers of Greek Lemon Rice Soup for up to three days. Use airtight containers to keep it fresh. Make sure to let the soup cool before sealing it. This helps avoid steam buildup, which can alter the texture. If you want to freeze the soup, pour it into freezer-safe containers. Leave some space at the top for expansion. It’s best to freeze the soup without the eggs added. When you are ready to eat, thaw it overnight in the fridge. To reheat frozen soup, warm it on low heat in a pot. Stir it gently and add a splash of broth if needed. Once it’s hot, whisk in a few beaten eggs for a creamy finish. Enjoy your comforting bowl of Greek Lemon Rice Soup! For the full recipe, you can refer to the earlier sections. What is Greek Lemon Rice Soup? Greek Lemon Rice Soup is a warm, creamy dish. It features rice, broth, and a tangy lemon flavor. The soup often includes eggs, adding richness. It’s comforting and nourishing, perfect for chilly days or when you need a pick-me-up. How can I adjust the soup for more servings? To make more soup, simply increase the ingredients. Double the rice, broth, and eggs. Keep the same lemon juice for that bright flavor. Adjust seasoning to taste as you go. Why did my eggs scramble in the soup? Scrambled eggs can happen if the soup is too hot when you add them. To avoid this, temper the eggs. Slowly add hot broth to the egg mixture while whisking. This warms the eggs without cooking them too fast. How can I thicken the soup if needed? If your soup is too thin, try one of these tricks. You can add more rice and let it cook a bit longer. Another option is to mix a bit of cornstarch with water and stir it in. Let it simmer until thickened. Can I use brown rice instead? Yes, you can use brown rice. Just remember it takes longer to cook. You may need to add more broth and simmer until tender. This will change the soup's texture but keep it flavorful. What’s a good substitute for lemon juice? If you don't have lemon juice, try using lime juice. It gives a similar tang. You can also use vinegar, like white wine vinegar, but adjust the amount to taste. This blog post showed you how to make Greek Lemon Rice Soup. We covered key ingredients, and step-by-step instructions for a tasty dish. You learned helpful tips and variations to suit your tastes. With proper storage tips, you can enjoy this soup later. Remember, cooking is fun and you can be creative! Now, gather your ingredients and enjoy making this nutritious meal. Happy cooking!

Greek Lemon Rice Soup Flavorful and Nourishing Recipe

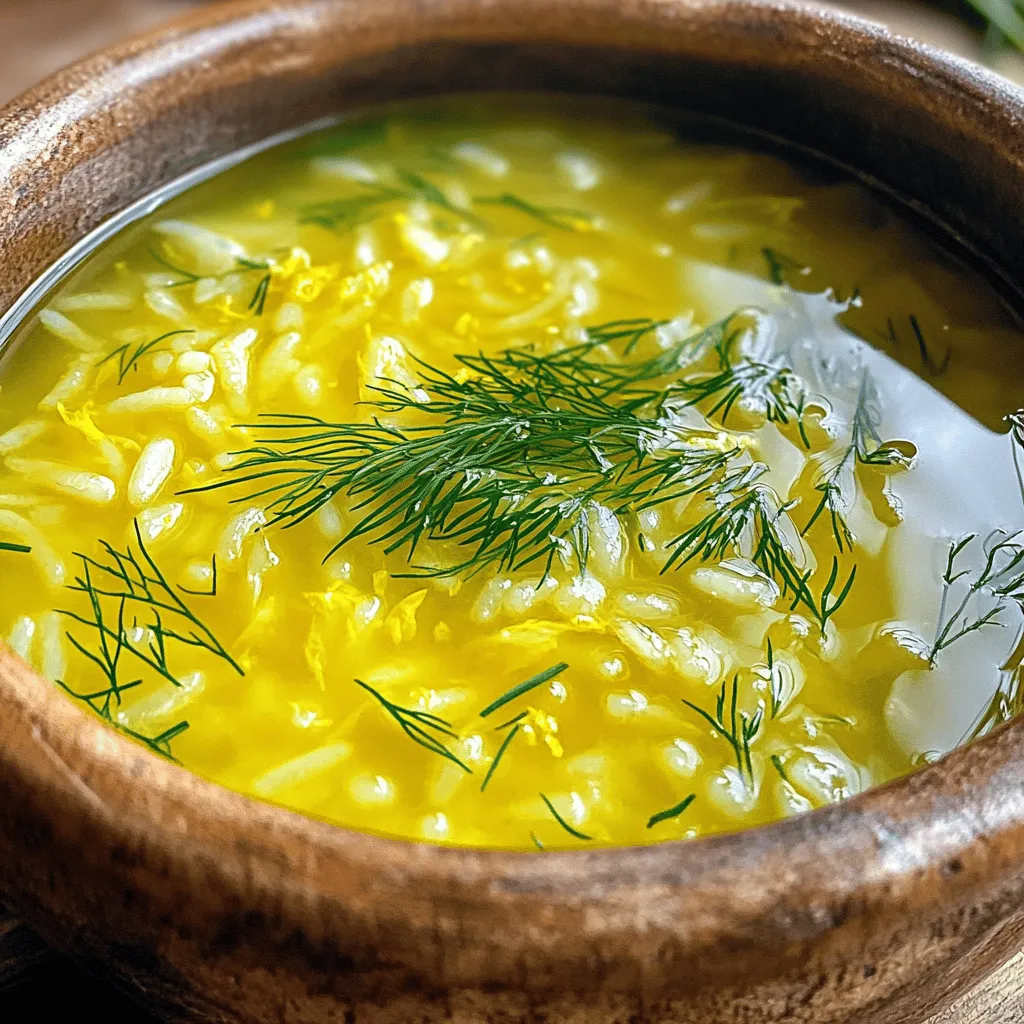
Are you ready to dive into a bowl of warmth and flavor? Greek Lemon Rice Soup, or Avgolemono, is a

- 4 ripe bananas, sliced and frozen - 1 tablespoon almond butter (or any nut/seed butter) - 1 teaspoon vanilla extract - 1/4 cup coconut milk (or any plant-based milk) - A pinch of salt To make vegan banana ice cream, you need ripe bananas. They should be yellow with brown spots. This means they are sweet and soft. The almond butter adds creaminess and rich flavor. Coconut milk gives a nice texture and sweetness, too. The vanilla extract enhances the taste. A pinch of salt makes the flavors pop. - Chopped nuts - Shredded coconut - Dark chocolate chips - Fresh berries Toppings make your ice cream fun! Chopped nuts give a crunchy bite. Shredded coconut adds a tropical touch. Dark chocolate chips are rich and delicious. Fresh berries bring a burst of flavor. You can mix and match these toppings for a special treat! For the full recipe, check out the detailed steps to create this creamy delight. To start, you need ripe bananas. They should have brown spots. This means they are sweet and perfect for ice cream. Freezing bananas: Peel the bananas and slice them into small pieces. Place the slices on a baking sheet lined with parchment paper. Make sure they do not touch each other. Freeze them for at least two hours or until they are solid. Slicing technique: Slice the bananas into about half-inch rounds. This size helps them freeze evenly. Even slices will blend better later. You will need a food processor for this step. A strong blender can also work, but a food processor gives the best results. Adding ingredients: Once your banana slices are frozen, take them out. Put the slices in the food processor. Add one tablespoon of almond butter, one teaspoon of vanilla extract, and a pinch of salt. These ingredients enhance the flavor of your ice cream. Blend the mixture until it starts to break down. Scrape down the sides of the bowl as needed. Soft-serve vs. firmer ice cream: If you want a soft-serve texture, you can serve it right away. If you want it firmer, transfer it to an airtight container. Freeze it for one to two more hours. Mixing in sweeteners if needed: Taste the mixture. If you want it sweeter, you can add maple syrup or agave syrup. Blend again to mix. This creamy vegan banana ice cream is a simple treat. Follow these steps, and you’ll enjoy a delicious dessert in no time. For the full recipe, check out Creamy Dreamy Vegan Banana Ice Cream. To make the best vegan banana ice cream, choose ripe bananas. The riper they are, the sweeter and creamier your ice cream will be. Look for bananas with lots of brown spots. These bananas are sweet and soft, perfect for blending. Chill your equipment before you start. Place your food processor bowl in the fridge for a bit. This helps keep your ice cream cold and creamy as you blend. You can switch out the almond butter for other nut butters. Peanut butter adds a nice kick. Sunflower seed butter works well too. These options give your ice cream a unique flavor and texture. For the milk, you can try different dairy-free options. Cashew milk adds creaminess. Oat milk gives a nice taste too. Each milk will change the flavor a bit, so feel free to experiment. When serving, scoop the ice cream into fun bowls or cones. This makes it look inviting. You can add toppings like chopped nuts or shredded coconut. Dark chocolate chips or fresh berries also make great choices for extra flavor. Try pairing your vegan banana ice cream with other desserts. It goes well with brownies or pie. You can also serve it with fresh fruit for a refreshing treat. {{image_2}} You can make a tasty chocolate banana ice cream by adding cocoa powder or chocolate chips. Start by mixing in two tablespoons of cocoa powder when you blend the base. This gives your ice cream a rich, chocolatey flavor. If you prefer, add dark chocolate chips after blending. This adds a fun crunch and bursts of chocolate in each bite. You can also infuse your banana ice cream with other fruits. Strawberry banana ice cream is easy and delicious. Just blend in one cup of fresh strawberries with the bananas. This adds a sweet and tangy twist. Another option is a mango and banana twist. Blend one cup of frozen mango with the bananas to create a tropical treat. Want to spice things up? Try adding nutmeg or cinnamon to your mix. Just a pinch will add warmth and depth to your ice cream. You can also fold in cookie crumbles for a fun texture. Use your favorite vegan cookies for a sweet surprise in every scoop. For the full recipe, be sure to check out the instructions above. Enjoy your creamy and delicious treat! To keep your vegan banana ice cream fresh, use airtight containers. This helps prevent ice crystals from forming. Fill the container, leaving some space at the top. The ice cream will expand as it freezes. After freezing, handle it carefully. When scooping, use a warm spoon for easier serving. For the best taste, consume the ice cream within two weeks. After that, the flavor may fade. Look for signs of freezer burn. If you see white spots or a dry texture, it's time to toss it. These signs mean the ice cream is no longer at its best. Can you refreeze melted ice cream? Yes, but it might lose some creaminess. To keep the flavor and texture, try to serve it right away. If you must refreeze, let it sit at room temperature for a few minutes before serving next time. This helps restore some of its original smoothness. Use very ripe bananas for this recipe. Ripe bananas have brown spots. They are sweeter and creamier. The sugar content rises as they ripen, giving a rich flavor. You want bananas that feel soft but not mushy. This is key for that smooth texture in your vegan banana ice cream. Yes, you can! If you don't have a food processor, try a blender. A high-powered blender works well too. You can also mash the bananas with a fork. It may take more time, but it is still doable. After mashing, mix in the other ingredients in a bowl. Blend or mix until you reach a creamy texture. To make this recipe sugar-free, skip any sweeteners. The ripe bananas give enough natural sweetness. You can also use sugar substitutes like stevia or monk fruit. Just be sure to adjust the amount based on the brand. Always taste the mixture to ensure it meets your sweetness preference. Yes, this recipe is great for meal prep! After making the ice cream, store it in an airtight container. It keeps well in the freezer. For best results, scoop and serve soon after freezing. If frozen too long, it may become hard. Just let it sit at room temperature for a few minutes before serving. Enjoy it anytime you crave a sweet treat! In this blog post, we covered how to make vegan banana ice cream. You learned about key ingredients, like ripe bananas and almond butter. We shared step-by-step instructions for preparation and blending. Tips for the best texture and fun variations added depth to your ice cream options. Lastly, we discussed storage and answers to common questions. Now, it’s time for you to make your creamy treat and enjoy it with your favorite toppings. This easy recipe makes delightful, healthy desserts for everyone.

Vegan Banana Ice Cream Creamy and Delicious Treat

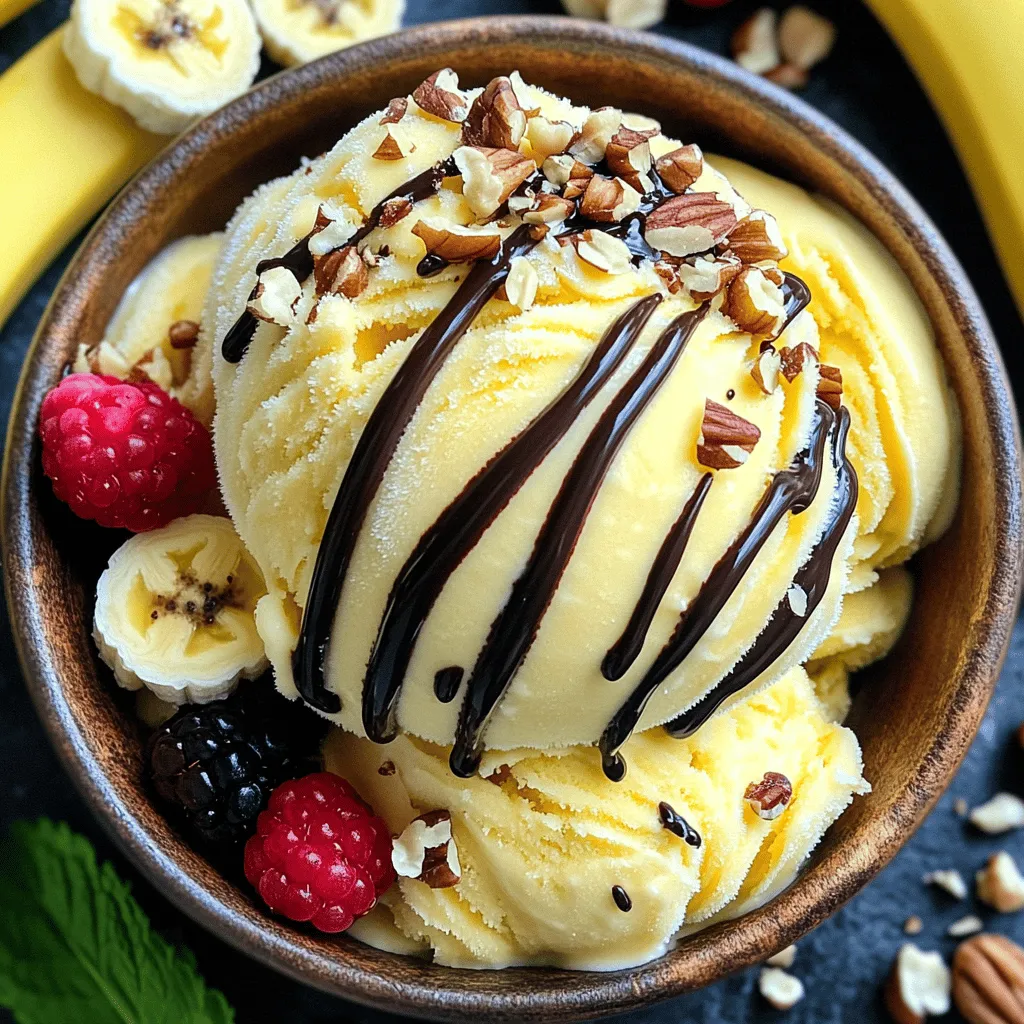
Are you ready to delight your taste buds with a creamy and delicious Vegan Banana Ice Cream? This simple recipe

- 2 cups cooked chicken, shredded - 1 cup cream cheese, softened - 1 cup shredded cheddar cheese - 12 small corn tortillas - 1 teaspoon garlic powder - 1 teaspoon onion powder - 1 teaspoon cumin - 1 teaspoon chili powder - 1/2 teaspoon salt - 1/4 teaspoon black pepper - Cooking spray or olive oil for brushing - Optional toppings: salsa, guacamole, or sour cream To make baked chicken taquitos, you need fresh and simple ingredients. Start with cooked chicken. I love using rotisserie chicken for its flavor. Then, cream cheese gives a nice, rich texture. Shredded cheddar cheese adds a cheesy kick that everyone loves. You also need corn tortillas. They hold all the goodness inside. For seasonings, garlic powder and onion powder add depth. Cumin and chili powder bring warmth and spice. Don’t forget the salt and black pepper for balance. If you want a crisp finish, brush the taquitos with cooking spray or olive oil. For fun, add toppings like salsa, guacamole, or sour cream. These make each bite even better! For the full recipe, check the section above. - Preheat the oven to 425°F (220°C). - Line the baking sheet with parchment paper. - In a large bowl, combine shredded chicken, cream cheese, cheddar cheese, garlic powder, onion powder, cumin, chili powder, salt, and black pepper. Mix until smooth. - Warm the corn tortillas in the microwave for about 30 seconds. This makes them soft and easy to roll. - Place about 2 tablespoons of the chicken mixture onto each tortilla. Roll each one tightly. - Place the rolled taquitos seam-side down on the baking sheet. - Lightly spray or brush the tops with oil for a crispy finish. - Bake for 15-20 minutes until the taquitos turn golden brown. These baked chicken taquitos are simple to make! For more details, check the Full Recipe. Enjoy your cooking adventure! - Ensure tortillas are warm for easy rolling. - Use a silicone brush for even oil application. Warming tortillas makes them soft and easy to roll. Place them in a damp paper towel and microwave for about 30 seconds. This prevents cracking as you roll. A silicone brush helps apply the oil evenly, giving your taquitos a nice golden finish. - Add diced jalapeños for extra heat. - Experiment with different cheese varieties. If you love spice, add diced jalapeños to the chicken mix. This adds a zesty kick. You can also switch up the cheese. Try pepper jack for more heat or a blend of cheeses for different flavors. - Serve with any of the optional toppings. - Pair with a side salad for a complete meal. Baked chicken taquitos shine with toppings like salsa, guacamole, or sour cream. These add freshness and creaminess. Pairing them with a side salad can round out your meal and add more nutrition. For the full recipe, check out the instructions above. {{image_2}} You can easily change the filling of your taquitos. Swap chicken for shredded beef or turkey. This keeps the dish fresh and exciting. If you prefer a lighter meal, use vegetables for a vegetarian option. Spinach, mushrooms, and zucchini work well together. If you need a gluten-free option, don’t worry! Just use gluten-free tortillas. They are available in most stores. Also, check that all seasonings are gluten-free. This way, everyone can enjoy your tasty taquitos. Cheese can change the flavor of your taquitos. Try pepper jack cheese for a spicier kick. It adds a nice heat that many love. You can also use a blend of Mexican cheeses for diversity. Mixing different cheeses can create a creamy and rich filling. For the full recipe and more tips, check out the [Full Recipe]. After enjoying your taquitos, let them cool down first. This step helps keep the texture nice. Once cool, place your taquitos in an airtight container. Store them in the refrigerator for up to three days. To reheat your taquitos, preheat your oven to 350°F (175°C). Place the taquitos on a baking sheet. Heat them in the oven until they are crispy again. This usually takes about 10-15 minutes. You can microwave them, but they may turn out softer. If you want that crispy bite, stick with the oven. Want to save some for later? You can freeze unbaked taquitos! Simply prepare the taquitos but do not bake them. Place them in a single layer on a baking sheet and freeze until firm. Then, transfer them to a freezer bag for easy storage. When you are ready to enjoy them, thaw them before following the baking instructions from the Full Recipe. To make the best Baked Chicken Taquitos, use high-quality ingredients. Fresh chicken and good cheese make a big difference. Mix the chicken with cream cheese and spices for rich flavor. Rolling the taquitos tightly is key. Warm the tortillas before filling to keep them soft. This helps avoid cracks. Place the seam-side down when baking. This keeps them from unrolling in the oven. Yes, you can prepare these taquitos ahead of time. Make the filling and roll the taquitos. Place them on a baking sheet. You can refrigerate or freeze them until you're ready to bake. When ready to eat, just pop them in the oven. No need to thaw if frozen, just add a few extra minutes to the baking time. You can serve Baked Chicken Taquitos with many tasty sides. Mexican rice is a classic choice. Refried beans add protein and flavor. A fresh salad also pairs nicely. Consider adding dips like salsa, guacamole, or sour cream for extra fun. These add flavor and moisture to each bite. Enjoy your meal! This post shared a simple recipe for baked chicken taquitos. It covered the main ingredients, seasonings, and extra tips. You learned steps to prepare, assemble, and bake them to perfection. Variations let you swap fillings and adjust for dietary needs, keeping the meal exciting. Store leftovers properly for later enjoyment. Enjoy your time in the kitchen, experimenting with flavors. Your taquitos will surely impress everyone around!

Baked Chicken Taquitos Flavorful and Easy Snack

Looking for a tasty snack that’s easy to make? Baked chicken taquitos are your answer! These crispy, cheesy rolls pack

For this tasty dish, gather these fresh ingredients: - 1 cup cherry tomatoes, halved - 1 medium zucchini, sliced - 1 bell pepper (any color), diced - 1 red onion, cut into wedges - 2 cups Brussels sprouts, halved - 4 cloves garlic, minced - 3 tablespoons olive oil - 1 teaspoon dried oregano - 1 teaspoon smoked paprika - Salt and pepper to taste - Fresh basil leaves for garnish Each ingredient plays a key role in flavor. The cherry tomatoes add sweetness. The zucchini and bell pepper bring crunch. Red onion adds a nice bite, while Brussels sprouts give a hearty taste. Minced garlic enhances the overall flavor. Olive oil helps the veggies roast nicely. Oregano and smoked paprika give a warm, earthy taste. Adjust salt and pepper to suit your liking. Always wash and cut your veggies before cooking. You can switch out some veggies if you like. Try using asparagus or carrots instead of Brussels sprouts. Sweet potatoes work well in place of zucchini. For herbs, thyme or rosemary can replace oregano. If you want spice, add cayenne pepper with the paprika. This dish is very flexible. Feel free to mix and match to find your favorite combo. For the full recipe, see the earlier section. Start by washing your vegetables well. Clean the cherry tomatoes and slice them in half. Next, take the zucchini and slice it into rounds. For the bell pepper, remove the seeds and dice it into small pieces. Cut the red onion into wedges. Lastly, halve the Brussels sprouts. Once all are prepared, gather them in a large mixing bowl. Preheat your oven to 425°F (220°C). Once ready, drizzle olive oil over the veggies in the bowl. Sprinkle dried oregano, smoked paprika, salt, and pepper on top. Toss everything well so every piece gets coated. Spread the veggies on a baking sheet in one layer. Make sure there is space between them. This helps them roast evenly. Roast in the oven for 20-25 minutes. Stir halfway through for best results. Look for a golden color and tender texture. Once the veggies are done, take them out of the oven. Let them cool for a few minutes. To serve, place them on a nice platter. Add fresh basil leaves on top for color and flavor. This makes the dish even more appealing. Enjoy your One Pan Roasted Veggies! For full details, check the Full Recipe. To boost the taste of your roasted veggies, try these tricks: - Use fresh herbs like rosemary or thyme for extra aroma. - Add a splash of balsamic vinegar before roasting for sweetness. - Sprinkle lemon juice after roasting for a fresh zing. - Mix in a pinch of chili flakes for some heat. These simple touches make a big difference. They bring out the natural sweetness and depth of your veggies. To ensure all your veggies roast evenly, follow these steps: - Cut vegetables into similar sizes. This helps them cook at the same rate. - Spread them out on the baking sheet. Leave space between pieces for hot air to circulate. - Stir halfway through roasting. This flips them and helps them brown nicely. These tips help you avoid undercooked or burnt spots. Here are some common mistakes to steer clear of: - Overcrowding the baking sheet. This leads to steaming instead of roasting. - Not preheating the oven. A hot oven helps veggies caramelize and get crispy. - Using too much oil. Too much oil makes veggies soggy rather than crisp. Avoiding these mistakes will make your One Pan Roasted Veggies shine. Enjoy the process and the tasty results! {{image_2}} You can change up the veggies based on the season. In spring, add asparagus or radishes. Summer brings great choices like eggplant or yellow squash. In fall, try root veggies like carrots and sweet potatoes. Winter lets you use hearty greens like kale or collard greens. Mixing seasonal veggies adds fun flavors to your dish. To make this dish a full meal, add protein or grains. Chickpeas are a great choice. They add protein and fiber. You can also toss in cooked quinoa or brown rice. For meat lovers, try adding diced chicken or sausage. These additions make your meal filling and hearty. Herbs and spices can change the taste of your veggies. Try rosemary or thyme for a fresh flavor. For a kick, add red pepper flakes. You can also experiment with cumin or curry powder for a warm taste. The right herbs and spices bring out the best in your roasted veggies. Explore different combinations to find your favorite. For the full recipe, check out the One Pan Roasted Veggies recipe above. After enjoying your one pan roasted veggies, it's key to store them right. Let the veggies cool before you put them away. Use an airtight container to keep them fresh. They will last in the fridge for about three to five days. If you want to keep them longer, freezing is a great option. To reheat your roasted veggies, use the oven or a skillet. The oven keeps them crisp. Preheat the oven to 350°F (175°C). Spread the veggies on a baking sheet and heat for about 10 minutes. You can also use a skillet on medium heat. Just add a splash of olive oil and stir until warm. Avoid the microwave if you want to keep that nice texture. Freezing is perfect for saving extra roasted veggies. Place the cooled veggies on a baking sheet first. Freeze them for about an hour. This step keeps them from sticking together. Once frozen, transfer them to a freezer bag. Label the bag with the date. They can stay good for up to three months. When you’re ready to eat, no need to thaw. Just toss them right into the oven or a skillet. Enjoy the flavors anytime! The best veggies for roasting are firm and hearty. I love using: - Cherry tomatoes - Zucchini - Bell peppers - Red onions - Brussels sprouts These vegetables cook well and get nice and tender. They also caramelize, giving you great flavor. You can mix and match based on your taste or what you have. Yes, you can! If you don’t want to roast, try sautéing. Sautéing cooks veggies quickly in a pan on the stove. You can also steam them for a softer texture. Grilling is another fun choice. It adds a nice smoky flavor. Each method gives a different taste and texture, so feel free to experiment. You can tell the veggies are done when they are soft and slightly golden. They should be tender when you poke them with a fork. Look for a little browning on the edges; this adds flavor. If you stir them halfway through roasting, it helps them cook evenly. Follow the steps in the Full Recipe for perfect timing! This blog post covered how to make tasty roasted veggies in one pan. We discussed the best ingredients, how to prepare and roast them, and tips for great flavor. I shared common mistakes to avoid and suggested fun variations. Plus, we went over storage tips for leftovers and answered key FAQs. Roasting veggies is easy and fun. You can mix it up with different veggies and flavors. Now, you have all the info you need to create a delicious dish. Enjoy your roasting adventure!

One Pan Roasted Veggies Flavorful and Easy Recipe

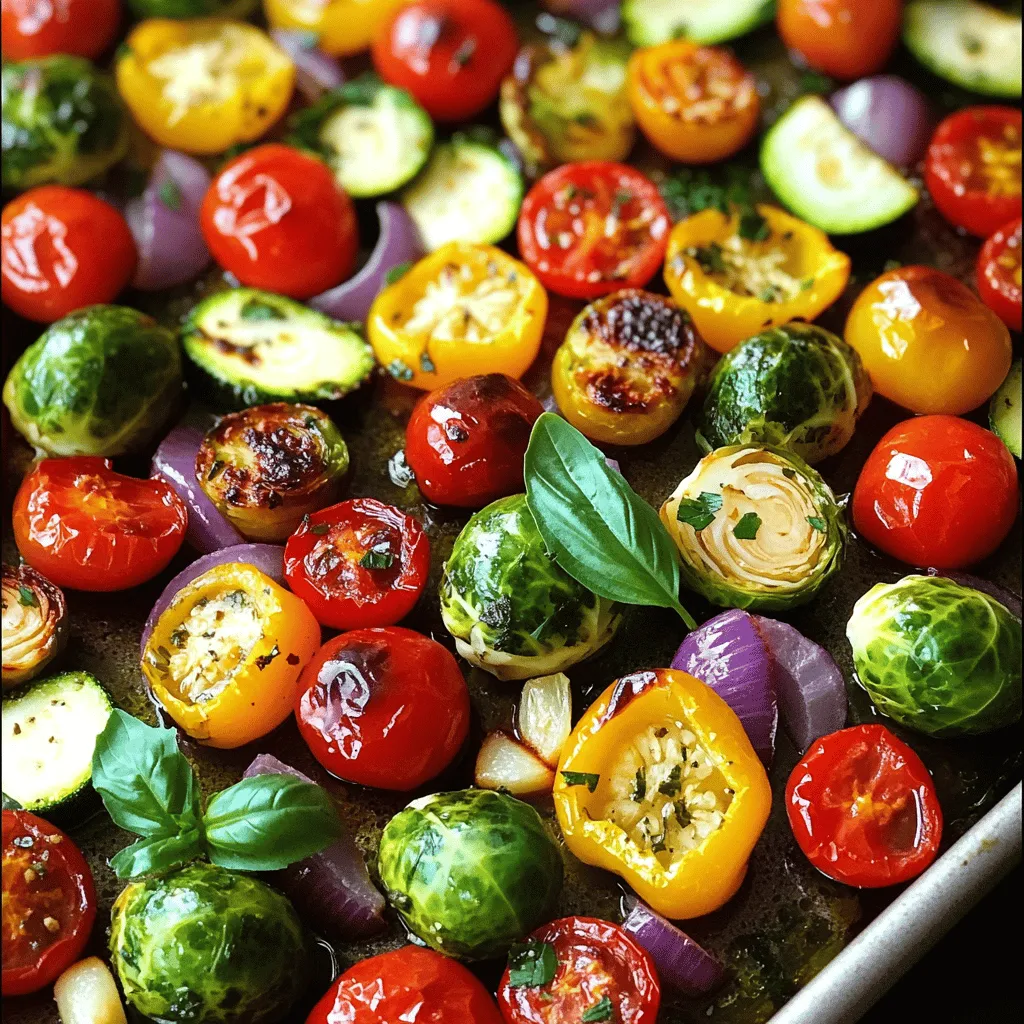
Are you ready to transform your weeknight dinners? My One Pan Roasted Veggies recipe is not only flavorful, but it’s

To make Cheesy Pull Apart Pizza Bread, gather these simple ingredients: - 1 loaf of rustic Italian bread - 1 cup shredded mozzarella cheese - 1/2 cup grated Parmesan cheese - 1/2 cup marinara sauce - 1 teaspoon Italian seasoning - 1/2 teaspoon garlic powder - 1/4 teaspoon red pepper flakes (optional) - 2 tablespoons olive oil - Fresh basil leaves for garnish Want to spice things up? Here are some tasty options: - Different cheese varieties, like cheddar or gouda - Additional pizza toppings, such as pepperoni, bell peppers, or olives These add-ins can change the flavor and make your bread even better. You can be creative and mix and match to suit your taste. For the full recipe, check out the details above. First, preheat your oven to 375°F (190°C). This step is key for even cooking. While the oven heats, prepare your baking sheet by lining it with aluminum foil. This helps with easy cleanup later. Next, take your loaf of rustic Italian bread. Place it on a cutting board. With a serrated knife, cut the bread into a grid pattern. Make diagonal cuts about an inch apart. Be careful not to slice all the way through the bottom. This keeps the bread intact for stuffing. Now, let’s make the cheese filling. In a mixing bowl, combine 1 cup of shredded mozzarella cheese and 1/2 cup of grated Parmesan cheese. Add 1 teaspoon of Italian seasoning, 1/2 teaspoon of garlic powder, and 1/4 teaspoon of red pepper flakes if you like heat. Stir until well mixed to blend the flavors. Take your knife and gently pry apart the cuts in the bread. Stuff the cheese mixture into each opening. Make sure to fill each space generously. This ensures every bite is cheesy and delicious. Once the bread is stuffed, drizzle 2 tablespoons of olive oil over the top. This adds flavor and helps the bread crisp up. Wrap the stuffed bread in aluminum foil, shiny side in, and place it on your baking sheet. Bake the bread for 15 minutes covered. After that, remove the foil and bake for an additional 10 minutes. This helps the cheese melt and the bread turn golden. To check doneness, look for melted cheese and a crispy crust. Enjoy the smell as it bakes! After removing it from the oven, let it cool for a few minutes. Then, gently pull apart to serve. Pair it with a small bowl of marinara sauce for dipping. You can find the full recipe details above. To get that perfect cheese pull, choose your cheese wisely. I recommend using mozzarella because it melts beautifully. Look for high-moisture mozzarella for the best results. It stretches nicely and gives that gooey texture we all love. Mixing in some Parmesan adds a sharp taste and depth. Next, the bread matters too. I love using rustic Italian bread. It's sturdy and has a great crust. This helps hold the cheese and toppings inside. You want a bread that can handle all that goodness without falling apart. To make your cheesy pull apart pizza bread even tastier, add herbs and spices. Italian seasoning adds a classic pizza flavor. For a kick, sprinkle in some red pepper flakes. You can also mix in garlic powder for extra flavor. If marinara sauce isn’t your thing, try other dips. Ranch or garlic butter work well too. You can even use pesto for a fresh twist. These alternatives add fun flavors and keep it exciting. Serving this dish is just as fun as making it. Pull apart the bread and place it on a nice platter. Add a small bowl of marinara or your chosen dip for guests to enjoy. For a fresh touch, garnish with basil leaves. They add a pop of color and flavor. You can also sprinkle some extra cheese on top before serving. This makes it look even more tempting. For the full recipe, check out the details above. Enjoy your cheesy creation! {{image_2}} You can make your Cheesy Pull Apart Pizza Bread more exciting. To create a spicy version, add crushed red pepper flakes to the cheese mix. This small change gives the dish a nice kick. You can also use pepper jack cheese instead of mozzarella for a spicy twist. If you want a healthier option, add fresh vegetables. Chopped bell peppers, spinach, or mushrooms work well. Mix these veggies into the cheese filling. This adds flavor and boosts nutrition. For those needing gluten-free options, you can use gluten-free bread. Many brands offer great choices, making it easy to enjoy this dish. Just ensure the bread has good texture to hold the filling. If you want a low-carb alternative, try using cauliflower bread. Cauliflower bread is easy to make and adds unique flavor. You can find many recipes online to guide you. You can also give your Cheesy Pull Apart Pizza Bread a cultural twist. Try a Mexican pizza inspiration by adding taco seasoning to the cheese mix. You might also include black beans, corn, or jalapeños for extra flavor. Top it off with avocado or cilantro after baking for a fresh touch. These variations keep the dish fun and interesting. Each version offers a new taste experience. Don’t hesitate to mix things up and try new ideas! To keep your cheesy pull apart pizza bread fresh, store it in an airtight container. This helps prevent the bread from drying out. You can also wrap the bread in plastic wrap before placing it in the container. Leftovers can last in the fridge for about 3 to 5 days. Make sure to cool the bread completely before storing. When you want to enjoy your cheesy pull apart pizza bread again, reheating it is key. The best method is using the oven. Preheat your oven to 350°F (175°C). Place the bread on a baking sheet and cover it with foil. Heat for about 10-15 minutes. This keeps the cheese melty and the bread soft. If you want to store it longer, you can freeze the leftovers. Wrap the bread tightly in plastic wrap and then in foil. It can last up to 3 months in the freezer. You can get creative with leftover cheesy pull apart pizza bread. Try cutting it into small pieces for a fun appetizer. You can also use the bread as a base for mini pizzas. Top it with extra marinara sauce, cheese, and your favorite toppings. Another idea is to toast it and serve it with soup or salad. Enjoy your leftovers in new ways! Yes, you can prep this dish ahead. To do so, cut the bread and fill it with cheese. Wrap it tightly in plastic wrap or foil. Store it in the fridge. Bake it when you're ready. This saves time and is great for parties. If you want a change, try different sauces. Ranch dressing adds a creamy taste. Pesto gives a fresh herby kick. You can also use garlic butter for a rich flavor. Experiment with your favorite dips for fun! To keep your bread crisp, avoid too much sauce. Use less marinara when stuffing. Make sure to bake it properly. Wrapping it in foil helps steam the bread but remove the foil for the last bake. This ensures a crispy crust. You can swap the rustic Italian bread. French bread works well for a crusty texture. Brioche adds a sweet touch. Just ensure the bread can hold the filling. With the right bread, your pull apart pizza will still be amazing. For the full recipe, check out the complete details on how to make it! You now have all the key steps to make Cheesy Pull Apart Pizza Bread. We've covered ingredients, preparation, baking, tips for great flavor, and variations. You can easily customize this dish to fit your taste. Whether you opt for gluten-free options or experiment with spices, this recipe is flexible. Don't forget to enjoy leftovers creatively! With practice, you can master this dish. So, gather your ingredients and start baking your delicious creation today.

Cheesy Pull Apart Pizza Bread Deliciously Easy Recipe

Get ready to dive into a cheesy delight with my Cheesy Pull Apart Pizza Bread recipe! This simple dish combines

To make delicious Spinach Feta Turkey Burgers, gather these main ingredients: - 1 lb ground turkey - 1 cup fresh spinach, chopped - 1/2 cup feta cheese, crumbled - 1/4 cup breadcrumbs - 1 clove garlic, minced - 1 small red onion, finely chopped - 1 egg, beaten - 1 teaspoon dried oregano - Salt and pepper to taste - Olive oil for grilling - Whole wheat burger buns These ingredients pack flavor and nutrition. Ground turkey keeps the burgers lean, while spinach adds vitamins. Feta cheese gives a tasty kick. The breadcrumbs help bind the mixture and keep it moist. You can elevate your burgers with simple toppings. Consider adding: - Sliced tomatoes - Crisp lettuce - Tzatziki sauce These toppings provide freshness and flavor. You can serve the burgers on whole wheat buns for a healthy touch. Feel free to get creative with your favorite toppings! Each burger is a healthy option. They are high in protein and low in fat. The spinach boosts your iron and vitamins. Feta cheese adds calcium but watch the portion for sodium. This meal is perfect for a balanced diet, making it a great choice for lunch or dinner. For the full recipe, check the details above. To start, grab a large mixing bowl. In this bowl, combine the ground turkey with fresh spinach, crumbled feta cheese, and breadcrumbs. Then, add minced garlic and finely chopped red onion. Next, pour in a beaten egg, sprinkle with dried oregano, and add salt and pepper to taste. Mix everything until just combined. It’s key not to overmix, as this helps keep the burgers tender and juicy. Once your mixture is ready, divide it into four equal portions. With your hands, shape each portion into a patty. Aim for a thickness of about one inch. Press down gently in the center of each patty. This helps them cook evenly and prevents puffing up while grilling. Preheat your grill or grill pan to medium heat. Brush it lightly with olive oil to prevent sticking. Place the patties on the grill and cook for about 5 to 7 minutes on each side. You want them to reach an internal temperature of 165°F (75°C). This ensures they are safe to eat and perfectly cooked. While grilling, you can toast whole wheat burger buns for 1 to 2 minutes until golden brown. Assemble your burgers by placing a patty on the bottom bun, adding toppings like sliced tomatoes or lettuce, and drizzle with tzatziki sauce if you like. Check out the Full Recipe for more details! To keep your spinach feta turkey burgers moist, avoid overmixing. When you blend the meat with other ingredients, mix just until combined. Overmixing can make the burgers tough. You can also add a little olive oil to the turkey mixture. This adds moisture and flavor. For extra flavor, try adding spices. A dash of paprika or cumin can boost taste. You can also mix in fresh herbs like basil or parsley. These add a fresh kick to every bite. Try adding a bit of lemon zest for brightness. It pairs well with feta cheese and spinach. You can cook these burgers on a grill or in a pan. Grilling gives a nice smoky flavor and those pretty grill marks. Make sure your grill is hot before placing the patties on it. If you pan-fry, use a non-stick skillet and a bit of olive oil. Both methods work well. Just cook until the burgers reach 165°F. This ensures they are safe to eat. For the best results, refer to the Full Recipe for detailed cooking tips. {{image_2}} If you want a meat-free option, you can make these burgers with black beans. Use one can of drained and rinsed black beans instead of ground turkey. Mash the beans in a bowl, then mix in the chopped spinach, crumbled feta, and breadcrumbs. Add the same spices and form patties. You can grill these just like regular burgers. This version is tasty and packed with fiber. Feta adds a salty zing to the burgers, but you can try other cheeses too. Goat cheese gives a creamy texture, while cheddar adds a rich flavor. Even mozzarella can work if you like it melty. Just remember to adjust the amount to your taste. Mixing cheese into your burgers can change the flavor in fun ways. Adding spices can change the game. Try paprika for a smoky flavor or cumin for warmth. Fresh herbs like parsley or dill can brighten the taste. You can also add a pinch of red pepper flakes for a kick. Spice and herb choices can make each batch of burgers unique. Get creative and find what you enjoy most! For the full recipe, check out the Spinach Feta Turkey Burgers. After making your spinach feta turkey burgers, you may have some leftovers. Store them in an airtight container. Place the burgers in the fridge. They will stay fresh for up to 3 days. If you want to keep them longer, freezing is a great option. To reheat your burgers, use a skillet or the oven. Heat a skillet over medium heat. Add a little olive oil for flavor. Cook for about 3-4 minutes on each side until warm. If using the oven, wrap the burgers in foil and heat at 350°F (175°C) for about 10-15 minutes. This keeps them moist and tasty. If you want to freeze the burgers, first let them cool completely. Wrap each burger in plastic wrap. Then, place them in a freezer bag. Squeeze out as much air as you can. The burgers can stay frozen for up to 3 months. When ready to eat, thaw them in the fridge overnight before reheating. This keeps the flavor and texture just right. You can find the full recipe for these delicious burgers to enjoy anytime! You can tell when turkey burgers are done by checking their temperature. Use a meat thermometer to find the internal temperature. It should read 165°F (75°C). This ensures the turkey is safe to eat. If you don’t have a thermometer, look for a golden brown color on the outside. The burgers should feel firm but not dry. Yes, you can make these burgers ahead of time. Prepare the patties and store them in the fridge for up to a day. This saves you time on busy days. You can also freeze the uncooked patties. Place parchment paper between each patty to prevent sticking. They will last in the freezer for about three months. Just thaw them in the fridge before cooking. Serve these burgers on whole wheat buns for a healthy twist. Add fresh toppings like sliced tomatoes and crisp lettuce. A dollop of tzatziki sauce brings great flavor. You can also pair the burgers with a side salad or sweet potato fries. For the full recipe, check out the instructions above. Enjoy your delicious meal! You now know how to make tasty spinach feta turkey burgers. We covered key ingredients, cooking steps, and tips for the best results. Remember the variations for vegetarian options and different cheeses. Storing and reheating leftovers is easy. In the end, these burgers are a great way to enjoy a healthy meal. Try them at your next cookout or family dinner. You'll impress your guests and feel good about what they eat. Enjoy your cooking!

Spinach Feta Turkey Burgers Healthy and Flavorful Meal

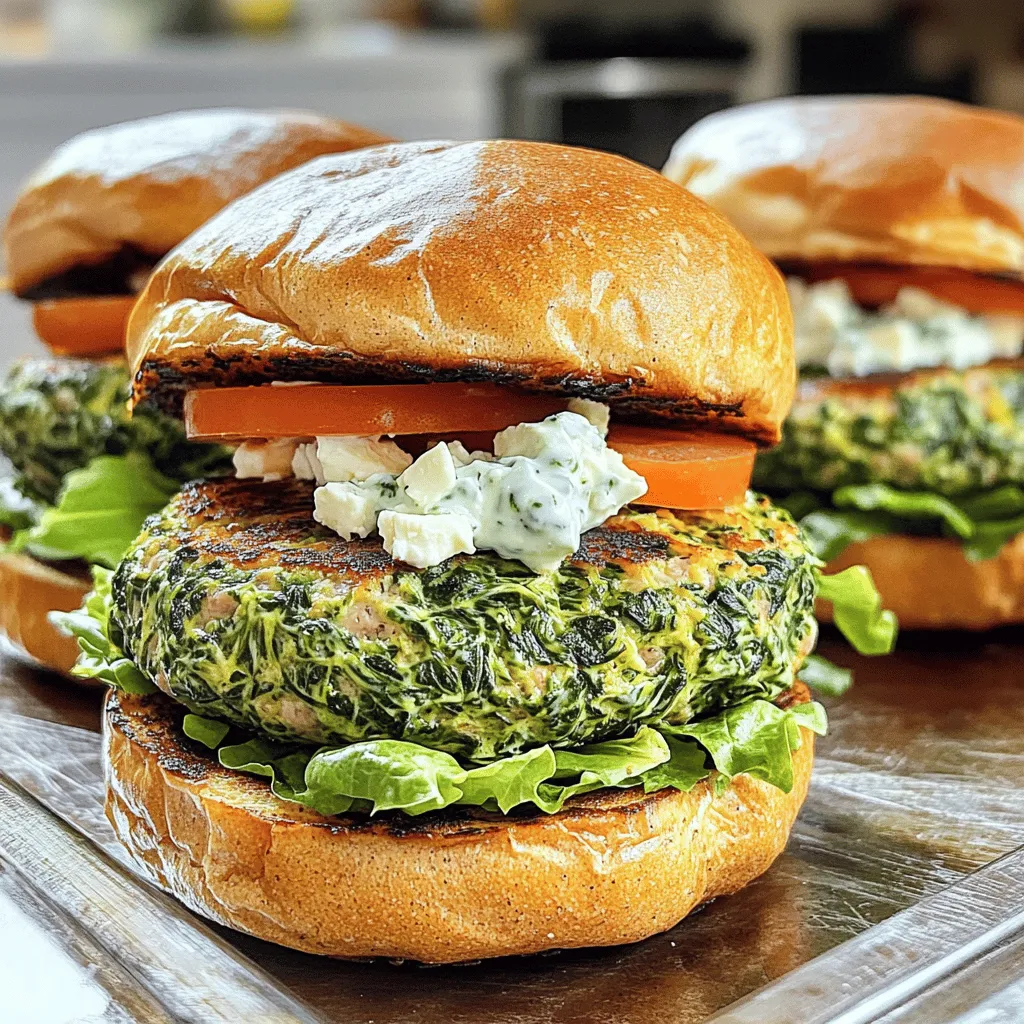
Are you looking for a healthy and tasty meal? Spinach feta turkey burgers offer the perfect blend of flavor and

- 2 ripe peaches - 1 banana (frozen) - 1 cup Greek yogurt (preferably vanilla) To make a Peach Pie Smoothie, you need fresh ingredients. Start with two ripe peaches. They should smell sweet and feel slightly soft. Next, grab a frozen banana. It adds creaminess and a nice chill. Finally, include one cup of Greek yogurt. I like using vanilla-flavored yogurt for extra sweetness. - Honey or maple syrup - Cinnamon and nutmeg - Rolled oats You can enhance your smoothie with a few optional ingredients. Honey or maple syrup gives it a sweet touch. A pinch of cinnamon and nutmeg adds warmth and spice. If you want more texture, consider adding rolled oats. They help make the smoothie filling and hearty. - Whipped cream - Crushed graham crackers When serving, consider some fun toppings. A dollop of whipped cream makes it feel like dessert. Crushed graham crackers can mimic that pie crust flavor. They add a nice crunch that pairs well with the smoothness of the drink. For the complete recipe, check the [Full Recipe]. 1. Start by washing the peaches under cold water. 2. Cut the peaches in half, remove the pit, and chop them into small pieces. 3. Grab a frozen banana from your freezer. If you don't have one, peel and slice a banana, then freeze it for later use. 1. In a blender, combine the chopped peaches, frozen banana, Greek yogurt, and almond milk. 2. Add in honey, cinnamon, nutmeg, rolled oats, and vanilla extract. 3. Blend on high speed until the mix is smooth. Check for any chunks. 4. If the smoothie is too thick, slowly add more almond milk until you reach your desired thickness. 1. Taste your smoothie. If it needs more sweetness, add a little more honey. Blend briefly. 2. Pour the smoothie into tall glasses. 3. For a fun touch, top each glass with whipped cream and a sprinkle of crushed graham crackers for that pie flavor. 4. Enjoy your tasty peach pie smoothie right away! For the full recipe, see the details above. Best types of peaches Use ripe, juicy peaches for the best flavor. Look for peaches that smell sweet and have a slight give when pressed. Freestone peaches are easier to prepare since the pit comes out easily. Using Greek yogurt vs. regular yogurt I recommend Greek yogurt for this smoothie. It adds creaminess and protein. Regular yogurt is fine too, but it may make the smoothie thinner. Choose vanilla-flavored Greek yogurt for added sweetness. How to adjust thickness If your smoothie is too thick, add more almond milk. Start with a little and blend. You want a nice, drinkable consistency. If you like it thicker, add more oats or yogurt. Tips for creaminess Frozen banana is key for a creamy texture. It blends well and adds natural sweetness. If you want extra creaminess, try adding a touch of avocado or a dollop of nut butter. Ideal glassware Serve your peach pie smoothie in tall glasses. This makes it look appealing and fun to drink. A mason jar works well too for a rustic touch. Pairing with snacks This smoothie pairs well with light snacks. Try it with whole-grain toast or a handful of nuts. You could also enjoy it with a simple fruit salad for a refreshing meal. For the full recipe, check out the Peach Pie Smoothie details above. {{image_2}} You can switch up the fruit in your peach pie smoothie. Try using ripe mangoes or sweet strawberries. These fruits can add new flavors and keep things exciting. You can also mix in berries like blueberries or raspberries. They pair well with peach and add a nice color. Just make sure the fruits are ripe for the best taste. If you want a dairy-free smoothie, you can swap Greek yogurt for plant-based yogurt. Look for options made from almond or coconut. They give a nice creaminess. For milk, you can use oat milk or soy milk instead of regular milk. These alternatives work great and keep the smoothie tasty. You can change how sweet your smoothie is. Use natural sweeteners like agave syrup or stevia instead of sugar. These options are often healthier and still sweet. You can also add spices like ginger or cardamom for more flavor. They can make your smoothie taste more complex and delicious. You can find the Full Recipe to make this tasty peach pie smoothie in the previous sections. To keep your Peach Pie Smoothie fresh, store leftovers in a sealed jar. This helps lock in the flavor. You can also pour the smoothie into an ice cube tray and freeze it for later. This is a smart way to enjoy a quick treat. When you want to enjoy your frozen smoothie, just take it out of the freezer. Let it sit in the fridge for a few hours to thaw. If it separates, just shake or stir it well before drinking. This will mix the ingredients back together. Peaches last about three to five days in the fridge. Bananas can spoil faster, so check them often. Signs your smoothie has gone bad include a sour smell or a change in color. If you notice these signs, it’s best to toss it out. The prep time for a Peach Pie Smoothie is about 10 minutes. This includes washing, chopping, and blending your ingredients. You can whip it up quickly, making it perfect for busy mornings or a refreshing snack. Yes, you can prepare this smoothie in advance. To do this, blend all the ingredients and store it in an airtight container. Keep it in the fridge for up to 24 hours. Just give it a quick stir before you drink. If you want to store it longer, pour the smoothie into ice cube trays and freeze. Then, blend the cubes with a bit of almond milk when you are ready to enjoy. To make the Peach Pie Smoothie vegan, swap Greek yogurt for plant-based yogurt. You can use almond, coconut, or soy yogurt. Also, replace honey with maple syrup or agave nectar for sweetness. These simple swaps keep all the flavor while making it dairy-free. This blog post showed you how to make a delicious Peach Pie Smoothie. You learned about the fresh ingredients and optional enhancements to boost flavor. I shared steps for blending and tips for the best texture. You can even explore tasty variations and storage tips. In the end, this smoothie is a fun and tasty way to enjoy fruit. Try it today and experiment with different ingredients!

Peach Pie Smoothie Flavorful and Refreshing Delight

Are you ready to enjoy a delicious treat that tastes like summer in a glass? My Peach Pie Smoothie is

Older posts
Newer posts
← Previous Page1 … Page19 Page20 Page21 … Page65 Next →

dsad

© 2025 Cooking Wells • Built with GeneratePress

Our Policies

  • Copyright Policy
  • Cookie Policy
  • GDPR Policy
  • Privacy Policy
  • Disclaimer
  • Terms Of Use

More Information

  • Home
  • About
  • Contact
  • Appetizers
  • Dessert
  • Dinner
  • Drinks
©2025, Cooking Wells About Back To Top