Skip to content
DisclaimerTerms Of UseGDPR PolicyCookie Policy

Cooking Wells

  • Home
  • Drinks
  • Appetizers
  • Dinner
  • Dessert
  • About
  • Contact
  • Privacy Policy
DisclaimerTerms Of UseGDPR PolicyCookie Policy

Mia

- Zucchini and Apple Requirements - 1 medium zucchini, grated - 1 medium apple, peeled and grated (choose a sweet variety like Fuji or Gala) - Key Dry Ingredients - 2 cups all-purpose flour - 1 cup granulated sugar - 1/2 cup brown sugar, packed - 1/2 cup vegetable oil - 2 large eggs, beaten - 1 teaspoon vanilla extract - 1 teaspoon baking soda - 1/2 teaspoon baking powder - 1/2 teaspoon salt - 1 teaspoon ground cinnamon - 1/4 teaspoon ground nutmeg - Optional Add-ins - 1/2 cup chopped walnuts or pecans Gathering these ingredients will set you up for success. The combination of zucchini and apple gives this bread a moist texture and sweet flavor. Using a sweet apple like Fuji or Gala is key. The spices elevate the dish, adding warmth. If you want a crunch, add nuts. This blend creates a simple yet delicious treat. Check out the Full Recipe for step-by-step guidance. Preheating and Pan Preparation Start by preheating your oven to 350°F (175°C). This step is key. While it heats, grease a 9x5-inch loaf pan with butter or cooking spray. You can also line it with parchment paper. This helps in easy removal later. Preparing the Zucchini and Apple Next, take your medium zucchini and apple. Grate both using a box grater. You want them to blend well into the bread. If the grated mix looks too wet, squeeze out extra moisture with a clean cloth or paper towel. This will help keep the bread from being soggy. Combining Wet Ingredients In a large bowl, mix together your sugars and vegetable oil. Use a whisk to blend them until smooth. Then, add in the beaten eggs and vanilla extract. Make sure to mix well until everything is combined. Adding Dry Ingredients In another bowl, sift together the flour, baking soda, baking powder, salt, cinnamon, and nutmeg. Slowly add this dry mix to the wet ingredients. Stir gently until just combined. Be careful not to overmix; this keeps the bread nice and fluffy. Pouring the Batter into the Pan Now, fold in the grated zucchini and apple. If you like, add chopped walnuts or pecans at this stage. Pour the batter into the prepared loaf pan. Smooth the top with a spatula to ensure even baking. Checking for Doneness Place the pan in the preheated oven. Bake for 50 to 60 minutes. To check if it’s done, insert a toothpick into the center. If it comes out clean, your bread is ready. Let it cool in the pan for about 10 minutes, then transfer it to a wire rack. Enjoy the delightful aroma while it cools! Moisture Management Zucchini and apple bring moisture to your bread. This is great, but too much can make it soggy. To manage moisture, grate your zucchini and apple. Then, use a clean cloth to squeeze out excess liquid. This keeps your bread from being too wet. Avoiding Overmixing When mixing, do it gently. Overmixing can make the bread tough. Mix until you see no dry flour. Then fold in your zucchini and apple. This helps keep your bread light and fluffy. Spice Recommendations Spices can boost your bread's flavor. I love adding ground cinnamon and nutmeg. They give a warm, cozy taste. You can try adding a pinch of ginger or allspice for something new. Additions for Extra Flavor Consider adding chopped nuts or chocolate chips. Walnuts or pecans offer crunch and depth. You can swap them for chocolate chips if you want a sweeter treat. Dried fruit like raisins or cranberries also works well. Serving Suggestions Slice the Zucchini Apple Bread and serve it warm or at room temperature. It looks nice on a wooden board. Pair it with a cup of tea or coffee for a delightful snack. Toppings and Garnishes For extra flair, drizzle honey on top. A dollop of cream cheese spread adds richness. You can also sprinkle powdered sugar for a sweet touch. These garnishes make your bread look and taste even better. {{image_2}} You can customize your zucchini apple bread with fun flavors. Adding different nuts can bring a nice crunch. I love using walnuts or pecans. They add depth and texture to each bite. If you want a sweet twist, try incorporating chocolate chips. They melt into the bread and create a delicious treat. If you need a gluten-free version, swap the all-purpose flour for a gluten-free blend. This keeps the bread light and tasty. For vegan substitutions, you can replace the eggs with flaxseed meal or applesauce. Use a plant-based oil too, like coconut oil, for a rich flavor. You can make muffins instead of bread. Muffins bake faster and are great for snacks. Just adjust the baking time to about 20-25 minutes. Another fun idea is to use different bread sizes. Try mini loaf pans for smaller portions. They are perfect for sharing or gifting. For the full recipe, check out the complete guide to making zucchini apple bread. Room Temperature Storage Store your Zucchini Apple Bread at room temperature. Place it in a sealed container or cover it tightly with plastic wrap. This keeps the bread fresh and moist. It can stay good for up to three days. Refrigeration Recommendation If you want it to last longer, place the bread in the fridge. Wrap it well in plastic wrap or foil. This method can extend its freshness for about one week. Just remember that cold air can dry it out, so wrap it tightly. How to Freeze for Later To freeze your Zucchini Apple Bread, let it cool completely first. Then, slice it into pieces. Wrap each slice in plastic wrap and place them in a freezer-safe bag. You can also freeze the whole loaf. Just wrap it tightly to prevent freezer burn. It will stay fresh for up to three months. Reheating Tips When you're ready to enjoy your frozen bread, remove it from the freezer. Let it thaw in the fridge overnight. For a quick option, use the microwave. Heat a slice for about 15 seconds. This keeps it soft and tasty. Freshness Guidelines Zucchini Apple Bread tastes best when fresh. At room temperature, enjoy it within three days. In the fridge, it’s good for about one week. If frozen, use it within three months for the best flavor. Signs of Spoilage Check for any mold or an off smell. If the bread feels dry or hard, it’s time to toss it. Always trust your senses. They help you know when it's no longer good to eat. How to Tell When Zucchini Apple Bread is Done? You can check if your bread is done by using a toothpick. Insert it in the center of the loaf. If it comes out clean, the bread is ready. If it’s wet, give it more time. The top should be golden brown and spring back when touched. Can I Substitute Ingredients? Yes, you can substitute some ingredients. For example, use coconut oil instead of vegetable oil. You can swap granulated sugar for honey or maple syrup. If you want a gluten-free option, use a gluten-free flour blend. What to Do If the Bread is Too Dense? If your bread turns out dense, it might be due to overmixing. Mix only until the dry ingredients are combined. Also, make sure to measure the flour correctly. Too much flour can lead to dense bread. Can I Use a Different Pan Size? You can use a different pan size, but keep an eye on the baking time. A smaller pan may require longer baking, while a larger pan may cook faster. Always test for doneness with a toothpick. Calorie Count per Slice Each slice of Zucchini Apple Bread has about 150 calories. This can vary based on the added ingredients. If you add nuts, the calorie count will increase slightly. Nutritional Benefits of Ingredients Zucchini is low in calories and high in vitamins. It adds moisture without much fat. Apples provide fiber and natural sweetness. The nuts add healthy fats and protein. Together, these ingredients create a tasty and nutritious treat. In this article, we covered everything you need for making Zucchini Apple Bread. You learned about the key ingredients and how to mix and bake them properly. I shared tips for perfect texture, flavor boosts, and how to serve it best. You also found variations and storage tips to enjoy this bread longer. Remember, baking is a fun way to experiment. Don’t hesitate to try new flavors or ingredients. Enjoy the process and your delicious results!

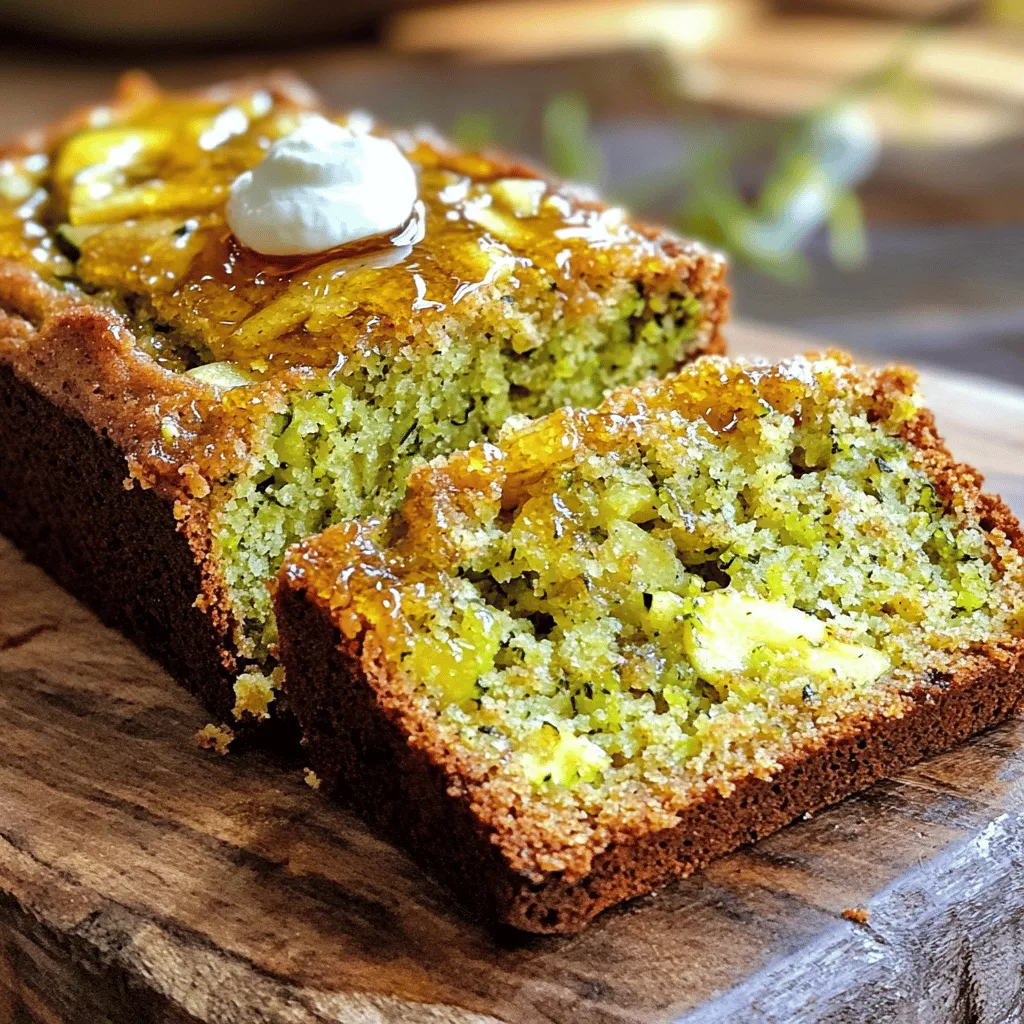
Zucchini Apple Bread Easy and Tasty Recipe Guide

Are you ready to bake something delightful? Zucchini Apple Bread is a tasty treat that combines fresh zucchini and juicy

- 2 ripe peaches, peeled and sliced - 1 cup raspberries (fresh or frozen) - 2 tablespoons honey or maple syrup - 1 teaspoon vanilla extract - 1 cup Greek yogurt (plain or vanilla) - 1 cup granola - Mint leaves for garnish (optional) Gather these ingredients to create a tasty treat. The ripe peaches bring sweetness and a lovely color. Raspberries add a nice tartness that balances the dish. Honey or maple syrup sweetens without overpowering. The Greek yogurt gives creaminess and protein, making it healthy. Granola adds crunch and texture, while mint leaves make a lovely garnish. Each layer will not only taste great but also look beautiful. You can find the full recipe for Peach Melba Parfait in the earlier section. Enjoy the process of mixing flavors and creating your masterpiece! Step 1: Cooking the Peaches and Raspberries Start by washing the peaches and raspberries. Peel the peaches and slice them. Use a small saucepan and set it on medium heat. Add the sliced peaches and half of the raspberries to the pan. Pour in the honey or maple syrup. Cook this mixture until it bubbles and the peaches soften, which takes about 5 to 7 minutes. Once done, remove it from heat and let it cool. Step 2: Flavoring the Greek Yogurt Now, grab a bowl for the Greek yogurt. Add one cup of Greek yogurt to the bowl. Pour in the teaspoon of vanilla extract. This step gives the yogurt a sweet flavor. Mix it well until the yogurt is smooth and creamy. Step 3: Layering the Ingredients It's time to build your parfait! Take serving glasses or bowls and start with a spoonful of the flavored Greek yogurt at the bottom. Next, add a layer of the cooked peach and raspberry mix over the yogurt. Then, sprinkle a layer of granola on top. Repeat this layering until you fill the glasses. Finish with a layer of yogurt on top. For a nice touch, place a few fresh raspberries on the top layer and add a mint leaf if you like. That’s it! You now have a Peach Melba Parfait ready to enjoy. For more details, check out the Full Recipe. Tip 1: Choosing the Right Peaches Select ripe peaches for the best flavor. Look for peaches that yield slightly when you press them. They should have a sweet aroma. If you can't find ripe ones, let them sit at room temperature for a few days. Tip 2: Achieving the Ideal Layering Technique Layering makes your parfait look great and adds texture. Start with yogurt, then add the peach and raspberry mix. Follow with granola for crunch. Repeat until your glass is full. Make sure to finish with yogurt for a neat look. Tip 3: Customizing Sweetness Levels You can adjust the sweetness to fit your taste. If you like it sweeter, add more honey or maple syrup. If you prefer less sugar, use plain yogurt and skip the sweeteners. Taste as you go to find what you love best. For the full recipe, check out the Peach Melba Parfait section. Enjoy making this tasty treat! {{image_2}} Variation 1: Substituting Yogurt for Dairy-Free Options If you want a dairy-free parfait, use coconut or almond yogurt. Both have a creamy texture. They add a delicious flavor that pairs well with peaches and raspberries. This swap keeps the parfait just as tasty. Variation 2: Adding Different Fruits or Nuts You can mix and match fruits to your liking. Try adding bananas, strawberries, or blueberries. Each fruit brings its own unique taste. You may also add nuts like almonds or walnuts for crunch. They give extra texture and flavor. Variation 3: Incorporating Flavored Yogurts or Granola Using flavored yogurt can change the taste of your parfait. Vanilla or berry yogurts add extra sweetness and depth. You can also choose different granola flavors. This simple change makes each parfait unique and fun. For the complete recipe, check out the Full Recipe section. It provides steps to make your Peach Melba Parfait delicious and easy. Storage Method: Refrigeration Tips Keep your Peach Melba parfaits in the fridge. Use airtight containers to keep them fresh. If you have layered parfaits, store them as is. This method saves time and keeps flavors intact. Shelf Life: How Long They Last When stored properly, your parfaits last up to three days. After that, the fruit may lose its texture. You want to enjoy them while they are still fresh and tasty. Reassembling After Storage If you notice some separation after storage, don’t worry. Just stir the parfait gently to mix it. You can also add a fresh layer of yogurt or granola. This refreshes the taste and keeps it exciting. For more details, check the Full Recipe. Can I make Peach Melba Parfaits in advance? Yes, you can make these parfaits ahead of time. Just layer the ingredients in jars or cups. Cover them well and place them in the fridge. They taste great for up to two days. The layers may blend a little, but the flavor stays rich. What can I use instead of granola? If you want a swap for granola, try crushed nuts, seeds, or oats. You can also use crushed cookies for a sweet twist. Each option adds unique flavors and textures. Choose what you like best for your parfait. How can I make this recipe vegan? To make a vegan version, switch Greek yogurt for coconut yogurt. Use maple syrup instead of honey for sweetness. Replace granola with a vegan-friendly option. These simple swaps keep the taste delicious while fitting a vegan diet. Check the Full Recipe for more details! You can create a tasty Peach Melba Parfait at home. We covered the ingredients, steps, and tips needed to make this delicious treat. You learned how to layer peaches, raspberries, Greek yogurt, and granola. Plus, I shared ways to customize your parfait. Don’t forget to store leftovers properly for later enjoyment. Making this parfait is fun and easy, so get started today. Trust me, it will be a hit! Enjoy your delicious, healthy dessert.

Peach Melba Parfait Tasty and Healthy Delight

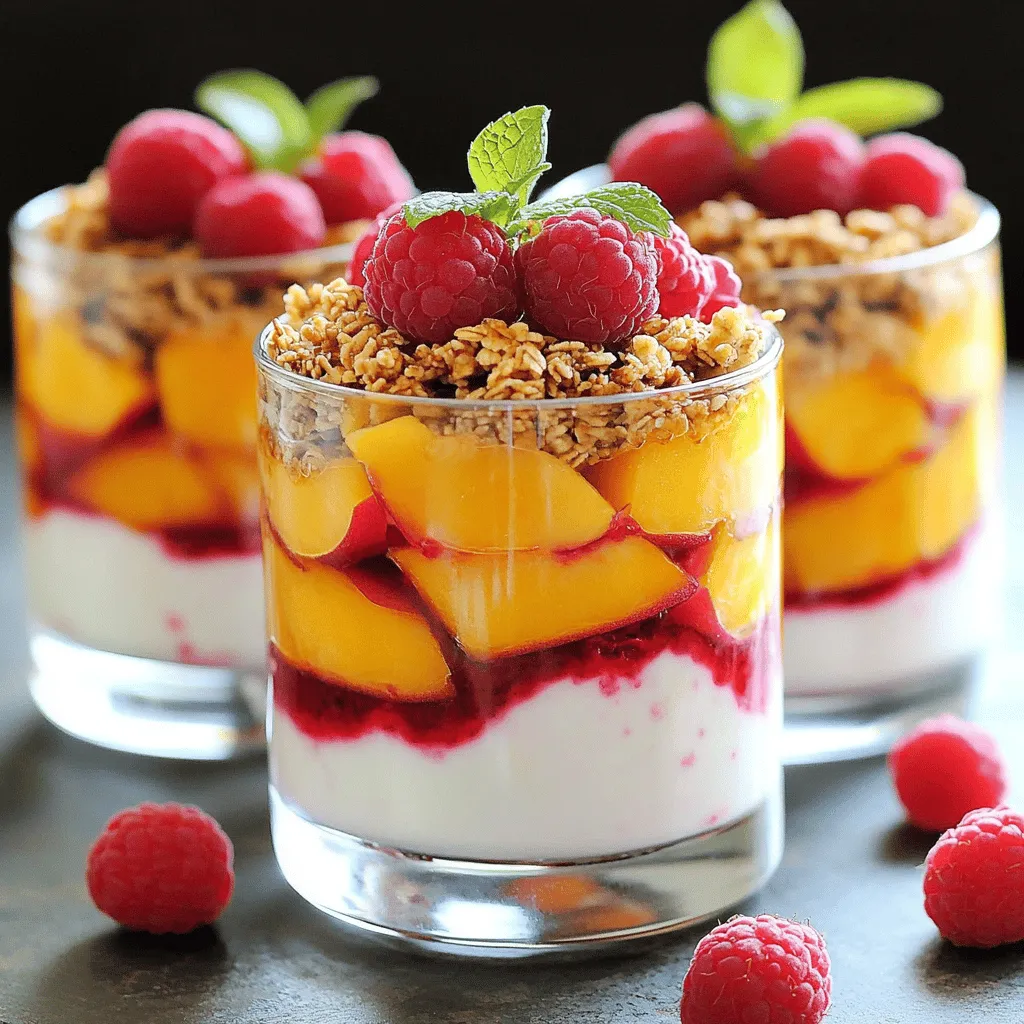
Craving a light, fruity treat that’s both tasty and healthy? Try my Peach Melba Parfait! This delicious dessert layers sweet

- 3 medium zucchinis, thinly sliced - 2 cups fresh spinach, packed - 15 oz ricotta cheese - 1 cup shredded mozzarella cheese - 1 cup grated Parmesan cheese - 1 large egg - 2 cups marinara sauce - 2 cloves garlic, minced - 1 teaspoon Italian seasoning - Salt and pepper to taste - Olive oil for cooking - Fresh basil leaves for garnish Zucchini and spinach make a great pair in this lasagna. You get the best of both worlds: a hearty dish that is also light and healthy. The zucchinis replace traditional pasta, which helps cut down on carbs. To start, gather your ingredients. Fresh zucchinis bring a crisp texture that holds up well in the oven. Spinach adds a vibrant green color and a healthy punch of nutrients. Ricotta cheese gives the dish creaminess. I love mixing it with an egg and some grated Parmesan. This blend helps bind the filling and adds depth. Marinara sauce brings a rich tomato flavor, while garlic and Italian seasoning enhance the taste even more. This recipe is easy to follow. You can find the Full Recipe in this article. Make sure to have all your ingredients ready before you start. Having everything prepped helps the cooking process go smoothly. Enjoy the colors and fresh scents as you prepare this tasty meal! - Preheat the oven to 375°F (190°C). - In a bowl, mix 15 oz of ricotta cheese, 1 large egg, and 1 cup of grated Parmesan cheese. Add 1 teaspoon of Italian seasoning, salt, and pepper to taste. Set this aside. - In a skillet, drizzle olive oil and heat over medium. Add 2 minced cloves of garlic and cook for about 1 minute until fragrant. - Toss in 2 cups of fresh spinach and cook until it wilts, about 2-3 minutes. Mix this into the ricotta mixture. - Start by spreading a thin layer of 2 cups of marinara sauce on the bottom of a baking dish. - Next, layer zucchini slices over the sauce. Use 3 medium zucchinis, thinly sliced. - Add half of the ricotta-spinach mixture on top of the zucchini. - Repeat with another layer of marinara sauce, more zucchini slices, and the rest of the ricotta-spinach mixture. - Finish with a final layer of zucchini, the remaining marinara sauce, and top it with 1 cup of shredded mozzarella cheese. - Cover the baking dish with aluminum foil and bake for 30 minutes. - Remove the foil and bake for an additional 15 minutes, or until the cheese bubbles and turns golden brown. - Let the lasagna cool for 10 minutes before slicing. This helps the layers set better. How to cut zucchini for optimal layering Cut zucchinis into thin slices. Aim for about 1/8 inch thick. This helps them cook well and blend in with the layers. You can use a sharp knife or a mandoline for even slices. Remember, even slices mean even cooking! Tips for seasoning the ricotta mixture Mix the ricotta cheese with one large egg and grated Parmesan. Add Italian seasoning, salt, and pepper. Taste it to adjust the flavor. If you want a kick, add a pinch of red pepper flakes. This step makes the ricotta rich and tasty. Best practices for sautéing spinach Heat olive oil in a skillet over medium heat. Add minced garlic and cook for about one minute. This makes your kitchen smell amazing! Then, add the fresh spinach. Cook until it wilts, about 2 to 3 minutes. Don't overcook—keep that vibrant green color! Recommended side dishes Serve your zucchini spinach lasagna with a fresh salad. A simple green salad with a light vinaigrette works great. Garlic bread also pairs well and adds a nice crunch. Best wines to pair with zucchini spinach lasagna A light red wine like Pinot Noir is perfect. If you prefer white, try a Chardonnay. Both wines enhance the flavors of the dish and make your meal feel special. Creative ways to use leftovers Leftover lasagna makes a quick lunch! You can also chop it up and mix it into a salad for a twist. Another idea is to bake it in a pie crust for a fun lunch option. For the full recipe, check out the [Full Recipe]. {{image_2}} If you want to change things up, you have great options. For the ricotta cheese, try cottage cheese or cream cheese. These swaps keep it creamy and delicious. You can also add different veggies. Consider mushrooms, bell peppers, or eggplant for added flavor. Mixing in these vegetables makes your lasagna colorful and fun. If you're gluten-free, use gluten-free lasagna noodles. You can also use thinly sliced zucchini as the noodle base. This keeps the dish light and healthy. To boost the taste, add spices like red pepper flakes or fresh herbs. Basil, oregano, or thyme can add depth to your dish. Just sprinkle them between the layers for extra flavor. You can use different cheeses for more richness. Try goat cheese or a sharp cheddar. Mixing cheeses creates a unique taste that you’ll love. Adjust your marinara sauce for more flavor. Add a splash of red wine or some chopped olives. This gives your sauce a special twist that makes it stand out. For the full recipe, check out the original instructions to see how all these ideas fit in. Store leftover zucchini spinach lasagna in an airtight container. Glass or plastic containers work well. Make sure to let it cool before sealing. The lasagna stays fresh in the fridge for up to three days. You can also freeze it. Wrap the lasagna tightly in plastic wrap and then in foil. It can last in the freezer for up to three months. When you're ready to eat it again, thaw it in the fridge overnight. To reheat lasagna, use an oven or microwave. Preheat the oven to 350°F (175°C). Cover the lasagna with foil to keep it moist. Heat for about 20 minutes or until warm. In the microwave, place a slice on a microwave-safe plate. Heat it for 2-3 minutes on high. Check to make sure it’s hot all the way through. This will help keep the texture and flavor intact. Enjoy your delicious zucchini spinach lasagna again! For a detailed guide, check the Full Recipe. Can I make zucchini spinach lasagna ahead of time? Yes, you can prepare the lasagna a day in advance. Assemble it, then cover it with foil. Store it in the fridge overnight. Bake it the next day. This helps the flavors blend well. What can I serve with this dish? I love to serve zucchini spinach lasagna with a fresh salad or garlic bread. A light Caesar salad pairs nicely. You can also try a crisp green salad with a lemon vinaigrette. Is this recipe suitable for meal prep? Absolutely! Zucchini spinach lasagna works great for meal prep. You can divide it into portions. Store leftovers in airtight containers. This makes it easy to grab a meal on busy days. How to prevent watery lasagna To avoid watery lasagna, salt the zucchini slices first. Let them sit for 15 minutes to draw out moisture. Pat them dry before layering. This keeps the dish from becoming soggy. Can I make this lasagna vegan? Yes, you can make a vegan version! Substitute ricotta with cashew cheese or tofu. Use a plant-based egg replacer for binding. Choose vegan mozzarella for topping. What if I don’t have fresh spinach? If you lack fresh spinach, you can use frozen spinach. Thaw and drain it well before mixing. Another option is to use kale or Swiss chard for a twist on flavor. This zucchini spinach lasagna recipe is a great way to enjoy healthy meals. You learned about the key ingredients, simple instructions, and helpful tips for perfecting flavor and texture. Don't forget the variations and storage tips to make the most of your dish. With this recipe, you'll impress family and friends while enjoying delicious meals all week. Cooking can be fun and rewarding, so dive in and make this lasagna your own!

Zucchini Spinach Lasagna Flavorful and Nutritious Dish

Looking for a tasty and healthy meal? This Zucchini Spinach Lasagna hits the spot! It’s easy to make and packed

To make the best peach raspberry scones, you need fresh, high-quality ingredients. Here’s what you will need: - 2 cups all-purpose flour - 1/2 cup granulated sugar - 1 tablespoon baking powder - 1/2 teaspoon salt - 1/2 cup unsalted butter, cold and cubed - 1 cup fresh peaches, diced - 1 cup fresh raspberries - 1/2 cup heavy cream - 1 large egg - 1 teaspoon vanilla extract - 1 tablespoon milk (for brushing) - Extra sugar for sprinkling These ingredients come together to create a delightful, flaky texture. The peaches add sweetness, while the raspberries give a tart burst of flavor. You can play with flavors by adding a few extra ingredients. Try these for a twist on the basic scone: - Zest from one lemon or orange - 1/2 teaspoon cinnamon - 1/2 teaspoon almond extract These extras can elevate the taste and give your scones a unique flair. If you run out of an ingredient, don’t worry! Here are some easy swaps: - Use whole wheat flour instead of all-purpose flour for a nuttier flavor. - Swap out heavy cream for buttermilk or Greek yogurt to cut calories. - Replace unsalted butter with coconut oil for a dairy-free option. These substitutions can help you make scones that fit your dietary needs without losing flavor. For the full recipe, check out the link provided. To start making your Peach Raspberry Scones, gather all your ingredients. You will need: - 2 cups all-purpose flour - 1/2 cup granulated sugar - 1 tablespoon baking powder - 1/2 teaspoon salt - 1/2 cup unsalted butter, cold and cubed - 1 cup fresh peaches, diced - 1 cup fresh raspberries - 1/2 cup heavy cream - 1 large egg - 1 teaspoon vanilla extract - 1 tablespoon milk (for brushing) - Extra sugar for sprinkling 1. Preheat your oven to 400°F (200°C). Line a baking sheet with parchment paper. 2. In a large bowl, whisk the flour, sugar, baking powder, and salt until mixed. 3. Add the cold butter. Use a pastry cutter or your hands to mix until it looks like coarse crumbs. 4. Gently fold in the diced peaches and raspberries. Be careful not to crush the berries. 5. In another bowl, whisk the cream, egg, and vanilla extract together. 6. Pour the wet mix into the dry mix. Stir until just combined. The dough should be a bit sticky. 7. Turn the dough onto a floured surface. Knead gently a few times to bring it together. 8. Pat the dough into a disc about 1-inch thick. Cut the disc into 8 equal wedges. 9. Place the wedges on the prepared baking sheet. Brush the tops with milk and sprinkle with extra sugar. 1. Bake the scones in the preheated oven for 15-18 minutes. They should turn golden brown. 2. Check for doneness by tapping the bottom. It should sound hollow. 3. Remove the scones from the oven and let them cool slightly on a wire rack. - Use cold butter to keep the scones flaky. - Don't overmix the dough. Stir just until combined. - For a softer scone, add a bit more cream if needed. - Let the scones cool on a rack for a few minutes before serving. For more details on preparation, check the Full Recipe. When making Peach Raspberry Scones, avoid overmixing the dough. Overmixing leads to tough scones. Handle the dough gently. Use cold butter for the best texture. If your butter is warm, your scones might spread too much. Also, watch your baking time. Scones can go from golden to burnt quickly. You can change the flavors in your scones! Try adding nuts like almonds or walnuts for crunch. You can also swap peaches and raspberries for other fruits. Blueberries or strawberries work well. For a zesty twist, add lemon or orange zest to the dough. This brightens the flavor and makes it unique. Mixing dough is key to great scones. Start by whisking dry ingredients in a bowl. This helps blend them evenly. When adding butter, use your fingers or a pastry cutter. Work until it looks like crumbs. Next, fold in your fruit gently. Make sure not to crush the raspberries; they should stay whole. Finally, add wet ingredients and mix until just combined. This keeps your scones light and fluffy. For the full recipe, check out the step-by-step guide. {{image_2}} You can change the fruits in these scones to fit your taste. Blueberries and peaches work well together. You could also use blackberries for a richer flavor. If you prefer a tropical twist, try adding diced pineapple. Mixing fruits brings new tastes to your scones. Want to make a savory version? Replace the peaches and raspberries with cheese and herbs. You could use sharp cheddar and fresh chives. This makes a great snack or appetizer. Serve them warm with your favorite dip. You can easily make these scones vegan. Swap the butter with coconut oil or vegan butter. Use almond milk instead of heavy cream. For gluten-free scones, replace all-purpose flour with a gluten-free blend. Just follow the Full Recipe for more details on making these swaps. To keep your leftover scones fresh, place them in an airtight container. This helps maintain their soft texture. You can store them at room temperature for up to two days. If you want to keep them longer, refrigeration is a good option. Just be aware that refrigeration may make them a bit dry. When you are ready to enjoy your scones again, reheating is simple. Preheat your oven to 350°F (175°C). Place the scones on a baking sheet. Heat them for about 5 to 10 minutes. This warms them up and brings back some crunch. You can also use a microwave, but be careful. Microwaving too long can make them tough. Heat for just 10 to 15 seconds at a time. Freezing is a great way to save scones for later. First, let the scones cool completely. Wrap each one tightly in plastic wrap. Then, place them in a freezer-safe bag. Label the bag with the date. You can freeze them for up to three months. When you're ready to eat them, thaw them in the fridge overnight. Reheat as mentioned above for the best results. For more details on preparation, check the Full Recipe. You can tell your scones are done when they turn a light golden brown. They should also feel firm to the touch. A toothpick inserted in the center should come out clean. If it comes out with wet dough, bake for a few more minutes. Keep an eye on them for the best results. Yes, you can make the dough ahead of time! Prepare the dough and wrap it in plastic wrap. Store it in the fridge for up to 24 hours. When you’re ready to bake, just cut the dough and follow the baking instructions. This makes it easy to enjoy fresh scones anytime! Peach Raspberry Scones pair well with clotted cream or whipped cream. You can also serve them with fresh fruit or a drizzle of honey. For a fun twist, add a flavored jam like peach or raspberry. These scones are great for brunch or a cozy afternoon tea. You can find the Full Recipe for all preparation details. In this post, we explored how to make delicious peach raspberry scones. We covered key and optional ingredients, along with substitutes for common items. You learned step-by-step instructions for perfect preparation and baking. Tips helped you avoid common mistakes and customize your scones. We also discussed variations, storage, and answered key FAQs. Enjoy baking these scones, and remember to check the full recipe for details. Happy baking!

Peach Raspberry Scones Fresh and Easy Recipe Guide

Welcome to my easy guide on making Peach Raspberry Scones! These scones are soft, sweet, and fruity. I’ll share simple

- 2 large cucumbers - 1 cup shredded red cabbage - 1 carrot - 1/4 cup fresh cilantro Cucumbers are the star of this dish. They are crisp and hydrating. I prefer large cucumbers for this slaw. Shredded red cabbage adds a nice crunch and a pop of color. Carrots bring sweetness and bright orange hues. Fresh cilantro gives a burst of flavor and freshness. - 2 tablespoons rice vinegar - 1 tablespoon honey - 1 teaspoon sesame oil For the dressing, rice vinegar adds a tangy taste. Honey balances the vinegar's acidity with sweetness. Sesame oil gives a rich, nutty flavor that ties everything together. - 1 teaspoon fresh ginger - 1/2 teaspoon red pepper flakes - Salt and pepper to taste Fresh ginger adds warmth and depth. Red pepper flakes bring a gentle heat to the slaw. Salt and pepper enhance all the flavors and make each bite better. For the Full Recipe, you can find all the details to create this dish. Enjoy crafting your refreshing cucumber slaw! To start, you will need to slice and peel the cucumbers. Use a sharp knife for clean cuts. Thin slices give the slaw a nice crunch. Next, shred the cabbage. I find using a box grater or a food processor makes this easy. Lastly, grate the carrot. This adds color and sweetness. Combine these veggies in a large bowl. Toss them gently to mix everything well. Now, let’s whisk together the dressing ingredients. In a smaller bowl, add the rice vinegar, honey, and sesame oil. Then, grate fresh ginger into the bowl. Add red pepper flakes, salt, and pepper. Whisk until all the ingredients blend together. This dressing will give the slaw a zesty kick that you will love. Pour the dressing over the mixed vegetables. Toss everything together so the dressing coats each piece. Let the slaw sit for at least 15 minutes. This time helps the flavors blend well. The cucumbers will also release some moisture, making the slaw even better. Serve it chilled or at room temperature. This dish is perfect as a side. For the full recipe, check the Zesty Cucumber Slaw section. To make your cucumber slaw even better, try adding fresh herbs. Mint or dill can give it a bright taste. You can also add nuts like peanuts or almonds for a nice crunch. This extra texture makes every bite more fun and satisfying. Let your slaw sit for at least 15 minutes. This helps the flavors mix well. It also allows the cucumbers to lose some water, which improves texture. Always use fresh ingredients for the best taste. Fresh veggies make the slaw crisp and vibrant. This slaw pairs well with grilled meats like chicken or fish. It adds a cool contrast to hot dishes. You can also serve it as a light lunch. Just add some protein like grilled shrimp or tofu, and you have a tasty meal. {{image_2}} For a rich twist, you can make creamy cucumber slaw. Simply add mayonnaise or yogurt to the mix. Start with about 1/2 cup of mayo or yogurt. This will give the slaw a smooth texture. Mix it in with the dressing before you combine it with the veggies. This version is great for those who love creamy salads. It pairs well with grilled meats and adds a nice touch to picnics. If you like heat, try spicy cucumber slaw. You can add jalapeños or chili paste to kick it up a notch. Start with one finely chopped jalapeño. If you want it even spicier, add a teaspoon of chili paste. Mix these in with the veggies and dressing. This version brings a fun zing to the dish and really wakes up your taste buds. It’s perfect for summer barbecues or taco nights. You can also switch up the dressing for different flavors. Try using balsamic vinegar or lime juice instead of rice vinegar. For balsamic, use the same amount as the rice vinegar. If you choose lime juice, start with the juice of one lime. This adds a fresh and tangy taste to the slaw. Feel free to experiment with herbs like dill or mint for extra zest. These alternative dressings keep the dish light and refreshing. For the full recipe, check out the Zesty Cucumber Slaw. To store leftover cucumber slaw, place it in an airtight container. This keeps the slaw fresh. Make sure the container seals well to avoid air exposure. You can also cover the bowl tightly with plastic wrap. Keep it in the fridge to maintain its crunch. Avoid adding dressing to the slaw until you are ready to eat. This prevents sogginess. You can safely keep cucumber slaw in the fridge for about 3 days. After that, the texture may change. If it gets too soft, it might not taste as good. Always check for any off smells or changes in color before eating. If you notice any, it’s best to throw it away. Freezing cucumber slaw is not the best option. Cucumbers contain a lot of water, which makes them mushy when thawed. The texture will not be the same. If you want to save the slaw, consider freezing the dressing instead. You can then mix it with fresh veggies later. This keeps the flavors intact and ensures a crisp texture. To keep your cucumber slaw crispy, start by using fresh cucumbers. Slice them thinly and sprinkle salt on them. This draws out excess moisture. Let them sit for about 10 minutes, and then rinse and drain. This method keeps the cucumbers crunchy. You can also add crunchy veggies like carrots or bell peppers for more texture. Yes, you can make cucumber slaw ahead of time. Prepare the veggies and dressing separately. Mix them just before serving. If you mix too early, the slaw may become soggy. Store the slaw in the fridge for up to two days. Keep the dressing in a sealed jar for freshness. Cucumber slaw pairs well with many dishes. Try it with grilled chicken or fish. It also works great with tacos or sandwiches. Use it as a fresh side for barbecues. You can even serve it on top of burgers for a crunch. Cucumber slaw is healthy and low in calories. Each serving has about 60 calories. Cucumbers are mostly water, making them hydrating. They also provide vitamins and minerals. The veggies in the slaw add fiber, which is good for digestion. The dressing is light and uses simple ingredients. You can find the complete Zesty Cucumber Slaw recipe [here](#). Cucumber slaw offers a refreshing crunch with simple ingredients. You learned how to prepare it and enhance its flavor. Try variations like creamy or spicy to keep meals exciting. Proper storage helps maintain freshness, so no waste occurs. Overall, cucumber slaw is a healthy, versatile dish you can enjoy. Don't hesitate to experiment and find your perfect twist!

Cucumber Slaw Simple and Refreshing Side Dish

Ready to add a burst of freshness to your meals? Cucumber slaw is a simple and tasty side dish that

To make Zucchini Chickpea Patties, gather these key ingredients: - 2 medium zucchinis, grated - 1 can (15 oz) chickpeas, drained and rinsed - 1/2 cup breadcrumbs (or gluten-free alternative) - 1/4 cup grated Parmesan cheese (or nutritional yeast for a vegan option) - 1/4 cup fresh parsley, chopped - 2 green onions, sliced - 2 cloves garlic, minced - 1 teaspoon ground cumin - 1 teaspoon smoked paprika - Salt and pepper to taste - 1 large egg (or a flax egg for a vegan option) - Olive oil for frying Having fresh, quality ingredients makes a big difference. The zucchinis add moisture, while chickpeas give protein. You can swap breadcrumbs with gluten-free ones if needed. For vegan diets, use nutritional yeast and a flax egg. Variations can keep this meal exciting. Try adding spices like chili powder for heat or fresh herbs like dill or cilantro for extra flavor. You can also play with cheese types or skip it altogether. This flexibility helps you create your perfect patty. For the full recipe, refer to the earlier section. Enjoy the cooking process! 1. Grate zucchini and remove moisture Start by grating the zucchinis. Use a box grater or a food processor. After grating, place the zucchini in a clean kitchen towel. Squeeze out as much moisture as you can. This helps keep the patties from being soggy. 2. Mash chickpeas and mix with other ingredients Open a can of chickpeas. Drain and rinse them well. Use a fork or a potato masher to mash them in a large bowl. Aim for a coarsely blended texture. You still want some chunks for good flavor. Next, add the grated zucchini, breadcrumbs, Parmesan cheese, parsley, green onions, minced garlic, cumin, smoked paprika, salt, and pepper. Mix everything until it’s well combined. 3. Form and cook the patties Beat one large egg in a small bowl. If you prefer a vegan option, mix 1 tablespoon of ground flaxseed with 2.5 tablespoons of water and let it sit for five minutes. Add the egg or flax egg to the mixture and stir well. Now, form the mixture into patties about 2-3 inches in diameter. You should yield around 8-10 patties depending on size. 4. Cooking tips for perfect patties Heat olive oil in a skillet over medium heat. Once hot, add the patties. If your skillet is small, cook in batches. Fry each patty for about 4-5 minutes on each side. You want them to be golden brown and crispy. After cooking, place the patties on a plate lined with paper towels. This will help drain any excess oil. For the full recipe, check out the detailed instructions above! To make great zucchini chickpea patties, moisture control is key. Start by grating the zucchinis and put them in a clean kitchen towel. Squeeze out the moisture. This step helps keep the patties from being soggy. If you want a vegan option, use a flax egg. Mix 1 tablespoon of ground flaxseed with 2.5 tablespoons of water. Let it sit for five minutes until it thickens. This will bind the ingredients well. Frying techniques matter too. Heat olive oil in a skillet over medium heat. When the oil is hot, add the patties carefully. Cook for about four to five minutes on each side. They should look golden brown and crispy. This method ensures a nice texture and flavor. Use these tips to make Zesty Zucchini Chickpea Patties that everyone will love. For the full recipe, be sure to check out the complete instructions. {{image_2}} You can easily change the taste of your zucchini chickpea patties. Adding spices or herbs gives them a fresh twist. Try adding a pinch of cayenne for heat or fresh basil for a sweet flavor. You can also mix in Italian seasoning or herbs de Provence for a fragrant touch. If you need a gluten-free option, use almond flour or crushed oats instead of breadcrumbs. These alternatives work great and keep the patties firm. They taste just as good and add a nutty flavor. For extra creaminess, consider using vegan cheese substitutes. Nutritional yeast adds a cheesy flavor without dairy. You can also try vegan cream cheese for a richer taste. These small changes can make your patties unique and delicious. Explore these variations to find your favorite. Each option adds its own charm to the dish. For the full recipe, check out the complete instructions above. To keep your zucchini chickpea patties fresh, refrigerate them within two hours of cooking. Place them in an airtight container. They will stay good for up to three days in the fridge. If you want to store them for a longer time, freezing is the way to go. First, let the patties cool completely. Then, layer them between parchment paper in a freezer-safe bag. They can last for up to three months in the freezer. When you are ready to eat them again, reheating is simple. For the best texture, heat a skillet over medium heat. Add a little olive oil and place the patties in the pan. Cook them for about 4-5 minutes on each side until they are warm and crispy again. You can also use an oven. Preheat it to 375°F (190°C) and bake for about 10-15 minutes. This method helps keep the outside nice and crunchy. With these storage tips, your zucchini chickpea patties will stay tasty and ready for your next meal! Can I make these patties ahead of time? Yes, you can make these patties ahead of time. Form the patties and store them in the fridge for up to 24 hours. This saves time when you're ready to cook. You can also freeze them. Just make sure to place parchment paper between each patty before freezing. This way, they won't stick together. What can I substitute for chickpeas? If you don’t have chickpeas, you can use black beans or white beans. Mash them the same way you do with chickpeas. Each option brings a different flavor and texture, but all work well in this recipe. How do I know when they are cooked? You can tell the patties are cooked when they turn golden brown on the outside. They should feel firm to the touch. If they are crispy and browned on both sides, they are ready to enjoy! Can I bake these instead of frying? Yes, you can bake these patties for a healthier option. Preheat your oven to 400°F (200°C). Place the patties on a baking sheet lined with parchment paper. Bake for about 20-25 minutes, flipping halfway through. They will be less crispy but still tasty. This way, you can enjoy Zucchini Chickpea Patties with less oil. For the full recipe, check the earlier section! In this blog post, we explored how to make delicious zucchini chickpea patties. You learned the key ingredients, step-by-step instructions, and helpful tips. I shared flavor variations, storage methods, and answers to common questions. These patties are simple to prepare and very tasty. Mix and match ingredients to suit your taste. Enjoy these healthy treats anytime!

Zucchini Chickpea Patties Simple and Flavorful Meal

Looking for a quick and tasty meal that bursts with flavor? Zucchini Chickpea Patties are the answer! These simple patties

To make a peach blueberry cobbler, you'll need some simple, fresh ingredients. Here’s what to gather: - 4 ripe peaches, peeled and sliced - 2 cups fresh blueberries - 1/2 cup granulated sugar - 1 teaspoon cinnamon - 1 teaspoon vanilla extract - 1 tablespoon lemon juice - 1 cup all-purpose flour - 1/2 cup brown sugar - 1 tablespoon baking powder - 1/2 teaspoon salt - 1/2 cup unsalted butter, melted - 1 cup milk These main ingredients create a sweet and fruity base for your cobbler. The peaches bring a juicy sweetness, while the blueberries add a burst of tart flavor. Want to make your cobbler extra special? Consider adding these optional ingredients: - 1/4 teaspoon nutmeg for warmth - 1 tablespoon of cornstarch to thicken the fruit - A splash of almond extract for a nutty twist - Fresh mint leaves for garnish These additions can deepen the flavors and make your dish stand out. Feel free to experiment with what you have on hand. If you don't have something on hand, you can easily swap ingredients. Here are some ideas: - Use frozen peaches or blueberries for convenience - Substitute coconut milk for regular milk for a dairy-free option - If you're out of granulated sugar, brown sugar works well too - Use whole wheat flour instead of all-purpose flour for added nutrition With these flexible options, you can create a delicious cobbler that fits your pantry and taste. For the full recipe, check the earlier section. Start by washing your peaches and blueberries. Peel the peaches, then slice them into thin pieces. In a big bowl, mix the sliced peaches with 2 cups of fresh blueberries. Add 1/2 cup of granulated sugar, 1 teaspoon of cinnamon, 1 teaspoon of vanilla extract, and 1 tablespoon of lemon juice. Toss the fruit gently until it is well coated. This step brings out the fruit's sweet flavors. Once mixed, transfer it into a greased 9x13 inch baking dish. In a separate bowl, whisk together 1 cup of all-purpose flour, 1/2 cup of brown sugar, 1 tablespoon of baking powder, and 1/2 teaspoon of salt. Pour in 1/2 cup of melted unsalted butter and 1 cup of milk. Stir until just combined. Don’t worry if it looks lumpy; this is normal! You want a batter that is thick but still spreadable. Spoon the cobbler batter evenly over the fruit mixture in your baking dish. Now, it’s time to bake your cobbler! Preheat your oven to 375°F (190°C). Place your cobbler in the oven and bake for 30-35 minutes. Keep an eye on it. You want the top to turn golden brown and the fruit to bubble around the edges. Once it looks perfect, remove it from the oven. Let it cool for about 10 minutes before serving. For a delightful touch, serve it warm with a scoop of vanilla ice cream or whipped cream on top. Enjoy! To get the best texture, use ripe peaches. They should feel soft yet firm. Fresh blueberries add a juicy burst. The batter should be thick but not dry. Spoon it gently over the fruit. This keeps the fruit from sinking. Bake until the top is golden brown and the fruit bubbles. You can add a pinch of nutmeg with the cinnamon. This gives a warm taste. Fresh mint leaves are great for a fresh kick. Try using almond extract instead of vanilla for a twist. You can also mix in a bit of orange zest for added brightness. One mistake is using overly ripe fruit. It can turn mushy in the oven. Another is overmixing the batter. This can make the cobbler dense. Make sure your oven is preheated. A cold oven can lead to uneven baking. Lastly, don’t rush the cooling time. It helps the cobbler set properly and makes serving easier. {{image_2}} To make a gluten-free version, swap the all-purpose flour with a gluten-free blend. Look for a blend that has xanthan gum. This gum helps with texture and binding. Use the same amount of gluten-free flour as the recipe calls for. The rest of the ingredients stay the same. You will still enjoy that sweet, fruity goodness. To make this cobbler vegan, replace the milk with almond milk or oat milk. For the butter, use coconut oil or a vegan butter substitute. Simply melt it like you would with regular butter. The rest of the recipe remains unchanged. You will still get a delightful taste and texture without any animal products. Want to switch things up? Try other fruits for a fun twist. Apples and raspberries work great together. You can also mix strawberries and peaches for a summer delight. Cherries add a nice tartness that pairs well with blueberries. Mix and match to find your favorite combo. Each fruit brings its own flavor profile, making each cobbler unique. To store leftover cobbler, let it cool first. Place it in an airtight container. You can keep it in the fridge for up to three days. This helps maintain its texture and flavor. Cover the top with plastic wrap to prevent drying out. If you want to freeze your cobbler, wait until it cools completely. Cut it into slices for easier thawing. Wrap each slice tightly in plastic wrap. Then, place the wrapped slices in a freezer-safe bag or container. You can freeze it for up to three months. Make sure to label the bag with the date. To reheat your cobbler, preheat the oven to 350°F (175°C). Place the cobbler in an oven-safe dish. Cover it with foil to keep it moist. Heat it for about 20 minutes. For individual slices, microwave them for about 30-45 seconds. Enjoy your delicious cobbler warm, just like when it was fresh! For the full recipe, check the section above. Yes, you can use frozen fruit. Just make sure to thaw and drain them first. This helps avoid extra water in your cobbler. Frozen peaches and blueberries work well, too. Your cobbler is done when it is golden brown on top. The fruit should bubble around the edges. A toothpick inserted in the batter should come out clean, showing it has cooked through. I love serving my cobbler warm with a scoop of vanilla ice cream. Whipped cream is another great choice. Fresh mint leaves add a nice touch too! Yes, you can prepare the fruit and batter ahead of time. Just store them separately in the fridge. When ready to bake, combine them in the baking dish and follow the baking instructions. For the complete recipe, check out the Full Recipe section. You’ll find all the steps and ingredients needed for this yummy dish. Peach blueberry cobbler is delicious and easy to make. We explored key ingredients, prep steps, and helpful tips. We also looked at tasty variations, storage tips, and answers to common questions. Remember, you can use fresh or frozen fruit depending on what you have. With practice, you’ll avoid common mistakes and nail the perfect texture. This recipe lets you enjoy fresh flavors any time. Happy baking, and enjoy your cobbler with friends and family!

Peach Blueberry Cobbler Simple and Delicious Recipe

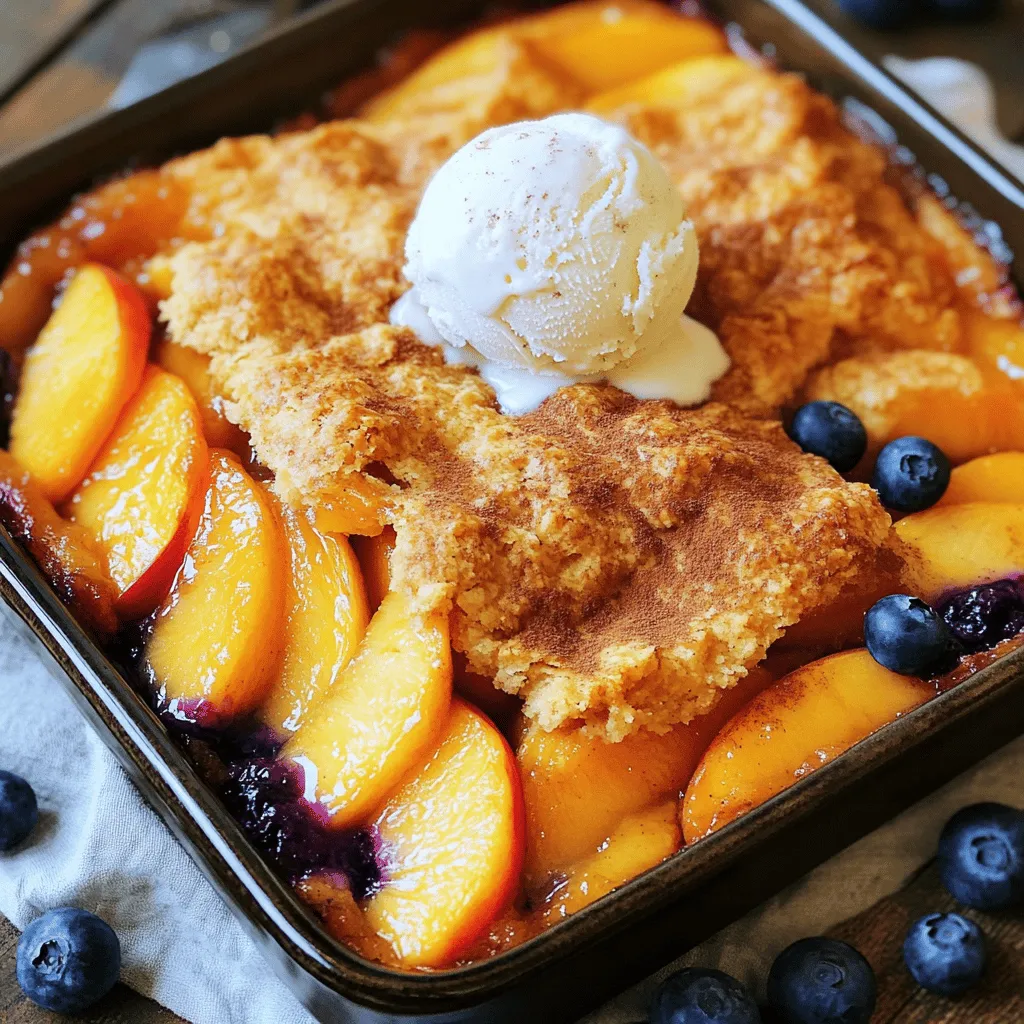
Craving a warm, sweet dessert that’s easy to make? Look no further! My Peach Blueberry Cobbler recipe combines juicy peaches

To make delicious zucchini oat muffins, gather these key ingredients: - 1 medium zucchini, grated - 1 cup rolled oats - 1 cup whole wheat flour - 1/2 cup brown sugar (or coconut sugar for a healthier option) - 1/2 cup unsweetened applesauce - 1/3 cup honey or maple syrup - 1/4 cup vegetable oil or melted coconut oil - 1 large egg - 1 teaspoon vanilla extract - 1 teaspoon baking powder - 1/2 teaspoon baking soda - 1/2 teaspoon cinnamon - 1/4 teaspoon salt - Optional: 1/2 cup chocolate chips or nuts for added texture Each ingredient in these muffins offers unique health benefits: - Zucchini: Low in calories and high in fiber, zucchini helps keep you full. - Rolled oats: Rich in whole grains, oats support heart health and digestion. - Whole wheat flour: This flour adds fiber and nutrients compared to white flour. - Brown sugar: A natural sweetener that adds a hint of molasses flavor. - Unsweetened applesauce: It reduces fat and sugar while adding moisture. - Honey or maple syrup: Natural sweeteners that provide antioxidants. - Vegetable oil or coconut oil: These healthy fats support heart health. - Egg: Adds protein and helps with structure in baking. - Vanilla extract: Enhances flavor and may boost mood. - Baking powder and baking soda: These leavening agents help muffins rise. - Cinnamon: A spice that adds warmth and may lower blood sugar levels. - Salt: Balances flavors and enhances sweetness in baked goods. - Chocolate chips or nuts: Optional ingredients that add taste and texture. Don’t worry if you lack certain ingredients! Here are some easy swaps: - Zucchini: Substitute with carrot or apple for different flavors. - Whole wheat flour: Use almond flour or oat flour for a gluten-free option. - Brown sugar: Replace with coconut sugar or maple syrup for a lighter choice. - Applesauce: Use mashed banana if you prefer a different fruit flavor. - Egg: Use a flax egg or applesauce for a vegan version. - Vegetable oil: Swap with olive oil or melted butter for taste. - Chocolate chips: Try dried fruit or seeds for a healthier touch. These muffins are flexible, so mix and match to fit your taste! For the full recipe, check out the instructions above. Start by preheating your oven to 350°F (175°C). This helps the muffins bake evenly. Next, grab a medium zucchini and grate it using a box grater. If your zucchini has a lot of water, squeeze it in a clean towel to remove excess moisture. This keeps your muffins from being too soggy. In a large bowl, mix the dry ingredients. Combine 1 cup of rolled oats, 1 cup of whole wheat flour, and 1/2 cup of brown sugar. Add 1 teaspoon of baking powder, 1/2 teaspoon of baking soda, 1/2 teaspoon of cinnamon, and 1/4 teaspoon of salt. Stir well to blend all the dry ingredients together. In a separate bowl, whisk together the wet ingredients. You will need 1/2 cup of unsweetened applesauce, 1/3 cup of honey or maple syrup, and 1/4 cup of vegetable oil. Add 1 large egg and 1 teaspoon of vanilla extract. Mix until smooth and creamy. Pour the wet ingredients into the bowl with dry ingredients. Add the grated zucchini and optional mix-ins like chocolate chips or nuts. Stir gently until just combined; a few lumps are fine. Next, divide the batter evenly among your muffin cups, filling each about 2/3 full. Bake in the preheated oven for 18-20 minutes. To check if they’re done, insert a toothpick in the center. If it comes out clean, they’re ready! Let the muffins cool in the tin for 5 minutes before transferring them to a wire rack to cool completely. Enjoy your tasty and healthy zucchini oat muffins! For the full recipe, check out the recipe section above. To get the best texture, make sure to squeeze out excess moisture from the zucchini. This keeps the muffins light and fluffy. If you leave too much water in, the muffins can turn out dense and soggy. Mix the wet and dry ingredients just until combined. Overmixing can lead to tough muffins. A few lumps are okay; they will bake out. Once your muffins cool, store them in an airtight container. They stay fresh for up to three days at room temperature. If you want to keep them longer, freeze them. Place them in a freezer-safe bag and store for up to three months. To enjoy, just thaw them at room temperature or warm them in the microwave for a few seconds. If your muffins sink in the middle, you might have added too much liquid. Check your measurements carefully next time. If they come out dry, try using a little more applesauce or oil. If the tops burn before the center is cooked, lower your oven temperature and bake a bit longer. Always test with a toothpick to check if they are done. {{image_2}} You can spice up your zucchini oat muffins with simple additions. Try adding a pinch of nutmeg for warmth. A splash of almond extract can enhance the flavor. Use ground ginger for a little zing. These spices bring different flavors and aromas. Experimenting with these can make each batch unique. Adding nuts and seeds can improve the texture and nutrition. Chopped walnuts or pecans give a nice crunch. Sunflower seeds or pumpkin seeds add healthy fats and protein. You can also mix in shredded coconut for a tropical twist. These add-ins make your muffins more filling and fun. To make these muffins vegan, swap the egg for flaxseed meal. Use 1 tablespoon of flaxseed mixed with 2.5 tablespoons of water. For gluten-free muffins, replace the whole wheat flour with almond or gluten-free flour. You can also use oat flour for a consistent flavor. These changes keep muffins tasty while meeting different diets. Feel free to check the Full Recipe for more ideas! To keep your zucchini oat muffins fresh, store them in an airtight container. This will help prevent them from drying out. Place a piece of parchment paper between layers if you stack them. Muffins taste best within three days. For longer freshness, consider refrigerating them. Just remember to let them cool completely before storing. Freezing is a smart way to preserve your muffins. Wrap each muffin in plastic wrap or foil. Then, place them in a freezer-safe bag. This method helps keep them fresh for up to three months. When you’re ready to enjoy, take out the desired number and thaw them at room temperature or in the fridge overnight. Reheating your zucchini oat muffins is simple. You can use a microwave for quick heating. Just heat each muffin for 15-20 seconds. If you prefer a crusty exterior, use your oven. Preheat the oven to 350°F (175°C) and heat for about 5-10 minutes. This will restore warmth and texture, making them taste freshly baked again. For more details, you can check the Full Recipe. Yes, you can! Whole wheat flour works great. You could also try almond flour or oat flour. Each flour gives the muffins a unique taste and texture. Experimenting with different flours can lead to fun results. Just keep in mind that some flours might change the moisture level. You may need to adjust the liquid in the recipe to balance it out. To make sugar-free muffins, you can use ripe bananas or applesauce. Both add natural sweetness. You can also use stevia or monk fruit sweetener. These options are great for cutting sugar while keeping the flavor. Just remember, using natural sweeteners can change the moisture level. Adjust the liquid in the recipe if needed. You can add carrots, sweet potatoes, or even spinach! Carrots give a nice sweetness. Sweet potatoes add creaminess and flavor. Spinach adds nutrients without changing the taste much. Just make sure to grate or puree the veggies to keep the texture smooth. This way, your muffins stay soft and fluffy. You can find the full recipe [here](#). You learned how to make tasty zucchini oat muffins with healthy ingredients. Each step, from mixing to baking, is simple. I shared tips for texture and storage, plus fun variations to try. Feel free to swap ingredients or make these muffins fit your diet. Now, you can enjoy a wholesome treat that’s easy and fun to make. Try it out, and enjoy your muffins fresh or stored for later!

Zucchini Oat Muffins Tasty and Healthy Snack Idea

Looking for a tasty and healthy snack? Zucchini oat muffins are your answer! Packed with nutrients, these muffins combine the

To make these triple berry muffins, you will need the following ingredients: - 1 cup all-purpose flour - 1/2 cup rolled oats - 1/2 cup granulated sugar - 1 tablespoon baking powder - 1/2 teaspoon salt - 1/2 teaspoon cinnamon - 1/2 cup milk (or almond milk) - 1/4 cup vegetable oil - 1 large egg - 1 teaspoon vanilla extract - 1/2 cup fresh blueberries - 1/2 cup fresh raspberries - 1/2 cup chopped strawberries - Optional: Turbinado sugar for topping I love using fresh berries for the best flavor. Choose ripe blueberries, raspberries, and strawberries. You can mix and match, but this trio works wonders together. If fresh berries are hard to find, frozen berries can work too. Just make sure to thaw them and drain any excess liquid before adding them to your batter. To add a little extra crunch and sweetness, consider using turbinado sugar on top. It creates a nice, crispy layer that contrasts beautifully with the soft muffin. You could also sprinkle some cinnamon or top with a dollop of whipped cream for fun. This will definitely make your muffins stand out! For the full recipe, check out the details above. 1. Preheating the Oven and Preparing the Muffin Tin Preheat your oven to 375°F (190°C). This step is key for even baking. Line a muffin tin with paper liners or grease it well with oil. This will help your muffins come out easily. 2. Mixing Dry Ingredients In a large bowl, add the following dry ingredients: - 1 cup all-purpose flour - 1/2 cup rolled oats - 1/2 cup granulated sugar - 1 tablespoon baking powder - 1/2 teaspoon salt - 1/2 teaspoon cinnamon Whisk them together until they are evenly mixed. This mix gives flavor and texture. 3. Combining Wet Ingredients In a separate bowl, whisk together: - 1/2 cup milk (or almond milk) - 1/4 cup vegetable oil - 1 large egg - 1 teaspoon vanilla extract Mix these well until they are blended. This mixture adds moisture to the muffins. 4. Folding in the Berries Pour the wet mixture into the dry ingredients. Stir gently until just combined. Be careful not to overmix. Then, fold in the berries: - 1/2 cup fresh blueberries - 1/2 cup fresh raspberries - 1/2 cup chopped strawberries This step adds bursts of flavor and color to the muffins. 5. Filling Muffin Cups Spoon the batter into the prepared muffin tin. Fill each cup about two-thirds full. If you want, sprinkle a little turbinado sugar on top for extra crunch. This topping gives a nice texture. - Recommended Baking Temperature Bake the muffins at 375°F (190°C). This temperature helps them rise perfectly. - Baking Time Guide Bake for 18-22 minutes. The muffins should be golden brown when done. - Checking for Doneness To check, insert a toothpick into the center of a muffin. If it comes out clean, your muffins are ready! This is a great way to ensure they are baked through. Follow these steps for a delightful treat. For the complete recipe, check out the Full Recipe section. Enjoy your baking! - How to Prevent Overmixing Overmixing can make muffins tough. Mix your wet and dry ingredients until they just combine. A few lumps are okay! This keeps your muffins light and fluffy. - Tips for Fluffier Muffins To make your muffins fluffier, use room temperature ingredients. Cold eggs or milk can slow down the rise. Also, don’t skip the baking powder. It helps your muffins rise nicely. - Using Frozen Berries Frozen berries work well too! Just make sure not to thaw them first. You want to add them straight to the batter. This prevents the color from bleeding into the mix. - Ideas for Serving Serve your muffins warm on a rustic wooden board. You can also place them in a basket lined with a colorful napkin. This makes them look inviting and fun! - How to Garnish for Aesthetic Appeal Add a few fresh berries on the side for a pop of color. You can sprinkle some powdered sugar on top, too. This little touch makes your muffins look like a treat from a bakery! {{image_2}} You can use different berries to change the flavor of your muffins. Each berry brings its own taste. For example, blackberries add a tangy twist, while strawberries give a sweet touch. You can mix any berries you like. The key is to keep the total amount the same: 1.5 cups of berries. Using seasonal berries is a fun idea. In summer, choose fresh blueberries, raspberries, or strawberries. Fall brings cranberries, which can add a tart flavor. Winter offers frozen berries, which work great, too! Just remember to thaw them first and drain any extra liquid. If you need to make gluten-free muffins, swap the all-purpose flour for a gluten-free blend. Many blends work well in muffins. Just ensure it has a good amount of starch for fluffiness. For vegan muffins, replace the egg with a flax egg. To make a flax egg, mix one tablespoon of ground flaxseed with three tablespoons of water. Let it sit for five minutes until it thickens. You can also use almond milk instead of regular milk, keeping the recipe dairy-free. These adjustments help everyone enjoy this tasty treat! For the full recipe, check out the full recipe section. To keep your muffins fresh, store them in an airtight container. This will help keep moisture in and prevent them from drying out. If you do not have an airtight container, you can use plastic wrap. Just make sure to cover them well. Place the muffins at room temperature away from direct sunlight. They will taste best this way. Recommended Storage Duration You can store your muffins at room temperature for up to three days. If you want to keep them longer, consider freezing them. This will help maintain their taste and texture for a few months. To freeze muffins, let them cool completely first. Wrap each muffin in plastic wrap, then place them in a freezer bag. This extra layer protects them from freezer burn. Make sure to squeeze out any air before sealing the bag. Thawing Instructions When you are ready to enjoy your muffins, take one out of the freezer. Remove the plastic wrap and place it on a plate. You can thaw it at room temperature for about an hour. If you want it warm, pop it in the microwave for about 10-15 seconds. Enjoy them fresh, just like when you baked them! For the full recipe, check out the earlier sections. Can I use frozen berries in my muffins? Yes, you can use frozen berries. They add great flavor and work well. Just remember to toss them in a bit of flour. This helps to prevent them from sinking in the batter. How do I know when my muffins are done baking? To check if your muffins are ready, insert a toothpick into the center. If it comes out clean, they are done. The tops should be golden brown and spring back when lightly pressed. Can I make the batter ahead of time? You can make the batter ahead of time. Just cover it and chill in the fridge for up to 2 hours. When you're ready, just fill the muffin cups and bake as usual. What can I serve with triple berry muffins? These muffins pair well with many treats. Try serving them with butter, cream cheese, or even a dollop of yogurt. Fresh fruit or a drizzle of honey can also add a nice touch. How do I adjust the recipe for a different serving size? Adjusting the recipe is simple. Just multiply each ingredient by the number of servings you want. For example, if you want 24 muffins, double each ingredient. Keep an eye on baking time, as larger batches may need a few extra minutes. For the full recipe, check out the earlier section. You learned how to make delicious triple berry muffins. We covered the key ingredients, like fresh berries and optional toppings. The step-by-step instructions help you prepare and bake these treats easily. I shared tips to avoid overmixing and ideas for serving. These muffins can be fun to customize with different berries or dietary needs. Proper storage keeps them fresh longer, and freezing offers more options. Enjoy your baking, and feel free to experiment with flavors and variations!

Triple Berry Muffins Delightfully Easy Recipe

Looking for a sweet treat that’s simple and delicious? You’ll love these Triple Berry Muffins! They burst with fresh fruit

- 2 pounds baby potatoes, halved - 3 tablespoons olive oil - 2 tablespoons fresh lemon juice - Zest of 1 lemon - 1 teaspoon garlic powder - 1 teaspoon onion powder - 1 teaspoon dried oregano - 1 teaspoon dried thyme - Salt and pepper to taste - Fresh parsley, chopped for garnish Using baby potatoes makes this dish easy to prepare. Their small size means they cook quickly. Halve the potatoes for even cooking and better flavor absorption. Measure out the olive oil and lemon juice for the best taste. Fresh lemon juice adds zest, while the zest enhances the aroma. Keep your garlic and onion powders handy; they add depth to the dish. Use dried oregano and thyme to round out the flavors. Don’t forget to add salt and pepper to taste; they are essential for a balanced dish. You can change the flavor profile with some easy swaps. Consider adding fresh herbs like rosemary or basil for a new twist. If you want a kick, try adding a pinch of red pepper flakes. For a smoky flavor, include smoked paprika. You can also mix in some grated Parmesan cheese before roasting for richness. This recipe is flexible, so feel free to experiment! For the full recipe, check out the details above. To start, turn your oven to 400°F (200°C). Preheating is key for crispy potatoes. It helps them cook evenly and develop that nice golden color. Next, get 2 pounds of baby potatoes. Cut them in half and place them in a large mixing bowl. Add 3 tablespoons of olive oil, 2 tablespoons of fresh lemon juice, and the zest of one lemon. Sprinkle in 1 teaspoon each of garlic powder, onion powder, dried oregano, and dried thyme. Don’t forget salt and pepper to taste! Toss everything together. Make sure each potato is coated well. This mix gives your potatoes great flavor. Now, take a baking sheet and line it with parchment paper. Spread the coated potatoes in a single layer. Place them in the oven and roast for 30 to 35 minutes. Halfway through, toss the potatoes for even cooking. They should come out golden and crispy. Once done, let them cool for a couple of minutes. Finish by garnishing with fresh chopped parsley. Enjoy this simple and tasty side! You can find the full recipe for more details. To get crispy potatoes, you must follow a few simple steps. First, cut the baby potatoes into halves. Smaller pieces will crisp up better. After mixing them with oil and spices, spread them out on the baking sheet. Make sure they don’t touch. This allows warm air to circulate and crisp them up. Halfway through baking, toss the potatoes. This helps them brown evenly. Seasoning is key to tasty potatoes. Use fresh lemon juice and zest for a bright flavor. I love adding garlic and onion powder for depth. Dried oregano and thyme bring in an earthy taste. Don't forget salt and pepper! Use these to your liking. You can adjust them based on your taste. Always mix well so every piece is coated. You don’t need fancy tools for this recipe. A large mixing bowl works for mixing. A baking sheet lined with parchment paper helps with easy cleanup. Use a spatula for tossing the potatoes. An oven thermometer can help check the temperature. This ensures your oven is at the right heat. For the full recipe, check out the detailed steps above. {{image_2}} You can switch up the herbs for more flavor. Try using fresh rosemary or dill. Both add a nice twist. You can also mix in fresh basil for a sweet touch. If you want a kick, use fresh cilantro. Each herb brings its unique taste, making the dish fun and exciting. Lemon is great, but other citrus fruits work too. You can use lime for a zesty flavor. Grapefruit juice adds a bold twist. Orange juice gives a sweeter taste that pairs well with the potatoes. Experiment with different citrus to find your favorite! Consider adding extra veggies for more color and nutrients. Bell peppers or red onions roast nicely with potatoes. For a crunchy topping, sprinkle some breadcrumbs or nuts before baking. You can also add grated cheese right after roasting for a melty finish. Let your creativity shine with these fun options. For the complete recipe, check out the Full Recipe. After enjoying your Lemon Herb Roasted Potatoes, let them cool to room temperature. Place the cooled potatoes in an airtight container. This helps keep them fresh and tasty. Store them in the fridge for up to three days. If you want, you can add a piece of parchment paper to keep moisture away. To reheat the potatoes, you can use the oven or microwave. For the oven, preheat it to 350°F (175°C). Spread the potatoes on a baking sheet. Heat for about 15 minutes, until they are hot and crispy. If you use a microwave, place them on a microwave-safe plate. Heat for 1-2 minutes, checking to avoid overheating. You want them warm, not dry. You can freeze these roasted potatoes if you have leftovers. After cooling, place them in a freezer-safe bag. Remove as much air as possible before sealing. The potatoes can stay fresh for up to three months in the freezer. When ready to eat, thaw them overnight in the fridge. Reheat them in the oven for the best texture. For detailed cooking steps, check the Full Recipe. Yes, you can use different types of potatoes. Yukon Gold, red potatoes, or even sweet potatoes work well. Each type brings its own taste and texture. Yukon Gold gives a creamy feel, while red potatoes are waxy and hold their shape. Sweet potatoes add a unique sweetness. Just cut them to a similar size for even cooking. These potatoes pair well with many dishes. You can serve them with grilled chicken, steak, or fish. They also go great with salads or roasted veggies. For a complete meal, try them with a fresh green salad and a tangy dressing. They are a versatile side that fits many meals. Leftovers can last about 3 to 4 days in the fridge. Store them in an airtight container to keep them fresh. When you want to eat them again, just reheat in the oven or microwave. They may lose some crispness, but they will still taste great. For the best flavor, enjoy them within a few days. You can find the full recipe at the beginning of this article. This post covered every step for making delicious Lemon Herb Roasted Potatoes. We explored key ingredients, precise measurements, and variations for taste. I shared tips for achieving crispy potatoes and the best ways to store leftovers. Use these insights to enjoy your cooking and impress your friends. Feel free to experiment with herbs and spices that you love. Happy cooking!

Lemon Herb Roasted Potatoes Simple and Tasty Side

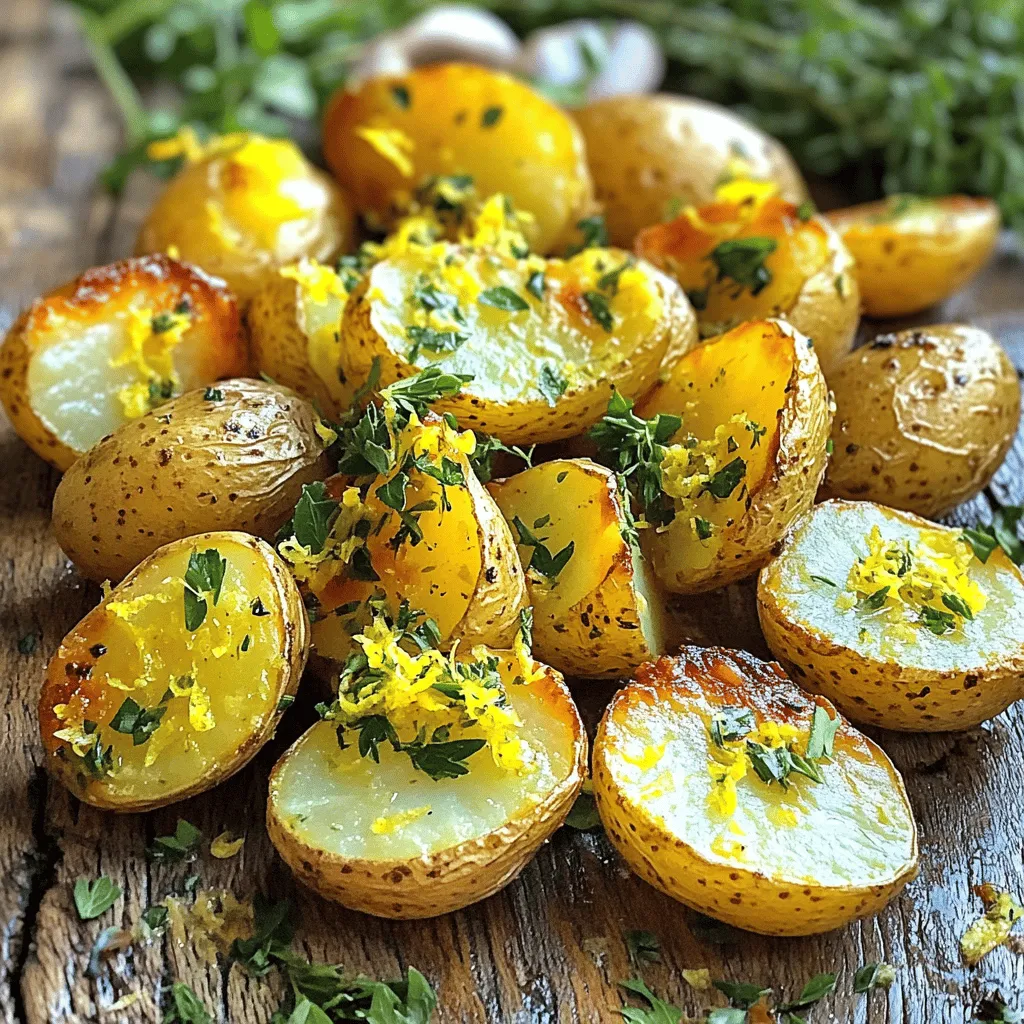
Are you ready to elevate your mealtime with a side dish that bursts with flavor? In this post, I’ll show

Older posts
Newer posts
← Previous Page1 … Page20 Page21 Page22 … Page65 Next →

dsad

© 2025 Cooking Wells • Built with GeneratePress

Our Policies

  • Copyright Policy
  • Cookie Policy
  • GDPR Policy
  • Privacy Policy
  • Disclaimer
  • Terms Of Use

More Information

  • Home
  • About
  • Contact
  • Appetizers
  • Dessert
  • Dinner
  • Drinks
©2025, Cooking Wells About Back To Top