Skip to content
DisclaimerTerms Of UseGDPR PolicyCookie Policy

Cooking Wells

  • Home
  • Drinks
  • Appetizers
  • Dinner
  • Dessert
  • About
  • Contact
  • Privacy Policy
DisclaimerTerms Of UseGDPR PolicyCookie Policy

Mia

For the best One Pot Taco Pasta, gather these simple ingredients: - 12 oz penne pasta (or pasta of choice) - 1 lb ground beef or turkey - 1 packet taco seasoning (or homemade mix) - 1 can (15 oz) black beans, rinsed and drained - 1 can (14.5 oz) diced tomatoes with green chilies - 2 cups chicken or vegetable broth - 1 cup frozen corn - 1 bell pepper, diced (any color) - 1 medium onion, diced - 2 cloves garlic, minced - 1 cup shredded cheddar cheese - 2 tablespoons olive oil - Salt and pepper to taste - Fresh cilantro, chopped (for garnish) If you lack some items, don't worry! Here are easy swaps: - Use any pasta shape you like, such as rotini or macaroni. - Swap ground beef or turkey for ground chicken or plant-based meat. - You can replace black beans with pinto beans or chickpeas. - Try fresh tomatoes instead of canned, if you prefer. - Use vegetable broth if you want a vegetarian dish. - For a cheese alternative, use dairy-free shredded cheese. Toppings make your dish shine! Here are my favorites: - Sliced jalapeños for heat - Avocado slices for creaminess - Sour cream for a cool touch - Chopped green onions for freshness - Extra shredded cheese for melty goodness - Lime wedges for a bright kick These ingredients and swaps help you customize your One Pot Taco Pasta. Cooking is about your taste, so feel free to explore! For the full recipe, check the complete instructions above. Making One Pot Taco Pasta is quick and fun. You start by cooking the meat and veggies together. Then, you add the pasta and other ingredients. Finally, everything cooks in one pot. It’s easy, and clean-up is a breeze! 1. Heat the Olive Oil: In a large pot, heat 2 tablespoons of olive oil over medium heat. 2. Sauté the Veggies: Add 1 medium diced onion and 1 diced bell pepper. Cook for about 3-4 minutes until they’re soft. 3. Add Garlic: Stir in 2 minced garlic cloves for 1 minute. Be careful not to burn the garlic. 4. Cook the Meat: Add 1 pound of ground beef or turkey. Break it up with a spatula. Cook for 5-7 minutes until it’s brown. 5. Season the Meat: Sprinkle 1 packet of taco seasoning over the meat. Mix it well. 6. Combine Ingredients: Pour in 1 can of diced tomatoes, 1 can of black beans, 1 cup of frozen corn, and 2 cups of broth. Stir everything together. 7. Add the Pasta: Add 12 ounces of uncooked penne pasta. Make sure it’s underwater in the liquid. Bring the pot to a boil. 8. Simmer: Once boiling, lower the heat. Cover the pot and simmer for 12-15 minutes. Stir often until the pasta is al dente. 9. Add Cheese: Remove the pot from heat. Stir in 1 cup of shredded cheddar cheese until it melts. 10. Taste and Serve: Season with salt and pepper. Serve hot and top with fresh cilantro. - Use Enough Liquid: Make sure there is enough broth for the pasta to cook well. - Don’t Overcook the Pasta: Keep an eye on the time and stir to avoid sticking. - Test for Doneness: Taste the pasta a minute before the cooking time ends. It should be firm but not hard. For the full recipe, check the detailed steps above. Enjoy the process and the tasty results! When making One Pot Taco Pasta, avoid these common mistakes: - Not cooking the meat fully: Always cook your meat until it turns brown. This adds rich flavor. - Skipping the seasoning: Don't forget to add taco seasoning. It brings all the flavors together. - Overcooking pasta: Stir the pasta often. Check it at the 12-minute mark to keep it al dente. To boost the taste of your One Pot Taco Pasta, try these tips: - Use homemade taco seasoning: This gives a fresher, bolder flavor compared to store-bought options. - Add lime juice: Squeeze fresh lime juice just before serving. It brightens the dish. - Mix in fresh herbs: Cilantro or green onions add freshness and a pop of color. Here are the tools that make cooking easier: - Large pot or Dutch oven: This helps cook everything evenly and holds all the ingredients. - Wooden spoon or spatula: Use this to mix ingredients without scratching your pot. - Measuring cups and spoons: Accurate measurements keep the flavors balanced. These tips will help you create a delicious One Pot Taco Pasta every time. For the full recipe, check out the details above. Enjoy your cooking! {{image_2}} You can easily switch this dish to a vegetarian or vegan option. For a vegetarian taco pasta, replace the meat with extra black beans or lentils. This change adds protein and keeps it hearty. Use vegetable broth instead of chicken broth to keep it vegan. For a vegan cheese option, try nutritional yeast or a plant-based cheese. These swaps will give you a tasty meal without meat. If you need a gluten-free dish, use gluten-free pasta. Many brands offer great options that taste good. Make sure to check the taco seasoning for gluten. Some store-bought mixes can include gluten. You can also make your own seasoning with cumin, chili powder, garlic powder, and paprika. This way, you control the ingredients and flavors. You can choose different proteins for your taco pasta. Ground turkey or chicken works well if you want leaner meat. For a richer flavor, try ground beef. You can also use plant-based crumbles if you prefer a meatless meal. Each option can change the taste, so feel free to mix and match. Storing your One Pot Taco Pasta is easy. First, let it cool down. Then, place it in an airtight container. This keeps the pasta fresh. You can store it in the fridge for up to three days. Make sure to label the container with the date. This helps you keep track of freshness. To reheat your pasta, use a microwave or a stove. If you use a microwave, place a serving in a bowl. Heat it for 1-2 minutes. Stir halfway through to ensure even heating. If you prefer the stove, add the pasta to a pot. Add a splash of broth or water to prevent sticking. Heat over low heat for about 5 minutes. Stir often until warm. You can also freeze One Pot Taco Pasta. After it cools, transfer it to a freezer-safe container. Leave some space at the top. The pasta will expand as it freezes. This dish can last up to three months in the freezer. When you're ready to eat, thaw it in the fridge overnight. Then, reheat using the methods above. Enjoy your meal anytime! For the full recipe, check out the earlier section. To add heat to One Pot Taco Pasta, you can use spicy taco seasoning. You can also add sliced jalapeños or a dash of hot sauce. Fresh chopped chili peppers are another great choice. Adjust the amount based on your heat preference. For a smoky flavor, try adding chipotle powder. It’s fun to experiment with flavors! Yes, you can use any pasta you like! While I prefer penne, rotini or fusilli work well too. Short shapes hold sauce better. If you want a lighter dish, try whole wheat or gluten-free pasta. Just remember to adjust cooking times as needed. Always check the pasta package for guidance on cooking. One Pot Taco Pasta takes about 30 minutes total. You'll spend about 15 minutes prepping and the same for cooking. This makes it perfect for busy nights. Just keep an eye on the pasta as it cooks. Stir occasionally to prevent sticking. Enjoy this quick and tasty meal! You've learned how to make a tasty One Pot Taco Pasta. We covered the important ingredients, cooking steps, and helpful tips. I shared ideas for variations, including vegetarian and gluten-free options. You now know how to store and reheat leftovers too. Remember, cooking should be fun and easy. Experiment with flavors to make the dish your own. Enjoy your meal!

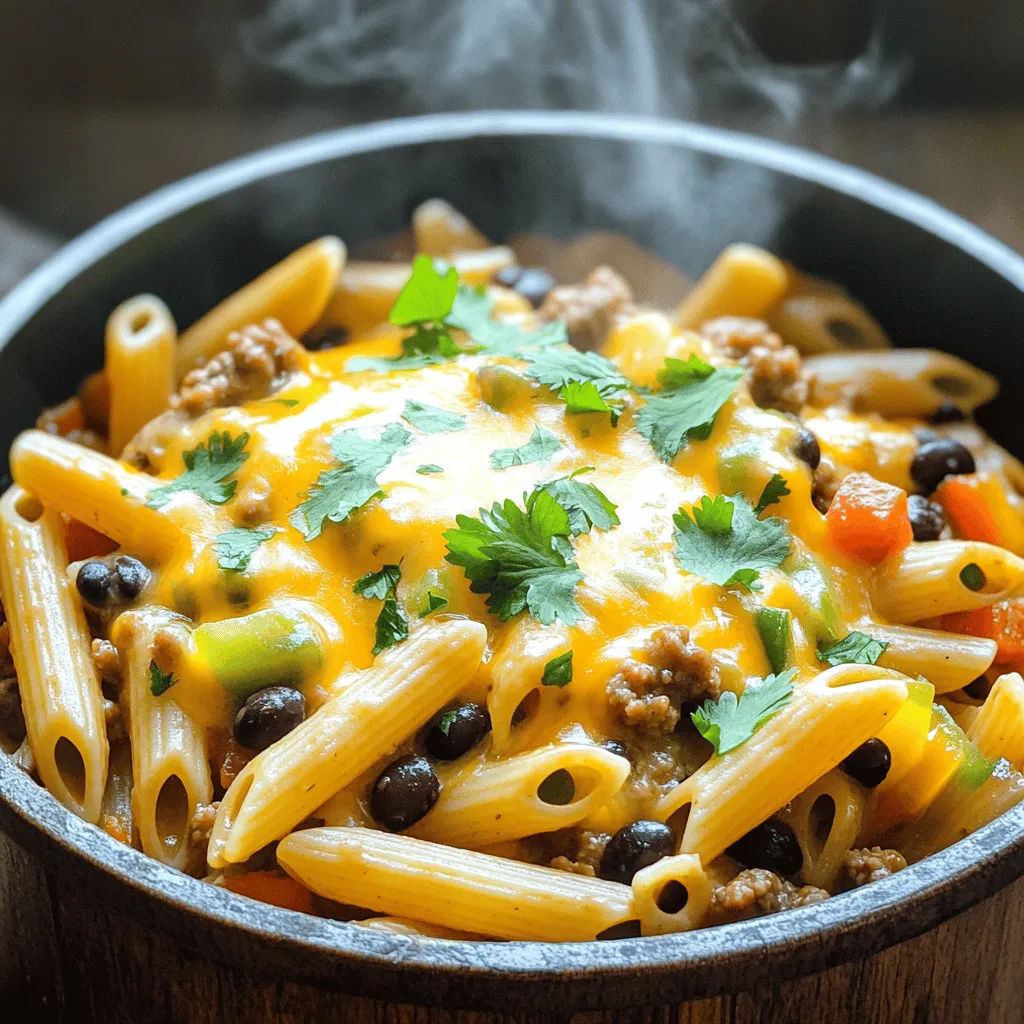
One Pot Taco Pasta Flavorful and Easy Recipe

Craving a tasty meal with minimal cleanup? One Pot Taco Pasta is your answer! This simple, flavorful dish combines all

To make easy teriyaki chicken skewers, you need a few key ingredients. These will help you create a tasty and colorful meal. Here’s what you will need: - Chicken and Marinade Components - 1 lb (450g) boneless, skinless chicken thighs, cut into 1-inch pieces - 1/4 cup soy sauce - 1/4 cup honey - 2 tablespoons rice vinegar - 1 tablespoon sesame oil - 2 cloves garlic, minced - 1 teaspoon fresh ginger, grated - 1 tablespoon cornstarch mixed with 2 tablespoons water (to thicken the sauce) - Vegetables for Skewers - 1 red bell pepper, cut into 1-inch pieces - 1 green bell pepper, cut into 1-inch pieces - 1 small zucchini, sliced into thick rounds - Bamboo or metal skewers (if using bamboo, soak in water for 30 minutes) - Garnish Essentials - Sesame seeds - Chopped green onions These ingredients will bring out great flavors in your skewers. The chicken pairs perfectly with the sweet and salty marinade. The veggies add color and crunch. You can find the full recipe for easy teriyaki chicken skewers further along in this article. Enjoy cooking! Marinating the Chicken Start by making the marinade. In a bowl, whisk together soy sauce, honey, rice vinegar, sesame oil, minced garlic, and grated ginger. This mix gives the chicken a sweet and savory taste. Divide the marinade in half. Place the chicken pieces in one half and marinate for at least 30 minutes. If you have time, let them sit for up to 2 hours. This makes the flavors stronger. Preparing the Skewers While the chicken marinates, prepare your vegetables. Cut the bell peppers and zucchini into 1-inch pieces. Thread the vegetables onto skewers, alternating colors. This adds visual appeal and flavor. If you use bamboo skewers, soak them in water for 30 minutes. This helps prevent burning. Cooking Process After marinating, remove the chicken from the fridge. Thread the chicken onto the other half of the skewers, mixing with the vegetables. Heat your grill or grill pan on medium-high. Lightly oil the grill grates. Grill the skewers for about 5-7 minutes on each side. The chicken should be cooked through and have nice grill marks. In the last few minutes, baste with the thickened teriyaki sauce. Once done, let the skewers rest for a few minutes. Drizzle any remaining sauce over them. Garnish with sesame seeds and chopped green onions for a lovely finish. For the full recipe, check the details above. Enjoy your delicious teriyaki chicken skewers! Timing for Marination Marinate your chicken for at least 30 minutes. This lets the flavors soak in. Longer is better. If you can, let it sit for up to 2 hours. This will really boost the taste. Adjusting Flavor Profiles Feel free to tweak the marinade. Want it sweeter? Add more honey. Prefer a saltier taste? Increase the soy sauce. Experiment until it suits your palate. Alternative Marinade Ingredients You can switch up the marinade ingredients too. Try adding orange juice for a citrus touch. Or use lime juice for a zesty kick. Different oils, like olive oil, can also change the flavor. Optimal Grill Settings Set your grill to medium-high heat. This gives nice grill marks and helps cook the chicken quickly. If it’s too hot, the outside cooks too fast, leaving the inside raw. Tips for Avoiding Sticking Oil your grill grates before cooking. You can use a paper towel dipped in oil on tongs. This will help keep your skewers from sticking. Checking Chicken Doneness Check if the chicken is done by cutting a piece. It should be white inside with no pink. The internal temperature should reach 165°F (75°C). If you have a meat thermometer, use it for best results. These tips will help you make the best teriyaki chicken skewers. For the complete cooking guide, check the Full Recipe. {{image_2}} Other Meat Options You can swap chicken for other meats. Pork or beef works great. Use boneless cuts for best results. Just adjust cooking times. Try marinating them the same way as chicken. You’ll get a tasty twist on the classic dish. Vegetarian Choices If you prefer a meatless meal, use tofu or tempeh. They soak up flavors well. Cut them into bite-sized pieces. You can also try mushrooms or eggplant. These veggies add a nice texture and flavor. Recommended Seasonings Boost the taste with spices. Try adding crushed red pepper for heat. Garlic powder or onion powder can deepen the flavor. A sprinkle of black sesame seeds adds a nutty crunch. Substitute Veggies Don’t limit yourself to bell peppers and zucchini. Use cherry tomatoes or mushrooms for a fun twist. Carrots or asparagus work well too. Just remember, cut them to similar sizes for even cooking. This keeps your skewers colorful and tasty. For the complete recipe, check out the Full Recipe. To keep your teriyaki chicken skewers fresh, follow these easy steps. First, let the skewers cool to room temperature. Next, place them in an airtight container. You can store leftovers in the fridge for up to three days. Make sure to cover them well to prevent moisture loss. If you want to keep them longer, consider freezing. Wrap the skewers tightly in plastic wrap, then place them in a freezer bag. This helps avoid freezer burn. You can freeze them for up to three months. Label your bags with the date for easy tracking. When it's time to enjoy your leftovers, reheating is key. The best way is to use a grill or a stovetop pan. Heat the grill to medium-low and place the skewers on it. Grill for about five minutes, turning occasionally until they are hot. This method keeps the chicken juicy and gives it a nice char. If you're using a pan, add a splash of water to help steam the chicken. Cover the pan with a lid to trap heat. Heat for about five to seven minutes, checking often. Avoid reheating in the microwave if you can. It can make the chicken tough and rubbery. Keeping the texture is important for the best taste experience. How long do I marinate the chicken? You should marinate the chicken for at least 30 minutes. If you have time, let it sit for up to 2 hours. This extra time makes the chicken taste great. Can I use chicken breast instead of thighs? Yes, you can use chicken breast. Chicken thighs add more flavor and juiciness. However, breast works well too. What dipping sauces pair well with teriyaki chicken skewers? Some great options are sweet chili sauce or soy sauce. You can also try a spicy mayo for a kick. How do I know when the skewers are done? The chicken should reach an internal temperature of 165°F. You can also cut a piece to check if it’s no longer pink inside. Can I cook these skewers in the oven? Yes, you can cook them in the oven. Place the skewers on a baking sheet and broil them for about 10-15 minutes, turning halfway. What to serve with teriyaki chicken skewers? Serve the skewers with rice or a fresh salad. You can also add some steamed veggies for a complete meal. Check out the Full Recipe for more ideas! You learned about the key ingredients for tasty teriyaki chicken skewers. We explored marinating techniques, cooking steps, and handy tips. I also shared ways to switch up flavors and store leftovers. This dish is easy and fun to make. You can impress friends and family with your cooking skills. Enjoy experimenting with different proteins and vegetables. Try new marinades and sauces to find your favorites. Cooking can be simple and joyful when you have the right steps!

Easy Teriyaki Chicken Skewers Flavorful and Quick Meal

If you’re looking for a quick, tasty meal, I have just the thing: Easy Teriyaki Chicken Skewers! These flavorful bites

- 1 cup water - 1/2 cup unsalted butter - 2 tablespoons granulated sugar - 1/4 teaspoon salt - 1 cup all-purpose flour - 2 large eggs - 1 teaspoon vanilla extract - Oil for frying - 1/2 cup granulated sugar (for coating) - 2 teaspoons ground cinnamon You need simple ingredients to make these churro bites. The water and butter create a rich dough. Sugar adds a sweet touch, while salt enhances the flavor. Flour gives the dough structure, and eggs add moisture. Vanilla makes everything taste better. You will also need oil for frying and sugar with cinnamon for coating. - Medium saucepan - Wooden spoon - Piping bag with star tip - Deep pot or fryer Using the right tools is key. A medium saucepan helps you boil the mixture. A wooden spoon ensures you mix well without scratching your pan. A piping bag with a star tip shapes the churros nicely. A deep pot or fryer keeps the oil hot for perfect frying. - Chocolate or caramel sauce for dipping - Parchment paper for presentation Adding a sauce for dipping makes these churro bites even better. Chocolate or caramel adds a sweet touch. Using parchment paper for serving looks nice and keeps things clean. You can serve your churro bites in a fun way, too. For the complete process, check the Full Recipe. 1. In a medium saucepan, bring water, butter, sugar, and salt to a boil. 2. Once it boils, add flour and stir until a dough forms. Mixing the dough is fun! The heat helps the butter melt, and the flour combines with the water. This step is key for a smooth churro. 1. Heat oil to 350°F (175°C) in a deep pot or fryer. 2. Pipe the dough into the hot oil, cutting it into small bites. Fry until golden brown, about 2-3 minutes on each side. Watch the churros puff up! This is when they get their lovely shape. The hot oil cooks them quickly. 1. In a shallow bowl, combine sugar and cinnamon for the coating. 2. Roll the warm churro bites in the mixture until fully coated. This sweet coating is what makes churros irresistible. Serve them warm for the best taste. You can find the full recipe to guide you through the whole process. To avoid greasy churros, make sure the oil is hot enough. Heat your oil to 350°F (175°C). If the oil is too cold, the churros will soak up oil and become soggy. Use a deep pot or fryer to hold the heat well. For a smooth dough, mix the flour in quickly after boiling. Stir until you see the dough pull away from the pan. Let the dough cool for five minutes before adding eggs. This helps keep the churros light and fluffy. For a fun presentation, serve churro bites in a small basket lined with parchment paper. This adds a nice touch and keeps them warm. You can also use a cone for a cute look. Pair these bites with chocolate or caramel sauce for dipping. This makes the treat even more enjoyable! One common mistake is overcooking churros. Fry them for 2-3 minutes on each side. Watch closely, so they turn golden brown, not dark brown. Under-cooking is another issue. If they're too pale, they might be doughy inside. Improper dough consistency can also ruin the bites. If the dough is too runny, it won’t hold its shape. Make sure to follow the recipe closely for the right texture. If the dough seems too thick, add a teaspoon of water. This can help smooth things out. For the full recipe, check the detailed instructions provided. {{image_2}} You can mix up the flavors of your churro bites. Here are two tasty ideas: - Chocolate churro bites: Add cocoa powder to the dough. Use about 1/4 cup of cocoa along with the flour. This gives a rich chocolate taste. Roll them in a mix of sugar and cocoa for a sweet finish. - Pumpkin spice churro bites: Add pumpkin puree and spices. Use 1/2 cup of pumpkin and add 1 teaspoon of pumpkin pie spice to the dough. This brings a warm, fall flavor that everyone loves. If you need gluten-free churro bites, switch the flour. Use gluten-free all-purpose flour instead. This works well in the dough and keeps the taste great. Just make sure to check the package for a good brand. Some flours may need extra liquid, so watch the dough's texture. You can also play with different coatings for your churro bites. Here are some fun options: - Using powdered sugar: Instead of the cinnamon sugar mix, roll your churros in powdered sugar. This gives a sweet and soft finish. - Adding sprinkles or nut toppings: After rolling in sugar, add colorful sprinkles or chopped nuts. This makes your churro bites look fun and adds a nice crunch. For the full recipe, you can refer to the [Full Recipe]. To keep your churro bites fresh, place them in an airtight container. This helps retain their crispy texture. Layer them with parchment paper to avoid sticking. Keep the container in a cool, dry spot. Ideally, consume them within two days for the best taste. When you want to enjoy leftover churro bites, reheat them for the best texture. Preheat your oven to 350°F (175°C). Spread the churro bites on a baking sheet. Heat for about 5-7 minutes. This method keeps them crispy and warm. Avoid using the microwave, as it can make them soggy. Yes, you can freeze churro bites! Allow them to cool completely before freezing. Place them in a single layer on a baking sheet. Once frozen, transfer them to a freezer-safe bag. They stay fresh for up to three months. To thaw, remove them from the freezer and let them sit at room temperature for about 30 minutes. To re-crisp, follow the reheating instructions mentioned earlier. Enjoy a warm treat anytime! For the full recipe, check the instructions above. Cinnamon sugar churro bites taste best fresh. However, they can last for about 1-2 days. Store them in an airtight container at room temperature. They may become less crispy over time. To keep them crunchy, reheat them in an oven for a few minutes. Yes, you can make the dough ahead of time. Store it in the fridge for up to 24 hours. Just make sure to cover it well to prevent it from drying out. When ready to fry, let the dough sit at room temperature for about 15 minutes. This will help it pipe smoothly. The best oils for frying churros are vegetable oil and canola oil. Both oils have a high smoke point, which is great for frying. They also have a mild flavor that won’t overpower the churros. Avoid using olive oil as it has a lower smoke point and strong taste. Churro bites are simple and fun to make. We covered the key ingredients, tools, and steps to fry these treats. Remember to avoid common mistakes for the best results. Feel free to explore flavor variations, try optional coatings, and learn how to store and reheat leftovers. Enjoying churros brings joy, and with this guide, you can share that happiness. Making churro bites at home is a sweet adventure worth taking. Try it soon!

Cinnamon Sugar Churro Bites Quick and Tasty Treat

Craving something sweet and easy? I’ve got just the treat for you—Cinnamon Sugar Churro Bites! These crispy bites are quick

To make hot honey fried chicken, you need these main ingredients: - 4 chicken thighs (bone-in, skin-on) - 1 cup buttermilk - 1 tablespoon hot sauce (adjust to taste) - 1 cup all-purpose flour - 1 teaspoon garlic powder - 1 teaspoon onion powder - 1 teaspoon smoked paprika - ½ teaspoon cayenne pepper (optional, for extra heat) - Salt and pepper to taste - Vegetable oil for frying - ¼ cup honey - 1-2 teaspoons red pepper flakes (to taste) These ingredients will create a juicy chicken with a spicy-sweet glaze. The buttermilk makes the chicken tender. The spices add depth to the flavor. You will need some key tools to make this dish: - A large bowl for marinating - A deep skillet or frying pan - A thermometer for checking oil temperature - A slotted spoon or tongs for frying - A plate lined with paper towels for draining These tools help you cook safely and effectively. A thermometer ensures your oil is hot enough for frying. Pair your hot honey fried chicken with these tasty sides: - Creamy coleslaw - Cornbread - Mashed potatoes - Green beans These sides balance the meal. They add texture and flavor to your plate. For the full recipe, check out the details above. Enjoy your cooking! To start, I mix buttermilk and hot sauce in a big bowl. This mix makes the chicken juicy and flavorful. Next, I add the chicken thighs, making sure they soak well. I cover the bowl and pop it in the fridge. I let it marinate for at least two hours. If I can wait overnight, it’s even better! This step is key for tender and tasty chicken. Now, I prepare the coating. In a separate bowl, I combine flour, garlic powder, onion powder, smoked paprika, cayenne pepper, salt, and pepper. I mix it well so all the spices blend together. This mix gives the chicken a crispy and tasty outside. It’s important to coat the chicken well for the best crunch! Next, I heat vegetable oil in a skillet to about 350°F. This is the perfect temperature for frying. I carefully take the marinated chicken out of the buttermilk. I let any excess drip off before dredging each piece in the flour mixture. I press the flour onto the chicken to ensure it sticks. I place the chicken in the hot oil, skin-side down. I fry each piece for about 7 to 10 minutes. I flip the chicken halfway through to get it golden brown all over. Once the chicken reaches 165°F inside, it’s ready! I use a meat thermometer for accuracy. After frying, I drain the chicken on paper towels. This keeps it crispy and not greasy. Now, it’s time to drizzle on the hot honey for that sweet and spicy kick! For the full recipe, you can refer to the detailed instructions above. To get that perfect crispy skin, start with the right chicken. I recommend using bone-in, skin-on thighs. The skin keeps the meat juicy and adds great flavor. Marinate the chicken in buttermilk and hot sauce for at least 2 hours. This step tenderizes the meat and adds moisture. When ready to fry, coat the chicken well in the flour mixture. Press down firmly to ensure the coating sticks. Fry in hot oil, and don’t overcrowd the pan. This keeps the temperature steady and helps the chicken cook evenly. You can customize the heat to suit your taste. The recipe includes cayenne pepper, but you can skip it for less heat. If you like it spicy, add more hot sauce to the buttermilk. For the hot honey, adjust the red pepper flakes to your liking. If you want a mild flavor, use less. Taste as you go! Cooking should be fun, so feel free to experiment until it’s just right for you. Maintaining the right oil temperature is crucial. Heat the oil to 350°F (175°C) before adding the chicken. This temperature ensures a crispy crust while cooking the inside properly. Use a deep-frying thermometer for accuracy. If the oil gets too hot, the chicken can burn. If it’s too cool, the chicken absorbs excess oil and becomes greasy. Fry in small batches to keep the temperature steady. This way, you’ll end up with perfectly fried chicken every time! {{image_2}} You can change the hot honey sauce to fit your taste. Try using maple syrup instead of honey for a different flavor. If you want more heat, add more red pepper flakes or even a splash of your favorite hot sauce. You can also mix in some lime juice for a tangy twist. This adds brightness and balances out the sweetness. Always taste your sauce as you mix, so you get it just right. If you want to switch things up, you have options for the coating. Instead of all-purpose flour, try using cornmeal for a crunchier texture. You can also use a gluten-free flour blend if needed. Some people like to add crushed cornflakes or panko breadcrumbs for extra crunch. Spices can change too; try adding your favorites, like Italian seasoning or chili powder, to give it a unique flair. You don't have to stick with chicken thighs. Drumsticks or chicken wings are great alternatives. Both offer juicy meat and crispy skin. If you prefer white meat, chicken breasts work too, but they may need a shorter cooking time. Just make sure to check that the internal temperature hits 165°F (74°C) for safety. Each cut brings its own flavor and texture, so feel free to experiment and find your favorite! To keep your hot honey fried chicken fresh, place it in an airtight container. Make sure it cools to room temperature first. You can store it in the fridge for up to four days. If you want to save it longer, consider freezing it. Reheat your fried chicken in the oven for the best results. Preheat your oven to 375°F (190°C). Place the chicken on a baking sheet and cover it with foil. Heat for about 20-25 minutes or until it is warm. You can also use an air fryer for a crispier option. Heat at 350°F (175°C) for about 10 minutes. Freezing is a great way to save hot honey fried chicken for later. Wrap each piece tightly in plastic wrap, then place them in a freezer bag. Make sure to squeeze out all the air. You can freeze it for up to three months. When ready to eat, let it thaw in the fridge overnight before reheating. The best type of chicken for frying is bone-in, skin-on chicken. I love using chicken thighs because they stay juicy and tender. The skin also gets crispy, adding great texture. You can use drumsticks or wings, too, but thighs offer the best flavor. Yes, you can use other sweeteners like maple syrup or agave. These options give you a different taste but still pair well with heat. If you want a sugar-free option, try using a sugar substitute. Just adjust the amount to your taste. If you don’t have buttermilk, you can make a quick substitute. Mix one cup of milk with one tablespoon of vinegar or lemon juice. Let it sit for five minutes. This will give you a similar tangy flavor, perfect for marinating the chicken. To prevent greasy chicken, make sure your oil is hot enough. Heat it to 350°F (175°C) before frying. Don’t overcrowd the pan; cook in batches if needed. After frying, place the chicken on paper towels to absorb excess oil. Marinating takes at least two hours. For the best flavor, marinate overnight. This allows the chicken to soak up all the buttermilk and hot sauce. It makes the chicken super tender and flavorful, perfect for frying. For the full recipe, check out the complete guide on Hot Honey Fried Chicken! In this article, we explored how to make hot honey fried chicken. You learned about key ingredients, cooking tools, and side dish ideas. I shared step-by-step instructions for marinating, coating, and frying. We covered tips to get crispy skin and adjust spice levels. I also gave variations for the sauce and coating options. Remember, practice makes perfect. Keep trying different methods to find your favorite. Enjoy your cooking adventure with this tasty dish!

Hot Honey Fried Chicken Flavorful and Simple Recipe

Are you ready to spice up your dinner routine? Hot Honey Fried Chicken is deliciously crispy and full of flavor.

Here’s what you need for your Lemon Cream Cheese Danish. Gather these items before you start: - 1 sheet of puff pastry (thawed) - 8 oz cream cheese, softened - 1/2 cup powdered sugar - 1 tablespoon lemon zest - 2 tablespoons lemon juice - 1 egg (for egg wash) - 1 tablespoon vanilla extract - Fresh blueberries or raspberries for garnish (optional) - 1 tablespoon heavy cream (for cream cheese mixture, optional) These ingredients bring together a delightful blend of flavors. The cream cheese gives a rich base, while lemon zest and juice add freshness. You can adjust the sweetness with powdered sugar. The egg wash helps the pastry turn golden and shiny. Fresh berries make a lovely garnish and add a pop of color. You will love how easy it is to make this treat with the Full Recipe! 1. Preheat the oven: Start by setting your oven to 400°F (200°C). This step is key for a nice, crisp pastry. 2. Roll out the puff pastry: On a floured surface, take your thawed puff pastry. Gently roll it out to smooth any creases. Then, cut it into four equal squares. 3. Prepare the cream cheese mixture: In a bowl, mix the softened cream cheese with an electric mixer. Add the powdered sugar, lemon zest, lemon juice, and vanilla extract. If you want a creamier filling, add the heavy cream. Mix until it’s smooth. 1. Fill and fold the pastry squares: Place about a tablespoon of the lemon cream cheese mixture in the center of each pastry square. Fold the corners towards the center, pinching to seal. You can also leave the center open for a cute look. 2. Egg wash application: Beat the egg in a small bowl. Brush it over the top of the pastries. This gives them a beautiful golden finish. 3. Baking instructions and timing: Place the pastries on a lined baking sheet. Bake in the preheated oven for 15 to 20 minutes. Look for them to be puffed and golden brown. Each step is simple and ensures that your Lemon Cream Cheese Danish turns out delightful. Check out the Full Recipe for more details! - Ideal puff pastry handling: To get the best puff pastry, handle it gently. When you roll it out, use a light touch. Don’t press too hard. Dust your work surface with flour to prevent sticking. If the dough gets too warm, chill it briefly. This keeps the layers intact for a nice puff. - Achieving a golden finish: For a beautiful golden color, use an egg wash. Beat one egg and brush it over the tops of the pastries. This gives them a nice shine and helps with browning. Bake the pastries until they are puffed and golden, about 15-20 minutes at 400°F (200°C). - Adjusting sweetness: If you want a sweeter treat, add more powdered sugar to the cream cheese mixture. Start with a tablespoon at a time until you reach your desired taste. Remember, the lemon juice will add some tang. - Adding spices or extracts: You can elevate the flavor by adding spices. A pinch of cinnamon or nutmeg can add warmth. You might also add a few drops of almond extract for a unique twist. Experiment and find what you love! For the complete guide on making these delights, check out the Full Recipe. {{image_2}} You can play with flavors in your Lemon Cream Cheese Danish. Here are two fun ideas: - Berry Lemon Cream Cheese Danish: Add fresh berries like blueberries or raspberries to the cream cheese mix. This adds color and a burst of flavor. The sweet-tart taste of the berries pairs well with lemon. You can also top the finished pastries with more berries for a bright look. - Chocolate Lemon Cream Cheese Danish: If you love chocolate, try adding cocoa powder to the cream cheese filling. Start with 2 tablespoons and mix well. This will give you a rich and creamy chocolate flavor that contrasts nicely with the lemon. You can also drizzle melted chocolate on top after baking for a sweet treat. You can still enjoy this treat if you have dietary needs. Here are some great swaps: - Gluten-free puff pastry options: Many brands now offer gluten-free puff pastry. Check the frozen section of your local store. Just follow the same steps in the Full Recipe. The texture may be slightly different, but it will still taste great. - Vegan alternatives for cream cheese: You can replace cream cheese with a vegan option. Look for brands made from nuts or tofu. These can give you a creamy texture while keeping it plant-based. Just make sure to check for a good flavor that complements the lemon. For short-term storage, keep your Lemon Cream Cheese Danish in the fridge. Place them in an airtight container to keep them fresh. They will last about 2 to 3 days. If you have leftovers, let them cool completely before storing. This helps prevent sogginess. To store these danishes long-term, you can freeze them. Wrap each danish tightly in plastic wrap. Then, place them in a freezer-safe bag or container. They will keep well for up to 2 months in the freezer. When you want to eat them, thaw them in the fridge overnight. Then, reheat them in the oven for a few minutes at 350°F (175°C). This will help restore their flaky texture. Enjoy your delicious Lemon Cream Cheese Danish later with ease! For the complete recipe, check out the Full Recipe. Can I use homemade puff pastry? Yes, you can use homemade puff pastry. It can give your Danish a personal touch. Make sure it is cold before using. This will help it puff up nicely. How can I make the cream cheese filling smoother? To make your cream cheese filling smoother, beat it longer. Use an electric mixer for the best results. Adding a touch of heavy cream can also help. This makes it creamy and dreamy. What can I serve with Lemon Cream Cheese Danish? You can serve this Danish with fresh fruit or a scoop of ice cream. A dollop of whipped cream also works well. Pair it with coffee or tea for a perfect treat. Why are my pastries not puffing? If your pastries are not puffing, the oven may be too cold. Ensure it is preheated to 400°F (200°C). Also, check the puff pastry. It should be cold before baking. What to do if the filling is too runny? If the filling is too runny, you can add more cream cheese. Mix in a bit of powdered sugar to thicken it. Let it chill in the fridge for a while before using. Where did Lemon Cream Cheese Danish originate? The Lemon Cream Cheese Danish has roots in Danish baking traditions. These pastries spread across Europe. Now they are loved worldwide, especially in cafes. How to pair this pastry with drinks? Pair your Lemon Cream Cheese Danish with a light tea or coffee. A glass of lemonade enhances the lemon flavor. Sparkling water is refreshing too. Enjoy these drinks with your tasty treat! You’ve learned about making a delicious Lemon Cream Cheese Danish. We covered the key ingredients, simple steps, and helpful tips. Don't forget the fun variations and storage methods to make these treats last. Baking can be simple yet rewarding. Remember to personalize your danishes with your favorite flavors. Enjoy your baking journey and share your tasty results!

Lemon Cream Cheese Danish Delightful and Simple Treat

If you’re looking for a treat that bursts with flavor, you’ve come to the right place! This Lemon Cream Cheese

To make tasty eggplant lasagna roll ups, you need some key ingredients. Here’s what you’ll need: - 2 large eggplants, sliced lengthwise into 1/4-inch thick strips - 2 cups marinara sauce (homemade or store-bought) - 1 cup fresh spinach, chopped These ingredients form the base of your dish. The eggplants give a rich flavor, while marinara adds a nice touch of sweetness. Fresh spinach adds color and nutrition. The cheese mixture plays a big role in the flavor. For this, gather these items: - 1 cup ricotta cheese - 1 cup shredded mozzarella cheese - 1/2 cup grated Parmesan cheese These cheeses blend well together. Ricotta is creamy, mozzarella melts beautifully, and Parmesan gives a sharp taste. This mix makes your roll ups creamy and satisfying. Spices and extras help enhance the dish. Here’s what to add: - 1 teaspoon garlic powder - 1 teaspoon dried basil - Salt and pepper to taste - Olive oil for brushing These seasonings add depth to your roll ups. You can also add other veggies or herbs. Feel free to get creative! For the full recipe, check the complete guide. To start, I slice the eggplants into long strips, about 1/4 inch thick. This size helps them roll easily. I place the strips on a baking sheet with parchment paper. Then, I brush both sides lightly with olive oil, and sprinkle salt and pepper on top. I bake the eggplant at 375°F for 15 to 20 minutes. Flipping them halfway ensures even cooking. The goal is to soften the eggplant, making it pliable for rolling. In a bowl, I mix the ricotta cheese, half of the mozzarella, and the grated Parmesan cheese. Next, I add the chopped spinach, garlic powder, dried basil, and a pinch of salt and pepper. This mixture creates a creamy, flavorful filling. I stir it well until all the ingredients combine into a smooth blend. Once the eggplant is ready, I take each strip and spread about 2 tablespoons of the cheese mixture on it. I roll the strip tightly, placing it seam-side down in a greased baking dish. I repeat this for all the eggplant strips. Arranging them snugly helps them stay together while baking. After filling the baking dish, I pour marinara sauce evenly over the roll-ups. Then, I sprinkle the remaining mozzarella cheese on top. I cover the dish with aluminum foil and bake it for 25 minutes. After that, I remove the foil and bake for an extra 10 to 15 minutes. The cheese should be bubbly and slightly golden. Finally, I let the dish cool for about 5 minutes before serving. When picking eggplant, look for firm, smooth skin. The color should be vibrant and shiny. Avoid any with wrinkles or soft spots. Choose smaller eggplants for a sweeter taste. If you can, try to buy organic. This helps support local farmers and the environment. For the cheese mix, make sure your ricotta is creamy and smooth. If it’s too thick, add a splash of milk. Mix it with mozzarella and Parmesan for great flavor. This blend should spread easily on the eggplant. If the cheese is too runny, it may not hold the roll-up shape. One common mistake is skipping the pre-baking of the eggplant. This step makes the slices soft and easy to roll. Another error is overstuffing the eggplant strips. Too much filling can cause them to burst. Lastly, don’t forget to let the dish cool before serving. This helps the flavors settle. For a full recipe, check the Eggplant Lasagna Roll Ups. {{image_2}} You can make eggplant lasagna roll ups even better by adding other vegetables. Try spinach, mushrooms, or bell peppers. Slice them thin and layer them with the cheese mixture. Zucchini is a great choice too. It adds a nice crunch and flavor. Mix and match based on what you like or what’s in season. This makes each bite exciting and full of surprises. If you need a gluten-free option, don’t worry! You can replace the marinara sauce with a homemade tomato sauce that uses no flour. Also, check the cheese labels to ensure they are gluten-free. Some brands have gluten-free options that work well in this recipe. You can enjoy the same great taste without any gluten worries. Mixing different cheeses can change the flavor of your roll ups. Try adding feta or goat cheese to the ricotta for a tangy twist. You can also use smoked mozzarella for a unique smoky taste. Experiment with different cheese blends to find your perfect combo. Each variation can give you a new favorite dish! For more details on making these delicious roll ups, check out the Full Recipe. To keep your eggplant lasagna roll-ups fresh, first let them cool. Place them in an airtight container. You can store them in the fridge for up to three days. If you want to keep them longer, consider freezing them. When you are ready to enjoy leftovers, preheat your oven to 350°F (175°C). Place the roll-ups in a baking dish and cover them with foil. Bake for about 20 minutes, or until heated through. You can also microwave them for a quick meal, but the oven gives the best results. To freeze your eggplant roll-ups, wrap each one tightly in plastic wrap. Then, place them in a freezer-safe bag. They can last in the freezer for up to three months. When you want to eat them, thaw them overnight in the fridge before reheating. This keeps their taste and texture nice. For best results, eat them within a month for optimal flavor. Enjoy your meal anytime! Yes, you can use other types of cheese. Try using goat cheese or feta for a tangy taste. You might also like using provolone or gouda for a smokier flavor. Mixing cheeses can create a fun twist. Just keep the cheese balance in mind for the best texture. To reduce bitterness, sprinkle salt on the eggplant slices before cooking. Let them sit for about 30 minutes. This draws out moisture and bitterness. Rinse the slices and pat them dry with a paper towel. This way, you get rich flavor without the bitterness. Absolutely! Eggplant lasagna roll ups are perfect for meal prep. You can make them ahead and store them in the fridge for a few days. Just pop them in the oven when you're ready to eat. They also freeze well, so you can enjoy them later. Yes, zucchini makes a great substitute for eggplant. It has a mild flavor and a similar texture when baked. Slice the zucchini into strips like the eggplant. Follow the same steps in the recipe for delicious roll-ups. Each veggie adds its own twist to your dish. For the full recipe on how to make these tasty roll-ups, check the [Full Recipe]. In this article, we explored how to make delicious eggplant lasagna roll ups. We discussed main ingredients, like eggplant and cheese, along with seasoning options. The step-by-step guide helped you prepare, assemble, and bake these tasty rolls. Tips offered ways to pick the best eggplant and avoid common mistakes. Variations shared creative ideas to change the recipe. Finally, storage tips ensure your leftovers stay fresh. Try these roll ups for a satisfying meal that’s easy to enjoy anytime. Enjoy your cooking journey!

Eggplant Lasagna Roll Ups Flavorful and Easy Recipe

Looking for a tasty twist on a classic Italian dish? You’ll love my Eggplant Lasagna Roll Ups! This easy recipe

- 1 cup sushi rice - 8 oz sushi-grade tuna, diced - 1 avocado, sliced - 1/2 cucumber, julienned - 1 small carrot, julienned - 1 radish, thinly sliced - 2 green onions, sliced - 1 tablespoon rice vinegar - 2 tablespoons mayonnaise (preferably Kewpie) - 1 tablespoon sriracha (adjust for heat preference) - Nori sheets, cut into strips - Sesame seeds, for garnish - Soy sauce or tamari, for drizzling When you gather these ingredients, think about how fresh and colorful they will look on your plate. Sushi rice forms the base, giving you that perfect sticky texture. Sushi-grade tuna is key for taste and safety, so make sure you get it from a trusted source. The avocado adds creaminess, while colorful veggies bring crunch and flavor. Rice vinegar, mayonnaise, and sriracha mix together to create that spicy tuna flavor. Don’t forget the optional toppings! Nori sheets add a fun crunch, sesame seeds give a nutty touch, and a drizzle of soy sauce enhances the umami. For the full recipe and step-by-step instructions, check out the [Full Recipe]. - Rinse the Rice Start by rinsing 1 cup of sushi rice under cold water. This washes away extra starch. Keep rinsing until the water runs clear. This step is key to fluffy rice. - Combine and Cook In a medium saucepan, add the rinsed rice and 1 ½ cups of water. Bring it to a boil over medium-high heat. Once it boils, lower the heat, cover the pot, and let it simmer for about 18 minutes. The water should be absorbed, and the rice should be soft. - Seasoning the Rice Mix 1 tablespoon of rice vinegar, 1 teaspoon of sugar, and ½ teaspoon of salt in a small bowl. Once the rice is cooked, remove it from heat and let it sit, covered, for 10 minutes. Then, fold in the vinegar mix. This gives the rice a nice flavor. - Mix Tuna with Mayonnaise In a separate bowl, take 8 ounces of sushi-grade tuna, diced into small pieces. Add 2 tablespoons of mayonnaise and 1 tablespoon of sriracha. Stir this mix well until everything combines nicely. - Adjusting Spice Levels You can adjust the spice based on your taste. If you want it hotter, add more sriracha. If you prefer it milder, use less. This way, you control the heat to fit your liking. - Layering the Ingredients Take a scoop of the seasoned sushi rice and place it at the bottom of each bowl. This will be the base for your delicious meal. - Adding Toppings Next, add a good amount of the spicy tuna mix on top of the rice. Then, layer in sliced avocado, julienned cucumber, julienned carrot, thinly sliced radish, and sliced green onions. Layering makes it colorful and fun! - Presentation Tips Finish with a sprinkle of sesame seeds. You can also add nori strips for extra texture. Drizzle some soy sauce or tamari on top for added flavor. Serve in deep bowls for a beautiful look. Don't forget to place chopsticks next to each bowl for an authentic touch. Now you have a quick and flavorful meal! For the complete recipe, check the Full Recipe section. Rinsing the sushi rice is key. It removes excess starch. This helps keep the rice fluffy. You want the grains to stay separate. Rinse the rice until the water runs clear. This usually takes a few minutes. Cooling the rice properly is also important. After cooking, let it sit covered for 10 minutes. This allows the steam to finish cooking it. Then, transfer it to a large bowl. Gently fold in the vinegar mixture. Let it cool slightly. This gives the rice the perfect texture. Adjusting sriracha is easy. Start with one tablespoon in your tuna mix. If you want more heat, add a bit more. Taste as you go to find your perfect level. For those who don’t like spice, there are alternatives. You can use a sweet mayo instead. Mixing in a little honey can also add sweetness. This way, everyone can enjoy the meal. Bowl presentation is vital for a great look. Use deep bowls or plates for a nice effect. Start with a scoop of sushi rice at the bottom. Layer the spicy tuna on top. Add the sliced avocado, cucumber, and carrot next. Finish with radish and green onions for color. For an authentic touch, place chopsticks next to each bowl. You can also sprinkle sesame seeds on top. If you want extra flavor, drizzle some soy sauce or tamari over everything. This adds a nice finish to your dish. {{image_2}} Variations for Tuna You can swap sushi-grade tuna for other fish. Salmon or yellowtail work well, too. If you want a plant-based option, try marinated tofu. It adds a nice texture and flavor. You can even use canned tuna in a pinch, but the taste changes. Alternative Vegetables Feel free to mix up the veggies in your bowl. Bell peppers, radishes, or even edamame make great choices. You can use anything you like! Just keep it fresh and colorful. This adds more crunch and nutrients to your meal. Adding Spices or Sauces Want more kick? Add chili oil or extra sriracha to your tuna mix. You can also try wasabi for a spicy twist. For a creamy touch, add more mayonnaise or avocado. Each choice will change the flavor in fun ways. Incorporating Different Oils Drizzle sesame oil or avocado oil over the top for added richness. These oils bring extra flavor to the bowl. You can also use olive oil for a different taste. Just remember, a little goes a long way! Bento Box Arrangement Try serving your spicy tuna sushi bowls in a bento box. It keeps everything neat and fun to eat. Each section can hold a different topping. The colors and textures will look amazing together. Sushi Roll Twist Feeling adventurous? Turn your bowl into sushi rolls! Use a nori sheet to wrap the sushi rice and spicy tuna. Then add your favorite veggies inside. This twist makes for a fun, handheld meal. You can also cut them into bite-sized pieces for easy sharing. These variations let you customize your spicy tuna sushi bowls. Each choice adds a unique touch to your meal. For the full recipe, check out the recipe section. To keep your spicy tuna sushi bowls fresh, store them in the fridge. Place the rice and toppings in separate airtight containers. This helps prevent the rice from getting soggy. Eat the leftovers within two days for the best taste. If you want to freeze the fish, wrap it tightly in plastic wrap. Use a freezer bag to keep out air. This way, the tuna stays fresh for up to three months. However, I recommend eating it fresh for the best flavor. When reheating rice, use the microwave. Add a few drops of water. Cover the bowl with a damp paper towel. Heat it in short bursts, stirring in between, until warm. This keeps the rice moist and fluffy. For the tuna, avoid reheating it. Raw fish tastes best fresh. If you must, mix it with a bit of mayo and sriracha. This can help mask any changes in texture. Your spicy tuna sushi bowls are best when fresh. The rice stays good for about four days in the fridge. Tuna should be eaten within one to two days. Watch for signs of spoilage. If the rice smells sour or changes color, it's time to toss it. Tuna that looks dull or has a fishy smell should not be eaten. Always trust your senses to keep your meal safe. For spicy tuna sushi bowls, always choose sushi-grade tuna. This type is safe to eat raw. Sushi-grade tuna comes from the highest quality fish. It has a bright color and a firm texture. Regular tuna is not suitable for sushi. It may not be fresh enough and can pose health risks. When you shop, look for tuna labeled "sushi-grade" at your fish market or grocery store. Yes, you can easily make these bowls vegan! Substitute the tuna with diced avocado or marinated tofu. Use vegan mayo instead of regular mayo. You can also add extra veggies for taste. Try using ingredients like mango or bell peppers for a sweet touch. The rice and toppings remain the same, making it a tasty vegan meal. To keep sushi rice from getting gummy, rinsing is key! Wash the rice under cold water until the water runs clear. This removes excess starch that makes rice sticky. Cooking it properly is also important. Use the right water-to-rice ratio and let it rest after cooking. Allowing it to cool before adding seasoning helps too. With these tips, you’ll have perfect sushi rice every time! In this blog, we explored how to make delicious sushi bowls. We covered key ingredients like sushi rice, sushi-grade tuna, and veggies. I shared step-by-step instructions for cooking the rice, preparing spicy tuna, and assembling your bowl. We also discussed tips to perfect your sushi rice and storage guidelines for leftovers. By following these steps, you can create tasty sushi bowls at home. Experiment with ingredients and enjoy your unique creations. Happy cooking!

Spicy Tuna Sushi Bowls Quick and Flavorful Meal

If you’re craving a quick and tasty meal, look no further than Spicy Tuna Sushi Bowls. This dish brings together

- Shredded chicken - Broccoli florets - Creamy sauce components: - 1 cup mayonnaise - 1 cup sour cream - Seasoning essentials: - 1 tablespoon Dijon mustard - 1 teaspoon garlic powder - 1 teaspoon onion powder - ½ teaspoon black pepper - Topping ingredients: - 1 cup shredded cheddar cheese - 1 cup breadcrumbs (panko preferred) - 2 tablespoons olive oil - ½ teaspoon paprika (for garnish) To make Easy Chicken Divan, you need some key ingredients. Start with shredded chicken. You can use leftover chicken or rotisserie chicken for ease. Broccoli florets add a bright color and nutrition. The creamy sauce is made from mayonnaise and sour cream. This combination gives the dish richness and flavor. Next, seasoning is vital. Dijon mustard adds a tangy note, while garlic powder and onion powder bring depth. Black pepper adds just the right kick. Finally, for that crunchy topping, use shredded cheddar cheese and breadcrumbs. Panko breadcrumbs are best for a crunchy texture. Drizzle them with olive oil to help them brown nicely. A touch of paprika on top adds a pop of color. When you gather these ingredients, you set the stage for a simple yet flavorful dish. Follow the Full Recipe to create your own delicious Chicken Divan. First, take your cooked chicken and shred it into bite-sized pieces. You can use leftover chicken or rotisserie chicken for ease. Next, steam the broccoli florets until they are bright green and tender but still crisp. This usually takes about 3–5 minutes. Make sure not to overcook them; we want them to keep their shape and flavor. In a large bowl, combine the mayonnaise, sour cream, Dijon mustard, garlic powder, onion powder, and black pepper. Stir until the mixture is smooth and well-blended. This creamy sauce adds richness to the dish. You can taste it and adjust the seasoning if needed. If you like it tangier, add a bit more mustard. Gently fold the shredded chicken and steamed broccoli into the creamy mixture. Make sure each piece is well coated. Once combined, transfer the mixture into a greased 9x13-inch baking dish. Spread it evenly across the dish. This ensures every bite will be tasty and creamy. In a small bowl, mix the breadcrumbs with olive oil until they are well coated. This step helps achieve a golden, crunchy topping. Evenly sprinkle the breadcrumb mixture over the chicken and broccoli. The breadcrumbs will add a nice texture contrast to the creamy filling. Now it’s time to bake! Preheat your oven to 350°F (175°C). Place your baking dish in the oven and bake for 25-30 minutes. Look for a golden, bubbly top. If you want a little extra color, add a sprinkle of paprika before serving. Once done, let it cool for a few minutes. Enjoy your creamy Chicken Divan! For the full recipe, you can refer to the earlier sections. 1. Overcooking the broccoli Broccoli should stay bright green and crisp. If you cook it too long, it will turn mushy. Aim to steam it just until tender. This will keep the flavor fresh and vibrant. 2. Skipping the breadcrumb coating Breadcrumbs add a nice crunch. If you skip this step, your dish may feel flat. Mix the breadcrumbs with olive oil to enhance their flavor and texture. 3. Using unseasoned chicken Chicken needs flavor to shine. Use seasoned chicken or add spices to the mixture. This way, every bite is full of taste. - Substitutions for ingredients You can change up the ingredients based on what you have. Try Greek yogurt instead of sour cream for a tangy twist. You can swap chicken for turkey or even a plant-based option. - Adding more vegetables or spices Feel free to toss in other veggies like bell peppers or carrots. Adding different spices can also elevate your dish. A pinch of cayenne pepper will add a nice kick. {{image_2}} You can make Chicken Divan in fun ways. One classic way is to serve it with rice. This adds a nice base to soak up the creamy sauce. Just cook your rice as the Chicken Divan bakes. The flavors mix well together. Another idea is to add different cheeses. You can try mozzarella for a stretchy texture. Or use Swiss cheese for a nutty taste. Mixing cheeses can make your dish even more special. If you need a gluten-free option, you can use gluten-free breadcrumbs. These will give you that same crunchy topping. Just check the label to ensure they are certified gluten-free. You can also use other thickening agents for the sauce. Cornstarch or arrowroot powder can work well. Mix them with a little water before adding to your sauce. This will help it thicken nicely without any flour. For the full recipe, check out the Creamy Chicken Divan Delight. To keep your Easy Chicken Divan fresh, you should refrigerate it right away. Place it in an airtight container. This helps prevent it from drying out. It’s best to eat it within three days for the best taste. For freezing, let the dish cool first. Then, wrap it tightly in plastic wrap or foil. You can also use a freezer-safe container. Properly stored, it can last up to three months in the freezer. When reheating, I recommend using the oven for the best results. Preheat it to 350°F (175°C). Place your Chicken Divan in a baking dish. Cover it with aluminum foil to keep it moist. Heat for about 20-25 minutes, or until warm. If you use the microwave, place a single portion on a microwave-safe plate. Cover it with a damp paper towel to keep it from drying out. Heat in intervals, checking every minute to ensure even heating. This way, you enjoy a warm, tasty meal every time! If you don't have mayonnaise, you can use Greek yogurt or cottage cheese. Both options give a creamy texture. They also add a nice tang to your dish. You might want to adjust the seasoning a bit. If you like a lighter taste, sour cream is another good choice. You can store Chicken Divan in the fridge for about three to four days. Make sure to put it in an airtight container. This helps keep it fresh and tasty. To enjoy it later, simply reheat it in the oven or microwave. Yes, you can prepare Chicken Divan ahead of time. Just follow these tips for the best results: - Prepare in advance: Assemble the dish but don’t bake it. Cover it tightly and keep it in the fridge. Bake it later when you're ready to eat. - Freezing instructions: To freeze, wrap the dish tightly in plastic wrap and then in foil. It can stay in the freezer for about two months. When ready to eat, thaw it in the fridge overnight before baking. This way, you will have a quick and tasty meal ready to go! For the full recipe, check out the Creamy Chicken Divan Delight. This blog post covered all you need for a tasty Chicken Divan. We went over essential ingredients like chicken, broccoli, and creamy sauce components. I shared step-by-step instructions to guide you in the kitchen. You learned tips to avoid common mistakes and ways to customize your dish. Don’t forget about variations, storage, and reheating methods to enjoy later. In summary, you can make this meal your own. Enjoy experimenting with flavors and sharing it with others!

Easy Chicken Divan Flavorful and Simple Recipe

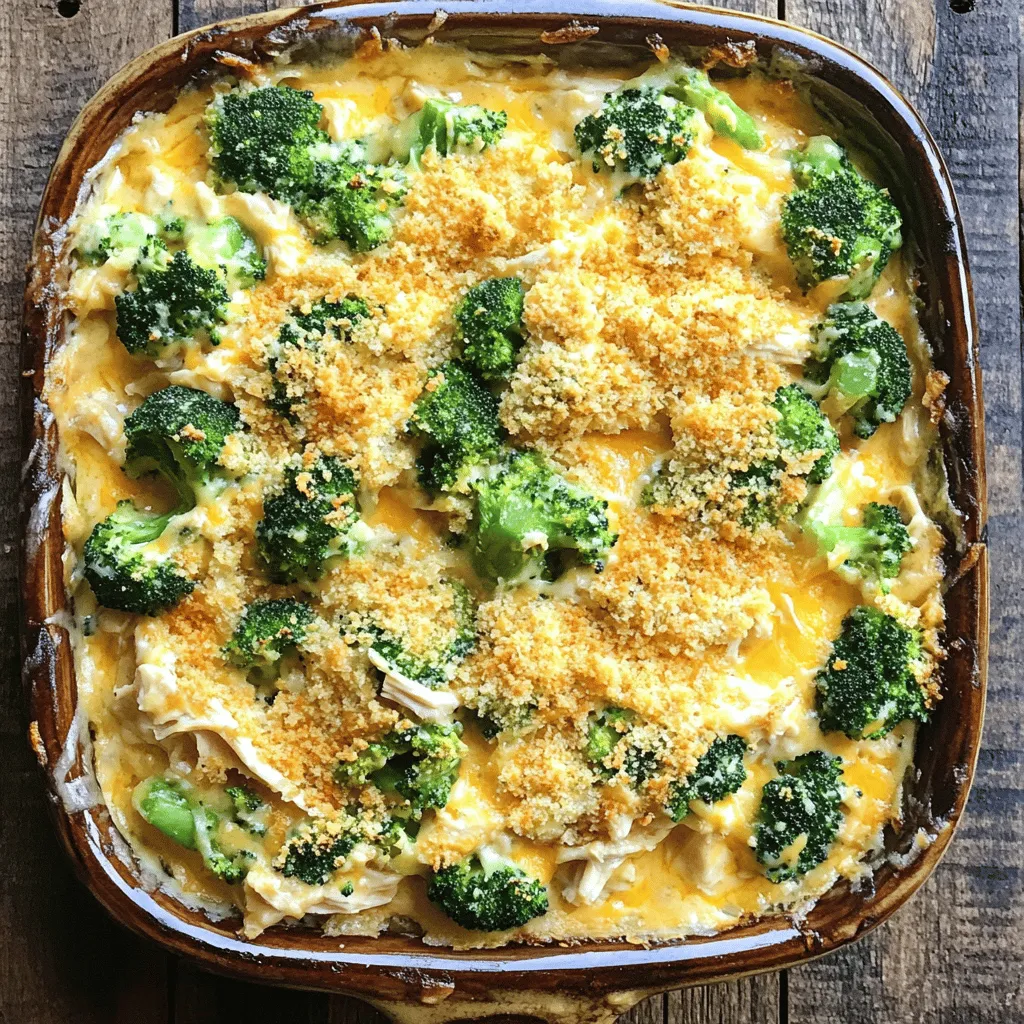
If you’re looking for a simple yet tasty dish, you’ve found it! My Easy Chicken Divan recipe combines tender chicken,

- 4 boneless, skinless chicken breasts - 1 cup grated Parmesan cheese - 1 cup panko breadcrumbs - 1 teaspoon garlic powder - 1 teaspoon onion powder - 1 teaspoon Italian seasoning - Salt and pepper to taste - 2 large eggs - 1/4 cup all-purpose flour - Olive oil spray For this baked Parmesan crusted chicken recipe, you need fresh, high-quality ingredients. The chicken breasts serve as a great base. They stay juicy and tender while baking. The grated Parmesan cheese brings a lovely, rich flavor. It adds that cheesy goodness we all love. Panko breadcrumbs provide the crunch that makes every bite exciting. You will also need some seasonings. Garlic powder, onion powder, and Italian seasoning add depth to the taste. Don’t forget salt and pepper! They help bring out all the flavors in the dish. You will need eggs and flour for the coating. The eggs help the crumbs stick to the chicken. The flour creates a thin layer that keeps everything together. Finally, a light spray of olive oil helps achieve that golden, crispy finish. For the full recipe, check the details above. Enjoy cooking! To start, preheat your oven to 400°F (200°C). This heat will help create a crispy outside. Next, line a baking sheet with parchment paper. This makes cleanup easy and prevents sticking. Now, set up your breading station. You will need three shallow bowls. In the first bowl, add 1/4 cup of all-purpose flour, seasoned with salt and pepper. In the second bowl, beat two large eggs. In the third bowl, mix one cup of grated Parmesan cheese, one cup of panko breadcrumbs, chopped parsley, garlic powder, onion powder, Italian seasoning, and more salt and pepper. Now it’s time to coat the chicken. Take each boneless, skinless chicken breast and dip it in the flour first. Shake off any extra flour. Next, dip it into the beaten eggs, letting any excess egg drip off. Finally, coat the chicken with the Parmesan and breadcrumb mixture. Press gently to help it stick well. Once coated, place the chicken breasts on the prepared baking sheet. Lightly spray the tops with olive oil spray to help them crisp up. Bake in your preheated oven for about 25-30 minutes. The chicken is done when it turns golden brown and reaches an internal temperature of 165°F (75°C). Let it rest for a few minutes before slicing. This keeps the chicken juicy and tasty. For the full recipe, check out the detailed instructions. Enjoy creating this crispy delight! To get that perfect crispy crust, use panko breadcrumbs. Panko is lighter and airier than regular breadcrumbs. This means more crunch when baked. To make sure the coating sticks, follow these steps: 1. Dry the Chicken: Pat the chicken breasts dry with paper towels. This helps the coating stick well. 2. Coat in Flour First: Dip each chicken piece in flour before the egg wash. This helps create a base for the crumbs. 3. Press Down: When you coat the chicken in the Parmesan breadcrumb mix, press down gently. This helps the crumbs stick better. The best internal temperature for chicken is 165°F (75°C). Use a meat thermometer to check this. If you do not have one, slice into the chicken. The juices should run clear, not pink. After baking, let the chicken rest for a few minutes. This keeps it juicy and flavorful. For a beautiful presentation, serve the chicken on a wooden cutting board. Slice it into strips for easy serving. Garnish with fresh parsley for color. A lemon wedge adds a fresh touch. This makes your dish look more appealing and ready to enjoy. For more details, check the Full Recipe. {{image_2}} You can easily switch up the cheese in your dish. Romano or Asiago gives a good twist. These cheeses add a unique flavor that enhances the chicken. If you need a gluten-free option for breadcrumbs, try crushed rice or cornflakes. They work great and still provide a lovely crunch. Want to jazz up your chicken? Add fresh herbs like thyme or rosemary to the breadcrumb mix. These herbs add depth and aroma. For a spicy kick, toss in some chili flakes. This will make your dish exciting and flavorful. When it comes to side dishes, you have many choices. Pair your chicken with roasted veggies or a fresh salad. You can also serve it with sauces or dips. A tangy lemon sauce or creamy ranch dip works well. This adds extra taste and makes the meal fun. For the full recipe, check out the detailed instructions and tips above! To keep your baked Parmesan crusted chicken fresh, place it in an airtight container. You can refrigerate it for up to three days. If you want to store it longer, you can freeze it. Wrap each piece in plastic wrap, then put them in a freezer bag. This helps prevent freezer burn. When you reheat the chicken, you want to keep it crispy. The best way to do this is in an oven. Preheat your oven to 375°F (190°C). Place the chicken on a baking sheet lined with foil. Heat for about 15-20 minutes. This keeps the crust crunchy and the inside juicy. Avoid using the microwave as it can make the chicken soggy. In the fridge, your baked Parmesan crusted chicken lasts about three days. If you freeze it, it can last up to three months. Just remember, the longer you store it, the more the flavor may change. Enjoy your delicious chicken within that time for the best taste! Yes, you can use chicken thighs. They are darker meat and can be juicier. However, chicken thighs cook a bit longer than breasts. Aim for an internal temperature of 175°F (80°C) for thighs. You might need to adjust your baking time by about 5 to 10 minutes. The texture will be softer, and the flavor is richer. To enhance the crust's crispiness, consider these tips: - Use panko breadcrumbs instead of regular ones. They add extra crunch. - Add more Parmesan cheese to the breadcrumb mixture for a cheesy kick. - Lightly spray the chicken with olive oil before baking. This helps it brown better. - Try broiling the chicken for a few minutes at the end. Just watch it closely to avoid burning. Yes, you can prep this dish ahead of time. Here’s how: - Coat the chicken as directed in the recipe. - Place the coated chicken on a baking sheet and cover it with plastic wrap. - Store it in the fridge overnight. - When ready, bake it straight from the fridge. Just add a few extra minutes to the baking time. This way, you have a tasty meal ready to go! For the full recipe, check out the details above. This blog post covered how to make a tasty chicken dish. You learned about key ingredients, including chicken, Parmesan, and panko breadcrumbs. I shared the steps for preparation, coating, and baking. We also discussed tips for a crispy crust and variations to keep it exciting. With these ideas, you can impress your friends and family. Enjoy experimenting with flavors and styles in your kitchen. Happy cooking!

Baked Parmesan Crusted Chicken Crispy Delight Today

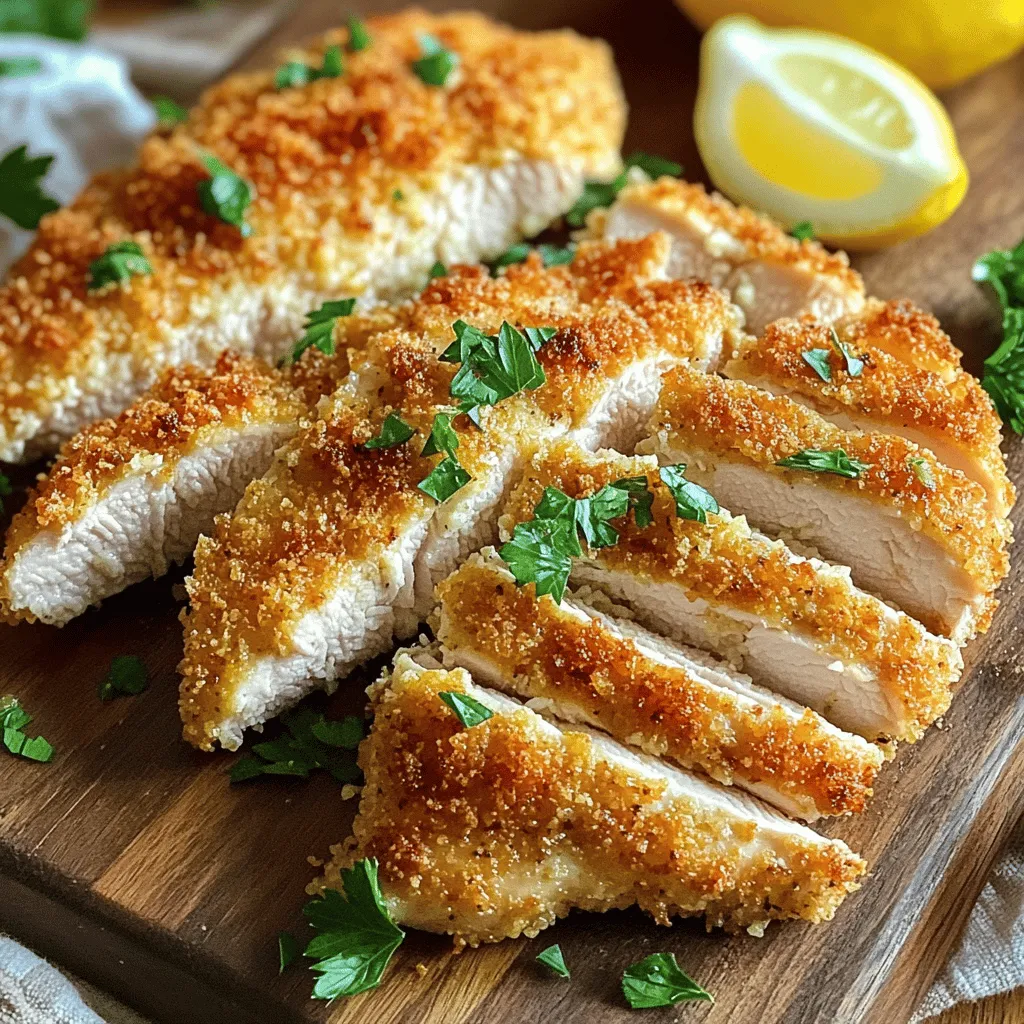
Get ready to enjoy a crunchy, cheesy treat with my Baked Parmesan Crusted Chicken. This dish features juicy chicken breasts

To make a warm and tasty vegan pumpkin soup, gather these essential ingredients: - 1 medium pumpkin (about 3-4 pounds), peeled, seeded, and cubed - 1 large onion, chopped - 3 cloves garlic, minced - 2 carrots, diced - 1 celery stalk, diced - 4 cups vegetable broth - 1 can (400ml) coconut milk - 1 teaspoon ground cumin - 1/2 teaspoon ground nutmeg - 1 teaspoon smoked paprika - 2 tablespoons olive oil - Salt and pepper to taste Each of these ingredients plays a key role. The pumpkin gives the soup its creamy base. The onion and garlic add depth. Carrots and celery provide sweetness and texture. Coconut milk makes it rich and smooth. You can make your soup even better with some optional garnishes: - Fresh parsley or cilantro for a pop of color - A drizzle of extra coconut milk for creaminess - A sprinkle of smoked paprika for added flavor These garnishes not only enhance the look but also boost taste. Choosing the right pumpkin is crucial. Look for these signs: - A firm skin without soft spots or bruises - A deep, rich color, often orange - Heavy for its size, which indicates good flesh If you can, pick a sugar pumpkin. They are sweeter and work best for soups. Always check your local farmer's market for the freshest options. For the full recipe, refer to the Cozy Autumn Vegan Pumpkin Soup. Start by peeling and seeding your pumpkin. Cut it into small cubes. This makes the pumpkin cook faster and blend better. Next, chop your onion and dice the carrots and celery. These veggies add sweetness and depth to the soup. In a large pot, heat the olive oil over medium heat. Add the chopped onion, carrots, and celery. Sauté for about 5-7 minutes. You want the veggies soft and the onion clear. Then, add the minced garlic, cumin, nutmeg, and smoked paprika. This mix will fill your kitchen with a warm, inviting scent. Cook for one more minute. Now, add the cubed pumpkin to the pot. Pour in the vegetable broth and bring everything to a boil. Lower the heat and let it simmer for 20-25 minutes. You want the pumpkin to be soft. After that, use an immersion blender to purée the soup until it’s smooth. If you don’t have one, carefully transfer the soup to a blender in small batches. Stir in the coconut milk. Then, season with salt and pepper to taste. Heat the soup for 5 more minutes. This step lets all the flavors mix well. Serve hot, garnished with fresh parsley or cilantro. For a special touch, drizzle extra coconut milk on top. For the full recipe, check out the Cozy Autumn Vegan Pumpkin Soup. To make your vegan pumpkin soup stand out, you can add extra spices. Try adding fresh ginger for a zing. You can also use fresh herbs like thyme or sage. These herbs pair well with pumpkin and add depth. Don’t forget to taste as you go. This way, you can adjust the seasoning to your liking. If you want a bit of heat, add a dash of cayenne pepper or red pepper flakes. A squeeze of lime juice just before serving can brighten the flavors. One common mistake is not cooking the vegetables long enough. Make sure your onion is soft and translucent. This step builds a great base flavor. Another mistake is blending the soup too soon. Ensure the pumpkin is fully tender for a smooth texture. Also, avoid adding coconut milk too early. Add it at the end to keep its creamy quality. Lastly, don’t skip the seasoning. Salt and pepper are key to enhancing the taste of your soup. For a cozy meal, serve the soup with crusty bread or a fresh salad. A simple green salad with lemon vinaigrette complements the soup well. You can also add roasted seeds on top for crunch. They add flavor and texture, making the dish more satisfying. If you want to impress, drizzle extra coconut milk on top before serving. This not only looks nice but adds creaminess. You can find the full recipe to guide you through the process. {{image_2}} You can make your vegan pumpkin soup smooth or chunky. For a creamy soup, blend all the ingredients until they are velvety. This gives you a rich texture that feels cozy. If you prefer some bite, reserve a cup of pumpkin cubes. Add them back after blending for a nice contrast. Feel free to switch ingredients to match your taste. You can use sweet potatoes or butternut squash instead of pumpkin. Both give a sweet flavor. Try adding red lentils for protein and a thicker base. If you want a spicy kick, add cayenne pepper or chili flakes. Coconut milk can be swapped for almond or cashew milk if you prefer a nutty taste. This soup is great for any season. In fall, add roasted apples for sweetness. In winter, stir in kale or spinach for color and nutrients. Spring brings fresh herbs like basil or mint. Summer is perfect for adding grilled corn for a smoky flavor. Each variation makes the soup feel new and exciting. For the full recipe, check the details above! After you enjoy your vegan pumpkin soup, let it cool down. Pour the soup into an airtight container. Make sure the lid seals tightly. Store it in the fridge for up to 4 days. This keeps the soup fresh and tasty. When it’s time to eat again, you have a few choices. You can reheat the soup in a pot on the stove. Just heat it over medium heat, stirring often. This warms the soup evenly. You can also use a microwave. Pour the soup into a microwave-safe bowl. Heat it in short bursts, stirring between each. This helps avoid hot spots. If you want to save the soup for later, freezing works well. Use freezer-safe containers or bags. Leave some space at the top for expansion. Label your containers with the date. The soup can last for up to 3 months in the freezer. To thaw, move the soup to the fridge overnight before reheating. For the full recipe, check out the Cozy Autumn Vegan Pumpkin Soup! Yes, you can use canned pumpkin. It saves time and is still tasty. Canned pumpkin is smooth and ready to use. Just replace fresh pumpkin with an equal amount of canned. This makes your soup quick and easy to prepare. This vegan pumpkin soup is packed with nutrients. Pumpkins are high in vitamin A, which helps your eyes. They also have fiber, which aids digestion. Coconut milk adds healthy fats that keep you full. Onions and garlic boost your immune system too. Enjoying this soup can help you stay healthy! To spice up your soup, add more smoked paprika or cumin. You can also stir in cayenne pepper for heat. If you like, add fresh chili peppers. Start with a small amount, then taste and adjust as needed. This way, you control the spice level. Yes, this vegan pumpkin soup is gluten-free. All the ingredients are naturally free from gluten. Using vegetable broth ensures it stays gluten-free. So, you can enjoy this soup safely if you are gluten-sensitive. In this blog post, I covered how to make vegan pumpkin soup from scratch. We explored essential ingredients, step-by-step instructions, and tips to boost flavor. I shared ways to customize the soup and how to store leftovers properly. Remember, choosing fresh pumpkin can make a big difference in taste. Use these recipes and tips to create a soup that warms your heart. Enjoy your cooking journey and share your favorite versions with friends!

Vegan Pumpkin Soup Comforting and Cozy Recipe

Looking for a warm, hearty dish to enjoy this fall? My Vegan Pumpkin Soup is your answer! This cozy recipe

Older posts
Newer posts
← Previous Page1 … Page24 Page25 Page26 … Page63 Next →

dsad

© 2025 Cooking Wells • Built with GeneratePress

Our Policies

  • Copyright Policy
  • Cookie Policy
  • GDPR Policy
  • Privacy Policy
  • Disclaimer
  • Terms Of Use

More Information

  • Home
  • About
  • Contact
  • Appetizers
  • Dessert
  • Dinner
  • Drinks
©2025, Cooking Wells About Back To Top