Skip to content
DisclaimerTerms Of UseGDPR PolicyCookie Policy

Cooking Wells

  • Home
  • Drinks
  • Appetizers
  • Dinner
  • Dessert
  • About
  • Contact
  • Privacy Policy
DisclaimerTerms Of UseGDPR PolicyCookie Policy

Mia

- Canned chickpeas (2 cups): These are the stars of our stew. They offer protein and fiber. You can use dry chickpeas too, but soak and cook them first. - Onion (1, finely chopped): Onions add sweetness and depth. They form a base for the flavors. Yellow or white onions work well here. - Garlic (3 cloves, minced): Garlic brings a strong aroma. It adds warmth and flavor. Fresh garlic is best for a bold taste. - Carrot (1, diced): Carrots add a sweet crunch. They balance the spices. You can swap them for sweet potatoes if you like. - Red bell pepper (1, diced): This pepper gives color and sweetness. You can use green or yellow peppers too. - Zucchini (1, diced): Zucchini adds a soft texture. It cooks quickly and absorbs flavors well. You can replace it with eggplant or squash. - Diced tomatoes (1 can, 14 oz): Tomatoes provide acidity and moisture. They help to create a rich stew. Use fresh tomatoes if you have them. - Vegetable broth (4 cups): Broth adds depth and richness. It enhances the stew’s flavor. You can use water, but broth is better. - Olive oil (2 tablespoons): Olive oil adds healthy fats and flavor. It helps to sauté the veggies. You can use avocado oil for a different taste. - Ground cumin (1 teaspoon): Cumin gives a warm, earthy flavor. It’s a key spice in Moroccan dishes. - Ground coriander (1 teaspoon): This spice adds citrus notes. It brightens the stew. - Paprika (1 teaspoon): Paprika adds color and mild heat. Smoked paprika can add a smoky flavor. - Cayenne pepper (1/2 teaspoon, adjust to taste): This spice brings heat. Use less if you prefer a milder stew. - Salt and pepper to taste: These enhance all the flavors. Always taste and adjust as you cook. - Fresh cilantro for garnish: Cilantro adds freshness. It brightens the final dish. If you dislike cilantro, try parsley instead. - Lemon wedges for serving: Lemon adds acidity and brightness. A squeeze over the stew makes it pop! Using fresh ingredients is key for vibrant flavors. While canned items are convenient, fresh produce enhances taste and texture. Always choose what feels right for your kitchen and palate. For the full recipe, check out the detailed instructions above. 1. Start by heating olive oil in a large pot over medium heat. Once hot, add the chopped onion and sauté for about 5 minutes. This makes the onion soft and sweet. 2. Next, stir in the minced garlic and cook for another minute. You want to smell that garlic aroma filling your kitchen. 3. Add the diced carrot and red bell pepper. Sauté these for about 5 minutes. Stir occasionally to cook them evenly. 4. Now, toss in the diced zucchini and cook for 3 more minutes. This adds color and texture to your stew. 5. Sprinkle in the spices: cumin, coriander, paprika, cayenne pepper, salt, and pepper. Stir well to coat the veggies in those warm flavors. 6. Add the diced tomatoes along with their juices and the vegetable broth. Bring the mixture to a boil. This is when the magic starts! 7. Once it boils, lower the heat and add the chickpeas. Cover and let it simmer for 20 to 25 minutes. Stir occasionally to mix everything well. 8. After simmering, taste the stew. Adjust the seasoning if you need to. If you want a thicker stew, leave it uncovered for a few extra minutes. 9. Serve hot, garnished with fresh cilantro. Add lemon wedges on the side to squeeze over your stew. This brightens the flavors and makes it even better! These steps are simple, but they help create a rich and hearty Moroccan Chickpea Stew. Enjoy the process, and feel free to make it your own! You can find the Full Recipe linked above. To make your Moroccan chickpea stew even tastier, use spices. Here are some good ones: - Cumin: Adds warmth and earthiness. - Coriander: Brightens the dish with citrus notes. - Paprika: Gives a sweet, smoky flavor. - Cayenne pepper: Adds heat; adjust to your liking. For spicier stew, add more cayenne or chili powder. If you want less heat, cut back on cayenne. Using the right tools helps too. A heavy pot or Dutch oven distributes heat evenly. A good knife makes chopping faster. A wooden spoon stirs well without scratching the pot. Pair your stew with tasty sides. Here are some great options: - Couscous: Fluffy and light, it soaks up the stew well. - Rice: A classic choice that adds a nice base. - Pita bread: Perfect for dipping and adds a fun texture. For a beautiful presentation, try these garnishes: - Fresh cilantro: Adds color and a fresh taste. - Lemon wedges: Brighten the dish with a squeeze of juice. Serve the stew hot. It tastes best when enjoyed warm, right from the pot. {{image_2}} You can change up the vegetables in this stew easily. Try using sweet potatoes, kale, or spinach. They add great flavor and nutrients. If you want to add protein, chicken or lamb works well. Just cook it first and then add it to the pot. This gives you a heartier meal. For a vegan option, stick to chickpeas or add tofu. This stew is also gluten-free! Enjoy it without worry if you have gluten sensitivities. Moroccan stew varies by region. In some areas, cooks use dried fruits like apricots or raisins for sweetness. Others might add nuts for crunch. North African cuisines, like Tunisian or Algerian, also influence the flavors. You might find harissa, a spicy paste, used in some variations. Feel free to customize this stew for your taste. Adjust the spices or veggies to what you love. It makes the dish uniquely yours. After you enjoy your Moroccan chickpea stew, storing leftovers is easy. First, let the stew cool down to room temperature. This helps keep it fresh. - Best practices for refrigerating: Use an airtight container to store the stew. This keeps it from drying out or absorbing other smells. - How long it lasts in the fridge: The stew can last up to 4 days in the fridge. Make sure to check for any signs of spoilage before eating. - Freezing options and methods: If you want to keep it longer, you can freeze the stew. Pour it into freezer-safe containers, leaving space for expansion. It can last for up to 3 months in the freezer. Reheating the stew properly is key to keeping its great taste. - Best ways to reheat for optimal texture: The stovetop method works best. Heat it in a pot over medium heat, stirring often. This helps keep the texture nice. - Microwave versus stovetop methods: You can also use the microwave. Put it in a microwave-safe bowl. Heat it in short bursts, stirring in between, until hot. - Tips for preserving flavor during reheating: To keep the flavors bright, add a splash of lemon juice before serving. This brightens the dish and brings back its fresh taste. For the full recipe, check out the section above. Enjoy your cooking! Is Moroccan Chickpea Stew easy to make? Yes, Moroccan Chickpea Stew is very easy to make. You only need simple steps to create a hearty meal. The ingredients come together quickly, and you can cook it in about 40 minutes. This is perfect for busy days or a cozy night in. Can I make this stew ahead of time? Yes, you can make this stew ahead of time. It tastes even better the next day, as the flavors deepen. Just store it in the fridge in an airtight container. When ready to eat, reheat on the stove or in the microwave. What can I serve with Moroccan Chickpea Stew? You can serve this stew with rice, couscous, or warm bread. A side salad adds freshness. For a special touch, garnish the stew with fresh cilantro and lemon wedges. Can I use dry chickpeas instead of canned? Yes, you can use dry chickpeas. Just remember to soak them overnight before cooking. You will need to adjust the cooking time, as dry chickpeas take longer to become tender. How to adjust the recipe for a larger group? To serve more people, simply double the ingredients. You might need a larger pot to cook it all at once. Make sure to taste and adjust seasoning after cooking. What are the best substitutes for vegetable broth? If you don’t have vegetable broth, you can use water or chicken broth. You can also make your own broth with herbs and spices for extra flavor. What is the Full Recipe for Moroccan Chickpea Stew? You can find the Full Recipe for Moroccan Chickpea Stew earlier in the article. It includes all the steps and ingredients you need to make this dish. How can I make this stew spicier? To add spice, use more cayenne pepper or add a chopped fresh chili. You can also try adding harissa paste for a deeper heat. Start small, then adjust to your taste. Can I add more vegetables to this stew? Absolutely! You can add any vegetables you like. Spinach, kale, or sweet potatoes work well. Just chop them up and add them at the right time in the cooking process. In this blog post, we explored the making of Moroccan Chickpea Stew. We detailed each ingredient, offered substitutions, and shared tips for cooking and serving. I provided insights on regional variations and how to store leftovers effectively. Final thoughts: This dish is flexible and forgiving, perfect for any cook. Enjoy experimenting and making it your own. You'll find joy in each bite and warmth in every serving.

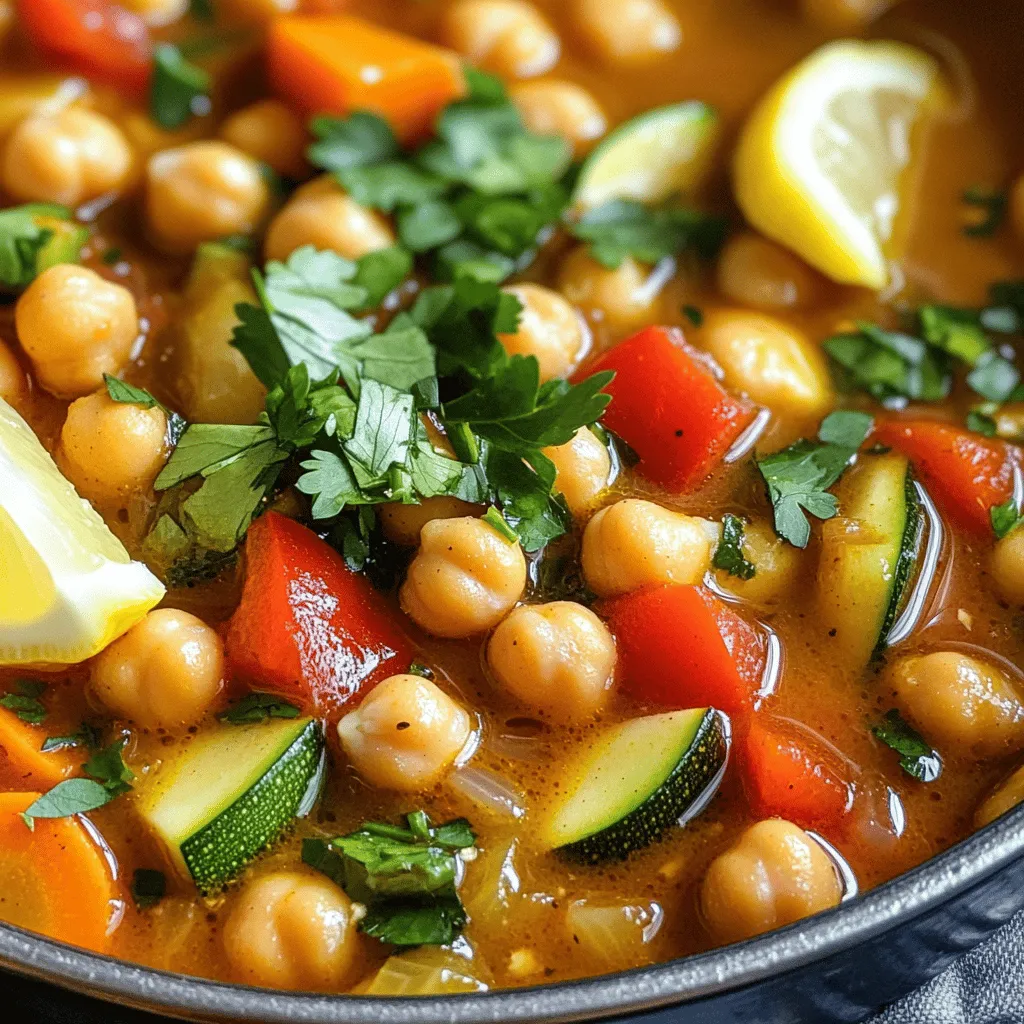
Moroccan Chickpea Stew Flavorful and Simple Recipe

Looking for a warm dish that packs a punch? Moroccan Chickpea Stew is your answer! This flavorful and simple recipe

To make a great Margherita pizza, you need a few key items. Here’s what you’ll need: - 2 cups all-purpose flour - 1 teaspoon instant yeast - 3/4 teaspoon salt - 3/4 cup warm water (about 110°F) - 1 tablespoon olive oil - 1/2 cup tomato sauce (preferably San Marzano tomatoes) - 8 oz fresh mozzarella cheese, sliced - Fresh basil leaves - A drizzle of extra virgin olive oil - Salt and pepper to taste These ingredients create a classic taste that everyone loves. If you can’t find some ingredients, don’t worry! Here are some easy swaps: - Flour: You can use bread flour instead of all-purpose flour for more chew. - Instant yeast: Regular yeast works too; just activate it in water first. - Tomato sauce: Use any good quality canned tomatoes if fresh is not available. - Mozzarella: Try burrata cheese for a creamier texture. - Basil: If fresh basil is hard to find, use dried basil for a different flavor. These substitutes keep your pizza tasty and fun. When picking ingredients, always look for quality. Here’s what to consider: - Flour: Choose unbleached flour for better flavor. - Tomatoes: San Marzano tomatoes are sweet and less acidic. - Mozzarella: Buy fresh mozzarella from a local market for the best taste. - Basil: Look for vibrant green basil. It should smell fresh and strong. Good ingredients make a big difference in your pizza’s flavor. For a complete guide, check out the Full Recipe. To start, gather your ingredients. You will need 2 cups of all-purpose flour, 1 teaspoon of instant yeast, 3/4 teaspoon of salt, 3/4 cup of warm water, and 1 tablespoon of olive oil. 1. In a large bowl, mix the flour, yeast, and salt. 2. Add the warm water and olive oil. 3. Stir until a sticky dough forms. Now it’s time to knead. Turn the dough onto a floured surface and knead for about 8-10 minutes. You want it smooth and elastic. Next, let the dough rise. Place it in a greased bowl. Cover it with a damp cloth. Put the bowl in a warm spot for about 1 hour. The dough should double in size. Once the dough has risen, punch it down to release the air. Divide it into two equal pieces. Roll one piece into a 12-inch circle on a floured surface. Next, transfer the dough to parchment paper. Spread 1/4 cup of tomato sauce evenly on top, leaving a small border. Use San Marzano tomatoes for the best flavor. Now, add 8 ounces of sliced fresh mozzarella cheese on top of the sauce. Before baking, preheat your oven to the highest setting, around 475°F. Place a pizza stone or baking sheet inside to heat up. Carefully slide the pizza on the parchment paper onto the preheated stone. Bake for 10-12 minutes. The crust should be golden, and the cheese should bubble. When it’s done, take the pizza out. Scatter fresh basil leaves on top. Drizzle with extra virgin olive oil and season with salt and pepper to taste. Now, allow the pizza to cool for a minute. Slice it and serve hot! Enjoy the delightful flavors of your homemade Margherita pizza. For the complete recipe, refer to the Full Recipe. To get great dough, start with quality flour. Use all-purpose flour for a soft crust. Mix it well with instant yeast and salt. Warm water helps activate the yeast. Knead the dough until it feels smooth and elastic. This step is key to a good texture. Letting the dough rise is also important. It should double in size for the best results. When shaping the pizza, handle the dough gently. Use your hands instead of a rolling pin. This keeps the air in the dough. Aim for a 12-inch circle, about 1/4 inch thick. Use parchment paper for easy transfer to the oven. Make sure your oven is really hot before baking. This helps create a crispy crust. For a true Margherita flavor, use fresh ingredients. San Marzano tomatoes give great taste. Fresh mozzarella adds creaminess. Don't forget the basil! Add it right after baking for a fresh touch. A drizzle of extra virgin olive oil enhances the flavor. This attention to detail makes your pizza shine. For the full recipe, check out the Margherita Pizza Extravaganza . {{image_2}} You can enjoy Margherita pizza without gluten. Use gluten-free flour instead of regular flour. Mix it with instant yeast, salt, warm water, and olive oil. The dough may feel different but still taste great. Make sure to let it rise well. Follow the same steps for shaping, topping, and baking from the Full Recipe. If you want a vegan twist, swap out the cheese. Use a nut-based cheese or a vegan mozzarella. You can also make your own using cashews. Blend soaked cashews with lemon juice, garlic, and nutritional yeast. For toppings, stick with the tomato sauce and fresh basil. The result is a fresh, bright pizza that is both tasty and plant-based. Get creative with your Margherita pizza! Add sliced cherry tomatoes for extra sweetness. You can also sprinkle red pepper flakes for some heat. Try fresh arugula after baking for a peppery kick. For a gourmet touch, drizzle balsamic glaze over the top before serving. Each addition gives your pizza a unique twist while keeping the classic charm. To keep leftover Margherita pizza fresh, let it cool first. Wrap each slice in plastic wrap or foil. Place the wrapped slices in an airtight container. Store them in the fridge. They will stay good for about three days. If you want to eat them later, consider freezing them. To enjoy your pizza again, reheat it properly. The best method is using an oven. Preheat the oven to 375°F. Place the pizza on a baking sheet. Heat for about 10 minutes. This keeps the crust crispy and the cheese melty. You can also use a skillet. Heat the skillet on low, add the pizza, and cover it. This method warms the pizza evenly. If you want to save pizza dough, you can freeze it. After kneading, shape it into a ball. Wrap the dough tightly in plastic wrap. Then place it in a freezer bag. Make sure to remove excess air. The dough can stay frozen for up to three months. When ready to use, thaw it in the fridge overnight. Then let it rise at room temperature before shaping your pizza. For the full recipe, check the related section. Margherita pizza stands out due to its simple and fresh toppings. It uses just a few key ingredients: tomato sauce, fresh mozzarella, and basil. This pizza highlights quality over quantity. Many other pizzas have lots of toppings, but Margherita keeps it light and fresh. The flavor comes from each ingredient, rather than a mix of many. Yes, you can use store-bought dough. It saves time and is very convenient. Look for high-quality dough from your local bakery or supermarket. Just remember to let it rest before shaping. This helps the dough expand and rise right. While homemade dough is great, store-bought can still make a tasty pizza. Making Margherita pizza in a regular oven is simple. First, preheat your oven to the highest heat setting. If you have a pizza stone, place it inside to heat. Once ready, shape your dough and add the toppings. Bake for 10-12 minutes until the crust is golden. This method works well to create a crispy crust. The best Margherita pizza often comes from pizzerias in Italy. Naples is famous for its authentic Margherita. However, many cities worldwide have great spots. Look for places that use fresh ingredients and a wood-fired oven. Reading reviews can help you find the top-rated spots in your area. Margherita pizza has a rich history. It dates back to the late 1800s in Naples. The pizza was named after Queen Margherita of Savoy. A chef created it using the colors of the Italian flag: red, white, and green. This simple yet delicious pizza has become a symbol of Italian cuisine. To make a great Margherita pizza, you need the right ingredients and techniques. We explored key components, like flour, tomatoes, and cheese. I shared tips on selecting the best elements for flavor. The step-by-step guide helped you master the dough and baking. We discussed variations, including gluten-free and vegan options, so everyone can enjoy this dish. Finally, I covered how to store and reheat leftovers, ensuring nothing goes to waste. Now, you can create your own delicious pizza masterpiece!

Classic Margherita Pizza Delightful Homemade Recipe

Do you crave the perfect slice of Margherita pizza? You’re in the right place! In my guide, Classic Margherita Pizza

To make a delicious Apple Cinnamon Oatmeal Bake, you will need: - 2 cups rolled oats - 2 ripe apples, peeled and diced (preferably Granny Smith for tartness) - 1/2 cup brown sugar or coconut sugar - 1 teaspoon ground cinnamon - 1/2 teaspoon ground nutmeg - 1/4 teaspoon salt - 2 cups almond milk (or any milk of choice) - 1/4 cup melted coconut oil (or butter) - 2 large eggs - 1 teaspoon vanilla extract - 1/2 cup chopped walnuts or pecans (optional) Each of these ingredients plays a key role. The oats provide a hearty base, while the apples add sweetness and moisture. Cinnamon and nutmeg give warm, cozy flavors. Almond milk keeps it creamy, and eggs help bind everything together. You can customize your bake with some fun add-ins and toppings. Here are a few ideas: - 1/2 cup dried cranberries or raisins - 1/4 cup shredded coconut - A sprinkle of chia seeds or flaxseeds - A drizzle of honey or maple syrup on top - Greek yogurt for serving Feel free to mix and match these options. They can enhance flavor and add texture. This recipe serves about 6 to 8 people. Each serving is filling and packed with flavor. You can easily adjust the recipe for a larger group or a cozy family breakfast. Just remember, it tastes best warm. Serve it fresh from the oven for a true comfort dish experience. Enjoy your Apple Cinnamon Oatmeal Bake! For the full recipe, check the details above. Start by preheating your oven to 350°F (175°C). This step ensures even baking. Next, grease a 9x9 inch baking dish or line it with parchment paper for easy removal later. In a large bowl, combine 2 cups of rolled oats, 1/2 cup of brown sugar, 1 teaspoon of ground cinnamon, 1/2 teaspoon of ground nutmeg, and 1/4 teaspoon of salt. Stir these dry ingredients well. Then, peel and dice 2 ripe apples, preferably Granny Smith for a nice tartness. Add the diced apples to the dry mixture, making sure all pieces get coated. This keeps the apples from sinking during baking. In a separate bowl, whisk together 2 cups of almond milk, 1/4 cup of melted coconut oil, 2 large eggs, and 1 teaspoon of vanilla extract. Mix them until they blend well. Pour this wet mixture into the dry oat and apple blend. Stir gently until everything is evenly combined. If you want a little crunch, fold in 1/2 cup of chopped walnuts or pecans at this stage. Transfer the mixture into the prepared baking dish. Spread it out evenly with a spatula. Bake in your preheated oven for 30-35 minutes. Look for a golden brown top. To check if it’s done, insert a toothpick in the center; it should come out clean. Once baked, remove it from the oven and allow it to cool for about 10 minutes. This cooling time helps it set up nicely, making slicing easier. Enjoy this delicious Apple Cinnamon Oatmeal Bake as a warm treat! To get a great texture, start with rolled oats. They hold up well during baking. Avoid instant oats; they become mushy. You want your bake to be fluffy but firm. Mixing the oats with apples is key. Make sure the apples are evenly spread. Use ripe apples for more flavor. Granny Smith apples give a nice tartness. This helps balance the sweetness of the brown sugar. Sweetness can change based on your taste. I usually use half a cup of brown sugar. You can use coconut sugar for a different flavor. If you want it less sweet, cut the sugar to 1/3 cup. Taste the mixture before baking. Add a little more sugar if needed. You can also sweeten with honey or maple syrup later. This dish is great for breakfast or dessert. Serve it warm to enjoy its full flavors. Drizzle honey or maple syrup on top. For a creamier touch, add a dollop of Greek yogurt. You can also sprinkle more cinnamon for extra taste. Thin apple slices make a nice garnish. If you want a crunch, add nuts on top. Serve it fresh from the oven or let it cool. Enjoy it any time of day! For the full recipe, check out the details above. {{image_2}} You can easily make this dish vegan. Swap the two large eggs for flax eggs. Mix one tablespoon of flaxseed meal with three tablespoons of water. Let it sit for five minutes until it thickens. Use almond milk or oat milk in place of regular milk. For added creaminess, try coconut yogurt as a topping. This keeps the dish rich and satisfying without dairy. To make this bake gluten-free, choose gluten-free rolled oats. Many brands offer great options that taste just as good. Check the labels to ensure they are certified gluten-free. You can also use almond flour instead of regular flour if you want an added nutty flavor. This keeps the texture light while ensuring everyone can enjoy it. Adding different flavors can make this dish even better. Try mixing in dried fruits like raisins or cranberries for a sweet touch. You can also add nuts, like pecans or almonds, for crunch. For spice lovers, consider a pinch of ginger or cardamom to the mix. These small changes can create a whole new experience with each bake. After you bake the Apple Cinnamon Oatmeal Bake, let it cool. Cut it into squares and place them in an airtight container. Store the container in the fridge. This dish stays fresh for about four days. If you want it to last longer, consider freezing it. To reheat, simply take a square out of the fridge. Place it on a microwave-safe plate. Heat it in the microwave for about 30 seconds to 1 minute. If you prefer to use the oven, preheat it to 350°F (175°C). Warm the oatmeal bake for about 10 minutes. This will help keep it moist. To freeze, wrap each square tightly in plastic wrap. You can then place them in a freezer bag or container. Make sure to label it with the date. The oatmeal bake will keep well in the freezer for up to three months. When you're ready to enjoy it, thaw it overnight in the fridge. Then, reheat it as mentioned above. Enjoy your delicious homemade treat anytime! Yes, you can! Other fruits work well in this dish. You might try pears, berries, or bananas. Each fruit adds a unique flavor and texture. For example, pears provide a soft, sweet touch, while berries add tartness. Just make sure to adjust the sugar if your fruit is very sweet. This recipe is versatile, so feel free to experiment! If you need an egg substitute, there are great options. You can use flaxseed meal, applesauce, or mashed bananas. For flaxseed, mix one tablespoon with three tablespoons of water. Let it sit for a few minutes to thicken. Use 1/4 cup of applesauce or mashed banana in place of each egg. These options keep the bake moist and tasty. When stored properly, this bake can last for about five days in the fridge. Just cover it with plastic wrap or keep it in an airtight container. If you want to save it longer, you can freeze it. It stays good in the freezer for up to three months. Just thaw it in the fridge overnight before reheating. Enjoy your delicious Apple Cinnamon Oatmeal Bake anytime! This blog gave you a clear guide to making Apple Cinnamon Oatmeal Bake. We covered key ingredients, step-by-step cooking, and helpful tips. You learned about variations and how to store leftovers for later. In my view, this bake is a great mix of flavor and nutrition. Enjoy it for breakfast or a dessert. You can also adapt it to your taste. Now, gather your ingredients and start baking!

Apple Cinnamon Oatmeal Bake Simple Comfort Dish

Warm, cozy, and oh-so-delicious, Apple Cinnamon Oatmeal Bake is the comfort dish you need. You can whip it up with

You need simple ingredients to make these grilled vegetable skewers. Here’s what you’ll need: - 1 large zucchini, sliced into half-moons - 1 bell pepper (red or yellow), cut into 1-inch pieces - 1 red onion, cut into wedges - 8 cherry tomatoes - 1 cup mushrooms, stems removed - 2 tablespoons olive oil - 1 tablespoon balsamic vinegar - 1 teaspoon garlic powder - 1 teaspoon dried oregano - Salt and pepper to taste - Fresh basil leaves for garnish I recommend using fresh vegetables for the best flavor. Look for firm zucchini without soft spots. Choose bell peppers that are bright and shiny. The onion should feel heavy for its size. For tomatoes, pick ones that are plump and fragrant. Fresh mushrooms should be smooth and not slimy. You can mix and match your favorite veggies too! The marinade adds great taste to your skewers. You will use olive oil for richness and balsamic vinegar for a tangy kick. Garlic powder gives it a nice depth of flavor, while dried oregano adds a hint of earthiness. Don’t forget salt and pepper to enhance all the flavors. Toss your veggies in this mixture for a tasty treat! For the full recipe, check the instructions above. Start by preheating your grill to medium-high heat. This step is key. A hot grill helps the veggies cook fast and get those pretty grill marks. If you use wooden skewers, soak them in water for 30 minutes. This trick keeps them from burning on the grill. In a large bowl, combine your fresh vegetables. I use zucchini, bell pepper, onion, cherry tomatoes, and mushrooms for color and flavor. Next, make your marinade. In a small bowl, mix olive oil, balsamic vinegar, garlic powder, oregano, salt, and pepper. Pour this mix over the veggies. Toss them gently so every piece gets coated well. Now it’s time to skewer! Thread your marinated veggies onto the skewers. Alternate the colors for a vibrant look. Place the skewers on the grill and cook for 8 to 10 minutes. Turn them every few minutes for even cooking. You’ll know they are done when they are tender and have nice grill marks. Remove them from the grill and top with fresh basil leaves. Enjoy your delicious grilled vegetable skewers! For the full recipe, refer to the section above. To get grilled vegetables just right, start with good prep. Cut your veggies into even sizes. This helps them cook at the same rate. Zucchini should be sliced into half-moons. The bell pepper and onion should be in 1-inch pieces. Cherry tomatoes and mushrooms can stay whole. Uniform pieces mean even cooking and better taste. Keep an eye on your grill heat. Medium-high works best for grilling veggies. You want them to cook through without burning. Turn the skewers often. This gives all sides some grill marks and a nice char. Grill for about 8-10 minutes until they’re tender. Choosing skewers can change your grilling game. Wooden skewers are great but need some care. Soak them in water for 30 minutes first. This stops them from burning on the grill. Metal skewers are sturdy and reusable. They don’t need soaking, but they can get hot. Use oven mitts when handling them. Both types work well, so pick what you have. Seasoning is key to tasty grilled veggies. Start simple with salt and pepper. They bring out the natural flavors. For a boost, try garlic powder and dried oregano. These add depth to your dish. A splash of balsamic vinegar brightens everything up. Olive oil helps the veggies cook better and adds flavor. Feel free to mix in your favorite herbs. Fresh basil or thyme can change the dish. Experiment with spices for fun flavors. Each choice will make your skewers unique! For the full recipe, check out the details above! {{image_2}} You can mix and match vegetables for your skewers. Try these options: - Eggplant, cut into cubes - Asparagus, trimmed - Sweet corn, cut into rounds - Bell peppers in different colors - Carrots, sliced thin These veggies add different flavors and textures. Feel free to experiment! This recipe is vegan and gluten-free. All the ingredients fit those needs. Use the same marinade and veggies. If you want a different taste, add some lemon juice or tamari for extra flavor. These changes keep it fresh and fun. Pair vegetables with herbs and spices for great taste. Here are some fun ideas: - Add fresh rosemary or thyme for a fragrant twist. - Use smoked paprika for a hint of smokiness. - Try a splash of soy sauce for umami depth. Mix and match flavors to find your perfect combination. Grilled vegetable skewers can be a colorful and tasty treat for everyone! For the complete recipe, check out the [Full Recipe]. To keep your grilled vegetable skewers fresh, store them in an airtight container. Make sure they cool down first. If you have leftovers, you can also wrap them tightly in foil or plastic wrap. This helps to keep the moisture in and the flavors intact. If you can, store your skewers in the fridge. They will stay fresh longer that way. When you want to eat the leftovers, you can reheat them easily. The best way is to use a grill or a pan. Just heat it on medium heat and add the skewers. Cook for about 5 minutes, turning them so they heat evenly. You can also use a microwave, but they may not taste as good. Use the microwave for about one minute, then check if they are warm. Grilled vegetable skewers will last in the fridge for about 3 to 5 days. After that, they may lose flavor and texture. If you want to keep them longer, you can freeze them. They will last up to 3 months in the freezer. Just remember to wrap them well to avoid freezer burn. For the best taste, enjoy them fresh! Yes, you can use wooden, metal, or even bamboo skewers. Wooden skewers need soaking in water. This helps prevent burning. Metal skewers can handle high heat well. They also make it easy to turn the skewers. Choose what works best for you! The best grill temperature is medium-high. This usually means around 400°F to 450°F. At this heat, the veggies cook evenly. They become tender and get nice grill marks. If the grill is too hot, the outside may burn. You can tell the veggies are done by looking for a few signs. They should be tender when you poke them with a fork. You also want nice grill marks on the outside. Cooking usually takes about 8-10 minutes. Keep an eye on them and turn often for even cooking. For the full recipe, check out the details above! Grilling vegetables can be fun and tasty. You learned about the best ingredients, marinating tips, and grilling steps. I shared ways to make your veggies perfect every time. You can choose different vegetables and even add flavors that excite your taste buds. Remember to store leftovers properly for future meals. Now, you're ready to impress friends and family with your grilled veggie skills. Enjoy cooking and make every meal delicious!

Grilled Vegetable Skewers Flavorful and Festive Recipe

Get ready to elevate your grilling game with my easy and delicious Grilled Vegetable Skewers! This festive recipe features colorful

To make a tasty cauliflower fried rice, gather these key items: - 1 medium head of cauliflower, riced (about 4 cups) - 2 tablespoons sesame oil - 1 small onion, finely chopped - 2 garlic cloves, minced - 1 cup mixed vegetables (carrots, peas, and corn) - 2 green onions, chopped - 2 eggs, lightly beaten - 3 tablespoons low-sodium soy sauce - 1 teaspoon freshly grated ginger - Salt and pepper to taste These ingredients create a base that is both flavorful and healthy. The riced cauliflower acts as a great substitute for regular rice, making this dish low in carbs while still delicious. You can also add these optional ingredients to make your dish unique: - Cooked chicken or shrimp for added protein - Tofu for a vegetarian option - Sesame seeds for garnish - Additional spices, like chili flakes, for heat Feel free to mix and match based on your taste. The beauty of this recipe is its flexibility. You can use what you have on hand to create many different flavors. Cauliflower fried rice is not only low in calories but also packed with nutrients. Here's a rough breakdown per serving: - Calories: 120 - Protein: 7g - Carbohydrates: 10g - Fiber: 4g - Fat: 6g This dish is a great way to enjoy a meal that is both filling and nutritious. You can enjoy it guilt-free while getting plenty of vitamins and minerals. For the full recipe, check out the complete guide! To start, rinse the cauliflower well. Remove the leaves and cut it into small florets. You can use a food processor to rice the cauliflower. Pulse it until it looks like small grains of rice. If you're busy, you can buy pre-riced cauliflower at the store. This step makes it easy and quick. Next, grab a large skillet or wok. Heat two tablespoons of sesame oil over medium heat. Once hot, add one finely chopped onion and two minced garlic cloves. Sauté these for about two to three minutes. You want the onion to turn clear and smell great. Then, toss in one cup of mixed vegetables like carrots, peas, and corn. Cook them for three to four minutes, stirring often, until they become tender. Move the cooked veggies to one side of the skillet. Pour two lightly beaten eggs into the empty space. Scramble the eggs until they are fully cooked. Then mix them back with the veggies. Now, add the riced cauliflower to the skillet. Stir everything together and pour in three tablespoons of low-sodium soy sauce. Add one teaspoon of freshly grated ginger next. Stir-fry the mixture for five to seven minutes. You want the cauliflower to be tender but still firm. Season with salt and pepper to taste. Lastly, stir in two chopped green onions and take it off the heat. For a finishing touch, sprinkle sesame seeds on top for extra crunch. You can find the full recipe in the previous section. To rice cauliflower, start with a fresh head. Rinse it under cold water. Remove the leaves and cut it into smaller florets. Use a food processor to pulse the florets until they look like rice grains. You can also buy pre-riced cauliflower to save time. Just make sure it’s fresh. If you rice it yourself, do not over-process. You want small, even pieces. This way, it cooks evenly. When cooking cauliflower fried rice, use a large skillet or wok. Heat your skillet before adding oil. Sesame oil adds great flavor. Sauté onions and garlic until soft. This takes about 2-3 minutes. Add your mixed vegetables next. Stir regularly so they cook evenly. Push the veggies to one side when adding eggs. Scramble them well before mixing everything together. This keeps the eggs fluffy and prevents them from sticking. Stir-fry everything for about 5-7 minutes. You want the cauliflower tender but not mushy. Seasonings can take your cauliflower fried rice to the next level. Low-sodium soy sauce gives it a savory taste. Fresh ginger adds a nice zing. Don’t forget salt and pepper for balance. You can also add sesame seeds for extra crunch. Green onions are a great garnish too. They add freshness and color. Experiment with different spices to find your favorite blend. For a kick, consider adding a splash of hot sauce or chili flakes. {{image_2}} You can add protein to make your cauliflower fried rice heartier. Chicken is a great option. Use cooked, diced chicken breast for a lean touch. Shrimp adds a nice seafood flavor. Just sauté them until they turn pink. For a plant-based choice, tofu works well. Press and cube firm tofu, then fry it until golden. This keeps your meal filling and nutritious. Cauliflower fried rice easily caters to vegetarians and vegans. Just skip the eggs for a vegan meal. You can add chickpeas or black beans for extra protein. Both add texture and flavor. Consider using nutritional yeast for a cheesy taste without dairy. This also boosts your meal's nutrition. You can switch up your veggies based on what’s in season. In spring, add fresh peas or asparagus. Summer is perfect for zucchini or bell peppers. In fall, try butternut squash or kale. Winter brings options like Brussels sprouts or carrots. This keeps your dish fresh and exciting throughout the year. For the full recipe, check out the details above! To keep your cauliflower fried rice fresh, let it cool first. Once cool, place it in an airtight container. This helps prevent moisture loss and keeps the flavors intact. Store it in the fridge for up to four days. Make sure to label the container with the date. This way, you’ll know when to use it. When you're ready to eat your leftover cauliflower fried rice, reheat it gently. You can use a skillet or a microwave. If using a skillet, add a splash of water. This helps steam the rice and keeps it from drying out. Heat on medium until warm, stirring often. If using a microwave, cover the bowl with a lid or a damp paper towel. Heat in 30-second intervals until warm. This method helps retain moisture. You can freeze cauliflower fried rice for later meals. Let it cool completely and portion it into freezer bags. Remove as much air as you can before sealing. Label the bags with the date. You can freeze it for up to three months. When you're ready to enjoy it, thaw it in the fridge overnight. Reheat using the tips mentioned above for the best texture. With these simple steps, your meal prep becomes easy and effective! For the full recipe, check out the section above. Yes, you can use frozen cauliflower rice. It saves time and is easy to find. Just thaw it before cooking. It cooks quickly, so stir-fry it for a few minutes. This will keep the texture nice. Cauliflower fried rice is low in carbs and calories. It is rich in vitamins and fiber. You get lots of nutrients from the cauliflower and veggies. This dish can help with weight loss and digestion. Plus, it is a great way to eat more vegetables. To make it spicy, add chili sauce or crushed red pepper. You can also use fresh jalapeños for heat. Just mix them in with the veggies. Start with a little, then taste and add more if needed. Enjoy the kick! For the full experience, check out the Full Recipe for Cauliflower Fried Rice! Cauliflower fried rice is a simple, healthy dish that you can make at home. We covered essential and optional ingredients, cooking steps, and tasty tips to get it right. You can add protein or swap in seasonal veggies for extra flavor. Plus, storing leftovers and reheating them is easy. Overall, this dish is a great way to enjoy a low-carb meal packed with nutrition. Give it a try and make it your own!

Flavorful Cauliflower Fried Rice Easy and Healthy Meal

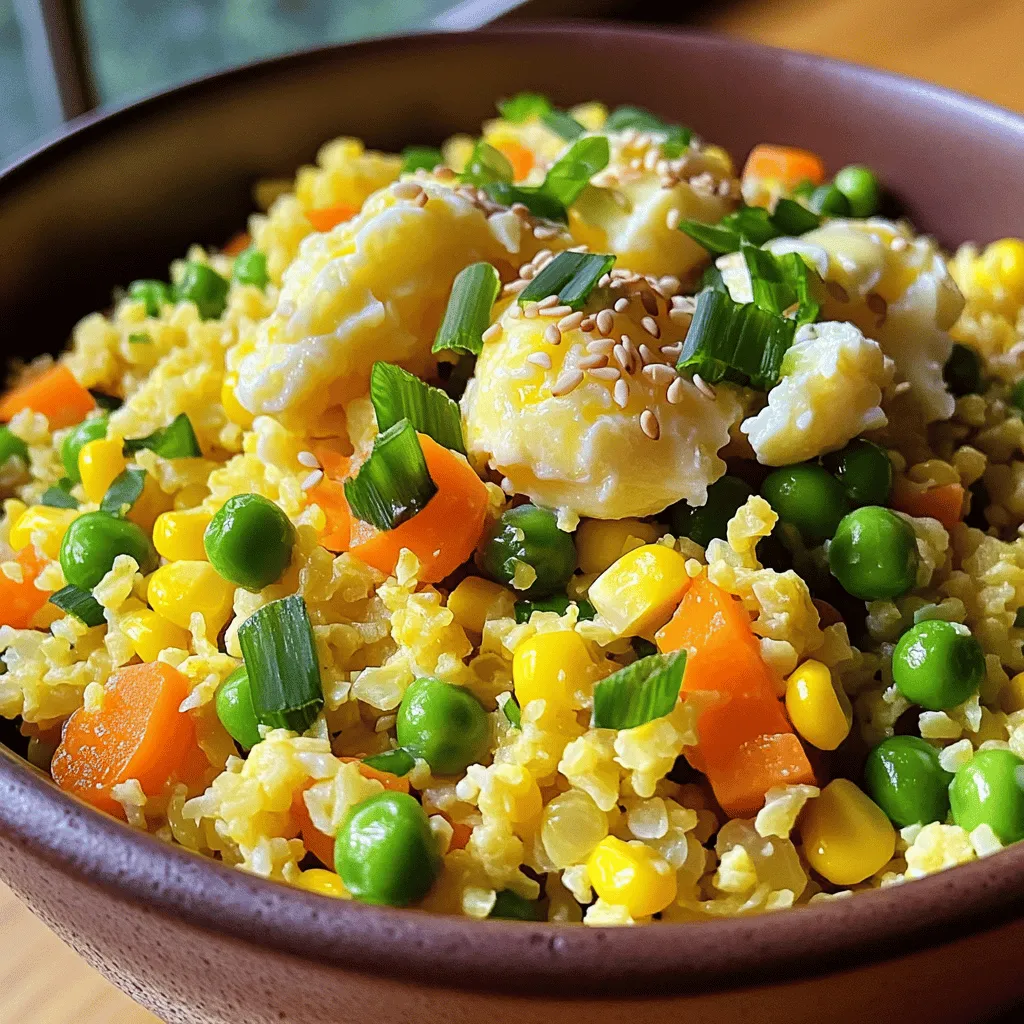
Looking for a healthy meal that’s quick and tasty? You’ve found it! My flavorful cauliflower fried rice recipe swaps out

To make a refreshing chilled avocado soup, you'll need these simple ingredients: - 3 ripe avocados, peeled and pitted - 2 cups vegetable broth (preferably low-sodium) - 1 cup plain Greek yogurt - 1 clove garlic, minced - 1 tablespoon lime juice - 1 jalapeño, seeded and finely chopped - 1 teaspoon ground cumin - Salt and pepper to taste - Fresh cilantro leaves for garnish - Lime wedges for serving These ingredients blend perfectly to create a creamy and smooth texture. The avocados provide a rich flavor, while the Greek yogurt adds creaminess. The lime juice gives it a bright zing, and the jalapeño adds a hint of spice. When choosing avocados, look for ones that yield slightly when you press them. This means they are ripe and ready for your soup. The vegetable broth keeps the dish light and flavorful. Using low-sodium broth allows you to control the saltiness. You can also play with the ingredients. If you want a thicker soup, use less broth. For more spice, add more jalapeño or try a different pepper. Each ingredient adds something special, making this soup a delight. - Step 1: Blend the ingredients Start by adding the avocados, vegetable broth, Greek yogurt, minced garlic, lime juice, jalapeño, and ground cumin to a blender. Blend on high speed until smooth and creamy. This process takes just a few minutes. - Step 2: Adjust consistency and seasoning Check the soup’s thickness. If it feels too thick, add a bit more vegetable broth. After that, taste the soup. Add salt and pepper to enhance the flavor to your liking. - Step 3: Chill the soup Pour the blended soup into a bowl or container. Cover it well and place it in the fridge. Let it chill for at least 1 hour. This time allows the flavors to blend nicely. - Step 4: Serve and garnish When ready to serve, stir the soup well. Pour it into chilled bowls. Garnish with fresh cilantro leaves and add a lime wedge on the side. This step adds a nice touch and a burst of flavor. You can find the complete method in the Full Recipe. Enjoy this refreshing dish! - Pair this soup with tortilla chips for crunch. - Add shrimp or crab for a protein boost. - Serve in chilled bowls to keep it cold. - Garnish each bowl with cilantro and lime wedges. - To ensure a smooth texture, blend the soup well. - If the soup is too thick, add more broth slowly. - Use fresh lime juice for a brighter taste. - Try roasting the garlic for a sweeter flavor. - If you can’t find avocados, use ripe bananas for a creamy base. - For a dairy-free option, swap Greek yogurt with coconut cream. - You can also use nut milk instead of yogurt for creaminess. - Explore using silken tofu for a protein-packed alternative. For the full recipe, check out Chilled Avocado Delight. {{image_2}} To make a spicy avocado soup, you can add different peppers. Use jalapeños, serranos, or even habaneros for heat. Start with a small amount, then taste. You can adjust the spice level to fit your taste. If you want less heat, remove the seeds and membranes. This will help tone down the spice and keep the soup flavorful. For a refreshing twist, try adding cucumbers. They add crunch and a cool taste. Peel and chop one medium cucumber. Blend it with the other ingredients in the Full Recipe. The cucumber balances the creaminess of the avocado. You may want to add a bit more lime juice for brightness. Using fresh herbs can elevate your chilled avocado soup. Cilantro is a classic choice, but try basil or mint for a different flavor. Make sure to chop the herbs finely before blending. Pairing herbs with avocado creates a fresh and vibrant taste. Experiment to find your favorite herb combination! For storing chilled avocado soup, choose glass or BPA-free plastic containers. These materials help keep the soup fresh. Make sure the container has a tight lid. This prevents air from spoiling the soup. You want to seal it well to keep flavors strong. You can store this soup in the fridge for up to three days. Just make sure to keep it sealed. If you want to freeze it, pour the soup into ice cube trays or freezer-safe bags. This way, you can take out only what you need. When ready to eat, thaw it in the fridge overnight. Avoid refreezing once it has been thawed. To thicken chilled avocado soup, consider using these options: - Add more Greek yogurt for creaminess. - Blend in a small potato for extra body. - Include a bit of avocado oil for richness. - Use less vegetable broth to keep it dense. Each of these options enhances the texture while keeping the flavor intact. Just remember to blend well after adding any thickening agents. Yes, you can make this soup ahead of time. Here are some best practices: - Prepare the soup up to a day in advance. - Store it in an airtight container to keep it fresh. - Chill it in the refrigerator for at least one hour before serving. - Give it a stir before serving to mix the flavors. Making it in advance allows the flavors to meld beautifully. Chilled avocado soup is very healthy. Here are some nutritional benefits: - Avocados are rich in healthy fats. - Greek yogurt adds protein and probiotics. - Vegetables provide vitamins and fiber. - Lime juice offers vitamin C and boosts flavor. This soup not only tastes great but also supports a balanced diet. Yes, you can serve this soup warm. To enjoy it hot: - Heat the soup gently on the stove. - Avoid boiling to keep the creamy texture. - Taste and adjust seasoning before serving. Serving it warm gives a new twist to this delightful dish. Chilled avocado soup is easy to make with just a few simple steps. First, blend your fresh ingredients, then chill and serve with garnishes. This soup is not only delicious but also healthy and versatile. You can change flavors or use different herbs based on your taste. Remember to store leftovers properly to enjoy later. Experimenting with new ingredients can make each bowl unique. Enjoy your cooking, and feel proud of the vibrant soup you create!

Chilled Avocado Soup Refreshing and Flavorful Recipe

Looking for a light and refreshing dish that screams summer? Try this Chilled Avocado Soup! It’s creamy, flavorful, and takes

To make honey glazed carrots, you need simple and fresh ingredients. Here’s what you need: - 1 pound baby carrots (or regular carrots, peeled and cut into sticks) - 3 tablespoons honey - 2 tablespoons butter - 1 teaspoon fresh thyme leaves (or ½ teaspoon dried thyme) - Salt and pepper to taste - 1 tablespoon lemon juice - 1 tablespoon chopped fresh parsley (for garnish) These ingredients work together to create a sweet and savory dish. Should you use fresh or frozen carrots? I always prefer fresh carrots for this recipe. They have a better texture and flavor. Fresh carrots are crisp and sweet. They can soak up the honey glaze well. If you only have frozen carrots, you can still use them. Just make sure to thaw them first. They may not be as crunchy, but they’ll still taste good. What if you want to change the sweetness? You can try different sweeteners. Maple syrup is a great choice. It has a rich flavor that pairs well with carrots. Agave nectar is another option. It’s light and sweet. You can also use brown sugar if you want a caramel-like taste. Just keep in mind that each sweetener will change the flavor a bit. Try them to see what you like best. You can find the full recipe [here](#). Start by washing your baby carrots well. If you use regular carrots, peel them first. Then cut them into sticks. This helps them cook evenly. You want pieces that are about the same size. It makes sure they all get tender at the same time. Keep them ready for cooking. Heat a large skillet over medium heat. Add the butter and let it melt. Once melted, add your carrots to the skillet. Stir them every few minutes. Cook for about 5 minutes. You want them to soften a bit. Then drizzle the honey over the carrots. Stir well to coat them evenly. Add fresh thyme, salt, and pepper. Cook for another 5 to 7 minutes. This allows the honey to turn sticky and caramelize. Make sure to stir often to prevent burning. When the carrots are tender, remove the skillet from the heat. Squeeze in some lemon juice for a bright taste. Mix it all well. Now, transfer the honey-glazed carrots to a serving dish. Sprinkle fresh parsley on top for a nice color. Your dish is ready to enjoy. For the full recipe, check out the details above. To get the best glaze on your carrots, follow these steps. First, use fresh carrots for great flavor. Cut them evenly to ensure they cook at the same rate. Start with melted butter in your skillet and let it coat the carrots well. Add honey after the carrots soften a bit. This timing helps the honey stick and caramelize nicely. Stir often to prevent burning and get that beautiful, shiny glaze. You can tweak the sweetness to fit your taste. If you find the dish too sweet, add a bit more lemon juice. This will brighten the flavor and balance the sweetness. For extra depth, try adding a pinch of salt or a dash of pepper. Fresh herbs like thyme add a savory note, while honey provides sweetness. Experiment to find your perfect mix! Avoid overcooking the carrots. They should be tender yet crisp when done. If you cook them too long, they'll become mushy. Also, watch the heat closely. Cooking on high can burn the honey, making it bitter. Lastly, don’t skip the lemon juice. It lifts the dish and makes the flavors pop. Follow these tips, and you'll create a dish everyone loves. For the full recipe, check the section above. {{image_2}} You can change the flavor of honey glazed carrots by adding spices and herbs. For a warm taste, try cinnamon or ginger. Just a pinch can make a big difference. If you like a bit of heat, add a dash of cayenne pepper. Fresh herbs like rosemary or dill can also enhance the flavor. Mix and match to find your favorite blend! Honey glazed carrots pair well with other veggies. You can add baby potatoes for heartiness. Roasted parsnips also work great with the glaze. Try mixing in some green beans or snap peas for a colorful dish. Each vegetable brings its own unique taste to the mix. This adds depth and makes the dish more exciting. If you want a vegan version, it’s easy to swap out the butter. Use coconut oil or olive oil instead. The honey can be replaced with maple syrup or agave nectar for sweetness. The taste will still be rich and delicious. You’ll still enjoy that lovely glaze without any animal products. After enjoying your honey glazed carrots, let them cool. Place them in an airtight container. This keeps them fresh for up to three days. Make sure to store them in the fridge. For best taste, eat them within two days. To reheat, use the stove or a microwave. In a skillet, add a splash of water. Heat on low until warm. Stir often to avoid burning. In the microwave, place in a bowl. Cover it with a damp paper towel. Heat in short bursts until warm. This keeps the carrots tender. You can freeze honey glazed carrots, but they may lose some texture. Let them cool completely. Place them in a freezer-safe bag. Squeeze out the air before sealing. They can last up to three months in the freezer. When ready to eat, thaw in the fridge overnight. Reheat as mentioned above for the best results. For a full recipe, check out the earlier sections. I recommend using baby carrots for their sweetness and tenderness. They cook quickly and add nice color to your dish. If you prefer regular carrots, choose firm ones. Peel and cut them into sticks for even cooking. Both options work well for honey glazed carrots. Yes, you can make honey glazed carrots ahead of time. Cook them as stated in the recipe, then let them cool. Store them in an airtight container in the fridge for up to three days. When ready to serve, reheat them on the stove or in the microwave. To reduce the sweetness, use less honey. You can also add more lemon juice for a tangy flavor. Mixing in some garlic or onion can balance the sweetness too. Adjust the flavors in small steps to find your perfect mix. Enjoy your honey glazed carrots just the way you like! In this blog post, we covered how to make perfect honey-glazed carrots. We looked at key ingredients, like fresh versus frozen carrots and alternative sweeteners. I shared simple steps for preparation, cooking, and serving. You learned tips for achieving the right glaze and avoiding common mistakes. We also explored variations, such as adding spices or making it vegan. Finally, I discussed the best ways to store and reheat leftovers. Enjoy making this dish your own, and remember, small changes can lead to big flavors.

Honey Glazed Carrots Simple and Flavorful Side Dish

Looking for a simple side dish that packs a punch? Honey Glazed Carrots are a must-try! These sweet, tender veggies

- 1 cup quinoa, rinsed - 2 cups vegetable broth - 1 red bell pepper, diced - 1 yellow bell pepper, diced - 1 zucchini, diced - 1 red onion, chopped - 1 cup cherry tomatoes, halved - 2 tablespoons olive oil - 1 teaspoon garlic powder - 1 teaspoon paprika - Salt and pepper to taste - 1/4 cup fresh parsley, chopped - Juice of 1 lemon - 1/4 cup feta cheese (optional) The heart of this salad is quinoa. It's a superfood packed with protein. Quinoa is gluten-free and easy to digest. Next, we have fresh vegetables. I love using bell peppers, zucchini, and cherry tomatoes. They add color and a sweet taste. The red onion gives a nice crunch and flavor. We coat our veggies in olive oil and seasonings. Olive oil adds richness. Garlic powder and paprika kick up the taste. You can adjust the salt and pepper to your liking. For a fresh touch, we add parsley and lemon juice. The parsley brightens the dish. Feta cheese is optional but adds a creamy texture. You can find the full recipe above to guide you through this tasty creation. - Calories per serving: About 250 calories - Key nutrients: High in protein, fiber, vitamins, and minerals This salad is not just tasty; it’s also healthy. Each serving gives you good protein and fiber. You will feel full and satisfied. The vitamins from the vegetables help keep you healthy. This dish is a great choice for lunch or dinner. Preheating the oven Start by preheating your oven to 400°F (200°C). This heat helps to roast the veggies perfectly. Chopping and seasoning the vegetables Next, chop your vegetables. Dice the bell peppers, zucchini, and red onion. Halve the cherry tomatoes. In a big bowl, toss these chopped veggies with two tablespoons of olive oil. Add one teaspoon of garlic powder, one teaspoon of paprika, and a pinch of salt and pepper. Make sure everything is well mixed to coat the vegetables evenly. Boiling vegetable broth In a medium pot, bring two cups of vegetable broth to a boil. This broth adds great flavor to the quinoa. Simmering instructions Once the broth is boiling, add one cup of rinsed quinoa. Lower the heat to a simmer and cover the pot. Let it cook for about 15 minutes. The quinoa will absorb all the broth and become fluffy. After cooking, remove it from heat and let it cool for a bit. Mixing roasted vegetables with quinoa After the vegetables are roasted and the quinoa is cooked, it’s time to mix them. In a large bowl, combine the roasted veggies with the fluffy quinoa. Adding finishing touches Squeeze the juice of one lemon over the mixture for a fresh taste. Toss everything together gently. Fold in a quarter cup of chopped parsley. If you like cheese, sprinkle some feta on top. Adjust the seasonings with more salt and pepper if needed. This dish is colorful and full of flavor. For the full recipe, check above! To make your roasted vegetable quinoa salad shine, focus on spices and herbs. I recommend using: - 1 teaspoon garlic powder - 1 teaspoon paprika - Salt and pepper to taste These add depth and warmth. You can also try fresh herbs like parsley or basil for a burst of flavor. Marinating your veggies can also enhance taste. Toss the chopped vegetables in olive oil, garlic, and spices. Let them sit for at least 30 minutes. This helps them soak up all those delicious flavors before roasting. Roasting vegetables right is key for a great salad. Start by cutting them into uniform pieces. This ensures they cook evenly. Spread them on a baking sheet in a single layer. If they are crowded, they will steam instead of roast. For quinoa, rinse it under cold water first. This removes bitterness and gives it a clean taste. Then, cook it in vegetable broth, not water. This adds extra flavor. Bring the broth to a boil, then lower the heat. Cover and let it simmer for about 15 minutes. Fluff it with a fork once done. By following these tips, you will create a salad that is not only healthy but also full of flavor and texture. For the full recipe, check out the section above. {{image_2}} You can change the vegetables based on the season. In spring, use asparagus and peas. For summer, try eggplant and corn. Autumn works well with squash and carrots. In winter, consider root vegetables like sweet potatoes and beets. Each season brings new flavors. Roasting is key to bringing out the taste. You can grill veggies instead. This method adds a smoky flavor. You can also steam them for a softer texture. Experiment with different methods to find what you love. Adding protein makes your salad even better. You can toss in black beans or chickpeas. These options boost fiber and keep you full. If you like meat, consider grilled chicken or shrimp. For a vegan option, use tofu or tempeh. These add protein and soak up flavors well. You can marinate them before cooking for even more taste. Enjoy the Full Recipe to discover all the ways you can mix it up! To store leftover salad, place it in an airtight container. This keeps it fresh for up to four days. You can also layer a paper towel in the container to absorb excess moisture. This helps prevent sogginess. For longer freshness, use glass containers. They seal tightly and do not retain odors. If your salad has feta, store it separately to keep flavors bright. The best way to reheat quinoa salad is to warm it gently in a skillet. Use low heat to prevent burning. Stir often to heat evenly. You can also enjoy this salad cold. Cold salads are crisp and refreshing. They are perfect for hot days or as a quick meal. I often serve it both ways for variety. For the Full Recipe, check back at the beginning of the article! Roasted Vegetable Quinoa Salad lasts about 4 to 5 days in the fridge. Store it in an airtight container. This keeps it fresh and safe to eat. If you notice any odd smells or changes in texture, it’s best to toss it. Always check before eating leftovers. Yes, you can make this salad ahead of time. I recommend prepping it a day in advance. Just roast the veggies and cook the quinoa. Then, mix them together right before serving. This keeps the flavors fresh and bright. You can also store the dressing separately to avoid sogginess. If you need a substitute for quinoa, try rice or couscous. Both options work well. For a gluten-free choice, use cauliflower rice or millet. These alternatives still provide a nice base and texture. You can add your favorite grains to suit your taste. Yes, this salad is gluten-free! Quinoa is naturally gluten-free, making it a great choice. If you use gluten-free broth and check other ingredients, you can enjoy it worry-free. This makes the salad perfect for those with gluten sensitivities. Roasted Vegetable Quinoa Salad is easy to make and packed with nutrients. We covered vital ingredients, cooking steps, and flavorful tips. You learned about storage and variations to keep the dish fresh and tasty. In summary, this salad is versatile and nutritious. It fits many diets and tastes. Try different veggies or proteins to make it your own. Enjoy the simple joy this dish brings to your table.

Roasted Vegetable Quinoa Salad Healthy and Flavorful Dish

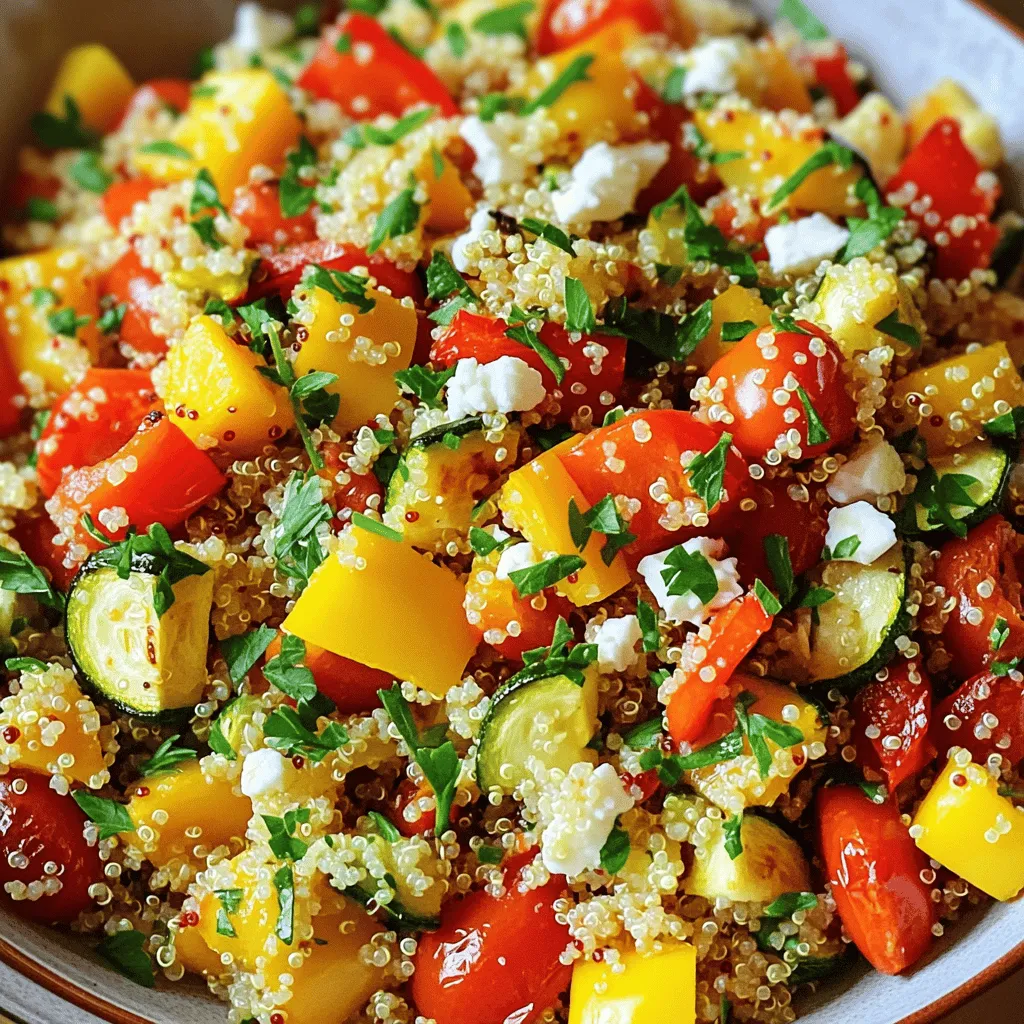
Looking for a dish that’s both healthy and full of flavor? Try my Roasted Vegetable Quinoa Salad! Packed with colorful

- 2 ripe mangoes, peeled and diced - 1 small red onion, finely chopped - 1 jalapeño, deseeded and minced - 1 red bell pepper, diced - 1/2 cup fresh cilantro, chopped - Juice of 2 limes - 1 teaspoon honey (optional) - Salt and pepper to taste - 1/2 teaspoon cumin To make a spicy mango salsa, you need fresh ingredients. Ripe mangoes bring sweetness, while jalapeños add heat. Always look for firm mangoes that give slightly when pressed. This texture ensures a juicy bite. Red onion gives a nice crunch and sharp taste. If you want less bite, soak it in water. This step can tame the flavor a bit. The red bell pepper adds color and sweetness. Fresh cilantro is key for a bright taste. If you're not a fan, you can skip it or use parsley. Lime juice adds tanginess and keeps the mangoes vibrant. Honey is optional, but it can balance the spice if you desire. Cumin gives a smoky note that enhances the salsa. Gather your ingredients before starting. This keeps the process smooth and fun. For the full recipe, check the section below. To make spicy mango salsa, follow these simple steps. This salsa is easy and fun to prepare. - Step 1: Combine diced mangoes, red onion, jalapeño, and bell pepper in a bowl. This mix gives a bright and fresh look. - Step 2: Add chopped cilantro and lime juice. The lime juice adds a zesty kick. - Step 3: Include optional honey for sweetness. Honey balances the heat from the jalapeño. - Step 4: Season with salt, pepper, and cumin. Cumin adds a smoky flavor that enhances the salsa. - Step 5: Fold ingredients gently, avoiding mashing. This keeps the mangoes intact and juicy. - Step 6: Refrigerate for 30 minutes. Chilling helps the flavors blend well. - Step 7: Adjust seasoning before serving. Taste and add more salt, lime, or honey if needed. For the complete recipe, check out the Full Recipe section above. Enjoy this salsa with chips or on your favorite dishes! - Use ripe mangoes for the best sweetness. Ripe mangoes have a natural sweetness that makes the salsa shine. Look for mangoes that yield slightly to pressure and have a sweet aroma. - Adjust jalapeño amount for desired heat level. If you like it spicy, add more jalapeño. For a mild flavor, use less. Remember, you can always add more spice later, but it's hard to tone it down. - Letting sit allows flavors to meld. After mixing, cover the salsa and chill it for at least 30 minutes. This resting time lets the flavors combine, making each bite taste better. - Serve in a colorful bowl with cilantro and lime wedges. A bright bowl makes the vibrant colors pop. Top it with fresh cilantro and lime wedges for a fun touch. - Pair with tortilla chips or as a topping for grilled meats. This salsa is perfect with crispy chips. You can also spoon it over grilled chicken or fish. It adds freshness and zing! {{image_2}} You can change the base fruit in your salsa. Try using pineapple or peaches instead of mangoes. These fruits add their own sweet twist. If you want more protein, add black beans. They give you a hearty bite and make the salsa filling. For a creamy texture, mix in diced avocado. This step not only enhances the flavor but also adds richness. To freshen up the salsa, include diced tomatoes. They add a burst of color and taste. If you crave more heat, just add a splash of hot sauce. This small change can take your salsa to a new level. Experimenting with these swaps and additions helps to find your perfect mix. You can check the full recipe for more tips and flavors! To keep your spicy mango salsa fresh, store leftovers in an airtight container in the fridge. It tastes best when eaten within 2-3 days. This helps keep the flavors bright and vibrant. If you want to save some for later, you can freeze it! The salsa can be frozen for up to 1 month. Just make sure to thaw it in the fridge before serving. This way, it stays tasty and ready for your next gathering. Enjoy your delicious mango salsa anytime! The best mango for salsa is the Ataulfo mango. This mango is sweet and creamy. It has fewer fibers, making it perfect for salsa. You can also use Haden or Tommy Atkins mangoes if Ataulfo is not available. Yes, you can make this salsa ahead of time. It tastes better after sitting for a while. The flavors blend well when you let it chill in the fridge for at least 30 minutes. Just cover it tightly to keep it fresh. To adjust the spice, change the amount of jalapeño. For less heat, use half or remove the seeds. If you want it spicier, add more jalapeño or even a pinch of cayenne pepper. Always taste as you go. Yes, mango salsa is healthy! It is low in calories and full of vitamins. Mangoes provide vitamin C and fiber. The fresh veggies add more nutrients. This salsa can be a great choice for a light snack or side. Mango salsa pairs well with many dishes. It is great with grilled chicken or fish. You can serve it with tacos or nachos too. It also makes a colorful topping for salads or wraps. Check out the Full Recipe for more serving ideas! Fiery Mango Salsa is a bright, fresh dip. It bursts with flavor and is easy to make. This salsa is perfect for summer gatherings or a tasty snack. Here’s a quick look at what you need and how to prepare it. Key Ingredients: - 2 ripe mangoes, peeled and diced - 1 small red onion, finely chopped - 1 jalapeño, deseeded and minced - 1 red bell pepper, diced - 1/2 cup fresh cilantro, chopped - Juice of 2 limes - 1 teaspoon honey (optional for extra sweetness) - Salt and pepper to taste - 1/2 teaspoon cumin (for a smoky flavor) Quick Steps: 1. Mix the diced mangoes, red onion, jalapeño, and red bell pepper in a bowl. 2. Add the chopped cilantro and fresh lime juice. 3. If you like it sweeter, add honey. 4. Season with salt, pepper, and cumin. 5. Fold the mixture gently, avoiding mashing the mangoes. 6. Cover the bowl and chill in the fridge for at least 30 minutes. 7. Taste and adjust seasoning before you serve. This salsa is great with chips or as a topping for grilled chicken or fish. Enjoy the vibrant colors and flavors of summer! This blog post showed you how to make a tasty mango salsa. We covered all the key ingredients, step-by-step instructions, and helpful tips. You learned about fun variations and storage ideas to keep your salsa fresh. Incorporating ripe mangoes and adjusting heat can elevate the flavor. This dish pairs well with many meals. Enjoy your vibrant and delicious mango salsa at your next gathering!

Spicy Mango Salsa Flavorful and Easy Summer Dip

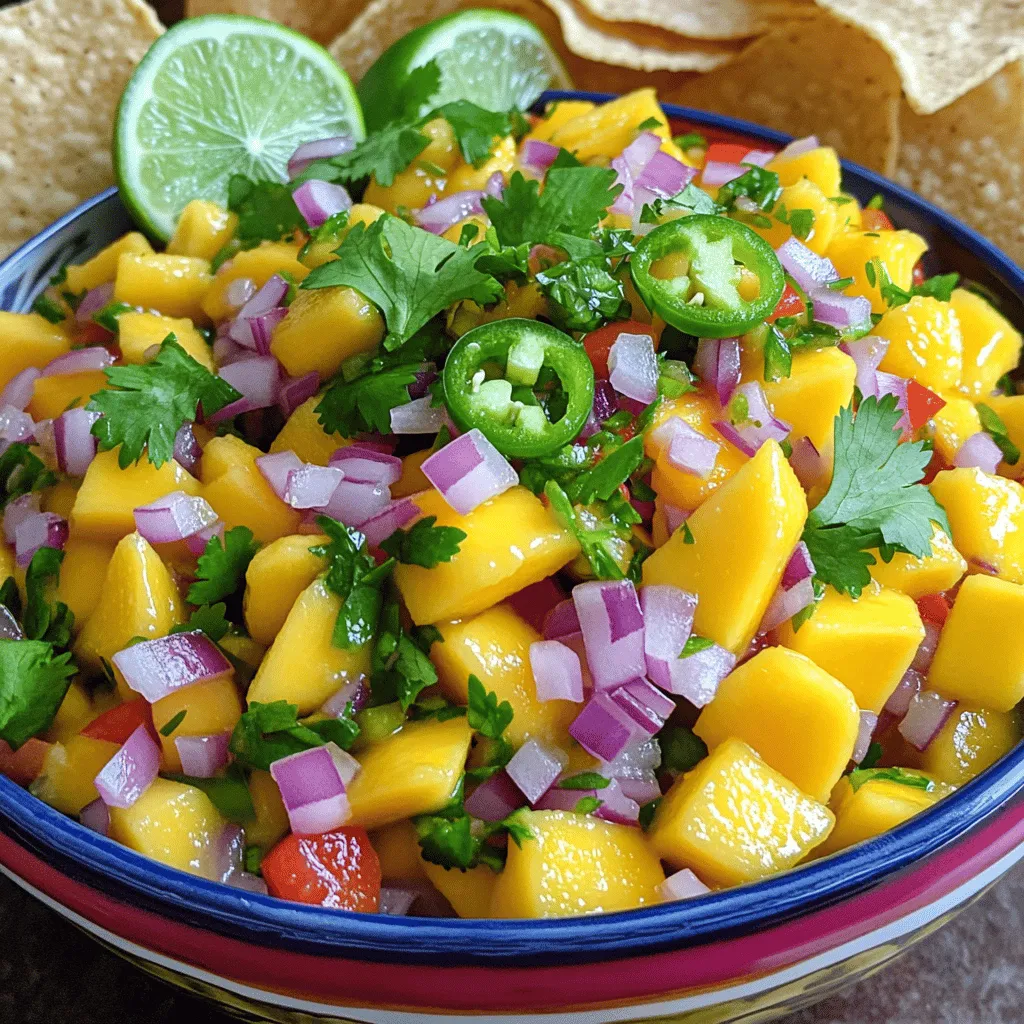
Welcome to the vibrant world of Spicy Mango Salsa! If you crave a fresh and zesty dip for summer, you’ve

To create a rich vegan chocolate cake, you’ll need these key ingredients: - 1 ½ cups all-purpose flour - 1 cup granulated sugar - 1/3 cup unsweetened cocoa powder - 1 tsp baking soda - ½ tsp salt - 1/3 cup unsweetened applesauce - 1 cup non-dairy milk (almond, soy, or oat) - 1/3 cup vegetable oil (or melted coconut oil) - 1 tsp vanilla extract - 1 tbsp apple cider vinegar - ½ cup vegan chocolate chips (optional) These ingredients come together to form a moist and flavorful cake. Each plays a vital role in achieving the perfect texture and taste. Sometimes, you might not have all the ingredients. Here are some easy swaps: - All-purpose flour: Use whole wheat flour for added fiber or gluten-free flour for a gluten-free version. - Granulated sugar: Coconut sugar or maple syrup can work well here. Just adjust the liquid in your recipe. - Unsweetened applesauce: Mashed banana or silken tofu can provide similar moisture. - Non-dairy milk: Any plant milk will work, but coconut milk adds richness. - Vegetable oil: Use melted vegan butter or applesauce for less fat. These substitutions keep the cake vegan while allowing for flexibility based on what you have on hand. When making your vegan chocolate cake, select the best ingredients for a delightful outcome: - Flour: Choose unbleached, organic flour for better taste and texture. - Cocoa powder: Opt for high-quality, unsweetened cocoa to enhance the chocolate flavor. - Sugar: Make sure the sugar is vegan, as some brands use bone char in processing. - Non-dairy milk: Select brands without added sugars or preservatives for a cleaner flavor. - Vegan chocolate chips: Look for brands that use fair trade chocolate for ethical choices. These tips help improve the overall quality of your cake, making it a truly decadent treat. For the complete recipe, check out the Full Recipe section. 1. Preheat your oven to 350°F (175°C). This warms the oven for baking. 2. Grease and flour a 9-inch round cake pan. You can also line it with parchment paper. This helps the cake come out easily. 3. Sift together the dry ingredients. In a large bowl, mix 1 ½ cups all-purpose flour, 1 cup sugar, 1/3 cup cocoa powder, 1 tsp baking soda, and ½ tsp salt. Whisk until they blend. 4. Combine the wet ingredients in another bowl. Mix 1/3 cup applesauce, 1 cup non-dairy milk, 1/3 cup vegetable oil, 1 tsp vanilla extract, and 1 tbsp apple cider vinegar. Whisk until smooth. 5. Mix wet and dry ingredients together. Pour the wet mix into the dry mix. Stir gently until just combined. Don’t over-mix! If you like, fold in ½ cup vegan chocolate chips for more chocolate flavor. 6. Pour the batter into the prepared cake pan. Use a spatula to smooth the top. 7. Bake for 30-35 minutes. Check if it’s done by inserting a toothpick into the center. If it comes out clean, it’s ready. 8. Cool the cake in the pan for 10 minutes. Then, transfer it to a wire rack to cool completely. 9. Frost or serve the cake. You can add your favorite vegan chocolate frosting or dust it with powdered sugar. For a nice touch, serve slices on plates with fresh berries and mint. Drizzle with chocolate sauce for an extra treat. Try this full recipe for a rich, vegan chocolate cake that everyone will enjoy! To keep your vegan chocolate cake moist and fluffy, use fresh ingredients. Check the expiration dates on your baking soda and non-dairy milk. Applesauce adds moisture and helps with the cake's texture. Mix the wet and dry ingredients until just combined. Over-mixing can lead to a dense cake. Adding a bit of extra non-dairy milk can also help if your batter looks too thick. One common mistake is not preheating the oven. Always ensure your oven is ready before baking. Use the right size pan; a 9-inch round pan works best for this recipe. If you use a different size, adjust the baking time. Remember to check the cake a few minutes before the timer goes off. Each oven is unique. Lastly, let the cake cool in the pan for ten minutes. This helps it stay intact when you transfer it. To enhance the flavor of your cake, try adding a splash of coffee. It deepens the chocolate taste without making it taste like coffee. You can also use flavored extracts, like almond or orange. For a fun twist, fold in some nuts or dried fruit. If you love chocolate, add vegan chocolate chips for extra richness. Use high-quality cocoa powder; it makes a big difference in taste. For the full recipe, check the sections above. {{image_2}} You can make this cake gluten-free. Just swap all-purpose flour for gluten-free flour. Use a blend that contains xanthan gum for best results. This will help the cake rise nicely. Follow the same steps in the full recipe. You’ll still enjoy a moist and rich cake. Want to jazz up the flavor? Add mint extract or coffee. For mint, use about 1 teaspoon in the wet mix. For coffee, brew a strong cup and replace some non-dairy milk with it. Both options give your cake a unique twist. Experiment to find your favorite! You can easily turn this cake into a layered dessert. Bake two or three rounds instead of one. Stack them with vegan frosting between each layer. This makes for a stunning presentation. You can also fill the layers with fruit or a chocolate ganache. The choices are endless! To keep your vegan chocolate cake fresh, store it in an airtight container. This helps keep moisture in and prevents the cake from drying out. If you have leftover slices, place parchment paper between them. This prevents sticking and keeps each piece intact. You can freeze your vegan chocolate cake for later enjoyment. First, let the cake cool completely. Wrap it tightly in plastic wrap. Then, place it in a freezer-safe bag. This protects it from freezer burn and keeps it fresh. When you’re ready to eat, thaw it in the fridge overnight before serving. The cake stays fresh at room temperature for about 3 days. If you store it in the fridge, it can last up to a week. To check for freshness, look for any changes in texture or smell. Always trust your senses. If it seems off, it’s best to discard it. Yes, you can! If you don't have applesauce, try using mashed bananas. They add moisture and sweetness. You can also use pureed silken tofu or a vegan yogurt. Both options work well. Just keep the same amount as the recipe calls for. This way, your cake stays moist and delicious. To make your cake richer, add more chocolate! You can mix in vegan chocolate chips or chunks into the batter. A sprinkle of espresso powder in the dry mix can boost the chocolate flavor. For an extra layer of decadence, drizzle melted vegan chocolate on top after frosting. Each bite will be heavenly! A creamy vegan chocolate frosting is perfect for this cake. You can make it by blending vegan butter, cocoa powder, and powdered sugar. Add a splash of non-dairy milk for creaminess. Another great option is a rich coconut cream frosting. Just chill a can of coconut milk, scoop out the cream, and whip it. Both frostings will make your cake shine. For the full recipe, check out the Decadent Vegan Chocolate Dream Cake! In this post, we explored key ingredients for a vegan chocolate cake and their substitutes. I shared step-by-step instructions for preparation and baking. You learned tips to ensure fluffiness and flavor, along with fun variations like gluten-free options. I also discussed best storage methods and answered common questions. Baking a cake can be fun and easy. Use quality ingredients and enjoy the process. Happy baking!

Vegan Chocolate Cake Rich and Decadent Delight

Indulging in a rich, vegan chocolate cake doesn’t have to be hard! In this article, I’ll guide you through a

Older posts
Newer posts
← Previous Page1 … Page25 Page26 Page27 … Page62 Next →

dsad

© 2025 Cooking Wells • Built with GeneratePress

Our Policies

  • Copyright Policy
  • Cookie Policy
  • GDPR Policy
  • Privacy Policy
  • Disclaimer
  • Terms Of Use

More Information

  • Home
  • About
  • Contact
  • Appetizers
  • Dessert
  • Dinner
  • Drinks
©2025, Cooking Wells About Back To Top