Skip to content
DisclaimerTerms Of UseGDPR PolicyCookie Policy

Cooking Wells

  • Home
  • Drinks
  • Appetizers
  • Dinner
  • Dessert
  • About
  • Contact
  • Privacy Policy
DisclaimerTerms Of UseGDPR PolicyCookie Policy

Mia

- 2 ripe peaches, sliced - 4 cups fresh arugula - 1/4 cup feta cheese, crumbled - 1/4 cup toasted walnuts, chopped - 1 tablespoon honey - 2 tablespoons balsamic vinegar - 3 tablespoons olive oil - Salt and pepper to taste To make a peach and arugula salad, you need fresh and vibrant ingredients. Start with ripe peaches. They should be juicy and sweet. Slice them into thin wedges for a lovely look. Next, grab fresh arugula. Its peppery flavor balances the sweet peaches well. For a creamy twist, add feta cheese. You can crumble it easily with your fingers. It brings a salty kick to the salad. Then, toast some walnuts. Chop them into small pieces. This adds a delightful crunch. Now, let’s talk about the dressing. I like a mix of honey, balsamic vinegar, and olive oil. It’s simple yet full of flavor. Salt and pepper will enhance everything. This salad is not just tasty. It’s also colorful and fun. You can find the full recipe for a detailed guide. Enjoy making this fresh and flavorful dish! First, take a small bowl. In it, whisk together the honey, balsamic vinegar, olive oil, salt, and pepper. This dressing adds a sweet and tangy flavor. It brings all the salad's flavors together. Next, grab a large bowl. Combine the fresh arugula and sliced peaches in this bowl. Toss them gently to mix. Drizzle the dressing over the arugula and peaches. Toss again to coat everything evenly. This step is key for great flavor. Now it's time for the fun part! Sprinkle the crumbled feta cheese and chopped walnuts over the top. These toppings add creaminess and crunch. You can serve the salad right away or let it sit for about 5-10 minutes. This waiting time helps the flavors meld beautifully. For the full recipe, you can check the details above. Letting the salad sit for 5-10 minutes before serving really helps. This time allows the flavors to blend well. You will notice a big difference in taste. The sweet peaches and tangy dressing create a delightful mix. Serve this salad on a large platter or in individual bowls. A beautiful presentation makes the dish more inviting. Garnish with extra peach slices and a sprinkle of feta. This adds color and charm to your meal. This salad pairs well with grilled chicken or shrimp for added protein. You can also serve it with crusty bread or a light soup. These options make a perfect meal. Enjoy the fresh and vibrant flavors together. {{image_2}} You can mix in other fruits for more flavor. Strawberries and blueberries work well. They add sweetness and color. You can even try plums or nectarines. Fresh fruits keep the dish lively. If you don’t have walnuts, use pecans or almonds. Pecans give a sweet taste. Almonds add a nice crunch. You can toast them for extra flavor. These swaps keep the salad tasty and interesting. For a vegan twist, replace feta cheese. Use a plant-based cheese instead. Many brands offer great options. This change keeps the salad creamy and rich. You can enjoy this dish while sticking to your diet. To keep your peach and arugula salad fresh, place it in an airtight container. Avoid adding the dressing until you are ready to eat. This helps keep the arugula crisp and the peaches firm. If you have leftovers, store the salad in the fridge right away. The salad stays good for about 1 to 2 days in the fridge. After that, the greens may wilt, and the peaches might lose their flavor. Always check for freshness before serving. If the salad smells off or looks soggy, it’s best to toss it. You should not heat this salad. The fresh greens and fruit taste best cold. If you want to enjoy leftovers, just take them out of the fridge and serve. If the salad has been dressed, it may be good to add a little more olive oil or vinegar to refresh the flavors. Enjoy your fresh and flavorful dish again! For the full recipe, check out the details above. Yes, you can make Peach and Arugula Salad ahead of time. To prepare it in advance, mix the dressing and store it separately. You can slice the peaches and wash the arugula a few hours before serving. Just keep everything in the fridge. When you are ready to eat, toss the salad with the dressing right before serving. This way, the arugula stays fresh and crisp. Arugula is a superfood packed with nutrients. It's low in calories and high in vitamins A, C, and K. These vitamins help keep your skin and bones healthy. Arugula also has antioxidants that fight free radicals. Peaches add fiber and vitamins too. Together, they make a tasty and healthy dish that supports your overall health. Absolutely! You can change a few ingredients to fit your needs. If you are lactose intolerant, try using a dairy-free cheese instead of feta. You can replace walnuts with almonds or pecans if you prefer. If peaches are not in season, use nectarines or plums. These swaps allow you to enjoy the salad while meeting your dietary needs. For the complete recipe, check out the Full Recipe section. This blog post covered a fresh peach and arugula salad. We explored easy steps to create a tasty dish. You learned how to make a simple dressing, assemble the salad, and add final touches. I shared tips to enhance flavor and improve presentation. You can try different fruits and nuts too! Don’t forget about storage and pairing options to enjoy this salad longer. Remember, cooking should be fun. Enjoy making this salad your way!

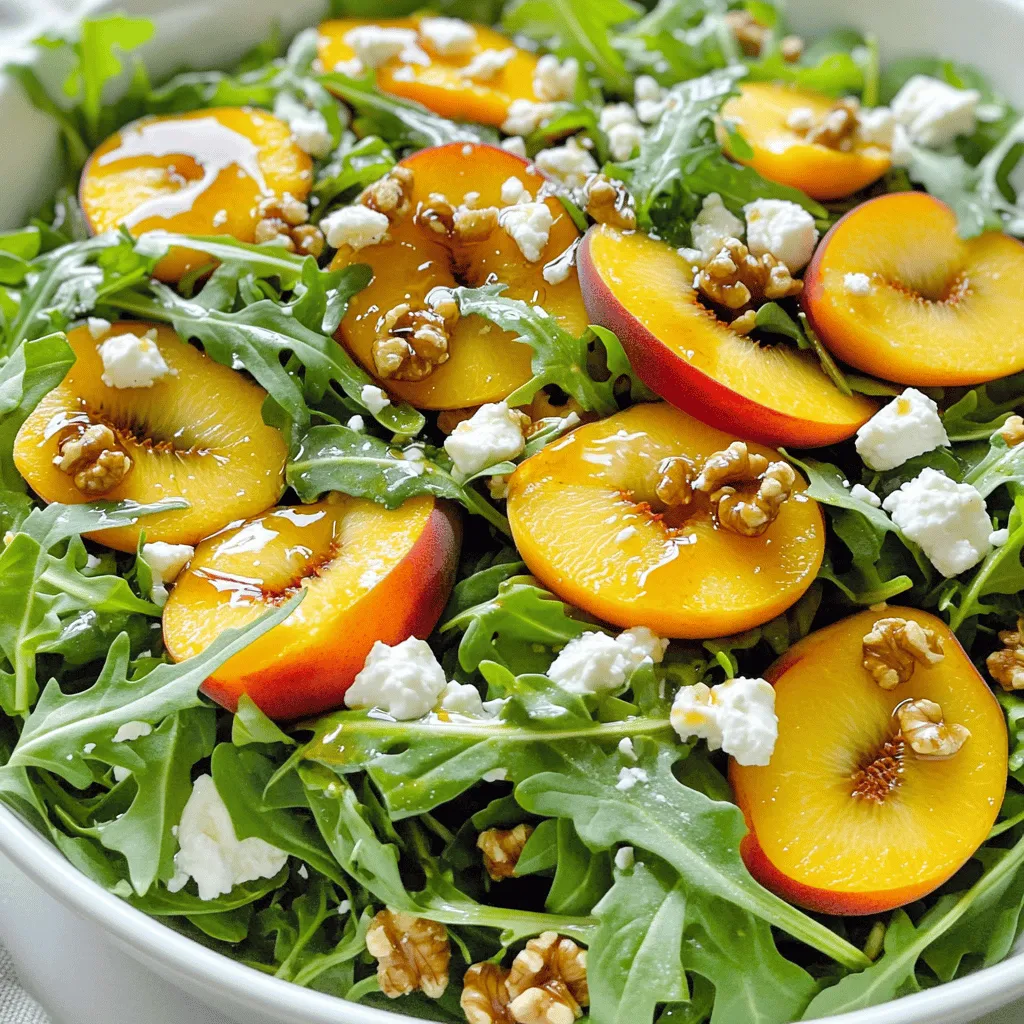
Peach and Arugula Salad Fresh and Flavorful Dish

Dive into the refreshing world of Peach and Arugula Salad! This simple, yet zesty dish bursts with flavor, making it

- 500g mixed mushrooms (cremini, shiitake, and button) - 1 large onion, finely chopped - 3 cloves garlic, minced - 1 tablespoon olive oil - 1 tablespoon unsalted butter - 1 teaspoon dried thyme - 1 teaspoon smoked paprika - 1 tablespoon soy sauce - 1 tablespoon Dijon mustard - 1 cup vegetable broth - 1 cup coconut cream or sour cream - Salt and pepper, to taste - 300g egg noodles or any pasta of your choice - Fresh parsley for garnish Mushrooms are the star of this dish. I love using a mix for depth. Cremini, shiitake, and button mushrooms each bring unique flavors. The onions and garlic add sweetness and warmth. These ingredients form the base of our creamy sauce. For the sauce, I use olive oil and butter. This blend gives a rich taste. Thyme and smoked paprika enhance the mushroom flavor. Soy sauce adds umami, while Dijon mustard gives a tangy kick. The vegetable broth makes everything come together. The creamy part can be coconut cream or sour cream. Both work well, giving a rich texture. Salt and pepper round out the flavors perfectly. The egg noodles or any pasta of your choice bring it all together. This recipe is simple and delicious. You can find the full recipe [here]. - Cook the pasta according to package instructions until al dente. - Drain and set aside, reserving a little pasta water for later use. - In a large skillet, heat the olive oil and butter over medium heat. - Add the chopped onion and sauté for 3-4 minutes until it turns soft and clear. - Add the minced garlic and sliced mushrooms to the skillet. Cook for 5-7 minutes until the mushrooms brown and release their juices. - Sprinkle in the dried thyme and smoked paprika, stirring to mix the flavors. - Pour in the soy sauce and Dijon mustard, cooking for 1-2 minutes more. - Stir in the vegetable broth and bring the mix to a gentle simmer. Let it cook for about 5 minutes. - Reduce the heat to low and add the coconut cream or sour cream. Stir until creamy. Let it simmer for another 3-4 minutes. Season with salt and pepper to taste. - If the sauce is too thick, add a little reserved pasta water to reach the right texture. - Toss the cooked pasta into the sauce, making sure it's well-coated. - Serve right away, garnishing with fresh parsley for a lovely touch. For the full recipe, check the details above! To make your mushroom stroganoff shine, use a mix of mushrooms. I love using cremini, shiitake, and button mushrooms together. This combo adds depth and richness to the dish. Each type brings its own unique taste. Feel free to mix and match based on what you have. Adjusting the seasoning is key. Start with salt and pepper, then build from there. If you want it a bit tangier, add more soy sauce or Dijon mustard. Always taste as you go. This ensures you get the flavor just right for your palate. Creaminess is vital in stroganoff. If your sauce gets too thick, add a bit of reserved pasta water. This not only helps thin it out, but it also adds flavor. Stir well to incorporate. You want a smooth and luscious sauce that clings to the pasta. Be careful not to overcook the sauce. Once you add the coconut cream or sour cream, keep it on low heat. You just want it to warm through. Overcooking can make it separate or lose that creamy texture. For the full recipe, check the section above! Enjoy your cooking! {{image_2}} If you want a dairy-free version, use coconut cream instead of sour cream. Coconut cream adds a rich, creamy taste, making the dish still feel indulgent. It blends well with the mushrooms and spices. You won’t miss the dairy at all! For extra protein, you can add tofu or chickpeas. Both options work great in Mushroom Stroganoff. Tofu absorbs flavor well, while chickpeas add a hearty bite. You can also toss in some spinach or other greens for added nutrition. Greens bring color and vitamins, making your meal more balanced. If you like some heat, add red pepper flakes. A pinch can transform your dish into a spicy delight. It adds a kick without overwhelming the other flavors. Adjust the amount based on your spice preference for the best experience. These variations allow you to mix things up while enjoying this flavorful and creamy delight. For the complete recipe, check out the [Full Recipe]. To store leftover Mushroom Stroganoff, place it in an airtight container. Make sure it cools down first. This dish keeps well in the fridge for up to three days. For reheating, warm it gently on the stove over low heat. Stir often to avoid burning. You can also use a microwave. Heat it in short intervals and stir in between. If the sauce is too thick, add a splash of vegetable broth or reserved pasta water for creaminess. You can freeze Mushroom Stroganoff for later use. Let it cool completely before packing it into freezer-safe bags or containers. Be sure to remove as much air as possible. This helps prevent freezer burn. To defrost, move it to the fridge the night before you plan to eat it. Reheat it in a skillet over low heat. Stir it often and add a little broth or water if needed. This keeps the sauce smooth and creamy. For the complete cooking experience, don’t forget to check out the Full Recipe. For a rich flavor, use a mix of mushrooms. I suggest cremini, shiitake, and button mushrooms. Cremini adds depth with its earthy taste. Shiitake gives a nice umami kick. Button mushrooms are mild and blend well with other flavors. You can also try portobello for a hearty texture. Yes, you can prepare this dish in advance. Cook the sauce and pasta, but don’t mix them right away. Store the sauce in an airtight container in the fridge. Cooked pasta can go in another container. When ready to serve, just heat the sauce and mix in the pasta. This keeps everything fresh. This dish pairs well with many sides. I like to serve it with a simple green salad. Roasted vegetables also complement the creamy sauce. For some crunch, try garlic bread or crusty rolls. These sides add texture and balance to the meal. To make this dish gluten-free, choose gluten-free pasta. There are many great options like rice or chickpea pasta. For the sauce, use gluten-free soy sauce. Always check labels to ensure all ingredients are safe. This way, everyone can enjoy this creamy delight. Yes, you can easily make this recipe vegan. Just swap out the butter for olive oil. Use coconut cream instead of sour cream for creaminess. Ensure the soy sauce is vegan too. By making these changes, you keep all the flavors while staying plant-based. Mushroom Stroganoff is a warm and creamy dish that fills you up with flavor. This recipe takes just 30 minutes from start to finish. You will need a mix of mushrooms, which adds depth to the dish. I often use cremini, shiitake, and button mushrooms for the best taste. Cooking Details: 1. Start by cooking 300g of pasta according to the package. Drain it and set aside. 2. In a large skillet, heat 1 tablespoon of olive oil and 1 tablespoon of butter over medium heat. Add 1 finely chopped onion and cook for about 3 to 4 minutes. 3. Next, add 3 minced garlic cloves and the sliced 500g mixed mushrooms. Stir and cook for 5 to 7 minutes until they turn brown. 4. Then, sprinkle in 1 teaspoon of dried thyme and 1 teaspoon of smoked paprika. Stir well to mix the flavors. 5. Add 1 tablespoon of soy sauce and 1 tablespoon of Dijon mustard. Cook for another 1 to 2 minutes. 6. Pour in 1 cup of vegetable broth and bring it to a gentle simmer for about 5 minutes. 7. Reduce the heat, then stir in 1 cup of coconut cream or sour cream. Let it simmer for 3 to 4 minutes. 8. If the sauce is too thick, add a bit of reserved pasta water to reach your desired creaminess. 9. Mix in the cooked pasta until it is well-coated with the sauce. 10. Serve hot and top with fresh chopped parsley for a lovely finish. This dish is great for any night of the week. You can enjoy it with friends or family. You will love the rich, creamy taste! This article covered how to create a tasty Mushroom Stroganoff using simple ingredients. You learned about the main components like mushrooms, onions, and garlic. I shared step-by-step instructions to guide you through cooking. Remember, you can adjust flavors and make it your own with fun variations. Store any leftovers properly for later enjoyment. With the tips provided, you can master this dish. Enjoy crafting a delicious meal that is as satisfying as it is easy to prepare!

Mushroom Stroganoff Flavorful and Creamy Delight

Are you ready to dive into a delicious and creamy Mushroom Stroganoff? This dish is a cozy meal perfect for

For your BBQ Chicken Pizza, you will need: - 1 pre-made pizza dough - 1 cup cooked chicken, shredded - 1/2 cup BBQ sauce (your choice of flavor) - 1 cup shredded mozzarella cheese - 1/2 cup red onion, thinly sliced - 1/2 cup corn kernels (fresh or canned) - 1/4 cup cilantro or parsley, chopped - 1 tablespoon olive oil - Salt and pepper to taste - Optional: 1/4 cup sliced jalapeños for heat Choosing the right ingredients makes a big difference. Here are some tips: - Pizza Dough: Look for dough that is fresh and easy to work with. You can buy it at the store or make your own. - Chicken: Use rotisserie chicken for a quick option. If you cook your own, season it well. - BBQ Sauce: Try different flavors. A sweet sauce works well with the cheese and chicken. - Cheese: Always go for fresh mozzarella. It melts well and adds great flavor. - Vegetables: Select fresh red onions and corn. Fresh veggies enhance the taste and texture. You can swap some ingredients if needed: - Pizza Dough: Use naan or pita bread for a quick base. - Chicken: Tofu or tempeh can replace chicken for a vegetarian option. - BBQ Sauce: Try teriyaki or a spicy chili sauce for a different twist. - Mozzarella Cheese: Cheddar or gouda can work if you want a stronger taste. - Red Onion: Use green onions for a milder flavor. This recipe is flexible, so feel free to get creative! For the full recipe, refer to the detailed cooking guide. Start by preheating your oven to 475°F (245°C). This high heat gives the pizza a great crust. If your oven can't reach this, just set it to the highest setting. While the oven warms up, take your pre-made pizza dough. Roll it out on a lightly floured surface to your favorite thickness. Then, place the dough on a greased baking sheet or pizza stone. In a mixing bowl, combine one cup of shredded chicken with half a cup of BBQ sauce. Stir well until the chicken is fully coated. This mix adds flavor and moisture to the pizza. You can choose any BBQ sauce you like. Feel free to taste it and adjust as needed. You might want more sauce for extra flavor. Now it’s time to build your pizza. Spread a thin layer of BBQ sauce over the dough, leaving half an inch around the edges for the crust. Next, evenly place the saucy chicken on top. Add one cup of shredded mozzarella cheese over the chicken, then sprinkle on half a cup of thinly sliced red onion and half a cup of corn kernels. If you like heat, add sliced jalapeños as well. Once it’s assembled, slide your pizza into the preheated oven. Bake for about 12-15 minutes. Look for bubbly, golden cheese and a crispy crust. After baking, take it out and sprinkle chopped cilantro or parsley on top for a fresh finish. Enjoy your very own BBQ chicken pizza! You can find the Full Recipe in this article for more details. To get that perfect crust, start with good dough. I prefer pre-made pizza dough for ease. Roll it out on a floured surface. Make it as thick or thin as you like. A thinner crust will get crispy. A thicker crust will be chewy. Make sure to use a hot oven. Preheat it to 475°F (245°C). This helps the crust rise and brown nicely. If you have a pizza stone, use it. It holds heat well and gives a great crust. Always grease your baking sheet or stone with olive oil to prevent sticking. To boost flavor, think beyond just BBQ sauce. You can add spices to the chicken mix. A pinch of smoked paprika or garlic powder makes a big difference. For a twist, use different BBQ sauces for unique tastes. Sweet, spicy, or tangy can change the whole vibe. Don’t forget the toppings! Fresh ingredients like red onion and corn add crunch and sweetness. If you want heat, jalapeños are a perfect choice. For freshness, sprinkle cilantro or parsley after baking. It adds color and brightens the dish. Presentation matters! Cut your pizza into even slices for a nice look. Serve it on a wooden board for a rustic feel. Add a small bowl of extra BBQ sauce for dipping. This makes it fun for guests. You can also garnish with fresh herbs. A light sprinkle of cilantro or parsley can make your pizza pop. Serve it with a side salad for a complete meal. A simple arugula salad pairs well with the rich flavors of BBQ chicken pizza. {{image_2}} You can easily turn BBQ chicken pizza into a vegetarian delight. Start by swapping the chicken for roasted vegetables. Use bell peppers, zucchini, or mushrooms. These veggies add great flavor. Mix in your favorite BBQ sauce to coat them well. Use the same cheese on top, or try a vegan cheese option. This version remains tasty and satisfying. If you love heat, add sliced jalapeños to your pizza. They pair well with the BBQ sauce. You can also sprinkle some crushed red pepper flakes for extra spice. Another option is to use a spicy BBQ sauce instead of regular. This adds a nice kick and flavor depth. You can adjust the heat level to your taste. Using fresh, seasonal ingredients can make your pizza shine. In summer, add fresh corn or tomatoes for sweetness. In fall, consider roasted butternut squash or pumpkin. These ingredients give your pizza a unique twist. You can also use herbs like basil or arugula to top the pizza after baking. This adds freshness and vibrant color to the dish. For more details on the basic recipe, check the Full Recipe. To store leftover BBQ chicken pizza, let it cool first. Once cooled, wrap each slice in plastic wrap. You can also put the slices in an airtight container. Make sure to store it in the fridge. It stays good for up to three days. Proper storage keeps the pizza fresh and tasty. To reheat, use an oven for the best taste. Preheat your oven to 375°F (190°C). Place the pizza on a baking sheet. Heat for about 10-15 minutes. Check that the cheese is bubbly and hot. You can also use a skillet. Place the slice in the skillet over low heat. Cover it with a lid for 5-7 minutes. This method helps keep the crust crispy. If you want to freeze BBQ chicken pizza, do this before baking. Assemble the pizza but do not bake it. Wrap it tightly in plastic wrap and foil. Label it with the date. It can stay in the freezer for up to three months. To bake, thaw it in the fridge overnight. Then bake it as you normally would. Enjoy the fresh taste even after freezing! BBQ chicken pizza stands out with its smoky, sweet, and tangy flavors. The blend of BBQ sauce and chicken creates a rich taste that everyone enjoys. You can customize it with your favorite toppings. The crispy crust adds a delightful crunch. This pizza is fun and easy to share at gatherings. Yes, you can use homemade BBQ sauce! Making your own sauce lets you control the taste. You can add spices or sweetness to match your liking. A simple mix of ketchup, vinegar, and spices works great. Just make sure it’s thick enough to coat the chicken. This option adds a personal touch to your pizza. BBQ chicken pizza pairs well with simple sides. A fresh salad can balance the rich flavors. Try a coleslaw for a crunchy and creamy side. Grilled vegetables also complement the pizza nicely. For drinks, a light beer or iced tea enhances the meal. These pairings round out your dining experience beautifully. You now have all the tools to make BBQ chicken pizza at home. We've covered key ingredients, step-by-step baking, and tips for the perfect crust. Explore tasty variations, from vegetarian options to spicy twists. Don't forget how to store leftovers and reheat them so they taste fresh. This pizza is not just a meal; it’s a fun way to impress family and friends. Enjoy making your BBQ chicken pizza, and share it with those you love.

BBQ Chicken Pizza Tasty Recipe Everyone Loves

Craving a delicious twist on pizza night? You’re in the right place! My BBQ Chicken Pizza recipe combines smoky, sweet,

- 6 ripe Roma tomatoes, finely diced - 1 cup fresh basil leaves, chopped - 2 cloves garlic, minced These ingredients are the heart of any good bruschetta. Roma tomatoes are firm and sweet, making them perfect. Fresh basil adds a fragrant touch. Garlic gives the dish a nice kick. - 3 tablespoons olive oil - 1 tablespoon balsamic glaze - 1 French baguette, sliced into 1-inch thick pieces Olive oil adds richness, while balsamic glaze brings sweetness. The French baguette provides a perfect base. It should be crispy on the outside and soft inside. - ½ cup crumbled feta cheese or fresh mozzarella balls for garnish - Salt and pepper to taste These optional ingredients can elevate your bruschetta. Feta adds a salty bite, and mozzarella brings creaminess. Season with salt and pepper to enhance all the flavors. This combination of ingredients creates a fresh, flavorful snack that everyone will love. For those who want to make this dish, I suggest checking out the full recipe for step-by-step instructions. To start, you need to make the tomato mixture. In a medium bowl, combine the diced Roma tomatoes, fresh basil, minced garlic, olive oil, and balsamic glaze. Make sure to mix everything well. Season with salt and pepper to your taste. This step is key because it brings all the flavors together. Let it sit for at least 15 minutes. This waiting time helps the juices meld, giving your bruschetta great flavor. Now, it's time to toast the bread. First, preheat your oven to 400°F (200°C). While the oven heats, take your French baguette and slice it into 1-inch thick pieces. Lay the slices on a baking sheet. Brush each slice lightly with olive oil for a nice golden finish. Place them in the oven and toast for 5-7 minutes. You want them to be golden brown and crispy. Once your bread is ready, it’s time to assemble the bruschetta. Let the toasted bread cool slightly. Then, use a spoon to generously top each slice with the tasty tomato mixture. If you like, you can add crumbled feta cheese or small mozzarella balls for extra flavor. Finally, drizzle a bit more balsamic glaze over the top before serving. For the full recipe, refer to the detailed instructions above. Enjoy this vibrant and fresh snack! For the best bruschetta, use ripe Roma tomatoes. They are meaty and have few seeds. Look for tomatoes that are firm and shiny. The color should be deep red. Avoid tomatoes that feel soft or have blemishes. These may lack flavor. Ripeness is key. Ripe tomatoes taste sweet and juicy. Press gently on the tomato; it should give a little. This means it’s ready to eat. If they are not ripe, let them sit at room temperature for a few days. This allows natural sugars to develop. Marinating the tomato mixture makes a big difference. Let it sit for at least 15 minutes. This allows the flavors to blend well. The garlic and basil will infuse into the tomatoes. When seasoning, use salt and pepper wisely. Start with a pinch of salt and a dash of pepper. Taste and adjust as needed. Too much salt can overpower the tomatoes. A light touch adds flavor without hiding the fresh taste. Presentation matters! Arrange your bruschetta on a large platter. This makes it look inviting. Place the toasted slices in a single layer. You can also alternate the toppings for a colorful display. For garnishing, sprinkle fresh basil on top. You can also drizzle balsamic glaze over the bruschetta. This adds a nice touch and enhances the look. Remember, we eat with our eyes first! For the Full Recipe, follow the steps above to create a delightful and fresh snack. {{image_2}} You can switch up the herbs in your bruschetta for new flavors. If you want, swap basil for parsley or arugula. Both herbs add a fresh taste. You can also try adding oregano or thyme. These herbs bring a nice earthiness to the mix. Cheese can change your bruschetta's flavor. Try using goat cheese for a tangy kick. Aged parmesan also works well for a rich taste. If you need a dairy-free choice, consider using cashew cheese or almond cheese. They provide a creamy texture without dairy. Add more excitement to your bruschetta with extra toppings. Chopped olives can give a salty punch. Sun-dried tomatoes can add sweetness and depth. You can also experiment with different spreads. Hummus or pesto can bring a fun twist to your snack. Feel free to get creative with these variations. They can turn your tomato and basil bruschetta into a unique dish every time! For the complete instructions and ingredients, check out the Full Recipe. Store the tomato mixture in an airtight container. This keeps it fresh for up to two days. Avoid storing it too long, as the tomatoes can lose their crunch. For toasted bread, place it in a paper bag. This helps maintain its crispness. Do not store the toasted bread in plastic, as it can get soggy. If you have stale bread, refresh it by toasting it again. Preheat your oven to 350°F (175°C). Place the stale slices on a baking sheet and toast for about 5 minutes. This helps bring back the crunch. For leftover bruschetta, reassemble it just before serving. Toast new bread slices and top them with the tomato mixture again. This keeps everything fresh and tasty. You can freeze the tomato mixture for later use. Just place it in a freezer-safe container. It can last up to three months. When you’re ready to use it, move the container to the fridge overnight to thaw. Do not freeze the toasted bread, as it won’t taste good after. Instead, toast fresh bread when you want to serve the bruschetta. To pick ripe tomatoes, look for these signs: - They should feel firm but slightly soft when you squeeze them. - The skin should be smooth and shiny. - The color should be deep red or orange, depending on the type. - Smell the stem area; a sweet aroma means they are ripe. Using Roma tomatoes gives you the best flavor. They are meaty and less watery. Always choose the freshest tomatoes for the best bruschetta. Yes, you can prep some parts in advance. - Make the tomato mixture a few hours before serving. - Keep it in the fridge to let the flavors blend. - Toast the bread right before serving for a crispy bite. If you mix the topping too early, the bread can get soggy. Keep them separate until you are ready to enjoy. Bruschetta pairs well with many drinks and dishes. - Serve it with a glass of chilled white wine, like Sauvignon Blanc. - Pair it with a light salad for a fresh, crunchy side. - You can also enjoy bruschetta as a starter before pasta. Consider adding a cheese platter or olives for variety. This snack can fit into a fun meal or a party spread. For the full recipe, check out the complete guide! Making bruschetta is simple and fun. Use fresh ingredients like ripe tomatoes, basil, and garlic. Toasted baguette adds a nice crunch. You can add more flavors with options like feta cheese and balsamic glaze. Keep your tomatoes fresh and flavorful. Try different herbs and cheeses to switch things up. Remember to store the mixture properly to enjoy later. With these tips, you can impress your friends and family with delicious bruschetta every time. Enjoy your tasty creation!

Tomato and Basil Bruschetta Flavorful Fresh Snack

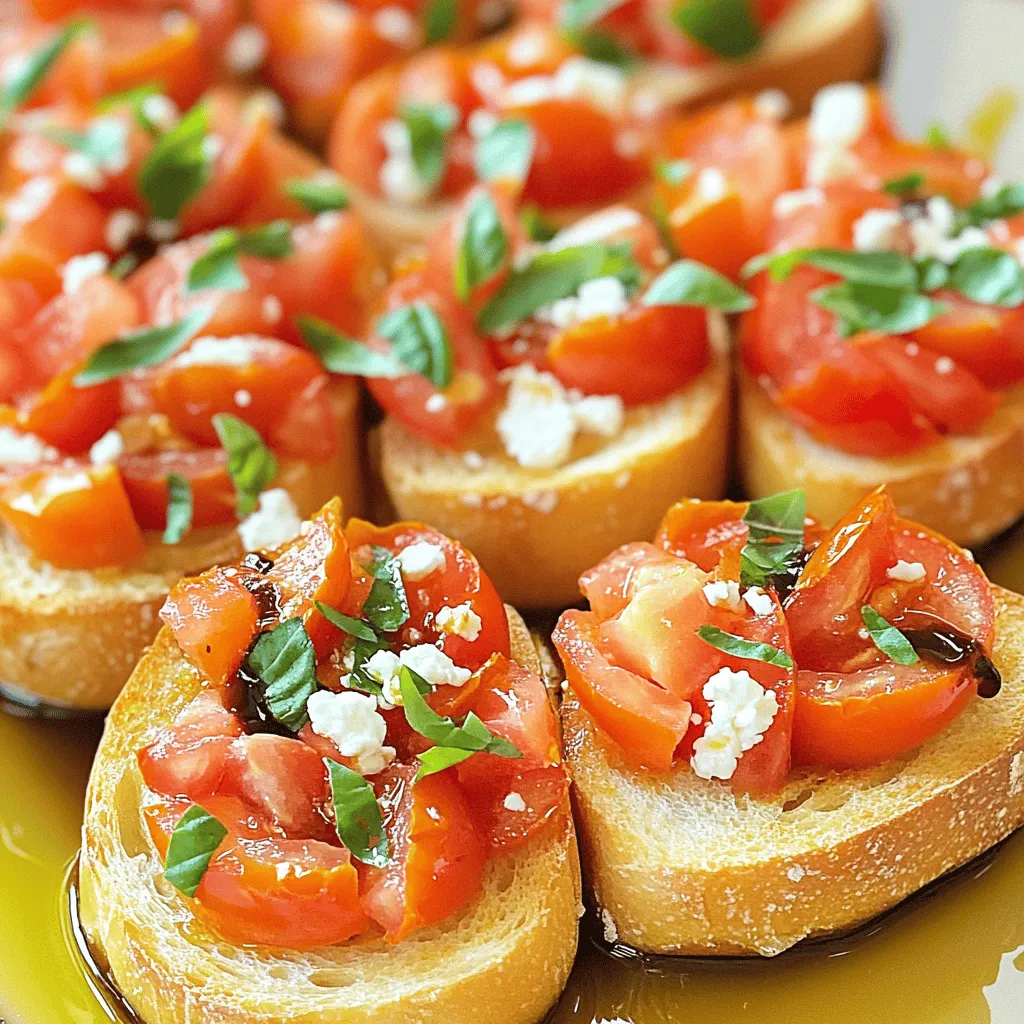
If you’re looking for a fresh and flavorful snack, Tomato and Basil Bruschetta is a must-try! With ripe Roma tomatoes,

To make a tasty Pesto Chicken Salad, you need fresh and simple ingredients. Here’s what you’ll need: - 2 cups cooked chicken breast, shredded - 1 cup cherry tomatoes, halved - 1 cup cucumber, diced - ½ cup red bell pepper, diced - ¼ cup red onion, finely chopped - ½ cup basil pesto (store-bought or homemade) - 2 tablespoons olive oil - Juice of 1 lemon - Salt and pepper to taste - 4 cups mixed greens (arugula, spinach, or your choice) - Optional: ¼ cup feta cheese, crumbled Each ingredient adds flavor and texture. The cooked chicken gives protein, while the veggies add crunch. The pesto brings a nice herby taste that ties it all together. You can make your salad unique with some add-ins. Here are a few ideas: - Swap chicken for grilled shrimp or tofu for a different protein. - Add avocado for creaminess and healthy fats. - Toss in nuts or seeds for extra crunch. - Use another type of cheese like goat cheese instead of feta. Feel free to mix and match based on what you like! This salad is not only delicious but also nutritious. Here’s a quick breakdown: - Calories: About 350 per serving - Protein: Approximately 30g - Fat: Around 20g - Carbohydrates: About 15g These values can change based on your choices. If you add more veggies or use less cheese, it can be lighter. This salad gives you a balanced meal with protein, fats, and carbs. For the full recipe, check out the details above. To start, gather all your ingredients. You need cooked chicken, cherry tomatoes, cucumber, red bell pepper, red onion, basil pesto, olive oil, lemon juice, salt, and pepper. You can also add mixed greens and feta cheese if you like. First, shred the cooked chicken into small pieces. Then, halve the cherry tomatoes and dice the cucumber and red bell pepper. Finally, finely chop the red onion. In a large mixing bowl, combine the shredded chicken, cherry tomatoes, cucumber, red bell pepper, and red onion. This mixture is colorful and full of flavor. Next, take a small bowl and whisk together the basil pesto, olive oil, lemon juice, salt, and pepper. Keep whisking until everything is smooth and mixed well. Now, pour the pesto dressing over the chicken and veggie mix. Toss gently to coat all the ingredients. The pesto brings everything together and adds a fresh taste. For a nice presentation, arrange mixed greens on a large serving platter. This makes the salad look vibrant and inviting. Spoon the pesto chicken mixture on top of the greens. If you want to add more flavor, sprinkle crumbled feta cheese over the salad. You can serve the salad right away, or chill it in the fridge for 30 minutes. Chilling helps the flavors blend together. For the full recipe, check out the details above. To make a tasty pesto chicken salad, start with fresh ingredients. Use cooked chicken that you love. Shredded rotisserie chicken works well. Next, chop your veggies into bite-sized pieces. This helps with even flavor in every bite. A good ratio of pesto to chicken is key. Aim for about half a cup of pesto for two cups of chicken. This gives a balanced taste. I love adding a squeeze of lemon juice for brightness. It enhances the flavors and keeps the salad fresh. For an extra kick, mix in some crumbled feta. It adds a creamy texture and salty flavor. One mistake is using old or wilted vegetables. Always check your produce before you start. Another common issue is not seasoning enough. A pinch of salt and pepper makes a big difference. If your salad tastes flat, it may need more seasoning. Don't skip chilling the salad before serving. It allows the flavors to meld. Finally, avoid overmixing your salad. You want to keep the veggies crisp and colorful. Store your pesto chicken salad in an airtight container. It lasts well in the fridge for about three days. Keep the salad separate from the greens until serving. This keeps the greens fresh and crunchy. If you plan to meal prep, divide the salad into portioned containers. This makes lunch easy and quick. You can also freeze the chicken mixture if you want to save it longer. Just remember to thaw it in the fridge before serving. For more details on the recipe, check out the Full Recipe. {{image_2}} You can switch up the chicken in your salad. Try using turkey for a leaner option. Shrimp also makes a great choice if you prefer seafood. For a vegetarian twist, use chickpeas or tofu. These options keep your salad fresh and fun. Feel free to get creative! Add fruits like apples or grapes for sweetness. Nuts like walnuts or almonds give a nice crunch. You can also experiment with different cheeses, such as goat cheese or mozzarella. These additions make each bite exciting and flavorful. Seasonal ingredients can brighten your salad. In spring, add peas or asparagus for a fresh taste. Summer is perfect for ripe peaches or zucchini. In fall, consider pumpkin or roasted sweet potatoes. Winter calls for hearty veggies like kale or brussels sprouts. Using seasonal items keeps your pesto chicken salad vibrant and delicious. Check out the Full Recipe for more ideas! To keep your pesto chicken salad fresh, store it in an airtight container. Make sure to seal it well. Place it in the fridge right after serving. It stays good for about 3 days. If you want, you can keep the dressing separate for better taste. This way, the greens won't get soggy. Freezing pesto chicken salad is not the best idea. The texture of the salad changes when frozen. The veggies may become mushy when thawed. If you want to freeze it, consider freezing the chicken and pesto separately. You can mix them with fresh veggies later for a better result. If you have leftover salad, serve it cold for the best taste. You can add a splash of lemon juice to freshen it up. If you prefer it warm, gently heat the chicken in a pan. Avoid heating the greens, as they wilt quickly. Toss everything together right before serving. For the full recipe, check out the details above. To make homemade pesto, blend fresh basil, garlic, nuts, and olive oil. Use these steps: - Ingredients: 2 cups fresh basil, 2 cloves garlic, ¼ cup pine nuts (or walnuts), ½ cup olive oil, ½ cup Parmesan cheese, salt to taste. - Steps: 1. Place basil, garlic, and nuts in a food processor. 2. Pulse until finely chopped. 3. Slowly add olive oil while blending. 4. Mix in Parmesan cheese and salt. - Adjust the flavor if needed. This homemade pesto gives your salad a fresh taste. Yes, you can prepare the salad ahead of time. Follow these tips: - Mix the chicken and veggies in a bowl. - Store the pesto dressing in a separate container. - Keep the greens fresh in a bag. - Combine everything before serving. This way, the greens stay crisp. Pesto Chicken Salad is a healthy choice. Here’s why: - It has lean protein from chicken, which helps build muscles. - The veggies add fiber, vitamins, and minerals. - Pesto contains healthy fats from nuts and olive oil. - You can control the salt and oil to keep it light. - Feel free to adjust ingredients for your health goals. Pesto chicken salad is easy to make and tasty. We covered key ingredients and fun add-ins. You learned how to prepare, mix, and serve it. I shared tips to avoid common mistakes and best storage practices. Plus, there are many ways to vary the salad to suit your taste. In short, this dish is great for meals or snacks. Enjoy making your own version!

Pesto Chicken Salad Fresh and Tasty Recipe

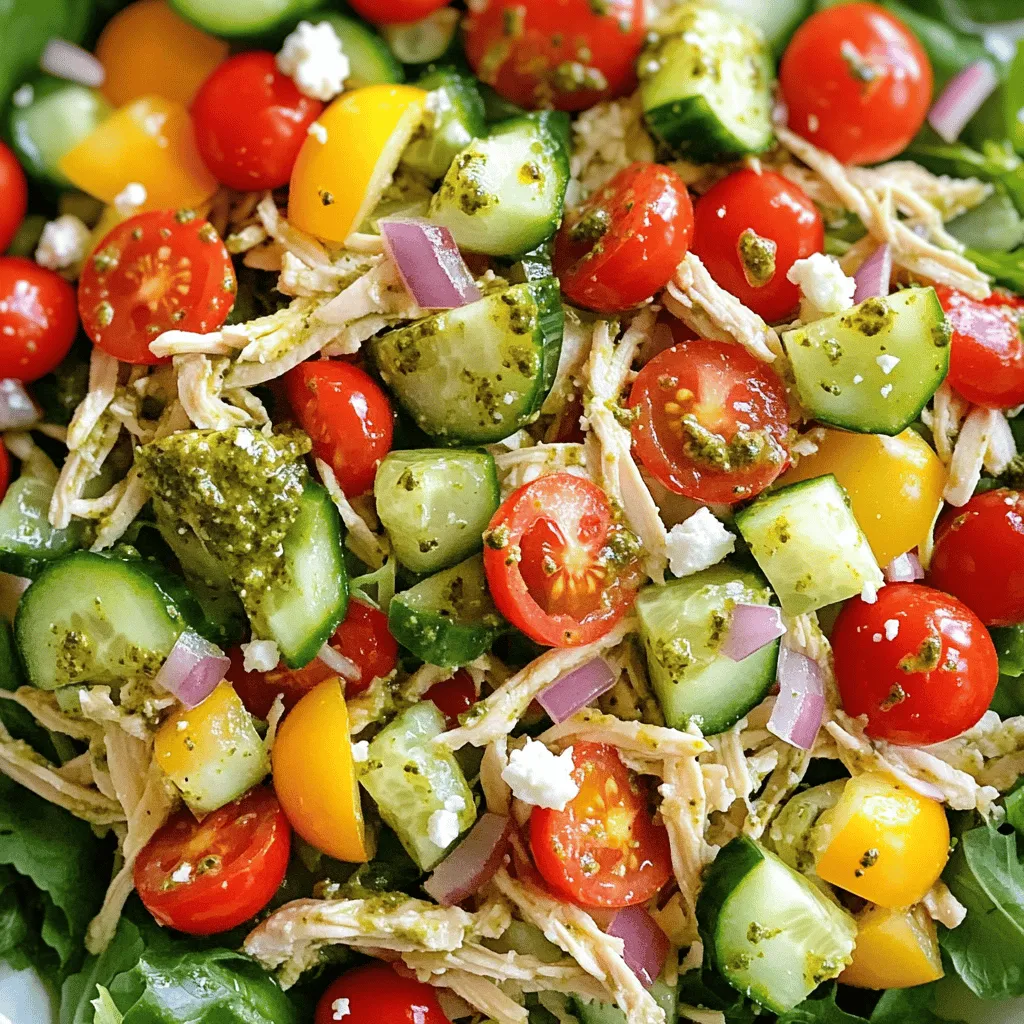
Looking for a fresh and tasty meal? Your quest ends here with my Pesto Chicken Salad! Vibrant greens, juicy chicken,

To make the perfect chicken and waffles, you need some key items: - 2 boneless, skinless chicken breasts - 1 cup buttermilk - 1 cup all-purpose flour - 1 teaspoon paprika - 1 teaspoon garlic powder - 1 teaspoon onion powder - ½ teaspoon black pepper - ½ teaspoon salt - ½ teaspoon cayenne pepper (optional for spice) - 2 large eggs - 1 cup cornmeal - 1 teaspoon baking powder - 1¼ cups milk - 1 tablespoon sugar - 1 teaspoon vanilla extract - 4 tablespoons unsalted butter, melted - Maple syrup, for serving - Fresh berries (strawberries, blueberries, or raspberries), for garnish These ingredients create a tasty blend of flavors. The buttermilk makes the chicken juicy. The spices add a nice kick. You can add more fun with extra ingredients: - Hot sauce for spice lovers - Honey for added sweetness - Cinnamon for a warm twist - Lemon zest for brightness These small changes can give your dish a unique touch. Feel free to mix and match based on your taste. When shopping, look for these tips: - Choose chicken that feels firm and moist. - Check the buttermilk for a fresh scent. - Pick flour with no lumps and a fine texture. - Choose berries that are bright and plump. Fresh ingredients make a big difference in taste. Always look for high quality to ensure the best meal. For the complete cooking guide, check the Full Recipe. To start, I mix buttermilk, paprika, and salt in a bowl. This blend makes the chicken tender and flavorful. I add the chicken breasts to the mixture and let them sit in the fridge for at least 30 minutes. This marinating step is key to juicy chicken. Next, I prepare the coating. I take a shallow dish and mix flour, paprika, garlic powder, onion powder, black pepper, salt, and cayenne pepper. In another dish, I beat the eggs until smooth. This coating gives the chicken a nice crunch. Now, it's time to cook. I remove the chicken from the buttermilk and dip each piece into the egg. After that, I dredge the chicken in the flour mixture. I heat oil in a deep frying pan over medium-high heat and fry the chicken for about 6-8 minutes on each side until golden brown. I place the cooked chicken on a paper towel-lined plate to absorb extra oil. While the chicken cools, I make the waffles. I whisk together cornmeal, flour, baking powder, sugar, and a pinch of salt in a large bowl. In another bowl, I mix milk, melted butter, and vanilla extract. I combine the wet and dry ingredients, stirring until just blended. Next, I preheat the waffle iron and lightly grease it with cooking spray. I pour the batter into the waffle iron and cook according to the manufacturer's instructions until golden brown. Finally, I assemble the dish. I place a waffle on a plate, top it with a piece of fried chicken, and drizzle it with maple syrup. I like to garnish with fresh berries on the side for color. - Full Recipe Overview: - Marinate chicken in buttermilk. - Prepare coating with flour and spices. - Fry chicken until golden brown. - Make waffles with cornmeal and flour. - Serve with syrup and berries. Frying chicken can be easy if you follow some simple steps. First, use a deep frying pan. This allows for even cooking. Heat oil to about 350°F for best results. Always test the oil by dropping in a small piece of bread. If it sizzles, the oil is ready. Cook the chicken in small batches. This keeps the oil temperature steady. Fry each piece for 6-8 minutes on each side until golden brown. Drain on paper towels to keep it crispy. To make perfect waffles, focus on the batter. Use cornmeal for a nice texture. This adds a crunch that pairs well with the chicken. Preheat your waffle iron before adding the batter. Lightly grease it with cooking spray to prevent sticking. Cook until golden brown, but don’t peek too soon. This can make the waffles soggy. Let them cool slightly on a wire rack to keep them crisp. Make your dish look as good as it tastes. Stack the fried chicken on top of the waffle for a fun tower. Drizzle warm maple syrup over the top for sweetness. Scatter fresh berries around the plate for color. A sprig of mint can add a nice touch. This simple presentation makes your meal feel special. Try these tips, and your chicken and waffles will impress everyone! {{image_2}} You can switch the chicken for other proteins. Try using biscuits or sausages. Biscuits give a fun twist, and they soak up syrup well. Sausages add a savory touch that pairs nicely with waffles. You can even use tofu for a vegetarian option. Just season and cook it well to keep the flavor. Waffles don't have to be plain. You can make them with chocolate chips or blueberries. Chocolate chip waffles add sweetness and fun. Blueberry waffles bring a burst of freshness. You can also try adding spices like cinnamon or nutmeg for more flavor. Mixing in fruit makes your dish colorful and tasty. How you serve your meal can change the whole vibe. Consider using savory sauces like gravy or hot sauce. This adds a spicy kick and a different taste. Fruit compotes, like berry or peach, can add sweetness. Drizzling maple syrup is classic, but don’t shy away from experimenting. Add fresh herbs like mint for a bright touch. Each serving becomes unique and exciting. For more ideas, check out the Full Recipe for more ways to enjoy this dish! To keep chicken and waffles tasty, wrap leftovers well. Use plastic wrap or aluminum foil. Store them in an airtight container. This helps keep them fresh and moist. When you reheat, do it gently. Use an oven for best results. Preheat to 350°F (175°C). Place the chicken and waffles on a baking sheet. Heat for about 10-15 minutes. This keeps the chicken crispy and warms the waffles nicely. You can also microwave, but it may make the food soggy. If you use the microwave, warm them for 30 seconds at a time. Chicken and waffles can last in the fridge for about 3 to 4 days. Always check for any signs of spoilage before eating. If they look or smell off, throw them out. Enjoy your meal safely! If you don't have buttermilk, you can use regular milk. Add 1 tablespoon of vinegar or lemon juice to 1 cup of milk. Let it sit for five minutes. This will create a tangy taste similar to buttermilk. Yes, you can make gluten-free waffles! Use a gluten-free flour blend instead of all-purpose flour. Look for a blend that has xanthan gum for better texture. This will help your waffles stay light and fluffy. To keep chicken juicy, marinate it in buttermilk. The acidity helps tenderize the meat. Fry the chicken at the right temperature. Too hot can dry it out, while too low may make it soggy. Aim for 350°F for frying. Maple syrup is the classic choice. Its sweetness pairs well with savory chicken. You can also try flavored syrups, like peach or berry. These add a fun twist and enhance the dish's taste. In this post, we explored how to make amazing chicken and waffles. We covered key ingredients, marinating and cooking steps, and essential tips for frying and presentation. You can even switch up proteins or waffle flavors to keep things fresh. Remember to store leftovers safely and reheat them to keep flavors intact. With these steps, you can make a dish your family will love. Enjoy your cooking journey!

Chicken and Waffles Delightful and Quick Recipe

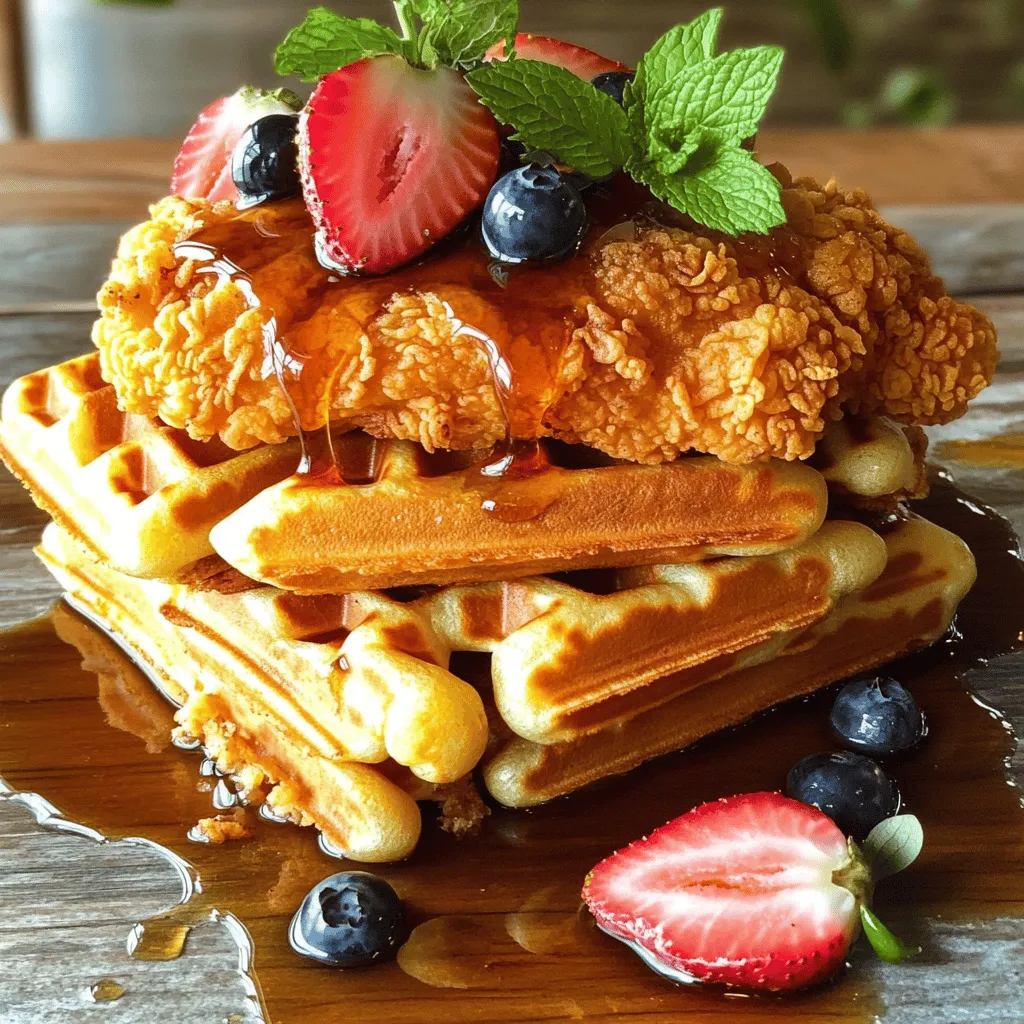
Get ready to savor the ultimate comfort food: Chicken and Waffles! This delightful dish combines crispy, juicy chicken with fluffy

- 1 large head of cauliflower, cut into florets - 4 cloves garlic, minced - 3 tablespoons olive oil - 1 lemon (zest and juice) - 1 teaspoon smoked paprika - 1/2 teaspoon cumin - Salt and pepper to taste - Fresh parsley, chopped (for garnish) The key to making garlic lemon roasted cauliflower is in the simple yet flavorful ingredients. You start with a large head of cauliflower. Cut it into bite-sized florets to ensure even cooking. Next, you’ll need garlic—four cloves, minced. This is where the dish gets its vibrant flavor. For the dressing, you will use three tablespoons of olive oil. It helps everything stick and brings a rich taste. The juice and zest of one lemon add brightness. This citrusy touch balances the earthiness of the cauliflower. Then, you add spices. One teaspoon of smoked paprika gives a subtle smoky flavor. Half a teaspoon of cumin enhances the warmth of the dish. Finally, finish with salt and pepper to your liking. For a fresh look, sprinkle chopped parsley on top right before serving. This adds color and a hint of herbiness. All these ingredients come together to create a dish that is not only healthy but also very tasty. You can find the full recipe for garlic lemon roasted cauliflower in the recipe section. - Preheat the oven to 425°F (220°C). - Prepare the baking sheet with parchment paper. Start by setting your oven to 425°F. This temperature helps the cauliflower roast nicely. Next, line your baking sheet with parchment paper. This step makes cleanup easy and keeps the cauliflower from sticking. - Combine garlic, olive oil, lemon zest, lemon juice, and spices. In a mixing bowl, add your minced garlic and olive oil. Then, zest the lemon and add both the zest and juice to the bowl. Sprinkle in the smoked paprika, cumin, salt, and pepper. Stir the mixture well to ensure it blends nicely. This marinade will coat the cauliflower in vibrant flavor. - Toss cauliflower in the marinade, spread on the baking sheet, and roast. Add the cauliflower florets to the marinade. Toss them gently until they are well covered. Spread the marinated cauliflower on the prepared baking sheet in a single layer. Roast in the oven for 25-30 minutes. Stir halfway through to help with even cooking. When it's done, the cauliflower should be tender and golden brown. Remove it from the oven and let it cool slightly. Transfer to a serving platter and garnish with chopped parsley for a fresh touch. For the full recipe, check out the earlier section. Enjoy your tasty garlic lemon roasted cauliflower! To get the best flavor, make sure each cauliflower floret gets an even coating of the marinade. This helps every bite pack a punch of garlic and lemon. I like to stir the cauliflower halfway through cooking. This step ensures even browning and helps it cook perfectly all around. Serve the roasted cauliflower warm. It tastes best right out of the oven. For a bright touch, add a little extra lemon juice on top. A sprinkle of fresh parsley adds color and freshness, making the dish look beautiful on your table. Use a heavy-duty baking sheet for the best results. A rimmed sheet prevents any oil from spilling. I also recommend using a large mixing bowl. This gives you enough space to toss the cauliflower without making a mess. A good spatula helps in spreading the florets evenly on the sheet. For the full recipe, check out the Garlic Lemon Roasted Cauliflower section above! {{image_2}} You can boost the flavor of garlic lemon roasted cauliflower in many ways. Try adding fresh herbs like thyme or rosemary. These herbs work well with the garlic and lemon. For a tangy twist, add a splash of balsamic vinegar. It brings a sweet acidity that complements the dish. You can easily modify this recipe to fit your diet. For a gluten-free version, ensure your spices are gluten-free. If you want a vegan option, this recipe is already plant-based. To make it low-carb for a keto diet, simply focus on the cauliflower and spices, avoiding any starchy sides. You can also change how you cook the cauliflower. Air frying gives it a crispy texture in less time. Just toss the cauliflower in the marinade and air fry until golden. Grilling adds a smoky flavor that enhances the dish. It’s perfect for summer barbecues. For more details, check the Full Recipe. To keep your garlic lemon roasted cauliflower fresh, store it in an airtight container. Place it in the fridge right after it cools down. This method helps keep the flavors intact. You can enjoy it for up to five days. If you want to keep it longer, consider freezing it. Wrap the cooled cauliflower tightly in plastic wrap, then put it in a freezer bag. It will last about three months in the freezer while still tasting great. When you’re ready to eat your leftovers, reheating is key. For the best results, heat your oven to 350°F (175°C). Spread the cauliflower on a baking sheet. Heat for about 10-15 minutes or until warm. This method helps keep the texture crispy. If you’re in a hurry, you can use the microwave. Place the cauliflower in a microwave-safe bowl. Heat it for about 1-2 minutes. Be sure to stir it halfway through to avoid sogginess. You can easily add garlic lemon roasted cauliflower to your meal prep. It goes well with grains, like quinoa or rice. You can also pair it with proteins, such as grilled chicken or chickpeas. Pack it in containers for lunch or dinner throughout the week. This way, you have a healthy, tasty option ready to go. You’ll find it adds a bright flavor to any meal. For more details on making this dish, check the Full Recipe. To cut cauliflower for roasting, start with a large head. Remove the leaves and stem. Then, slice the head into quarters. From there, cut each quarter into florets. Aim for even sizes, about 1 to 2 inches. This helps them cook at the same rate. Smaller pieces may brown faster, while larger ones may need more time. So, keep them about the same size for best results. Yes, you can prepare garlic lemon roasted cauliflower ahead of time. After cutting and marinating the cauliflower, you can store it in the fridge for up to a day. This lets the flavors soak in, which makes it even tastier. Just remember to keep it in an airtight container. When you’re ready to cook, simply spread it on a baking sheet and roast as directed. If you have leftovers, store them in the fridge for up to three days. Garlic lemon roasted cauliflower pairs well with many dishes. You can serve it with grilled chicken for protein. It also goes great with quinoa or rice for a hearty meal. Try it alongside a fresh salad for a light side. For a Mediterranean touch, serve it with hummus or tzatziki. The flavors mix well and keep your meal balanced. Enjoy experimenting with different pairings! This blog post covered garlic lemon roasted cauliflower and its key ingredients and steps. You learned how to mix a flavorful marinade, roast the cauliflower, and serve it warm. Exploring tips and variations can boost the dish's taste. Also, proper storage and reheating keep it fresh for later. Enjoy this nutritious side in many ways. Roasted cauliflower is easy to make and delicious to eat. Embrace your kitchen skills and share this dish with loved ones!

Garlic Lemon Roasted Cauliflower Flavorful Delight

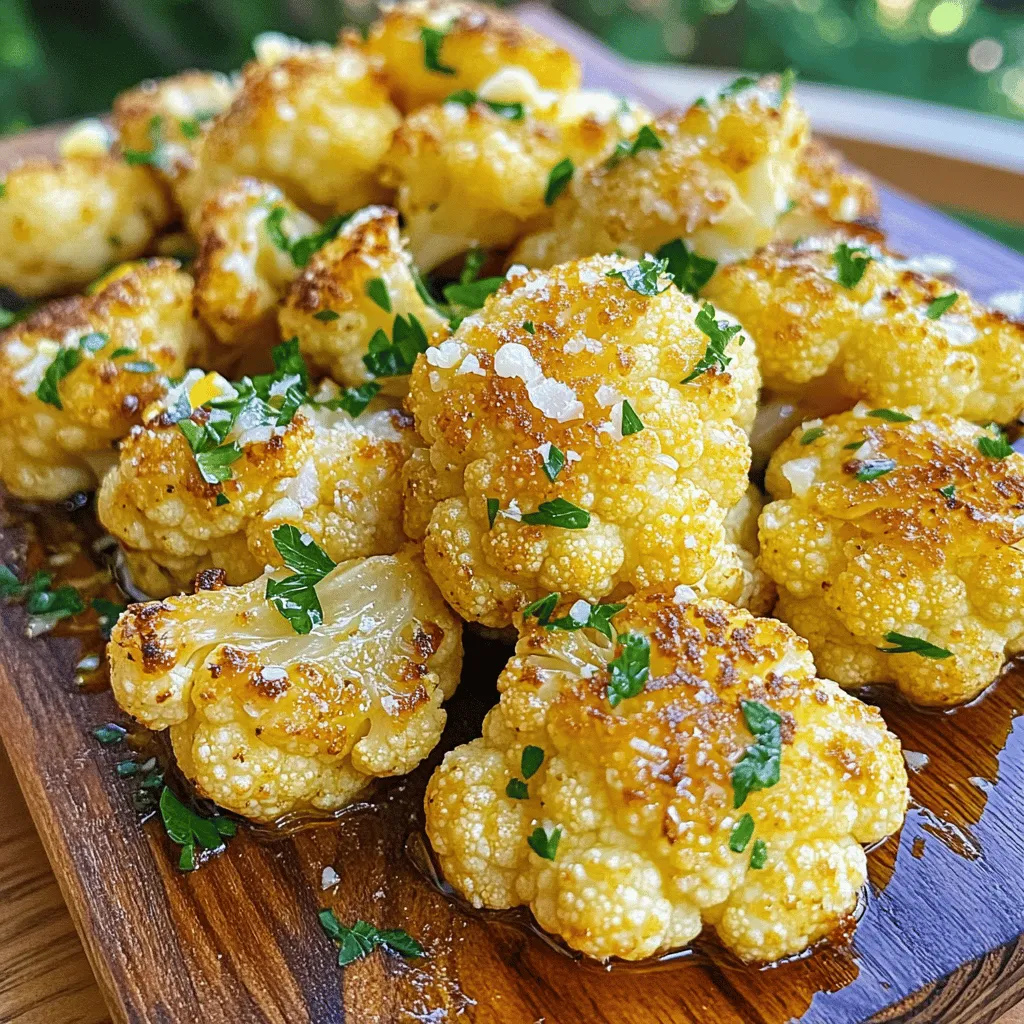
Looking for a tasty side dish that will impress? Try my Garlic Lemon Roasted Cauliflower! This dish boasts a perfect

- 2 cups fresh blackberries - 2 tablespoons fresh thyme leaves (plus extra for garnish) - 1 cup water - 3/4 cup granulated sugar - 1 tablespoon lemon juice - A pinch of salt Gathering fresh ingredients is key for great flavor. The blackberries should be ripe and juicy. They bring sweetness and a lovely color to the sorbet. The fresh thyme adds a unique touch. It complements the blackberries and enhances the overall taste. Now, for the pantry staples, you need water to create the syrup. The sugar helps to balance the tartness of the blackberries. Lemon juice adds brightness, while salt boosts flavor. Each ingredient plays an important role in making this Blackberry Thyme Sorbet a refreshing treat. For the full recipe, see the instructions above. Start by mixing water, sugar, and thyme leaves in a saucepan. Use a medium heat to bring this mix to a gentle boil. Stir occasionally until the sugar dissolves. Then, take it off the heat. Let the thyme steep in the syrup for about 15 minutes. This step gives the syrup a fresh, herbal taste. Next, strain the syrup through a fine mesh sieve into a bowl. Discard the thyme leaves. You want the syrup to cool completely. In a blender, combine the fresh blackberries, the cooled syrup, lemon juice, and a pinch of salt. Blend until the mix is smooth and creamy. The blackberries and thyme create a unique flavor. Pour the blended mix into a shallow container. Cover it and place it in the freezer for about 2 hours. After 2 hours, take it out and stir the mixture with a fork to break any ice crystals. This step helps the sorbet stay smooth. Return it to the freezer and let it freeze for another 2-3 hours, or until firm. When ready to serve, let it sit at room temperature for a few minutes. This makes it easier to scoop into bowls. Garnish with fresh thyme leaves for a lovely touch. For the complete recipe, check out the Full Recipe. To get the best texture for your sorbet, timing is key. You want to freeze the mixture long enough to create a firm and smooth treat. Start checking the sorbet after about four hours in the freezer. If it seems too soft, let it sit longer. Stirring the sorbet during freezing helps break up any ice crystals. This keeps it creamy. After two hours, use a fork to stir the mixture. This simple step improves the final texture. Return it to the freezer and let it freeze for another two to three hours. You can make this sorbet even better by adding more fruits. Try mixing in raspberries or strawberries for a fun twist. They add a new layer of taste and color to your sorbet. Adjusting the sweetness is easy too. If you like it sweeter, add more sugar or honey. Start with a little, then taste. This way, you’ll find the right balance for your palate. For the full recipe, check out the details above. Enjoy crafting your unique blackberry thyme sorbet! {{image_2}} You can add other berries to your sorbet. Raspberries or strawberries mix well with blackberries. They bring a new taste and color to the dish. Blend them in when you make the base. This gives you a fruity twist. You can even try using mixed berries for a fun flavor combination. Looking to change things up? Try using basil or mint instead of thyme. Basil adds a sweet touch, while mint brings a fresh zing. Both herbs can change the taste profile. Just make sure to use fresh herbs for the best flavor. Blend them in as you would with thyme for a new experience. You can swap out granulated sugar for honey or agave syrup. Honey adds a rich, floral sweetness. Agave syrup is smoother and less intense. Adjust the amount based on your taste. Both options can create a unique sorbet experience. Just remember to keep the balance right to maintain the texture. To keep your blackberry thyme sorbet fresh, store it in an airtight container. This prevents freezer burn and keeps flavors intact. Make sure to cover the top with plastic wrap before sealing the lid. If you have a larger batch, consider using smaller containers for easy serving. Blackberry thyme sorbet can stay fresh in your freezer for up to two weeks. After that, it may lose its flavor and texture. To enjoy it at its best, try to eat it within this time frame. If you notice any ice crystals or a change in color, it's best to toss it. If your sorbet is too hard to scoop, let it sit at room temperature for about 5 to 10 minutes. This softens it enough to get a perfect scoop. You can also use a warm ice cream scoop to help. Just dip the scoop in warm water for a second before diving in! For the full recipe, check out the Blackberry Thyme Sorbet recipe. Yes, but adjust the blending time for a smoother texture. Frozen blackberries work well. They save time and reduce prep work. Just remember, they might not blend as easily as fresh ones. Give them a little extra time in the blender. Fresh thyme provides the best flavor; dried may alter taste. Fresh herbs bring a bright taste to the sorbet. Dried thyme can make the flavor less vibrant. If you can, always choose fresh thyme for this recipe. Yes, the method outlined does not require specialized equipment. You can use simple tools like a blender and a shallow container. This makes the sorbet process easy and fun. You can enjoy homemade sorbet without fancy gadgets. Add more sugar or a sweetener of choice to taste. If you prefer a sweeter treat, feel free to add sugar. Start with small amounts and taste as you go. This way, you can find your perfect sweetness level. Consider pairing it with desserts or serving as a palate cleanser. This sorbet can refresh your taste buds between courses. Try it alongside chocolate cake or fresh fruit. It also makes a lovely light dessert on its own. For the full recipe, check out the instructions above. This blog post outlined how to make a refreshing Blackberry Thyme Sorbet. You learned about fresh ingredients and pantry staples, and I provided clear steps for crafting your sorbet. Remember to adjust the freezing time for a great texture and consider flavor mix-ins. I encourage you to experiment with different fruits and herbs. This recipe is simple and fun, even without an ice cream maker. Enjoy your delicious creation, and share it to brighten someone’s day.

Blackberry Thyme Sorbet Refreshing Frozen Treat

Looking for a cool and fruity treat? Try my Blackberry Thyme Sorbet! It combines the rich flavor of fresh blackberries

For a tasty roasted vegetable medley, you need fresh veggies. Here’s a list of what I use: - 2 cups Brussels sprouts, halved - 1 cup baby carrots, halved lengthwise - 1 red bell pepper, chopped - 1 yellow bell pepper, chopped - 1 zucchini, sliced - 1 red onion, cut into wedges These vegetables add great taste and color to your dish. You can mix and match based on what you have. The right seasoning makes all the difference. I use: - 4 cloves garlic, minced - 3 tablespoons olive oil - 2 teaspoons Italian seasoning - Salt and pepper to taste The olive oil helps the veggies roast well. Garlic gives a rich flavor. Italian seasoning adds herbs that make everything pop. To make your medley even better, think about these options: - Fresh parsley, chopped (for garnish) - A sprinkle of grated cheese - A squeeze of lemon juice These add-ins can give your dish a personal touch. Feel free to get creative with flavors you love. For the full recipe, check out the detailed instructions to make this dish shine! First, gather all your ingredients. Start with the Brussels sprouts, baby carrots, red and yellow bell peppers, zucchini, and red onion. Wash and cut them as needed. Halve the Brussels sprouts and baby carrots. Chop the bell peppers and slice the zucchini. Cut the red onion into wedges. Next, mince the garlic. This adds great flavor to your dish. In a large mixing bowl, combine all the vegetables. Add the minced garlic to the bowl. Now, drizzle olive oil over the mix. Sprinkle the Italian seasoning, salt, and pepper. Toss everything well. Make sure each piece is coated with oil and seasoning. This step ensures every bite is full of flavor. Preheat your oven to 425°F (220°C). This high temperature helps the vegetables become tender and caramelized. Spread the coated vegetables in a single layer on a large baking sheet. Lay them out evenly. Roast the vegetables in the oven for 25-30 minutes. Stir them halfway through. This helps them cook evenly. You'll know they are done when they feel tender and look slightly caramelized. Once you take the vegetables out of the oven, let them cool for a few minutes. This helps with handling and serving. Before serving, sprinkle chopped fresh parsley on top. It adds a nice touch and fresh flavor. Now, your roasted vegetable medley is ready to enjoy. You can find the full recipe above for reference! For a roasted vegetable medley, choose veggies that get sweet and tender. Good options are: - Brussels sprouts - Baby carrots - Red and yellow bell peppers - Zucchini - Red onion These vegetables roast well and provide great flavor. Feel free to mix and match to suit your taste. Caramelization adds a rich, sweet flavor to your veggies. To get it right: 1. Use high heat, around 425°F (220°C). 2. Cut vegetables into uniform sizes for even cooking. 3. Don't overcrowd the pan; this helps them brown. 4. Toss halfway through roasting to ensure all sides get that nice color. These steps help make your roasted vegetable medley look and taste great. Roasted vegetables stay tasty and healthy for later meals. Here are some ideas: - Store leftovers in an airtight container for up to four days. - Add them to salads for a quick lunch. - Mix them into pasta for a hearty dinner. These tips make meal prep easy and fun! Check out the Full Recipe for more details on making your own roasted vegetable medley. {{image_2}} You can mix and match vegetables for your roasted medley. Try using sweet potatoes or butternut squash for a sweet touch. Broccoli and cauliflower add color and crunch. Eggplant gives a nice, creamy texture. You can even add green beans for a fresh bite. The key is to keep the sizes similar. This way, everything cooks evenly. Adding proteins makes this dish more filling. You can toss in chickpeas or lentils for a plant-based option. If you prefer meat, try diced chicken or shrimp. For a heartier dish, add tofu or tempeh. Just remember to adjust cooking times. Proteins should be cooked through and safe to eat. This recipe can easily fit vegan and gluten-free diets. All the ingredients are already plant-based. Ensure your seasonings and oils are gluten-free. You can also use tamari instead of soy sauce if you want a savory boost. These changes keep the dish tasty while meeting dietary needs. Check labels to guarantee everything is suitable for your lifestyle. For the full recipe, refer to the main section. Let the roasted vegetable medley cool fully before storing. Use an airtight container. You can keep leftovers in the fridge for about 3 to 5 days. Make sure to label the container with the date. This helps you know when to use them. To reheat, you can use the oven or a microwave. For the oven, preheat to 350°F (175°C). Spread the vegetables on a baking sheet. Heat them for about 10 to 15 minutes. This keeps them crispy. If you use a microwave, place the veggies in a microwave-safe dish. Heat for 1 to 2 minutes, stirring halfway through. Check that they are hot all the way through. Freezing is a great way to save leftovers. Place the cooled vegetables in freezer-safe bags. Remove as much air as possible before sealing. You can freeze them for up to 3 months. When you're ready to eat, thaw them in the fridge overnight. Reheat in the oven or microwave as mentioned above. This method keeps the flavors fresh and tasty. For the full recipe, check out the details above. Yes, you can use frozen vegetables. They work well in this recipe. However, frozen veggies may lose some texture. Thaw them and pat dry before roasting. This helps them crisp up nicely. Keep in mind that cooking time might change slightly. Check for doneness as you roast. Roasted Vegetable Medley pairs great with many dishes. You can serve it with grilled chicken or fish. It also goes well with quinoa or brown rice. If you want a vegetarian option, try it with a hearty bean dish. Adding a fresh salad on the side is a nice touch, too. You can easily change the seasoning to fit your taste. Try adding cumin or paprika for a smoky flavor. For a spicy kick, add red pepper flakes. You can also use fresh herbs like thyme or rosemary. Experiment with different spices to find your favorite blend. Roasting vegetables is easy and fun. We explored the best veggies and how to prepare them. You learned about seasoning, cooking steps, and finishing touches. I shared tips for the perfect roast and ways to store leftovers. You can even mix in proteins or modify for dietary needs. Remember, roasting brings out natural flavors. Use our tips to make it your own. Enjoy cooking and happy eating!

Roasted Vegetable Medley Flavorful and Nutritious

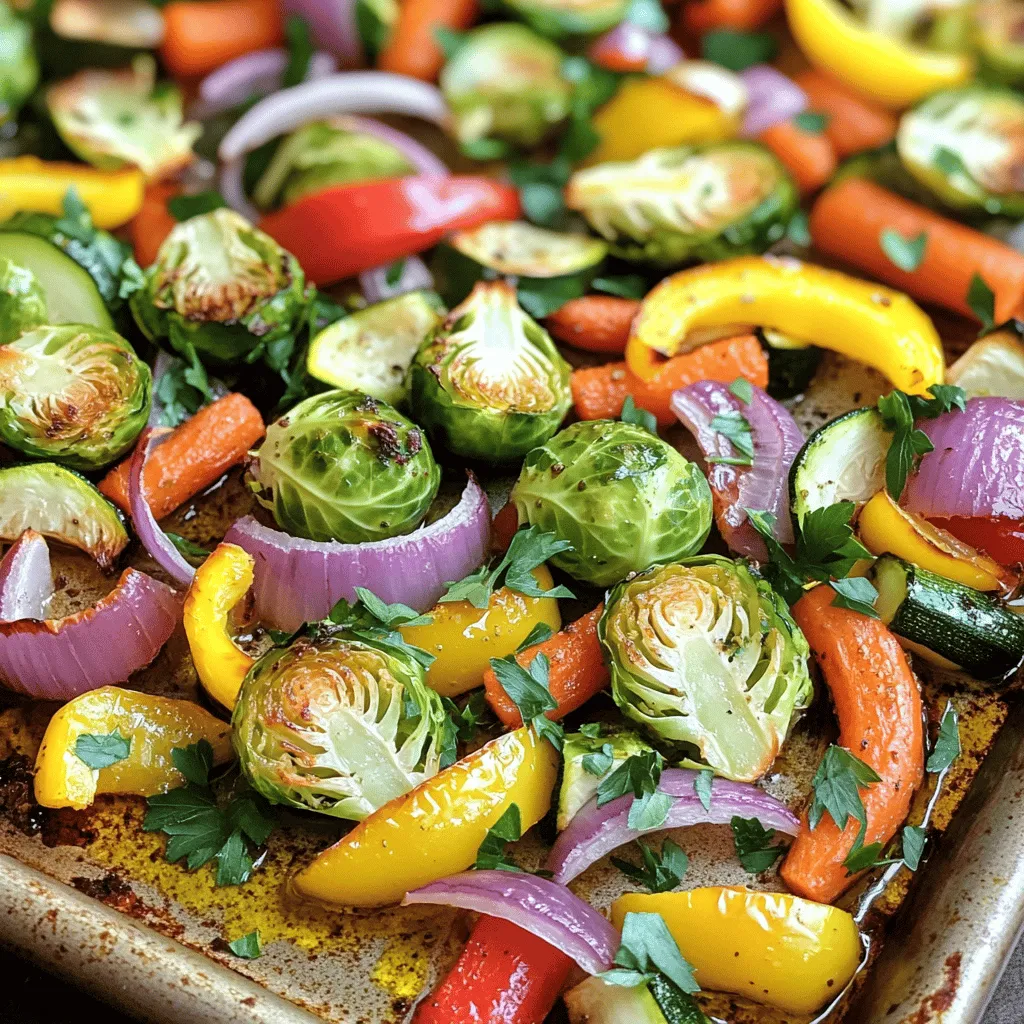
Want a dish that is both tasty and good for you? You’ve found it! My Roasted Vegetable Medley is packed

For this tasty dish, gather these key items: - 4 bone-in, skin-on chicken thighs - 1/4 cup honey - 3 tablespoons soy sauce (low sodium) - 3 cloves garlic, minced - 1 tablespoon fresh ginger, grated - 2 tablespoons apple cider vinegar - 1 tablespoon sesame oil - Salt and pepper to taste - Fresh cilantro, chopped (for garnish) - Sesame seeds (for garnish) These ingredients work together to create a sweet and savory flavor. The honey and garlic give a lovely glaze to the chicken, making it sticky and delicious. You can add more depth to your dish with these extras: - Red pepper flakes for heat - Green onions for a fresh crunch - Lime juice for brightness These options help you customize the dish. Feel free to mix and match based on your taste! If you don’t have an ingredient, don’t worry! Here are some swaps: - Use maple syrup instead of honey for a different sweetness. - Swap apple cider vinegar with rice vinegar if that’s what you have. - Try olive oil instead of sesame oil for a milder flavor. These substitutions keep the dish simple and flexible. You can still enjoy tasty honey garlic chicken thighs even with changes! For the full recipe, check out the details above. To start, gather your ingredients for the marinade. You will need honey, soy sauce, garlic, ginger, apple cider vinegar, sesame oil, salt, and pepper. In a mixing bowl, whisk together these ingredients. This blend creates a sweet and savory mix. The garlic and ginger add a nice kick. Make sure everything is well combined. You want a smooth marinade for the chicken. Next, take your chicken thighs. Place them in a resealable bag or a shallow dish. Pour the marinade over the chicken. Ensure each thigh is coated well. Seal the bag or cover the dish tightly. Now, refrigerate the chicken for at least one hour. If you have more time, let it marinate overnight. This helps the flavors soak in deeply. Preheat your oven to 400°F (200°C). While it heats, line a baking dish with parchment paper. This makes cleanup easier. Remove the chicken from the marinade, but save the marinade for later. Place the chicken thighs skin-side up in the baking dish. Bake the chicken for about 25 to 30 minutes. You want the skin to turn golden brown. Also, check that the internal temperature reaches 165°F (74°C). While the chicken bakes, pour the reserved marinade into a small saucepan. Bring it to a boil over medium heat. Reduce the heat and let it simmer for 5 to 7 minutes until it thickens. Once the chicken is done, brush this thickened sauce over the thighs. Return them to the oven for another 5 to 10 minutes. This caramelizes the sauce and adds a nice glaze. After baking, let the chicken rest for a few minutes. Garnish with chopped cilantro and sesame seeds before serving. Enjoy your sticky honey garlic chicken thighs! You can find the full recipe for more details. Cooking chicken thighs well brings out their rich taste. You can bake, grill, or pan-sear them. Baking is easy and lets the flavors bloom. Grilling gives a nice char and smoky taste. Pan-searing is quick and makes the skin crispy. For this recipe, baking is ideal to keep the meat juicy. Crispy skin is a must for chicken thighs. Start with dry skin; pat it with paper towels. This helps the skin crisp up. Use high heat when baking, around 400°F (200°C). The hot air makes the skin golden and crunchy. Brush on some marinade before the final bake for extra flavor and color. Honey garlic chicken thighs shine on their own but pair nicely with sides. Try serving them with steamed rice or quinoa. Roasted veggies like broccoli or carrots add color and nutrition. A fresh salad can balance the sweet sauce. For a fun twist, serve with warm naan or rice paper wraps. Check out the Full Recipe for more ideas! {{image_2}} Honey garlic chicken thighs are fun to tweak. Here are some tasty ideas. You can add veggies for a one-pan meal. Try bell peppers, broccoli, or carrots. Chop them into bite-sized pieces. Toss them in with the chicken thighs during the last 20 minutes of baking. They soak up the tasty sauce. This makes a colorful and healthy dish. Plus, it saves you from washing extra pots. Want some heat? Add chili flakes or sriracha to the marinade. Start with a teaspoon. Taste it and adjust as needed. This adds a nice kick without losing the sweet flavor. You can even add jalapeños for a fresh touch. It’s great for those who love spicy food. Grilling adds a smoky flavor to the chicken. Marinate the chicken as usual. Preheat your grill to medium-high heat. Cook the chicken for about 5-7 minutes on each side. Brush with the thickened marinade during the last few minutes. It gives a nice glaze. Oven-baking keeps the chicken juicy and tender. Both methods are delicious, so choose your favorite! These variations keep the dish fresh and exciting. You can find the full recipe above to get started. After enjoying your honey garlic chicken thighs, store any leftovers properly. Let the chicken cool to room temperature. Place the thighs in an airtight container. This keeps them fresh for up to three days in the fridge. If you use a resealable bag, squeeze out all the air before sealing. To reheat your chicken thighs, preheat your oven to 350°F (175°C). Place the thighs on a baking sheet. Cover them with foil to keep moisture in. Heat for about 15-20 minutes, or until warmed through. This method helps maintain the crispy skin and juicy meat. You can also use a microwave if you're short on time, but the oven gives better results. If you want to keep your chicken longer, freezing is a great option. Wrap each thigh in plastic wrap, then place them in a freezer bag. They can last up to three months in the freezer. When you're ready to eat, thaw them in the fridge overnight. For a quick option, you can thaw them in cold water. Just make sure to cook them right after thawing. Enjoy your sticky honey garlic chicken whenever you like! For more details, check the Full Recipe. I recommend marinating chicken thighs for at least 1 hour. For best flavor, marinate them overnight. This allows the chicken to soak up all those tasty honey and garlic flavors. Yes, you can use boneless chicken thighs. They cook faster than bone-in thighs. Just check the cooking time, as they may need less time in the oven. Great sides include steamed rice, mashed potatoes, or a fresh salad. You can also add roasted vegetables for a colorful plate. The sweet and savory sauce pairs well with these options. To check if chicken thighs are done, use a meat thermometer. The internal temperature should reach 165°F (74°C). The juices should run clear, and the skin should be crispy and golden. In this post, we explored how to make honey garlic chicken thighs. We discussed key ingredients, marinating techniques, and baking methods. I shared tips for crispy skin and serving ideas. Variations included options for spice and grilling. Lastly, we covered storage and reheating methods. When you make this dish, enjoy the rich flavors and simple steps. Cooking can be fun and rewarding. Now, go create your delicious meal!

Honey Garlic Chicken Thighs Flavorful Dinner Idea

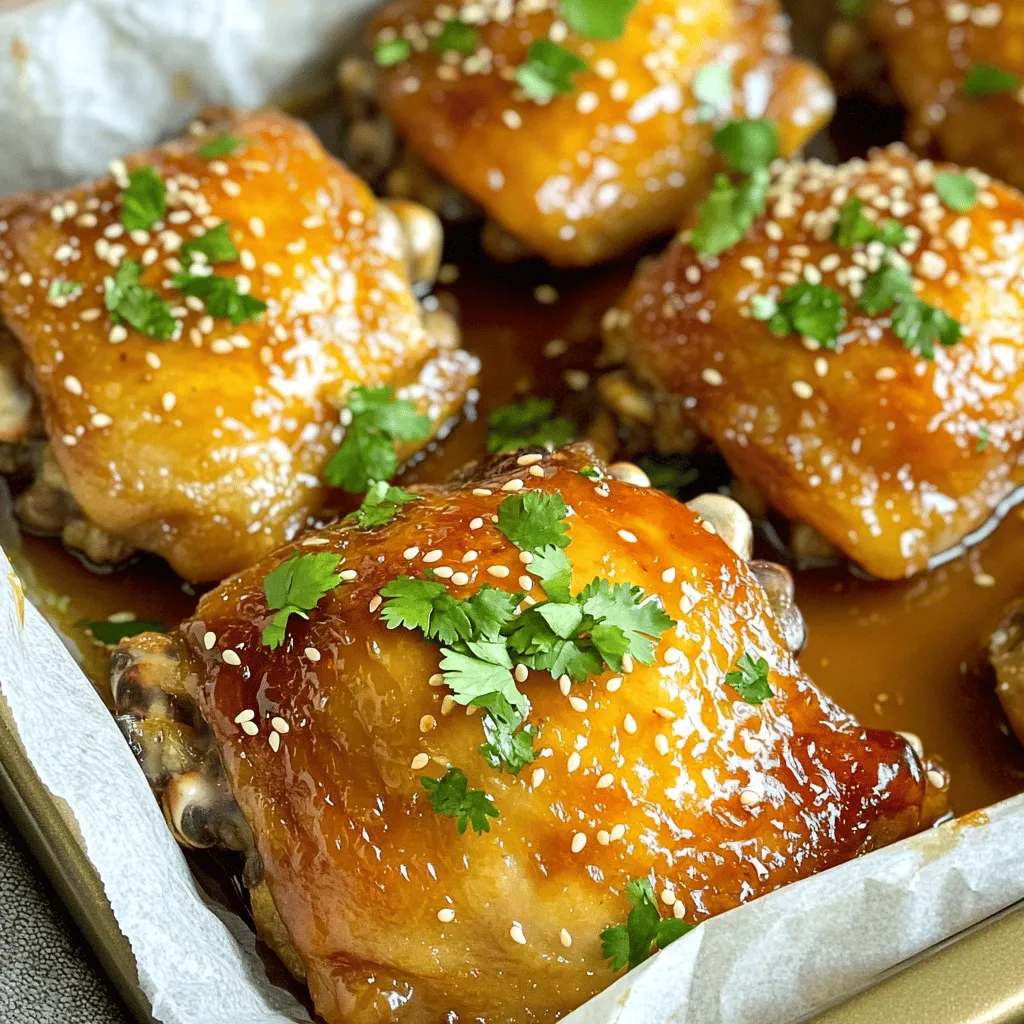
Looking for a tasty and easy dinner idea? Honey Garlic Chicken Thighs are a smart choice! With their sweet and

Older posts
Newer posts
← Previous Page1 … Page29 Page30 Page31 … Page61 Next →

dsad

© 2025 Cooking Wells • Built with GeneratePress

Our Policies

  • Copyright Policy
  • Cookie Policy
  • GDPR Policy
  • Privacy Policy
  • Disclaimer
  • Terms Of Use

More Information

  • Home
  • About
  • Contact
  • Appetizers
  • Dessert
  • Dinner
  • Drinks
©2025, Cooking Wells About Back To Top