Skip to content
DisclaimerTerms Of UseGDPR PolicyCookie Policy

Cooking Wells

  • Home
  • Drinks
  • Appetizers
  • Dinner
  • Dessert
  • About
  • Contact
  • Privacy Policy
DisclaimerTerms Of UseGDPR PolicyCookie Policy

Mia

To make your savory quinoa salad with avocado, gather these fresh ingredients: - 1 cup quinoa - 2 cups vegetable broth or water - 1 ripe avocado, diced - 1 cup cherry tomatoes, halved - 1/2 cup cucumber, diced - 1/4 red onion, finely chopped - 1 small bell pepper, diced (any color) - 1/4 cup fresh parsley, chopped - 1 tablespoon olive oil - 2 tablespoons lemon juice - 1 teaspoon garlic powder - 1/2 teaspoon cumin - Salt and pepper to taste This salad is not just tasty; it is also healthy. Here’s a quick glance at its benefits: - Calories: About 250 per serving - Protein: 7 grams - Carbohydrates: 35 grams - Fat: 10 grams - Fiber: 6 grams - Vitamins: Rich in vitamins A, C, and K Quinoa is a complete protein, which means it has all nine essential amino acids. The avocado adds healthy fats and fiber. Together, these ingredients provide a great balance. To prepare this salad, you’ll need a few simple tools: - Medium saucepan for cooking quinoa - Fine mesh strainer for rinsing quinoa - Large mixing bowl for combining ingredients - Small bowl for making the dressing - Whisk or fork for mixing the dressing - Knife and cutting board for chopping vegetables These tools make the process easy and fun. You can find all of them in your kitchen. For the full recipe, refer to the earlier section. Enjoy your cooking! First, rinse the quinoa under cold water. Use a fine mesh strainer for this step. Rinsing helps remove any bitter taste. Next, pour two cups of vegetable broth or water into a medium saucepan. Bring it to a boil. Add the rinsed quinoa to the boiling liquid. Lower the heat to a simmer and cover the pot. Cook for about 15 minutes until all the liquid is gone. Once cooked, take the pot off the heat and let the quinoa cool. In a large mixing bowl, add the cooled quinoa. Now, it’s time to add other fresh ingredients. Toss in one diced avocado, one cup of halved cherry tomatoes, and half a diced cucumber. Next, add a quarter of a finely chopped red onion and one diced bell pepper. You can use any color bell pepper you like. Lastly, add a quarter cup of chopped fresh parsley. Gently mix these ingredients together until combined. To make the dressing, grab a small bowl. In this bowl, whisk together one tablespoon of olive oil and two tablespoons of lemon juice. Next, add one teaspoon of garlic powder and half a teaspoon of cumin. Season with salt and pepper to taste. Whisk until the dressing is well combined. Pour the dressing over your quinoa salad mix. Gently toss everything together to ensure even coating. If needed, adjust seasoning with more salt or lemon juice. For the full recipe, check out the detailed instructions above. To cook quinoa well, first rinse it. Rinsing removes bitterness and improves taste. Use one part quinoa to two parts liquid. You can use water or vegetable broth for more flavor. Bring the liquid to a boil, then add the rinsed quinoa. Lower the heat and cover. Let it simmer for about 15 minutes. After that, remove it from heat and let it cool. Fluff it with a fork for the best texture. This savory quinoa salad works great as a main dish or a side. You can serve it warm or cold. For lunch, pack it in a container. It holds up well in the fridge. For dinner, pair it with grilled chicken or fish. You can also add it to a taco bar for a fresh twist. Garnishing adds a fun touch to your salad. Try adding extra parsley on top for color. A lemon wedge or lime can brighten the dish. You might also sprinkle some feta cheese for creaminess. For crunch, consider adding toasted nuts or seeds. These little extras make your salad pop with flavor and style. For the complete recipe, check out the [Full Recipe]. {{image_2}} You can change up the flavor with different dressings. A creamy tahini dressing adds a nutty taste. For a spicy kick, try a chipotle vinaigrette. A simple balsamic glaze also works well. These dressings can bring new life to your quinoa salad. Feel free to mix in more veggies. Try adding shredded carrots for crunch. Roasted corn adds sweetness and texture. You might also like to include spinach or kale for extra nutrients. Don't forget to experiment with herbs like cilantro or basil for added flavor. For a filling meal, add protein to your salad. Grilled chicken or shrimp pairs well with the flavors. You can also use chickpeas or black beans for a plant-based option. Tofu is another great choice that soaks up the dressing beautifully. These additions make the salad even more satisfying. For a full recipe, check out the Savory Quinoa Salad with Avocado. After you make the savory quinoa salad, store any leftovers in an airtight container. Keep it in the fridge for up to three days. This salad tastes great cold and is perfect for quick meals. You can freeze this salad if you want to keep it longer. However, the avocado may not stay nice. To freeze, put the salad in a freezer-safe container. It will last for about a month. When you’re ready to eat it, let it thaw in the fridge overnight. If you want to reheat the salad, warm it in a pan over low heat. Add a splash of water or broth to help it heat evenly. Stir gently until warm. Avoid using the microwave, as it can make the avocado mushy. For best taste, enjoy it cold or at room temperature. Try this full recipe for the best results! To make this salad vegan, simply use vegetable broth. All the other ingredients are already plant-based. The creamy avocado adds richness without any dairy. You can enjoy this salad guilt-free! Yes, you can use brown rice. Just remember that brown rice takes longer to cook. It usually needs about 45 minutes of cooking time. Make sure to adjust the water or broth according to the rice package instructions. If you don't have avocado, try using mashed chickpeas. They add creaminess and nutrition. You can also use diced mango for a sweet twist. Another option is to add a dollop of hummus for a tasty kick. This blog post covered how to make a delicious quinoa salad. We explored the key ingredients, their nutrition, and the tools you need. I shared step-by-step instructions for preparing quinoa and mixing ingredients. We also discussed tips for perfect cooking and serving ideas. Variations let you try new dressings and add protein. Lastly, I provided storage and reheating tips. Remember, this salad is flexible and fun. Experiment with flavors to make it your own! Enjoy your journey to a tasty and healthy meal!

Savory Quinoa Salad with Avocado Simple and Fresh

Looking for a fresh, tasty dish that’s easy to make? You’ve found it! This savory quinoa salad with avocado is

To make coconut milk rice pudding, you need a few key items. Here is what to gather: - 1 cup jasmine rice - 2 cups coconut milk - 2 cups water - 1/2 cup granulated sugar - 1/4 teaspoon salt - 1 teaspoon vanilla extract - 1/2 teaspoon cinnamon (plus extra for garnish) - 1/2 cup raisins (optional) - Toasted coconut flakes for garnish These ingredients come together to create a creamy, sweet treat that warms the soul. You can swap some ingredients if needed. Here are a few ideas: - Use arborio rice instead of jasmine rice for a creamier texture. - Swap coconut milk with almond milk for a lighter version. - Maple syrup can replace granulated sugar for a natural sweetener. - Use any dried fruit instead of raisins, like cranberries or apricots. These substitutes keep the dish tasty while allowing for dietary needs. Toppings can add fun and flavor to your pudding. Here are some great options: - More cinnamon for that extra spice kick. - Fresh fruit like mango or banana for a fruity touch. - Chopped nuts like almonds or pistachios for crunch. - A drizzle of honey or maple syrup for added sweetness. Feel free to mix and match these toppings to suit your taste! For the full recipe, refer to the earlier section. Start by rinsing the jasmine rice. Place it in a sieve and run cold water over it. Rinse until the water runs clear. This step removes excess starch. It helps keep your pudding from becoming too sticky. Next, combine the rinsed rice, coconut milk, and water in a medium saucepan. Heat this mixture over medium heat until it begins to boil. Once boiling, lower the heat. Stir in the sugar, salt, vanilla extract, and cinnamon. Mix well to combine all the ingredients. Cover the saucepan with a lid. Let it simmer on low heat for about 20 to 25 minutes. Stir occasionally to stop the rice from sticking to the bottom. You want the rice to be tender, and the pudding to thicken. If you want to add raisins, stir them in during the last five minutes. This lets them plump up nicely. When the rice pudding is done cooking, take it off the heat. Let it sit for about 5 to 10 minutes. This allows it to thicken even more as it cools down. You can serve the rice pudding warm or chilled. Scoop it into individual bowls for a lovely presentation. For a special touch, garnish with toasted coconut flakes and a sprinkle of cinnamon on top. This will enhance the flavor and make your dish look amazing. For the full recipe, check out the details above! To get the creamiest texture, use jasmine rice. Jasmine rice has a lovely, sticky quality. Rinse the rice well before cooking. This removes excess starch and helps keep the pudding smooth. Cook the rice in both coconut milk and water. The mix creates a rich flavor. Let it simmer on low heat. Stir occasionally, so it does not stick. Letting it sit after cooking helps thicken the pudding. One big mistake is not rinsing the rice. This can lead to a gummy texture. Another error is cooking at too high a heat. It can burn the rice and ruin the flavor. Don't skip the resting time after cooking. This step allows the pudding to thicken well. Lastly, avoid adding too much sugar at once. Add it gradually to taste. You can boost the flavor of your pudding. Try adding vanilla extract for warmth. A pinch of salt enhances sweetness, too. Cinnamon adds a nice, cozy spice. For extra texture, mix in raisins or toasted coconut flakes. These add chewiness and crunch. You can even try fresh fruit like mango or banana. They bring a bright, fresh taste to your creamy dish. For the full recipe, check out the detailed steps above. {{image_2}} You can make coconut rice pudding more fun by adding fruits. Pineapple, mango, or banana work great. Just chop them into small pieces and stir them in near the end of cooking. This will give your pudding a sweet, tropical vibe. The fresh fruit adds color and flavor, making every bite a delight. If you want a dairy-free treat, this recipe is perfect. Coconut milk is already dairy-free, so you can enjoy it without worry. Just keep the recipe as it is. You can also use maple syrup instead of sugar for a hint of natural sweetness. This way, you still get that creamy texture without any dairy. For a twist, try adding cardamom. This spice brings a warm, fragrant note to your pudding. Just add a pinch of ground cardamom when you mix in the sugar and cinnamon. It adds depth and makes the dish feel more special. You can also top with chopped pistachios for a crunchy finish. For the full recipe, check out the earlier section. Enjoy exploring these variations to make your coconut milk rice pudding truly your own! Store leftover coconut milk rice pudding in an airtight container. This keeps it fresh. Place it in the fridge within two hours of cooking. The pudding lasts about three days. When you want to eat it, check for any changes in smell or color. You can freeze coconut milk rice pudding for longer storage. First, let it cool completely. Then, scoop portions into freezer-safe containers. Leave some space at the top for expansion. It can last up to two months in the freezer. To use, thaw it in the fridge overnight. To reheat, put the pudding in a saucepan over low heat. Stir gently to avoid burning. If it seems dry, add a splash of coconut milk or water. Heat until warm, about five minutes. Serve it warm, and enjoy the creamy comfort. For the full recipe, check out the earlier section! To thicken coconut milk rice pudding, cook it longer. Stir often to prevent sticking. You can also add more rice or reduce the liquid. Adding a little cornstarch can help too. Mix the cornstarch with water before stirring it into the pudding. This method gives you a nice, creamy texture. Yes, you can use brown rice. It may take longer to cook, about 40-50 minutes. Brown rice gives a nuttier flavor and more chewiness. Just remember to adjust the water ratio. Use 2.5 cups of water for each cup of brown rice. This way, you will achieve a great texture. Coconut milk offers several health benefits. It contains healthy fats that can boost energy. These fats can support heart health too. Coconut milk also has vitamins and minerals like magnesium and potassium. It may help with digestion and boost immunity. Plus, it’s dairy-free, making it great for lactose-intolerant folks. Coconut milk rice pudding lasts about 4-5 days in the fridge. Store it in an airtight container to keep it fresh. If you notice any separation, just stir it before serving. This dish can be enjoyed warm or cold, so you have options! Yes, you can make coconut milk rice pudding ahead of time. It’s a great dish to prepare for gatherings. Just refrigerate it after cooking. Let it sit for a while before serving. For the best taste, make it a day in advance. You can find the Full Recipe in the earlier section for reference. You now know the key ingredients and steps to make coconut milk rice pudding. From cooking tips to tasty variations, you have the tools to create a great dish. Remember to store it correctly for future enjoyment. Whether you want a creamy classic or a fruity treat, there's a recipe for you. Enjoy experimenting and sharing your delicious creations with others!

Coconut Milk Rice Pudding Creamy Comfort Dish

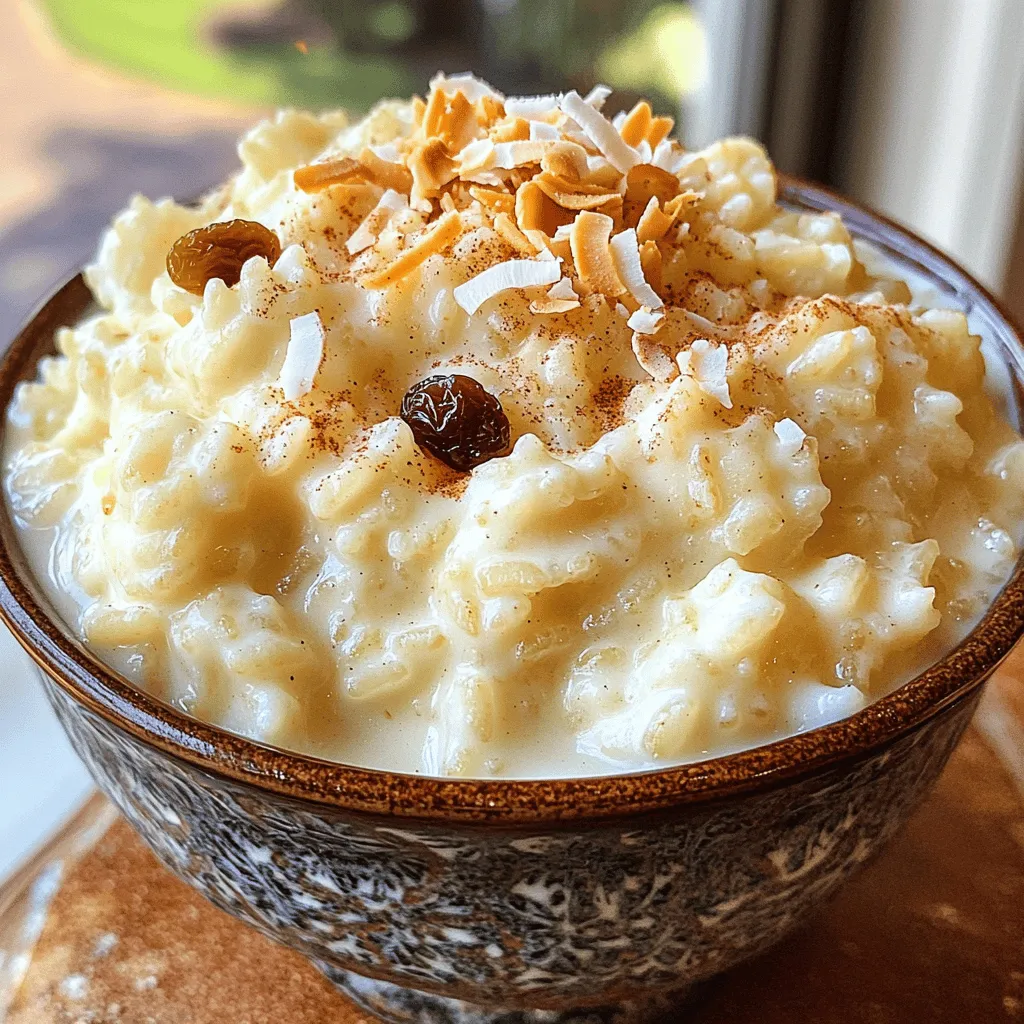
If you’re craving a warm, creamy dessert that never fails to comfort, you’re in the right place! Coconut Milk Rice

- 4 medium zucchinis, spiralized - 1 ripe avocado - 1 cup fresh basil leaves - 2 tablespoons pine nuts - 2 garlic cloves, minced - 2 tablespoons lemon juice - 3 tablespoons olive oil - Salt and pepper to taste - Cherry tomatoes, halved (for garnish) - Grated Parmesan cheese (optional, for serving) When I make zucchini noodles with pesto, I focus on fresh, simple ingredients. Zucchini noodles serve as a great base. They soak up flavor and bring a nice crunch. Avocado adds creaminess and healthy fats. Fresh basil gives the dish an aromatic kick. Pine nuts add a bit of crunch. Garlic and lemon juice brighten the flavors. Olive oil ties everything together. You can adjust salt and pepper to fit your taste. - Calories per serving: Approximately 250 - Macronutrient breakdown: - Carbohydrates: 20g - Protein: 5g - Fat: 18g This dish is light but filling. It provides a good mix of carbs, proteins, and healthy fats. It's perfect for a quick meal. The calories are low, making it a great option for many diets. - Spiralizer or vegetable peeler - Food processor - Large pan Using the right tools makes cooking easier. A spiralizer is key for making zucchini noodles. If you don’t have one, a vegetable peeler works too. A food processor blends the pesto quickly. A large pan is needed to sauté the noodles. Each tool helps you create a great meal with ease. For the full recipe, check the details above. To start, spiralizing your zucchinis is fun and easy. You can use a spiralizer or a vegetable peeler. Just slice off the ends first. Then, push the zucchini through the spiralizer. If using a peeler, make long strips. Aim for thin, noodle-like strands. Once spiralized, set the zucchini noodles aside on a plate. Next, we make the avocado pesto. Gather your ingredients: avocado, fresh basil leaves, pine nuts, garlic, lemon juice, olive oil, salt, and pepper. In a food processor, add all these items. Blend until the mix is smooth and creamy. You may need to scrape down the sides. Taste your pesto and adjust the flavor. Add more salt or lemon juice if needed. Now, it’s time to cook the zucchini noodles. In a large pan, heat a drizzle of olive oil over medium heat. Add the spiralized zucchini noodles and sauté for about 2-3 minutes. You want them to soften but not become mushy. Remove the pan from heat and stir in the avocado pesto. Mix until the noodles are well coated. Serve right away, garnishing with cherry tomatoes and Parmesan cheese if you like. Check out the Full Recipe for more details! To avoid overcooked zucchini, sauté the noodles for only 2-3 minutes. You want them soft but still firm. If you cook too long, they become mushy. For seasoning, start with salt and pepper. You can add more lemon juice for brightness. Try a pinch of red pepper flakes for heat. Creating an appetizing bowl starts with how you arrange the noodles. Use a twirling fork to make a nest shape in the center. Drizzle extra pesto over the top for a glossy finish. Add halved cherry tomatoes around the bowl for color. A sprinkle of grated Parmesan can add a nice touch, too. Using a spiralizer is simple. Hold the zucchini firmly and twist it to make noodles. If you don’t have a spiralizer, a vegetable peeler works well too. To get a creamy pesto, blend the ingredients until smooth. If it's too thick, add a little olive oil or water to reach your desired consistency. {{image_2}} You can add protein to make this dish heartier. Chicken or shrimp work well. Just cook the protein first, then mix it in with the zucchini noodles. For a plant-based option, try chickpeas or tofu. You can also change up the nuts in your pesto. Instead of pine nuts, use walnuts or cashews for a different flavor. Each nut adds its own twist to the creamy sauce. If you want to make this dish vegan-friendly, skip the cheese or use a plant-based alternative. Nutritional yeast is a great choice for a cheesy flavor without dairy. Zucchini noodles are naturally gluten-free. To keep your dish gluten-free, just ensure any added ingredients, like sauces or toppings, are also gluten-free. Spice things up by adding red pepper flakes to your pesto or sautéed noodles. This gives it a nice kick. You can also play with herbs. Try mixing basil with parsley or cilantro for a fresh taste. Each herb brings a new layer of flavor to your dish. If you want to see the full recipe, check out the Zesty Zucchini Noodles with Avocado Pesto. To keep your zucchini noodles and pesto fresh, use airtight containers. Glass or plastic containers work well. Store them in the fridge. They stay good for about three days. Make sure to separate the noodles from the pesto to keep both fresh. This prevents sogginess in your noodles. When reheating, use a skillet over low heat. This warms the noodles gently. Avoid microwaving, as it can make them mushy. Pesto does not reheat well. The oils may separate, changing its texture and taste. Always reheat just what you plan to eat. You can freeze pesto for later use. Place it in ice cube trays for easy portions. Once frozen, transfer the cubes to a bag. Zucchini noodles do not freeze well. They become watery when thawed. If you must freeze them, freeze raw noodles. Thaw them in the fridge before cooking. You can make zucchini noodles without a spiralizer. Use a vegetable peeler instead. Simply peel long strips off the zucchini. You can also use a box grater to create thin strands. Both methods work well to create noodles. The texture may differ slightly, but they will still taste great. Yes, you can use store-bought pesto. It saves you time and effort. Many brands offer tasty options. However, pre-made pesto may contain preservatives or added oils. Making your own allows for fresher flavors and healthier choices. If you choose store-bought, look for brands with clean ingredients. Zucchini noodles stay fresh for about three days when stored properly. Keep them in an airtight container in the fridge. They will lose some texture over time. For the best taste, enjoy them soon after making. If you notice any sliminess, it’s time to toss them out. This blog post covered many aspects of making a delicious zucchini noodle dish. We explored ingredients, prepared an easy avocado pesto, and offered tips for perfecting your meal. You learned how to combine flavors and find fun variations while keeping it healthy. Remember to store leftovers right and enjoy your creation for days. Cooking can be simple and tasty with these easy steps. Happy cooking!

Zucchini Noodles with Pesto Fresh and Flavorful Dish

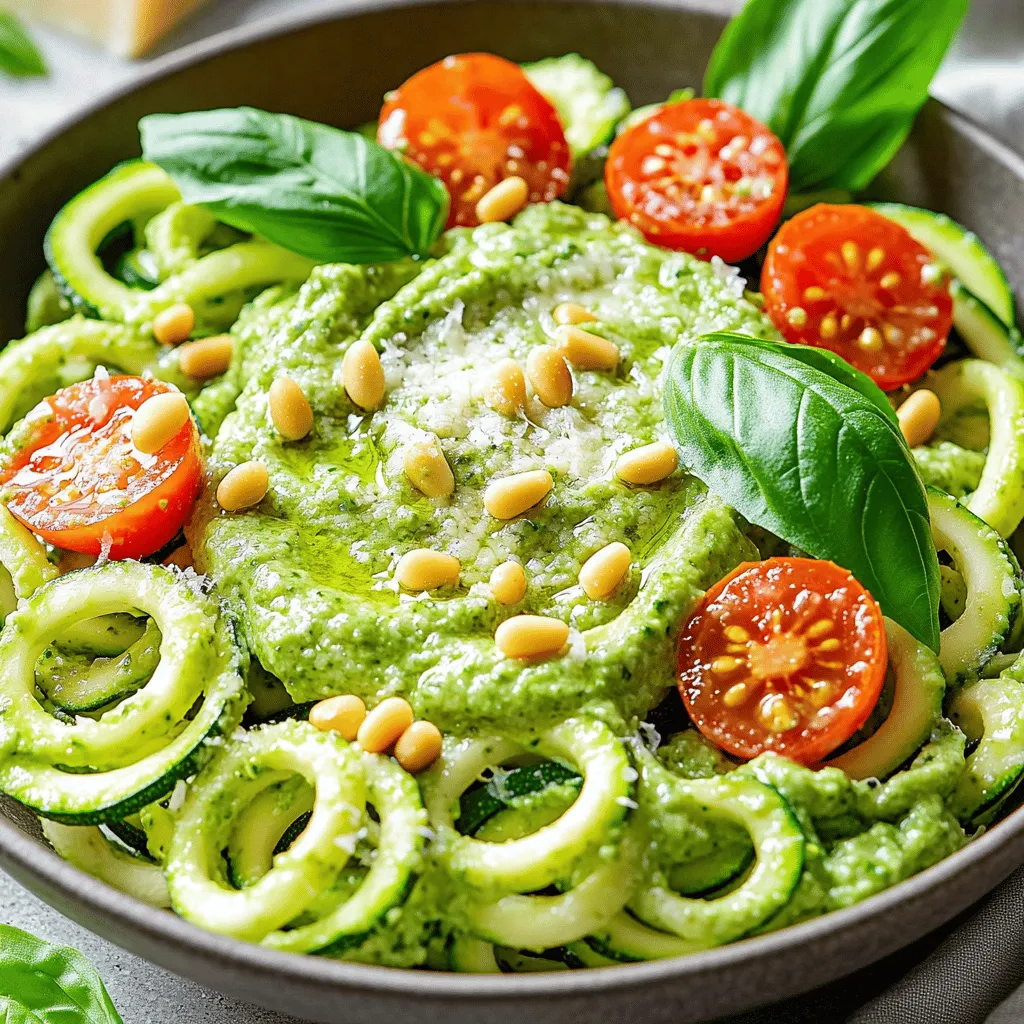
Craving something fresh and flavorful? Let me introduce you to the delight of zucchini noodles with pesto! This simple yet

To make these tasty banana oatmeal cookies, you will need: - 2 ripe bananas, mashed - 1 cup rolled oats - 1/2 cup almond flour - 1/4 cup honey or maple syrup - 1/4 cup unsweetened applesauce - 1 teaspoon vanilla extract - 1/2 teaspoon baking soda - 1/2 teaspoon cinnamon - 1/4 cup dark chocolate chips (optional) - 1/4 cup chopped walnuts or pecans (optional) - Pinch of salt These ingredients blend well together. The bananas give moisture, while the oats add texture. Almond flour gives a nutty taste. Honey or maple syrup adds sweetness. You can add fun extras to your cookies. Here are some ideas: - 1/4 cup of shredded coconut - 1/2 teaspoon of nutmeg for warmth - 1/4 cup of dried fruits like cranberries or raisins - A handful of peanut butter chips for creaminess These add-ins can make your cookies unique. Feel free to mix and match based on your taste. If you have dietary needs, you can still enjoy these cookies. Here are some easy swaps: - Use gluten-free oats if you're gluten-sensitive. - Swap almond flour with oat flour for nut-free options. - Replace honey with agave syrup for a vegan choice. These substitutions help everyone enjoy banana oatmeal cookies. You can find the full recipe to try all these options! To make the dough for banana oatmeal cookies, start by gathering your ingredients. You will need ripe bananas, rolled oats, almond flour, honey or maple syrup, unsweetened applesauce, vanilla extract, baking soda, cinnamon, and a pinch of salt. If you like, add dark chocolate chips or nuts for extra flavor. 1. Preheat your oven to 350°F (175°C). Line a baking sheet with parchment paper. This will help the cookies not stick. 2. In a large bowl, mash the ripe bananas until smooth. Add honey or maple syrup, applesauce, and vanilla extract. Mix everything well. 3. In another bowl, whisk together rolled oats, almond flour, baking soda, cinnamon, and salt. This helps combine the dry ingredients evenly. 4. Gradually add the dry mix to the wet mix. Stir until combined. If you want, fold in chocolate chips and nuts at this point. Now that your dough is ready, it’s time to bake the cookies. 1. Use a spoon to scoop out the dough. Place spoonfuls on the prepared baking sheet. Space them about 2 inches apart. This gives them room to spread. 2. Bake in the oven for 12-15 minutes. Keep an eye on them until they are lightly golden brown. This means they are done. After baking, it’s important to cool the cookies properly. 1. Let the cookies cool on the baking sheet for 5 minutes. This makes them easier to move. 2. After 5 minutes, transfer them to a wire rack to cool completely. This helps them firm up. 3. For serving, arrange the cookies on a rustic wooden board. Add a few banana slices or a sprinkle of oats for a nice touch. Enjoy your delicious banana oatmeal cookies! You can find the Full Recipe above to follow these steps easily. To make sure your cookies stay soft, use ripe bananas. Ripe bananas are sweeter and add moisture. Mix the wet ingredients well to create a smooth batter. When you combine dry and wet ingredients, stir gently. Overmixing can make cookies tough. If you want a chewier texture, let the dough chill in the fridge for 30 minutes. One common mistake is using unripe bananas. They don’t mix well and can make your cookies dry. Another mistake is forgetting to measure ingredients correctly. Too much flour can lead to hard cookies. Also, avoid baking on a hot baking sheet. Always preheat your oven and use parchment paper. This helps the cookies bake evenly and not stick. You don’t need fancy tools for this recipe, but a few can help. A large mixing bowl is great for combining ingredients. A whisk makes blending easier. Use a spatula for scraping down the sides. A cookie scoop helps with even portions. Finally, parchment paper helps with easy cleanup and baking. For the full recipe, be sure to check the instructions! {{image_2}} You can make banana oatmeal cookies nut-free by skipping the almond flour. Use regular all-purpose flour or gluten-free flour instead. This way, everyone can enjoy these cookies, even those with nut allergies. Be sure to check labels to avoid cross-contamination if you need them to be gluten-free. Spices really change the taste of your cookies. Try adding 1/4 teaspoon of nutmeg for warmth. You can also use different extracts. Swap vanilla for almond extract for a new twist. A pinch of ginger or cardamom can make your cookies unique. These small changes can take your cookies from good to great. Fruits are a fun way to add flavor. Chop up some dried cranberries or apricots and mix them in. Fresh fruits like blueberries or diced apples can work too. If you love nuts, add chopped pecans or walnuts for crunch. Just remember to change the amount of oats if you add a lot of extra ingredients. Check the full recipe for guidance on balancing flavors. To keep your banana oatmeal cookies fresh, store them in an airtight container. This helps keep them soft and chewy. You can also use parchment paper between layers to avoid sticking. It’s best to store cookies at room temperature. They will stay good for about three to five days. If you want to save some cookies for later, freezing works great. First, let the cookies cool completely. Then, place them in a single layer on a baking sheet. Freeze them for about two hours. Once frozen, move them to a freezer-safe bag or container. Label it with the date. They can last up to three months in the freezer without losing flavor. To enjoy your cookies warm, reheat them easily. Preheat your oven to 350°F (175°C). Place the cookies on a baking sheet and heat for about five to seven minutes. This will warm them up and make them taste fresh. You can also microwave them for about ten seconds if you want a quick treat. Enjoy the warmth and the yummy taste! For the full recipe, check out the earlier section on ingredients and instructions. No, you should not use steel-cut oats in this recipe. Steel-cut oats are thicker and take longer to cook. This will change the texture of your cookies. Rolled oats are softer and blend well in the dough. They also bake evenly, giving you a great cookie. You can tell the cookies are done when they turn a light golden brown. This usually happens in 12 to 15 minutes at 350°F (175°C). The edges should feel set, but the center may look a bit soft. They will firm up as they cool. Trust your eyes and the timer for perfect results. Banana oatmeal cookies stay fresh for about a week at room temperature. Store them in an airtight container. If you want them to last longer, freeze them. They can keep well in the freezer for up to three months. Just let them thaw before enjoying again. For the full recipe, check the instructions above. In this post, we covered how to make banana oatmeal cookies. We discussed ingredients and included options for flavor. You can easily swap ingredients for dietary needs. The step-by-step guide helps you prepare, bake, and serve these treats. I shared tips to make them soft and avoid common mistakes. You can try fun variations and learn the best storage methods. Experimenting with these cookies can lead to delicious results. Enjoy baking and sharing your tasty cookies!

Banana Oatmeal Cookies Easy Recipe for Everyone

Looking for a simple and tasty treat? These Banana Oatmeal Cookies are just what you need! With easy instructions and

- 2 ripe avocados - 1 cup cherry tomatoes, halved - 1 cup fresh mozzarella balls (bocconcini), drained - 1/4 cup fresh basil leaves, chopped - 2 tablespoons balsamic glaze - 1 tablespoon olive oil - Salt and pepper to taste Each ingredient in Caprese stuffed avocados brings unique benefits. Avocados are rich in healthy fats and fiber. They help keep your heart healthy and your tummy full. Cherry tomatoes add a burst of flavor and are low in calories. They are also packed with vitamins C and K. Fresh mozzarella brings creaminess and calcium, a key nutrient for strong bones. Basil not only adds flavor but also has antioxidant properties. Balsamic glaze gives a sweet and tangy touch, enhancing the dish's taste. Olive oil is a heart-healthy fat that adds richness to the recipe. If you’re missing an ingredient, don’t fret! You can swap cherry tomatoes for diced regular tomatoes. If you can’t find fresh mozzarella, use shredded mozzarella instead. For a dairy-free option, try vegan cheese. If basil isn’t available, parsley can add a fresh touch. Balsamic glaze can be replaced with lemon juice for a zesty kick. Olive oil can be swapped out for avocado oil, which has a similar flavor. These options keep the dish delicious while offering variety. For the complete guide, check the Full Recipe. First, gather your ingredients. You will need ripe avocados, cherry tomatoes, mozzarella balls, basil, balsamic glaze, and olive oil. Start by cutting each avocado in half. Remove the pit with care. Use a spoon to scoop out some flesh. This gives you more room for your tasty filling. Set the scooped avocado aside in a bowl. In the bowl with the scooped avocado, mix in the halved cherry tomatoes and mozzarella balls. Add the chopped basil, olive oil, salt, and pepper. Stir gently until all the ingredients blend well but stay chunky. Now, take this delightful mixture and fill each avocado half. Press it down slightly so it stays put. Once filled, drizzle balsamic glaze over the top for extra flavor. This adds a nice sweet touch to your dish. If you like, add a few extra basil leaves on top for a pop of color. A light sprinkle of salt enhances the taste as well. Now, your Caprese stuffed avocados are ready to impress! For more details, check the Full Recipe. When you pick an avocado, you want it to feel just right. Gently press the skin. If it gives a little, it’s ripe. If it feels hard, it needs more time. Avoid avocados with dark spots or dents. These signs mean the fruit may be overripe or spoiled. Caprese stuffed avocados shine as a light lunch or snack. Pair them with crusty bread for a tasty bite. You can also serve them on a bed of mixed greens. The fresh flavors mix well with a crisp salad. For a fun twist, add grilled chicken or shrimp for protein. Make your dish pop with color. Place the stuffed avocados on a bright plate. Drizzle extra balsamic glaze artfully around the avocado. Add a few whole basil leaves on top for a splash of green. You can also sprinkle some cracked pepper for a touch of elegance. This makes the dish more inviting and fun to eat. For the complete recipe, check out the Full Recipe. {{image_2}} You can switch up the Caprese stuffed avocados. Try adding cooked shrimp or diced chicken for protein. You can also mix in some red onion or bell peppers for crunch. If you love spice, add jalapeños or red pepper flakes. Fresh corn brings sweetness and texture, too! To boost flavor, consider using pesto instead of olive oil. It adds a rich taste that pairs well with the other ingredients. A squeeze of lemon juice brightens the dish and adds zest. For a smoky twist, try smoked mozzarella or add grilled vegetables. These small changes can turn this dish into a new favorite. If you follow a vegan diet, use vegan mozzarella or skip the cheese entirely. You can replace the balsamic glaze with a homemade vinaigrette. For gluten-free needs, this recipe is already safe, as all ingredients are gluten-free. Adjust the ingredients to fit your dietary needs while keeping the dish tasty. For the full recipe, check out the Caprese Stuffed Avocados! To store leftover Caprese stuffed avocados, place them in an airtight container. Make sure to cover them tightly to keep the air out. This helps slow down browning. If you have extra filling, store it in a separate container. This keeps the avocados fresh longer. Caprese stuffed avocados are best enjoyed fresh. However, if you want to reheat them, do it gently. Place them in the microwave for about 10-15 seconds. This warms them without cooking the avocado. Check the temperature before eating. You want them warm, not hot. Leftover stuffed avocados last about a day in the fridge. After that, the avocado may turn brown and mushy. If stored properly, the filling can last up to three days. If you notice any off smells or colors, it's best to toss them. Always trust your senses! Yes, you can prepare the stuffing ahead. Mix the cherry tomatoes, mozzarella, and basil. Keep this in the fridge for up to a day. Cut the avocados just before serving. This keeps them fresh and green. These stuffed avocados pair well with many dishes. Serve them with crispy bread or a light salad. You can also add grilled chicken for protein. A glass of white wine can make the meal special. To stop avocados from browning, use lemon or lime juice. Squeeze some juice on the cut sides. This slows down the browning process. You can also cover the avocados tightly with plastic wrap. Store them in the fridge for best results. In this article, we explored making Caprese Stuffed Avocados. We covered the best ingredients and their benefits. You learned how to prepare, stuff, and serve them. I shared tips on choosing ripe avocados and creative presentation ideas. Variations let you customize the dish to your taste. Lastly, we discussed storage and answered common questions. Caprese Stuffed Avocados are fun to make and taste great. Enjoy experimenting with your own ideas!

Caprese Stuffed Avocados Savory and Simple Delight

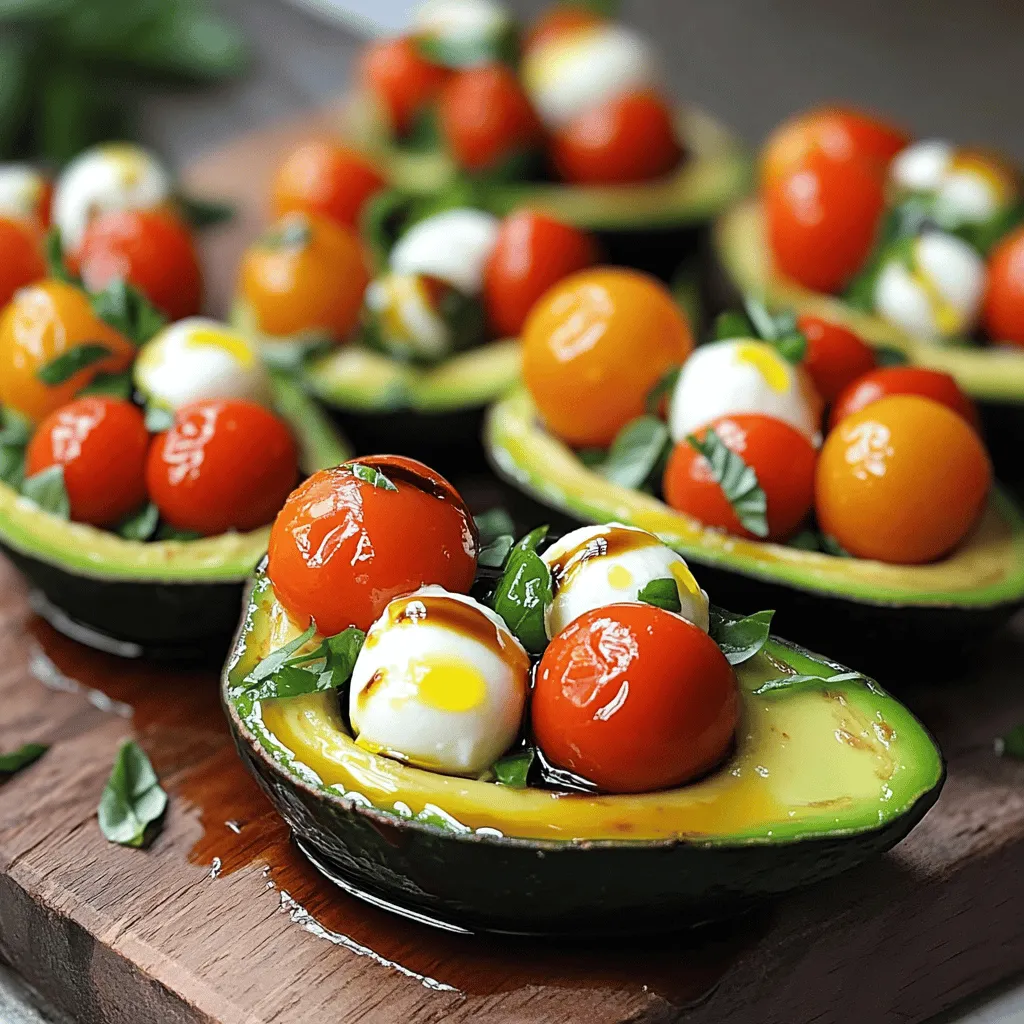
Are you ready for a fresh, tasty treat? Caprese Stuffed Avocados combine creamy avocado with the classic flavors of Caprese

- 1 lb fresh asparagus, trimmed - 3 tablespoons olive oil - 3 cloves garlic, minced - Zest of 1 lemon - Juice of 1 lemon - 1 teaspoon salt - ½ teaspoon black pepper - ¼ teaspoon red pepper flakes (optional) - Fresh parsley for garnish Using fresh ingredients is key for great flavor. Fresh asparagus tastes crisp and bright. It adds a nice texture to your dish. The garlic should be fresh, too. It brings out the lemon's zest. Fresh ingredients make your meal not just tasty but also healthy. They keep more nutrients. You can tell the difference when you bite into each piece. Don't worry if you can't find something! You can swap some ingredients. Instead of asparagus, try green beans or broccoli. If you're out of olive oil, use melted butter for a rich taste. For garlic, garlic powder can work in a pinch. You can use lemon juice from a bottle if you don't have a fresh lemon. Just remember, fresh is best! Each swap may change the taste a little, but you can still enjoy this dish. Check out the Full Recipe for more ideas! First, turn your oven to 425°F (220°C). This high heat helps the asparagus roast well. Next, take 1 pound of fresh asparagus. Trim the ends to remove any tough parts. This step is key for great texture. Place the asparagus in a large bowl, ready for the marinade. In another bowl, mix together 3 tablespoons of olive oil, 3 minced garlic cloves, the zest of 1 lemon, and the juice of that lemon. Add 1 teaspoon of salt, ½ teaspoon of black pepper, and ¼ teaspoon of red pepper flakes if you want some heat. Whisk this mixture until everything blends well. This marinade gives the asparagus a bright flavor. Now, add the asparagus to your marinade. Toss it gently, so every piece gets coated. Spread the asparagus on a baking sheet lined with parchment paper. This helps with cleanup later. Roast in the oven for 12 to 15 minutes. When done, the asparagus should be tender and have some brown spots. Let it cool for a minute on the sheet. Then, transfer it to a serving platter. Garnish with chopped parsley for color and taste. For the full recipe, check back on the ingredients section. To get the best flavor from your asparagus, choose fresh stalks. Look for bright green color and firm texture. Trim the ends to get rid of the tough parts. Make sure to spread the asparagus in a single layer on your baking sheet. This helps them roast evenly. Don't overcrowd the pan; give each stalk some space. The lemon garlic mixture makes the asparagus shine. Use fresh ingredients like garlic and lemon for bright taste. Feel free to add more spice with red pepper flakes. For a twist, try adding some Parmesan cheese before serving. A sprinkle of balsamic glaze can also add depth. These simple changes can take your dish to the next level. To impress your guests, focus on how you serve the dish. Arrange the roasted asparagus in a fanned-out pattern on a nice platter. Drizzle any leftover juices from the baking sheet over the top. This adds a glossy look and extra flavor. Garnish with fresh parsley for a pop of color. You can also add lemon wedges on the side for a refreshing touch. These small details make your dish stand out when you share it at the table. By using these tips, you can elevate your Lemon Garlic Roasted Asparagus to a delightful dish. For the complete cooking steps, check the Full Recipe. {{image_2}} You can add more veggies to your Lemon Garlic Roasted Asparagus. Bell peppers, zucchini, or cherry tomatoes work great. Just cut them into similar sizes. Toss them with the asparagus and the lemon garlic mix. This will boost the flavor and add color to your dish. If you want to switch things up, try different seasonings. Herbs like thyme or rosemary pair well with lemon. You can also use a sprinkle of parmesan cheese for a cheesy twist. This adds a nice depth of flavor. Mixing in some lemon pepper seasoning can give an extra zing. You can cook asparagus in other ways too. Grilling gives it a smoky taste. Simply toss it on a hot grill for a few minutes. Sautéing is another quick method. Heat some oil in a pan and cook the asparagus for about five minutes. Each method brings out different flavors. Enjoy exploring these options to find your favorite. To keep your Lemon Garlic Roasted Asparagus fresh, store it in an airtight container. Place it in the fridge. It will stay good for about 3 to 5 days. If you want to keep it longer, consider freezing it. When you're ready to enjoy your leftovers, heat them in the oven or microwave. For the oven, preheat it to 350°F (175°C). Spread the asparagus on a baking sheet. Heat for about 10 minutes or until warm. In the microwave, place the asparagus on a plate and cover it. Heat in 30-second bursts until warm. If you freeze your asparagus, wash and trim it first. Blanch it in boiling water for 2 to 3 minutes. Then, place it in ice water to stop the cooking. Drain and dry it before putting it in a freezer bag. When you want to use it, thaw it overnight in the fridge. You can then roast it again or add it to your favorite dishes. For the full recipe, check out the instructions above. You will know asparagus is done when it is bright green and tender. The tips may brown slightly, but they should not burn. A fork should easily pierce the stalks. I like to set a timer for about 12 minutes and check. If it needs more time, give it a few extra minutes. This way, you get the best texture and flavor. Yes, you can use frozen asparagus, but fresh is best. Frozen asparagus tends to be softer after cooking. If you use frozen, thaw it first and pat it dry. This helps avoid excess moisture. You may need to adjust the roasting time since frozen asparagus cooks faster than fresh. This dish goes well with many meals. It pairs nicely with grilled chicken or fish. You can serve it alongside pasta or quinoa for a complete meal. It also works great as a side for steak or pork. The bright flavors of lemon and garlic complement many main dishes, making it a versatile choice. For more ideas, check the Full Recipe for serving suggestions. Lemon Garlic Roasted Asparagus is simple and tasty. Fresh ingredients make a big difference. You learned about key ingredients and their substitutions. I shared easy steps for prep and cooking. Tips for roasting and serving help elevate your dish. Consider variations to keep things interesting, too. Store leftovers properly to enjoy later. Explore your questions in the FAQ section. I hope you feel ready to try this recipe. Enjoy your cooking and the great flavors of asparagus!

Lemon Garlic Roasted Asparagus Fresh and Flavorful Dish

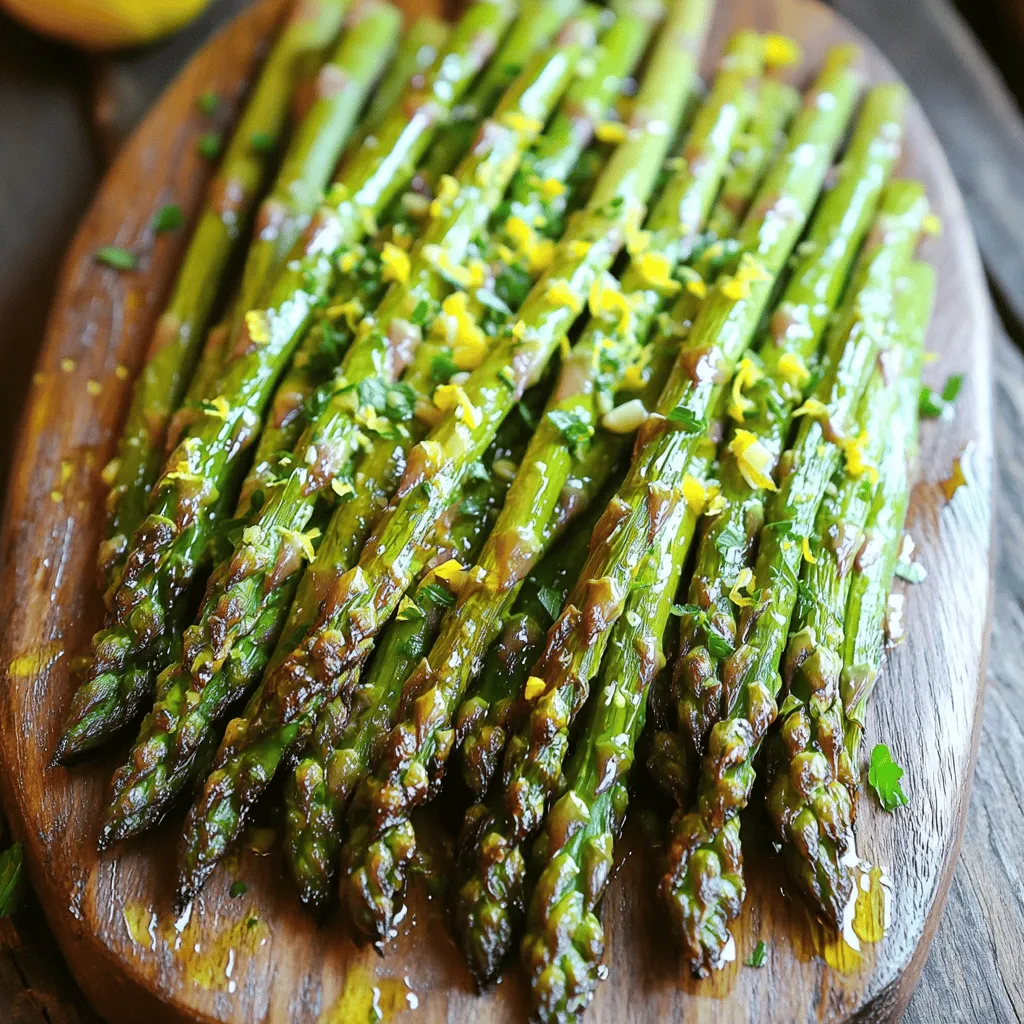
Looking for a fresh side dish that sings with flavor? Lemon Garlic Roasted Asparagus is your answer! This tasty dish

To make Pumpkin Spice Overnight Oats, gather the following key items: - 1 cup rolled oats - 1 cup almond milk (or any milk of your choice) - 1/2 cup pure pumpkin puree These main ingredients form the base of your meal. The rolled oats provide fiber and texture. The almond milk adds a creamy touch. The pumpkin puree gives that rich, warm flavor we love in fall. Next, let's add some sweetness and spice: - 1 tablespoon maple syrup (adjust for sweetness) - 1 teaspoon pumpkin pie spice - 1/2 teaspoon vanilla extract Maple syrup sweetens your oats. Adjust it to your taste. Pumpkin pie spice brings that classic fall flavor. Vanilla extract adds depth and warmth. Together, they create a festive taste. Finally, you can finish your oats with fun toppings: - Chopped walnuts or pecans for topping - Dried cranberries or raisins for garnish Nuts not only add crunch but also healthy fats. Dried fruits give a sweet burst in every bite. These toppings make your overnight oats both tasty and pretty. You can find the full recipe for Pumpkin Spice Overnight Oats above. Enjoy making this creamy and flavorful meal! Start by gathering your ingredients. You need rolled oats, almond milk, pure pumpkin puree, maple syrup, pumpkin pie spice, vanilla extract, and salt. In a medium bowl, combine these items. Use a spatula or a spoon to mix until everything blends well. The oats should be fully coated with the pumpkin mixture. This step is crucial for flavor. Now that you have a well-mixed oat mixture, it’s time to divide it. Take your jars or airtight containers and pour the mixture evenly into them. Cover each jar tightly. Place them in the fridge overnight. This allows the oats to soak up the flavors and become creamy. You can prepare them the night before for a quick breakfast. When morning comes, it’s time to enjoy your oats. Take your jars out of the fridge and stir the oats well. If you want a creamier texture, add a splash of milk. This makes each bite smooth and delicious. Finally, top the oats with your favorite nuts, like walnuts or pecans. You can also add some dried fruit, such as cranberries or raisins. This adds a nice touch of sweetness and texture. For the full recipe, check out the details above. To get creamy oats, adjust the liquid. If you want thicker oats, use less milk. If you enjoy them creamier, add more milk. Letting the oats soak overnight helps them absorb flavors. This makes every bite taste better. You can switch the milk for any type you like. Almond, soy, or oat milk work well. If you want the oats sweeter, try different sweeteners. Honey or agave syrup can be good options. For extra protein, mix in Greek yogurt. This adds creaminess and boosts nutrition. Serve your oats in clear jars. This shows off the lovely layers. Add a drizzle of maple syrup for shine. You can also sprinkle extra pumpkin pie spice on top. Chopped nuts and dried fruit make great garnishes. They add texture and color, making your meal look special. For the full recipe, check out the [Full Recipe]. {{image_2}} You can change your pumpkin spice overnight oats with seasonal fruits. Apples and pears add sweetness and freshness. Just chop them up and mix them in before you refrigerate. You can also try new spice blends. For example, add cinnamon or nutmeg for a twist on flavor. This keeps your oats exciting and fun. Want to make your oats even healthier? Add chia seeds or flaxseeds. They give a boost of fiber and nutrients. Just a tablespoon or two can make a big difference. You might also want to mix in protein powder. This helps you feel full longer. It also adds a creamy texture to your oats. If you are short on time, there are quick options. You can mix oats, milk, and flavors in a jar. Experiment with different flavors like chocolate or berry. You don’t need to blend everything if you're in a hurry. Just stir and let it sit overnight. Enjoy your tasty meal in the morning! For the full recipe, check out the details provided earlier. To keep your pumpkin spice overnight oats fresh, store them in an airtight container. This helps prevent any strong smells from other foods in your fridge from mixing in. The oats will taste best within three to four days. After this, the texture may change, and they can lose flavor. You can freeze these oats if you want to store them longer. First, divide the mixture into freezer-safe containers. Leave some space at the top, as the oats will expand when frozen. To enjoy them later, take them out and thaw overnight in the fridge. This method keeps the taste strong and fresh. For the best texture, eat them within three months. You can enjoy overnight oats cold or warm. Cold oats are quick, refreshing, and perfect for busy mornings. On the other hand, hot oats feel cozy and comforting, especially in cooler weather. If you prefer them warm, simply microwave them for 30 to 60 seconds. Stir well to ensure even heating. If the mixture seems too thick, add a splash of milk for a creamier finish. Yes, you can easily make these oats vegan. Just swap regular milk for plant-based milk. Almond, oat, or soy milk all work well. For sweeteners, use agave syrup or coconut sugar instead of maple syrup if you prefer. This way, you keep all the great flavors while keeping it plant-based. You can store these oats for up to five days in the fridge. Make sure you keep them in airtight containers. They taste best within the first three days. After that, the oats might soak up too much liquid and lose their creamy texture. Absolutely! You can get creative with toppings. Try adding fresh fruit, like bananas or berries. Nuts, seeds, or granola also add a nice crunch. For a sweet touch, drizzle a little honey or more maple syrup. Explore different options to find your perfect combination. For more ideas, check out the [Full Recipe]. Pumpkin spice overnight oats are simple and delicious. You blend oats, almond milk, and pumpkin puree, then add spices and sweeteners. After mixing, refrigerate the jars overnight. This meal is easy to customize with fruits or proteins and can stay fresh for days. In the end, I encourage you to explore these recipes. Enjoy the flavors and make them your own! Your ideal breakfast awaits, ready for you each morning.

Pumpkin Spice Overnight Oats Creamy and Flavorful Meal

Start your day with a warm hug of flavor! My Pumpkin Spice Overnight Oats recipe is creamy, delicious, and the

- 4 medium zucchinis - 1 cup fresh basil leaves - 1/2 cup pine nuts - 1/4 cup Parmesan cheese, grated - 2 garlic cloves - 1/2 cup olive oil - Salt and pepper to taste - 1 cup cherry tomatoes, halved - 1/4 teaspoon red pepper flakes When making zucchini noodles with pesto, fresh and high-quality ingredients shine. The zucchini acts as a light, crunchy base. I enjoy using medium zucchinis for the right texture. You’ll want a cup of fresh basil leaves. This adds a bright, herbaceous note. For the pesto, pine nuts give a nice nutty flavor. I use a half cup, but you can adjust based on your taste. Grated Parmesan cheese adds creaminess and depth. The two garlic cloves bring a punch of flavor. Olive oil helps emulsify everything into a smooth blend. Finally, season with salt and pepper to enhance the taste. If you want to boost your dish, consider the optional add-ins. Cherry tomatoes add sweetness and color. A sprinkle of red pepper flakes can bring a nice kick if you like heat. This recipe also encourages creativity. You can mix and match ingredients to suit your taste. For the full recipe, check out the Zesty Zucchini Noodles with Pesto Delight. To start, grab your food processor. You will need fresh basil, pine nuts, Parmesan cheese, and garlic. First, put the basil, pine nuts, Parmesan, and garlic in the processor. Pulse these ingredients until they are finely chopped. Next, keep the processor running and slowly drizzle in the olive oil. This helps to create a smooth sauce. Don’t forget to add salt and pepper to taste. Once mixed, set your pesto aside. Now let’s get to the zucchini! You can use a spiralizer or a vegetable peeler. A spiralizer makes thin, curly noodles. If you use a peeler, you will get flat ribbons. Both are great! To make perfect noodles, choose firm zucchinis and cut off the ends. Then, spiralize or peel them into your desired shape. Heat a large skillet over medium heat and add a little olive oil. Toss in your zucchini noodles and sauté them for 2-3 minutes. The goal is to soften them just a bit. Be careful not to overcook! Once ready, take the skillet off the heat. Add the pesto and halved cherry tomatoes to the noodles. Gently toss everything together until the noodles are well coated. If you like a little heat, sprinkle in red pepper flakes. For more details, check the Full Recipe. When making pesto, fresh is best. Fresh basil gives a bright flavor. Store-bought pesto can save time, but it often lacks the same zing. You can adjust flavors easily. If it’s too strong, add more olive oil. If it’s bland, add more cheese or garlic. The texture matters too. For a smooth pesto, blend longer. If you want it chunkier, pulse less. To avoid overcooked zucchini noodles, keep an eye on the time. Sauté them for just 2-3 minutes. They should be tender but still firm. A non-stick skillet works great. It helps prevent sticking and burning. Use medium heat for even cooking. If your pan is too hot, the noodles will turn mushy. Garnishes can add flavor and color. Try extra Parmesan on top. Fresh basil leaves also look nice and taste great. For protein, pair the dish with grilled chicken or shrimp. If you want a side, a simple salad complements it well. Feel free to explore more serving ideas in the Full Recipe. {{image_2}} For a vegan pesto, swap the Parmesan cheese with nutritional yeast. It gives a cheesy taste without dairy. You can also use cashews instead of pine nuts for a creamy texture. Add lemon juice for a bright flavor. This way, you can serve a tasty vegan dish that everyone will love. You can mix zucchini noodles with other veggies. Try adding carrots or bell peppers for color and crunch. Broccoli can also add a nice twist. Creating a veggie medley can enhance your dish. You can make the meal more filling while keeping it healthy. This adds more flavors and nutrients to your plate. For a low-calorie dish, use less olive oil or drop the cheese. You can even add spinach or kale to boost nutrition. These greens are packed with vitamins and minerals. Mixing in chickpeas or lentils can add protein and keep you full longer. This way, you can enjoy a dish that is both light and satisfying. To keep zucchini noodles fresh, store them in a sealed container. Place a paper towel inside to absorb excess moisture. This helps prevent sogginess. You can keep them in the fridge for up to three days. For pesto, use an airtight jar. Pour a thin layer of olive oil on top. This seals in the flavor and keeps it fresh. Store it in the fridge for up to one week. Reheat zucchini noodles gently in a skillet over low heat. This keeps them from getting mushy. Stir for about two minutes until warm. You can also microwave them for 30 seconds, but check often. For serving leftovers, toss them with a bit of fresh pesto. Add some cherry tomatoes for a fresh burst of flavor. You can also top with grated Parmesan cheese for extra taste. You can freeze zucchini noodles, but they may lose some texture. To freeze, place them in a freezer-safe bag. Remove as much air as possible. They can last up to three months. For pesto, freeze it in ice cube trays. Once frozen, transfer the cubes to a bag. This way, you can use just what you need later. Pesto can last up to six months in the freezer. For the complete recipe, check out the Full Recipe section. Yes, you can eat zucchini noodles raw. They have a crisp texture and a fresh taste. Raw zucchini noodles are low in calories and high in vitamins. They also keep their nutrients better than cooked ones. Eating them raw adds crunch to your salads. You can pair them with dips or dressings for a tasty snack. You can use a vegetable peeler to make zucchini noodles. Start by trimming the ends of the zucchini. Then, run the peeler along the length to create flat ribbons. Keep peeling until you reach the seeds. These flat noodles work great in salads or with sauces. They may not look like traditional noodles, but they taste just as good. Zucchini noodles with pesto pair well with many dishes. You can serve them with grilled chicken or shrimp for protein. Add cherry tomatoes for sweetness and color. A sprinkle of extra Parmesan cheese enhances the flavor. You may also enjoy them with a side of crusty bread. This dish is light yet satisfying, making it perfect for any meal. You can find the Full Recipe for a complete guide. Zucchini noodles with pesto are tasty and easy to make. We’ve covered key ingredients like fresh zucchinis and basil, along with the steps to create rich pesto. Remember to choose the right cooking method to avoid mushy noodles. You can even add fun twists like cherry tomatoes or go vegan with the pesto. Don’t forget to store your leftovers properly to keep them fresh. Enjoy crafting this dish that’s not just healthy but also packed with flavor. It's a simple yet delightful meal you'll love to share.

Zucchini Noodles with Pesto Flavorful and Healthy Dish

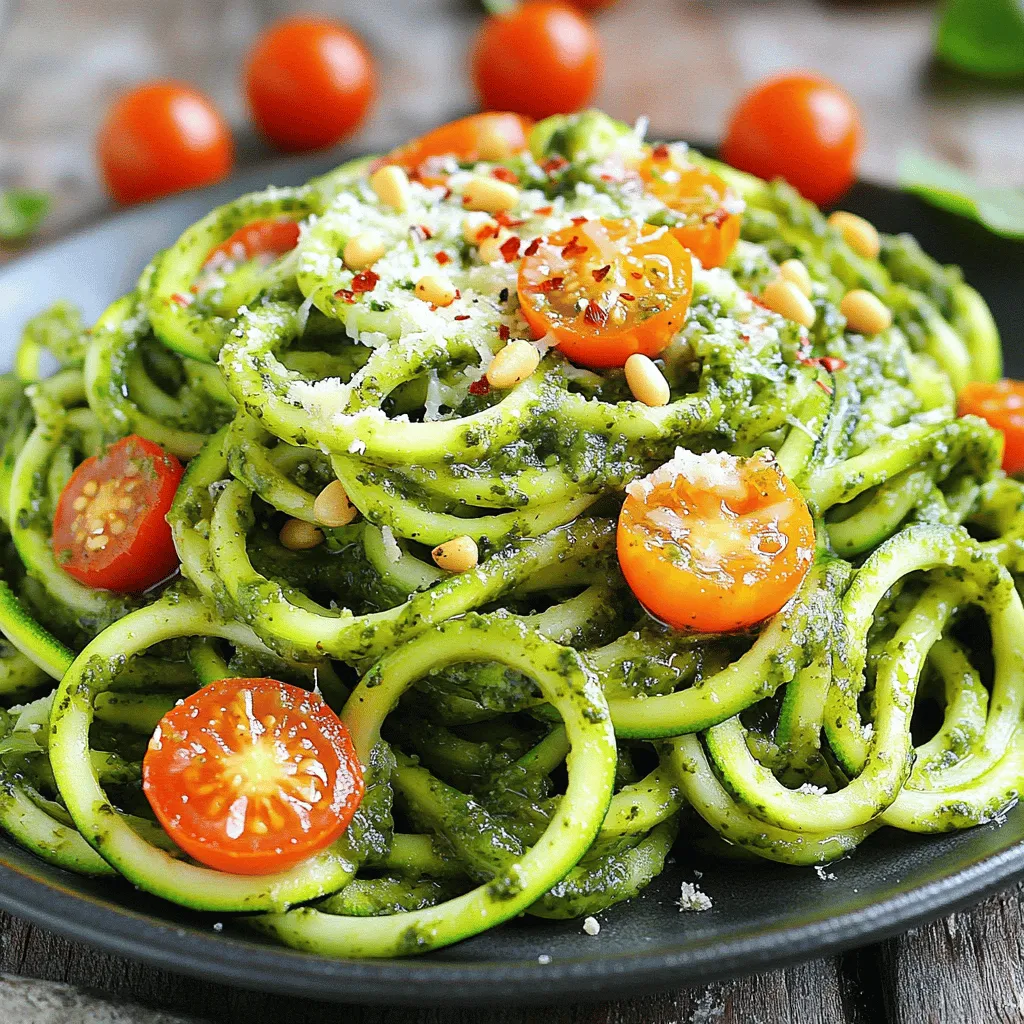
If you’re craving a light, tasty dish, zucchini noodles with pesto are your answer. This meal is not just healthy;

To make Coconut Cream Pie Bars, you need a few simple ingredients. Each one plays a key role in creating that creamy, dreamy taste. Here’s what you will need: - 1 ½ cups graham cracker crumbs - ½ cup unsalted butter, melted - 1/4 cup granulated sugar - 1 (14 oz) can coconut milk - 1 cup heavy whipping cream - 1/2 cup sweetened shredded coconut - 3/4 cup powdered sugar - 2 large eggs - 1 teaspoon vanilla extract - 1/4 cup cornstarch - 1/4 teaspoon salt - Toasted coconut flakes, for garnish These ingredients come together to make a treat that is both rich and refreshing. The graham cracker crumbs form a buttery crust that holds everything together. The coconut milk and heavy cream create that luscious filling. Each bite feels like a little slice of paradise. You can find the full recipe to guide you through every step of making these bars. Enjoy the process and savor the results! 1. Preheat your oven to 350°F (175°C). Grease an 8x8-inch baking dish. You can use cooking spray or line it with parchment paper for easy removal. 2. In a medium bowl, combine the graham cracker crumbs, melted butter, and granulated sugar. Mix until the mixture looks like wet sand. 3. Press the graham cracker mixture firmly into the bottom of the baking dish. Bake for 10 minutes, then set it aside to cool. 1. In a saucepan over medium heat, whisk together the coconut milk, heavy cream, shredded coconut, and granulated sugar. Bring this mixture to a gentle simmer. 2. In a separate bowl, whisk the eggs, cornstarch, vanilla extract, and salt until smooth. Once the coconut mixture is simmering, slowly pour it into the egg mixture while whisking. This helps avoid curdling the eggs. 3. Return the mixture to the saucepan. Cook over medium heat, stirring constantly until it thickens and bubbles gently. This should take about 5 to 7 minutes. 1. Pour the coconut filling over the baked crust. Spread it evenly with a spatula. 2. Allow the pie bars to cool to room temperature. Then cover and refrigerate for at least 4 hours to set. 3. Once set, lift the bars from the baking dish using the parchment paper. Cut into squares. 4. In a medium bowl, whip the heavy cream with powdered sugar until stiff peaks form. Top each bar with a dollop of whipped cream and sprinkle with toasted coconut flakes. For the full recipe, check the earlier section. Enjoy making your Coconut Cream Pie Bars! - Ensure the eggs are at room temperature for smooth mixing. Cold eggs can cause lumps. - Use full-fat coconut milk for a richer flavor. It adds creaminess and depth to your bars. - Whip the cream until stiff peaks form for the best texture. This makes your topping light and fluffy. - Serve chilled for the best taste. Chilling helps the flavors meld and enhances the dish. - Garnish with fresh mint for added color. It gives a nice pop and freshness to each bite. - Don’t skip chilling the bars for at least 4 hours. This step is key for the filling to set properly. - Ensure not to overcook the filling. Overcooking can lead to a rubbery texture, which is not pleasant. For the full recipe, you can check the earlier sections. Enjoy making your Coconut Cream Pie Bars! {{image_2}} You can change the flavor of these coconut cream pie bars to suit your taste. - Add a hint of lime for a tropical twist. This will brighten the bars. - Incorporate chocolate chips for a richer dessert. The chocolate adds depth to the coconut flavor. If you need a gluten-free version, it’s easy to adapt the recipe. - Substitute graham cracker crumbs with gluten-free alternatives. Look for gluten-free graham crackers or use crushed nuts. This will keep the crust tasty and firm. Making these bars vegan is simple and fun. - Use coconut cream instead of heavy whipping cream. This gives a rich, creamy texture. - Replace eggs with a flaxseed mixture or a commercial egg replacer. Mix 1 tablespoon of ground flaxseed with 2.5 tablespoons of water. Let it sit until thick. This keeps the bars moist and fluffy. Explore these variations to make the bars your own. Each twist adds something special! For the complete recipe, check the Full Recipe section. Store your coconut cream pie bars in the refrigerator. They stay fresh for up to 5 days. Keep them covered to prevent drying out. You can use plastic wrap or an airtight container. To enjoy these bars later, freeze them in an airtight container. They can last up to 3 months in the freezer. Cut them into squares before freezing for easy serving later. Layer parchment paper between the bars to keep them from sticking. Thaw your frozen bars in the refrigerator overnight. This method gives the best results. Avoid thawing at room temperature to keep the texture perfect. Enjoy the creamy goodness without losing any taste or quality. Prep time is 20 minutes, total time 4 hours 30 minutes including setting. This allows the bars to chill and get firm. Chilling helps all the flavors mix well. You can easily prepare the crust and filling while you wait. Yes, but consider adjusting sugar levels to taste. Unsweetened coconut has a different flavor. It can make the bars less sweet. If you prefer a sweeter treat, add a bit more sugar to the filling. Taste it as you mix to find what you like best. All-purpose flour or tapioca starch can be used as alternatives. Both options work well in this recipe. If you use flour, use the same amount as the cornstarch. Tapioca starch may give a slightly different texture, but it’s also a good choice. The filling should coat the back of a spoon and bubble gently. This shows it has thickened correctly. If it doesn’t coat the spoon, keep cooking for a bit longer. Stir constantly to prevent it from sticking or burning. This blog post covers the essential steps to make delicious Coconut Cream Pie Bars. We explored the key ingredients, from graham crackers to coconut milk. I shared tips to perfect your recipe and suggested variations for a unique twist. Remember, patience is key; chill the bars for the best flavor. Enjoy your creation and experiment with different ingredients to make it your own. Happy baking!

Coconut Cream Pie Bars Irresistible and Simple Treat

Who doesn’t love a sweet and creamy treat? Coconut Cream Pie Bars are easy to make and packed with flavor.

- 3 medium apples (Honeycrisp or Granny Smith), thinly sliced - 1 cup granola (your favorite blend) - 1 cup shredded coconut (optional) - 1/2 cup mini chocolate chips - 1/2 cup caramel sauce (store-bought or homemade) - 1/4 cup chopped nuts (walnuts or pecans) - 1 teaspoon cinnamon (for dusting) - Whipped cream (for drizzling, optional) - Fresh mint leaves (for garnish) To make tasty caramel apple nachos, you need fresh, crisp apples. Honeycrisp and Granny Smith are my favorites. They add a nice sweet and tart flavor. You’ll also want granola for crunch. Choose the blend you love best. Coconut adds a fun twist, so consider using it. Mini chocolate chips bring a touch of sweetness that kids adore. Caramel sauce is key for that gooey goodness. You can buy it or make it at home. Chopped nuts like walnuts or pecans give a nice crunch and added flavor. A dash of cinnamon makes everything warm and cozy. If you like it rich, drizzle some whipped cream on top. Fresh mint leaves add a pop of color and freshness to the dish. - Large serving platter or parchment paper - Knife and cutting board - Measuring cups and spoons To prepare your caramel apple nachos, gather a few simple tools. A large serving platter helps arrange the nachos beautifully. Parchment paper makes cleanup easy. Use a sharp knife and a sturdy cutting board to slice your apples. Measuring cups and spoons ensure you get the right amounts of each ingredient. With everything ready, you can create this fun and delicious snack in no time! Check the Full Recipe for more details. - Wash and slice apples into thin wedges. - Arrange apple slices onto a serving platter. Start by washing the apples well. I prefer Honeycrisp or Granny Smith for their crunch. Slice them into thin wedges. This helps them hold up under the toppings. Next, spread the apple slices on a big platter. You can also use parchment paper for easy cleanup. - Sprinkle granola evenly over the apples. - Add optional shredded coconut. Now, sprinkle your favorite granola over the apple slices. This adds a nice crunch. If you like coconut, sprinkle some shredded coconut on top. It gives a sweet twist and extra texture. - Distribute mini chocolate chips and drizzle caramel sauce. - Top with chopped nuts and cinnamon. Next, spread mini chocolate chips all over the platter. They melt slightly and taste great with the apples. Drizzle caramel sauce generously over everything. This makes the nachos sweet and sticky. Finally, sprinkle chopped nuts and a dash of cinnamon on top. This adds a warm flavor. If you want more fun, add whipped cream and fresh mint leaves as a garnish. Enjoy your treat right away! You can find the full recipe above. When making caramel apple nachos, choose the right apples. I recommend using Honeycrisp or Granny Smith apples. These apples are crisp and juicy. Crisp apples hold up well under the weight of toppings. They also offer a nice balance of sweet and tart flavors. Using a mix of sweet and tart apples can enhance the taste. Make your nachos visually appealing. Arrange the apple slices in a fun pattern on a large platter. You can also use parchment paper for easy cleanup. Drizzle caramel sauce in a zigzag for a fun look. Add colorful garnishes like fresh mint leaves. These small touches make a big difference. To balance sweetness and crunch, think about your toppings. Use a mix of granola and nuts. The crunch adds texture and depth. You can also experiment with different toppings. Try adding dried fruits or mini marshmallows for a twist. These variations keep the dish exciting and fun. For an extra kick, sprinkle cinnamon over the top. It adds warmth and flavor. {{image_2}} You can play with flavors in your caramel apple nachos. Adding different fruits makes them even more fun. Think of pears or bananas for a sweet twist. You could also try flavored yogurt instead of whipped cream. This change gives a creamy touch and adds unique flavors. If you need gluten-free options, choose gluten-free granola. It keeps the crunch and taste. For those who prefer vegan treats, look for vegan caramel sauce. It tastes just as good and fits many diets. Seasonal spices can make your nachos shine. Use nutmeg or pumpkin spice for a fall vibe. They add warmth and depth to each bite. You can also add holiday-themed toppings. Think about crushed candy canes for winter or colorful sprinkles for celebrations. Each option brings its own festive spirit to the dish. To keep your caramel apple nachos fresh, store them in an airtight container. This helps keep the apples crisp and reduces moisture loss. Make sure to layer the nachos gently. Use parchment paper between layers to avoid sticking. Keep the container in the fridge for up to two days. If you have leftover caramel sauce, store it separately. This will prevent sogginess. Reheating caramel apple nachos can be tricky. To maintain their crunch, avoid using the microwave. Instead, place them in an oven set to low heat. Warm them for about 5-10 minutes. Check frequently to ensure they do not overheat. Serve them warm with extra caramel sauce drizzled on top. This adds a nice touch and enhances flavor. Enjoy these nachos as a sweet snack or dessert! To make caramel apple nachos healthier, you can reduce sugar. Choose a sugar-free caramel sauce. You can also replace some apples with pears or berries. These fruits add sweetness without extra sugar. Use less granola or choose a nut-based blend. This helps cut carbs and adds protein. You can even sprinkle cinnamon for flavor without sugar. Yes! You can prep the apples ahead of time. Slice them and soak them in lemon juice. This keeps them fresh and bright. You can also mix granola and nuts in a separate bowl. Store them in airtight containers. Just layer everything together before serving. This way, you save time and enjoy fresh nachos. You can add many fun toppings to your nachos. Here are some popular ideas: - Chopped nuts (like almonds or pecans) - Mini marshmallows for a sweet touch - Drizzle of peanut butter for extra creaminess - Crushed graham crackers for a s'mores vibe - Fresh berries like blueberries or raspberries - Shredded coconut for a tropical twist These toppings can really elevate your caramel apple nachos! For the full recipe, check the details above. Caramel apple nachos are fun to make and share. We used fresh apples, granola, and chocolate to create a tasty treat. You can switch up ingredients or add toppings to fit your taste. Remember to keep your nachos fresh by storing them right. This snack is perfect for parties or a cozy night in. Get creative with flavors and enjoy every bite you take!

Caramel Apple Nachos Delightful Fall Snack Idea

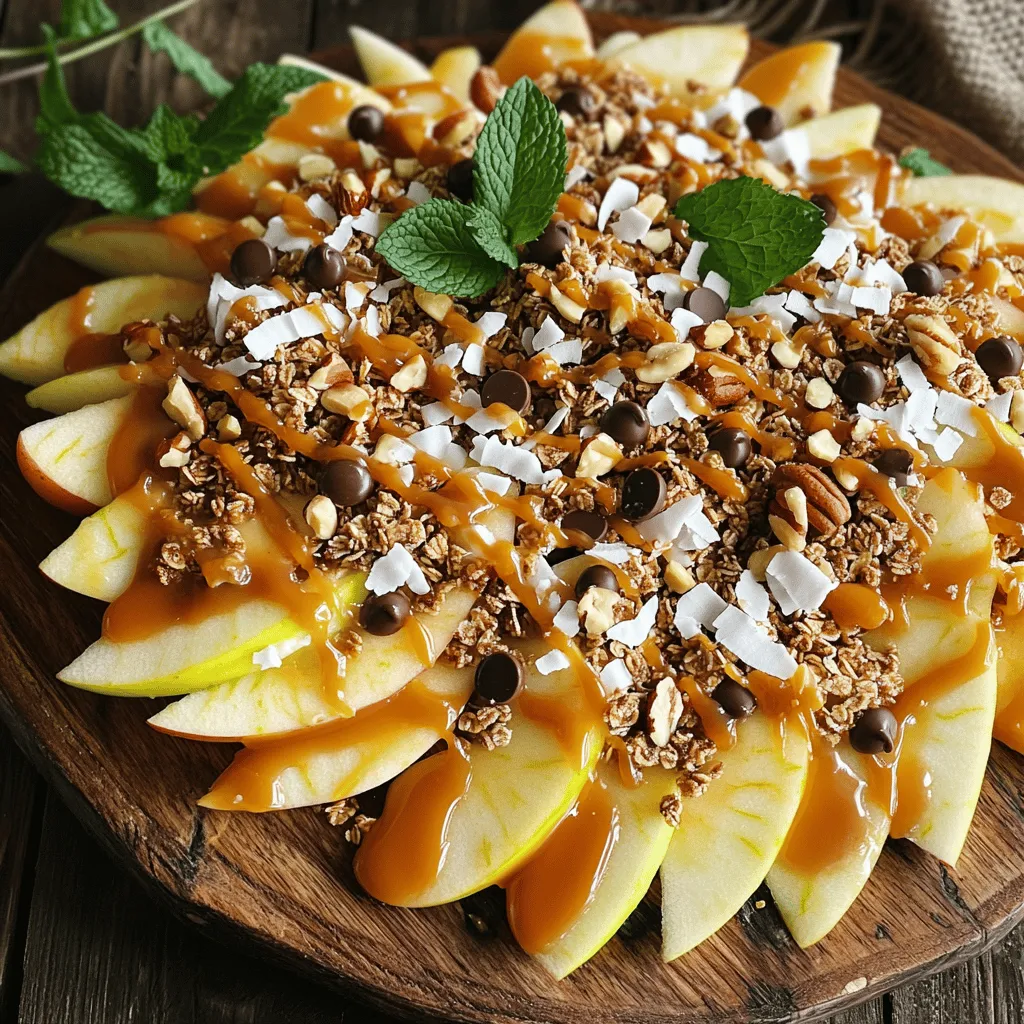
Looking for a fun fall treat? Caramel Apple Nachos are your answer! This sweet and crunchy snack brings together crisp

Older posts
Newer posts
← Previous Page1 … Page32 Page33 Page34 … Page61 Next →

dsad

© 2025 Cooking Wells • Built with GeneratePress

Our Policies

  • Copyright Policy
  • Cookie Policy
  • GDPR Policy
  • Privacy Policy
  • Disclaimer
  • Terms Of Use

More Information

  • Home
  • About
  • Contact
  • Appetizers
  • Dessert
  • Dinner
  • Drinks
©2025, Cooking Wells About Back To Top