Skip to content
DisclaimerTerms Of UseGDPR PolicyCookie Policy

Cooking Wells

  • Home
  • Drinks
  • Appetizers
  • Dinner
  • Dessert
  • About
  • Contact
  • Privacy Policy
DisclaimerTerms Of UseGDPR PolicyCookie Policy

Mia

To make a Berry Smoothie Bowl, you need the following key ingredients: - 1 cup frozen mixed berries (strawberries, blueberries, raspberries) - 1 medium banana, sliced - 1/2 cup Greek yogurt (or plant-based yogurt) - 1/2 cup almond milk (or any milk of your choice) - 1 tablespoon honey or maple syrup (optional) - 1 tablespoon chia seeds For customization, consider these optional ingredients: - Sliced fresh fruit (like kiwi and banana) - Granola - Coconut flakes - Nuts and seeds A Berry Smoothie Bowl is not just tasty; it’s also healthy. Here’s a quick look at its nutritional breakdown: - Approximate calories: 250-300 per serving - Protein from yogurt: about 10 grams Berries are a superfood. They are low in calories and high in vitamins. They help with heart health and improve digestion. Plus, they are rich in antioxidants, which fight free radicals in your body. Eating a Berry Smoothie Bowl can boost your mood and energy! For all the details, check the Full Recipe. To make the Berry Smoothie Bowl, start by gathering your ingredients. You’ll need frozen mixed berries, a banana, Greek yogurt, almond milk, and chia seeds. If you like, add honey or maple syrup for sweetness. 1. Blend the Ingredients: Place the frozen mixed berries, sliced banana, Greek yogurt, and almond milk into a blender. If you want it sweeter, add honey or maple syrup. 2. Blend Until Smooth: Blend on high speed until the mixture is creamy and smooth. If it is too thick, add a little more almond milk. Blend again until you reach your desired texture. I like mine thick, but you can adjust it to your taste. Now, let’s make it pretty! Pour your smoothie into a wide, shallow bowl. This helps with the toppings and makes it look nice. - Topping Ideas: Get creative! Use sliced fresh fruit like kiwi or banana. You can also add granola for crunch, coconut flakes for a tropical touch, or nuts and seeds for extra nutrition. - Garnishing: After adding your toppings, sprinkle chia seeds on top. You can create patterns with the fruit or arrange toppings in sections. This makes your bowl look fun and inviting! For the full recipe, check out Berry Bliss Smoothie Bowl 🥥. Enjoy your healthy delight! Choosing berries is simple. Seasonal berries taste best. In summer, use fresh strawberries and blueberries. In winter, frozen berries are great. They are picked at peak ripeness and frozen quickly. This keeps their flavor and nutrients intact. Fresh berries spoil fast, while frozen ones last longer. Want to boost your smoothie bowl? Add superfoods like chia seeds or flaxseeds. They give fiber and omega-3s. You can also try nut butters for a creamy texture. If you want sweetness, use honey or maple syrup. You can skip sugar and use ripe bananas instead. They add natural sweetness without extra sugar. Check out the Full Recipe for the Berry Bliss Smoothie Bowl. It has all the details you need to make it perfect! {{image_2}} For a fun twist, try an acai smoothie bowl. This bowl is rich in flavor and nutrients. Ingredients: - 1 packet frozen acai puree - 1 cup frozen mixed berries - 1 medium banana - 1/2 cup almond milk - 1 tablespoon honey (optional) - Toppings: granola, sliced fruits, nuts, and seeds Preparation: 1. Blend the frozen acai puree, frozen mixed berries, banana, almond milk, and honey until smooth. 2. Pour into a bowl. 3. Top with your favorite toppings. Enjoy your acai bowl! You can customize a mixed berry bowl to match your taste. Use any berries you love. Customizations: - Swap strawberries for blackberries. - Add raspberries for a tart kick. - Use blueberries for a sweet touch. Mixing different berries adds flavors and boosts nutrition. Each bite will be a new delight. If you want a dairy-free berry smoothie bowl, there are easy swaps. Substitutes: - Use coconut yogurt instead of Greek yogurt. - Choose oat milk or soy milk in place of almond milk. These options keep your bowl creamy and delicious without any dairy. Enjoy the same great taste while meeting your dietary needs. If you have leftover berry smoothie bowl, store it in an airtight container. Place it in the fridge. This keeps it fresh for about 24 hours. The bowl may separate after sitting. Just stir it gently before serving again. Remember that the toppings might get soggy. It’s best to add fresh toppings when you re-serve. To keep things easy, prepare your toppings in a separate container. You can freeze an unused smoothie bowl for later. Pour the leftover smoothie into a freezer-safe container. Leave space at the top for expansion. Seal the container tightly. When you are ready to enjoy it, take it out of the freezer. Let it sit in the fridge overnight. Blend it again to regain that creamy texture. You can also add a splash of milk if it’s too thick. Enjoy your berry smoothie bowl later on a busy day! You can make a Berry Smoothie Bowl vegan by using plant-based ingredients. For yogurt, choose almond, coconut, or soy yogurt. For milk, use almond milk, coconut milk, or oat milk. You can also replace honey with maple syrup or agave syrup. These swaps keep all the flavor without using any animal products. Yes, fresh berries work in a Berry Smoothie Bowl. However, the texture changes. Frozen berries create a thicker, creamier bowl. Fresh berries give a lighter, more refreshing taste. If you use fresh berries, add a few ice cubes to keep it cold and thick. This way, you still enjoy a delicious smoothie bowl. Toppings add fun and flavor to your bowl. Here are popular choices: - Sliced fresh fruit like kiwi, banana, or strawberries - Crunchy granola for texture - Coconut flakes for a tropical twist - Nuts like almonds or walnuts for healthy fats - Chia seeds for added nutrition You can mix and match these toppings to create your perfect bowl. Get creative and enjoy! - Full Recipe: Berry Bliss Smoothie Bowl 🥥 This blog covered how to make a Berry Smoothie Bowl, from ingredients to storage. We explored key ingredients, nutritional facts, and creative ways to enhance flavor. You now have steps to achieve the perfect texture and presentation. Remember, you can customize your bowl to your taste and needs. Keep your leftovers fresh or freeze them for later. Enjoy your delicious and healthy creations!

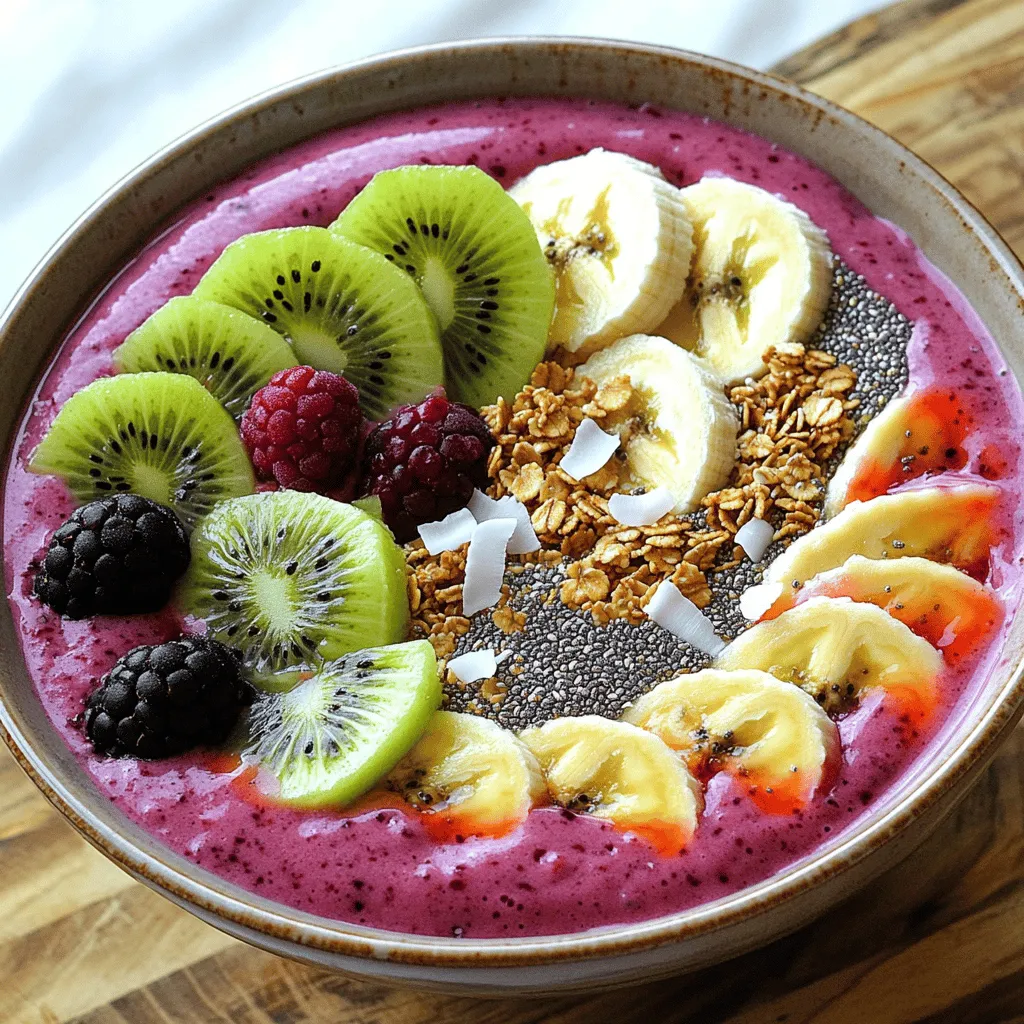
Berry Smoothie Bowl Energizing and Healthy Delight

Welcome to the world of Berry Smoothie Bowls! If you crave a healthy treat that’s bursting with flavor, you’re in

This orange glazed carrots recipe is simple and tasty. You will need fresh carrots and flavorful ingredients to make the glaze. - 1 pound baby carrots (or chopped regular carrots) - 1/4 cup fresh orange juice - 2 tablespoons honey or maple syrup - 1 tablespoon unsalted butter - Zest of 1 orange - 1 teaspoon ground cinnamon - 1/4 teaspoon salt - Fresh parsley for garnish (optional) You can swap honey for maple syrup for a different taste. If you want less sweetness, use less honey. For a vegan option, use plant-based butter. You can also replace fresh orange juice with bottled juice, but fresh gives better flavor. If you don’t have ground cinnamon, try using allspice or nutmeg for a new twist. Start with fresh carrots. Rinse them well under cold water. If you use regular carrots, peel them first. Cut them into even pieces for even cooking. Baby carrots are great too; just rinse and keep them whole. In a medium saucepan, boil water. Once boiling, add the carrots. Cook them for about 5-7 minutes. You want them tender but still crisp. Drain the carrots and set them aside. In the same pan, melt the butter over medium heat. Add fresh orange juice, honey or maple syrup, orange zest, ground cinnamon, and salt. Stir the mix well. Bring it to a simmer. This step builds great flavor! Next, add the cooked carrots back into the glaze. Stir them well to coat evenly. Let them cook for 3-5 more minutes. This helps the glaze stick to the carrots. Remove from heat and let them sit for a couple of minutes. This allows the flavors to blend better. Finally, transfer your glazed carrots to a serving dish. You can garnish them with fresh parsley if you like. Enjoy your zesty orange glazed carrots! For the full recipe, see the recipe section above. To make your orange glazed carrots shine, use fresh orange juice. It brings bright taste. The zest adds a punch of citrus that makes every bite pop. Don’t skip the honey or maple syrup. They help balance the tartness. A pinch of salt boosts the flavors too. Cook your carrots until they are just tender. This takes about 5-7 minutes. You want them crunchy, not mushy. If you prefer softer carrots, cook them a few minutes longer. Always keep an eye on them to avoid overcooking. Remember, they will cook more in the glaze. Serve your orange glazed carrots with roasted chicken or fish. They pair well with grains like rice or quinoa. For a full meal, add a fresh salad on the side. You can also sprinkle some nuts on top for extra crunch. Check out the Full Recipe for more ideas! {{image_2}} To enhance your orange glazed carrots, consider adding different flavors. You can toss in a pinch of nutmeg for warmth. Fresh ginger gives a nice kick. You might also add a splash of balsamic vinegar for a tangy twist. If you love herbs, try adding thyme or rosemary. These small changes can make your dish exciting and unique. While honey and maple syrup are great choices, you can try other sweeteners. Brown sugar adds a rich flavor. Agave nectar is a lighter option. For a sugar-free choice, consider stevia or monk fruit. Each sweetener brings its own flair, so feel free to experiment until you find your favorite. Not a fan of carrots? You can swap them for other veggies. Parsnips add a sweet and nutty taste. Sweet potatoes offer a creamy texture. Even broccoli or brussels sprouts work well with the orange glaze. Just adjust the cooking time based on your chosen vegetable. Each option provides a new flavor profile while keeping that delicious glaze. To store leftover orange glazed carrots, let them cool first. Place them in an airtight container. You can keep them in the fridge for up to three days. This keeps them fresh and tasty. When you want to eat your leftover carrots, reheat them gently. You can use a microwave or a skillet. If using a microwave, heat in short bursts of 30 seconds. Stir in between to heat evenly. If using a skillet, add a splash of water and heat over medium heat. This helps to keep them moist. You can freeze orange glazed carrots, but they may lose some texture. First, let them cool completely. Then, place them in a freezer-safe bag. Squeeze out the air and seal it tight. They can last up to three months in the freezer. When ready to eat, thaw them in the fridge overnight. Reheat them gently to enjoy their sweet flavor again. For more details, check the Full Recipe. Yes, you can use frozen carrots. They will work well in this recipe. Just make sure to thaw them first. This helps them cook evenly and absorb the glaze better. You may need to adjust the cooking time. Frozen carrots might need a few more minutes to become tender. You can serve orange glazed carrots with many dishes. They pair well with roasted chicken, grilled fish, or pork chops. You can also add them to a salad for extra color. They bring a sweet, tangy flavor that brightens any meal. Try serving them at a holiday dinner or with a simple weeknight meal. Orange glazed carrots can last about 3 to 5 days in the fridge. Store them in an airtight container to keep them fresh. You can reheat them in the microwave or on the stove. Just add a splash of water to help them steam and stay moist. For the best taste, enjoy them within a few days. Check out the Full Recipe for more details. This article covered how to make delicious orange glazed carrots. You saw the full recipe and ingredient list. We discussed possible substitutions to make cooking easier. I shared step-by-step instructions for perfect carrots. Tips on flavor and serving ideas helped you elevate the dish. We explored fun variations to suit your taste. In cooking, simplicity and creativity can go hand in hand. Now, it’s time to try this recipe for yourself. Enjoy your cooking and impress your guests!

Orange Glazed Carrots Irresistible and Simple Recipe

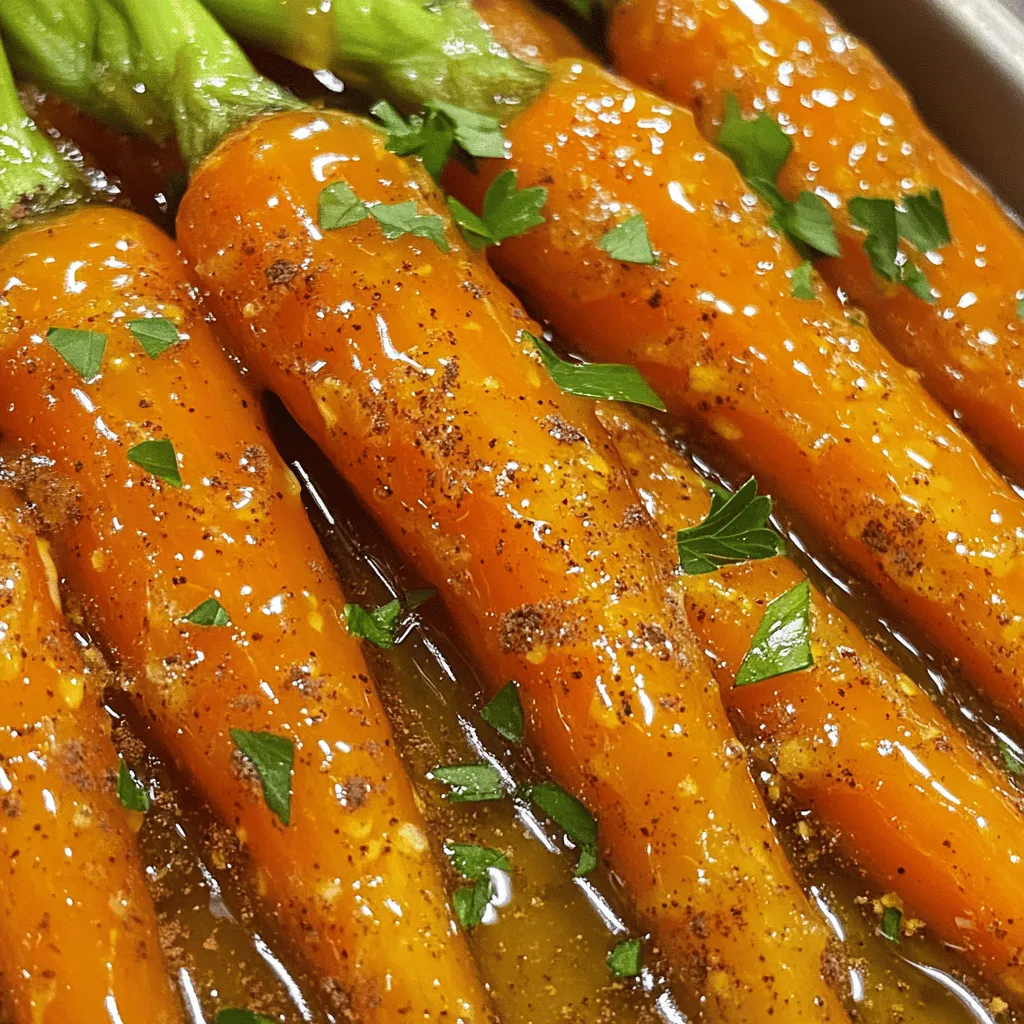
Do you want to impress your family with a tasty side dish? Orange glazed carrots are sweet, vibrant, and super

- 1 lb (450g) beef sirloin, sliced into thin strips - 2 tablespoons olive oil - 1 onion, finely chopped - 2 cloves garlic, minced For Classic Beef Stroganoff, we start with fresh beef sirloin. This cut gives the dish its rich flavor and tender texture. I like to slice it thin, which helps it cook quickly and evenly. Olive oil is your best friend here. It adds a nice richness as you sear the beef. Next, we need onion and garlic. These two ingredients build a solid flavor base. I chop the onion finely and mince the garlic. This way, they blend well into the dish. - 8 oz (225g) mushrooms, sliced - 1 cup beef broth - 1 tablespoon Dijon mustard - 1 cup sour cream Mushrooms are key for that earthy taste. I prefer sliced button mushrooms, but you can use any kind! Beef broth adds depth, making the sauce hearty. Dijon mustard gives a nice tang, balancing the creaminess of sour cream. This ingredient is a must for the classic flavor. - Cooked egg noodles - Fresh parsley I love serving this dish over egg noodles. They soak up the sauce nicely and add a comforting touch. Lastly, don’t forget the fresh parsley! A sprinkle of it adds color and a hint of freshness. For the full recipe and detailed steps, check out the Full Recipe. How to sear beef properly To sear the beef, heat olive oil in a large skillet on medium-high heat. Once hot, add the sliced beef. Cook for about 4-5 minutes until it is browned on all sides. This step locks in the flavor and keeps the beef juicy. Remove the beef from the skillet and set it aside. Sautéing onions and garlic In the same skillet, add the chopped onion and minced garlic. Stir them around for about 3-4 minutes. You want the onion to become soft and clear. This adds a nice base flavor to your dish. Combining flour and mushrooms Next, add the sliced mushrooms to the skillet. Cook them for about 5-7 minutes until they turn golden brown. Then, sprinkle flour over the mushroom mix and stir it well. This helps thicken your sauce. Adding broth and finishing the sauce Slowly pour in the beef broth while stirring constantly. This prevents lumps from forming. Bring the mixture to a simmer and let it thicken for about 3-4 minutes. Stir in Dijon mustard and Worcestershire sauce for extra flavor. Adding sour cream and seasoning Turn down the heat and add the sour cream. Mix it in until smooth. Return the seared beef to the skillet and stir to coat it in the sauce. Season with salt and pepper to taste. Garnishing and serving Let the stroganoff heat through for another 2-3 minutes. Now it's ready! Serve it over cooked egg noodles and garnish with fresh parsley. Enjoy a warm bowl of comfort with this creamy beef stroganoff. For the complete recipe, check out the Full Recipe section. - Achieving the right steak doneness: Use beef sirloin for the best flavor. Cook it over medium-high heat. You want it browned on the outside but still juicy inside. Aim for medium-rare to medium. This keeps the meat tender. - How to thicken your sauce without lumps: After cooking the mushrooms, sprinkle flour over the mix. Stir it well before adding broth. Slowly pour in the beef broth while stirring. This helps avoid lumps and makes your sauce smooth. - Prepping ingredients in advance: Cut your beef, onions, and mushrooms before cooking. This cuts down on cooking time. You can even do this the night before. Store them in the fridge until you are ready. - One-pan cooking to minimize cleanup: Use the same skillet for the whole dish. Start with your beef, then add onions, garlic, and mushrooms. This saves time and means fewer dishes to wash. - Creative ways to serve and present your dish: Serve stroganoff over egg noodles on a large plate. Add a sprinkle of fresh parsley for color. You can also serve it in individual bowls. This makes it look fancy and inviting. Presenting it well makes your meal even more enjoyable. For the full recipe, check out the details above. {{image_2}} You can change up the cut of meat in your stroganoff. Tenderloin adds a rich flavor and melts in your mouth. Ground beef is a great choice too if you want a quicker meal. Both options work well and taste amazing. You can also try different sauces. For a creamy base, use mushroom soup instead of sour cream. If you prefer plant-based options, there are great vegan sauces available. These alternatives can give your dish a new twist. If you need a gluten-free version, there are simple swaps. Use gluten-free flour and noodles. Many brands make tasty gluten-free pasta that works great with stroganoff. For a dairy-free twist, you can use coconut cream or cashew cream. Both options give a nice creamy texture without dairy. You won’t miss the sour cream at all! To make your stroganoff even tastier, add more herbs and spices. Fresh thyme or a touch of paprika can make a big difference. They add depth and warmth to the dish. You can also include vegetables like bell peppers or peas. These add color and nutrition to your meal. They blend well with the beef and sauce, making every bite delightful. For the full recipe and more details, check out the Full Recipe. To store leftovers safely, let the stroganoff cool down first. Place it in an airtight container. This keeps it fresh and tasty. Try to use containers that are freezer-safe if you plan to freeze it. Glass or heavy-duty plastic containers work well. Avoid using metal containers as they can react with the food. Reheating is easy if you do it right. You can use a microwave or stovetop. For the microwave, heat in short bursts. Stir the stroganoff in between to ensure even warming. If using the stovetop, add a splash of broth or water to keep it creamy. Stir it gently over low heat. This keeps the sauce smooth and prevents it from breaking. Classic Beef Stroganoff lasts about 3 to 4 days in the fridge. Keep it sealed tightly for best results. If you freeze it, it can last up to 3 months. Look for signs of spoilage, such as a sour smell or changes in color. If it looks off or smells bad, it’s best to toss it. Enjoy your stroganoff safely! For the full recipe, check out the detailed instructions. What can I substitute for sour cream? You can use Greek yogurt as a great sour cream replacement. It gives the same creamy taste. Another option is cream cheese mixed with milk. This mix makes a smooth and rich sauce. Can I make this dish ahead of time? Yes, you can prepare beef stroganoff ahead of time. Cook the beef and sauce, then let it cool. Store it in the fridge for up to three days. When ready, just reheat it on the stove. How do I make a lighter version? To make a lighter version, use lean cuts of beef, like sirloin. You can also swap sour cream for low-fat yogurt. Use less oil and serve over vegetables instead of noodles. What's the best way to slice beef for stroganoff? Always slice the beef against the grain. This makes the meat tender and easy to chew. Aim for thin strips, about 1/4 inch thick, for even cooking. What sides go well with beef stroganoff? Beef stroganoff pairs well with green beans or a fresh salad. You can also serve it with crusty bread to soak up the sauce. Can I serve it without noodles? Yes, you can serve beef stroganoff without noodles. It tastes great over rice, mashed potatoes, or even quinoa. This gives you options for a hearty meal without the carbs. For the full recipe, check out the Creamy Beef Stroganoff section above. Classic Beef Stroganoff is a rich and satisfying dish. We covered the key ingredients, step-by-step instructions, and helpful tips. You learned how to make it creamy and flavorful, even with changes for special diets. With proper storage and reheating tips, your leftovers will taste great too. This dish is perfect for family meals and special occasions. So get cooking and enjoy this classic comfort food!

Classic Beef Stroganoff Tasty and Comforting Recipe

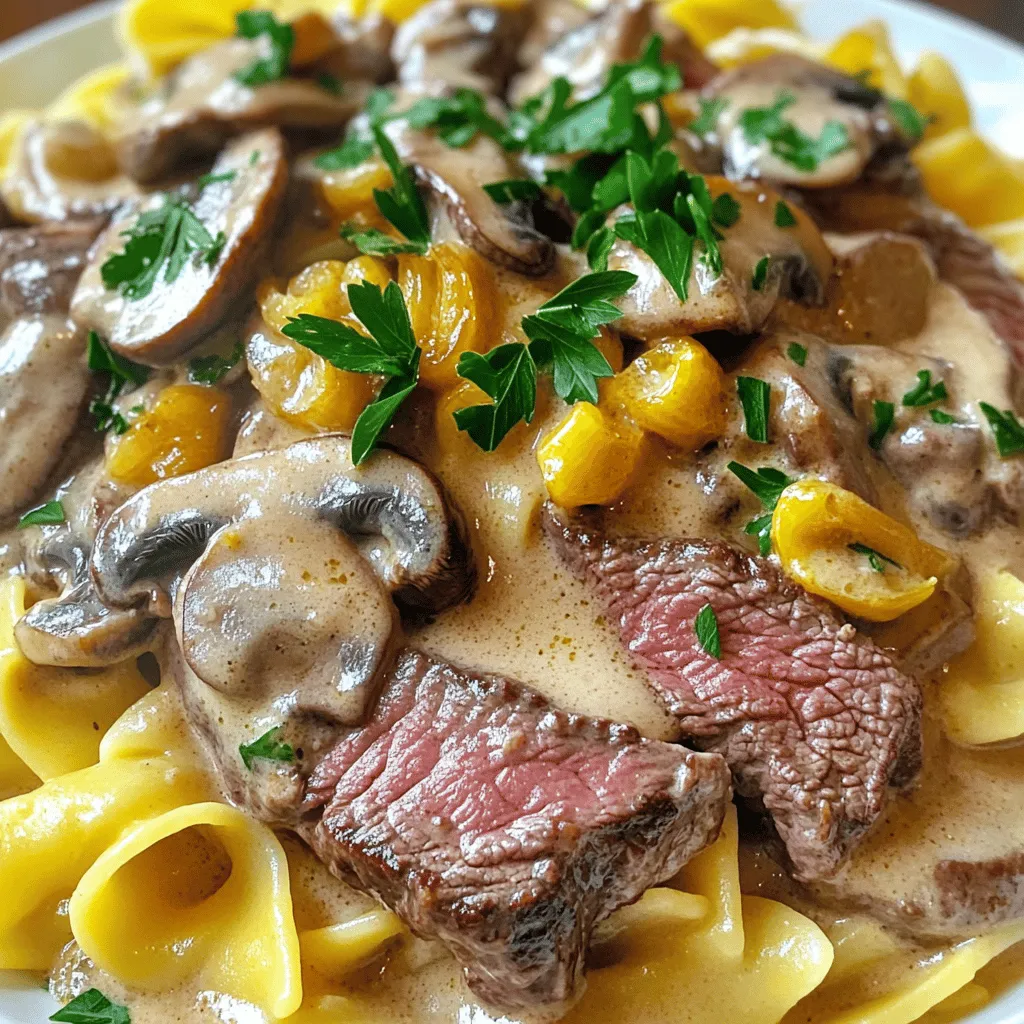
If you’re in search of a comforting meal that warms the soul, look no further than classic beef stroganoff. This

- Cherry tomatoes: These small, sweet tomatoes add a burst of flavor. - Fresh mozzarella balls: Creamy and soft, they balance the acidity of the tomatoes. - Fresh basil leaves: These leaves provide a fragrant and herbal note. - Balsamic glaze: This adds a sweet and tangy finish to your skewers. - Extra-virgin olive oil: It brings richness and depth to the dish. - Salt and pepper: These basic seasonings enhance all the flavors. - Skewers: Use 8-10 inch bamboo or metal skewers for easy handling. - Alternatives for mozzarella: You can use feta or goat cheese if you want a tangy twist. - Types of tomatoes to use: Grape tomatoes or even small heirloom varieties work well. - Fresh vs. dried basil: Fresh basil tastes best, but dried works in a pinch if needed. - Skewers: Essential for threading the ingredients together. - Serving platter: This is where your beautiful skewers will shine. - Mixing bowl: Use this for tossing the oil and seasonings. - Rinse cherry tomatoes and basil leaves under cold water. - Drain mozzarella balls and set them aside. First, washing your ingredients helps remove any dirt or chemicals. I like to use fresh, ripe cherry tomatoes because they add a sweet burst of flavor. The basil leaves should be bright green and fragrant. This is important for achieving that classic Caprese taste. For mozzarella, choose high-quality bocconcini. Their creamy texture pairs well with the other ingredients. - Thread a cherry tomato half, a basil leaf, and a mozzarella ball onto each skewer. - Repeat this pattern until the skewer is full, leaving space at both ends. When threading ingredients, I like to alternate them for a colorful look. You can fit about three to four sets of tomato, basil, and mozzarella on each skewer. Make sure the skewers are not too crowded, as this allows for better flavor and easier eating. For best presentation, try to keep the basil leaves whole. This adds a fresh touch and looks great on a platter. - Drizzle extra-virgin olive oil over the assembled skewers. - Sprinkle with salt and pepper to taste. - Finish with a drizzle of balsamic glaze. The olive oil adds a rich flavor. It also helps the salt and pepper stick to the skewers. Balsamic glaze gives a sweet and tangy finish, making each bite even more delightful. This step is crucial, as it enhances the overall taste and presentation. Serve these skewers right away for a fresh and tasty appetizer. For the full recipe, check the detailed instructions above. To make your Caprese salad skewers shine, start with even seasoning. Lightly sprinkle salt and pepper on each skewer. This step boosts flavor without overpowering the fresh taste. Use a light hand with the balsamic glaze as well; a little goes a long way. Choosing the right size for skewers is key. I suggest using 8 to 10-inch skewers. This length allows for a good number of ingredients while being easy to handle. If you use extra-long skewers, they can be unwieldy and hard to serve. When it comes to arranging skewers, think of a rainbow. Layer cherry tomatoes, basil, and mozzarella to make them colorful. Place them on a nice serving platter for a great look. You can also fan them out for an inviting display. Garnishing ideas can elevate your presentation. Try adding a few whole basil leaves around the skewers. Fresh herbs add color and scent. You might also drizzle a bit more balsamic glaze over the plate for a striking effect. To enhance flavors, consider adding fresh herbs. Chopped basil or a bit of oregano can add depth. You might also try a sprinkle of crushed red pepper for a touch of heat. Adding fruits or other vegetables can make your skewers stand out. Consider using slices of fresh peach or cucumber. Their sweetness or crunch adds a delightful twist to the classic Caprese flavor. {{image_2}} You can mix up your Caprese salad skewers with a few simple swaps. - Caprese with prosciutto: Add thin slices of prosciutto for a savory twist. This adds saltiness that pairs well with the fresh flavors. - Vegetarian alternatives: Try using marinated artichoke hearts or olives instead of mozzarella for a unique taste. These options keep it plant-based and delicious. Adding new flavors can make your skewers even more exciting. - Adding spice with jalapeños: For those who like heat, slice jalapeños and add them to the skewers. The spice balances the creaminess of the mozzarella. - Incorporating different dressings: You can switch out balsamic glaze for pesto or a lemon vinaigrette. These dressings add a fresh twist that brightens every bite. How you serve your skewers can change the vibe of your meal. - Skewers for picnics vs. formal gatherings: For a picnic, keep the skewers simple and portable. At formal events, arrange them on a nice platter with garnishes. - Skewers as part of a larger appetizer spread: Serve them alongside other finger foods like bruschetta or stuffed mushrooms. This creates a fun and varied appetizer table. For more ideas, check the Full Recipe for Caprese Salad Skewers. To keep your Caprese salad skewers fresh, store them in the fridge. Use an airtight container to prevent air and moisture from getting in. This helps to maintain the taste and texture. Avoid placing them close to strong-smelling foods, as mozzarella can absorb odors. These skewers can last about three days in the fridge. After that, they may start to lose flavor. Look for any signs of spoilage, like a sour smell or a slimy texture on the mozzarella. If you notice any of these signs, it's best to throw them out. Caprese salad skewers are best served cold. They do not reheat well and may lose their charm if warmed up. If you have leftovers, try mixing the ingredients into a salad or a wrap. This way, you can enjoy the fresh flavors in a new form. Caprese salad comes from Italy, specifically the island of Capri. This dish is simple and fresh. It features tomatoes, mozzarella, and basil. The colors reflect the Italian flag: red, white, and green. It is a classic summer dish. People enjoy it for its bright flavors and lightness. Over time, it has become a favorite worldwide. Yes, you can prep these skewers ahead of time. Assemble them a few hours before serving. Keep them in the fridge until you are ready to serve. Just remember to drizzle the balsamic glaze right before you serve. This keeps the flavors fresh and vibrant. Yes, Caprese Salad Skewers are gluten-free. They use fresh tomatoes, mozzarella, and basil. None of these ingredients contain gluten. Just be sure your balsamic glaze is gluten-free. Most brands are safe, but always check the label to be sure. You can pair these skewers with many drinks and dishes. For drinks, try sparkling water or a light white wine. Both will enhance the fresh flavors. For food, serve them with crusty bread or a light pasta salad. They also go well with grilled meats or seafood. These combinations make for a delightful meal or appetizer spread. You can easily make delicious Caprese Salad Skewers. We explored the fresh ingredients, gave key tips, and outlined fun variations. Remember, you can switch ingredients to fit your taste. Always store them properly to keep them fresh. These skewers suit any gathering. Enjoy experimenting with flavors and serving styles. Whether simple or fancy, these bites are sure to impress. Now, take what you learned and create your own perfect skewers. Happy cooking!

Caprese Salad Skewers Tasty and Fresh Appetizer

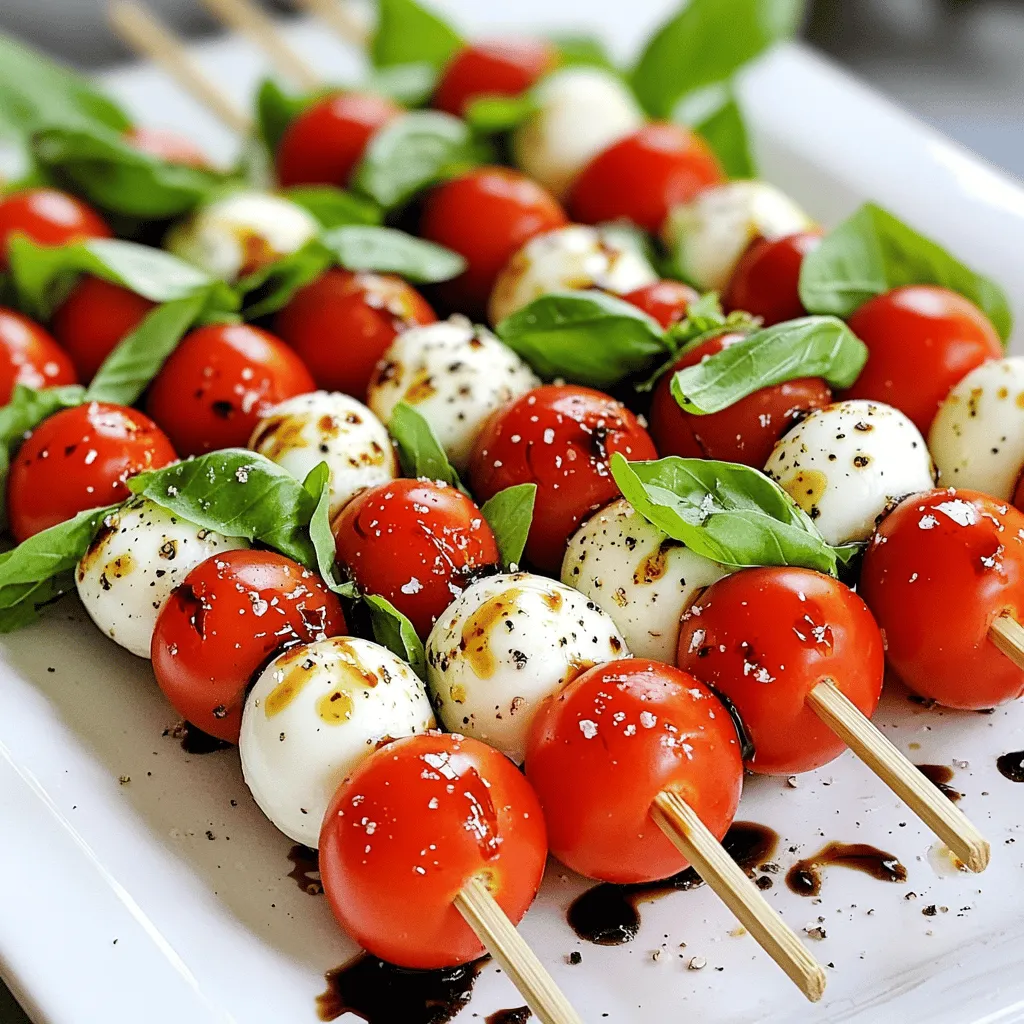
Get ready to impress your guests with the vibrant and delicious Caprese Salad Skewers! This fresh appetizer is a perfect

- 3 medium zucchinis - 1 cup fresh basil leaves - 2 cloves garlic, minced - 1/4 cup pine nuts (toasted) - 1/4 cup grated Parmesan cheese - 1/4 cup olive oil - 1 tablespoon lemon juice - Salt and pepper to taste - Cherry tomatoes, halved To make zucchini noodles with pesto, start with fresh ingredients. You need three medium zucchinis. They will become our tasty noodles. Next, grab one cup of fresh basil leaves. This herb adds a bright flavor. Lastly, use two cloves of garlic, minced, for that punchy taste. Next, we need some pantry staples. Toast a quarter cup of pine nuts for a rich, nutty flavor. You will also need a quarter cup of grated Parmesan cheese. This cheese gives our dish a creamy texture. Don’t forget a quarter cup of olive oil. This will help blend the pesto smoothly. You also need one tablespoon of lemon juice. It adds zest to the sauce. Finally, season with salt and pepper to taste. For a pop of color, use cherry tomatoes as optional garnishes. Halve them for a sweet bite that pairs well with the noodles. For the complete recipe, check out the Full Recipe section. First, you need to spiralize the zucchinis. Use a spiralizer or a vegetable peeler. This makes long, noodle-like strips. After spiralizing, lay the zucchini noodles on a clean kitchen towel. This step helps to drain excess moisture. If you skip this, the noodles can become soggy. Next, gather your ingredients for the pesto. In a food processor, combine fresh basil, toasted pine nuts, grated Parmesan cheese, and minced garlic. Pulse the mix until it becomes finely chopped. Now, with the food processor running, slowly pour in olive oil. This will make the pesto smooth and creamy. Add lemon juice, salt, and pepper. Give it one last pulse to blend everything well. Now it's time to sauté the zucchini noodles. Heat a large skillet over medium heat. Add the noodles and cook for 2-3 minutes. You want them tender but still a bit crunchy. Avoid overcooking them. Once done, remove the skillet from heat. Now, add the pesto to the noodles. Toss gently to coat them evenly. Serve right away, and feel free to garnish with halved cherry tomatoes for a bright touch. For the complete recipe, check out [Full Recipe]. To avoid soggy noodles, it's key to drain them well. After spiralizing, lay the noodles on a clean kitchen towel. Let them sit for about 10 minutes. This helps remove excess moisture. Cooking time matters too. Sauté them for just 2-3 minutes. You want them tender, but not mushy. The goal is to keep a slight crunch. You can boost your pesto flavor by adding nuts and herbs. Try mixing in walnuts or almonds for a different taste. Fresh herbs like parsley or mint can add depth, too. If you don't have Parmesan cheese, use nutritional yeast. It gives a nice cheesy flavor without dairy. You can also use pecorino or even a vegan cheese substitute. Garnishing with halved cherry tomatoes makes your dish pop. Their sweetness adds a nice contrast to the pesto. For plating, use a large shallow bowl. Twirl the noodles in the center for a pretty look. Drizzle a little olive oil on top for shine. You can also sprinkle extra nuts or herbs for flair. For the complete recipe, check the [Full Recipe]. {{image_2}} You can easily change up the noodles in this dish. Instead of zucchini, try using other vegetables. Spaghetti squash is a great choice. It has a nice texture and flavor. You can also use carrots or butternut squash for a fun twist. If you need gluten-free options, these vegetables work well. They are light and healthy. Pesto is not just one flavor. You can mix it up! Instead of classic basil pesto, try cashew or walnut pesto. These nuts add a rich taste. You can also switch herbs. Cilantro adds a fresh and bright flavor. Just blend the nuts and herbs with olive oil and garlic for a new take. Want more from your meal? Adding protein can make it heartier. Grilled chicken or shrimp pairs great with zucchini noodles. The flavors blend so well! If you prefer vegan options, add chickpeas or lentils. They bring a great texture and boost protein. There are many ways to customize this dish for your needs. For the full recipe, check out the Zesty Zucchini Noodles with Pesto . To keep your zucchini noodles fresh, use airtight containers. Glass or plastic containers work well. Store the noodles in the fridge right after cooking. They stay good for up to three days. Be sure to keep the pesto separate. This helps prevent sogginess. Store the pesto in a small container to keep it fresh for about five days. Can you freeze zucchini noodles? Yes, but they lose some texture. If you plan to freeze, do it before cooking. Place them in a freezer bag and remove as much air as possible. You can freeze pesto too! Pour it into an ice cube tray. Once frozen, transfer the cubes to a freezer bag. This way, you can use just what you need later. To reheat zucchini noodles, avoid mushiness by using low heat. Heat them in a skillet for about two minutes. Stir gently to warm them through. You can also microwave them, but for no more than 30 seconds. Check often to prevent overcooking. Always add fresh pesto after reheating to keep flavors bright and tasty. To spiralize zucchini, use a spiralizer. This tool creates long, noodle-like shapes. You can also use a vegetable peeler. Thin strips work well too. Just peel the zucchini into ribbons. Yes, you can prep zucchini noodles in advance. Spiralize them and let them drain. Place them in a container lined with a paper towel. This helps absorb extra moisture. Store them in the fridge for up to 2 days. Zucchini noodles with pesto pair well with many dishes. Try serving them with grilled chicken or shrimp for protein. You can also add a fresh salad on the side. Roasted vegetables or garlic bread are tasty options too. Check out the Full Recipe for more ideas! Zucchini noodles with pesto are a fun and healthy dish. We explored fresh ingredients and easy steps to make it. You learned to create the perfect pesto and sauté zucchini for the best bite. Remember to store leftovers correctly and consider fun variations. The right pairs and presentation can make your meal shine. Enjoy experimenting in the kitchen, and make this dish your own!

Zucchini Noodles with Pesto Fresh and Flavorful Dish

Looking for a fresh and tasty meal? Zucchini Noodles with Pesto are your answer! This simple dish combines spiralized zucchini

To make the best Chocolate Peanut Butter Protein Balls, you need simple, healthy ingredients. Here is what you will need: - 1 cup rolled oats - 1/2 cup natural peanut butter - 1/4 cup honey or maple syrup - 1/4 cup chocolate protein powder - 1/4 cup mini dark chocolate chips - 1 teaspoon vanilla extract - A pinch of sea salt - Optional: 2 tablespoons chia seeds for added texture These ingredients combine to create a tasty treat. Each one adds flavor and nutrition. Rolled oats give a chewy texture, while peanut butter adds richness. Honey or maple syrup brings sweetness. The chocolate protein powder boosts protein content, which is great for energy. Mini dark chocolate chips provide a chocolatey bite, making these balls hard to resist. I often use chia seeds for extra crunch and nutrients. They are a fun addition, but not required. You can adjust the sweetness by choosing honey or maple syrup. Each option works well, so pick what you like best. You’ll enjoy making and eating these protein balls. They are not just easy to make; they are also good for you! Check out the [Full Recipe] for step-by-step guidance. Mixing dry ingredients Start by taking a large mixing bowl. Add 1 cup of rolled oats, 1/4 cup of chocolate protein powder, and a pinch of sea salt. If you want extra crunch, toss in 2 tablespoons of chia seeds. Stir these together until they mix evenly. Combining wet ingredients Next, grab a measuring cup. Add 1/2 cup of natural peanut butter, 1/4 cup of honey or maple syrup, and 1 teaspoon of vanilla extract. Pour this mixture into the dry ingredients. Use a spatula or your hands to combine everything. The mix should feel thick and sticky. Forming the protein balls Once your mixture is well combined, fold in 1/4 cup of mini dark chocolate chips. Now, take small portions of the mixture and roll them into balls about 1 inch in size. Place these on a parchment-lined baking sheet as you form them. Refrigeration process After shaping all the balls, pop them into the fridge. Let them chill for at least 30 minutes. This helps them firm up and makes them easier to eat. You can enjoy these protein balls as a snack or a post-workout treat. For the complete recipe, check out the [Full Recipe]. To make the best chocolate peanut butter protein balls, you need the right texture. The mixture should be thick and sticky but not too dry. If it feels too crumbly, add a bit more peanut butter or honey. This will help it hold together well. You might face some sticking issues when rolling the balls. To solve this, dampen your hands with water before shaping them. This simple trick helps the mixture slide off your hands easily. Chilling your protein balls is key to their texture. I recommend refrigerating them for at least 30 minutes. This allows them to firm up and makes them easier to enjoy. These protein balls taste great on their own, but you can elevate the experience. Serve them with a glass of almond milk or your favorite smoothie. They also pair well with coffee for a quick snack boost. If you want a fun twist, try crumbling them over yogurt or oatmeal. This adds flavor and texture to your breakfast or snack. For the full recipe, check out the details above. {{image_2}} You can change the flavor of your protein balls easily. Try using different nut butters. Almond or cashew butter works great. Each nut butter adds its unique taste. You can also switch the protein powder flavor. Vanilla or peanut butter protein powder will add a new twist. Spices and extracts can enhance your protein balls too. Cinnamon adds warmth and sweetness. A drop of almond extract brings a nice nutty flavor. You can even mix in cocoa powder for extra chocolate richness. If you're vegan, it's simple to make these protein balls plant-based. Just swap honey for maple syrup. This keeps the taste great and meets your diet needs. For gluten-free options, ensure your oats are certified gluten-free. This keeps the recipe safe for those with gluten sensitivity. You can enjoy these treats without worry. To keep your chocolate peanut butter protein balls fresh, use an airtight container. This helps lock in moisture and flavor. Store them in the refrigerator. They stay good for up to one week. If you notice they start to dry out, they might be past their prime. You can freeze these protein balls for longer storage. Place them in a single layer on a baking sheet. Once they are frozen solid, transfer them to a freezer-safe bag or container. They can last for about three months in the freezer. To thaw, simply move them to the fridge for a few hours before eating. You can also leave them at room temperature for about 30 minutes. This way, they stay tasty and ready to eat. For the full recipe, check out the main section of this article. How long do they last in the refrigerator? These protein balls last about one week in the fridge. Just store them in an airtight container to keep them fresh. Can I substitute the peanut butter? Yes, you can use other nut butters. Almond butter or cashew butter work great too. Just make sure it's a natural type without added sugars. What are the nutritional benefits? These protein balls offer protein, healthy fats, and fiber. The oats and peanut butter give you energy, while the protein powder helps with muscle recovery. Can I make them without protein powder? Yes, you can skip the protein powder. Just add more oats or nut butter for a good texture. Keep in mind, the protein content will be lower. Are these protein balls a good pre-workout snack? Absolutely! They provide energy and protein. The carbs from oats fuel your workout, while protein helps with muscle building. How can I increase the protein content? You can add more protein powder or nuts. Chia seeds also help boost protein while adding fiber and texture. These chocolate peanut butter protein balls are easy to make and fun to eat. You learned about the key ingredients, steps, and useful tips for getting it right. The variations allow you to switch things up, and storage info helps keep them fresh. Remember, you can enjoy them as a snack or a post-workout treat. With a bit of creativity, you can customize these protein balls to fit your taste. Now, go ahead and make your own delicious batch!

Chocolate Peanut Butter Protein Balls Easy No-Bake Treat

If you’re craving a snack that’s both tasty and nutritious, you’re in the right place! These Chocolate Peanut Butter Protein

To make delicious banana oatmeal muffins, gather these main items. Each one plays a key role in taste and texture. Bananas add natural sweetness and moisture. Rolled oats provide a hearty base. Whole wheat flour boosts fiber. Eggs bind everything together. Milk brings a creamy touch. Honey or maple syrup sweetens your muffins. Baking powder and soda help them rise. Cinnamon gives warmth, and salt balances flavors. Optional walnuts or chocolate chips add crunch or sweetness. Here’s what you need for the perfect batch of muffins: - 2 ripe bananas, mashed - 1 cup rolled oats - 1 cup whole wheat flour - 1/3 cup honey or maple syrup - 2 large eggs - 1/2 cup almond milk (or any milk of choice) - 1 teaspoon baking powder - 1/2 teaspoon baking soda - 1 teaspoon cinnamon - 1/4 teaspoon salt - 1/2 cup chopped walnuts or chocolate chips (optional) Feel free to get creative with your muffins. You can add different mix-ins to suit your taste. Try dried fruits like raisins or cranberries for a fruity twist. If you want more flavor, add a dash of vanilla extract. For a nut-free option, skip the walnuts and use seeds instead. You can also replace honey with agave syrup for a vegan version. These simple swaps can change the flavor and make your muffins unique. First, gather all your ingredients. You need ripe bananas, oats, flour, and a few more things. Start by preheating your oven to 350°F (175°C). This step makes sure your muffins bake evenly. Line a muffin tin with paper liners or grease it lightly. In a large bowl, mash the bananas until smooth. I like to use a fork for this. Then, mix in the honey or maple syrup. This adds sweetness and moisture. Next, add the eggs and almond milk. Whisk everything together until it is well combined. In another bowl, mix the dry ingredients. Combine rolled oats, whole wheat flour, baking powder, baking soda, cinnamon, and salt. Stir these well to blend the flavors. Slowly add the dry mix to the wet mix. Stir gently until just combined. Remember, don’t overmix! If you want, fold in walnuts or chocolate chips for extra crunch or sweetness. Now it’s time to fill the muffin tin. Scoop the batter into each cup, filling them about 3/4 full. This gives them room to rise without spilling over. Place the muffin tin in the preheated oven. Bake for 18-20 minutes. Check for doneness by inserting a toothpick into the center. If it comes out clean, your muffins are ready! Once baked, let the muffins cool in the pan for about 5 minutes. This helps them set and makes them easier to remove. After that, transfer them to a wire rack to cool completely. Proper cooling helps keep the muffins fluffy. If you have leftovers, store them in an airtight container. You can keep them at room temperature for a few days. For longer storage, freeze them. Just wrap each muffin tightly. Enjoy your delicious banana oatmeal muffins from the [Full Recipe]! To bake perfect banana oatmeal muffins, follow these steps. First, use ripe bananas. The riper they are, the sweeter your muffins will taste. Next, mix the wet ingredients well. This ensures a smooth batter. Don’t overmix when adding the dry ingredients. Stir until just combined to keep muffins light and fluffy. These muffins shine when served warm. Try spreading almond butter on top for extra flavor. You can also drizzle some honey for a touch of sweetness. For a fun twist, pair them with fresh fruit or yogurt. This makes a great breakfast or snack option. Watch out for these common errors. First, don’t skip the baking powder and baking soda. They help the muffins rise. Also, avoid using too much flour. Too much can make the muffins dense. Finally, resist the urge to open the oven door while baking. This can cause them to collapse. Follow these tips for a delightful treat every time. {{image_2}} You can easily make gluten-free banana oatmeal muffins. Just swap the whole wheat flour for a gluten-free blend. Many brands offer great options. Always check the label for safe ingredients. This change keeps the muffins soft and tasty, just like the original. If you want to make vegan banana oatmeal muffins, replace the eggs. A simple mix of flaxseed meal and water works well. Use one tablespoon of flaxseed meal with three tablespoons of water for each egg. Allow this mix to sit for five minutes before adding it to your batter. You can also substitute almond milk with any plant-based milk. These muffins will still taste great! To enhance the flavor, try adding spices. A pinch of nutmeg or a bit of ginger gives a nice kick. You can also mix in other fruits. Blueberries or chopped apples add freshness. For extra crunch, add nuts or chocolate chips to the batter. These little additions make your muffins even more special. For the full recipe, check out the section above. To keep your banana oatmeal muffins fresh, store them in an airtight container. This helps to lock in moisture and flavor. Place the container at room temperature for up to three days. If you want to keep them longer, consider refrigeration. Just remember, refrigeration may change the texture slightly. Freezing is a great option if you have extras. First, let the muffins cool completely. Then, wrap each muffin tightly in plastic wrap. Place the wrapped muffins in a freezer bag or container. This method keeps them fresh for up to three months. When you want to enjoy one, just take it out and let it thaw at room temperature. To reheat your muffins, simply pop them in the microwave for about 15-20 seconds. This warms them up without drying them out. If you prefer a crispier muffin, you can reheat them in the oven at 350°F (175°C) for about 5-10 minutes. Serve warm for the best taste. For more details, check the Full Recipe. You can replace eggs with applesauce. Use 1/4 cup of unsweetened applesauce for each egg. This swap makes muffins moist and tasty. Another option is to use flaxseed meal. Mix 1 tablespoon of flaxseed with 2.5 tablespoons of water. Let it sit for five minutes to thicken. This also works well in banana oatmeal muffins. Yes, you can use quick oats. They will give a softer texture to the muffins. Quick oats absorb liquid faster, so you may need to adjust the liquid slightly. If you want a chewier muffin, stick to rolled oats. Rolled oats add more structure and texture. To ripen bananas fast, place them in a paper bag. Seal the bag and leave it at room temperature. The bag traps ethylene gas, speeding up ripening. You can also place bananas in a warm spot, like near a sunny window. If you need bananas ripe now, bake them at 300°F (150°C) for about 15-20 minutes. This softens them quickly for your banana oatmeal muffins. For the full recipe, check the earlier section. Banana oatmeal muffins are easy to make and delicious. We covered key ingredients, baking steps, and tips to get perfect muffins. Options for gluten-free or vegan versions let you explore flavors. Storing and reheating muffins is simple too. Remember to avoid common mistakes for the best results. Enjoy your baking and create tasty treats that everyone will love. Baking these muffins is fun and rewarding!

Delicious Banana Oatmeal Muffins Easy and Healthy Recipe

Are you craving a tasty treat that’s both easy to make and healthy? Look no further! These delicious banana oatmeal

- 1 lb Brussels sprouts, trimmed and halved - 4 cloves garlic, minced - 3 tablespoons olive oil - Zest of 1 lemon - 2 tablespoons fresh lemon juice - 1 teaspoon honey - ¼ teaspoon red pepper flakes - Fresh parsley, chopped, for garnish - 1 teaspoon salt - ½ teaspoon black pepper Lemon Garlic Roasted Brussels Sprouts is a fun dish to make. You start with fresh Brussels sprouts, which are tiny cabbages packed with flavor. Trim and halve them to help them cook evenly. Next, garlic adds a nice kick that pairs well with the sprouts. Mince four cloves for the best taste. Now, let’s talk about the magic of lemon. Zest one lemon and add it to the mix. This gives a bright flavor. Then, squeeze in two tablespoons of fresh lemon juice. It balances the dish perfectly. Olive oil is a must here. Three tablespoons help everything roast nicely. If you want a touch of sweetness, add one teaspoon of honey. It’s optional but adds depth. For a bit of heat, you can sprinkle in a quarter teaspoon of red pepper flakes. Finally, don't forget the salt and black pepper for seasoning. They make everything taste better. These ingredients come together to create a simple delight that’s full of flavor. You can find the full recipe to see how to put everything together. Enjoy! - Preheat the oven to 400°F (200°C). - In a large bowl, combine Brussels sprouts and minced garlic. - In a small bowl, whisk together olive oil, lemon zest, lemon juice, honey (if using), salt, black pepper, and red pepper flakes. - Toss the Brussels sprouts with the seasoning until they are well coated. - Arrange the Brussels sprouts on a baking sheet lined with parchment paper. - Roast for 25-30 minutes, stirring halfway through, until golden brown and crispy. This method makes the Brussels sprouts tender inside and crispy outside. For the best results, check doneness by piercing one with a fork. The flavor of lemon and garlic will shine through each bite. For full details, refer to the Full Recipe. - Cut Brussels sprouts evenly for even cooking. - Stir halfway through roasting for even browning. These two simple tips help create the best texture. When you cut the sprouts evenly, they cook at the same rate. This way, some won't burn while others remain raw. Stirring halfway through ensures they brown nicely. - Serve with lemon wedges and extra parsley for garnish. Adding lemon wedges brightens the dish. It also gives a burst of fresh flavor when squeezed over the sprouts. Extra parsley adds color and makes the dish look fancy. Brussels sprouts are full of vitamins and fiber. They help boost health and digestion. Garlic has great health benefits too. It may help boost your immune system and add flavor without extra calories. Lemon juice adds vitamin C. This means it helps keep you healthy and adds tangy flavor. Plus, it makes the dish taste fresh and bright. {{image_2}} You can add balsamic vinegar for a tasty twist. The vinegar gives a sweet tang. It pairs well with lemon and garlic. You can also mix in fresh herbs. Try thyme or rosemary for extra flavor. Both herbs bring unique notes that enhance the dish. For added crunch, you can toss in nuts. Almonds or walnuts work great here. They add texture and a nutty taste. You can also mix in other veggies. Carrots or sweet potatoes add color and sweetness. This makes your dish even more fun and vibrant. If you want a quicker method, try stovetop sautéing. Heat a pan with olive oil, add the sprouts, and cook until tender. You can also use an air fryer. This method makes them crispy while using less oil. It’s quick and easy, perfect for busy nights. Store any leftover Lemon Garlic Roasted Brussels Sprouts in an airtight container. Keep them in the fridge. They will stay fresh for about three days. This way, you can enjoy them again! To reheat, the oven is best. It keeps the sprouts crispy. Preheat your oven to 350°F (175°C). Spread the leftovers on a baking sheet. Heat for about 10-15 minutes. If you are in a hurry, use the microwave. Just be aware that they might become a bit soft. You can freeze Brussels sprouts for long-term storage. First, blanch them in boiling water for 3 minutes. Then, cool them in ice water. Drain and pat dry. Place them in freezer bags, removing as much air as possible. They can stay in the freezer for up to 3 months. When you're ready to use them, thaw in the fridge overnight before cooking. To make Lemon Garlic Roasted Brussels Sprouts, follow these simple steps: 1. Preheat your oven to 400°F (200°C). 2. Trim and halve 1 pound of Brussels sprouts. 3. Mince 4 cloves of garlic and place them in a large bowl with the sprouts. 4. In a small bowl, mix 3 tablespoons of olive oil, the zest of 1 lemon, 2 tablespoons of lemon juice, 1 teaspoon of salt, ½ teaspoon of black pepper, and ¼ teaspoon of red pepper flakes (if using). 5. Pour this mixture over the sprouts and garlic. 6. Toss everything until the Brussels sprouts are well coated. 7. Spread the sprouts on a parchment-lined baking sheet. 8. Roast for 25 to 30 minutes, stirring halfway through. 9. Garnish with fresh parsley before serving. This process brings out the rich flavor of the Brussels sprouts while the garlic and lemon add a fresh kick. Yes, you can prepare Brussels sprouts in advance! Trim and halve them a day before cooking. You can also marinate them. Just mix the olive oil, garlic, lemon zest, and juice and let the sprouts soak in the flavors. This step can enhance their taste. Store them in the fridge until you are ready to roast them. Lemon Garlic Roasted Brussels Sprouts pair well with many dishes. Here are some great ideas: - Serve them alongside grilled chicken or fish. - They also complement roasted pork or beef nicely. - For a vegetarian option, try them with quinoa or a grain salad. - Add a fresh green salad for a colorful plate. These pairings balance the flavors and create a satisfying meal. For the full recipe, check the earlier section. Lemon Garlic Roasted Brussels Sprouts are easy and tasty. You start with fresh sprouts, garlic, and a simple lemon mix. Roasting them adds a nice crunch. Remember to check for even cooking. You can add flavors or nuts to make them your own. Store leftovers well to enjoy later. These sprouts make a great side dish for any meal. Keep experimenting until you find your favorite version. Enjoy healthy eating with this fun recipe!

Lemon Garlic Roasted Brussels Sprouts Simple Delight

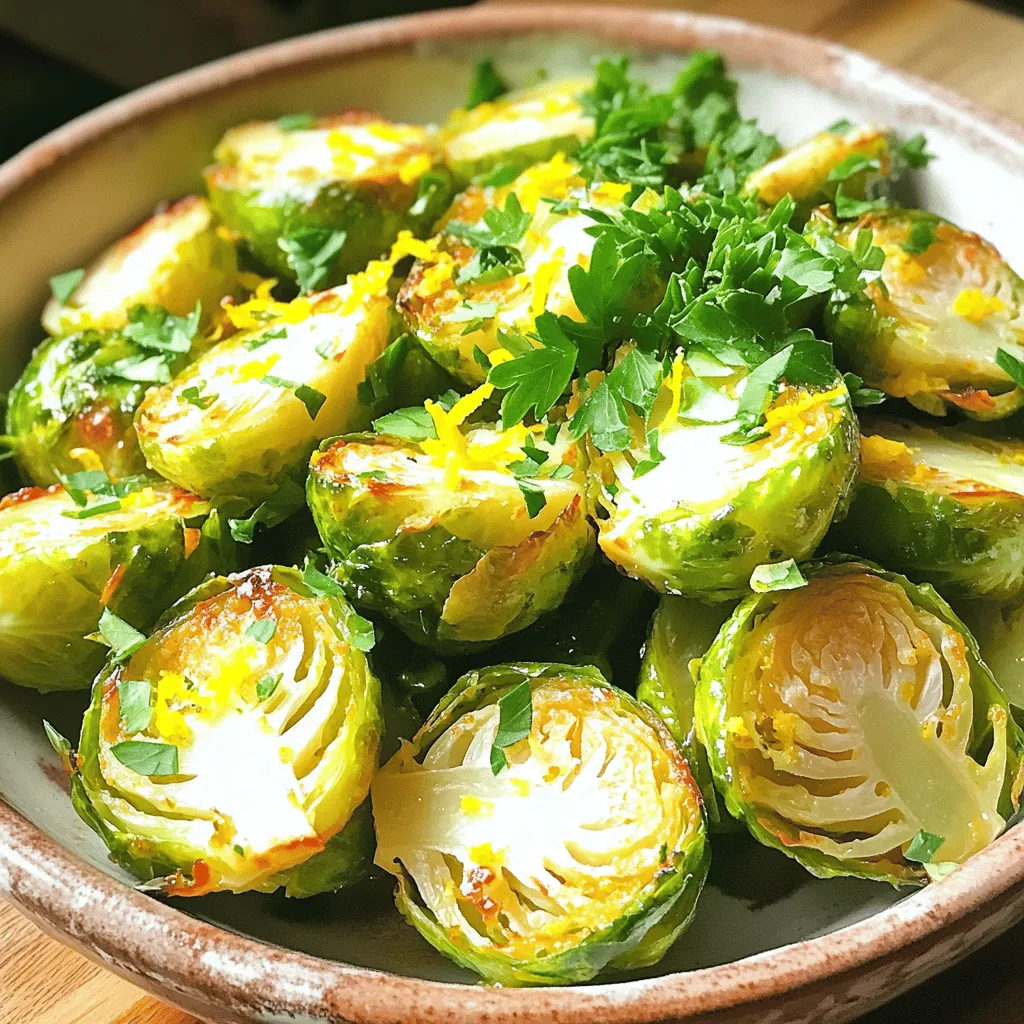
If you’re looking for a side dish that shines with flavor and is simple to make, you’ve found it! My

To make cinnamon sugar churros, gather these simple ingredients: - 1 cup water - 2 tablespoons granulated sugar - 1/2 teaspoon salt - 1/4 cup unsalted butter - 1 cup all-purpose flour - 2 large eggs - 1 teaspoon vanilla extract - Oil for frying - 1/2 cup granulated sugar (for coating) - 1 tablespoon ground cinnamon You can swap some ingredients if needed. Here are a few ideas: - Use coconut oil instead of unsalted butter for a dairy-free option. - Substitute the all-purpose flour with gluten-free flour for a gluten-free churro. - You can replace granulated sugar with brown sugar for a richer flavor. To make your churros, gather these tools: - Medium saucepan - Deep frying pan - Pastry bag with a large star tip - Mixing spoon - Scissors - Paper towels - Shallow dish for sugar coating These tools help ensure your churros are crispy and delicious. Each piece plays a key role in making this fun treat! If you want the full recipe, just refer back to the list above. To start, gather your ingredients. You need water, sugar, salt, butter, flour, eggs, and vanilla. In a medium saucepan, mix the water, sugar, salt, and butter. Heat this over medium heat. Wait until the butter melts and the mixture boils. Once it boils, take it off the heat. Stir in the flour quickly. You want it to form a ball and pull away from the pan's sides. Let it cool for about five minutes. Now, add the eggs one at a time. Mix well after each egg until smooth. Finally, stir in the vanilla extract. Next, heat oil in a deep frying pan. Aim for medium-high heat, around 350°F (175°C). While the oil heats, prepare a pastry bag with a large star tip. Transfer the churro dough into this bag. Now, pipe 5-inch strips of dough into the hot oil. Use scissors to cut the strips as you go. Fry the churros until they are golden brown, about two to three minutes. Keep an eye on them to ensure even cooking. Once done, remove them and let them drain on paper towels. While the churros drain, mix sugar and cinnamon in a shallow dish. Use half a cup of sugar and one tablespoon of cinnamon. Roll the warm churros in this mixture until they are well coated. Serve your churros hot, and if you like, enjoy them with chocolate sauce for dipping. For the complete recipe, check the Full Recipe section. To make your churros crispy, use the right oil. Choose a neutral oil with a high smoke point, like canola or vegetable oil. Heat the oil to about 350°F (175°C). This temperature helps the churros cook evenly and get that nice golden color. When piping the dough, use a large star tip. This makes your churros puff up nicely. Fry them in small batches. This keeps the oil hot and prevents soggy churros. One common mistake is not letting the dough cool enough. If you add eggs to hot dough, they can cook. Cool the dough for about five minutes before adding the eggs. Another mistake is overcrowding the frying pan. If you add too many churros at once, the oil temperature drops. This leads to greasy, undercooked churros. Finally, don’t forget the cinnamon sugar coating. This is what makes churros so yummy! Serve your churros warm for the best taste. They pair well with chocolate sauce for dipping. You can also try caramel or dulce de leche. For a twist, sprinkle some sea salt on top. This adds a nice contrast to the sweet flavor. You can share them at parties or enjoy them as a snack. For the full recipe, check the complete guide on making cinnamon sugar churros. {{image_2}} You can make chocolate-filled churros for a rich twist. To do this, prepare the dough as usual. Then, fill a piping bag with melted chocolate or chocolate ganache. When you fry the churros, poke a hole in one end and squeeze the chocolate into the center. This makes each bite a sweet surprise. Serve these with a drizzle of chocolate sauce for extra fun. For a seasonal delight, try pumpkin spice churros. Add 1/2 cup of pumpkin puree to the dough while mixing in the eggs. Then, mix 1 tablespoon of pumpkin pie spice into the cinnamon sugar. This gives your churros a warm, cozy flavor perfect for fall. You might want to serve these with cream cheese frosting for dipping. If you need gluten-free churros, use a gluten-free flour blend instead of all-purpose flour. The rest of the recipe stays the same. Make sure to check the labels of your ingredients to ensure they are gluten-free. These churros taste just as good as the classic ones! Enjoy with the usual cinnamon sugar coating or dip them in chocolate sauce. You can find the full recipe for classic cinnamon sugar churros earlier in this article. Each variation brings a new twist to this beloved treat. To keep your churros fresh, store them in an airtight container. Place parchment paper between layers to avoid sticking. Keep the container at room temperature for up to two days. Avoid the fridge, as it can make them soggy. If you won’t eat them in that time, freezing is a better option. To reheat churros, preheat your oven to 350°F (175°C). Place the churros on a baking sheet. Heat them for about 5-7 minutes until warm and crispy. You can also use an air fryer at the same temperature for a quicker option. This method helps restore their crispiness without adding oil. You can freeze churros for longer storage. After frying and cooling them, place churros on a baking sheet. Freeze them for about an hour until firm. Then, transfer them to a freezer bag. They can last for up to three months. To thaw, move them to the fridge overnight. Reheat as mentioned above before serving. For the full recipe, check out the entire process to create these delightful treats! The best dips for churros are chocolate sauce and caramel. Both add a sweet touch. You can also try a warm fruit sauce. These dips pair well with the crispy churro texture. Feel free to get creative! Adding a sprinkle of sea salt can enhance the flavor. Yes, you can make churros without eggs. Use a mix of flour and water instead. Some people use mashed bananas or applesauce as a binder. This will change the texture a bit but can still taste great. Make sure to adjust the cooking time as needed. To check if the oil is hot enough, drop a small piece of dough in. If it bubbles and rises, the oil is ready. You can also use a candy thermometer. Aim for about 350°F (175°C). This temperature ensures the churros fry evenly and become crispy. You can buy cinnamon sugar churros at fairs or carnivals. Many bakeries sell them fresh. Some grocery stores also carry frozen churros. Check the frozen aisle for options. If you want the best experience, try making them at home using the Full Recipe. Churros and beignets are both fried treats, but they differ in shape and taste. Churros are long and ridged, often coated in sugar. Beignets are square, soft, and dusted with powdered sugar. The dough for churros is firmer, while beignet dough is lighter and fluffier. Both are delicious in their own way! In this blog post, we explored how to make delicious cinnamon sugar churros. You learned about the key ingredients and even substitutions you can make. I shared step-by-step instructions for preparing, frying, and serving perfect churros. We also covered tips for achieving a crisp texture and common mistakes to avoid. Whether you try chocolate-filled or gluten-free versions, churros are a treat for everyone. Remember to store leftovers correctly for future enjoyment. Enjoy your churros with dips or on their own! Happy cooking!

Cinnamon Sugar Churros Crispy and Irresistible Treat

Are you ready for a treat that’s crispy and oh-so-irresistible? Cinnamon sugar churros are the perfect snack or dessert for

To make a delicious Mediterranean Chickpea Salad, you need these fresh ingredients: - 1 can (15 oz) chickpeas, drained and rinsed - 1 cup cherry tomatoes, halved - 1 cucumber, diced - 1 bell pepper (red or yellow), diced - 1/2 red onion, finely chopped - 1/4 cup Kalamata olives, pitted and halved - 2 tablespoons fresh parsley, chopped You can make this salad even better with some optional add-ins: - 1/2 cup feta cheese, crumbled (for a creamy touch) - Avocado, diced (for a creamy texture) - Cooked quinoa (for extra protein) - 1/4 cup roasted red peppers, sliced If you want to swap some ingredients, here are a few common substitutions: - Use canned white beans instead of chickpeas for a different flavor. - Swap cherry tomatoes for regular tomatoes, diced. - Use green bell pepper if you prefer less sweetness. - Replace feta cheese with a vegan cheese option for a dairy-free salad. For the full recipe, check out the Mediterranean Chickpea Salad 🥗 section! Start with one can of chickpeas. Drain and rinse them well. This removes extra salt and makes them taste better. In a big bowl, mix the chickpeas with one cup of halved cherry tomatoes. Next, add one diced cucumber and one diced bell pepper. I like using red or yellow for a pop of color. Then, finely chop half of a red onion and toss it in. If you like cheese, crumble half a cup of feta on top. Finally, add a quarter cup of pitted and halved Kalamata olives. In a small bowl, pour three tablespoons of olive oil. Add two tablespoons of fresh lemon juice. Sprinkle in one teaspoon of dried oregano. Season with salt and pepper to taste. Now, whisk everything together until it blends well. This dressing brings out the best flavors in your salad. Pour the dressing over your salad base. Toss gently to coat all the veggies and chickpeas evenly. Then, chop two tablespoons of fresh parsley and add it in. Toss lightly again to mix. It’s best to let the salad sit for about 15 to 20 minutes. This helps the flavors come together beautifully. You can find the full recipe for more details. To boost the taste of your Mediterranean chickpea salad, use fresh ingredients. Fresh herbs like parsley and mint add bright notes. You can also add a pinch of chili flakes for heat. Try using high-quality olive oil for a richer flavor. Letting the salad sit for 15-20 minutes helps the flavors blend. This waiting time is key to a tasty dish. Serve this salad as a side dish or a main meal. It pairs well with grilled meats or seafood. You can also serve it with warm pita bread. If you want a more filling meal, add protein like chicken or tuna. This salad also works great as a light lunch. Feel free to dress it up with extra olives or nuts. You can make this salad a day in advance. Just keep it in the fridge. The flavors will deepen overnight. To keep it fresh, add cucumbers and tomatoes right before serving. This keeps them crisp. If you want a quick meal, marinate the salad for a few hours. This will enhance the taste and make it even better. For the full recipe, check out the detailed instructions above. {{image_2}} You can easily make this salad vegan. Just skip the feta cheese. The other ingredients add great flavor. You have chickpeas, fresh veggies, and olives. They all work together to create a tasty dish. You can even add avocado for creaminess. This makes the salad even more filling. If you want extra protein, try adding tuna or chicken. Both options work well. For tuna, use canned, drained tuna. Just mix it in with the other ingredients. For chicken, use cooked, diced chicken breast. Both options help make the salad heartier. They keep you full and satisfied. Using seasonal ingredients makes your salad fresh and exciting. In summer, add fresh corn or zucchini. In fall, consider roasted pumpkin or sweet potatoes. These ingredients change the flavor and texture. They also make your salad colorful and fun. Always look for local produce to enhance taste. You can find more ideas in the Full Recipe. To keep your Mediterranean chickpea salad fresh, store it in an airtight container. Glass or plastic containers work well. Make sure to keep it in the fridge. If you know you won’t eat it all at once, store the dressing separately. This will help the salad stay crisp and tasty. This salad lasts about 3 to 5 days in the fridge. After that, the veggies may get soggy. If you notice any off smell or change in color, it's best to toss it. Always check for freshness before serving. While I don't recommend freezing the salad, you can freeze the chickpeas. Drain and rinse them first. Store them in a freezer bag. When you're ready, thaw them overnight in the fridge. Then, mix them back into a fresh salad. For the best taste, enjoy the salad fresh! For the full recipe, check out the Mediterranean Chickpea Salad section. Mediterranean Chickpea Salad is a tasty mix of fresh veggies and chickpeas. It often includes cherry tomatoes, cucumbers, bell peppers, red onion, and olives. You can enhance it with feta cheese for a creamier taste. This salad is colorful and full of flavor, making it a great side dish or a light meal. I love how it combines simple ingredients to create something so vibrant. Yes, you can easily make this salad vegan. Just skip the feta cheese. The chickpeas, veggies, and olives still give it plenty of taste. You won’t miss the cheese at all! Feel free to add more herbs or spices for extra flavor. To prepare chickpeas from dried, soak them overnight in water. This softens them for cooking. The next day, drain and rinse them. Then, boil them in fresh water for about 1 to 2 hours. Check for tenderness. Once soft, you can use them in your salad. This method gives a great texture and taste. Yes, Mediterranean Chickpea Salad is perfect for meal prep. It keeps well in the fridge for a few days. The flavors improve as it sits, so it tastes even better after a day or two. Just store it in an airtight container to keep it fresh. Make a big batch to enjoy throughout the week. You can find the full recipe to get started! This blog post shared how to make a fresh Mediterranean chickpea salad. You learned about key ingredients, and optional add-ins. You also discovered easy steps to prepare the salad, from making the dressing to combining it all. I hope you feel ready to enhance the flavors. Try different variations and store it properly. This salad is great for any meal or a snack. It’s simple, healthy, and packed with taste! Enjoy your delicious creation!

Mediterranean Chickpea Salad Tasty and Nutritious Dish

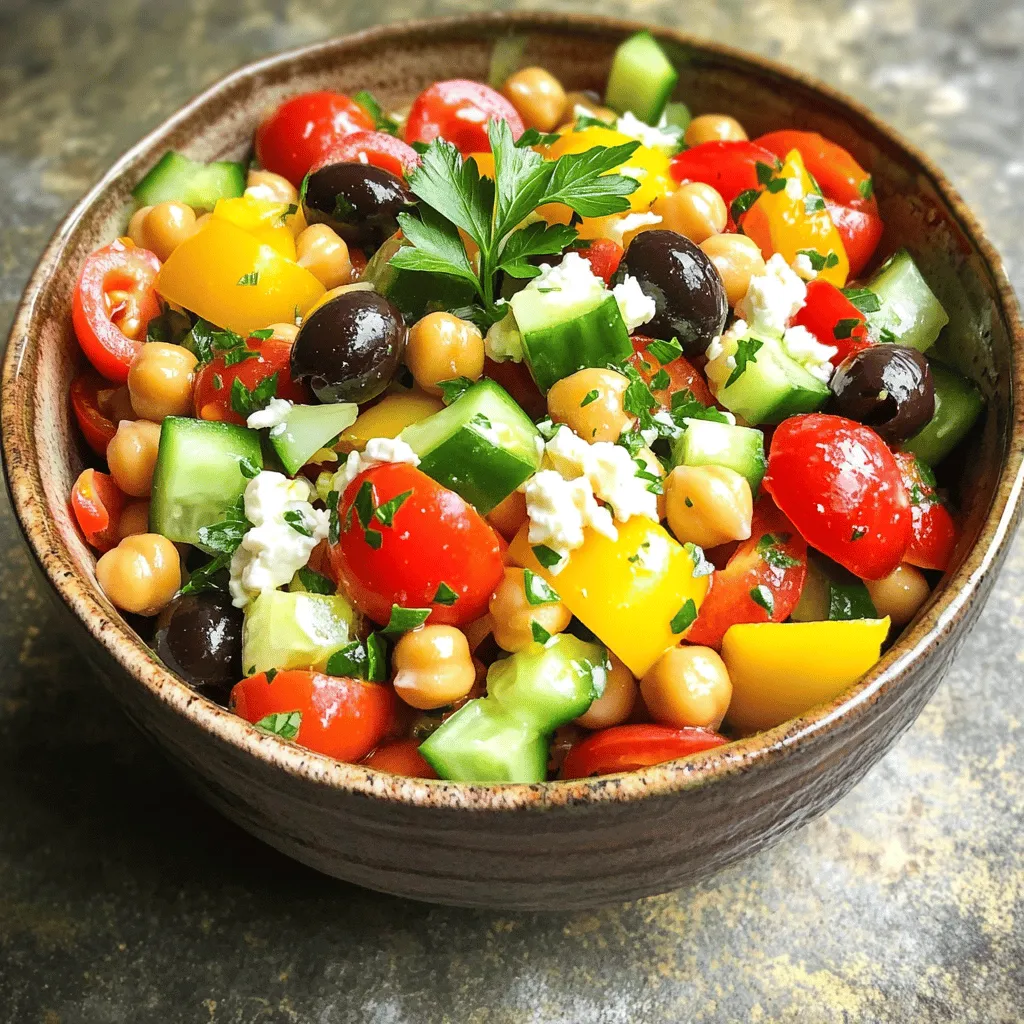
Looking for a vibrant and healthy dish? The Mediterranean Chickpea Salad is both tasty and nutritious! Packed with fresh veggies

Older posts
Newer posts
← Previous Page1 … Page37 Page38 Page39 … Page60 Next →

dsad

© 2025 Cooking Wells • Built with GeneratePress

Our Policies

  • Copyright Policy
  • Cookie Policy
  • GDPR Policy
  • Privacy Policy
  • Disclaimer
  • Terms Of Use

More Information

  • Home
  • About
  • Contact
  • Appetizers
  • Dessert
  • Dinner
  • Drinks
©2025, Cooking Wells About Back To Top