Skip to content
DisclaimerTerms Of UseGDPR PolicyCookie Policy

Cooking Wells

  • Home
  • Drinks
  • Appetizers
  • Dinner
  • Dessert
  • About
  • Contact
  • Privacy Policy
DisclaimerTerms Of UseGDPR PolicyCookie Policy

Mia

To make this tasty salad, you need: - 1 cup quinoa, rinsed - 2 cups vegetable broth - 1 medium zucchini, diced - 1 medium bell pepper (any color), diced - 1 cup cherry tomatoes, halved - 1 red onion, chopped - 2 cloves garlic, minced - 2 tablespoons olive oil - 1 teaspoon cumin - 1 teaspoon smoked paprika - Salt and pepper to taste - 1/4 cup fresh parsley, chopped - 1/4 cup feta cheese, crumbled (optional) - Juice of 1 lemon Fresh produce is key for your salad. I love using seasonal veggies. They add flavor and color. Zucchini brings a soft texture. Bell pepper adds crunch and sweetness. Cherry tomatoes offer juiciness. Red onion gives a mild bite. Fresh parsley brightens the dish. You can also mix in other veggies like carrots or asparagus. To make your salad even better, consider adding a few optional ingredients. Feta cheese adds creaminess and a salty kick. You can also sprinkle on some nuts or seeds for crunch. A dash of hot sauce can give it some heat. If you like herbs, try adding basil or mint for a fresh twist. These small changes can take your salad to a new level! For the full recipe, check out the details above. Enjoy making this healthy and filling meal! Start by preheating your oven to 400°F (200°C). In a large bowl, gather your diced zucchini, bell pepper, halved cherry tomatoes, chopped red onion, and minced garlic. Pour in two tablespoons of olive oil and sprinkle one teaspoon each of cumin and smoked paprika. Add salt and pepper to taste. Toss everything together until the vegetables are well coated. This step adds flavor and helps them roast evenly. While your vegetables are ready to roast, grab a medium saucepan. Pour in two cups of vegetable broth and bring it to a boil. Rinse one cup of quinoa under cold water. Once the broth boils, add the rinsed quinoa to the pan. Lower the heat, cover it, and let it simmer for about 15 minutes. After that time, the quinoa should be fluffy, and all the liquid will be absorbed. Once your veggies are roasted and your quinoa is cooked, remove both from heat. In a large mixing bowl, combine the fluffy quinoa and the roasted vegetables. Add in a quarter cup of chopped parsley, crumbled feta cheese if you like, and juice from one lemon. Stir gently to mix everything well. Taste your salad and adjust the seasoning with salt and pepper if needed. Now you have a colorful, healthy, and filling meal ready to enjoy! For the full recipe, check out the detailed instructions above. Roasting vegetables is an art. The right method brings out their natural flavors. Here are some tips to get it right: - Cut Evenly: Make sure to cut your veggies into similar sizes. This helps them cook evenly. - Don’t Overcrowd: Give your veggies space on the baking sheet. If they are too close, they will steam instead of roast. - Use High Heat: Roasting at a high temperature, around 400°F, helps caramelize the veggies. This adds a sweet flavor. Quinoa can be tricky. You want it fluffy and not mushy. Here’s how to nail the texture: - Rinse Well: Always rinse quinoa under cold water before cooking. This removes the natural coating called saponin, which can taste bitter. - Use the Right Ratio: For a fluffy texture, use two parts broth to one part quinoa. This helps it absorb the right amount of liquid. - Let it Sit: After cooking, let the quinoa sit covered for five minutes. This allows it to steam and become fluffy. To make your salad pop, consider these flavor tips: - Fresh Herbs: Add fresh herbs like parsley, basil, or cilantro. They bring color and freshness. - Zesty Citrus: A squeeze of lemon juice or lime juice brightens the dish. It adds a nice zing. - Spices and Nuts: Try adding different spices or nuts. Toasted almonds or walnuts can add a crunchy element. For more details, check out the Full Recipe. Enjoy your delicious creation! {{image_2}} If you want a change from quinoa, you have options. You can use brown rice or bulgur wheat. Both add a nice texture. Another great choice is farro. It has a chewy bite and a nutty taste. If you're avoiding grains, try lentils. They pack a protein punch and taste great. Feel free to mix up the veggies. You can use carrots, sweet potatoes, or broccoli. Each adds a unique flavor and color. For a bit of spice, add some jalapeños or radishes. You can also try seasonal vegetables. This keeps your salad fresh and exciting. The dressing can change the vibe of your salad. A simple balsamic vinaigrette works well. You can also try tahini or a yogurt-based dressing. If you want a kick, add sriracha or hot sauce. For toppings, consider nuts or seeds for crunch. Toasted almonds or pumpkin seeds add great texture. You can visit the Full Recipe for more ideas on how to customize your dish! To keep your roasted vegetable quinoa salad fresh, place it in an airtight container. Make sure to let it cool down to room temperature before sealing it. Store it in the fridge where it will stay good for up to four days. If you want to enjoy it later, just scoop out what you need. You can freeze this salad for later meals. First, ensure it cools completely. Then, transfer it to a freezer-safe container or bag. Squeeze out as much air as possible to prevent freezer burn. This salad can last up to three months in the freezer. When you’re ready to eat, just thaw it in the fridge overnight. To reheat, you can use a microwave or a stove. If using a microwave, place the salad in a bowl and heat in short bursts. Stir in between to heat evenly. If you prefer the stove, gently warm it in a pan over low heat. Add a splash of vegetable broth or water to keep it moist. Enjoy it warm or at room temperature. For the full recipe, check out the detailed instructions above! Roasted vegetable quinoa salad lasts for about 4 to 5 days in the fridge. Make sure to store it in an airtight container. This helps keep it fresh and tasty. I recommend checking for any smells or changes before eating it after a few days. Yes, you can make roasted vegetable quinoa salad ahead of time. In fact, it tastes even better after sitting for a few hours or overnight. The flavors mingle and create a delicious dish. Just make sure to store it in the fridge until you are ready to serve. You can serve roasted vegetable quinoa salad with many dishes. It pairs well with grilled chicken or fish for added protein. You can also enjoy it with pita bread or hummus for a lighter meal. If you want a full spread, add a simple soup on the side. Just think of what you like, and get creative! For the complete recipe, check out the Full Recipe link. This blog post covers making a tasty Roasted Vegetable Quinoa Salad. We talked about key ingredients and how to prepare them. The step-by-step guide makes cooking easy. You can use tips to improve flavor and texture. Variations let you customize this salad to your taste. Plus, I shared how to store leftovers safely. Roasted Vegetable Quinoa Salad is not only healthy but also fun to make. Try it out for a fresh meal!

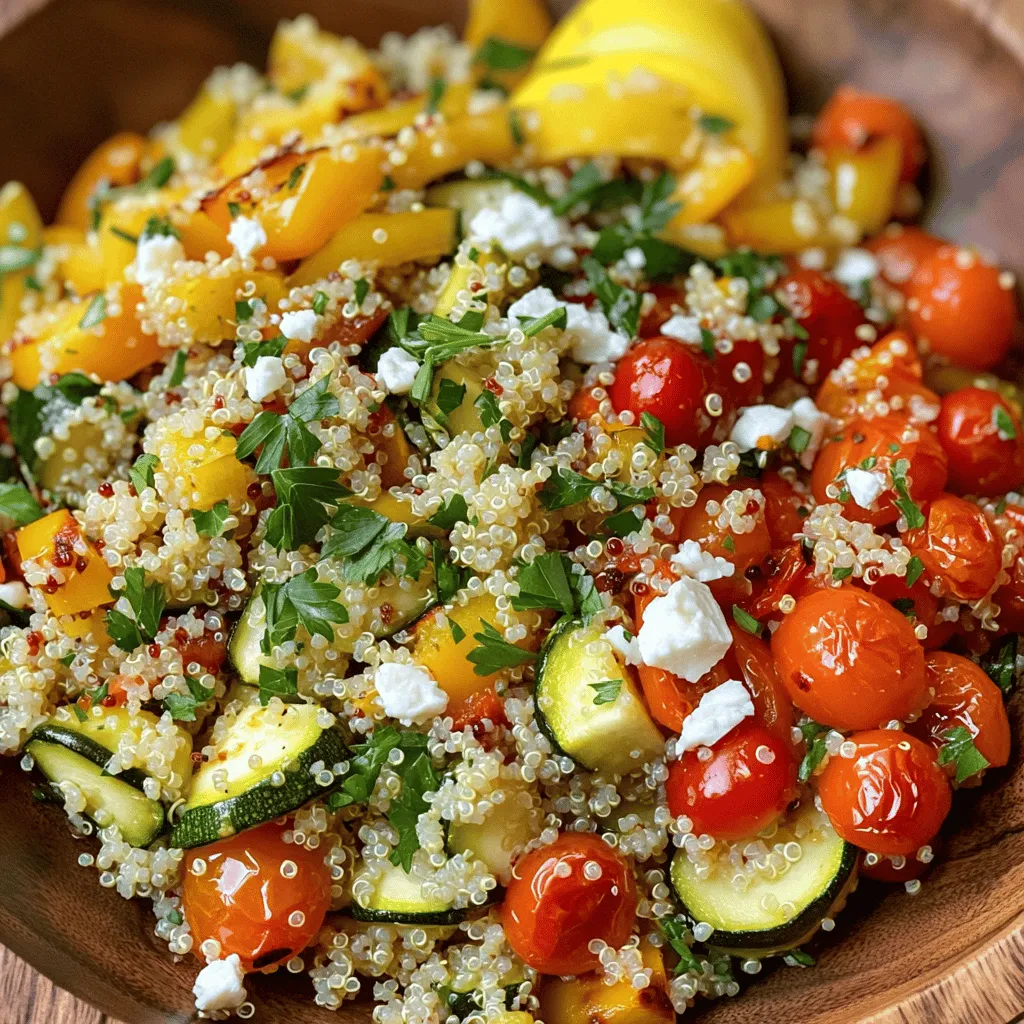
Roasted Vegetable Quinoa Salad Healthy and Filling Meal

Looking for a healthy meal that’s both filling and simple? I’ve got just the thing for you! My Roasted Vegetable

- 3 ripe bananas, mashed - 1/3 cup melted coconut oil - 1/2 cup brown sugar - 1 large egg, beaten - 1 teaspoon vanilla extract - 1 teaspoon baking soda - Pinch of salt - 1 1/2 cups all-purpose flour - 1/2 cup semi-sweet chocolate chips - 1/4 cup chopped walnuts - Extra chocolate chips for topping - 9x5-inch loaf pan - Mixing bowls - Whisk and spatula Gathering the right ingredients is key to making the best chocolate chip banana bread. Start with ripe bananas. The riper, the better! They add a sweet flavor and moisture to the bread. Next, melted coconut oil gives it a rich taste. Brown sugar adds depth and a touch of caramel flavor. You will also need an egg. This helps bind the bread and gives it structure. Vanilla extract boosts the sweetness and flavor. Baking soda is your leavening agent, making the bread rise. A pinch of salt balances all the flavors. Lastly, all-purpose flour forms the base of the batter. For optional ingredients, walnuts add a nice crunch. Extra chocolate chips on top make it even more delicious. Make sure to have the right equipment too. A 9x5-inch loaf pan is perfect for baking. Mixing bowls are essential for combining the ingredients. A whisk and spatula help you blend everything well. Once you have all your ingredients and tools ready, you're set to create a rich and flavorful chocolate chip banana bread. You can find the full recipe in the article. - Preheat the oven to 350°F (175°C). - Grease the loaf pan or line with parchment paper. - Combine mashed bananas and melted coconut oil in a bowl. - Add brown sugar, beaten egg, and vanilla extract. Stir until smooth. - In a separate bowl, whisk baking soda, salt, and flour. - Gradually add the dry mixture to the wet mixture. Mix just until combined. - Fold in chocolate chips and walnuts if you choose to use them. - Pour batter into the prepared pan and bake for 55-60 minutes. For the full recipe, check the section above. Enjoy the delightful smell of chocolate chip banana bread filling your kitchen! To ensure even baking, the oven must be preheated. I recommend using a thermometer to check the temperature. If your oven runs hot or cold, adjust the time or temperature as needed. When placing the loaf pan in the oven, keep it in the center. This helps the heat circulate evenly around the bread. Do not over-mix your batter. Mixing too much can make your bread tough. When you add the flour, stir gently until just combined. It’s okay if there are lumps. They will disappear while baking. You can enhance the flavor of your chocolate chip banana bread easily. Consider adding spices like cinnamon or nutmeg. A teaspoon of either can add warmth to the bread. You can also try adding a splash of almond extract for a unique twist. Using different types of chocolate chips can change the taste. You might use dark chocolate, milk chocolate, or even white chocolate. Each type brings a different flavor profile. You can mix and match to find your favorite blend. For presentation, slice the banana bread and place it on a wooden board. This gives a nice rustic look. You can add a dollop of whipped cream or yogurt on the side. Garnish with banana slices and chocolate shavings for extra flair. Pair your banana bread with coffee or tea. It also goes well with a scoop of vanilla ice cream. The warmth of the bread and the cold ice cream create a delightful contrast. {{image_2}} You can easily adapt this banana bread. For those avoiding gluten, swap all-purpose flour with a gluten-free blend. Many brands work well in baking. Check the package for measurements. If you want a vegan option, replace the egg with unsweetened applesauce or flaxseed meal mixed with water. Use plant-based milk instead of dairy. These simple swaps keep the bread moist and tasty. To add more fun, think about mixing in dried fruits or nuts. Chopped dates or raisins give a nice chew. Walnuts add crunch but are optional. You can also spice things up! Cinnamon and nutmeg pair well with bananas. Just a pinch can elevate the flavor. Try experimenting with your favorite spices for unique twists. Chocolate chips can really change your bread. Semi-sweet chips are classic, but dark chocolate offers a rich taste. Milk chocolate provides a sweeter bite. Feeling adventurous? Swap chocolate chips for peanut butter chips. This gives a creamy, nutty flavor that blends well with bananas. Mix and match to find your favorite! For the full recipe, check out the Choco-Banana Bliss Bread. To keep your chocolate chip banana bread fresh, store it in an airtight container. This method helps lock in moisture. You can choose to store it on the countertop or in the fridge. If you keep it at room temperature, it stays good for about 3-4 days. In the fridge, it lasts up to a week. If you want to save some for later, freeze banana bread slices. Wrap each slice in plastic wrap, then place them in a freezer bag. This keeps them fresh for up to three months. When ready to enjoy, take out a slice and let it thaw at room temperature. You can also heat it in a toaster or microwave for a warm treat. Homemade banana bread lasts about a week when stored properly. After that, it may start to dry out or spoil. Look for signs of spoilage like mold or an off smell. If you notice any of these signs, it’s best to discard it. Proper storage helps you enjoy your chocolate chip banana bread longer! For the complete recipe, check the Full Recipe. To make your banana bread moister, you can add ingredients like yogurt or applesauce. These ingredients help keep the bread soft and tender. You can also use very ripe bananas; the riper they are, the more moisture they add. Another tip is to avoid over-mixing the batter. Over-mixing can lead to a dry texture. Yes, you can use frozen bananas. Thaw them first and drain any excess liquid. Frozen bananas often become mushy, which is okay for banana bread. They add great flavor and moisture. Just mash them well before adding to the mix. If your banana bread is too dense, check your measurements. Too much flour can lead to density. Make sure you are using the right amount and spooning it into the measuring cup. Also, ensure you mix gently. Mixing too much can create a heavy loaf. If you find it dense, try adding a bit more liquid next time. To check if your banana bread is done, use a toothpick. Insert it into the center of the loaf. If it comes out clean or with a few crumbs, it’s done. If it has wet batter on it, bake for a few more minutes. The edges should also pull away from the pan slightly. This is a good sign of doneness. You can create delicious banana bread with just a few simple steps. We looked at key ingredients, equipment, and cooking tips. Remember, small changes can add big flavor. Try different nuts or chocolates to make it your own. Store it well to enjoy it longer. With practice, your banana bread will shine. Enjoy your baking journey!

Chocolate Chip Banana Bread Rich and Flavorful Delight

Ready to make a treat that’s both rich and flavorful? My Chocolate Chip Banana Bread combines sweet, ripe bananas with

- Chicken and vegetables - 1 lb boneless, skinless chicken thighs, thinly sliced - 1 red bell pepper, sliced - 4 cloves garlic, minced - 2 Thai bird's eye chilies, sliced (adjust for heat) Chicken makes this dish hearty and tasty. I love using chicken thighs. They stay juicy and flavorful. The red bell pepper adds a nice crunch and sweetness. Garlic brings depth, while the chilies add that spicy kick. - Sauce ingredients - 2 tablespoons soy sauce - 1 tablespoon fish sauce - 1 tablespoon oyster sauce - 1 teaspoon sugar These sauces create a rich base for the chicken. Soy sauce gives umami. Fish sauce adds saltiness. Oyster sauce brings sweetness, and sugar balances all the flavors. - Serving suggestions - Cooked jasmine rice, for serving - Fresh Thai basil leaves I always serve this dish with jasmine rice. It soaks up the sauce well. Thai basil is a must for garnish. It adds fragrance and a fresh taste. You can also add lime wedges for a zesty touch. For the full recipe, check out the detailed steps to create this delicious meal. 1. Cooking the chicken Start by heating the vegetable oil in a large skillet or wok over medium-high heat. When the oil is hot, add minced garlic and sliced bird's eye chilies. Stir-fry for about 30 seconds. This will release a strong aroma. Next, add the sliced chicken thighs. Cook for about 5 to 7 minutes. You want the chicken to turn golden and be fully cooked. 2. Adding vegetables Now toss in the sliced red bell pepper. Stir-fry for another 2 to 3 minutes. The bell pepper should be tender but still crisp. This keeps the dish colorful and adds crunch. 3. Mixing in sauces In a small bowl, mix the soy sauce, fish sauce, oyster sauce, and sugar. Pour this sauce over the chicken and peppers. Toss everything well until the chicken and vegetables are evenly coated. This step adds a rich and savory flavor to the dish. 4. Final touches with basil Remove the skillet from heat. Fold in the fresh Thai basil leaves until they wilt. This will give the dish its signature aroma and taste. Serve the Spicy Thai Basil Chicken over hot jasmine rice for a fantastic meal. You can find the Full Recipe for more details on preparation and serving. - Choosing the right chicken: I recommend using boneless, skinless chicken thighs. They stay juicy and tender. Thighs hold flavor better than chicken breasts. This makes a big difference in taste. - Adjusting spice levels: You can control the heat. Start with one chili if you prefer mild. Add more chilies as you like. Remember, fresh chilies pack a punch. Always taste as you go to find your perfect spice. - Importance of fresh ingredients: Fresh Thai basil is key to this dish. It adds a unique flavor that dried herbs can't match. Always buy fresh produce for the best taste. Fresh garlic and peppers also enhance your meal's aroma and flavor. - Pairing with rice: Serve your Spicy Thai Basil Chicken over jasmine rice. The rice soaks up the sauce well. It balances the heat and adds a nice texture. - Garnishes to enhance presentation: A few fresh basil leaves on top make it look great. You can also add lime wedges. They add a fresh kick when squeezed on the dish. These small touches make your meal stand out. For a full recipe, check out the [Full Recipe]. {{image_2}} You can easily change up this recipe by using different proteins. Instead of chicken, try shrimp, beef, or tofu. Each protein brings its own flair to the dish. If you want a vegetarian or vegan version, use firm tofu or tempeh. These options soak up the sauce well and still taste great. For alternate vegetables, think about adding snap peas or broccoli. These veggies add nice crunch and color. You can mix and match to find your favorite combo. Don't be afraid to get creative! To add more depth to your dish, consider adding nuts like cashews or peanuts. This adds texture and a rich flavor. You can also try spices like cumin or coriander for a new twist. Just a pinch can make a big difference. Using different sauces can also change the flavor profile. Try adding hoisin sauce for sweetness or chili garlic sauce for extra heat. Each change can create a unique meal. Explore these options to find what you love most. If you want the full recipe, check it out [here](#). To keep Spicy Thai Basil Chicken fresh, store it in the fridge. Place it in an airtight container. It will stay good for about 3 to 4 days. When you reheat it, use a skillet or microwave. Heat until the chicken is warm all the way through. Avoid overcooking, as this can dry it out. If you want to keep it longer, you can freeze it. First, let it cool completely. Then, place it in a freezer-safe bag or container. Make sure to remove as much air as possible. It can last up to 3 months in the freezer. When you are ready to eat, thaw it in the fridge overnight. Reheat it in a skillet for the best taste. Enjoy your Spicy Thai Basil Chicken again with a fresh flavor! For the complete recipe, check the Full Recipe section. What is the origin of Spicy Thai Basil Chicken? Spicy Thai Basil Chicken, or Pad Krapow Gai, comes from Thailand. It is a popular street food. Thai basil gives it a unique flavor. The dish is quick and easy to make, making it a favorite for many. Can I use dried basil instead of fresh? You can use dried basil, but fresh is best. Fresh Thai basil has a strong taste. Dried basil may lack the same depth. If you use dried, add less because it is more potent. How can I make it milder or spicier? To make it milder, use fewer chilies. You can also remove the seeds from the chilies. For more heat, add extra bird's eye chilies. Taste as you go to find your right balance. What sides pair well with Spicy Thai Basil Chicken? This dish goes well with jasmine rice. You can also serve it with a side salad. Stir-fried vegetables are a great choice too. They add color and crunch to your meal. Can I make this dish ahead of time? Yes, you can prepare it ahead. Cook the chicken and store it in the fridge. Reheat it before serving. The flavors will meld and taste great. How to properly stir-fry? To stir-fry, heat your pan until it is very hot. Add oil, then your ingredients quickly. Keep the food moving to cook evenly. This prevents burning and ensures a nice texture. What equipment do I need for this recipe? You need a large skillet or wok. A spatula is great for stirring. A cutting board and knife will help with prep. Having everything ready makes cooking easier. For more detailed cooking instructions, refer to the Full Recipe. This article covered how to make Spicy Thai Basil Chicken. You learned about the key ingredients and step-by-step cooking instructions. We shared tips for authentic flavor and fun variations. You can store this dish safely for later use. Cooking this meal can be a joyful experience. I hope you try it and enjoy every bite!

Spicy Thai Basil Chicken Flavorful and Easy Recipe

Are you ready to spice things up in the kitchen? Spicy Thai Basil Chicken is a simple, flavorful dish that

- 2 cans of refrigerated cinnamon rolls (with icing included) - 4 large eggs - 1 cup milk - 1 teaspoon vanilla extract - 1 teaspoon ground cinnamon - 1/2 cup brown sugar - 1/2 cup chopped pecans or walnuts (optional) - Powdered sugar for dusting (optional) When you gather your ingredients, make sure they are fresh. For the cinnamon rolls, I love using the ones with icing included. They add a sweet touch. The eggs give the casserole a nice, fluffy texture. Milk makes it creamy, while vanilla and cinnamon provide warm, lovely flavors. Brown sugar adds depth and sweetness. If you enjoy nuts, sprinkle in some chopped pecans or walnuts for a crunchy bite. Finally, a dusting of powdered sugar brings a nice finish to your dish. - 9x13 inch baking dish - Mixing bowls - Whisk and knife - Measuring cups and spoons Having the right tools makes cooking easier. A 9x13 inch baking dish is perfect for this casserole. You will need mixing bowls to blend your ingredients well. A whisk helps you mix the eggs and milk smoothly. A knife cuts the cinnamon rolls easily. Measuring cups and spoons ensure your ingredients are just right. These tools help you create a delicious breakfast everyone will love. - Preheat the oven to 350°F (175°C). - Grease a 9x13 inch baking dish. - Open the cans of cinnamon rolls. - Cut each cinnamon roll into quarters. - Place the cinnamon roll pieces in the greased baking dish. - In a large bowl, whisk together the eggs, milk, vanilla, cinnamon, and brown sugar. - Pour the egg mixture over the cinnamon rolls. Make sure all pieces are soaked. - If you like, sprinkle the chopped pecans or walnuts on top. - Bake for about 25-30 minutes. The edges should turn golden brown. - Once baked, let it cool slightly. Drizzle the icing over the top. - For a sweet touch, dust with powdered sugar before serving. Follow these steps for a warm and tasty Cinnamon Roll Casserole. For the complete recipe, check out the Full Recipe section. To make sure your cinnamon roll casserole bakes evenly, always preheat your oven. This step gives you a fluffy texture. Greasing the pan well helps too. For a better rise, let the casserole rest for a few minutes before baking. If you have a convection oven, reduce the baking time by about 5 minutes. Convection ovens cook faster. Always check for a golden color around the edges. If using a toaster oven, keep an eye on it. Small ovens can heat unevenly, so adjust as needed. Garnishing your casserole can elevate the dish. A light dusting of powdered sugar adds sweetness. You can drizzle extra icing on top for a rich flavor. Alternatively, serve with fresh fruits, like berries or sliced bananas. They add color and freshness. Whipped cream is another great choice. It balances the sweetness and makes the dish feel special. For added crunch, consider topping with toasted nuts. They pair well with the cinnamon flavor. {{image_2}} You can change up your cinnamon roll casserole by using different flavored rolls. Try pumpkin spice rolls for a fall twist. They add a warm, inviting flavor. Other flavors, like apple or caramel, also work well. Instead of nuts, you can use different toppings. Try chocolate chips for sweetness. You can also add fresh fruit, like berries or bananas. These additions can brighten up the dish. If you need gluten-free options, look for gluten-free cinnamon rolls. Many brands offer tasty choices that fit your needs. You can follow the same recipe steps with these rolls. For those who want dairy-free alternatives, use almond milk or coconut milk. You can swap eggs with flax eggs or applesauce. These changes keep your dish delicious while meeting dietary needs. For the full recipe, check the main article! To keep your cinnamon roll casserole fresh, store it in the fridge. Place it in an airtight container. This helps keep moisture in and flavors intact. You can also cover the dish with plastic wrap or foil. Make sure it cools down before putting it in the fridge. For freezing, wrap the casserole tightly in plastic wrap, then in foil. This keeps it safe from freezer burn. Thaw it in the fridge overnight before reheating. Your cinnamon roll casserole stays good in the fridge for about 3 to 4 days. If you freeze it, the casserole lasts for about 2 to 3 months. Remember to check for signs of spoilage before eating. If it looks or smells off, throw it away. Enjoy your leftovers safely! How do I know when the Cinnamon Roll Casserole is done? Check the casserole after 25 minutes. It should puff up and the edges turn golden brown. A toothpick inserted in the center should come out clean. If it still looks wet, bake for a few more minutes. Can I make this casserole ahead of time? Yes! You can prepare it the night before. Just assemble the casserole and cover it well. In the morning, bake it right from the fridge. This makes breakfast easy and quick! What are some customization ideas for this recipe? You can switch the nuts for chocolate chips or raisins. Try adding fresh fruits like apples or berries. Different flavors of cinnamon rolls, like caramel or pumpkin spice, work well too. The options are endless! What to do if the casserole is too dry? If your casserole is dry, it might need more liquid. Try adding a splash of milk to the egg mixture next time. You can also serve it with syrup or whipped cream for added moisture. How to fix burnt edges? If the edges burn, cover the casserole with foil during baking. This helps keep the middle soft while the edges cook evenly. Next time, check it a few minutes early to avoid burning. This blog post provided a simple, fun way to make a Cinnamon Roll Casserole. We covered the needed ingredients and helpful kitchen tools. You learned step-by-step instructions for preparation, baking, and serving. I shared tips and variations to make it your own and discussed storage options. Enjoy crafting this dish for any occasion. It's a delightful treat with endless possibilities. Dive in and make it your way!

Cinnamon Roll Casserole Delightful Breakfast Recipe

Are you ready for a breakfast that feels like a sweet hug? This Cinnamon Roll Casserole is a game-changer! It

To make the best lemon blueberry overnight oats, you need a few key ingredients. These will give your oats a zesty kick and a burst of flavor. Here’s what you’ll need: - 1 cup rolled oats - 1 ½ cups almond milk (or any milk of choice) - 1 tablespoon chia seeds - 1 tablespoon maple syrup (or honey) - Zest of 1 lemon - ¼ teaspoon vanilla extract - 1 cup fresh blueberries - Pinch of salt These ingredients work together to create a creamy and tasty dish. The oats soak up the almond milk and flavors overnight. The chia seeds add a nice texture and help thicken the mixture. While the base recipe is great, you can make it even better with some toppings. Here are some tasty options: - Sliced bananas - Nuts, like almonds or walnuts - Seeds, such as pumpkin or sunflower - More fresh blueberries Feel free to mix and match to find your favorite combo. These toppings add crunch and extra nutrients. They also make your oats look beautiful and colorful. Now, let’s talk about why this dish is a smart choice. Each serving of these lemon blueberry overnight oats is packed with nutrients. Here’s a quick breakdown: - Calories: About 300-350 per serving - Protein: Around 10 grams - Fiber: Approximately 8 grams - Healthy fats: Provided by chia seeds and nuts This dish is great for breakfast or a snack. It keeps you full and gives you energy. Plus, it’s easy to prepare and can be stored in the fridge. For the full recipe, check out the details above! Start by gathering your ingredients. You will need rolled oats, chia seeds, and a pinch of salt. In a medium bowl, combine 1 cup of rolled oats, 1 tablespoon of chia seeds, and a pinch of salt. This mix forms the base of your overnight oats. In another bowl, whisk together your wet ingredients. You’ll need 1 ½ cups of almond milk, 1 tablespoon of maple syrup, the zest of 1 lemon, and ¼ teaspoon of vanilla extract. Blend these until they mix well. Pour this mixture over your dry ingredients. Stir until all the oats are coated and happy. Gently fold in 1 cup of fresh blueberries, saving a few for later. Now it’s time to store your oats. Divide the mixture into two or three mason jars or airtight containers. Seal them tight and place them in the fridge. Let them chill overnight, or for at least four hours. This soaking time helps the oats absorb the liquid. In the morning, give the oats a stir. Add a splash of almond milk if you want a creamier texture. Top with extra blueberries, sliced bananas, or nuts for some crunch. Enjoy the fresh flavors of your lemon blueberry overnight oats! You can find the full recipe above for more details. To get the best texture in your Lemon Blueberry Overnight Oats, focus on the oats. Use rolled oats, not quick oats. Rolled oats soak up the liquid well and stay chewy. The chia seeds help make the oats creamy. After mixing, let them sit in the fridge overnight. This allows the oats to absorb the milk fully. In the morning, stir the mixture well. If it’s too thick, add a little more milk to reach your desired creaminess. Sweetness is key to enjoying your oats. I recommend starting with one tablespoon of maple syrup. If you like it sweeter, add more syrup or honey. You can also try mashed banana for natural sweetness. Taste your mix before it chills. This way, you can adjust it to your liking. Remember, the blueberries add their own sweetness too, so keep that in mind. For best results, use mason jars or airtight containers. These keep your oats fresh and tasty. Glass jars work great for easy cleaning and reuse. If you’re on the go, choose containers with tight lids. This helps prevent spills in your bag. Store them in the fridge for up to three days. Just grab and go in the morning! For the full recipe, check out the details above. {{image_2}} You can easily change the fruit in your overnight oats. Swap blueberries for strawberries or raspberries. Peaches or mangoes add a sweet twist. Each fruit gives a new flavor and color. Try mixing fruits for a fruity surprise. For example, lemon and raspberry together are fantastic. If you want to avoid dairy, use plant milk. Almond milk works well, but you can try oat or coconut milk too. Each milk type adds a unique taste. If you want creaminess, go for oat milk. It makes your oats rich and smooth. You can add fun flavors beyond lemon and blueberry. Try adding a dash of cinnamon or nutmeg for warmth. A spoon of cocoa powder can turn them into a chocolate delight. If you want a tropical vibe, add coconut flakes. Mix and match flavors to find your favorite. For the complete recipe, check out the Full Recipe section. To keep your lemon blueberry overnight oats fresh, always store them in airtight containers. I prefer mason jars because they seal well and look nice. Make sure to chill them in the fridge right after prepping. This way, the oats soak up all the flavors. You can enjoy your overnight oats for up to five days in the fridge. I recommend eating them within three days for the best taste. If you notice any changes in smell or texture, it’s best to toss them out. Always trust your senses. Freezing overnight oats is a great idea for meal prep. You can freeze them for up to three months. Just make sure to leave some space in the container for expansion. When you're ready to eat, move them to the fridge the night before. They will thaw and be ready by morning. You can also warm them up in the microwave if you prefer them warm. For the full recipe, check out the details above! Serve these oats cold for a refreshing breakfast. You can eat them straight from the jar. Add fresh blueberries on top for color and taste. A sprinkle of nuts or seeds gives a nice crunch. You can also add sliced bananas for extra sweetness. Yes, you can easily make these oats vegan. Use almond milk or any plant-based milk. Replace honey with maple syrup to keep it vegan. All the other ingredients are already plant-based. This way, everyone can enjoy this tasty meal. To keep your oats from getting too soggy, use the right oats. Rolled oats absorb liquid slowly, so they work best. You can also adjust the milk amount. If you want thicker oats, use less milk. Make sure to seal your jars tightly, too. These oats last about three to five days in the fridge. Store them in airtight containers. This keeps them fresh and tasty. Just remember to check for any changes in smell or color before eating. Yes, you can eat the oats warm if you prefer. Just microwave them for 30 to 60 seconds. Stir well before eating to warm them evenly. You may want to add a splash of milk if they seem too thick. You can add many fruits, like strawberries, raspberries, or peaches. These fruits pair well with the lemon and blueberry flavors. Just chop them up and mix them in before refrigerating. Try different fruits to find your favorite combo. To make your oats more filling, add a tablespoon of nut butter. Almond or peanut butter adds protein and creaminess. You can also add more chia seeds for extra fiber. These additions help keep you full longer. Yes, frozen blueberries work well in this recipe. They are great when fresh berries are not in season. Just add them straight from the freezer. They will thaw overnight and still taste delicious. Lemon blueberry overnight oats are easy and fun to make. You learned about essential ingredients, prep steps, and ways to enhance flavors. Remember to experiment with toppings and storage tips for the best taste and texture. This dish is versatile, allowing for fruit swaps and different milks. Enjoy your tasty breakfast packed with nutrition. You can customize it to fit your needs, making mornings brighter and healthier!

Lemon Blueberry Overnight Oats Simple and Tasty Recipe

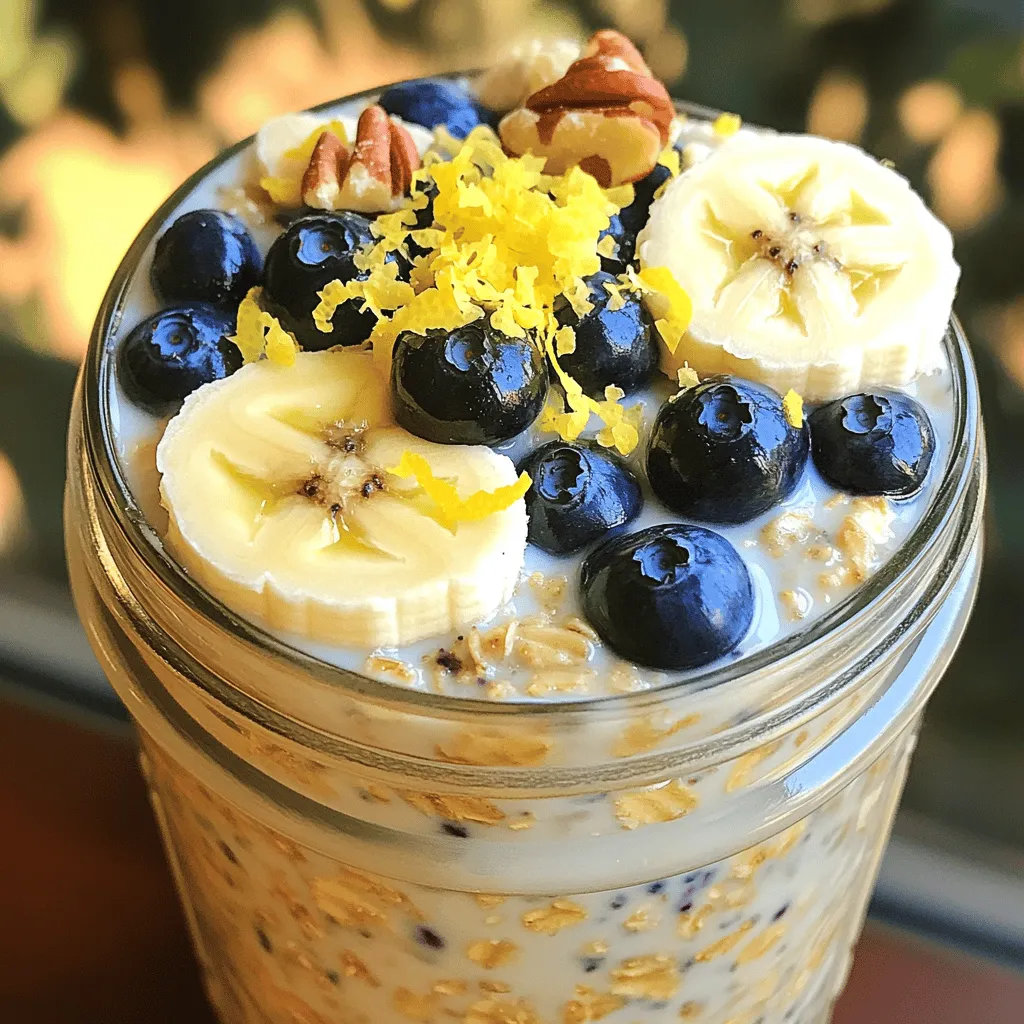
Start your day right with a burst of flavor! My Lemon Blueberry Overnight Oats mix tangy lemon and sweet blueberries

- 1.5 pounds baby potatoes, halved - 4 cloves garlic, minced - 3 tablespoons olive oil - 1 teaspoon dried thyme - 1 teaspoon dried rosemary - 1 teaspoon paprika - Salt and pepper to taste - Fresh parsley, chopped (for garnish) Garlic Herb Roasted Potatoes are simple yet tasty. The baby potatoes form the base of this dish. They cook up tender and creamy inside while being crispy outside. I love using baby potatoes because they cook quickly and require little prep. Next, garlic brings a bold flavor. Freshly minced garlic works best. It adds aroma and depth. Olive oil helps the potatoes crisp up nicely. It also helps the herbs and spices stick, ensuring each bite is packed with flavor. For the herbs and spices, I use dried thyme and rosemary. They give a warm, earthy note. Paprika adds a subtle smokiness. Adjust salt and pepper to your taste. Finally, I sprinkle fresh parsley on top. It adds color and a burst of freshness. These ingredients come together to create a delicious side dish. You can find the full recipe above to make your own Garlic Herb Roasted Potatoes! - Preheat the oven to 425°F (220°C). - In a large mixing bowl, combine the halved baby potatoes, minced garlic, olive oil, dried thyme, dried rosemary, paprika, salt, and pepper. - Toss to coat the potatoes well in the bowl. - Spread the seasoned potatoes in a single layer on a baking sheet lined with parchment paper. - Roast in the preheated oven for 25-30 minutes, flipping halfway through to ensure even cooking. - Once done, remove the baking sheet from the oven and let the potatoes cool slightly. - Transfer the roasted potatoes to a serving platter and sprinkle with freshly chopped parsley for a touch of color and freshness. For the full recipe, check the earlier section. Enjoy your Garlic Herb Roasted Potatoes! To achieve crispy potatoes, you must start with dry potatoes. After washing them, dry them well with a towel. This step helps them get crispy. Use enough oil to coat them well, but not too much. When you toss the potatoes in the bowl, make sure they are evenly coated. This step ensures every bite is full of flavor. When roasting, the size of your potatoes matters. If you use larger potatoes, cut them into smaller pieces. This change helps them cook faster. For smaller potatoes, like baby potatoes, you can roast them whole. Always check for doneness by poking them with a fork. They should feel soft inside and crisp outside. Choosing the right oil is key for roasting. Olive oil works well because it adds rich flavor. You can also use avocado oil for a higher smoke point. Avoid oils with strong flavors that might overpower the dish. The right oil enhances the garlic and herbs, making your Garlic Herb Roasted Potatoes shine. For the full recipe, refer back to the main section. {{image_2}} You can make Garlic Herb Roasted Potatoes even better. Adding cheese gives a creamy taste. Try using parmesan for a salty kick. A squeeze of lemon adds brightness. The fresh taste balances the rich garlic. You can also mix in other herbs. Basil, oregano, or dill work well. Each herb brings its own flavor. This lets you personalize your dish. Feel free to experiment with what you have. You can easily make this dish vegan. Replace olive oil with avocado oil. This keeps it plant-based and delicious. You can also skip the cheese if you add lemon. For gluten-free needs, this recipe is perfect. All the ingredients are gluten-free. You can enjoy them with no worries. Want a quicker option? Use an air fryer. Cook the potatoes at 400°F for about 15-20 minutes. This gives you crispy potatoes in less time. Shake the basket halfway to cook them evenly. You can also cook them on the stovetop. Heat a pan with oil and add the potatoes. Cook them on medium heat for about 20-25 minutes. Stir often for even browning. For the full recipe, check out the detailed instructions above. To store leftovers in the fridge, let the potatoes cool first. Place them in an airtight container. They can stay fresh for up to three days. Make sure to separate any garnishes like parsley to keep them fresh. When you want to eat them, just take out what you need. Freezing roasted potatoes is easy. Start by cooling them completely. Then, spread them out on a baking sheet. Freeze them for about an hour. After that, transfer the frozen potatoes to a freezer bag. They can last for up to three months in the freezer. When you’re ready to use them, you can simply thaw them overnight in the fridge. For the best taste, reheat the potatoes in the oven. Preheat it to 375°F (190°C). Spread the potatoes on a baking sheet and heat for about 10-15 minutes. This method keeps them crispy. You can also use a microwave, but they may not be as crispy. If you choose the microwave, heat them for 1-2 minutes. Enjoy your Garlic Herb Roasted Potatoes with your favorite dish. For the full recipe, check out the detailed instructions earlier. Can I use other types of potatoes? Yes, you can use other types of potatoes. While baby potatoes are great, you can try red or Yukon Gold potatoes. They will give a different taste and texture. Just cut them into even pieces so they cook well. How do I make them more flavorful? To boost flavor, add more herbs like oregano or basil. You can also mix in some lemon juice or zest for brightness. A dash of red pepper flakes can add a nice kick too. Experiment with your favorite flavors! Are Garlic Herb Roasted Potatoes healthy? Garlic Herb Roasted Potatoes are quite healthy. They are low in calories and high in fiber. Potatoes are also a good source of vitamins like C and B6. Using olive oil adds healthy fats, making this dish a balanced choice. How many servings does this recipe yield? This recipe yields about four servings. It’s perfect for a family meal or a small gathering. If you need more, simply double the recipe. You can also save leftovers for later! This blog post outlined a simple and tasty recipe for Garlic Herb Roasted Potatoes. We covered the main ingredients, important steps, and cooking tips for perfect results. I provided ideas for variations and ways to store leftovers. Remember, crispness is key to this dish, so coat the potatoes well and roast at the right temperature. You can easily personalize it with different flavors and herbs. With this guide, you can enjoy this dish anytime, satisfying both taste and nutrition.

Garlic Herb Roasted Potatoes Flavorful and Simple Dish

Are you ready to elevate your meal with a simple yet delicious side dish? Garlic Herb Roasted Potatoes are packed

- 1 cup quinoa, rinsed and drained - 2 cups vegetable broth (or water) - 1 tablespoon olive oil - 1 small onion, finely chopped - 1 red bell pepper, diced - 1 cup spinach, chopped - 2 cloves garlic, minced - 1 teaspoon smoked paprika - 1/2 teaspoon cumin - Salt and black pepper, to taste - 2 large eggs - Fresh parsley, chopped (for garnish) Let's talk about what makes this dish so tasty. First, quinoa is a grain that is full of protein. It cooks up fluffy and has a nice nutty taste. Using vegetable broth gives it a rich flavor, too. Next, we have the veggies. Onions and red bell peppers add sweetness and crunch. They mix well with spinach, which wilts down and adds color. The garlic brings a strong aroma, making your kitchen smell wonderful. Now, the spices. Smoked paprika gives a warm, smoky flavor. Cumin adds a bit of earthiness. A pinch of salt and black pepper brightens everything up. If you want to make it even heartier, you can add eggs. They cook right in the quinoa. The yolk makes a creamy sauce when you break it. Don't forget the parsley! It adds freshness and a pop of green. For the full recipe, check out the Full Recipe section. To start, you need to boil quinoa in vegetable broth or water. Measure 1 cup of rinsed quinoa and add it to a medium saucepan with 2 cups of vegetable broth or water. Bring it to a boil over high heat. Once it boils, reduce the heat to low. Cover it and let it simmer for about 15 minutes. The liquid will absorb fully when it's done. After that, remove it from heat and let it sit for 5 minutes. Fluff it with a fork to get that perfect texture. Next, let's sauté some vegetables. Heat 1 tablespoon of olive oil in a large skillet over medium heat. Add 1 small chopped onion and 1 diced red bell pepper. Cook them for about 5 minutes until they soften. Then, add 2 minced garlic cloves and 1 cup of chopped spinach. Stir well. Cook until the spinach wilts down, about 2-3 minutes. Now, it’s time to mix everything together. Add the cooked quinoa to the skillet with the sautéed vegetables. Stir well to combine. This is also the moment to add flavor. Sprinkle in 1 teaspoon of smoked paprika, 1/2 teaspoon of cumin, salt, and black pepper to taste. Mix everything until heated through. Taste it and adjust the seasoning if needed. If you want eggs, create two small wells in the quinoa mixture. Crack 2 large eggs into each well. Cover the skillet and reduce the heat to low. Cook for about 3-4 minutes until the egg whites are set, but the yolks are still runny. Serve your savory breakfast quinoa warm, garnished with fresh parsley for a nice touch. For the full recipe, you can check the details above. To make great quinoa, start by rinsing it. Rinsing removes bitter flavors. Place quinoa in a fine-mesh strainer. Run cold water over it for a couple of minutes. This step is key for good taste. For fluffy quinoa, use the right water ratio. A 1:2 ratio of quinoa to broth works best. Bring the water to a boil first. Once boiling, reduce the heat to low. Cover and let it simmer for about 15 minutes. After cooking, let it sit for 5 more minutes. Fluff it gently with a fork to separate the grains. To enhance flavor, try different herbs and spices. Fresh herbs like basil or thyme add brightness. Dried spices like oregano or chili powder can bring warmth. Experiment with your favorites! You can also add other ingredients for more taste. Feta cheese brings saltiness, while avocado adds creaminess. Sliced olives give a briny touch. Each option can change the dish in exciting ways. Garnishing is a simple way to make your dish look pretty. Chopped parsley adds a fresh green touch. Spread it on top right before serving. For a balanced meal, serve it alongside fresh fruit or a light salad. This adds color and nutrition. Enjoy your savory breakfast quinoa in a bowl or on a plate for a lovely presentation. For the full recipe, check out the details above. {{image_2}} You can add cooked chicken or tofu to your savory breakfast quinoa. Both options pack a protein punch. Just toss in diced chicken or cubed tofu while mixing in the quinoa. If you want to use beans, black beans or chickpeas work well. They not only boost protein but also add fiber to your meal. For a plant-based option, try adding more vegetables. Zucchini, mushrooms, or tomatoes can enhance the dish. You can also swap quinoa for other grains or seeds. Farro or millet can give you a different texture and flavor. If you enjoy spice, try adding chili flakes or sliced jalapeños. These can give your dish a nice kick. For those who prefer milder food, reduce the spices. Adjust the seasoning to suit your taste. This way, everyone can enjoy the meal. To store leftovers, let the savory breakfast quinoa cool. Place it in an airtight container. You can keep it in the fridge for about 3 to 5 days. This helps maintain its fresh taste and texture. I recommend using glass containers. They are great for keeping food safe and are easy to clean. You can freeze savory breakfast quinoa for longer storage. First, let it cool completely. Then, portion it into freezer bags or containers. Make sure to remove as much air as possible. This helps prevent freezer burn. You can freeze it for up to 3 months. When ready to eat, just thaw it in the fridge overnight. You have two great options for reheating: microwave or stove. For the microwave, place your quinoa in a bowl with a splash of water. Cover it with a damp paper towel. Heat it for 1 to 2 minutes, stirring halfway through. On the stove, heat it in a pan over medium-low heat, adding a splash of broth or water. Stir until hot. To keep the texture and flavor, avoid overheating. This way, your savory breakfast quinoa stays tasty and enjoyable. Yes, you can make savory breakfast quinoa ahead of time. It's great for meal prep. Cook the quinoa and veggies, then let them cool. Store them in an airtight container. You can keep it in the fridge for up to four days. When you're ready to eat, just reheat it in the microwave or on the stove. If you want, you can add the eggs fresh. This keeps them from overcooking. Yes, quinoa is gluten-free. It is a seed, not a grain. This makes it a safe choice for people with celiac disease or gluten sensitivity. Quinoa packs a great protein punch, making it a smart swap for grains. Always check labels if you buy pre-packaged quinoa. Some brands may process it in facilities that handle gluten. Cooked quinoa lasts about three to five days in the fridge. Store it in a sealed container to keep it fresh. Over time, it may lose its texture and flavor. To check if it's still good, look for any off smells or changes in color. If it looks dry, you can add a little water when reheating. This will help restore its fluffiness. This blog post covered a delicious savory breakfast quinoa recipe. We discussed key ingredients like quinoa, veggies, and spices. I shared step-by-step cooking instructions to help you succeed. There were tips for perfect quinoa and ideas for variations. Remember, you can customize this dish to suit your taste. Whether adding proteins or adjusting spice levels, the possibilities are endless. Enjoy your healthy, tasty meal, and don’t hesitate to experiment!

Savory Breakfast Quinoa Flavorful and Nutritious Meal

Start your day on a flavorful note with my savory breakfast quinoa. This nutritious meal proves you don’t need eggs

- 12 ounces of spaghetti or your preferred pasta - 2 ripe avocados, pitted and scooped - 3 cloves of garlic, minced - 1 small lemon, juiced - 1/4 cup olive oil - 1/4 cup freshly grated Parmesan cheese (optional) - Salt and pepper to taste - 1/4 teaspoon red pepper flakes (optional, for heat) - Fresh basil leaves, for garnish - Cherry tomatoes, halved, for added freshness (optional) You need 12 ounces of pasta. This is about three-quarters of a standard box. Use any pasta you like, but spaghetti works great! For the sauce, you need two ripe avocados. The avocados should feel soft but not mushy. You also need three cloves of garlic and the juice from one lemon for flavor. Add 1/4 cup of olive oil to help blend everything together. If you want a cheesy taste, add 1/4 cup of Parmesan cheese. Finally, season with salt, pepper, and red pepper flakes to fit your taste. When choosing avocados, look for ones that feel soft when you press gently. If they are hard, they are not ripe yet. You can also check the color. Dark green or black skin usually means they are ripe. If you find one that is too soft or has dark spots, it may be overripe. Buy a few so you can pick the best ones for your creamy avocado pasta. First, boil water in a large pot. Add salt to the water. This step helps flavor the pasta. Cook 12 ounces of your choice of pasta according to the package. You want it al dente, which means it should be firm but not hard. Once cooked, drain the pasta. Remember to save about 1 cup of pasta water. This water will help mix the sauce later. While the pasta cooks, it's time to make the sauce. In a blender or food processor, add the following ingredients: - 2 ripe avocados, pitted and scooped - 3 cloves of garlic, minced - Juice of 1 small lemon - 1/4 cup olive oil - 1/4 cup Parmesan cheese (optional) - Salt and pepper to taste - 1/4 teaspoon red pepper flakes (optional) Blend these until smooth and creamy. The sauce should be thick yet pourable. Taste it and adjust the salt and pepper if needed. This creamy avocado sauce is rich and full of flavor. Now, take the drained pasta and place it in a large mixing bowl or back in the pot. Pour the creamy avocado sauce over the pasta. Mix everything well. If the sauce is too thick, add some reserved pasta water little by little. Keep mixing until you get the right consistency. Finally, give it a taste and adjust the seasoning again if necessary. Your creamy avocado pasta is now ready to serve! For detailed measurements and tips, check out the Full Recipe. When making creamy avocado pasta, avoid using overripe avocados. They can make your dish mushy. Also, don’t skip the pasta water. It helps the sauce stick better. Be careful not to overblend your sauce. You want it creamy, not a smooth puree. Lastly, taste as you go. Adjust salt and pepper to suit your taste. You can boost the flavor of your avocado pasta easily. Add-ins like fresh herbs can make a big difference. Try using parsley, cilantro, or even mint. You might also add a splash of balsamic vinegar for depth. If you like spice, toss in red pepper flakes or chopped jalapeños. Cherry tomatoes add a nice pop of color and freshness. This recipe is flexible for many diets. If you want a vegan option, skip the cheese. Use nutritional yeast instead for a cheesy flavor. For gluten-free pasta lovers, choose a gluten-free pasta option. You can also add more vegetables for extra nutrients. Spinach, zucchini, or peas blend well with the dish. Check out the Full Recipe for more ideas on how to make this dish fit your needs! {{image_2}} You can easily make this dish vegan. Simply skip the Parmesan cheese or use a vegan alternative. The creamy avocado gives it a rich texture that feels indulgent. You won’t miss the cheese! Add nutritional yeast for a cheesy flavor without dairy. If you need a gluten-free meal, choose gluten-free pasta. Many brands offer great options that taste good. You can find rice or chickpea pasta in stores. They blend well with the creamy avocado sauce. Your dish will still be delicious and satisfying. Add seasonal vegetables for extra color and nutrition. Try cherry tomatoes, zucchini, or spinach. Sauté them lightly before mixing them into the pasta. This will enhance the dish’s flavor and give it a nice crunch. You can create a fresh and vibrant meal! Feel free to explore these variations to make the recipe your own. Check the Full Recipe for more details. After you enjoy your creamy avocado pasta, store leftovers in an airtight container. Keep it in the fridge. The dish stays fresh for about two days. If you wait too long, the avocado may brown. To slow this, press plastic wrap against the pasta before sealing the container. This method keeps air out. To reheat, warm the pasta in a pan over low heat. Add a splash of olive oil or a bit of reserved pasta water. This helps revive the creamy texture. Stir it gently to mix in the sauce. You can also use the microwave. Heat it in short bursts, stirring in between. This way, it heats evenly without drying out. Freezing creamy avocado pasta is tricky, but you can try it. First, make the pasta without the sauce. Cool it down completely, then store it in a freezer-safe bag. For the sauce, blend the avocado, garlic, lemon juice, and olive oil. Freeze that in a separate container. When you want to eat, thaw both in the fridge overnight. Cook the pasta and mix in the sauce. This keeps the flavor and texture better. Yes, you can prepare creamy avocado pasta ahead of time. Cook the pasta and make the sauce. Keep them separate until you are ready to serve. If you mix them too early, the avocado can brown. Store the sauce in an airtight container in the fridge. It stays fresh for one or two days. To keep the sauce fresh, add more lemon juice. The acidity helps slow down browning. Store the sauce in an airtight container. Press plastic wrap against the sauce before sealing to limit air exposure. Use it within two days for the best taste. You can use spaghetti or any pasta you like. I recommend whole wheat or gluten-free options. They add different textures and flavors. Just ensure you cook the pasta al dente. This keeps it firm and helps it hold the creamy sauce well. For the full recipe, check the details above! In this blog post, we explored how to make creamy avocado pasta. We covered the ingredients, step-by-step cooking instructions, and tips to avoid mistakes. You learned how to customize your dish with variations and how to store leftovers properly. Try this simple yet tasty recipe that packs flavor and nutrition. Enjoy the creamy goodness anytime, and feel free to experiment with new ingredients and flavors! Your pasta nights will never be the same.

Creamy Avocado Pasta Simple and Flavorful Dish

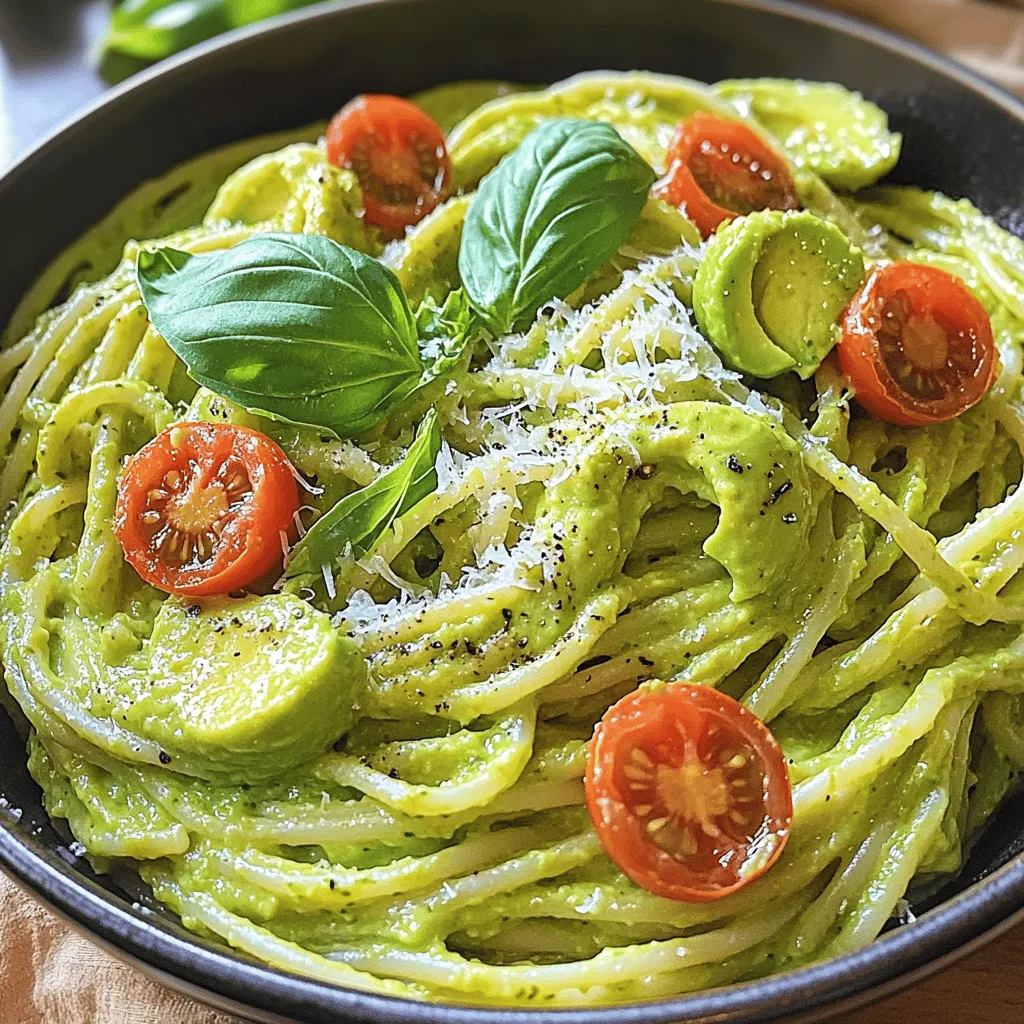
If you’re craving a quick and tasty meal, creamy avocado pasta is for you. This dish is not just simple;

To make homemade pizza dough, gather these key ingredients: - 2 ¼ teaspoons active dry yeast (1 packet) - 1 ½ cups warm water (110°F or 45°C) - 3 ½ to 4 cups all-purpose flour - 2 teaspoons sugar - 2 teaspoons salt - 2 tablespoons olive oil Measuring ingredients correctly is key. Use a dry measuring cup for flour. - For warm water, check the temperature with a thermometer. - Yeast should be fresh for the best rise. - Use a kitchen scale for precise measurements if you have one. You can add some extra taste to your dough with these options: - 1 teaspoon garlic powder - 1 teaspoon dried oregano These spices bring a nice kick to your crust. Feel free to experiment with other herbs too! For the full recipe, check out the detailed section. First, you need to wake up the yeast. Take a small bowl and pour in the warm water. Make sure it’s around 110°F (45°C). Add the sugar to the water. Then, sprinkle the yeast over the top. Let it sit for about 5 to 10 minutes. You will see bubbles forming. This means the yeast is active and ready to use. Next, grab a large mixing bowl. Add 3 ½ cups of all-purpose flour. Then, mix in the salt, garlic powder, and dried oregano if you like. Stir them well to combine. This mix gives your dough flavor and strength. Now, make a well in the center of your dry mix. Pour in the frothy yeast mixture and the olive oil. Use a wooden spoon to stir until the dough starts to come together. When it’s too hard to stir, transfer it onto a floured surface. Knead the dough for about 8 to 10 minutes. Don’t forget to add more flour if it sticks to your hands. You want a smooth and elastic dough. After kneading, place your dough in a lightly greased bowl. Cover it with a clean kitchen towel or plastic wrap. Let it rise in a warm spot for 1 to 2 hours. The dough should double in size. This step adds air and makes your crust light. Once the dough has risen, punch it down gently to release the air. Turn it out onto a floured surface. Divide the dough into 2 or 3 equal parts, depending on how big you want your pizzas. Roll each part into your desired thickness. Transfer the rolled dough onto a pizza peel or a baking sheet lined with parchment paper. Now, it’s ready for your favorite toppings! For the full recipe, check out the Homemade Pizza Dough section. To get the best pizza dough, you want a soft and smooth texture. Start with the right amount of flour. Too much will make the dough dry. Too little will make it sticky. Aim for about 3 ½ to 4 cups of flour. Add flour slowly while kneading until the dough no longer sticks to your hands. You can also check by pressing your finger into the dough. If it springs back, you're on the right track! Many people struggle with pizza dough. One common mistake is not letting the dough rise enough. It should double in size. If you skip this step, your crust will be flat and dense. Another mistake is using water that is too hot or too cold. The ideal temperature is around 110°F (45°C) for activating yeast. Lastly, don’t forget to add salt. It enhances flavor and controls yeast growth. Having the right tools makes a big difference. Use a large mixing bowl for combining ingredients. A wooden spoon helps mix the dough well. A clean surface is key for kneading. I recommend a pastry mat for easy cleanup. Don’t forget a rolling pin for shaping the dough. If you have a pizza peel, it makes transferring your pizza easy. Lastly, a good oven is essential for baking your pizza to perfection. For a complete recipe, check out the full recipe above. {{image_2}} To make whole wheat pizza dough, swap out some all-purpose flour. Use 50% whole wheat flour and 50% all-purpose flour. This mix gives your crust a nutty taste and boosts fiber. Follow the same steps in the Full Recipe. The dough may feel denser but still tastes great. Let it rise well to ensure a light crust. If you need a gluten-free option, use a gluten-free flour blend. Look for one that has xanthan gum. This helps mimic the elasticity of regular dough. Mix the gluten-free flour with the same amounts of yeast, water, salt, and olive oil from the Full Recipe. The dough may not rise as much, but it will still be delicious. Want to spice up your dough? Add flavor right into the mix. Try adding garlic powder, dried herbs, or even grated cheese. Mix in 1 teaspoon of garlic powder and 1 teaspoon of dried oregano with your dry ingredients. This gives your crust extra zest. You can also fold in fresh herbs after kneading for a fresh twist. To store unused pizza dough, wrap it tightly. Use plastic wrap or a resealable bag. Place it in the fridge for up to three days. This helps keep it fresh and ready for later use. When you are ready to use it, let it sit at room temperature for about 30 minutes. This makes it easier to roll out. You can freeze pizza dough for longer storage. First, wrap the dough tightly in plastic wrap. Then, place it in a freezer bag. Label the bag with the date. The dough can stay in the freezer for up to three months. When you're ready to use it, remove the dough from the freezer. Keep it in the fridge overnight to thaw. To thaw pizza dough properly, plan ahead. Move the dough from the freezer to the fridge the night before. This slow thawing keeps the texture nice. If you are in a hurry, you can let it sit at room temperature. This usually takes about 2 hours. Just make sure it warms up evenly before you roll it out. For the best results, let it rise a bit after thawing. You can store homemade pizza dough in the fridge for up to three days. Make sure to wrap it tightly in plastic wrap or place it in an airtight container. This keeps the dough fresh and prevents it from drying out. If you want to keep it longer, you can freeze it. Yes, you can make pizza dough ahead of time! Prepare the dough and let it rise. After that, you can either use it right away or store it in the fridge. If you store it, allow it to sit at room temperature for about 30 minutes before rolling it out. The best way to roll out pizza dough is on a floured surface. Start with a ball of dough and use a rolling pin. Roll from the center outwards. Keep turning the dough to maintain a round shape. If it sticks, add a little more flour, but not too much. You know the dough has risen enough when it doubles in size. After you let it rise, poke it gently with your finger. If the dough springs back slowly, it is ready. If it stays dented, let it rise for a bit longer. You learned about the key ingredients and steps for making perfect pizza dough. We covered the best tips and tricks to help you succeed. Variations like gluten-free options and flavored dough can add fun to your pizza nights. Remember to store unused dough properly so it stays fresh for later use. Now, you have all the tools to create tasty homemade pizza. Enjoy the process, and happy baking!

Homemade Pizza Dough Simple and Tasty Recipe Guide

Do you dream of creating the perfect pizza at home? You can start with my Homemade Pizza Dough Simple and
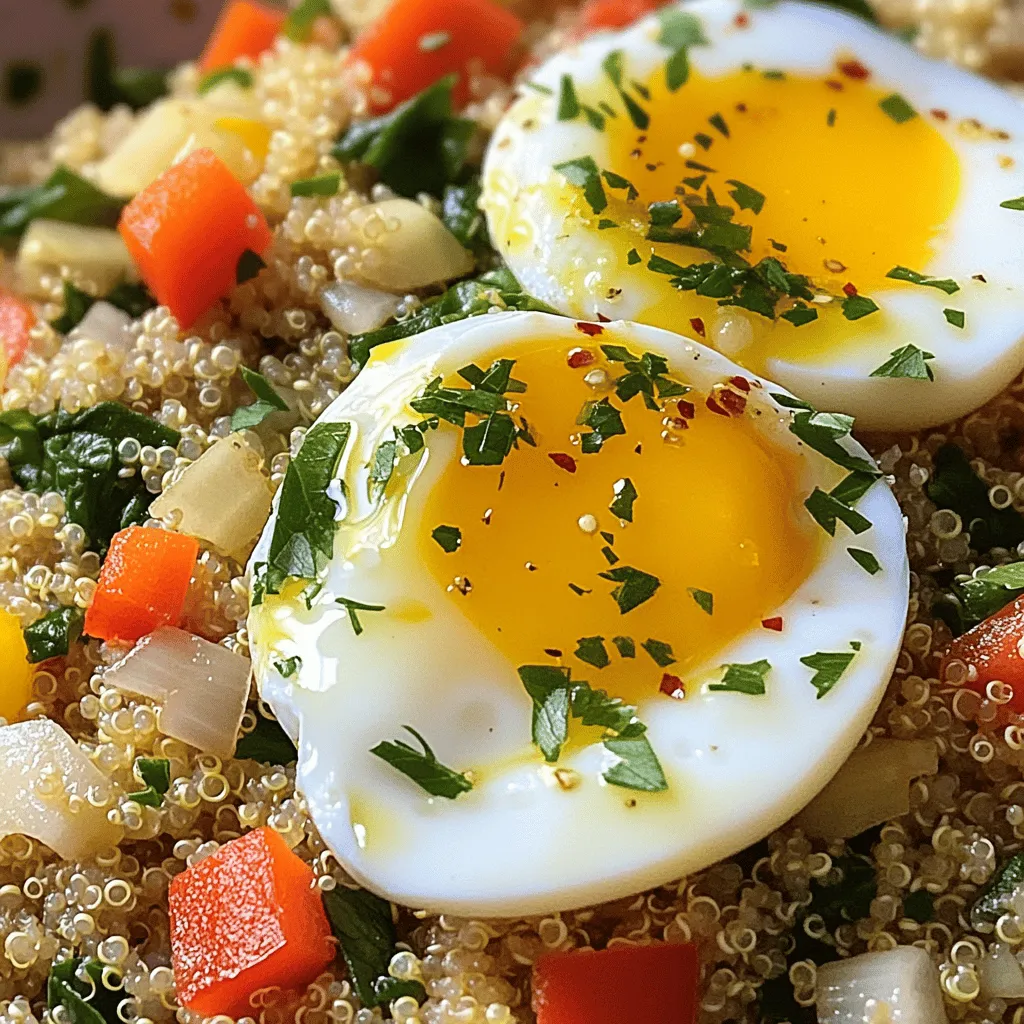
To make savory oatmeal with egg, you need a few key ingredients. Here’s what you’ll need: - 1 cup rolled oats - 2 cups vegetable broth (or water) - 1 tablespoon olive oil - 1 clove garlic, minced - 1 cup spinach, chopped - 1 medium tomato, diced - 1 teaspoon soy sauce or tamari - 1 teaspoon sesame oil - Salt and pepper to taste - 2 large eggs - Chopped green onions for garnish - Crumbled feta cheese (optional, for added creaminess) These ingredients create a delightful mix of flavors and textures. The rolled oats provide a hearty base, while the vegetable broth adds depth. Olive oil and garlic give it a rich flavor. Spinach and tomato add freshness. Soy sauce and sesame oil bring umami, making each bite exciting. You can easily adjust this list based on what you have at home. For instance, swap spinach for kale or add mushrooms for more earthiness. The beauty of savory oatmeal lies in its versatility. Feel free to get creative! For the complete cooking instructions, check out the Full Recipe. - Boiling the Broth Start by pouring the vegetable broth into a medium saucepan. Turn the heat up high. Wait for it to boil. Boiling broth adds rich flavor. You can also use water if you prefer. - Cooking the Oats Once the broth boils, add the rolled oats. Stir well to mix. Lower the heat to simmer. Let it cook for about five minutes. Stir occasionally to prevent sticking. The oats should be soft and creamy when done. - Sautéing Garlic In a separate skillet, heat the olive oil over medium heat. Add the minced garlic once the oil is hot. Sauté the garlic for about one minute. It should smell fragrant but not burn. - Adding Spinach and Tomato Next, toss in the chopped spinach and diced tomato. Cook for two to three minutes. You want the spinach to wilt and the tomato to soften. This mix adds freshness to your dish. - Mixing Oats with Vegetables After cooking the oats, remove them from heat. Stir in the spinach and tomato mixture. Make sure everything is mixed well. This step brings all the flavors together. - Cooking the Eggs In the same skillet, crack the eggs. Cook them sunny-side up or to your liking. This adds a nice touch to your savory oatmeal. When ready, place the eggs on top of the oatmeal in bowls. Make sure to check the [Full Recipe] for more details. Enjoy your hearty breakfast! Timing for Cooking Oats Cook rolled oats for about 5 minutes in boiling broth or water. Stir them often to keep them from sticking. This timing gives you creamy oats without being mushy. Ensuring Eggs are Cooked to Preference For sunny-side-up eggs, cook them in a skillet until the whites are set, but the yolks remain runny. If you prefer firmer yolks, cover the skillet for a minute or two. Adjust the cooking time to match your taste. Adding Spices and Herbs Boost the flavor by adding spices like cumin or paprika. Fresh herbs, such as basil or parsley, also add a bright note. Sprinkle them on top right before serving for extra freshness. Adjusting Texture with Feta Feta cheese adds a creamy texture to the dish. Crumble it over the top just before serving. Its salty flavor contrasts well with the oats and eggs, making each bite a delight. For the full recipe, check out Savory Oatmeal Delight with Egg . {{image_2}} You can swap oats for other grains to mix things up. Quinoa works great as a base. It brings a nutty taste and extra protein. Farro is another option, offering a chewy texture. Both grains cook well with the same broth. Feel free to add more veggies to boost flavor. Try bell peppers for sweetness or mushrooms for earthiness. Zucchini or kale are also good choices. They add color and nutrients without overpowering your dish. If you have an Instant Pot, you can quickly make this dish. Just combine oats, broth, and your veggies in the pot. Set it to cook on high pressure for about 3 minutes. Quick release the pressure, and you’re ready to serve. For a faster option, use the microwave. Combine rolled oats and broth in a bowl. Heat for 2 to 3 minutes, stirring halfway through. Then, add your sautéed veggies and follow the rest of the recipe. This method saves time without losing flavor. Explore these variations to create your perfect savory oatmeal. Each change brings new tastes and textures to enjoy! For the full recipe, check out the Savory Oatmeal Delight with Egg. To keep your savory oatmeal fresh, store it in an airtight container. Place it in the fridge if you plan to eat it within three days. Make sure to cool the oatmeal to room temperature before sealing it. This helps prevent moisture build-up and keeps flavors intact. If you want to store it longer, freezing is a great option. You can freeze portions in freezer-safe bags or containers. Label each container with the date. Frozen savory oatmeal can last for up to three months without losing its taste. When it's time to enjoy your leftover savory oatmeal, you can choose between the microwave or stovetop. Using the microwave is quick and easy. Transfer the oatmeal to a microwave-safe bowl. Add a splash of water or broth to keep it moist. Cover the bowl loosely to avoid splattering. Heat it in 30-second bursts, stirring in between, until warmed through. If you prefer stovetop reheating, place the oatmeal in a small saucepan. Add a little water or broth to help it heat evenly. Warm it over low heat, stirring often. This method takes a bit longer but can enhance the flavors by allowing them to meld together again. By following these tips, you can enjoy your savory oatmeal with egg even days later! For the full recipe, check out Savory Oatmeal Delight with Egg. You can easily make savory oatmeal your own. Here are some protein options: - Cooked chicken or turkey - Crumbled sausage - Tofu for a plant-based choice - Beans like chickpeas or black beans Adding these will make your meal heartier and more filling. You can also mix in different veggies. Try bell peppers, mushrooms, or zucchini. The choices are endless, so have fun with it! Yes, you can make this dish vegan! Here are some egg substitutes: - Silken tofu - Flaxseed meal mixed with water - Chia seeds mixed with water These alternatives work well in savory oatmeal. They add texture and help bind the dish. Just remember to adjust cooking times based on what you choose! Savory oatmeal with egg offers many health benefits. Here’s a look at its nutritional profile: - High in Fiber: Oats help keep you full and support digestion. - Protein-Rich: Eggs add protein, which is vital for muscle health. - Vitamins and Minerals: Spinach and tomatoes provide essential nutrients. - Healthy Fats: Olive oil and sesame oil give heart-healthy fats. This meal is a great way to start your day. It fuels your body with energy and nutrients. For the full recipe, visit the section earlier in the article. Savory oatmeal is a simple, tasty dish that offers many benefits. We covered key ingredients like oats, vegetables, and eggs, and I shared easy steps to prepare it. You can enhance flavors with spices and customize with your favorite veggies. Storing and reheating this dish is simple too. Overall, savory oatmeal is a versatile choice for any meal. I hope you feel inspired to try it today! Enjoy your healthy cooking.

Savory Oatmeal with Egg for a Hearty Breakfast Meal

Start your day with a bowl of savory oatmeal and egg for breakfast! This hearty meal is packed with flavor

Older posts
Newer posts
← Previous Page1 … Page38 Page39 Page40 … Page60 Next →

dsad

© 2025 Cooking Wells • Built with GeneratePress

Our Policies

  • Copyright Policy
  • Cookie Policy
  • GDPR Policy
  • Privacy Policy
  • Disclaimer
  • Terms Of Use

More Information

  • Home
  • About
  • Contact
  • Appetizers
  • Dessert
  • Dinner
  • Drinks
©2025, Cooking Wells About Back To Top