Skip to content
DisclaimerTerms Of UseGDPR PolicyCookie Policy

Cooking Wells

  • Home
  • Drinks
  • Appetizers
  • Dinner
  • Dessert
  • About
  • Contact
  • Privacy Policy
DisclaimerTerms Of UseGDPR PolicyCookie Policy

Mia

To make Creamy Roasted Garlic Potato Soup, you need a few tasty ingredients. Here’s what you'll gather: - Yukon gold potatoes - Garlic - Onion - Vegetable broth - Heavy cream (or coconut cream) - Olive oil - Thyme and rosemary - Seasoning: salt and pepper - Garnish: fresh chives These ingredients work together to create a rich and creamy soup. Yukon gold potatoes are perfect for their buttery flavor. Garlic brings a lovely depth, especially when roasted. Onion adds sweetness, while vegetable broth gives a savory base. You can use heavy cream for a rich texture, or coconut cream for a dairy-free twist. Olive oil helps to sauté the onion, enhancing the overall flavor. Fresh herbs like thyme and rosemary offer a fragrant touch. Don’t forget your seasoning! Salt and pepper balance all the flavors. Lastly, fresh chives make a bright garnish. For the full recipe, check the recipe card. Happy cooking! 1. Preheat your oven to 400°F (200°C). 2. Slice the top off the head of garlic to expose the cloves. Drizzle with olive oil and wrap it in aluminum foil. 3. Roast in the oven for about 30 to 40 minutes until soft and golden brown. 4. While the garlic roasts, chop the onion and peel and dice the Yukon gold potatoes. 1. In a large pot, heat 2 tablespoons of olive oil over medium heat. 2. Add the chopped onion and sauté until it turns translucent, about 5 to 7 minutes. 3. Next, add the diced potatoes, thyme, rosemary, and a generous pinch of salt and pepper. Stir to mix and let it cook for another 5 minutes. 4. Pour in the vegetable broth and bring it to a boil. Reduce the heat and let it simmer for about 20 minutes, until the potatoes are tender. 5. When the garlic is roasted, let it cool a bit. Squeeze the softened cloves out of their skins into the soup pot. 1. Use an immersion blender to blend the soup until it is smooth and creamy. If you don’t have one, carefully transfer the soup to a blender and blend in batches. 2. Stir in the heavy cream and adjust the seasoning with more salt and pepper if needed. Heat through for another 5 minutes, then remove from heat. 3. Serve hot, garnished with fresh chives and a drizzle of olive oil if you like. For the complete list of ingredients and detailed preparation, refer to the Full Recipe. To make your soup taste even better, use homemade broth. It adds great depth. Store-bought broth works, but homemade gives it a rich flavor. You can also adjust the creaminess. If you like it thicker, add more cream. For a lighter soup, use less cream. You can even try coconut cream for a dairy-free twist. For a smooth blend, use an immersion blender. This tool makes it easy to blend right in the pot. If you prefer a chunkier soup, blend only half of it. Leave the rest with potato pieces for texture. You can also mash some potatoes with a fork. This gives you both creaminess and chunks. {{image_2}} If you want a dairy-free version of the soup, use coconut cream instead of heavy cream. It gives a nice, rich flavor while keeping it light. Just swap a cup of heavy cream with a cup of coconut cream. This change makes the soup creamy without any dairy. You can make this soup even better by adding more ingredients. Here are some ideas: - Extra Vegetables: Try adding carrots, celery, or spinach. These add flavor and nutrients. - Protein Additions: If you want some protein, you can add cooked bacon for a smoky taste. If you prefer a plant-based option, chickpeas are a great choice. They add texture and protein, making the soup heartier. Feel free to mix and match these options to create your perfect bowl of creamy roasted garlic potato soup. For the full recipe, check out the detailed steps above! To keep your creamy roasted garlic potato soup fresh, store it in an airtight container. Place it in the refrigerator for up to five days. Make sure it cools to room temperature before sealing. If you want to keep it longer, you can freeze it. Pour the cooled soup into freezer-safe containers. Leave some space at the top for expansion. It can last in the freezer for up to three months. When it's time to enjoy the soup again, the best way to reheat it is on the stove. Pour the soup into a pot over medium heat. Stir it often to prevent sticking. Heat until warm, but do not boil. This keeps the soup creamy. If you prefer the microwave, place it in a microwave-safe bowl. Heat in short bursts, stirring in between. This also helps maintain texture and flavor. Can I make this soup ahead of time? Yes, you can make this soup ahead. Just store it in the fridge. Reheat on the stove before serving. This soup tastes even better the next day! How can I make this soup spicier? To spice things up, add red pepper flakes or diced jalapeños. You can also stir in hot sauce for a kick. Start small and taste as you go. What if I don't have fresh herbs? No fresh herbs? No problem! You can use dried herbs instead. Use about one-third of the amount. Dried thyme and rosemary work well in this soup. Is this recipe healthy? Yes, this recipe is healthy. It uses potatoes, garlic, and broth. These ingredients provide vitamins and minerals. You can make it even healthier with coconut cream. What are the calorie counts per serving? Each serving has about 300 calories. This can vary based on the cream you use. Check the labels on your ingredients for exact amounts. For the full recipe, check out the details above! This creamy roasted garlic potato soup offers rich flavors and easy steps. We used simple ingredients like Yukon gold potatoes, garlic, and herbs to create a warm dish. Remember, you can tweak recipes for a dairy-free or chunkier version. Store leftovers in the fridge or freezer for later. Enjoying a bowl brings comfort, and sharing it makes it even better. You now have all the tips to make this delicious soup your own. Try it out, and let your kitchen shine!

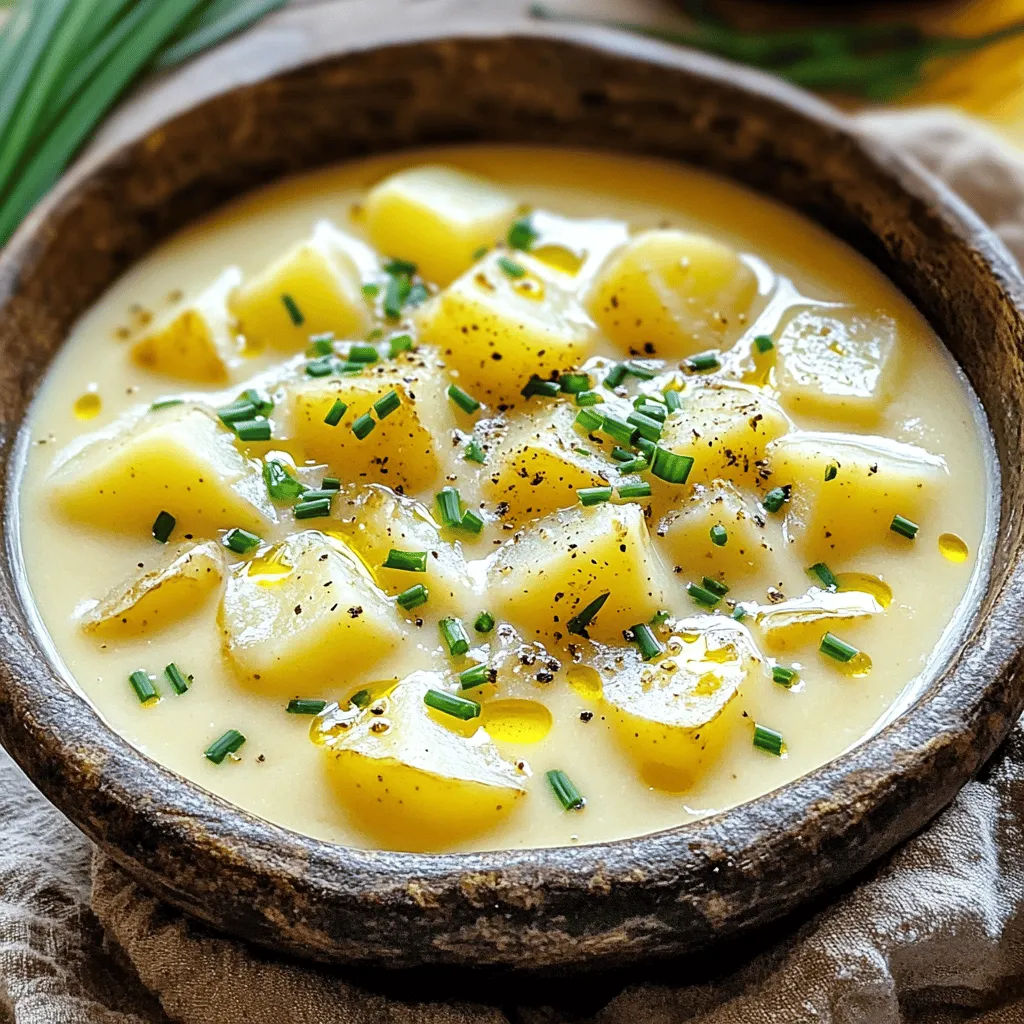
Creamy Roasted Garlic Potato Soup Flavorful and Easy

Welcome to a warm bowl of comfort! Today, I’ll guide you in making Creamy Roasted Garlic Potato Soup. With rich

For this Greek Chicken Sheet Pan Dinner, you will need these main ingredients: - 4 boneless, skinless chicken breasts - 1 cup cherry tomatoes, halved - 1 red bell pepper, sliced - 1 yellow bell pepper, sliced - 1 medium red onion, cut into wedges - 1 zucchini, sliced - 1 cup kalamata olives, pitted - 3 cloves garlic, minced - 2 tablespoons olive oil - 2 teaspoons dried oregano - 1 teaspoon paprika - Juice of 1 lemon - Salt and pepper, to taste - Fresh parsley, chopped (for garnish) These fresh ingredients bring wonderful flavors and colors to the dish. The chicken is lean, while the veggies add crunch and sweetness. The olives give a salty bite, making this dish truly special. You can add extra flavor with these optional ingredients: - Additional herbs like thyme or rosemary - Substitute vegetables such as asparagus or carrots - Alternate proteins like shrimp or tofu Feel free to mix and match to suit your taste. Adding different herbs can change the flavor profile completely. Using other veggies keeps it fun and fresh. For a protein swap, shrimp cooks quickly and adds a different twist. You can find the full details in the [Full Recipe]. Preheating the oven and preparing the baking sheet Start by preheating your oven to 400°F (200°C). This step ensures even cooking. While the oven heats, take a large rimmed baking sheet and line it with parchment paper. This makes cleanup a breeze. Marinating the chicken In a large bowl, mix olive oil, minced garlic, dried oregano, paprika, lemon juice, salt, and pepper. This mix creates a flavorful marinade. Add the chicken breasts and toss them well. Make sure every piece gets coated. Let them marinate for about 20 minutes while you prepare the veggies. Arranging the chicken and vegetables After marinating, place the chicken breasts in the center of the baking sheet. Surround them with cherry tomatoes, sliced bell peppers, onion, zucchini, and kalamata olives. Drizzle any leftover marinade over the veggies to enhance their taste. Add a pinch of salt and pepper if you want. Roasting times and tips for optimal results Roast the pan in your preheated oven for 25 to 30 minutes. Check if the chicken is cooked through and the veggies are tender and a bit charred. If you have a meat thermometer, the chicken should reach 165°F (74°C). Once cooked, let it rest for 5 minutes. This helps keep the chicken juicy. Before serving, sprinkle fresh parsley on top for color and flavor. For the full recipe, check the section above. For the best flavor, marinate your chicken well. I suggest using a mix of olive oil, garlic, oregano, paprika, lemon juice, salt, and pepper. Let the chicken sit in the marinade for about 20 minutes. This short wait lets the flavors seep in without making it mushy. To check for doneness, cut a piece of chicken in the thickest part. It should be white and juicy inside, with no pink. You can also use a meat thermometer. The safe temperature for chicken is 165°F (75°C). Trust me, this simple check helps ensure a tasty meal. Getting the right texture for your veggies is key. Cut them into even pieces to ensure they cook at the same rate. I love using cherry tomatoes, bell peppers, onions, zucchini, and olives for this dish. They add color and taste. Combine flavors by placing vegetables around the chicken on the sheet pan. Drizzle the remaining marinade on top of them. This way, all the veggies soak up those great flavors. Cook until they are tender and slightly charred. This brings out their natural sweetness and adds a nice crunch. For the full recipe, check the details above. {{image_2}} You can change the flavor of your Greek chicken sheet pan dinner easily. Herbs and spices can make a big difference. For example, instead of oregano, try thyme or rosemary. These herbs add a unique twist. You can also add a touch of cumin for warmth or chili flakes for heat. If you want to change the marinade, you have options too. Swap lemon juice for red wine vinegar for a tangy taste. You can also use yogurt to marinate the chicken. This will make it tender and add a creamy texture. Experiment with these changes to find a flavor profile you love! Using different proteins can create a fun new dish. Shrimp can be a great swap for chicken. Just reduce the cooking time to about 10-15 minutes. Tofu is another great option for a plant-based meal. Press it to remove water, and then marinate it just like the chicken. You can also explore other vegetable combinations. Try adding asparagus or broccoli for a crunchy texture. Sweet potatoes can add a sweet flavor, too. Mix and match to find what works best for you. These swaps will keep your meals exciting and fresh. Check out the Full Recipe to see all the options! To keep your Greek Chicken Sheet Pan Dinner fresh, store leftovers right away. Place the chicken and veggies in an airtight container. Make sure to cool them to room temperature first. This way, you avoid extra moisture that can make food soggy. Refrigerate the leftovers for up to three days. If you want to keep them longer, consider freezing. For freezing, pack the meal in freezer-safe bags. Be sure to remove as much air as possible. Label each bag with the date. You can freeze the dish for up to three months. This method helps keep the flavors intact. When it’s time to enjoy your leftovers, reheating is key. The best way to do this is in the oven. Preheat your oven to 350°F (175°C). Place the chicken and veggies on a baking sheet. Cover with aluminum foil to keep them moist. Heat for about 15-20 minutes. If you prefer the microwave, use a microwave-safe plate. Heat in short bursts of one minute, stirring in between. This ensures even heating. To revive the flavors, drizzle a little olive oil and a squeeze of lemon juice on top before serving. This simple step brings back that fresh taste! How long to marinate chicken? You should marinate the chicken for about 20 minutes. This gives the flavors time to soak in. If you have more time, you can marinate it for up to 2 hours. Just remember to keep it in the fridge. Can I make this recipe ahead of time? Yes, you can prepare the chicken and vegetables in advance. Simply marinate the chicken and chop the veggies a few hours before cooking. Store them in the fridge until you're ready to bake. This saves time and makes dinner easy. What sides pair well with Greek Chicken Sheet Pan Dinner? This dish goes well with several sides. Here are some ideas: - Rice or quinoa - Greek salad - Pita bread - Tzatziki sauce These sides add flavor and balance the meal. Can I serve this dish cold? You can serve Greek Chicken Sheet Pan Dinner cold. It tastes great as a salad topping or in a wrap. Just make sure to store leftovers in the fridge after cooking. Enjoy it in a new way for lunch! This blog post covered all you need to know for a tasty Greek chicken sheet pan dinner. We explored the main and optional ingredients, step-by-step prep and cooking directions, and essential tips for the best results. I shared ideas for variations and how to store and reheat leftovers, ensuring you enjoy every bite. Now, you can create meals with flavor and ease, impressing everyone at your table. Enjoy your cooking journey!

Greek Chicken Sheet Pan Dinner Flavorful and Easy Meal

If you crave a simple yet delicious meal, the Greek Chicken Sheet Pan Dinner is for you. With juicy chicken

- 1 ripe mango, peeled and diced - 1 cup fresh pineapple, peeled and diced - 1 banana, sliced - 1 cup coconut water - 1/2 cup Greek yogurt (optional for creaminess) - 1 tablespoon honey or agave syrup (optional, to taste) - A handful of ice cubes When you gather your ingredients, use ripe fruits. This ensures a sweet and tasty smoothie. A ripe mango feels soft when you gently press it. Pineapples should smell sweet at the base. Bananas add natural sweetness and creaminess. Coconut water gives a refreshing taste and keeps you hydrated. Greek yogurt adds creaminess and protein, but it’s optional. Honey or agave syrup can sweeten your drink if needed. Lastly, ice cubes make your smoothie extra cool and refreshing. A serving of this smoothie has about 200 calories. It contains about 3 grams of protein, 40 grams of carbs, and 1 gram of fat. You get vitamins A and C from mango and pineapple. Bananas add potassium, while coconut water brings in electrolytes. Greek yogurt provides calcium and probiotics. The health benefits of this smoothie are many. It hydrates, thanks to the coconut water. The fruits provide fiber, which helps digestion. Plus, the vitamins boost your immune system. Enjoy this smoothie as a tasty treat that is good for you. For the full recipe, check the Tropical Bliss Mango Pineapple Smoothie section. To make the Mango Pineapple Smoothie, start with fresh fruits. Dice a ripe mango and pineapple. Slice a banana and set these aside. - Blending Technique: Add the mango, pineapple, and banana to the blender. Pour in one cup of coconut water. You can add Greek yogurt for creaminess if you wish. If you like it sweet, add honey or agave syrup. Toss in a handful of ice cubes for a refreshing touch. - Recommended Blender Settings: Blend on high speed. Stop to scrape down the sides if needed. Blend until the mix is smooth and creamy. Taste it and adjust sweetness if necessary. A quick blend will make it perfect. Once your smoothie is ready, pour it into chilled glasses. This step keeps it cold and refreshing. - Garnish Ideas: You can garnish with a slice of fresh fruit or a sprinkle of shredded coconut. This adds a nice touch and makes it more appealing. - Pairing Ideas: This smoothie pairs well with light meals or snacks. Enjoy it with a healthy breakfast or as a midday treat. It also goes great with tropical-themed dishes, like fish tacos or a fresh salad. Try this recipe for a tasty and healthy treat that brightens your day! For the complete recipe, check out the Full Recipe section above. To get the best texture, you can adjust a few things. If you want a creamy smoothie, add Greek yogurt. It gives a rich taste. For a lighter texture, skip the yogurt. Use more coconut water instead. This will keep the drink refreshing. Ripe fruits play a big role too. Choose mangoes and pineapples that are soft and sweet. They blend well and enhance the flavor. Taste your smoothie after blending. If it needs more sweetness, add honey or agave syrup. Start with a small amount. Blend again and taste. For a different option, try maple syrup or dates. They also add unique flavors. Adjust until your smoothie is just right. This way, you control the sweetness to your liking. Enjoy your delicious drink! {{image_2}} You can add other fruits to your smoothie. Berries, like blueberries or strawberries, work well. You can also try peaches or kiwis for a fun twist. Mixing fruits lets you explore new tastes. For example, mango and banana create a creamy blend. Pineapple and berries add a zesty kick. Don't be afraid to experiment with your favorite fruits! If you want a dairy-free smoothie, use plant-based yogurt. Almond or coconut yogurt adds creaminess without dairy. You can also swap regular milk for almond or oat milk. These options make the smoothie vegan-friendly. They keep the flavor fresh while avoiding dairy. Enjoy your tasty Mango Pineapple Smoothie with these simple swaps! For the full recipe, check out the Tropical Bliss Mango Pineapple Smoothie. You can store leftover smoothie in the fridge. Use a glass or plastic container with a tight lid. This keeps the smoothie fresh. It will last for about one day. To help maintain its taste, drink it soon. If it separates, just shake or stir it before drinking. Freezing is a great way to save your smoothie. Pour it into ice cube trays or freezer bags. Make sure to leave space in the bags for expansion. When you want to enjoy it, thaw it in the fridge overnight. You can also blend frozen cubes directly into your next smoothie. To make smoothie packs, simply add your fruits and yogurt to bags. You can store these packs in the freezer. When you want a smoothie, just blend the pack with coconut water and ice. It's easy and fun! For the full recipe, check back to the beginning. To make your smoothie thicker, use ripe fruits. Frozen mango and pineapple work well. Add more Greek yogurt for creaminess. You can also try adding a banana. This fruit adds thickness and natural sweetness. If you like, blend in some oats or chia seeds. These ingredients will boost texture and nutrition. Yes, you can add protein powder. Whey protein is a popular choice. Plant-based protein powders also work great. Look for options like pea or hemp protein. These add extra nutrition without changing the taste much. Just start with a small scoop and blend well. Mango and pineapple both offer great health benefits. They are high in Vitamin C, which boosts immunity. Mangoes have Vitamin A, good for your eyes. Pineapples contain bromelain, which helps digestion. Coconut water hydrates and replenishes electrolytes. Greek yogurt adds protein and probiotics. This smoothie supports digestion and keeps you hydrated. Enjoy this refreshing drink for a healthy treat! For the full recipe, check the recipe section above. You've learned how to make a refreshing mango pineapple smoothie. We covered the right ingredients and their health benefits. You have step-by-step instructions for prep, blending, and serving. Plus, we shared tips for the perfect texture and sweetness. Explore variations and storage options to keep your smoothie fresh. Enjoy making and customizing this drink to fit your taste. It's a simple way to add more fruits to your diet while enjoying great flavors. Now, go ahead and blend your own smoothie masterpiece!

Mango Pineapple Smoothie Refreshing and Healthy Treat

Looking for a delicious and healthy treat? Try my Mango Pineapple Smoothie! Packed with sweet, tropical flavors, this drink is

- 1/2 cup chia seeds - 2 cups almond milk (or any plant-based milk) - 1 tablespoon maple syrup (or honey) Chia seeds are the star of this dish. They soak up liquid and form a gel-like texture. This makes the pudding thick and creamy. Almond milk adds a nutty taste. You can use any plant-based milk you prefer. Sweeteners like maple syrup or honey give it a hint of sweetness. - 1 cup strawberries, hulled and sliced - 2 ripe kiwis, peeled and diced - Fresh mint leaves for garnish (optional) Strawberries add a burst of flavor. Their sweetness pairs well with the mild chia. Kiwis bring a tangy twist. Together, they make the pudding vibrant and colorful. Mint leaves can add a nice touch on top. They give a refreshing scent. - Mixing bowl - Whisk - Serving glasses or bowls You need a mixing bowl to combine the ingredients. A whisk helps blend everything evenly. Finally, use serving glasses or bowls to display your pudding. Clear containers let the pretty layers show through. For the complete guide, check the Full Recipe. First, take a medium bowl. Combine the chia seeds, almond milk, maple syrup, and vanilla extract. Use a whisk to mix these ingredients well. It is important to avoid clumping. When mixed correctly, the chia seeds will absorb the liquid. Next, cover the bowl with plastic wrap or a lid. Place it in the refrigerator for at least 4 hours, or overnight if you can wait. This chilling time helps the mixture turn into a thick pudding. After chilling, it’s time to stir the chia pudding. Break up any clumps that formed. Now, grab your serving glasses or bowls. Start layering the pudding with the fresh strawberries and kiwis. Begin with a layer of chia pudding. Then, add a layer of sliced strawberries. Follow with another layer of chia pudding, and top it off with diced kiwis. Repeat this layering until you reach the top. If you want a fun swirl effect, gently mix the layers with a spoon before serving. For a fresh touch, you can garnish with mint leaves if you like. Enjoy your Strawberry Kiwi Chia Pudding! For a complete guide, check the Full Recipe. Soaking chia seeds is key to getting the right texture. When you mix chia seeds with almond milk, the seeds need time to absorb the liquid. I recommend soaking them for at least four hours or overnight for the best results. This will help them swell and create that pudding-like feel. To avoid clumping, stir the mixture well right after you combine the ingredients. Use a whisk to break up any clumps. Give it a good stir every 30 minutes during the first hour of soaking. This simple step makes a big difference in your pudding's texture. You can adjust the sweetness of your pudding to fit your taste. I often start with one tablespoon of maple syrup or honey. After tasting, you can add more if you like. Remember, the sweetness from the fruit will also play a part. If you want to try something different, you can use stevia or agave syrup. These options can give you that sweet flavor without adding extra sugar. Serving your pudding in clear glasses makes it look beautiful. You can see the layers of fruit and chia pudding, which is very appealing. I like to layer it with chia pudding, strawberries, and then kiwis. This creates a fun visual effect. For a final touch, add fresh mint leaves on top. They not only look great but also add a burst of flavor. Enjoy your healthy and refreshing treat! {{image_2}} You can change the flavor of your pudding easily. Adding coconut milk gives it a creamy feel. This adds a rich taste that pairs well with the fruits. You can also mix in other fruits like mango or banana. These fruits bring their own sweetness and flavors. Try blending different fruits to find your perfect mix. For a smoother pudding, use blended fruits. This method makes the pudding soft and creamy. You can also add oats or granola for a crunchy bite. The crunch of oats creates a fun texture contrast. This keeps each spoonful interesting and satisfying. If you want vegan options, use maple syrup instead of honey. This keeps it plant-based and sweet. For those who need gluten-free meals, chia seeds and fruit are naturally gluten-free. Always check your other ingredients to make sure they fit your diet. You can easily adjust this recipe to suit your needs. You can find the full recipe for Strawberry Kiwi Chia Pudding [here](#). Enjoy making your own variations! To store leftover chia pudding, place it in an airtight container. This keeps it fresh and prevents odors from other foods. You can safely eat it within 4 to 5 days. If you notice any change in smell or texture, it’s best to toss it out. Yes, you can freeze chia pudding! Just put it in a freezer-safe container. Leave some space at the top, as it will expand. To thaw, transfer it to the fridge overnight. Stir it well before serving to get back that creamy texture. For the best taste, serve the pudding fresh. Wait about 30 minutes after layering before serving. This lets the flavors blend and enhances the taste. If you prepare it in advance, keep it covered in the fridge until you’re ready to serve. For the full recipe, check out the details above. Strawberry Kiwi Chia Pudding can last up to five days in the fridge. To keep it fresh, store it in an airtight container. Make sure to check the pudding for any changes in smell or texture before eating. If you notice anything off, it's best to throw it away. Yes, you can use other types of milk. Options include coconut milk, soy milk, or oat milk. Each type of milk adds a different flavor and texture. Coconut milk gives a creamy taste, while oat milk is smooth and mild. Experiment to find your favorite! Chia seeds are packed with nutrients. They are high in fiber, which helps digestion. They also contain omega-3 fatty acids, which are good for your heart. Plus, chia seeds offer protein and antioxidants, making them a great addition to your diet. Enjoy their health perks in every bite of your pudding! This blog covered how to make a delicious Strawberry Kiwi Chia Pudding. We explored key ingredients like chia seeds, almond milk, and fresh fruits. I shared clear steps, tips for perfect texture, and creative variations. Chia pudding is not just tasty; it's also healthy and easy to customize. You can store it well and keep it fresh for later. Enjoy making your own tasty treats!

Strawberry Kiwi Chia Pudding Healthy and Refreshing Treat

Looking for a healthy and refreshing treat? Try my Strawberry Kiwi Chia Pudding! This tasty snack is packed with nutrition

- 1 large head of broccoli, cut into florets - 3 tablespoons olive oil - 4 cloves garlic, minced - Zest of 1 lemon - Juice of 1 lemon - 1 teaspoon red pepper flakes - Salt and pepper to taste - ¼ cup grated Parmesan cheese (optional) - Fresh parsley, chopped for garnish The ingredients for Lemon Garlic Roasted Broccoli are simple yet powerful. Each one contributes to the dish's flavor and health benefits. Broccoli Health Benefits Broccoli is a superfood. It is low in calories but high in vitamins. This green veggie is rich in fiber, which helps digestion. It also contains antioxidants that protect your body from harm. Lemon as a source of Vitamin C Lemons are packed with Vitamin C. This vitamin helps boost your immune system. It also aids in skin health and keeps your body strong. Garlic's health advantages Garlic is more than just a flavor booster. It has properties that can lower blood pressure. Garlic also has compounds that may help improve heart health. Using these ingredients together makes a dish that is not only tasty but good for you, too. For the complete cooking process, check the Full Recipe. First, preheat your oven to 400°F (200°C). This step is key for the perfect roast. While the oven heats, grab a large mixing bowl. In this bowl, combine the broccoli florets, olive oil, minced garlic, lemon zest, and lemon juice. Mix well to coat the broccoli evenly. Next, add red pepper flakes, salt, and pepper to taste. Toss everything together until it looks delicious and colorful. Once your broccoli is ready, spread it out on a baking sheet lined with parchment paper. Make sure the florets are in a single layer. This helps them roast evenly. Now, place the sheet in the oven and roast for about 20 to 25 minutes. Halfway through, stir the broccoli gently to ensure every piece gets that nice, roasted touch. Keep an eye on them. You want them tender but a little crisp. If you love cheese, sprinkle grated Parmesan over the broccoli during the last five minutes of roasting. This gives it a cheesy, golden finish. Once it’s done, take the baking sheet out of the oven. Garnish your beautiful dish with freshly chopped parsley. This adds a pop of color and a fresh taste. For the full recipe, check the ingredients and steps provided earlier. To get crispy broccoli, start by cutting it into even florets. This helps them cook evenly. Toss the florets in olive oil and spices before roasting. Make sure the broccoli is well coated, but don’t drown them in oil. To avoid overcooking, keep an eye on the time. Roast for about 20-25 minutes at 400°F (200°C). Stir halfway through to ensure all sides get crisp. If you notice some pieces browning too fast, take them out. You can try adding spices like paprika or cumin for extra flavor. These spices work well with lemon and garlic. For a kick, add more red pepper flakes. To boost lemon and garlic flavors, use fresh lemon juice and zest. Fresh garlic packs more punch than dried. You can also try roasting garlic cloves with the broccoli for a mellow taste. To prepare broccoli in advance, wash and cut it a day before. Store the florets in a sealed bag in the fridge. This keeps them fresh and ready to roast. For prepped ingredients, keep the olive oil and spices in a small bowl. You can mix them in the morning. Just toss them with the broccoli right before roasting. This saves time and makes it easier to cook. For the full recipe, check out the details above! {{image_2}} You can switch up the cheese for a new taste. Try feta or goat cheese. Both add a creamy touch. If you want a dairy-free option, leave out the cheese. You can also use other vegetables. Cauliflower or Brussels sprouts work well. They roast nicely and soak up the flavors too. In summer, use fresh herbs like basil or oregano. These herbs add a bright flavor. In winter, try thyme or rosemary. These herbs make the dish hearty and warm. You can also add cherry tomatoes for a burst of color and taste. For vegan options, skip the cheese and add nutritional yeast. It gives a cheesy flavor without dairy. If you need gluten-free, this dish is already safe. Just make sure to check the seasonings. For low-sodium diets, use less salt. You can also add lemon juice for flavor without extra salt. Explore variations to find your perfect blend! For the full recipe, check out the Zesty Lemon Garlic Roasted Broccoli. To keep leftover lemon garlic roasted broccoli fresh, place it in an airtight container. You can store it in the fridge for up to three days. Make sure it cools down first before sealing it. This helps avoid moisture buildup. If you want to keep it longer, freezing is a great option. Wrap the broccoli tightly in plastic wrap or use a freezer-safe bag. It can last for up to three months in the freezer. Just remember to label the bag with the date. When reheating your broccoli, the goal is to keep it tasty and crisp. The best way is to use the oven. Preheat your oven to 350°F (175°C). Spread the broccoli on a baking sheet and heat for about 10 minutes. This method helps regain some crispness. You can also reheat it in a skillet over medium heat. Just add a splash of olive oil to help keep the moisture in. Avoid using the microwave if you can. Microwaving often makes the broccoli soggy. If you must use it, do so for short intervals. Heat for 30 seconds at a time, stirring in between. This method helps keep the broccoli from getting too wet. Enjoy your tasty lemon garlic roasted broccoli as if it were freshly made! For the full recipe, check the main section. Can I use frozen broccoli for this recipe? Yes, you can use frozen broccoli. Just thaw it first. Pat it dry to remove excess water. This helps the broccoli roast well and get crisp. What can I serve this dish with? Lemon garlic roasted broccoli pairs well with grilled chicken or fish. You can also serve it with rice or quinoa. It makes a great side for pasta dishes too. How can I adjust the spice level? To adjust the spice, add more or less red pepper flakes. You can also skip them if you want a milder taste. Try adding black pepper for a different kick. Is it possible to prepare this dish in advance? Yes, you can prep the broccoli ahead of time. Cut the florets and mix them with oil and spices. Store in the fridge for up to a day before roasting. What other dishes pair well with Lemon Garlic Roasted Broccoli? This dish goes great with a variety of meals. Try it with a simple lemon chicken, a hearty steak, or a grain bowl. It’s a versatile side that complements many flavors. For the full recipe, check out the [Full Recipe]. This blog post showed you how to make Lemon Garlic Roasted Broccoli. We covered the ingredients you need, their health benefits, and step-by-step cooking instructions. I shared tips to make your broccoli crispy and ways to enhance its flavor. You learned about variations and dietary adjustments to fit your needs. Lastly, we discussed how to store leftovers and reheat them without losing taste. Roasted broccoli is an easy dish to enjoy in many ways. Try different flavors and have fun with this recipe!

Lemon Garlic Roasted Broccoli Simple and Flavorful Dish

If you’re craving a dish that bursts with flavor and is easy to make, I have the perfect recipe for

When you want to make a tasty Roasted Sweet Potato Quinoa Salad, you need the right ingredients. Here’s what you will need: - 2 medium sweet potatoes, peeled and diced - 1 cup quinoa, rinsed - 2 cups vegetable broth (or water) - 1 cup cherry tomatoes, halved - 1/2 red onion, finely diced - 1 cup black beans, rinsed and drained - 1 avocado, diced - 1/4 cup fresh cilantro, chopped - 3 tablespoons olive oil - 2 tablespoons lime juice - 1 teaspoon cumin powder - Salt and pepper to taste Gathering fresh ingredients makes this salad shine. Each item adds a unique flavor. Sweet potatoes bring sweetness and creaminess. Quinoa adds a nutty taste and a nice bite. Black beans give protein and fiber. I often use ripe avocados to add richness. Fresh cilantro brightens the dish with its unique flavor. The lime juice gives a zesty kick. Olive oil adds smoothness and helps blend flavors together. This combination of ingredients makes the salad not just healthy, but also colorful and fun to eat. Trust me, this salad will be a hit at your table! For the full recipe, check the instructions and enjoy your cooking journey! Start by preheating your oven to 400°F (200°C). While it heats, peel and dice the two sweet potatoes. Spread the sweet potato cubes on a baking sheet. Drizzle with two tablespoons of olive oil. Sprinkle salt, pepper, and cumin powder over the top. Toss everything to coat the sweet potatoes evenly. Roast them in the oven for 25 to 30 minutes, or until they are tender and caramelized. While the sweet potatoes roast, bring two cups of vegetable broth or water to a boil in a medium saucepan. Once it boils, add one cup of rinsed quinoa. Cover the pot and let it simmer for 15 minutes, or until the liquid is absorbed. After cooking, fluff the quinoa with a fork and let it cool. In a large mixing bowl, combine one cup of halved cherry tomatoes, half a finely diced red onion, and one cup of rinsed black beans. Add one diced avocado and one-quarter cup of chopped fresh cilantro. Mix these ingredients gently to keep the avocado intact. Once the sweet potatoes are done roasting, allow them to cool slightly. Add the roasted sweet potatoes to the mixing bowl with the other ingredients. Drizzle with the remaining tablespoon of olive oil and two tablespoons of lime juice. Season with additional salt and pepper if needed. Gently toss everything together until well combined. Serve the salad chilled or at room temperature. For the full recipe, refer to the earlier section. To get sweet potatoes just right, cut them into equal pieces. This helps them cook evenly. Toss them in olive oil, salt, pepper, and cumin. Lay them out on the baking sheet in a single layer. This way, they can roast well. Roast them at 400°F for 25 to 30 minutes. Look for a tender inside and a caramelized outside. If you want more caramelization, stir them halfway through. To add a kick, try adding smoked paprika or chili powder. These spices give a nice depth. You can also mix in some garlic powder for extra flavor. For toppings, consider feta cheese or nuts for crunch. They add great texture and taste. Fresh herbs like mint or parsley can also brighten the salad. For serving, use deep bowls or a large platter. This makes it look inviting. Drizzle with lime juice right before serving. It adds freshness and zing. Sprinkle extra cilantro on top for color. If you want, serve it with a side of grilled chicken or fish. This makes it a complete meal. Enjoy it warm or chill it in the fridge for later. Check out the Full Recipe for all the steps! {{image_2}} You can boost this salad's nutrition by adding greens. Spinach or kale works great. They add color and vitamins. For protein, try adding grilled chicken or chickpeas. They make the salad heartier and more filling. You can also use nuts or seeds for crunch and healthy fats. Feel free to switch some ingredients if you need to. If you don't have black beans, use kidney beans or chickpeas. You can also swap out quinoa for brown rice or farro. For the dressing, use apple cider vinegar instead of lime juice. This will give a nice tang and change the flavor profile. To make this salad vegan, skip the honey or any animal products in your dressings. You can also use a vegan dressing instead. If you need it gluten-free, make sure to choose gluten-free grains like quinoa or rice. Check that your dressings are also gluten-free to keep it safe. To store leftovers, put the salad in an airtight container. Make sure it cools down first. This keeps the flavors fresh. Use it within three to five days. If you add avocado, it may brown quickly. To slow this, store the avocado separately. You can freeze the quinoa and roasted sweet potatoes. Place them in freezer-safe bags. Label them with the date. The salad's other ingredients do not freeze well. When ready to eat, thaw the quinoa and sweet potatoes overnight in the fridge. In the fridge, this salad lasts about three to five days. The quinoa and sweet potatoes stay fresh longer. If you notice any off smells or odd colors, toss it. Always check before eating. This way, you enjoy the best flavors. For the full recipe, refer back to the earlier section. Yes, you can use other grains. Brown rice, farro, or barley work well. Each grain adds a unique flavor and texture. Just cook them as per package instructions. This gives you options for taste and nutrition. You can pair this salad with grilled chicken or shrimp for protein. It also goes well with a simple soup. Adding a slice of crusty bread makes for a hearty meal. Experiment with flavors that you enjoy. To add more heartiness, include nuts or seeds. Walnuts or pumpkin seeds add crunch. You can also mix in more beans for protein. Adding a hard-boiled egg gives extra richness. These tips help keep you satisfied longer. Yes, you can meal prep this salad. Roast the sweet potatoes and cook the quinoa ahead of time. Store them in airtight containers in the fridge. Mix the salad ingredients together just before serving. This keeps everything fresh and tasty. For the full recipe, check out the details above. This blog post covered making a tasty Roasted Sweet Potato Quinoa Salad. We explored essential ingredients and easy steps to create this dish. You learned tips for perfecting the sweet potatoes and enhancing flavor. We also shared variations and storage ideas to keep your salad fresh. In conclusion, this salad is healthy and simple. It fits many diets and is great for sharing. Enjoy experimenting with this recipe and make it your own!

Roasted Sweet Potato Quinoa Salad Flavorful and Healthy

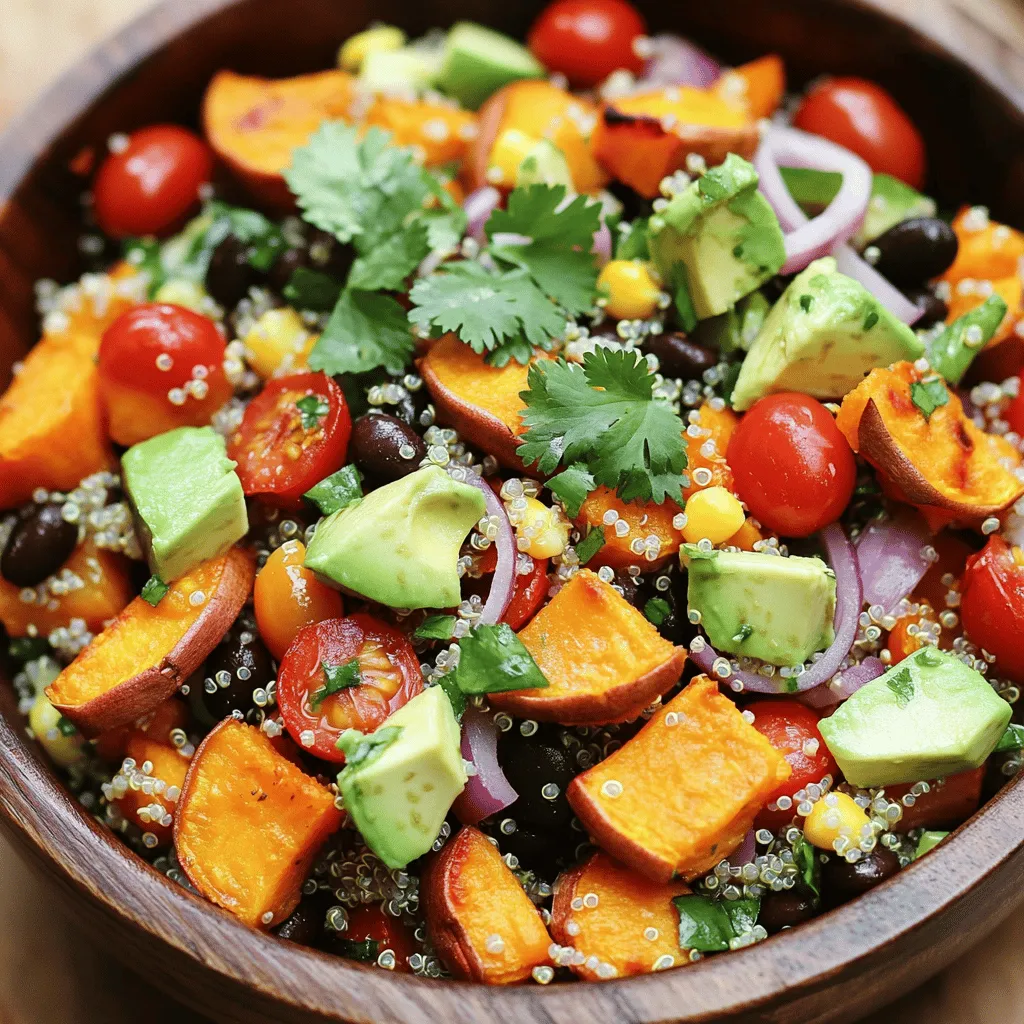
Looking for a tasty and healthy dish? Try my Roasted Sweet Potato Quinoa Salad! This colorful salad combines sweet, tender

To make Easy Veggie Egg Muffins, you need fresh and simple ingredients. Here’s what you will need: - 6 large eggs - 1/2 cup milk (dairy or non-dairy) - 1 cup chopped spinach - 1/2 cup bell pepper, diced (any color) - 1/4 cup red onion, finely chopped - 1/2 cup cherry tomatoes, halved - 1/2 teaspoon garlic powder - 1/2 teaspoon onion powder - Salt and pepper to taste - 1/2 cup shredded cheese (cheddar, feta, or your choice) - Cooking spray or muffin liners When picking vegetables, choose fresh and bright ones. Look for spinach that is vibrant and firm. Bell peppers should be smooth and shiny. Avoid any that are wrinkled or soft. For cherry tomatoes, pick ones that are plump and red. Fresh veggies make your muffins taste better. If you want to change up the cheese, there are many options. Cheddar adds a nice sharp taste. Feta gives a tangy flavor. You might also try mozzarella for a milder option. Each cheese will give a different twist to your muffins. For the full recipe, check out the complete guide. First, preheat your oven to 350°F (175°C). This ensures an even bake. Next, prepare your muffin tin. You can use cooking spray to coat each cup. Alternatively, you can place muffin liners in each cup. This step helps with easy removal later. Now, let’s whisk the eggs. In a large mixing bowl, crack the six large eggs. Add half a cup of milk. This could be dairy or any non-dairy milk you prefer. Whisk the eggs and milk together until they are well combined. You want a smooth mixture without lumps. Next, it’s time to add the veggies. Add one cup of chopped spinach, half a cup of diced bell pepper, and a quarter cup of finely chopped red onion. Toss in half a cup of halved cherry tomatoes too. Mix in half a teaspoon of garlic powder and half a teaspoon of onion powder. Don’t forget to add salt and pepper to taste. Stir everything together until it’s evenly mixed. Now, gently fold in half a cup of shredded cheese. You can use cheddar, feta, or any cheese you like. Make sure the cheese is spread throughout the mixture. Pour the egg and veggie mixture into the prepared muffin tin. Fill each cup about two-thirds full. This gives them room to rise. Finally, bake in the preheated oven for 20-25 minutes. You’ll know they are done when the muffins are set in the center and slightly golden on top. Once baked, remove them from the oven. Let them cool for a few minutes before taking them out of the tin. Enjoy these tasty veggie egg muffins warm, or store them for a quick breakfast later. For the full recipe, check the section above. To make your veggie egg muffins perfect, follow these tips. First, ensure even cooking by filling each muffin cup about two-thirds full. This allows the muffins to rise without spilling over. Use a whisk to mix the eggs and milk well. Combine them until they look smooth and creamy. Next, adjust the seasoning to fit your taste. If you like it spicy, add a pinch of red pepper flakes. If you prefer a milder flavor, skip the heat and add more herbs. Fresh herbs, like basil or parsley, can brighten the taste. Cooling muffins properly is key. After baking, let them cool for a few minutes in the tin. This helps them firm up and makes them easier to remove. Once they feel cool to the touch, transfer them to a wire rack. This prevents moisture from building up, which can make them soggy. For storage, keep them in an airtight container in the fridge. They stay fresh for up to a week. You can also freeze them for longer storage. Just wrap each muffin in plastic wrap and place them in a freezer bag. When you're ready to eat, reheat them in the microwave for a quick meal. For the full recipe, check out the section above. {{image_2}} You can make Easy Veggie Egg Muffins fun and unique. Start with different veggies. Try adding zucchini, mushrooms, or broccoli. Carrots and kale also work well. Just chop them small so they cook evenly. Next, think about adding protein. If you like meat, diced ham or cooked bacon fits great. For plant-based options, try black beans or cooked quinoa. They add a nice boost. Spices can change the flavor too. Add paprika or cumin for warmth. For a fresh taste, toss in some herbs like basil or oregano. You can even sprinkle some chili flakes for a kick. These tweaks keep the muffins exciting and tasty. You can always tweak the Full Recipe to match your flavor dreams. Storing your veggie egg muffins is easy. First, let them cool completely after baking. Then, place them in an airtight container. You can store them in the fridge for up to one week. If you want to keep them longer, freeze them. Just wrap each muffin in plastic wrap and then place them in a freezer-safe bag. They last in the freezer for up to three months. When you're ready to eat them, reheating is quick. For the best taste and texture, use the microwave. Heat each muffin for about 30 seconds. If they are frozen, you might need to heat them for a minute or two. You can also use the oven. Preheat the oven to 350°F (175°C) and heat them for about 10 minutes. This method helps keep the outside crispy. Always check the muffins to ensure they're heated through. If you notice any odd smells or colors, it’s best to throw them out. Enjoy your easy veggie egg muffins fresh and tasty! For the full recipe, refer to the earlier section. You can use flaxseed meal or chia seeds as a great egg substitute. Mix 1 tablespoon of flaxseed meal or chia seeds with 2.5 tablespoons of water. Let it sit for about 5 minutes until it becomes gel-like. This mixture works well to bind your muffins. To make these muffins dairy-free, simply swap the milk for a non-dairy option. Almond milk or oat milk works well. For cheese, look for plant-based cheese alternatives. Make sure to check the labels for hidden dairy ingredients. Yes! You can prepare these muffins ahead of time. Once baked, let them cool completely. Store them in an airtight container in the fridge for up to a week. You can also freeze them for longer storage. Just reheat them in the microwave or oven for a quick meal. For the full recipe, check the details above. Enjoy making your veggie egg muffins! You learned how to make Easy Veggie Egg Muffins. We covered key ingredients, tips for fresh veggies, and cheese swaps. I walked you through step-by-step prep, baking, and perfecting texture. We explored fun variations for customization and smart storage options. Now, enjoy these muffins fresh or stored for busy days. Your kitchen can be a place of creativity and healthy choices with this recipe.

Easy Veggie Egg Muffins Quick and Healthy Recipe

Looking for a quick and healthy breakfast? Easy Veggie Egg Muffins are your answer! I love this recipe because it’s

To make Garlic Butter Chicken Bites, you will need a few simple ingredients. Each one plays a key role in creating that rich, savory flavor. Here’s what you need: - 1 lb (450g) boneless chicken breast, cut into bite-sized pieces - 4 tablespoons unsalted butter - 4 cloves garlic, minced - 1 teaspoon dried oregano - 1 teaspoon dried thyme - 1 tablespoon fresh parsley, chopped (for garnish) - Salt and pepper to taste - Lemon wedges (for serving) These ingredients work together to create a dish that is both comforting and delicious. The chicken becomes tender and flavorful, thanks to the garlic and herbs. Butter adds a rich mouthfeel, making each bite irresistible. You can find the [Full Recipe] to guide you through the cooking process. Enjoy crafting this savory dish! Start by trimming any fat from the chicken breast. This step keeps the chicken lean and tasty. Cut the chicken into bite-sized pieces. Make sure they are even for quick cooking. Season the chicken with salt and pepper. This simple step adds a lot of flavor. In a large skillet, melt 2 tablespoons of butter over medium heat. Wait until the butter starts to bubble. Add the chicken pieces in a single layer. Let them cook for 5-7 minutes. Stir occasionally to cook them evenly. Look for a golden brown color. This means they are ready. Make sure the chicken is cooked through. The inside should no longer be pink. Now, it’s time to sauté the garlic. In the same skillet, add the remaining 2 tablespoons of butter. Once melted, add 4 minced garlic cloves. Sauté the garlic for about 1 minute. Watch closely so it doesn’t burn. Burned garlic tastes bitter. Next, return the chicken to the skillet. Add the dried oregano and thyme. Toss everything together well. Ensure each piece of chicken gets coated in that tasty garlic butter. Cook everything for another 1-2 minutes. This helps all the flavors meld together nicely. Finally, remove the skillet from heat. Garnish with fresh chopped parsley. This adds a bright touch. Serve with lemon wedges on the side. The lemon adds a zesty kick that brightens the dish. For the full recipe, check out the link provided. To avoid dry chicken, start by cutting the chicken breast into bite-sized pieces. This helps it cook evenly and stay juicy. Season the pieces with salt and pepper right before cooking. Use a large skillet for the best results. A non-stick skillet works well, allowing the chicken to brown without sticking. For extra flavor, consider adding spices like paprika or cayenne pepper. You can also try adding a pinch of smoked salt for a unique taste. To add a tangy twist, squeeze fresh lemon juice over the finished dish. This brightens the flavors and makes the meal more vibrant. For an impressive presentation, serve the garlic butter chicken bites on a large, colorful platter. Drizzle any leftover garlic butter over the chicken for added flavor. Garnish with extra parsley for a pop of color. Pair these bites with sides like rice or a fresh salad. You can also serve them with dipping sauces like ranch or a spicy aioli for extra fun. For the full recipe, check out the link. {{image_2}} You can change the protein in this dish easily. Try shrimp or even tofu. Both options work great with garlic and butter. For the butter, you can use infused flavors. Lemon or herb butter adds a nice twist. You can also use olive oil for a lighter option. If you need a gluten-free version, use gluten-free soy sauce instead of regular soy sauce. This keeps the taste while ensuring it fits your diet. For a dairy-free option, swap the butter for a dairy-free spread. This keeps the dish creamy without the dairy. You can make this dish a pasta meal. Just toss cooked pasta with the chicken and sauce. It’s a quick and fun way to enjoy it. You can also use the chicken bites in wraps. Add fresh veggies and your favorite sauce for a tasty sandwich. For the full recipe, check out the detailed steps above. To keep your garlic butter chicken bites fresh, store them in an airtight container. Place them in the fridge if you plan to eat them within three days. This helps keep the flavors intact. If you want to keep them longer, freezing is a great option. For freezing, let the chicken cool completely. Then, place it in a freezer-safe bag or container. Try to remove as much air as possible. This prevents freezer burn and keeps the chicken tasty. You can freeze these bites for up to three months. When it’s time to enjoy your leftovers, reheating properly is key. The best method is to use the stovetop. Heat a non-stick skillet over medium heat. Add a little butter, then place the chicken in the pan. Stir gently to warm it up without drying it out. If you prefer the microwave, use a microwave-safe dish. Add a splash of water to keep moisture. Cover it with a damp paper towel. Heat for 1-2 minutes, checking frequently to avoid overheating. Remember, you want to keep that delicious flavor and texture! Garlic butter chicken bites last about 3-4 days in the fridge. Store them in an airtight container. You can also freeze them for up to 3 months. Make sure to cool them completely before freezing. When ready to eat, just thaw overnight in the fridge. Yes, you can use frozen chicken. Just thaw it first before cooking. You can use the fridge for a slow thaw, which is best for flavor. If you need it fast, use the microwave's defrost setting. Always ensure the chicken is fully cooked. Garlic butter chicken bites pair well with many sides. Try serving them with rice or pasta. A fresh salad adds a nice crunch. Roasted veggies also complement the dish. For a fun twist, serve them in wraps or on skewers. You can even drizzle some extra garlic butter on top! This article walked through the key steps to make garlic butter chicken. We covered ingredients like chicken, butter, and garlic. You learned preparation, cooking techniques, and the best tips for flavor. Variations included swaps for proteins and dietary needs. Storing and reheating leftovers ensures nothing goes to waste. In the kitchen, these skills build your confidence. Simple choices can elevate your meals. Enjoy cooking and share your tasty creations!

Garlic Butter Chicken Bites Savory and Simple Dish

Craving a quick and delicious meal? Look no further! Garlic Butter Chicken Bites are a savory delight that you can

To make a tasty Crispy Chickpea Caesar Salad, gather these key ingredients: - 1 can (15 oz) chickpeas, drained and rinsed - 2 tablespoons olive oil - 1 teaspoon garlic powder - 1 teaspoon smoked paprika - Salt and pepper to taste - 4 cups romaine lettuce, chopped - ¼ cup grated Parmesan cheese (or nutritional yeast for a vegan option) - ½ cup cherry tomatoes, halved - ¼ cup Caesar dressing (store-bought or homemade) - Croutons (store-bought or homemade) for garnish - Fresh lemon wedges for serving These ingredients bring flavor and texture to your salad. The chickpeas provide protein, while the romaine gives a fresh crunch. You can change up the salad by adding some optional ingredients: - Avocado slices for creaminess - Grilled chicken or shrimp for extra protein - Cucumber for added crunch - Red onion for a bit of bite - Capers for a briny touch Feel free to mix and match these extras to fit your taste. This Crispy Chickpea Caesar Salad is not only delicious but also healthy. Here’s a quick look at its benefits: - Chickpeas are high in protein and fiber, which help keep you full. - Romaine lettuce is low in calories and rich in vitamins A and K. - Olive oil provides healthy fats that are good for your heart. - Parmesan cheese adds calcium, while nutritional yeast gives a cheesy taste without dairy. This salad packs a punch of nutrition and flavor, making it a great choice for lunch or dinner. For the complete recipe, check out the Full Recipe. Start by preheating your oven to 425°F (220°C). This heat will help the chickpeas get nice and crispy. Next, take a can of chickpeas, drain it, and rinse them well. Spread the chickpeas on a baking sheet in a single layer. Drizzle two tablespoons of olive oil over them. Then, sprinkle one teaspoon of garlic powder, one teaspoon of smoked paprika, and some salt and pepper to taste. Toss the chickpeas so they get coated well with the oil and spices. Now, it's time to roast the chickpeas. Place the baking sheet in the oven. Bake them for about 20 to 25 minutes. Remember to shake the pan halfway through. This step helps them cook evenly. You want the chickpeas to be golden brown and crispy when they are done. While the chickpeas roast, let's prepare the salad. In a large salad bowl, add four cups of chopped romaine lettuce. Then, sprinkle in ¼ cup of grated Parmesan cheese or nutritional yeast if you prefer a vegan option. Next, add ½ cup of halved cherry tomatoes for a burst of color and flavor. These will give your salad a fresh touch. Now, drizzle ¼ cup of Caesar dressing over the lettuce and tomatoes. Toss everything gently. Make sure the lettuce is well coated with the dressing. Once the chickpeas are done roasting, let them cool for a few minutes. Then add the chickpeas to the salad along with some croutons for extra crunch. Toss everything lightly again to mix. To serve, divide the salad into bowls. This recipe makes about four servings. For a delightful finishing touch, add fresh lemon wedges on the side. A squeeze of lemon can brighten up all the flavors. Enjoy your crispy chickpea Caesar salad as a healthy meal or a tasty side dish. You can find the full recipe above to guide you in making this delicious dish! To get crispy chickpeas, start with canned ones. Drain and rinse them well. Pat them dry using a clean kitchen towel. This step removes excess moisture. Then, spread them in a single layer on a baking sheet. Drizzle with olive oil and sprinkle your spices. I love using garlic powder and smoked paprika for flavor. Bake them at 425°F (220°C) for 20-25 minutes. Shake the pan halfway through to cook them evenly. Watch closely, as they can burn. You want them golden brown and crunchy. For the dressing, you can use store-bought Caesar dressing for ease. If you want to make your own, blend lemon juice, garlic, and anchovies for a classic taste. You can also swap in vegan options. Try using tahini or cashew cream for a creamy texture. A squeeze of lemon adds a bright touch. Remember, the dressing ties all the flavors together, so choose one you love. Garnishing makes your salad pop! Add fresh cherry tomatoes for color. Croutons bring crunch, so don’t skip them. Grated Parmesan cheese adds richness, but you can use nutritional yeast for a vegan twist. For a finishing touch, sprinkle chopped parsley or basil. A few lemon wedges on the side not only look good but add zest when squeezed. These details make your Crispy Chickpea Caesar Salad not just tasty but beautiful too. For the complete recipe, check out the Full Recipe. {{image_2}} You can easily make this salad vegan. To replace the Parmesan cheese, use nutritional yeast. This gives a cheesy taste without dairy. You can also make your own Caesar dressing. Use cashew cream or tahini mixed with lemon juice, garlic, and a touch of mustard. Both options work well and keep the flavors rich. Want more protein? Add cooked quinoa or lentils to your salad. Both options are healthy and add great texture. You can also toss in some diced avocado for creaminess. If you want a heartier salad, grilled chicken or tofu works, too. Just make sure to season them well for the best taste. Changing up ingredients with the seasons keeps your salad fresh. In spring, add asparagus or snap peas for crunch. In summer, try fresh corn or diced cucumbers. Autumn calls for roasted squash or apples to sweeten things up. Lastly, in winter, you can use kale instead of romaine for a hearty twist. These swaps add flavor and make the dish exciting all year long. For the full recipe, check out the Crispy Chickpea Caesar Salad instructions above. To store any leftover Crispy Chickpea Caesar Salad, place it in an airtight container. This keeps it fresh. Make sure to separate the crispy chickpeas from the salad. The salad can get soggy if they sit together. You can store the salad in the fridge for about 2 days. To keep your salad fresh, use a few key tips. First, only dress the salad before you eat it. This prevents wilting. Store the chickpeas in a separate container. They stay crispy this way. You can also add fresh lemon juice just before serving. This brightens the flavor and keeps the greens vibrant. When you're ready to enjoy those crispy chickpeas again, reheat them in the oven. Preheat the oven to 350°F (175°C). Spread the chickpeas on a baking sheet. Heat them for about 5-10 minutes. This brings back their crunch. Avoid using the microwave, as it makes them chewy. Enjoy your salad fresh every time! For the full recipe, check out the details above. Yes, you can use dried chickpeas. You need to soak and cook them first. Soak the dried chickpeas overnight in water. Then, cook them until they are soft. This will take about 1 to 2 hours. After cooking, drain and rinse them. Use them just like the canned chickpeas in the recipe. You have several options if you want to replace Parmesan cheese. Nutritional yeast works well for a vegan choice. It has a cheesy flavor and gives a nice texture. If you prefer, you can use other cheeses like pecorino or cheddar. Simply grate them and sprinkle them over the salad. The salad can last in the fridge for about 2 to 3 days. Keep it in an airtight container to stay fresh. If you want the chickpeas to remain crispy, add them just before serving. The dressing can also be kept separate until you are ready to eat. This helps keep everything fresh. For the full recipe, check out the earlier sections. This blog post offers a clear guide to making a Crispy Chickpea Caesar Salad. We covered the key ingredients, from chickpeas to optional items, and reviewed nutritional benefits. You learned step-by-step how to prepare each element. Tips for crispiness and variations ensure your salad stays fresh and exciting. Finally, proper storage and answers to common questions enhance your salad-making success. Enjoy crafting this tasty dish that’s simple and satisfying!

Crispy Chickpea Caesar Salad Healthy and Flavorful Dish

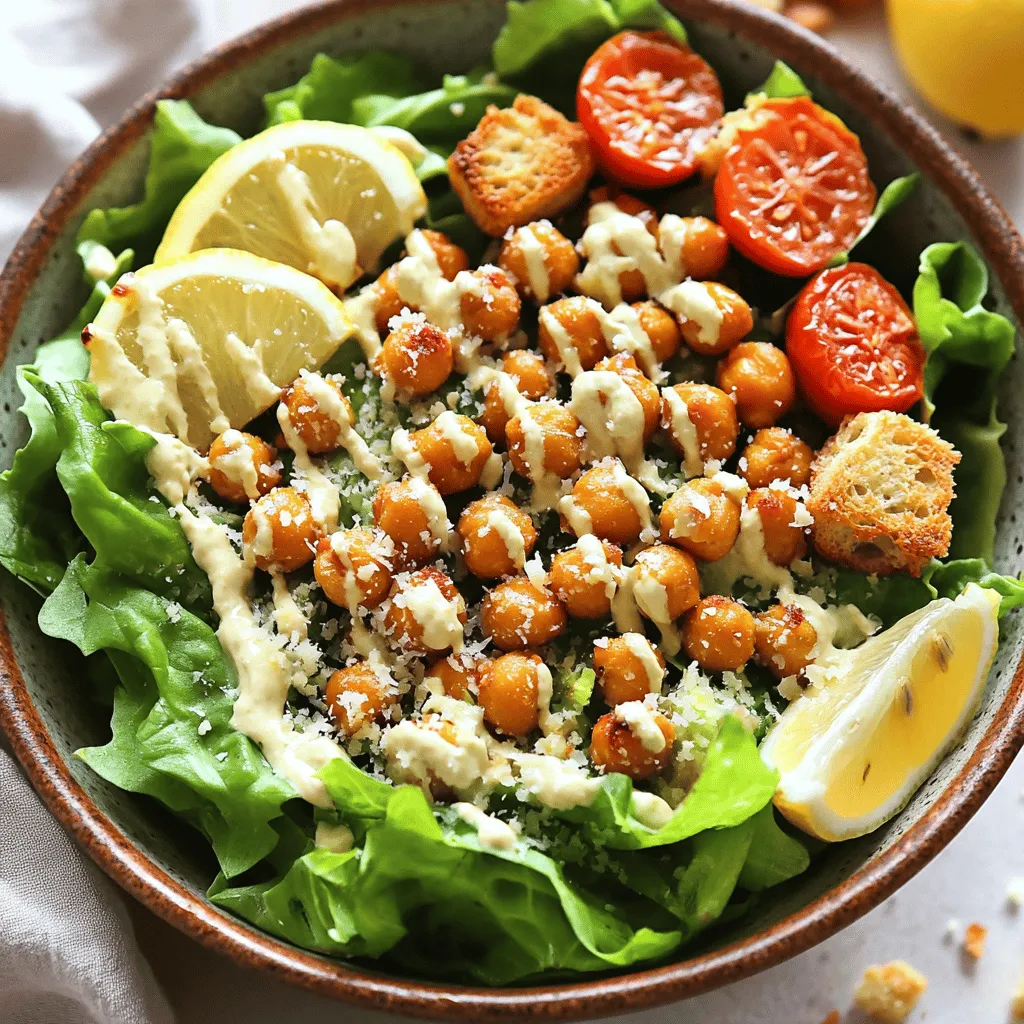
Looking for a fresh twist on a classic dish? My Crispy Chickpea Caesar Salad packs bold flavor without the guilt.

- 2 packets frozen acai puree - 1 banana, sliced - 1 cup coconut water - 1/2 cup mango, diced - 1/2 cup pineapple, diced - 1/4 cup granola - 2 tablespoons shredded coconut - 1 tablespoon chia seeds - 1 tablespoon honey (or agave syrup) - Fresh mint leaves for garnish Each ingredient in the Tropical Acai Bowl brings unique health benefits. - Acai puree: This berry is rich in antioxidants. It helps fight free radicals in your body. - Banana: A great source of potassium, bananas support heart health and digestion. - Coconut water: It hydrates and provides electrolytes, which are great after exercise. - Mango: Packed with vitamins A and C, mangoes boost your immune system. - Pineapple: This fruit has bromelain, which helps reduce inflammation and aids digestion. - Granola: A crunchy topping that offers fiber and keeps you full. - Shredded coconut: This adds healthy fats and fiber to your bowl. - Chia seeds: These tiny seeds are high in omega-3s and help with heart health. - Honey or agave syrup: Natural sweeteners that provide energy without refined sugars. - Mint leaves: They add a fresh flavor and may aid digestion. When picking fruits, look for vibrant colors and firm textures. - Bananas: Choose bananas with a few brown spots for sweetness. - Mangoes: They should give slightly when pressed. Smell for sweetness at the stem. - Pineapples: Look for a sweet aroma and a firm but slightly soft feel. The leaves should be green and fresh. Fresh fruits make your Tropical Acai Bowl taste even better. They also add more nutrients. Enjoy the process of choosing your fruits! For the full recipe, check out the Tropical Acai Bowl 🥥. To make the acai base, start with frozen acai puree. Grab two packets and place them in your blender. Next, add one sliced banana and one cup of coconut water. Blend this mix until it turns smooth and creamy. This step is key for a rich texture. Once blended, pour the acai mixture into your bowl. Now comes the fun part! Take half a cup of diced mango and half a cup of diced pineapple. Arrange these fruits on top of the acai mix in a bright, colorful pattern. This makes your bowl look pretty and appetizing. Next, sprinkle a quarter cup of granola over the top. Add two tablespoons of shredded coconut and one tablespoon of chia seeds. For a touch of sweetness, drizzle one tablespoon of honey or agave syrup on top. Lastly, garnish with fresh mint leaves for a refreshing finish. To serve your tropical acai bowl, make sure it looks inviting. Use a wide, shallow bowl for a great presentation. You can also use a coconut shell for a fun twist. Don't forget to keep some of the fruits aside for guests. This way, they can add more if they like. Serve it right away for the best taste. Enjoy your Tropical Acai Bowl as a breakfast or a snack. You can find the full recipe in the earlier section. To get the best blend, use frozen acai puree. This gives a thick texture. Start with the coconut water, then add the acai and banana. Blend on high until smooth. If it’s too thick, add a little more coconut water. A perfect blend makes a creamy base. Keep your acai puree in the freezer until you are ready to use it. Store bananas at room temperature, away from direct sunlight. Fresh mango and pineapple last longer in the fridge. Use them within a few days for the best taste. Toppings can really make your acai bowl pop. Try fresh fruits like kiwi or berries for added color and taste. Nuts and seeds add crunch and nutrition. You can also drizzle nut butter or yogurt on top for creaminess. Experiment with flavors to find your favorite combo. For the complete recipe, check out the Full Recipe section. {{image_2}} You can mix and match fruits in your Tropical Acai Bowl. Instead of mango and pineapple, try strawberries or kiwi. These fruits add bright colors and unique tastes. You can also use blueberries or raspberries for a burst of flavor. Adding a scoop of peanut butter or almond butter can make it creamier and richer. This recipe is easy to adapt for vegan and gluten-free diets. You can skip honey and use agave syrup instead. For granola, choose a gluten-free version. This way, you keep the taste while making it safe for everyone. You can also add seeds like pumpkin or sunflower for extra crunch. Seasonal fruits can change your bowl each time. In summer, add fresh peaches or cherries. In winter, consider pomegranate seeds or citrus slices. These fruits not only taste great but also brighten your dish. You can also experiment with spices like cinnamon or nutmeg for a twist. Explore these variations to make your Tropical Acai Bowl unique every time. For the full recipe, visit the section on ingredients and instructions. To store leftover acai mixture, place it in an airtight container. Make sure to seal it tightly. Refrigerate the container if you plan to use it within a day or two. The acai may thicken, but you can blend it again with a bit of coconut water to loosen it up. For toppings, keep them separate from the acai mixture. Use small containers to store fresh fruits like mango and pineapple. Granola should stay in a dry place to keep it crunchy. Shredded coconut and chia seeds can also be stored in airtight containers. This way, they will stay fresh and tasty. You can freeze some of the ingredients for your acai bowl. Freeze diced mango and pineapple in single layers on a baking sheet. Once frozen, transfer them to a freezer bag. This keeps them fresh and ready for your next bowl. You can also freeze extra acai puree if you have any left over. Just place it in ice cube trays for easy portioning later. An acai bowl is a smoothie in a bowl. It often uses acai berries, which are small and dark. These berries come from the Amazon rainforest. You blend them with fruits and liquids, like coconut water. Then, you top it with nuts, seeds, and fresh fruits. The bowl is thick and creamy, making it filling and tasty. Yes, you can make a tropical acai bowl ahead of time. I suggest making the acai base first. Store it in the fridge for a day. When you are ready to eat, add your toppings. Keep the toppings separate to stay fresh. This way, your bowl will still taste great. You can buy tropical acai bowls at many cafes and smoothie shops. Some grocery stores also sell them. Look for places that focus on healthy foods. You might find pre-packaged acai bowls in the freezer section too. Check online for local spots that serve acai bowls. Acai berries are full of nutrients. They are rich in antioxidants, which help fight free radicals. They may improve heart health and boost energy levels. Acai also has fiber, which aids digestion. Eating acai can keep your skin healthy too. Overall, acai bowls make a great addition to your diet. For a tasty recipe, check out the Full Recipe. To wrap up, we explored the tasty world of tropical acai bowls. We covered key ingredients and their health perks. You learned how to prepare, serve, and add your favorite toppings. I shared tips for blending and storing to keep your bowl fresh. Plus, we looked at fun variations to try in every season. Embrace these ideas to make delicious bowls that elevate your breakfast and snack time. Enjoy your health journey with vibrant flavors and wholesome ingredients!

Tropical Acai Bowl Refreshing and Nutritious Delight

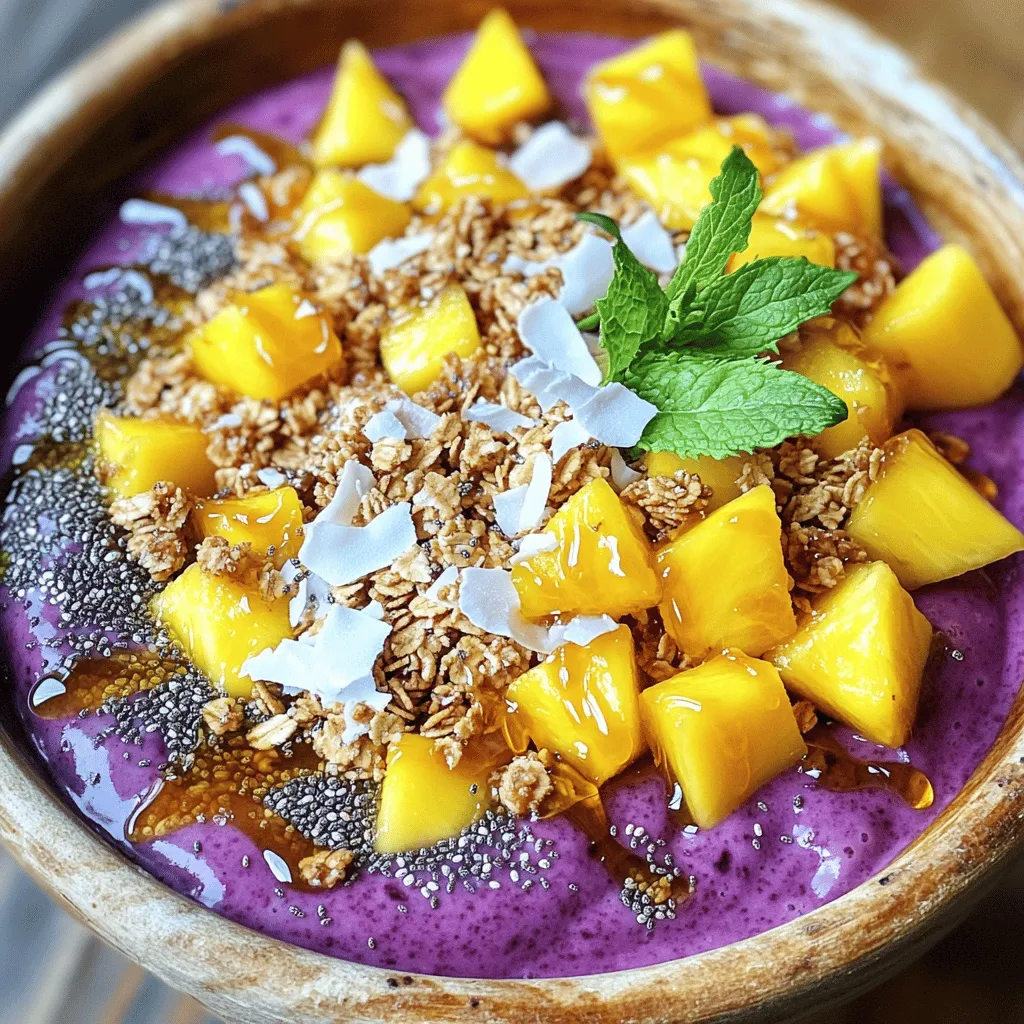
Are you ready to dive into a Tropical Acai Bowl that’s both refreshing and nutritious? This vibrant dish not only

Older posts
Newer posts
← Previous Page1 … Page3 Page4 Page5 … Page58 Next →

dsad

© 2025 Cooking Wells • Built with GeneratePress

Our Policies

  • Copyright Policy
  • Cookie Policy
  • GDPR Policy
  • Privacy Policy
  • Disclaimer
  • Terms Of Use

More Information

  • Home
  • About
  • Contact
  • Appetizers
  • Dessert
  • Dinner
  • Drinks
©2025, Cooking Wells About Back To Top