
Creamy Spinach Artichoke Dip Flavorful and Easy Recipe
Looking for a delicious snack that’s easy to make? Try my Creamy Spinach Artichoke Dip! This dip is packed with
Looking for a delicious snack that’s easy to make? Try my Creamy Spinach Artichoke Dip! This dip is packed with
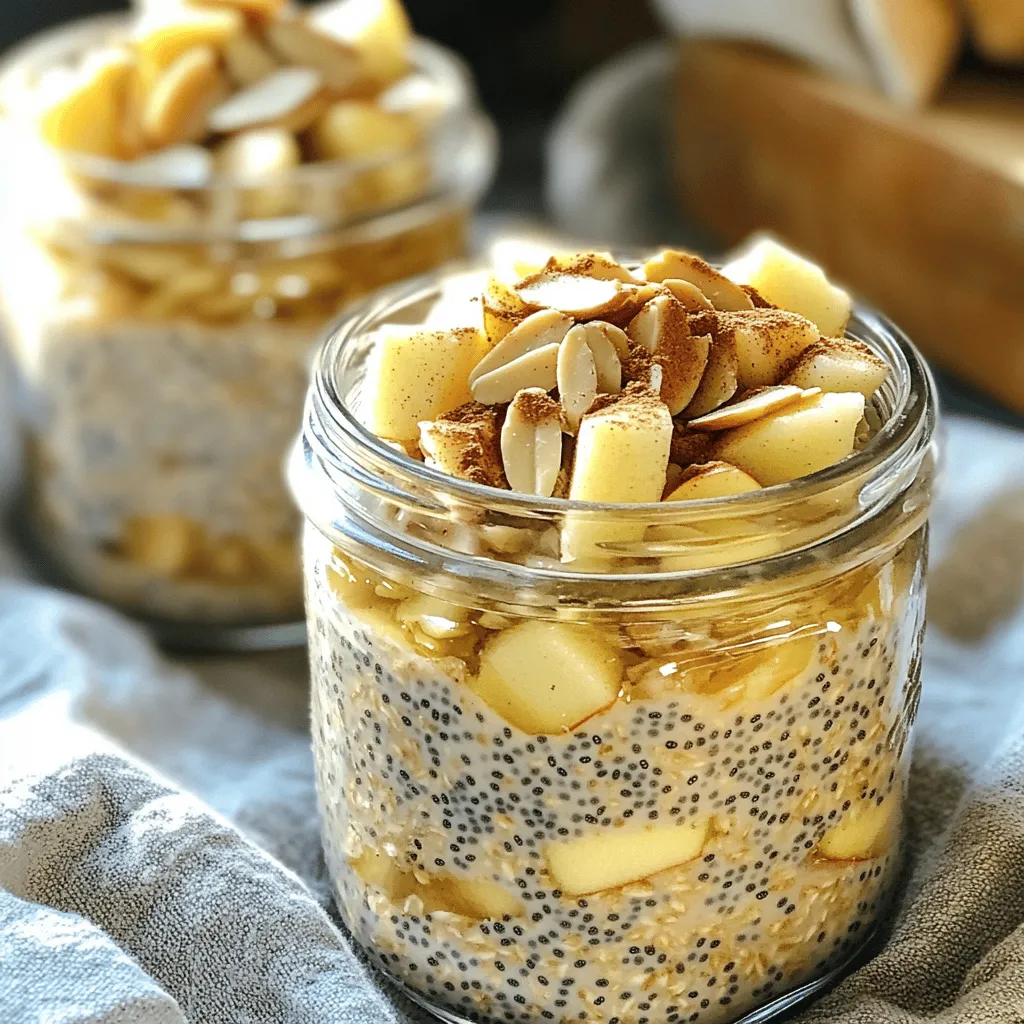
Start your day with a burst of flavor! Apple Cinnamon Overnight Oats are not just tasty; they’re easy to make

Are you ready to indulge in a dessert that is both easy to make and utterly delicious? This No-Bake Nutella
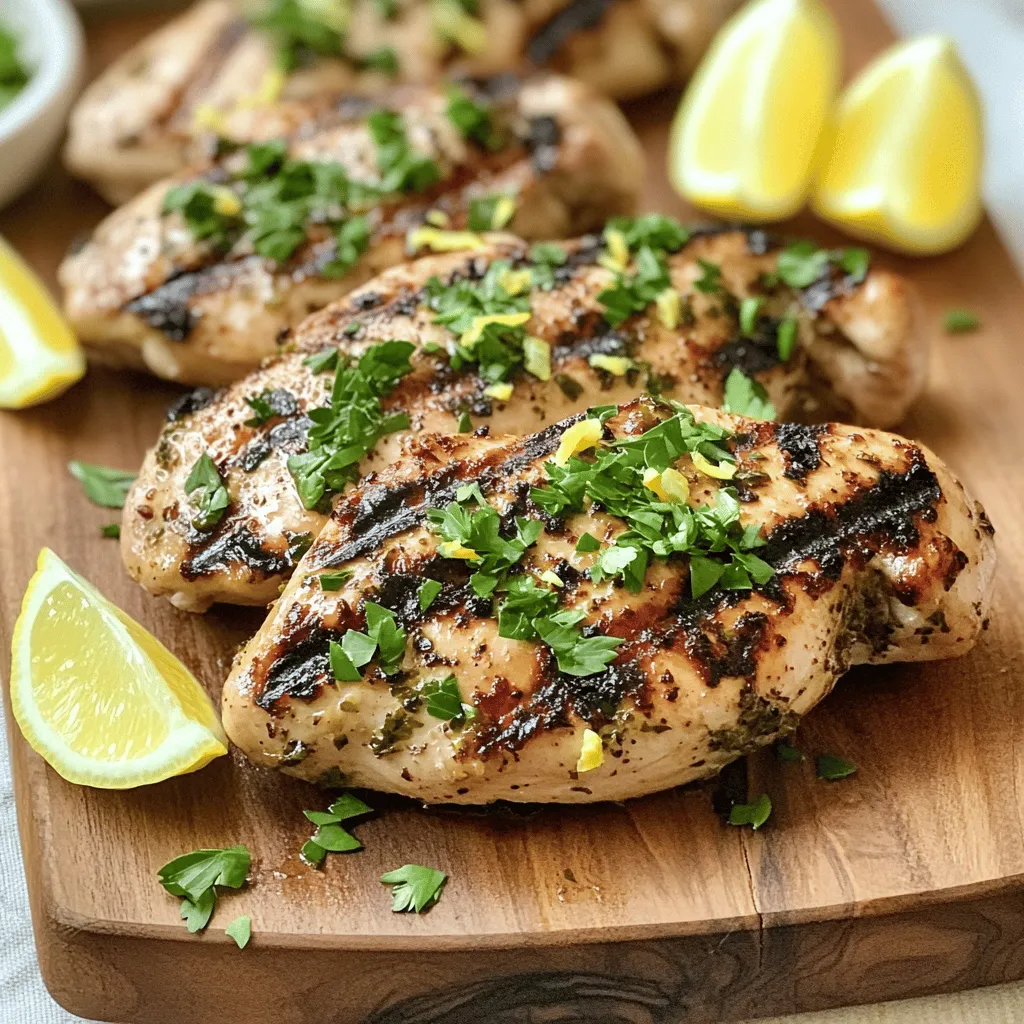
Are you craving a dish that’s both simple and full of flavor? Look no further! My Lemon Garlic Herb Grilled
![- 4 medium zucchini - 1 cup cooked quinoa - 1 cup cherry tomatoes, halved - 1 cup cooked black beans, drained and rinsed - 1/2 cup corn kernels - 1 teaspoon cumin - 1 teaspoon smoked paprika - 1/2 teaspoon garlic powder - 1/2 teaspoon onion powder - Salt and pepper to taste - 1 cup shredded cheese - Fresh cilantro or parsley for garnish To make Savory Stuffed Zucchini Boats, you need simple and fresh ingredients. Start with medium zucchini. They are the perfect size for stuffing. You will also need cooked quinoa, which adds protein and texture. Cherry tomatoes bring a burst of flavor, while black beans add heartiness. Corn kernels add sweetness and crunch. Spices like cumin and smoked paprika give depth to the filling. Garlic powder and onion powder add rich flavor without being overpowering. Don’t forget salt and pepper to taste; these will enhance all the flavors. For a creamy finish, use shredded cheese. Finally, fresh herbs like cilantro or parsley make a lovely garnish. Gather all these ingredients before you start. This makes the process easy and fun. You can find the full recipe to guide you through each step. Enjoy cooking! 1. Preheat the oven to 375°F (190°C). This step ensures your dish cooks evenly. 2. Slice each zucchini in half lengthwise. Use a spoon to scoop out the seeds. Be careful not to puncture the skin. This creates little boats for your filling. 1. In a large mixing bowl, combine the cooked quinoa, cherry tomatoes, black beans, corn, cumin, smoked paprika, garlic powder, onion powder, salt, and pepper. Mix until well combined. This mixture will be packed with flavor. 2. Carefully fill each zucchini half with the quinoa mixture. Press down gently to ensure they are full. 1. Place the stuffed zucchini boats on a baking sheet lined with parchment paper. This makes for easy cleanup. 2. Sprinkle the shredded cheese evenly over the top of each stuffed zucchini. Cheese adds a delicious, melty topping. 3. Bake in the preheated oven for 25-30 minutes. You want the zucchini to be tender and the cheese to be golden and bubbly. 4. Remove from the oven and let cool for a few minutes. Garnish with fresh cilantro or parsley before serving. This adds a nice touch of color and flavor. For the full recipe, check out the detailed instructions above. Enjoy your tasty, healthy meal! To make great stuffed zucchini, avoid overcooking the zucchini. Cook them until they are tender but still firm. This way, they hold their shape and do not become mushy. Keep an eye on them while baking. You want a slight crunch for the best texture. For a golden cheese topping, use shredded cheese with a good melt, like cheddar or mozzarella. Spread it evenly over the zucchini before baking. This helps it melt and bubble nicely. If you like a crispy finish, broil the zucchini for a minute or two at the end. Just watch it closely to prevent burning. You can switch up the grains or proteins in this recipe. For instance, use farro or brown rice instead of quinoa. If you need a protein boost, try ground turkey or lentils. They work great in stuffing. For cheese alternatives, use vegan cheese or nutritional yeast. These options fit well for those who want dairy-free meals. You can enjoy the same taste without dairy. To add more flavor, toss in your favorite spices or herbs. A pinch of chili powder or dried oregano can bring a new twist. You can also mix in fresh herbs like basil or cilantro for extra freshness. Incorporating different vegetables adds variety and color to your dish. Try bell peppers, spinach, or mushrooms. These can enhance the taste and make your meal more exciting. Experimenting will keep your stuffed zucchini interesting every time you make them. For the Full Recipe, check the main article section above. {{image_2}} For a Mediterranean flavor, add these ingredients: - 1 cup cooked couscous - 1/2 cup feta cheese, crumbled - 1/2 cup olives, chopped - 1 teaspoon oregano - 1 teaspoon lemon zest These ingredients bring a bright taste to your zucchini boats. The feta adds creaminess, while olives give a salty kick. Oregano and lemon zest enhance the freshness. Mix these into your stuffing for a taste of the Mediterranean. To create a Mexican version, include: - 1 jalapeño, diced - 1 teaspoon chili powder - 1/2 cup corn salsa - 1/2 cup shredded pepper jack cheese Jalapeños add heat, making this dish exciting. Chili powder boosts the flavor, while corn salsa brings sweetness. Pepper jack cheese melts beautifully and adds a spicy kick. This version is perfect for taco lovers. Making these boats vegan is simple. Use: - 1 cup cooked lentils instead of black beans - 1/2 cup nutritional yeast instead of cheese - 1 tablespoon olive oil instead of butter Lentils pack a protein punch, keeping the dish hearty. Nutritional yeast gives a cheesy flavor without dairy. Olive oil adds richness while being plant-based. These changes keep the meal delicious and healthy. You can find the full recipe to try these variations! To keep your savory stuffed zucchini boats fresh, place them in an airtight container. Make sure to cool them down first. These zucchini boats last up to four days in the fridge. If you want to keep them longer, freezing is a great option. Just remember, the sooner you store them, the better they will taste later. Reheating stuffed zucchini is easy. The best method is to use an oven. Preheat the oven to 350°F (175°C). Place the zucchini boats on a baking sheet. Heat them for about 15-20 minutes until warm. You can also use a microwave. Heat them for about 1-2 minutes, but the texture may not be as nice. Freezing your stuffed zucchini boats can be simple. First, let them cool down completely. Then, wrap each boat in plastic wrap or foil. Place them in a freezer-safe bag or container. They can stay in the freezer for up to three months. When you are ready to eat, thaw them overnight in the fridge. Reheat them as mentioned above for best results. This way, you can enjoy a healthy meal anytime! You can find the full recipe above to get started. Yes, you can use many other vegetables. Some great options include: - Bell peppers - Eggplant - Mushrooms - Acorn squash These veggies hold up well and are easy to stuff. Each one brings its own unique taste and texture. For instance, bell peppers add a sweet crunch, while mushrooms offer a rich, earthy flavor. You can mix and match these vegetables to create your perfect stuffed dish. To make this dish gluten-free, choose the right ingredients. Here are some options: - Use gluten-free quinoa or rice - Opt for gluten-free cheese or omit cheese - Ensure all canned ingredients are labeled gluten-free These swaps keep the dish safe for anyone with gluten allergies. Quinoa is a great base as it is naturally gluten-free. You can still enjoy the same great flavors without worry. Side dishes can enhance your meal. Here are some tasty pairings: - Mixed green salad - Garlic bread - Steamed broccoli - Roasted sweet potatoes These sides balance the flavors of the stuffed zucchini. A fresh salad adds crunch, while garlic bread offers a cozy touch. Choose sides that match your taste and make your meal even more enjoyable. For the complete recipe, check out the [Full Recipe]. Savory stuffed zucchini boats are a fun and healthy dish to make. We explored the ingredients, preparation, and cooking steps to ensure success. Tips for customizing flavors and dietary needs enhance the recipe. You can easily store leftovers or freeze them for later. Enjoy trying different twists, like Mediterranean or Mexican styles, and feel free to switch the ingredients to suit your taste. This dish is simple, delicious, and great for any meal. So grab your zucchini and start cooking!](https://cookingwells.com/wp-content/uploads/2025/05/b1f68fe8-f931-4888-bfa1-910a811fbf2c.webp)
Looking for a meal that’s both tasty and healthy? Savory stuffed zucchini boats are the perfect way to enjoy vibrant
![To make a great spaghetti aglio e olio, you need simple and fresh ingredients. Here’s what you will need: - 400g spaghetti - 6 cloves garlic, thinly sliced - 1/2 cup good-quality extra-virgin olive oil - 1/4 teaspoon red pepper flakes (adjust to taste) - Salt, to taste - 1/4 cup fresh parsley, finely chopped - Zest of 1 lemon These main ingredients create a base that shines with flavor and texture. The garlic and olive oil blend perfectly, giving the pasta its classic taste. While the main ingredients are key, you can add some optional items to take your dish up a notch: - 1/4 cup grated Parmesan cheese (optional) - Toasted pine nuts for garnish (optional) Adding Parmesan gives a creamy touch, while pine nuts add a nice crunch. You can mix and match these based on your taste. Quality matters in this simple dish. Here are some tips to select the best ingredients: - Pasta: Look for high-quality durum wheat spaghetti. It holds sauce well. - Garlic: Choose firm garlic bulbs. Fresh garlic has a stronger flavor. - Olive Oil: Use extra-virgin olive oil. It should be rich and fragrant. - Parsley: Pick fresh parsley with vibrant green leaves. Avoid wilted ones. - Cheese: If using Parmesan, choose block cheese over pre-grated for better flavor. These simple tips help you create a dish that tastes amazing. For the complete recipe, refer to the Full Recipe. Start by boiling water in a large pot. Add salt to the water. Once boiling, add 400g of spaghetti. Cook it until it is al dente, as per package instructions. This usually takes about 8 to 10 minutes. Before draining, save one cup of pasta water. Drain the spaghetti and set it aside for later. In a large skillet, heat 1/2 cup of extra-virgin olive oil over medium heat. Once the oil is warm, add 6 thinly sliced cloves of garlic and 1/4 teaspoon of red pepper flakes. Stir this mixture often. Cook until the garlic is soft and turns golden, which should take about 3 to 4 minutes. Be careful not to let the garlic burn. Next, lower the heat and add the drained spaghetti to the skillet. Toss the spaghetti well to coat it in the garlic oil. Now, take the reserved pasta water and slowly add it, a little at a time. Toss the pasta as you do this. This will help create a creamy texture that clings to the spaghetti. Season with salt to taste. Now it's time to add freshness. Stir in 1/4 cup of finely chopped parsley and the zest of one lemon. Make sure to mix thoroughly, as this will brighten the dish. If you like, add 1/4 cup of grated Parmesan cheese and toss again. For extra flavor, sprinkle some toasted pine nuts on top. Serve the spaghetti hot. Plate it while it's still warm for the best taste. You can garnish it with more parsley or Parmesan cheese if you want. Enjoy this simple and flavorful dish right away! If you wish to explore more details, check the Full Recipe. When making Spaghetti Aglio e Olio, some common mistakes can ruin your dish. First, do not let the garlic burn. It should be soft and golden, not brown. If it burns, the oil will taste bitter. Also, avoid overcooking the pasta. It should be al dente, which means it should have a slight bite. Lastly, do not skip the reserved pasta water. This starchy liquid helps create a creamy sauce. You can easily change the flavor of your Aglio e Olio. Want more heat? Add more red pepper flakes or even sliced fresh chili. If you like a brighter taste, add more lemon zest. For a richer flavor, toss in some grated Parmesan cheese. You can also try adding fresh herbs like basil or oregano. Each choice gives your dish a new twist. Cooking pasta seems simple, but a few tips make a big difference. Always use plenty of water and salt. This helps the pasta cook evenly and adds flavor. Stir the spaghetti in the pot to prevent sticking. Taste it a minute before the package says it’s done. This way, you’ll get the perfect al dente texture. Lastly, remember to reserve some pasta water before draining. It’s great for adjusting the sauce later. For a complete guide on making Spaghetti Aglio e Olio, check out the Full Recipe. {{image_2}} You can make Spaghetti Aglio e Olio even heartier by adding protein. Chicken or shrimp works great. For chicken, choose boneless, skinless thighs or breasts. Cook them in the olive oil before adding the garlic. For shrimp, sauté them until pink before mixing in the pasta. Both options add depth and keep the dish filling. If you want a vegan version, skip the cheese and use mushrooms instead. Mushrooms add a nice umami flavor. You can also toss in some spinach for added nutrients. Keep the garlic and olive oil for that classic taste. This way, you maintain the essence of the dish while making it plant-based. Get creative with your Spaghetti Aglio e Olio! You can add sun-dried tomatoes for sweetness. A splash of lemon juice brightens the dish nicely. Try adding capers for a salty burst. Each of these add-ins gives a new twist while keeping the core flavors intact. Explore your pantry and let your taste buds guide you! For the complete recipe, check out the [Full Recipe]. To keep your Spaghetti Aglio e Olio fresh, place it in an airtight container. Let it cool fully before sealing. Store it in the fridge for up to three days. If you want to eat it later, make sure to check for any signs of spoilage. When it's time to enjoy your leftovers, gently reheat them. You can use the microwave or a skillet. If you use a skillet, add a splash of olive oil or pasta water. This helps bring back the creamy texture. Stir frequently until heated through. Avoid cooking on high heat to keep the garlic from burning. If you want to freeze Spaghetti Aglio e Olio, store it in a freezer-safe container. It can last up to three months in the freezer. To reheat, let it thaw in the fridge overnight. Then, warm it in a skillet with a bit of olive oil or water. This method keeps the flavors intact. For full instructions, refer to the Full Recipe. Spaghetti Aglio e Olio comes from Italy, specifically Naples. This dish is simple but full of flavor. It uses just a few ingredients: garlic, olive oil, and red pepper flakes. Many chefs made this dish for years. It shows how tasty food can be with just a few items. Yes, you can make Spaghetti Aglio e Olio gluten-free! Use gluten-free spaghetti instead of regular pasta. There are many gluten-free options available today. Just cook it like regular pasta, and you will enjoy the same great taste. To change the spice level, adjust the red pepper flakes. Start with a small amount, like 1/8 teaspoon. Taste it, and then add more if you want more heat. You can also leave them out if you prefer a milder dish. You can serve Spaghetti Aglio e Olio with a fresh salad or garlic bread. A light green salad with lemon dressing pairs well. You can also add grilled chicken or shrimp for more protein. For complete details, check the Full Recipe. Spaghetti Aglio e Olio is simple yet full of flavor. We covered the key ingredients and tips for choosing the best ones. Cooking steps helped you make the perfect dish, while tips and variations gave you room to be creative. Storing leftovers and reheating properly helps you enjoy this meal longer. For all the details, check the full recipe. Enjoy cooking and tasting this classic dish!](https://cookingwells.com/wp-content/uploads/2025/05/bf31048d-3b35-406e-9e49-b4d6ef078036.webp)
Welcome to the world of Spaghetti Aglio e Olio! This simple and flavorful dish brings joy to your table with
. 1. Preheat your oven to 400°F (200°C). This ensures the chicken cooks evenly. 2. Make the marinade. In a bowl, mix the Dijon mustard, honey, olive oil, apple cider vinegar, minced garlic, dried thyme, smoked paprika, salt, and pepper. Whisk until smooth. 3. Prepare the chicken thighs. Pat the chicken thighs dry using paper towels. Season both sides with salt and pepper. 4. Marinate the chicken. Place the chicken thighs in a large bowl or a ziplock bag. Pour the honey mustard mixture over them. Make sure each piece is well coated. Let the chicken marinate for at least 30 minutes. For more flavor, marinate overnight in the fridge. 5. Sear the chicken thighs. Heat a large oven-safe skillet over medium-high heat. Add the marinated chicken thighs, skin-side down. Sear for about 5-7 minutes until the skin turns golden brown and crispy. 1. Bake the chicken thighs. Flip the chicken thighs over and pour any leftover marinade on top. Transfer the skillet to your hot oven. Bake for 25-30 minutes. The chicken should reach an internal temperature of 165°F (75°C). 2. Rest and garnish. Remove the skillet from the oven. Let the chicken rest for about 5 minutes. This helps keep the juices inside. Before serving, sprinkle fresh chopped parsley on top for color and flavor. - Tips for perfect searing. Make sure your skillet is hot before adding the chicken. This will help the skin get crispy. - Checking internal temperature. Use a meat thermometer to check the internal temperature. This ensures your chicken is safe to eat and perfectly cooked. Follow these steps for a delicious honey mustard chicken dish that impresses! For the complete recipe, refer to the Full Recipe section. Marinating chicken thighs gives them great flavor and tenderness. The honey mustard mix seeps into the meat, making every bite juicy. I always say, "The longer you marinate, the better the taste!" You can let your chicken soak in the marinade for at least 30 minutes. For a deeper flavor, try marinating overnight in the fridge. To get that crispy skin, always start by searing the chicken skin-side down. This step locks in the juices and adds a nice crunch. Cook it until golden brown, then flip it to finish in the oven. You can also play with flavors! Try adding herbs like rosemary or spices like cayenne for an extra kick. When serving honey mustard chicken thighs, think about sides that balance the dish. Roasted vegetables, mashed potatoes, or a fresh salad work well. For a lovely presentation, place the chicken on a bed of sautéed greens. Drizzle some pan juices over the top and add lemon wedges for color and zing. This makes it look as good as it tastes! For the full recipe, check out the instructions above. {{image_2}} You can change the mustard type in the recipe. Try whole grain mustard for a different texture. Yellow mustard gives a milder taste. Each type can shift the flavor. For honey substitutes, maple syrup works well. It adds a sweet touch and depth. Agave nectar is another great choice. Both keep the dish tasty while changing the sweetness. You can grill or bake the chicken thighs. Grilling gives a smoky flavor and crispy edges. Baking is easy and keeps the chicken juicy. Choose what fits your meal plan best. A slow cooker is also a great option. It makes the chicken very tender. Just mix the marinade and chicken in the pot. Cook on low for 6-8 hours for a simple dinner. If you're gluten-free, use gluten-free mustard. Many brands offer great options. Always check the label for safety. For low-carb diets, skip the honey. Use a sugar-free sweetener instead. This keeps the taste while lowering carbs. Enjoy this dish, no matter your diet! You can find the full recipe above. To keep your honey mustard chicken thighs fresh, follow these tips: - Refrigeration guidelines: Place leftover chicken thighs in an airtight container. They can last for up to four days in the fridge. Make sure the chicken cools down before sealing it. - Freezing tips: For longer storage, freeze the chicken. Wrap each thigh tightly in plastic wrap, then place them in a freezer bag. They stay good for up to three months. To enjoy your honey mustard chicken thighs again, reheat them properly: - How to reheat chicken thighs effectively: Preheat your oven to 350°F (175°C). Place the thighs in a baking dish, cover with foil, and heat for about 20-25 minutes. This keeps the chicken moist. You can also use a microwave. Heat on medium power for about 2-3 minutes, checking often to avoid drying out. Wondering how long your dish lasts? - How long the dish lasts properly stored: When stored correctly in the fridge, honey mustard chicken thighs last up to four days. If frozen, they stay tasty for about three months. Always check for any signs of spoilage before consuming. To make honey mustard chicken thighs, you start by marinating the chicken. The marinade includes Dijon mustard, honey, olive oil, apple cider vinegar, and spices. You mix these ingredients in a bowl until blended well. Then, pat the chicken dry and season it. Coat the chicken in the marinade and let it rest for at least 30 minutes. Next, heat an oven-safe skillet over medium-high heat. Place the thighs skin-side down and sear for 5-7 minutes until golden. Flip them over, pour any leftover marinade on top, and bake in a preheated oven at 400°F for 25-30 minutes. You want the chicken to reach 165°F inside. Let it rest for a few minutes before serving. This method ensures juicy, flavorful chicken with crispy skin. Yes, you can use boneless chicken thighs. They cook faster than bone-in thighs. Adjust the cooking time to about 20 minutes in the oven. Follow the same marinating and searing steps as with bone-in thighs. Just make sure to check for doneness using a meat thermometer. You want the internal temperature to still reach 165°F. The flavors from the honey mustard will still shine through with boneless thighs. Honey mustard chicken pairs well with many side dishes. Here are some tasty ideas: - Roasted vegetables like carrots, broccoli, or Brussels sprouts - A fresh green salad with mixed greens and a light vinaigrette - Creamy mashed potatoes or garlic mashed cauliflower - Quinoa or rice pilaf to soak up the sauce - Sautéed greens like spinach or kale These sides create a balanced meal and enhance the flavors of the chicken. Consider adding lemon wedges for a bright touch. For the full recipe, check out the detailed cooking steps provided above. In this blog post, we explored how to make delicious honey mustard chicken thighs. We covered essential ingredients, preparation steps, cooking tips, and variations. Remember, marinating enhances flavor and offers options to fit your taste. Storing leftovers correctly will keep your dish fresh. Experiment with different cooking methods and sides to make this meal your own. Enjoy creating your version of this tasty dish, and share it with those you love for a delightful meal!](https://cookingwells.com/wp-content/uploads/2025/05/558b58ce-605f-4a5c-a8c2-65113196f4cb.webp)
Are you ready to treat your taste buds? Honey Mustard Chicken Thighs is a dish you won’t forget! This recipe
![To make a tasty cinnamon roll casserole, you'll need: - 1 can (16 oz) refrigerated cinnamon rolls, cut into quarters - 4 large eggs - 1 cup milk (whole or almond for a dairy-free option) - 1/2 cup brown sugar, packed - 1 teaspoon vanilla extract - 1 teaspoon ground cinnamon - 1/4 teaspoon nutmeg - 1/2 cup pecans or walnuts, chopped (optional) - 1/2 cup raisins or dried cranberries (optional) - 1 cup cream cheese frosting (from the cinnamon roll can or homemade) When choosing your ingredients, freshness is key. - Cinnamon Rolls: Look for high-quality, refrigerated rolls. - Milk: Use fresh milk; check the expiration date. - Eggs: Choose eggs with bright yolks for rich flavor. - Nuts and Fruits: If using, ensure nuts are crunchy and fruits are plump. You can easily adapt this recipe to fit your needs. - Dairy-Free: Substitute whole milk with almond or oat milk. - Nut-Free: Omit nuts or use seeds like pumpkin seeds instead. - Sugar-Free: Use a sugar alternative in place of brown sugar. - Gluten-Free: Use gluten-free cinnamon rolls for a safe option. For the full recipe, check out the detailed instructions. Start by gathering all your ingredients. You will need: - 1 can (16 oz) refrigerated cinnamon rolls, cut into quarters - 4 large eggs - 1 cup milk - 1/2 cup brown sugar - 1 teaspoon vanilla extract - 1 teaspoon ground cinnamon - 1/4 teaspoon nutmeg - 1/2 cup chopped pecans or walnuts (optional) - 1/2 cup raisins or dried cranberries (optional) - 1 cup cream cheese frosting Next, preheat your oven to 375°F (190°C). Grease a 9x13-inch baking dish with cooking spray or butter. In a large bowl, whisk together the eggs, milk, brown sugar, vanilla extract, ground cinnamon, and nutmeg. Mix until you see no lumps. Now, add the quartered cinnamon rolls to the egg mixture. Make sure all pieces are covered well. If you want, stir in the nuts and dried fruit. Pour the mixture into the baking dish and spread it evenly. Place your baking dish in the preheated oven. Bake for 25 to 30 minutes. Keep an eye on it. You want the top to be golden brown. To check if it's done, use a toothpick. Insert it into the center of the casserole. If it comes out clean, it's ready. If not, bake for a few more minutes and check again. Let it cool for about 5 minutes before drizzling with cream cheese frosting. For the complete recipe, refer to the Full Recipe section. Enjoy your delicious cinnamon roll casserole! To get that fluffy texture, cut the cinnamon rolls into quarters. This helps them soak up the egg mixture. Make sure to mix them well in the bowl. You want every piece coated. Bake until the top is golden brown. This usually takes about 25-30 minutes at 375°F. Let it rest for a few minutes after baking. This helps it firm up before serving. One common mistake is not cutting the cinnamon rolls small enough. If they are too large, they won't cook evenly. Another mistake is under-baking. Always check with a toothpick. If it comes out clean, your casserole is ready. Also, don’t skip the resting time. Serving it too soon can make it fall apart. Serve the casserole warm. Cut it into squares for easy serving. Drizzle cream cheese frosting on top for a sweet touch. For added flavor, sprinkle some extra cinnamon or nuts. You can also pair it with fresh fruit like berries or banana slices. This adds freshness and balance to the dish. If you want the full recipe, check out the details above. {{image_2}} You can switch up the flavors in your Cinnamon Roll Casserole. Try using flavored cinnamon rolls, like pumpkin spice or apple cinnamon. These variations will add a fun twist. You could also mix in chocolate chips or swap in a flavored cream cheese frosting. This keeps breakfast exciting! To make this dish gluten-free, look for gluten-free cinnamon rolls. They work just as well. If you want a vegan version, use almond milk and replace the eggs with flax eggs. This will not change the taste too much. Both options let everyone enjoy this tasty meal. Get creative with seasonal flavors! In fall, add chopped apples or pumpkin puree. For winter, consider cranberries or walnuts. In spring, fresh berries can brighten the dish. Top with whipped cream or a drizzle of maple syrup for extra sweetness. These add-ins create a unique experience each time! For the complete recipe, check out the [Full Recipe]. Store any leftover cinnamon roll casserole in an airtight container. Make sure it cools down first. You can keep it in the fridge for up to three days. If you have more than one serving left, cut them into squares for easier storage. To reheat, place a square of the casserole on a microwave-safe plate. Heat it for about 30 seconds on high. Check if it’s warm enough. If not, heat for another 15 seconds. You can also reheat it in the oven. Preheat your oven to 350°F (175°C). Place the casserole in for about 10-15 minutes. Cover it with foil to keep it from drying out. If you want to save some for later, freezing is a good option. First, let the casserole cool completely. Then, cut it into serving-sized squares. Wrap each square tightly in plastic wrap and place them in a freezer-safe bag. Make sure to remove as much air as possible. You can freeze the casserole for up to three months. When you're ready to eat, thaw it in the fridge overnight before reheating. For the best taste, eat it within one month. Make sure to check out the Full Recipe for more delicious tips! Yes, you can make Cinnamon Roll Casserole ahead of time. Prepare the dish the night before. After mixing the cinnamon rolls with the egg mixture, cover the dish. Store it in the fridge overnight. This way, the flavors blend well. In the morning, simply bake it. You will have a warm and tasty breakfast ready to go. To avoid a soggy casserole, do not use too much milk. Stick to one cup as the recipe suggests. Ensure the cinnamon rolls are cut into small pieces. This helps them absorb the mixture without getting too mushy. Bake the casserole until it is golden brown. A toothpick should come out clean from the center. Cut the casserole into squares and serve it warm. Drizzle cream cheese frosting over the top for added flavor. You can also sprinkle some cinnamon or chopped nuts for a nice touch. Serve it on individual plates for a pretty presentation. This makes every bite feel special and delightful! This blog post covered everything you need for a great Cinnamon Roll Casserole. We looked at key ingredients and helpful tips for freshness, plus how to make smart substitutions. The step-by-step guide made the cooking process easy. I shared tips for achieving perfect texture and common mistakes to avoid. Variations offer fun ways to customize this dish. Finally, storage info ensures you can enjoy leftovers later. Follow these steps and enjoy a delicious casserole next time! It's that simple.](https://cookingwells.com/wp-content/uploads/2025/05/c271fb12-94b0-4cc7-8626-087488866d85.webp)
If you want a breakfast that feels like a hug, get ready for my Cinnamon Roll Casserole! This easy dish
![To make these tasty stuffed bell peppers with quinoa, gather these key ingredients: - 4 medium bell peppers (any color) - 1 cup quinoa, rinsed - 2 cups vegetable broth - 1 can (15 oz) black beans, drained and rinsed - 1 cup corn kernels (fresh, frozen, or canned) - 1 cup diced tomatoes (fresh or canned) - 1 teaspoon cumin - 1 teaspoon paprika - ½ teaspoon chili powder - ½ cup diced red onion - 1 clove garlic, minced - Salt and pepper to taste - 1 cup shredded cheese (cheddar or Mexican blend) - Fresh cilantro for garnish Using fresh ingredients can enhance flavor and nutrition. Fresh bell peppers offer crispness. Fresh corn adds sweetness. However, canned ingredients are quick and easy. Canned beans save time and still provide protein. Canned tomatoes can add moisture and taste. If you're in a rush, don't hesitate to use canned items. They still work great in this dish. Stuffed bell peppers with quinoa are healthy and filling. Each serving provides: - Calories: About 320 - Protein: 15 grams - Fiber: 10 grams - Carbohydrates: 45 grams - Fats: 10 grams These peppers are low in fat and high in protein. They also have plenty of fiber, which helps keep you full. Enjoying this meal offers both nutrition and taste. For the full recipe, check out the details above. First, rinse 1 cup of quinoa under cold water. This helps remove any bitter taste. Next, combine the rinsed quinoa with 2 cups of vegetable broth in a medium saucepan. Bring this mixture to a boil over medium heat. Once boiling, reduce the heat to low and cover the pot. Let it simmer for about 15 minutes. After that, check if the quinoa is fluffy and the liquid is absorbed. It should look light and airy. While the quinoa cooks, grab 4 medium bell peppers. You can choose any color you like. Cut off the tops and remove the seeds and membranes inside. If you want extra flavor, chop the tops (without the stems) and set them aside. You can add these bits to your stuffing later for a tasty twist. In a large mixing bowl, combine the cooked quinoa, 1 can of black beans (drained and rinsed), 1 cup of corn, and 1 cup of diced tomatoes. Next, add your spices: 1 teaspoon of cumin, 1 teaspoon of paprika, and ½ teaspoon of chili powder. Toss in ½ cup of diced red onion and 1 clove of minced garlic. Season with salt and pepper to taste. Mix everything well until it's evenly combined. Now, it’s time to stuff your bell peppers! Fill each pepper generously with this tasty quinoa mixture. For a delightful finish, sprinkle 1 cup of shredded cheese on top. For the complete recipe, you can visit the [Full Recipe]. After you stuff the bell peppers, the next step is baking them. I cover the baking dish with aluminum foil. This keeps the peppers moist as they cook. I bake them at 375°F (190°C) for 25 minutes. This helps the peppers get tender. You want them soft but not mushy. When you remove the foil, it’s time for the cheese. I sprinkle cheese on top of each stuffed pepper. You can use cheddar or a Mexican blend. Cheese adds flavor and makes the dish more appealing. For a fun twist, try mixing different cheeses. I like to check if the peppers are done. The cheese should be bubbly and golden. I poke a fork into a pepper to test it. If it feels soft, they are ready. If not, I put them back in the oven for a few more minutes. Enjoy your tasty stuffed peppers! For the full recipe, check out [Full Recipe]. {{image_2}} You can easily swap ingredients to fit your taste. Use brown rice instead of quinoa for a different texture. If you prefer, chickpeas can replace black beans. For a spicy kick, add jalapeños or hot sauce to the filling. You can also use different cheeses, like feta or mozzarella. If you want a lower-carb option, use cauliflower rice instead of quinoa. Making stuffed bell peppers ahead is simple. You can prepare the filling a day in advance. Store it in the fridge until you are ready to stuff the peppers. You can also stuff the peppers ahead of time. Just cover them tightly and refrigerate until you bake. When you're ready, bake them as usual, adding a few extra minutes if cold. Serve your stuffed peppers with a fresh salad for a complete meal. A dollop of sour cream or Greek yogurt adds creaminess. You can also sprinkle extra cilantro on top for flavor. For a side dish, consider roasted vegetables or a light grain salad. Pairing with a slice of crusty bread is also a great idea. Enjoy your meal with family and friends for a fun gathering. You can easily make stuffed bell peppers vegetarian or vegan. Just skip the cheese or use vegan cheese. You can also add more veggies. Consider spinach, zucchini, or mushrooms for extra flavor. These options keep it healthy and colorful. For a heartier meal, feel free to add protein. Cooked chicken or turkey blends well with the quinoa. It adds taste and makes the dish more filling. Simply mix the cooked meat into the stuffing before filling the peppers. Spices can change the flavor of your stuffed peppers. Try Italian herbs like oregano and basil for a new twist. You can also add curry powder for an Indian flavor. Mix and match spices based on what you enjoy. This makes your dish unique each time. Stuffed bell peppers last about 3 to 5 days in the fridge. Store them in an airtight container. This keeps them fresh and tasty. When you want to eat them, just reheat in the oven or microwave. Yes, you can freeze stuffed bell peppers. Wrap each pepper in plastic wrap or foil. Place them in a freezer-safe bag or container. They can last up to 3 months in the freezer. When ready to eat, thaw them overnight in the fridge. Bake them directly from frozen for a warm meal. If you want to switch grains, try brown rice or farro. Both add great flavor and texture. You can also use couscous or barley for a fun twist. Just make sure to cook the grain before mixing it with the stuffing. This way, you get a hearty meal every time. For the complete recipe, check out the Full Recipe. In this blog post, I covered how to make stuffed bell peppers. I shared the full list of ingredients, with options for fresh and canned. I also explained how to prepare quinoa and the peppers, plus tips for baking. You learned about substitutions and serving ideas to fit your taste. Stuffed peppers are flexible and fun to make. You can change the flavors or ingredients to match what you like. Enjoy your cooking journey with this tasty dish!](https://cookingwells.com/wp-content/uploads/2025/05/74daf231-de5b-4402-b552-c6a86beec81c.webp)
If you’re searching for a healthy meal that’s both tasty and filling, look no further! Stuffed bell peppers with quinoa
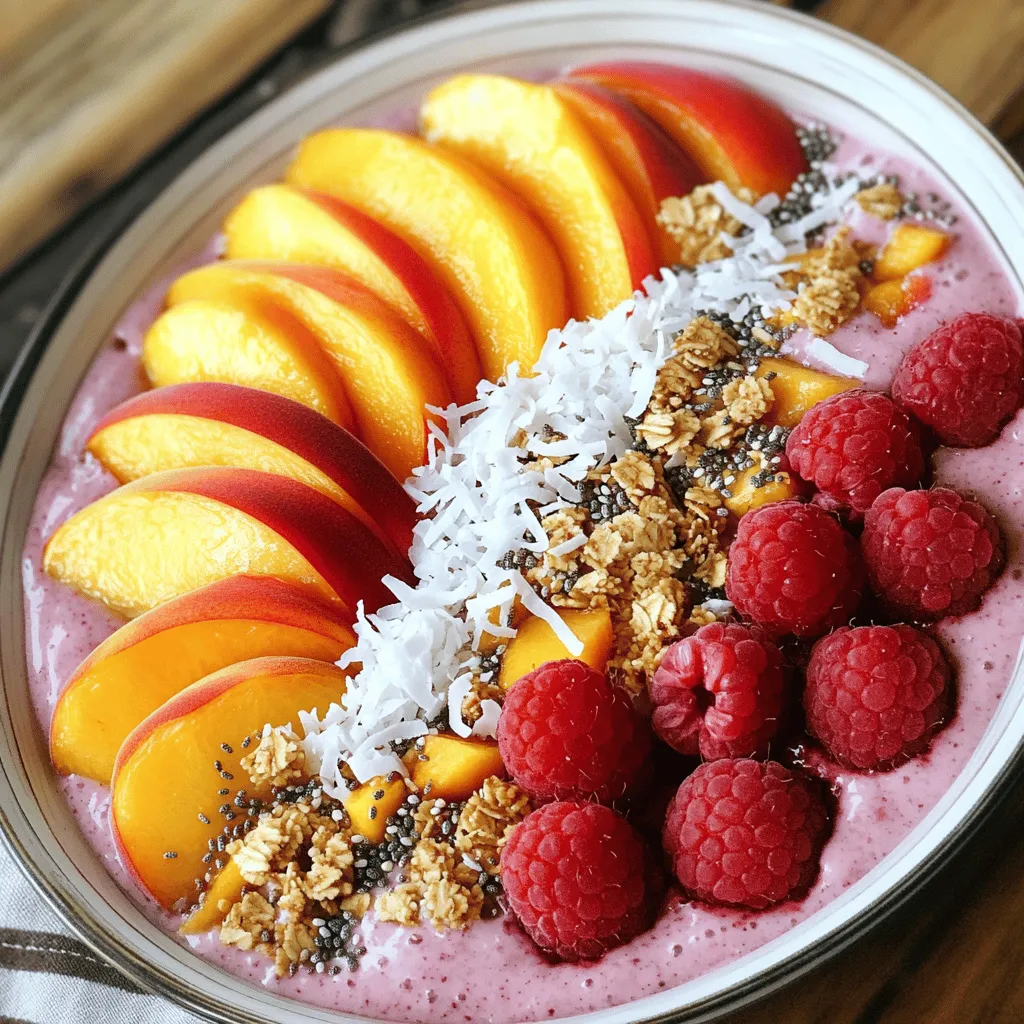
Looking for a healthy and delicious treat? Dive into my Peach Melba Smoothie Bowl! This vibrant bowl combines ripe peaches,
