Skip to content
DisclaimerTerms Of UseGDPR PolicyCookie Policy

Cooking Wells

  • Home
  • Drinks
  • Appetizers
  • Dinner
  • Dessert
  • About
  • Contact
  • Privacy Policy
DisclaimerTerms Of UseGDPR PolicyCookie Policy

Mia

To make a delicious Chocolate Avocado Mousse, you need just a few key ingredients. Here’s what you’ll need: - 2 ripe avocados, peeled and pitted - 1/2 cup unsweetened cocoa powder - 1/4 cup maple syrup (or honey) - 1/4 cup almond milk (or milk of choice) - 1 teaspoon vanilla extract - 1/4 teaspoon sea salt These ingredients work together to create a rich and creamy dessert. The avocados give the mousse its smooth texture while adding healthy fats. You can adjust the sweetness based on your taste. If you prefer, use honey or agave syrup instead of maple syrup. Each sweetener adds a unique flavor. For dairy options, you can replace almond milk with any milk you like, such as oat or coconut milk. This allows you to tailor the mousse to your dietary needs. Garnishing your mousse elevates its look and taste. Here are some tasty ideas: - Shaved dark chocolate - Fresh berries like raspberries or strawberries - Chopped nuts such as almonds or walnuts These toppings add crunch, color, and extra flavor. Feel free to mix and match them for a stunning presentation. You can find the Full Recipe for more details. Start with two ripe avocados. Their skin should be dark and slightly soft. Cut the avocados in half and remove the pit carefully. Scoop the green flesh into a blender. Avoid any brown spots, as they can affect the taste. The avocado is the base of our mousse. It adds creaminess and healthy fats. Next, add the cocoa powder, maple syrup, almond milk, vanilla extract, and sea salt to the blender. Blend on high until the mixture is smooth and creamy. Stop to scrape the sides if needed. Taste the mousse. If you want it sweeter, add more maple syrup. Blend again until it is perfect. This is where the magic happens. The chocolate and avocado blend into a silky treat. Transfer the mousse into dessert cups or bowls. Chill in the fridge for at least 30 minutes. This helps the flavors meld together. Before serving, consider topping it with shaved dark chocolate, fresh berries, or chopped nuts. These add great texture and look beautiful. Enjoy this treat knowing it’s both tasty and healthy! You can find the Full Recipe for more details. To get that dreamy, silky texture, start with ripe avocados. They should feel soft but not mushy. When blending, ensure you stop to scrape down the sides. This helps mix everything well. Blend until it looks smooth and creamy. If it feels too thick, add a splash of almond milk. This little trick makes it velvety. Taste your mousse as you mix. If you want it sweeter, add more maple syrup. Start with a bit, blend, and taste again. You can also swap maple syrup for honey if you prefer. This dessert is all about your taste. Want a hint of spice? Try adding a pinch of cinnamon or a splash of almond extract. One mistake is using unripe avocados. They won’t blend well, and your mousse may turn grainy. Also, don’t skip the chilling step. Chilling helps the flavors come together. If you forget to chill, your mousse might taste flat. Trust me; it’s worth the wait! For the best results, follow the Full Recipe carefully. {{image_2}} You can make a vegan version of chocolate avocado mousse easily. This recipe is already vegan-friendly. Just use maple syrup for sweetness. Replace any dairy with plant-based milk. Almond milk works well, but you can use others too. The flavor remains rich and creamy. You won't miss the dairy at all. For a dairy-free twist, focus on your milk choice. Almond, coconut, or oat milk are great options. You can also use dairy-free chocolate if you prefer. This mousse still tastes divine without any dairy. You get all the creaminess without the extra fat. It’s a great way to enjoy dessert guilt-free. Adding flavors can make this mousse even more fun. You can mix in a few drops of mint extract for a refreshing twist. If you love coffee, add a shot of espresso. For a deeper chocolate taste, try adding more cocoa powder. You can also add a pinch of cinnamon for warmth. Get creative with toppings like fresh berries or nuts. Each variation brings a new taste adventure. Explore these options to find your favorite! To keep leftover mousse fresh, place it in an airtight container. This helps preserve its creamy texture and rich taste. Make sure to cover the top with plastic wrap before sealing. The mousse can last in the fridge for about three days. You can freeze Chocolate Avocado Mousse for later enjoyment. First, scoop the mousse into a freezer-safe container. Leave some space at the top, as the mousse may expand when frozen. It can stay good for up to two months. When you’re ready to eat it, thaw in the fridge overnight. Use glass or plastic containers that seal tightly. Glass containers are great for preventing odors. Plastic containers are lightweight and easy to stack. If you plan to freeze the mousse, choose containers that are labeled as freezer-safe. This ensures your mousse stays fresh and tasty. For the full recipe, click here! Yes, you can use other sweeteners. Honey works great if you prefer it. You can also try agave syrup for a vegan option. Just remember to adjust the amount based on how sweet you want your mousse. Taste as you go to find the perfect balance. Chocolate Avocado Mousse stays fresh for about 3 days in the fridge. Store it in an airtight container to keep it from drying out. If you see any changes in color or texture, it's best to toss it. Always check before enjoying your dessert! Yes, this recipe is quite flexible. It is dairy-free and can be made vegan if you choose maple syrup. People with nut allergies can swap almond milk for oat milk or coconut milk. Just make sure to check the labels for any hidden ingredients that might not fit your needs. The Full Recipe is a great guide for making adjustments! You learned about making a tasty chocolate avocado mousse. We covered key ingredients, including sweeteners and garnishes. The step-by-step guide made the process easy. I shared tips for great texture and common mistakes to avoid. You can try different vegan and dairy-free variations too. In the end, this dessert is delicious and customizable. Enjoy your mousse, whether you share it or keep it for yourself!

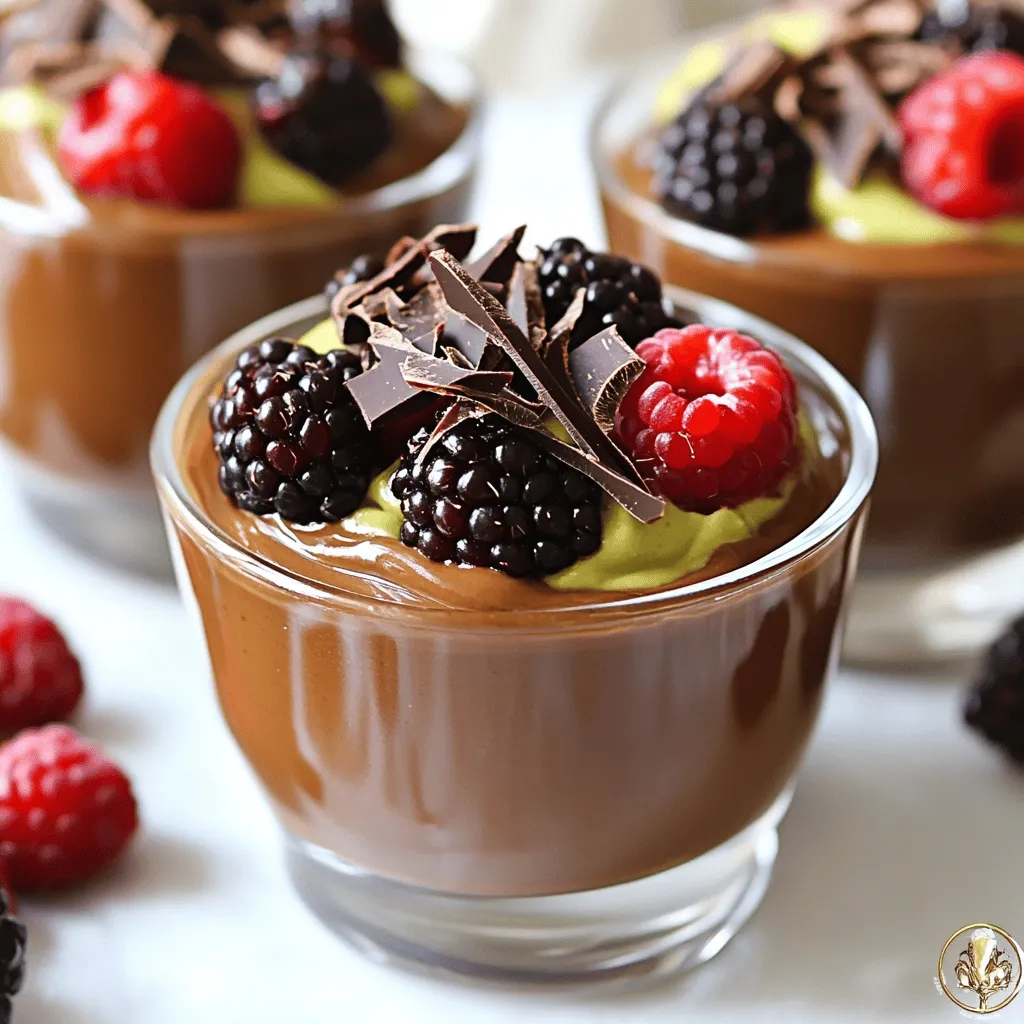
Chocolate Avocado Mousse Silky and Healthy Dessert

Are you ready to enjoy a dessert that is both silky smooth and healthy? Chocolate avocado mousse might sound surprising,

For a tasty avocado toast, you need these key items: - 2 ripe avocados - 4 slices of whole grain or sourdough bread - 1 cup cherry tomatoes, halved - 1/2 cup feta cheese, crumbled - 1 tablespoon olive oil - 1 tablespoon lemon juice - 1 teaspoon garlic powder - Salt and pepper to taste These ingredients create a creamy and colorful dish that sings with flavor. You can add more taste with these extras: - Fresh basil or parsley for garnish - Red pepper flakes for heat These optional items add freshness and a kick to your dish. Each ingredient brings its own health perks: - Avocados provide healthy fats and fiber. - Whole grain bread offers complex carbs and nutrients. - Cherry tomatoes are rich in vitamins and antioxidants. - Feta cheese adds protein and calcium. - Olive oil is great for heart health. - Lemon juice boosts your immune system. - Garlic powder has anti-inflammatory properties. This mix makes your meal both tasty and good for you. For the full recipe, check out the Avocado Toast Delight with Feta & Tomatoes. Start by cutting the ripe avocados in half. Remove the pit and scoop the flesh into a mixing bowl. Add lemon juice, garlic powder, and a pinch of salt and pepper. Mash the mix gently with a fork. You want it creamy yet chunky for nice texture. This step brings out the fresh flavors of the avocado. Next, take your slices of whole grain or sourdough bread. Toast them until they are golden brown and crispy. You can use a toaster or a skillet for this. Toasting adds a nice crunch that balances the creamy avocado. This step is key for the perfect bite. Now it’s time to assemble your toast. Spread the mashed avocado mixture generously over each slice of your toasted bread. Top with halved cherry tomatoes, scattered evenly. Add crumbled feta cheese on top for creamy, salty goodness. For a kick, sprinkle red pepper flakes if you like heat. Finally, drizzle a little olive oil on top and garnish with fresh herbs. Enjoy your beautiful creation! When picking avocados, look for ones that are dark green and slightly soft. Gently squeeze them in your hand. If they yield a bit, they are ripe and ready to eat. Avoid avocados with large dents or dark spots, as these may be overripe. If you can’t use them right away, choose firmer avocados. They will ripen over a few days at room temperature. For the best avocado toast, choose hearty bread. Whole grain and sourdough are great options. Their texture holds up well under toppings. You can also try rye or multigrain if you want to mix it up. For a gluten-free option, use gluten-free bread. Just make sure it toasts well for a nice crunch. You can add a twist to your avocado toast with fun flavors. Try adding sliced radishes for crunch or a sprinkle of za'atar for a Middle Eastern touch. For a kick, add red pepper flakes or drizzle hot sauce on top. Fresh herbs like cilantro or chives bring brightness to the dish. You can find the full recipe for Avocado Toast Delight with Feta & Tomatoes to explore these ideas further! {{image_2}} Avocado toast can be a canvas for your creativity. You can add many tasty toppings. Here are some ideas: - Sliced radishes for crunch - Poached eggs for protein - Smoked salmon for a gourmet touch - Sliced cucumbers for freshness - A sprinkle of everything bagel seasoning for flavor These toppings bring different tastes and textures. Experiment to find your favorite combo! If you have dietary needs, no problem! You can easily swap ingredients. Here are some substitutions: - Use vegan feta or nutritional yeast for a dairy-free option. - Choose gluten-free bread if you avoid gluten. - Try lime juice instead of lemon juice for a twist. - Use sunflower seeds or pumpkin seeds for a nut-free option. These swaps keep the dish tasty and suitable for everyone. Want to shake things up? Here are some fun twists on the classic recipe: - Add a spread of hummus under the avocado for extra flavor. - Mix in diced mango or pineapple for a sweet touch. - Blend in spices like cumin or smoked paprika for warmth. - Top with a drizzle of balsamic glaze for a tangy finish. These creative ideas turn simple avocado toast into a gourmet delight. Enjoy making it your own! Storing leftover avocado toast can be tricky. The avocado can brown quickly. To keep it fresh, wrap it tightly in plastic wrap. You can also place it in an airtight container. This helps slow down the browning. Avoid stacking slices, as that can squish the toppings. Each ingredient in your avocado toast has its own life in the fridge: - Avocados: 1-2 days after cutting, but whole avocados last longer. - Cherry Tomatoes: 4-7 days, depending on ripeness. - Feta Cheese: About 5 days when stored properly. - Bread: 5-7 days, but it can get stale quickly. Check for any signs of spoilage before using. You can freeze avocado, but it changes texture. Here’s how: - Mash the avocado with lemon juice. - Place it in a freezer-safe container or bag. - It can last up to 6 months in the freezer. You can thaw it in the fridge overnight. Use it in smoothies or spreads rather than on toast. For the full recipe, check out the Avocado Toast Delight with Feta & Tomatoes. The best bread for avocado toast is whole grain or sourdough. Both options give a nice crunch. They also hold the toppings well. Whole grain adds fiber, while sourdough has a great tangy flavor. You can also try gluten-free bread if you need to. To make avocado toast vegan, simply skip the feta cheese. You can add more toppings like nuts or seeds for protein. Use hummus instead of feta for a creamy texture. Nutritional yeast also adds a cheesy flavor and is a great vegan option. Common toppings for avocado toast include: - Sliced radishes - Poached eggs - Microgreens - Smoked salmon - Red pepper flakes - Sesame seeds - Fresh herbs like cilantro or dill These toppings add flavor and texture, making your toast even more delicious. For a complete guide on how to prepare this dish, check out the Full Recipe for Avocado Toast Delight with Feta & Tomatoes. It includes detailed steps to create a perfect meal. Avocado toast is simple yet versatile. We explored essential and optional ingredients, their benefits, and flavorful variations. The steps to prepare, toast, and assemble are straightforward. I shared tips on selecting avocados and bread types. Don't forget storage advice for leftovers. Embrace creativity with toppings and substitutions. This classic dish can adapt to your taste and needs. Now, go enjoy making your perfect avocado toast!

Avocado Toast with Feta and Tomatoes Simple Recipe

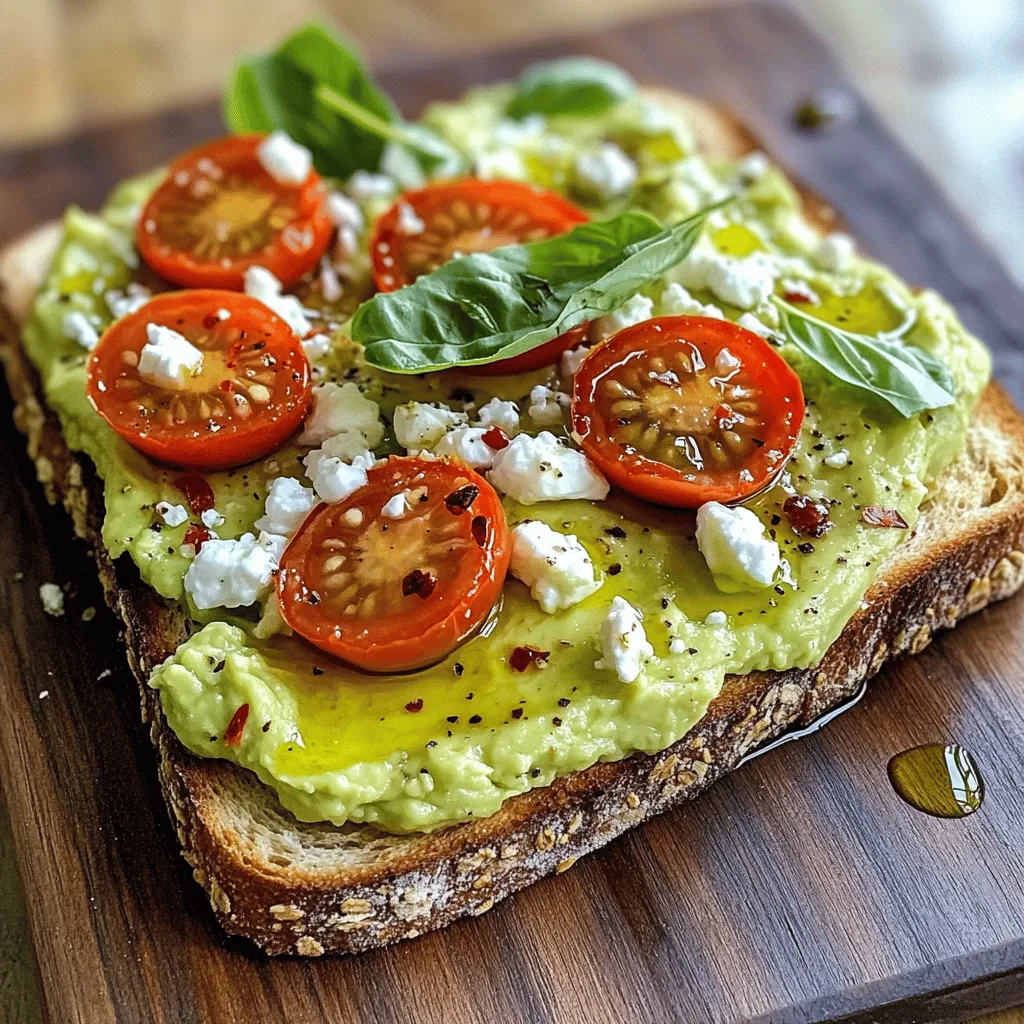
If you love simple, fresh flavors, you need to try my Avocado Toast with Feta and Tomatoes. This easy recipe

- 1 cup rolled oats - 1 ripe banana, mashed - 1 cup milk (dairy or plant-based) - 1 tablespoon honey or maple syrup (optional) - 1 teaspoon baking powder - 1/2 teaspoon cinnamon - 1/4 teaspoon salt - 1 large egg - 1 teaspoon vanilla extract - Cooking spray or oil for cooking To make banana oatmeal pancakes, you need a few simple ingredients. Rolled oats form the base of the pancakes. I love using them because they add fiber and thickness. The ripe banana gives sweetness and flavor. It also helps bind the ingredients together. Next, you need milk, which can be dairy or plant-based. This helps create a smooth batter. If you like extra sweetness, add honey or maple syrup. Baking powder makes the pancakes fluffy. A sprinkle of cinnamon adds warmth and spice. Don’t forget a bit of salt to balance all the flavors. You will also need one egg for richness. Finally, vanilla extract adds a lovely aroma and taste. Cooking spray or oil keeps the pancakes from sticking to the pan. These ingredients work together to create a delicious breakfast. Check the full recipe for exact amounts and cooking steps. First, we need to turn rolled oats into fine flour. Place 1 cup of rolled oats into a blender or food processor. Blend until the oats are smooth and fine. This is your oat flour. Now, transfer the oat flour to a mixing bowl. Next, we will mix the dry and wet ingredients. Add in the mashed banana, 1 cup of milk, and other ingredients like honey, baking powder, cinnamon, salt, egg, and vanilla extract. Stir everything together until you have a smooth batter. This part is essential for a fluffy pancake. Now it’s time to cook! Preheat a non-stick skillet or griddle over medium heat. Lightly grease the surface with cooking spray or a little oil. This helps prevent sticking. Pour about 1/4 cup of the batter onto the skillet for each pancake. Cook for about 2-3 minutes. Watch for bubbles forming on the surface; this shows it’s time to flip. Carefully flip the pancake with a spatula. Cook for another 1-2 minutes until golden brown. If you find flipping tricky, try using a larger spatula. It gives you more surface area to catch the pancake. These banana oatmeal pancakes taste great with various toppings. Try fresh fruits like berries or sliced bananas on top. Yogurt adds creaminess, while maple syrup brings sweetness. You can also sprinkle nuts or seeds for crunch. You can explore different flavors by pairing the pancakes with your favorite syrups. I love combining them with honey or agave for a sweet twist. For a fun breakfast, mix and match toppings to suit your taste! If you're eager to try this delicious recipe, check out the Full Recipe for all the details. To get the best pancakes, focus on the batter's consistency. The batter should be thick but pourable. If it's too thick, add a splash more milk. If it's too runny, sprinkle in a bit of oats. Cooking time also matters. Start with medium heat for your skillet. Cook the pancakes until bubbles form on top. This takes about 2-3 minutes. Then flip and cook for another 1-2 minutes. Look for a golden brown color; that's your sign they are done! For storage, place leftover pancakes in an airtight container. Refrigerate them for up to three days. If you want to store them longer, freeze them. Just layer them with parchment paper to prevent sticking. Reheating pancakes is easy. Use a microwave for quick results. Heat them for about 30 seconds. For a crispy edge, use a skillet. Just warm them on low heat for a couple of minutes. This keeps the texture nice. You can boost the nutrition of these pancakes. Add protein by mixing in Greek yogurt or protein powder. For more fiber, consider adding chia seeds or flaxseeds. If you want to cut sugar, skip the honey or syrup. Try using mashed banana instead. This keeps the pancakes sweet without added sugar. The Full Recipe will guide you through these adjustments too! {{image_2}} You can make these pancakes gluten-free. Just swap the rolled oats for gluten-free oats. They have the same great taste. This small change lets everyone enjoy this meal. Want to add some fun? You can toss in chocolate chips or nuts. They add a nice crunch and sweetness. You can also mix in spices like nutmeg or ginger. These spices give your pancakes a warm, cozy flavor. Experiment and find your favorite mix! If you prefer to go dairy-free, it's easy. Use plant-based milk like almond or oat milk. You can also replace the egg with a mashed banana or flaxseed mix. This change keeps your pancakes tasty and light. Enjoy your breakfast without dairy! To keep your banana oatmeal pancakes fresh, use airtight containers. Place pancakes in the container and seal it tightly. Then, store them in the refrigerator. This method helps keep them moist and ready for breakfast. You can also freeze pancakes. First, let them cool completely. Then, stack them with parchment paper between each pancake. Place the stack in a freezer-safe bag or container. When you’re ready to eat, just take them out and defrost. You can microwave them or heat them on the stove. When stored properly, pancakes last about 3 to 5 days in the fridge. If you freeze them, they can last up to 2 months. Always check for any signs of spoilage before eating. Enjoy your pancakes any time! For the full recipe, check out the section above. Yes, you can. Try using mashed banana as an egg substitute. Use 1/4 cup of mashed banana for each egg. Applesauce also works well. Use 1/4 cup of unsweetened applesauce. Another option is to mix 1 tablespoon of ground flaxseed with 2.5 tablespoons of water. Let it sit for 5 minutes to thicken. You can reduce calories by cutting the honey or syrup. Instead, try adding more banana for sweetness. Use unsweetened almond milk or another plant-based milk. You can also add chia seeds or ground flaxseeds for extra fiber. Consider using whole wheat flour to boost nutrients. You can use quick oats or steel-cut oats. If you prefer, try oat flour as a substitute. For a gluten-free option, use quinoa flakes or almond flour. Each alternative brings a unique flavor and texture to the pancakes. Look for bubbles forming on the surface of the pancakes. When the edges start to set, it’s time to flip them. After flipping, cook until they turn golden brown. This takes about 1-2 minutes. Enjoy your tasty pancakes! You will find that making banana oatmeal pancakes is simple and fun. We reviewed key ingredients and their roles. I shared step-by-step instructions to guide you from start to finish. Helpful tips ensured you get perfect texture every time. Plus, we explored tasty variations and smart storage methods. In closing, enjoy these easy pancakes any time. They are healthy, delicious, and quick to make. These tips help you become a pancake pro.

Tasty Banana Oatmeal Pancakes Easy Breakfast Recipe

Do you want to start your day deliciously? Let me show you how to make tasty banana oatmeal pancakes! They

To create the perfect garlic herb roasted potatoes, you need simple and fresh ingredients. Each one plays a key role in achieving that amazing flavor. - Baby potatoes - Garlic - Olive oil - Dried herbs (thyme and rosemary) - Paprika, salt, and pepper - Fresh parsley for garnish Baby potatoes are small and tender. They roast beautifully, becoming crispy on the outside and soft inside. Garlic adds a strong, rich flavor. Olive oil helps crisp the potatoes while adding a nice taste. Dried herbs, like thyme and rosemary, bring earthy notes to the dish. Paprika adds a hint of smokiness along with color. Salt and pepper balance the flavors. Finally, fresh parsley gives a bright finish that makes the dish pop. For the full recipe, check the section above. You’ll find all the steps to make these delicious garlic herb roasted potatoes! 1. Preheat your oven to 425°F (220°C). This step helps the potatoes cook evenly. 2. In a large mixing bowl, add the halved baby potatoes, minced garlic, and olive oil. Include dried thyme, dried rosemary, paprika, salt, and pepper. 3. Toss everything together until the potatoes are coated well. This mix gives them great flavor. 4. Spread the potatoes in a single layer on a baking sheet. Make sure they have space to roast well. 1. Roast the potatoes in the preheated oven for 25 to 30 minutes. Check that they turn golden brown and crispy. 2. Flip the potatoes halfway through cooking. This helps them brown evenly on all sides. 1. Once the potatoes are done, sprinkle chopped fresh parsley on top. It adds a nice color and fresh taste. 2. Serve the roasted potatoes hot. They pair well with chicken, beef, or fish. Enjoy them as a tasty snack, too! For the full recipe, refer to the original instructions provided above. To ensure crispy texture, use baby potatoes. Their smaller size helps them cook well. Halve them for even roasting. Coat them well with olive oil. This step is key for crispiness. Spread them in a single layer on the baking sheet. Avoid stacking potatoes to let air circulate. For managing oven space, use two baking sheets if needed. This way, you can roast more potatoes evenly. Rotate the sheets halfway through cooking. This helps every potato get that golden color. You can add other herbs or spices for more flavor. Try oregano or basil for a fresh twist. A pinch of cayenne pepper adds heat, if you like spice. Mixing different dried herbs can also create a unique taste. Using different types of potatoes can change the dish. Yukon Golds are buttery and smooth. Russets have a fluffier texture, perfect for a heartier dish. Mixing types gives a fun flavor and texture. Avoid overcrowding the baking sheet. This can lead to steaming instead of roasting. Each potato needs space to crisp up. Pay attention to seasoning balance. Too much salt can overpower the dish. Start with a little salt and add more if needed. Taste as you go to find the right mix. {{image_2}} You can switch up the herbs in garlic herb roasted potatoes. Fresh herbs add great flavor. Try using basil or oregano for a twist. For seasonal dishes, mix in fresh dill in spring or sage in fall. Each herb brings a new taste to the table. For vegan options, use olive oil and skip any butter. You can also make these potatoes gluten-free by sticking to the basic ingredients. If you want lower sodium, reduce the salt. Fresh herbs can help keep the taste strong while using less salt. You can turn roasted potatoes into a salad. Just let them cool, then toss them with greens and a light dressing. You can also add them to soups or stews for extra texture. Roasted potatoes work well in breakfast bowls too. Check out the Full Recipe for more ideas! To keep your garlic herb roasted potatoes fresh, place them in an airtight container. Store them in the fridge. They will stay good for about 3 to 4 days. If you want to freeze them, lay the potatoes on a baking sheet first. Once frozen, transfer them to a freezer-safe bag. This method keeps them from sticking together. When you reheat your potatoes, use the oven if you can. Preheat it to 375°F (190°C) and spread the potatoes on a baking sheet. Heat for about 10 to 15 minutes. This method helps keep them crispy. You can also use a skillet. Just warm them over medium heat. Stir gently to avoid mushiness. In the fridge, garlic herb roasted potatoes last for 3 to 4 days. If they start to smell sour or look slimy, it’s time to toss them. Always trust your senses. If anything seems off, don’t eat it. For frozen potatoes, they can last up to 2 months. After that, they may lose flavor and texture. You can enjoy garlic herb roasted potatoes with many tasty dips. Here are some of my favorites: - Sour cream - Ketchup - Ranch dressing - Garlic aioli - Spicy mayo These sauces add fun flavors. You can mix and match to find your perfect pair! Yes, you can use larger potatoes! Just cut them into smaller, even pieces. Aim for pieces that are about the same size. This helps them cook evenly. Baby potatoes are great for their creamy texture, but you can use any kind you like. To get that perfect crispy texture, follow these tips: - Preheat your oven well. A hot oven helps them crisp. - Toss potatoes well with olive oil. This ensures an even coat. - Don't overcrowd the baking sheet. Space lets heat circulate. - Flip them halfway through cooking. This helps all sides get golden brown. These steps will give you crispy, delicious potatoes! You can prep the potatoes ahead of time! Cut and season them, then store in the fridge. Keep them in an airtight container for up to 24 hours. Just remember to roast them right before serving for that fresh taste. Here’s a quick look at the nutritional info for one serving (about 1 cup): - Calories: 180 - Protein: 3g - Carbohydrates: 30g - Fat: 7g - Fiber: 3g This dish is a great source of energy and fits well in a balanced diet. Enjoy the flavor without the guilt! For the full recipe, check out the Garlic Herb Roasted Potatoes section. This blog post shared a simple and tasty recipe for garlic herb roasted potatoes. You learned about essential ingredients, step-by-step cooking, and tips for great textures. I also covered storage and reheating methods to keep leftovers fresh. Remember, you can change up the herbs and substitute ingredients for your needs. Enjoy these tasty potatoes as a side or in salads. Get creative, and make this dish your own!

Garlic Herb Roasted Potatoes Flavorful Side Dish

Garlic Herb Roasted Potatoes are a must-try side dish! You’ll love their rich flavor and crispy texture. In this post,

When making Spicy Honey Garlic Chicken, you'll need some key ingredients. These flavors work together to create a tasty dish. - 4 boneless, skinless chicken thighs - 1/4 cup honey - 3 tablespoons soy sauce (low sodium) - 3 cloves garlic, minced - 1 tablespoon sriracha (or to taste) - 1 tablespoon sesame oil - 1 teaspoon ginger, grated - Salt and pepper to taste Chicken thighs are perfect for this dish. They stay juicy and soak up the marinade well. Honey and soy sauce add sweet and salty notes. Garlic, ginger, and sriracha bring heat and depth to the flavor. You can adjust the sriracha based on your heat preference. Adding a few garnishes can elevate your dish. They add color and extra flavor. - 2 tablespoons green onions, sliced (for garnish) - 1 tablespoon sesame seeds (for garnish) Green onions give a fresh crunch. Sesame seeds add a nice nutty finish. You can sprinkle these on just before serving for the best look and taste. For the complete recipe, refer to the Full Recipe. To make the marinade, I start by whisking together the ingredients. In a medium bowl, I mix honey, soy sauce, minced garlic, sriracha, sesame oil, and grated ginger. This blend gives the chicken its sweet and spicy flavor. You want to whisk until everything combines well. Marinating time is key. I let the chicken sit in the marinade for at least 30 minutes. If I have more time, I let it go for up to 2 hours. This helps the chicken absorb all those tasty flavors. Next, I preheat the oven to 400°F (200°C). I take the marinated chicken thighs and place them in a baking dish. I pour any leftover marinade over the top. A light sprinkle of salt and pepper adds some extra taste. I bake the chicken for about 25-30 minutes. I make sure the chicken reaches an internal temperature of 165°F (75°C). Halfway through, I baste the chicken with the pan juices. This keeps it juicy and flavorful. For an added touch, I turn on the broiler for the last 2-3 minutes. This gives the chicken a nice, caramelized finish. I watch it closely to avoid burning. Once the chicken is done, I let it rest for a few minutes. Resting allows the juices to settle, making the chicken more tender. Before serving, I sprinkle sliced green onions and sesame seeds on top. This adds a pop of color and crunch. Now, the chicken is ready to enjoy! Check out the full recipe for more details. - Best Marinating Practices: To get juicy chicken, marinate it well. Use a mix of honey, soy sauce, garlic, sriracha, and sesame oil. Let the chicken sit in the marinade for at least 30 minutes. For more flavor, try marinating for up to 2 hours. This helps the chicken soak up all the tasty goodness. - Cooking Temperature Checks: Always check the chicken's internal temperature. Use a meat thermometer to ensure it reaches 165°F (75°C). This step keeps the chicken moist and safe to eat. Remember, if you overcook it, the chicken can dry out. - Adjusting Spice Levels: You can change how spicy the chicken is. If you want more heat, add more sriracha to the marinade. If you prefer it milder, reduce the amount of sriracha. You can also add some chili flakes when you serve it for an extra kick. - Pairing Suggestions with Side Dishes: This chicken goes well with many sides. Try serving it with steamed rice or fluffy quinoa. You can also add some roasted vegetables or a fresh salad. These choices balance the sweetness of the honey and the heat of the sriracha. For a complete meal, consider adding some stir-fried greens too. For the full recipe, check out the details above. {{image_2}} You can switch up the protein in this dish for variety. - Using Chicken Breasts or Drumsticks: Chicken breasts work well if you prefer a leaner option. Just ensure they cook thoroughly. Drumsticks bring a juicy texture and flavor. Adjust the cooking time as needed. - Vegetarian Adaptations with Tofu: If you want a meat-free choice, tofu is great. Use firm tofu, and press it to remove excess moisture. Cut it into cubes and marinate just like chicken. Bake until golden and crisp for a tasty twist. The sauce is what makes this dish special. Feel free to get creative! - Experimenting with Different Spices: You can add spices like paprika or cayenne for extra heat. Garlic powder and onion powder can also enhance the flavor. Mix and match to suit your taste. - Adding Fruit for Sweetness: Want to sweeten the sauce? Try adding fruit. Pineapple or orange juice can brighten the dish. You can even toss in some chopped fruit during baking for a delicious addition. For the complete recipe, check out the [Full Recipe]. After you enjoy your spicy honey garlic chicken, store any leftovers right away. Place the chicken in an airtight container. This helps keep it fresh. It can stay in the fridge for up to four days. When you store it, add some of the leftover sauce on top. This helps keep the chicken juicy and tasty. If you want to keep it longer, freezing is a good choice. Place the chicken in a freezer-safe bag. Squeeze out as much air as you can before sealing the bag. This will prevent freezer burn. The chicken can stay frozen for up to three months. When you're ready to eat it, thaw it in the fridge overnight. To enjoy your chicken again, you need to reheat it properly. The best way to keep the chicken moist is to use the oven. Preheat it to 350°F (175°C). Place the chicken in a baking dish. Add a splash of water or sauce to keep it moist. Cover the dish with foil to trap steam. Heat it for about 15-20 minutes. If you're short on time, you can use the microwave. Place the chicken on a microwave-safe plate. Cover it loosely with a damp paper towel. Heat it in 30-second bursts, checking often. This helps prevent it from drying out. For the best taste, I recommend using the oven. The chicken will taste fresher and more like the first time you cooked it. Enjoy your meal! Marinate the chicken for at least 30 minutes. For the best flavor, aim for 2 hours. This time allows the chicken to soak up the honey, garlic, and spice. The longer you marinate, the deeper the taste. Yes, you can prepare this dish in advance. Marinate the chicken and store it in the fridge. Cook it within 24 hours for the best flavor. If you need to meal prep, cook the chicken and refrigerate. It stays good for 3 to 4 days. Reheat it gently to keep it juicy. You have many great options. Try serving it with steamed rice or quinoa for a filling meal. Roasted vegetables also pair well. You can add a fresh salad for crunch and color. These sides balance the sweet and spicy flavors of the chicken. The Spicy Honey Garlic Chicken is simple and tasty. You learned about key ingredients like chicken thighs, honey, soy sauce, garlic, ginger, and Sriracha. The step-by-step guide covered marinating, cooking, and garnishing. Remember to let it rest before serving. You can also adjust flavors and try different proteins. Store leftovers properly for future meals. With these tips and tricks, you can enjoy a flavorful dish anytime. So, gather your ingredients and start cooking! You'll impress your family and friends with this easy recipe.

Spicy Honey Garlic Chicken Tasty and Easy Recipe

Are you ready to spice up your dinner? My Spicy Honey Garlic Chicken is a winner. Made with tender chicken

Here are the items you need to make these zesty Lemon Blueberry Muffins. Gather them before you start: - All-purpose flour: 2 cups - Baking powder: 1 tablespoon - Baking soda: 1/2 teaspoon - Salt: 1/2 teaspoon - Unsalted butter: 1/4 cup, softened - Granulated sugar: 1 cup - Eggs: 2 large - Vanilla extract: 1 teaspoon - Buttermilk: 1/2 cup - Lemon zest: Zest of 1 lemon - Blueberries: 1 1/2 cups - Lemon juice: 1 tablespoon - Prep time: 15 minutes - Cook time: 25 minutes - Servings: 12 muffins Each ingredient plays a vital role in creating that fluffy texture and vibrant flavor. The all-purpose flour gives structure, while the baking powder and baking soda help muffins rise. The butter adds richness, and the sugar balances the tartness of the lemon and blueberries. Using fresh blueberries will give you the best taste. If you can’t find fresh ones, frozen blueberries will work, too. Just toss them in flour to prevent sinking during baking. Lemon zest and juice bring a bright flavor, making every bite refreshing. You can even add a bit more lemon juice if you love that tangy taste. Gather all these ingredients for your delightful muffin adventure! Check out the Full Recipe for detailed steps and tips on baking these tasty treats. - Step 1: Preheat your oven to 375°F (190°C). - Step 2: Line a muffin tin with paper liners or grease it. - Step 3: Whisk together flour, baking powder, baking soda, and salt in a medium bowl. - Step 4: Set aside the dry mixture. - Step 5: In a large bowl, cream butter and sugar until fluffy. This takes about 3-5 minutes. - Step 6: Add eggs one at a time, then stir in vanilla extract and lemon zest. - Step 7: Mix in buttermilk and lemon juice until well blended. - Step 8: Gradually add the dry ingredients to the wet ones. Stir gently to avoid overmixing. - Step 9: Fold in blueberries carefully to keep them whole. - Step 10: Spoon the batter into the muffin tin, filling each cup about two-thirds full. - Step 11: Bake for 18-22 minutes. Check with a toothpick for doneness. - Step 12: Let the muffins cool for a few minutes before serving. For the full recipe, you can refer to the detailed instructions provided earlier. Enjoy your baking! - Keep ingredients at room temperature for better mixing. - Use a light hand when folding in blueberries. This helps them stay whole and keeps the muffins fluffy. - Avoid overmixing to keep muffins tender. Overmixing makes them tough and dry. - Use an ice cream scoop for even batter distribution. This ensures all muffins bake evenly. - Serve warm with a dusting of powdered sugar. It adds a nice touch and sweetness. - Garnish with lemon zest or extra blueberries for a fresh look. This makes your muffins eye-catching and tasty. For the full recipe, check out the Zesty Lemon Blueberry Bliss Muffins. {{image_2}} You can easily make these muffins a bit healthier. Try these swaps: - Substitute whole wheat flour for all-purpose flour. This adds fiber and nutrients. - Use Greek yogurt instead of buttermilk. It makes muffins moist and adds protein. Want to change the taste? Here are some fun ideas: - Add a teaspoon of poppy seeds for extra texture and crunch. - Incorporate different berries like raspberries or blackberries for a new twist. If you need a gluten-free version, you can still enjoy these muffins. - Substitute all-purpose flour with a gluten-free flour blend. This works well and keeps the muffins fluffy. For the full recipe, check the earlier sections. Enjoy experimenting with these variations! Keep your lemon blueberry muffins in an airtight container at room temperature. This helps them stay fresh. You can enjoy them for up to three days. If you need to keep them longer, freezing is a great option. To freeze muffins, wrap each one in plastic wrap or place them in a freezer bag. This helps prevent freezer burn and keeps them tasty. When you want to eat one, simply thaw it at room temperature. You can also warm them in the microwave for a cozy treat. Reheat your muffins by microwaving them for a few seconds. This brings back their delightful warmth and taste. Enjoy your muffins just like fresh out of the oven! Don't forget to check the [Full Recipe] for detailed steps. To make your muffins extra moist, add more buttermilk or yogurt to the batter. Buttermilk works well because it adds richness and softness. You can add an extra tablespoon or two for a creamier texture. Yogurt can also help. Just replace part of the buttermilk with plain yogurt for a delightful twist. Yes, you can use frozen blueberries! Do not thaw them before adding to the batter. Frozen blueberries help keep your muffins moist and add a nice burst of flavor. Just fold them in gently so they don’t break apart too much. If you don't have buttermilk, you can easily make a substitute. Mix one cup of regular milk with one tablespoon of lemon juice or vinegar. Let it sit for about five minutes. This will mimic the tangy taste of buttermilk and keep your muffins fluffy. To check if your muffins are done, insert a toothpick into the center. If it comes out clean, your muffins are ready. Look for a golden top as well. This means they have baked perfectly and will taste amazing! You now have a clear plan for making delicious Lemon Blueberry Muffins. We covered the key ingredients, step-by-step instructions, and helpful tips. Remember to be gentle when mixing and folding in the blueberries to keep your muffins tender. Feel free to experiment with variations or storage tips to suit your taste. Enjoy sharing these treats with friends and family, and savor every delightful bite. Happy baking!

Lemon Blueberry Muffins Delightfully Fluffy Recipe

Are you ready to elevate your baking game? These Lemon Blueberry Muffins are delightfully fluffy and bursting with flavor. This

- Coconut milk: You can use canned or carton coconut milk. Canned milk is thicker and creamier. It gives a richer taste to your pudding. Carton milk is lighter and easier to pour. I prefer canned for this recipe, as it makes the pudding extra creamy. - Almond milk: You can swap almond milk for other milk options. Try oat milk, soy milk, or cashew milk if you like those flavors. Each type adds a unique twist to the pudding. - Chia seeds: Look for whole chia seeds, as they hold more liquid and create a great texture. Chia seeds are full of fiber and omega-3 fatty acids. They help keep you full and are good for your heart. - Sweeteners: Use maple syrup or honey to sweeten the pudding. Maple syrup has a rich flavor, while honey is sweeter. You can adjust the amount based on your taste. - Flavor enhancers: Vanilla extract adds a warm flavor to the pudding. If you don’t have vanilla, try almond extract or a bit of cinnamon for a different taste. - Fresh mango: Choose a ripe mango for the best flavor. A ripe mango should be slightly soft to touch and have a sweet smell. This will brighten your pudding and add natural sweetness. - Shredded coconut: I recommend unsweetened shredded coconut. It adds texture without extra sugar. You can also use coconut flakes if you want larger pieces. - Garnishing options: Fresh mint leaves look beautiful on top. They also add a pop of flavor. If you don’t have mint, try using edible flowers or more shredded coconut for decoration. These ingredients come together to create a delightful and healthy treat. For the full recipe, check out the detailed instructions above. Start by combining the coconut milk and almond milk in a mixing bowl. Use one cup of coconut milk and half a cup of almond milk. Add two tablespoons of maple syrup or honey for sweetness. Then, add one teaspoon of vanilla extract for flavor. Whisk the mixture gently. This step is crucial for creating a smooth base. Good whisking helps blend the flavors well. Next, it's time to stir in the chia seeds. You need one-fourth cup of chia seeds for this recipe. Add them slowly to the milk mixture. Stir well to prevent clumps. It is important to mix until all seeds are evenly spread. This ensures a creamy texture in the final pudding. Cover the bowl with plastic wrap or transfer the mix to a jar. Place it in the refrigerator for at least four hours. For the best results, chill it overnight. The chia seeds will absorb the liquid and thicken the pudding. Once set, give it a good stir. If it seems too thick, add a little more milk to adjust the texture. When it's time to serve, divide the pudding into bowls or glasses. Layer the top with diced mango and a sprinkle of shredded coconut. Use one ripe mango and one-fourth cup of shredded coconut. This adds flavor and texture. For a special touch, garnish with fresh mint leaves. Choose clear glass containers for a nice presentation. Enjoy your delicious Mango Coconut Chia Pudding! For the full recipe, you can refer to the earlier section. To get the best taste, you can adjust the sweetness. If you like it sweeter, add more maple syrup or honey. For a less sweet flavor, cut back on the sweetener. This will help balance the natural taste of the mango. Next, you can customize the texture with milk adjustments. If you like a thicker pudding, use less almond milk. For a creamier texture, add more coconut milk. This way, you control how your pudding feels in every bite. When it comes to serving, make it fun! Use clear glasses to show off the layers of mango and chia pudding. You can also layer the ingredients. Start with pudding, add mango, and then top with coconut. This adds visual interest and makes each bite exciting. For garnishing, fresh mint leaves add a nice pop of color. You can also sprinkle extra shredded coconut on top. This gives your dish a beautiful finish. One common mistake is over- or under-stirring the chia seeds. Stir gently but thoroughly. This helps avoid clumps and makes for a smooth texture. Another mistake is not considering the setting time. Be sure to let the pudding set for at least four hours. For the best results, let it chill overnight. This allows the chia seeds to absorb the liquid fully and create the perfect pudding. {{image_2}} You can make this mango coconut chia pudding even tastier by adding other fruits. Try diced pineapple or mixed berries for a fun twist. These fruits add different flavors and colors to your dish. You can also infuse your pudding with spices. Cinnamon or nutmeg can bring warmth and depth to every bite. Just a little sprinkle can change the whole taste. If you follow a vegan diet, you can easily make swaps in this recipe. Use maple syrup instead of honey, as it keeps your pudding plant-based. For those who need gluten-free options, rest easy! Chia seeds and all the other ingredients are naturally gluten-free. You can enjoy this pudding without worry. You can choose how to prepare your chia pudding based on your time. The overnight fridge method is perfect if you plan ahead. Let the mixture chill overnight for the best texture. If you're in a hurry, use the quick-set method. Just let it sit for about 30 minutes. Both methods work well, so choose what fits your schedule. Also, consider what container you use for setting. A jar, bowl, or even a cup can work. Just ensure it's covered to help the chia seeds absorb the liquid. For the full recipe, check out the detailed steps and enjoy your tasty treat! To keep your mango coconut chia pudding fresh, choose the right container. Use glass jars with tight lids or BPA-free plastic containers. These options help seal in flavor and moisture. Avoid containers that can absorb odors. Store your pudding in the fridge right after you make it. Mango coconut chia pudding lasts up to five days in the refrigerator. Keep an eye out for changes in texture or smell. If the pudding gets watery or has an off scent, it's time to discard it. You can freeze chia pudding, but the texture may change. To freeze, portion it into freezer-safe containers. Leave space at the top for expansion. Thaw in the fridge overnight before serving. Stir well to restore texture before enjoying. For extra flavor, add fresh mango after thawing. Check out the Full Recipe for more details! Mango Coconut Chia Pudding can last up to five days in the fridge. Store it in an airtight container to keep it fresh. If it looks or smells off, it's best to throw it away. Yes, you can use flax seeds instead of chia seeds. However, flax seeds will not absorb liquid in the same way. This may change the texture of your pudding. Absolutely! This pudding is great for meal prep. You can make a batch and store it in individual jars. Just add the mango and coconut right before serving for the best taste. Chia seeds are rich in fiber, protein, and omega-3 fatty acids. They help with digestion and can keep you full longer. They also contain antioxidants, which are good for your body. Yes, fresh mango works perfectly! Just make sure it is ripe and sweet. You can dice it and add it to your pudding right before serving. To lower the calories, use less sweetener or a sugar substitute. You can also reduce the amount of coconut milk. Use low-fat almond milk instead to cut down on calories without losing flavor. For the full recipe, check above. This blog post covered everything you need to know about making Mango Coconut Chia Pudding. We discussed key ingredients, like coconut milk, almond milk, and chia seeds. You learned how to prepare the base mix and avoid common mistakes. We explored variations and storage tips to keep your pudding fresh. In the end, this pudding is tasty and healthy. It's easy to make and fun to customize. Enjoy your delicious creation and share it with others!

Mango Coconut Chia Pudding Tasty and Healthy Treat

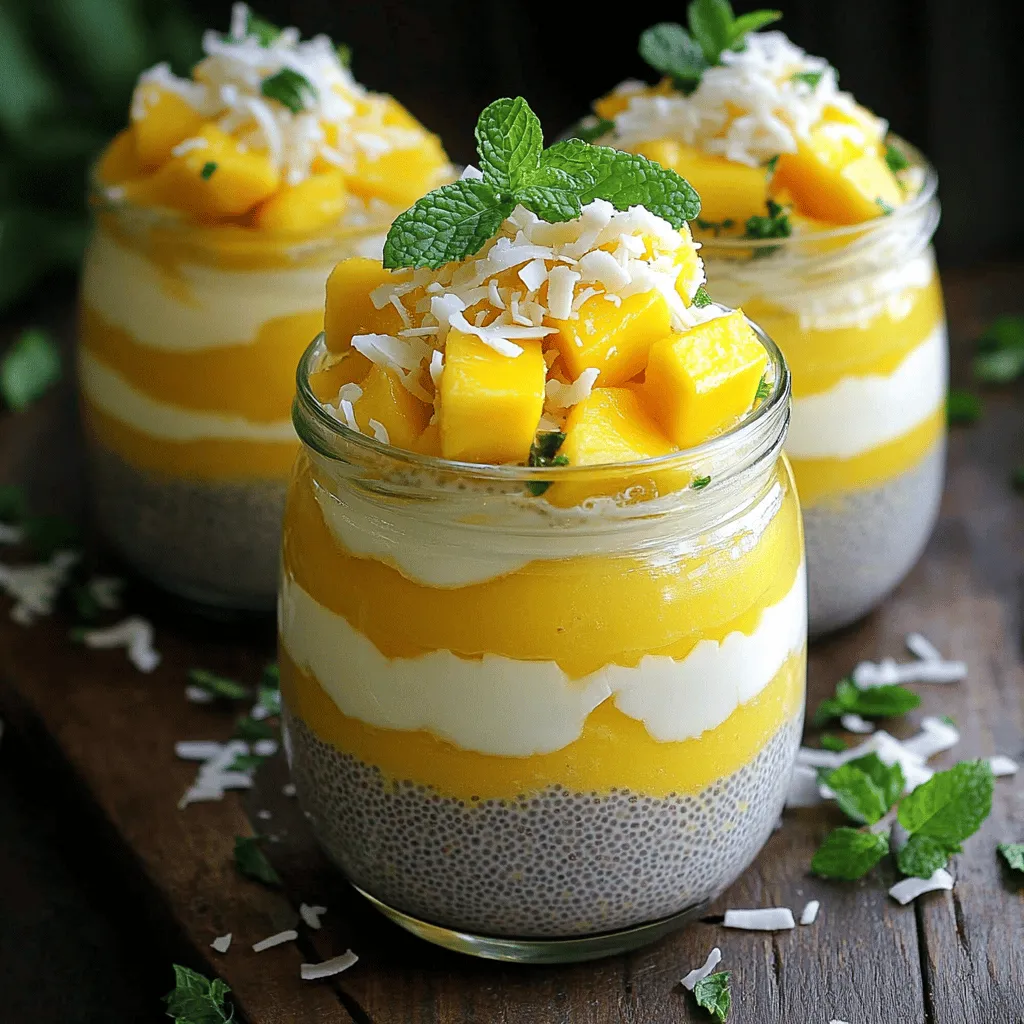
Looking for a tasty and healthy treat? Mango Coconut Chia Pudding checks all the boxes! Packed with flavor and nutrients,

To make delicious pumpkin spice overnight oats, gather these ingredients: - 1 cup rolled oats - 1 cup unsweetened almond milk (or any milk of choice) - ½ cup pumpkin puree - 2 tablespoons chia seeds - 2 tablespoons maple syrup (or honey) - 1 teaspoon vanilla extract - 1 teaspoon pumpkin pie spice - ¼ teaspoon salt - Optional toppings: chopped pecans, sliced banana, or a dollop of yogurt This mix of flavors gives a warm and cozy taste that I love. Each bite feels like a hug, especially during fall. If you want to make more servings, here’s how to scale up: - For 4 servings, use 2 cups of oats and 2 cups of milk. - For 6 servings, use 3 cups of oats and 3 cups of milk. - For 8 servings, use 4 cups of oats and 4 cups of milk. Just keep the other ingredients in the same ratio. This way, you can enjoy more of this tasty treat! You can easily switch ingredients to fit your needs: - For dairy-free, stick with almond milk or use oat milk. - For gluten-free, make sure to use certified gluten-free oats. - If you want to cut sugar, use less maple syrup or honey. These changes let you enjoy this recipe no matter your diet. So don’t worry; you can still savor these pumpkin spice overnight oats! For the complete recipe, check out the Full Recipe section. To make pumpkin spice overnight oats, start by gathering your ingredients. You will need rolled oats, almond milk, pumpkin puree, chia seeds, maple syrup, vanilla extract, pumpkin pie spice, and salt. 1. In a medium bowl, combine the rolled oats and almond milk. 2. Add the pumpkin puree, chia seeds, and maple syrup. 3. Stir in the vanilla extract, pumpkin pie spice, and salt. 4. Mix until everything is smooth and well combined. 5. Divide the mixture into two jars or containers. 6. Seal the jars and place them in the fridge for at least four hours or overnight. This soaking allows the oats to soften and absorb the flavors. To get the best texture, use rolled oats. They are chewy and hold up well. If your oats seem too thick in the morning, just add a little more almond milk. Stir well to mix it in. If you like a creamier texture, blend the mixture before refrigerating. Feel free to experiment with the amount of chia seeds. They help thicken the oats, but you can reduce them for a looser feel. Store your pumpkin spice overnight oats in the fridge. They will stay fresh for about three to five days. If you want to make a larger batch, just double the recipe. To reheat, you can use the microwave. Heat the oats in short bursts, stirring after each interval. This helps avoid hot spots. Enjoy your oats cold or warm, based on what you like. For the full recipe, check the details above. To make your pumpkin spice overnight oats shine, use fresh pumpkin puree. It adds a rich taste. You can also try adding a pinch of nutmeg for warmth. A drizzle of maple syrup gives a sweet touch. Make sure to mix well for even flavors. Another great tip is to let them sit overnight. This helps the oats soak up all the goodness. One common mistake is using too little liquid. Oats absorb liquid, so always use enough. If your oats are too thick, add more milk in the morning. Another mistake is skipping the chia seeds. They help thicken the oats and add nutrients. Lastly, don't forget to taste before serving. Adjust sweetness or spice as needed. You can make your oats unique by adding different toppings. Try chopped pecans for crunch. Sliced banana adds sweetness and creaminess. If you like yogurt, a dollop on top is perfect. You can also swap in different spices, like cinnamon or ginger. For a fun twist, mix in cocoa powder for a chocolate version. Check out the Full Recipe for more ideas. {{image_2}} You can change your pumpkin spice overnight oats with the seasons. In the fall, stick to pumpkin flavors. Add maple syrup for sweetness. During winter, try mixing in some cinnamon and nutmeg. These spices warm you up. In spring, swap pumpkin for fresh strawberries. In summer, use peaches or blueberries. Seasonal fruits make each bowl exciting. Want to make your oats even better? Add chia seeds for fiber. You can also toss in some flaxseeds for omega-3s. Nuts like almonds or walnuts give a nice crunch. Try adding a scoop of protein powder if you're active. You can mix in some grated carrots for extra vitamins. These add-ins boost nutrition without losing flavor. Bored with pumpkin? No problem! You can make banana bread oats by adding mashed bananas and cinnamon. For a tropical twist, use coconut milk and shredded coconut with pineapple chunks. If you like chocolate, mix cocoa powder into your base. Each flavor brings a new vibe to your breakfast. Explore these options to keep things fun and tasty! For the full recipe, check out the Pumpkin Spice Overnight Oats. To keep your pumpkin spice overnight oats fresh, store them in airtight containers. This helps prevent any unwanted odors and keeps the oats creamy. Make sure to seal the jars well. You can prepare these oats on Sunday for a quick breakfast all week. If you want to save some for later, freezing is a great option. Portion the oats into freezer-safe containers. Leave a little space at the top, as the oats will expand when frozen. They can last up to three months in the freezer. When ready to eat, simply thaw them overnight in the fridge. You can safely store pumpkin spice overnight oats in the fridge for about 4 to 5 days. They may thicken over time, so you might want to add a splash of milk before serving. This keeps them nice and creamy. Enjoy the taste of fall any day of the week with these easy-to-store oats! For the full recipe, check out the full recipe. Overnight oats are a no-cook way to prepare oatmeal. You mix oats with liquid and let them sit overnight. This allows the oats to soak up the liquid. They become soft and ready to eat by morning. You can use milk or yogurt. The oats are full of fiber and keep you full. Yes, you can easily make this recipe vegan. Just use almond milk or any plant-based milk. You can also swap honey for maple syrup. This keeps your oats delicious and plant-friendly. To make one serving, just halve the amounts in the recipe. Use ½ cup of rolled oats and ½ cup of almond milk. Adjust all the other ingredients as well. This way, you get just the right amount for yourself. Yes, eating overnight oats every day is fine. They are healthy and fill you up. You can also change the flavors and toppings. This keeps your meals fun and interesting. For the full recipe, check out my Pumpkin Spice Overnight Oats recipe. Pumpkin spice overnight oats are simple, yet delicious. We covered ingredients, preparation, and storage tips. You can customize these oats to suit your tastes and dietary needs. Avoid common mistakes to get the best flavor and texture. In the end, these oats offer an easy, healthy breakfast option. Try different flavors and add-ins to keep it fun. Enjoy this tasty start to your day!

Pumpkin Spice Overnight Oats Cozy and Comforting Recipe

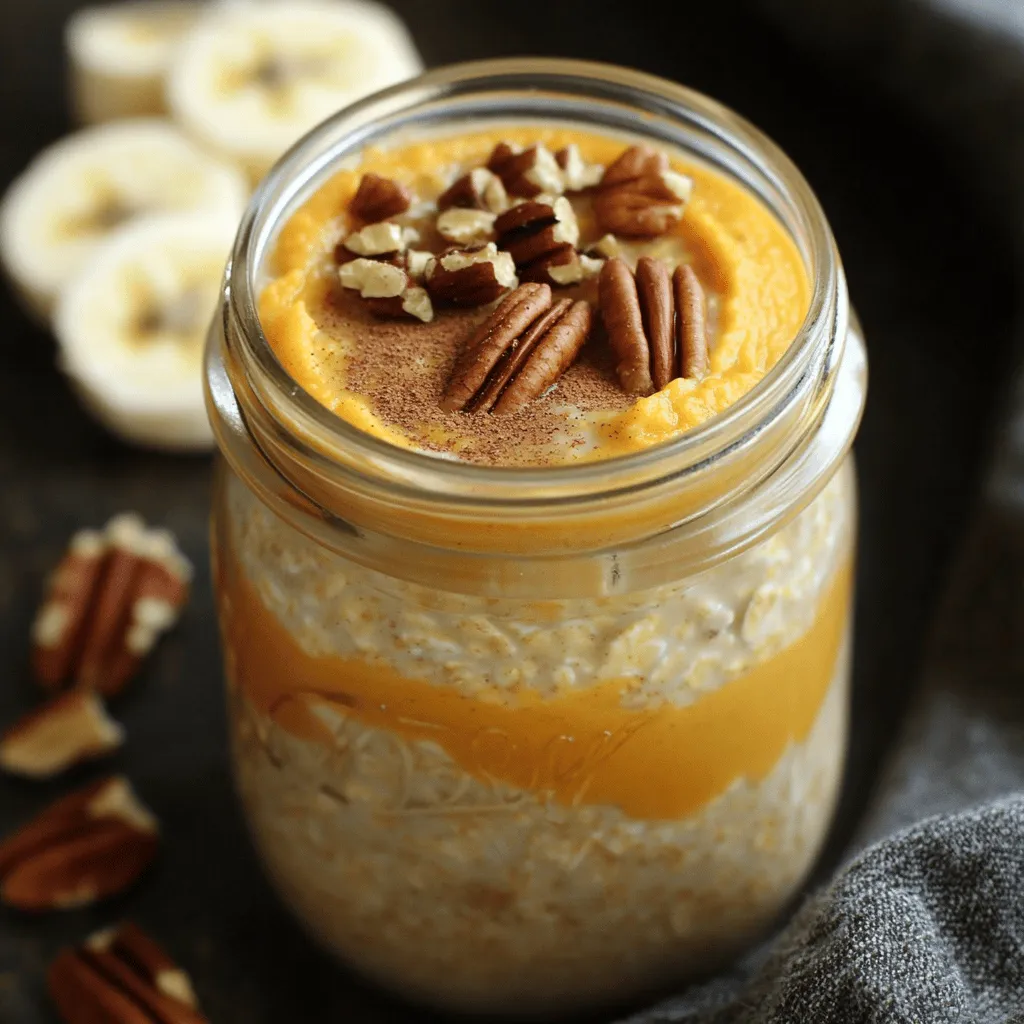
Get ready for fall with my Pumpkin Spice Overnight Oats! This cozy recipe brings the warm flavors of pumpkin spice

- Cauliflower florets - All-purpose flour - Garlic powder - Onion powder Cauliflower florets serve as the base for this dish. They provide a great texture and absorb flavors well. I use all-purpose flour to create a light batter. Garlic and onion powder add a nice depth to the flavor. - Smoked paprika - Buffalo sauce - Optional garnishes Smoked paprika gives the cauliflower a smoky taste that pairs perfectly with the heat. Buffalo sauce is the star of the show, providing that classic spicy kick. You can add garnishes like fresh parsley for color and freshness. - Ranch dressing - Blue cheese dressing Ranch dressing is a popular choice for dipping. Its cool, creamy texture balances the heat of the buffalo sauce. Blue cheese dressing adds a tangy flavor that many love. Both options enhance your snacking experience. For the full recipe, check out the complete cooking instructions and nutritional information. First, preheat your oven to 450°F (230°C). This temperature helps the bites get nice and crispy. While the oven heats, line a baking sheet with parchment paper. This makes clean-up easy and keeps the bites from sticking. In a large mixing bowl, combine the dry ingredients. Mix together 1 cup of all-purpose flour, 1 teaspoon of garlic powder, 1 teaspoon of onion powder, 1 teaspoon of smoked paprika, and ½ teaspoon of salt. These spices give the batter great flavor. Next, add 1 cup of water or plant-based milk. Stir until you have a smooth batter. The batter should be thick enough to coat the cauliflower well. Now it’s time to coat the cauliflower. Take each floret and dip it into the batter. Make sure it’s fully coated, but let the excess drip off. Place the coated florets on the prepared baking sheet. Bake the cauliflower for 20-25 minutes. Remember to flip them halfway through. This helps them cook evenly and get crispy on all sides. Once they are golden brown, remove them from the oven. You can toss them in the buffalo sauce mixture to add more flavor. Return them to the oven for an extra 10-15 minutes. This final bake helps the sauce stick and gives them a perfect crunch. For the complete recipe, you can refer to the Full Recipe section. To get that crispy bite, you need to focus on a few key steps. First, ensure the cauliflower florets are dry before coating them. Any moisture can lead to sogginess. Next, use a hot oven. Preheating to 450°F (230°C) is crucial. This high heat helps the batter crisp up nicely. You can customize the buffalo sauce to fit your taste. If you want it milder, mix in some honey or maple syrup. This gives a sweet balance to the heat. For extra kick, add more hot sauce to the base mix. Taste as you go to make sure it’s just right. Buffalo cauliflower bites pair well with cooling dips. Ranch is a classic choice, but blue cheese dressing works too. For a fun twist, serve them with celery sticks or carrot sticks. Presentation matters—arrange the bites on a platter and sprinkle fresh parsley on top. This adds color and makes the dish pop. For the full recipe, check out the detailed instructions above. {{image_2}} For a lighter take, try a gluten-free batter. Use almond flour or chickpea flour instead of all-purpose flour. These options keep the bites crispy while adding a nutty flavor. You can also air fry the cauliflower. This method cuts down on oil while still giving you that satisfying crunch. Just coat the florets in the batter and place them in the air fryer. Cook them at 400°F for about 15 minutes, shaking halfway through for even cooking. Want to spice things up? Add more seasonings! Try cayenne pepper for heat or nutritional yeast for a cheesy taste. You can experiment with herbs like oregano or thyme for a fresh twist. Also, don't limit yourself to just buffalo sauce. Try barbecue sauce for a sweet kick or a zesty garlic sauce if you prefer something milder. Mixing sauces can also create unique flavors that surprise your guests. Make a grand presentation with a buffalo cauliflower platter. Arrange the bites on a large dish with fresh veggies like celery and carrot sticks. This adds color and crunch to your spread. To create a full meal, serve the bites with side dishes. Pair them with a crisp salad, creamy coleslaw, or even some quinoa. These sides balance the flavors and make your meal more satisfying. Feel free to check the Full Recipe for more details on making these delicious bites! To keep your Buffalo cauliflower bites fresh, store them in an airtight container. Place a paper towel in the container to absorb moisture. This helps keep the bites crispy. You can refrigerate them for up to three days. When you want to enjoy them again, reheating is key. Use an oven or air fryer for the best results. Heat them at 350°F (175°C) for about 10 minutes. This method restores that crunchy texture. If you want to save some bites for later, freezing is a great choice. First, let the cooked cauliflower bites cool completely. Then, arrange them in a single layer on a baking sheet. Freeze them for an hour, and then transfer them to a freezer-safe bag. This prevents them from sticking together. You can freeze them for up to three months. When you're ready to eat, thaw them in the fridge overnight. For reheating, bake them at 375°F (190°C) for about 15 minutes. In the fridge, your Buffalo cauliflower bites last about three days. When stored in the freezer, they can stay good for three months. This gives you plenty of time to enjoy them later. Always check for any signs of spoilage before eating. Proper storage ensures you get the best taste and texture from your bites. Buffalo cauliflower bites last for about 3 to 5 days in the fridge. Store them in an airtight container. This helps keep them fresh and tasty. Just remember, the longer you wait, the less crispy they become. Yes, you can prep these bites ahead of time. You can coat the cauliflower and keep them in the fridge for up to a day. Just make sure they are in a covered container. When you are ready to cook, bake them directly from the fridge. This saves time on busy days. To reheat, use an oven for the best results. Preheat your oven to 375°F (190°C). Spread the bites on a baking sheet. Bake them for about 10-15 minutes. This way, they stay crispy and warm. Yes, these bites are vegan. They use plant-based ingredients like cauliflower, flour, and buffalo sauce. Just check your buffalo sauce to ensure it has no animal products. This makes them perfect for everyone! You can use frozen cauliflower, but fresh is better. Frozen cauliflower has more water. This can make the bites soggy. If using frozen, thaw and drain well before coating. This helps keep them crispy. Ranch dressing is a classic choice for dipping. Blue cheese dressing also pairs well. Both bring a creamy balance to the heat of the buffalo sauce. You can try different sauces too, like garlic aioli or honey mustard. - 1 medium head of cauliflower, cut into bite-sized florets - 1 cup all-purpose flour - 1 teaspoon garlic powder - 1 teaspoon onion powder - 1 teaspoon smoked paprika - 1 cup water (or plant-based milk for richness) - 1 cup buffalo sauce (adjust according to spice preference) - 2 tablespoons olive oil - ½ teaspoon salt - Fresh parsley, chopped (for garnish) - Ranch or blue cheese dressing (for dipping, optional) 1. Preheat the oven to 450°F (230°C). Line a baking sheet with parchment paper. 2. In a large bowl, whisk together flour, garlic powder, onion powder, smoked paprika, and salt. Gradually add water or plant-based milk, stirring until smooth. 3. Dip each cauliflower floret into the batter. Let excess drip off before placing on the baking sheet. 4. Bake for 20-25 minutes, flipping halfway, until golden and crispy. 5. Mix buffalo sauce with olive oil in a bowl for added flavor. 6. After baking, toss the cauliflower in the buffalo sauce mixture until coated. 7. Bake again for 10-15 minutes until the sauce is sticky and bites are crispy. 8. Garnish with parsley and serve warm with ranch or blue cheese dressing. This recipe serves four. Each serving provides a healthy snack option. Cauliflower is low in calories and high in fiber. It offers vitamins C and K, as well as antioxidants. The buffalo sauce adds a spicy kick while keeping it flavorful. Enjoy this snack that’s both tasty and nutritious! Buffalo cauliflower bites are simple to make and delicious. We covered key ingredients, including cauliflower, flour, and spices. You learned how to prepare, coat, and bake the bites for the best texture. Don’t forget tips for adjusting spices and serving your dish. Explore variations like healthier batters or air frying for a twist. Store leftovers correctly for later enjoyment. Enjoy your tasty creation any time!

Buffalo Cauliflower Bites Crispy and Flavorful Snack

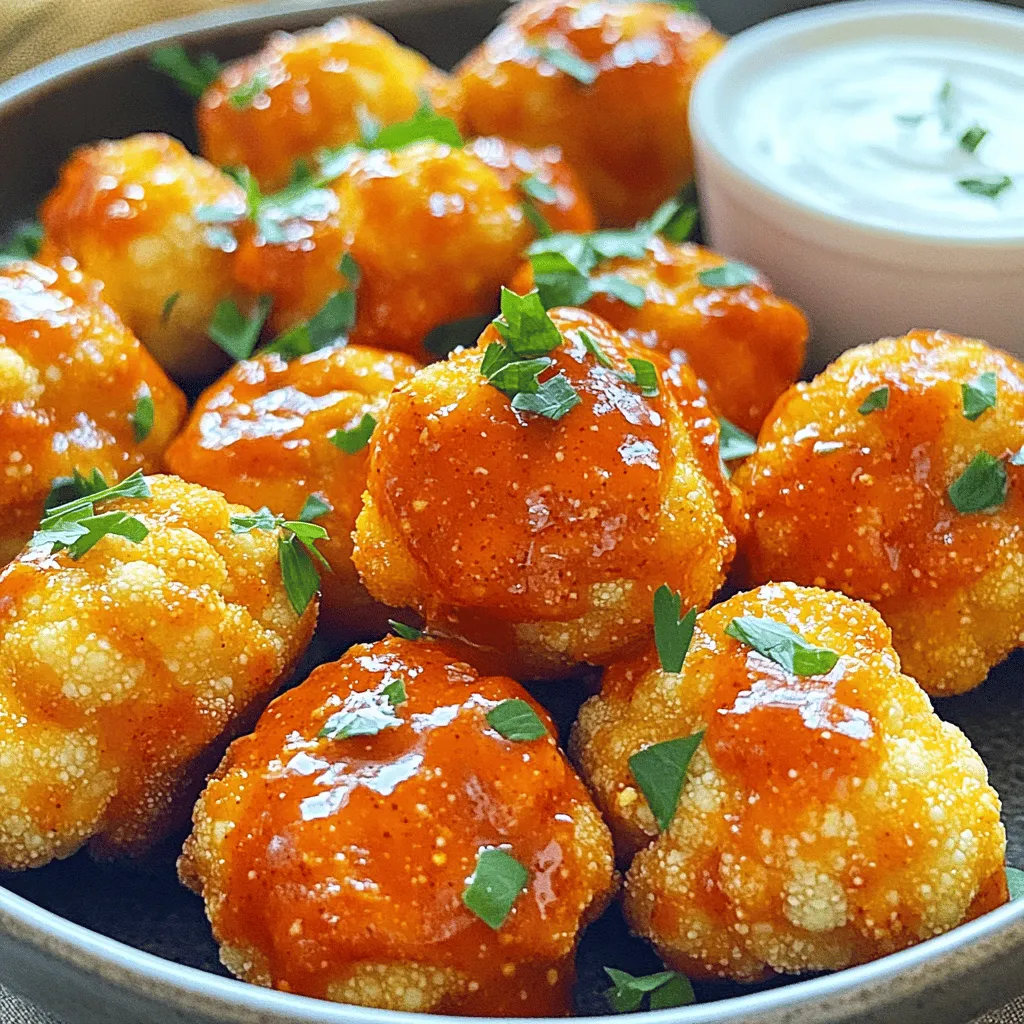
Craving something crispy and flavorful? Dive into the world of Buffalo Cauliflower Bites! This tasty snack is not only easy

To make the Caramelized Onion and Goat Cheese Tart, gather these ingredients: - 1 sheet of puff pastry, thawed - 3 large onions, thinly sliced - 3 tablespoons unsalted butter - 2 tablespoons olive oil - 1 teaspoon sugar - 1 teaspoon thyme, fresh or dried - 4 oz goat cheese, crumbled - 1 tablespoon balsamic vinegar - Salt and pepper to taste - A handful of fresh arugula (for garnish) This list gives you everything you need for a delicious tart. If you can't find goat cheese, try feta or cream cheese. These options will still give a creamy texture. For the onions, sweet onions work best, but yellow onions are fine too. You can swap fresh thyme with dried herbs if needed. Using a different pastry? You can use pie crust or a gluten-free puff pastry if that suits your needs. Choose fresh onions that feel firm and heavy. Look for puff pastry that is flaky and well-packaged. Always check the expiration date on cheese. Fresh goat cheese should smell pleasant and creamy. For herbs, select vibrant greens without browning. Quality ingredients make your tart taste even better. For the full recipe, check the section above. Start by gathering all your ingredients. You need puff pastry, onions, goat cheese, and a few herbs. Make sure your puff pastry is thawed and ready to use. This will help it puff nicely when baked. 1. Preheat the Oven: Set your oven to 400°F (200°C). This ensures even cooking for your tart. 2. Caramelize the Onions: In a large skillet, melt the butter and olive oil over medium heat. 3. Add Onions: Add the thinly sliced onions, salt, and sugar. Stir well. Cook these onions slowly for 25-30 minutes. Keep an eye on them, stirring every few minutes. You want them to turn golden brown and sweet. 4. Finish with Herbs: In the last few minutes, add thyme and balsamic vinegar. This adds a nice depth of flavor. Once done, set the onions aside to cool. 5. Prepare the Puff Pastry: Roll out the puff pastry on a floured surface. This helps to smooth out any creases. 6. Shape the Pastry: Place the puff pastry on a baking sheet lined with parchment paper. Use a knife to gently score a 1-inch border around the edges. Be careful not to cut all the way through. 7. Assemble the Tart: Spread the caramelized onions evenly within the scored border. Then, sprinkle crumbled goat cheese on top. 8. Bake the Tart: Place the tart in the oven and bake for 20-25 minutes. Look for a puffed and golden brown pastry. 9. Garnish: Once baked, let the tart cool for a few minutes. Top with fresh arugula for a pop of color. Slice and serve warm or at room temperature. - Keep It Cold: Always work with cold puff pastry. This helps it puff up better when baked. - Watch for Burns: The oven can be hot. Use oven mitts when handling the tart. - Avoid Cross-Contamination: Use separate cutting boards for raw and cooked foods. This keeps everything safe and clean. Enjoy your Caramelized Onion and Goat Cheese Tart with the Full Recipe for the best experience! Caramelizing onions takes patience. Start with medium heat. Use a large skillet. Add butter and olive oil. This mix helps the onions cook evenly. Stir the onions often. This keeps them from burning. Add a pinch of salt and sugar. This will help them caramelize better. Cook for 25-30 minutes. Look for a deep golden brown color. The sweeter the taste, the better the onions will be. For perfect puff pastry, keep it cold. Thaw it in the fridge, not at room temp. Roll it out gently on a floured surface. Use a sharp knife to score the edges lightly. This creates a nice border once baked. Don't press too hard; you want the layers to stay intact. Bake it until it's golden and puffed. This makes each bite light and flaky. This tart pairs well with a fresh salad. Try arugula or mixed greens. A light vinaigrette adds a nice touch. For drinks, a crisp white wine works great. You can also serve it with a fruit chutney. This adds a sweet and tangy flavor. Feel free to enjoy it warm or at room temperature. Each slice is a delight. For the full recipe, check out the details above. {{image_2}} You can swap goat cheese for other cheeses. Feta adds a salty kick. Cream cheese gives a smooth texture. Try sharp cheddar for a bold flavor. Use ricotta for a creamy base. Each cheese brings its own charm to the tart. Want to add more to your tart? Try adding spinach or mushrooms. Both blend well with onions. You can also mix in cooked chicken or bacon for protein. This makes the tart heartier and more filling. Get creative with whatever you have on hand. If you need a gluten-free option, look for gluten-free puff pastry. Many brands now make this tasty alternative. You can also use a gluten-free pie crust or dough. This way, you still enjoy the tart without gluten. Always check the labels to ensure safety. For the full recipe, check out the details above! To store your leftover tart, let it cool completely first. Wrap it in plastic wrap or place it in an airtight container. Store it in the fridge for up to three days. This keeps it fresh and ready for your next meal. To reheat, preheat your oven to 350°F (175°C). Place the tart on a baking sheet. Heat for about 10-15 minutes, or until it’s warm. This method helps keep the crust crisp. You can also use a microwave, but it may make the crust soft. You can freeze the tart for later use. Wrap it tightly with plastic wrap and aluminum foil. It can last in the freezer for up to three months. When ready to eat, thaw it in the fridge overnight and reheat as mentioned above. Enjoy the flavors just like fresh! For more details, check the Full Recipe. Yes, you can make this tart ahead of time. I suggest preparing the caramelized onions and the puff pastry separately. You can store the onions in the fridge for up to three days. When ready to serve, spread the onions on the pastry and bake. This keeps the crust nice and crisp. This tart pairs well with several sides. Here are some great options: - A fresh green salad with lemon vinaigrette - Roasted vegetables for a hearty touch - A light soup, like tomato or butternut squash - A glass of white wine, such as Sauvignon Blanc These sides balance the rich flavors of the tart. Yes, you can make a vegan version of this tart. Use plant-based butter instead of regular butter. For the cheese, try vegan cream cheese or a nut-based cheese. The puff pastry is often vegan, but check the label to be sure. With these swaps, you can enjoy a delicious vegan tart! For the full recipe, click here: [Full Recipe]. This blog post covered all you need to know about making a Caramelized Onion and Goat Cheese Tart. You learned about key ingredients, cooking steps, and important safety tips. The best practices for caramelizing onions and perfecting puff pastry were shared, along with variations to try. For your leftovers, proper storage and reheating methods will keep your tart tasting great. Feel free to experiment with options like vegan ingredients or different cheeses. Cooking is all about trying new things while enjoying the process. Dive in and make this delicious tart your own!

Caramelized Onion and Goat Cheese Tart Delight

Are you ready to impress your taste buds? My Caramelized Onion and Goat Cheese Tart is a simple yet stunning

Older posts
Newer posts
← Previous Page1 … Page45 Page46 Page47 … Page59 Next →

dsad

© 2025 Cooking Wells • Built with GeneratePress

Our Policies

  • Copyright Policy
  • Cookie Policy
  • GDPR Policy
  • Privacy Policy
  • Disclaimer
  • Terms Of Use

More Information

  • Home
  • About
  • Contact
  • Appetizers
  • Dessert
  • Dinner
  • Drinks
©2025, Cooking Wells About Back To Top