Skip to content
DisclaimerTerms Of UseGDPR PolicyCookie Policy

Cooking Wells

  • Home
  • Drinks
  • Appetizers
  • Dinner
  • Dessert
  • About
  • Contact
  • Privacy Policy
DisclaimerTerms Of UseGDPR PolicyCookie Policy

Mia

To create the perfect spicy mango chicken tacos, you need a few key items: - 2 boneless, skinless chicken breasts - 1 ripe mango, diced - 1/2 cup red cabbage, shredded - 1/4 cup red onion, finely chopped - 1 jalapeño, deseeded and minced - 2 tablespoons lime juice - 2 tablespoons olive oil - 1 teaspoon chili powder - 1 teaspoon cumin - Salt and pepper, to taste - 8 small corn tortillas These ingredients work together to create a balance of flavors. The chicken gives protein, while the mango adds sweetness. The spices bring heat and depth, making each bite exciting. You can enhance your tacos with these toppings: - Fresh cilantro - Avocado slices Cilantro adds a fresh taste, while avocado gives creaminess. These optional items make the dish even more enjoyable. Feel free to mix and match to find your favorite combination! For a detailed look at the preparation, check out the Full Recipe. To start, you need to prepare the marinade. In a bowl, mix olive oil, lime juice, chili powder, cumin, salt, and pepper. This blend adds great flavor to the chicken. Use two boneless, skinless chicken breasts. Make sure each piece gets a nice coat of the marinade. Let the chicken marinate for at least 30 minutes. This time allows the flavors to soak in. Now, it's time to cook the chicken. You can grill or pan-sear it. Preheat your grill or skillet over medium heat. Remove the chicken from the marinade and place it on the hot surface. Cook for 6 to 7 minutes on each side. Check for doneness; the chicken should not be pink in the center. Once cooked, let it rest for a few minutes before slicing. While the chicken rests, prepare the mango salsa. In a mixing bowl, combine diced ripe mango, shredded red cabbage, chopped red onion, and minced jalapeño. Add a pinch of salt for flavor. Toss everything gently and set it aside. Letting the salsa sit helps the flavors meld together. This step ensures each bite bursts with freshness. Now comes the fun part: assembling the tacos! First, you need to warm the corn tortillas. Use a dry skillet over medium heat for about 30 seconds on each side. This makes them soft and easy to fold. Next, slice the cooked chicken into strips. Place a few strips on each tortilla. Top with the mango salsa mixture and avocado slices if you like. This layering creates a delightful taste in every bite. To get the best flavor from your chicken, pay special attention to the marinade. Adjust your spice levels by adding more jalapeño for heat or lime juice for brightness. If you prefer milder flavors, reduce the chili powder and jalapeño. Marination time is key. I recommend letting the chicken sit for at least 30 minutes. If you have more time, try marinating for up to four hours. This helps the flavors soak into the chicken. Cooking the chicken properly keeps it juicy. I like to sear the chicken over medium heat. This gives a nice crust and seals in the juices. Cook each side for about 6 to 7 minutes. Always check that it is no longer pink in the center. After cooking, let the chicken rest for a few minutes. Resting allows the juices to redistribute, making the chicken more flavorful and tender. Pair your tacos with fresh sides. I love serving them with a simple salad or chips and salsa. A fruity drink like mango lemonade also complements the spicy tacos well. For a great presentation, stack the tacos on a colorful platter. Sprinkle fresh cilantro on top for a pop of color. You can also add avocado slices for creaminess. This makes your dish not just tasty but visually appealing too. {{image_2}} You can swap chicken for shrimp or tofu. Shrimp cooks fast and adds a nice ocean taste. Simply marinate and grill them like chicken. Tofu is great for a vegetarian choice. Use firm tofu and press it to remove extra water. Marinate and grill or pan-sear until golden. Feel free to get creative with your salsa. You can add fruits like pineapple or peach for sweetness. Fresh herbs like mint or basil can also lift the flavor. If you want more heat, toss in extra jalapeño or a dash of cayenne. Adjust the spice to your taste for a perfect balance. Corn tortillas are classic for tacos. They have a nice flavor and are gluten-free. If you prefer flour, they offer a softer bite. For a low-carb option, use lettuce wraps instead. They give a fresh crunch and are a great way to enjoy the filling without the carbs. Check out the full recipe for all these tips and ideas! Store leftover tacos in an airtight container. Keep them in the fridge for up to three days. To maintain flavor, separate the chicken and salsa from the tortillas. This way, the tortillas stay soft and fresh. Reheat your tacos in the microwave or on a skillet. If using a microwave, cover the tacos with a damp paper towel. This keeps them moist. If you use a skillet, heat it on medium-low and warm the tacos for a few minutes. Freshness is key, so eat them within a couple of days. Prep the chicken and mango salsa in advance. Marinate the chicken a day before. Store it in the fridge. For the salsa, mix all ingredients and keep it in a sealed container. When you are ready to eat, just warm the tortillas and assemble your tacos. This makes taco night easy and fun! Check out the Full Recipe for more details. Yes, you can. For meal prepping, marinate the chicken a day before cooking. Store it in the fridge. This allows flavors to soak in. You can cook the chicken and make the mango salsa in advance too. Keep them in separate containers. When ready to eat, warm the tortillas and assemble. Enjoy fresh tacos without extra work! Many sides pair well with Spicy Mango Chicken Tacos. Here are some popular choices: - Mexican rice - Black beans - Corn salad - Chips with salsa - Guacamole These sides add color and flavor to your meal. They also balance the spice of the tacos. You can easily adjust the heat level. Start with less jalapeño if you prefer mild tacos. You can also remove the seeds for less heat. If you like it spicy, add more jalapeño or even a dash of hot sauce. Experiment with chili powder too. Just remember, taste as you go! Yes, this recipe can be gluten-free. Use corn tortillas instead of flour tortillas. Make sure to check the packaging for gluten-free labels. Many brands offer tasty options that work perfectly with the tacos. Enjoy the flavors without worry! Spicy Mango Chicken Tacos are easy to make and packed with flavor. You learned about the essential ingredients and step-by-step cooking methods. We discussed tips for juiciness and variations to fit any diet. Storing leftovers and meal prep ideas help you enjoy these tacos later. Try customizing your dish with unique toppings and side dishes. This recipe is fun and flexible. Dive in, have fun, and make it your own! Your perfect taco night starts now.

Spicy Mango Chicken Tacos Flavorful and Fresh Recipe

Craving a burst of flavor in your meals? Try my Spicy Mango Chicken Tacos! This recipe brings the perfect blend

To make Peanut Butter Banana Overnight Oats, gather these simple ingredients: - 1 cup rolled oats - 1 ½ cups almond milk (or any milk of choice) - 2 ripe bananas (1 mashed and 1 sliced) - 3 tablespoons peanut butter - 1 tablespoon honey or maple syrup (optional) - 1 teaspoon chia seeds (optional) - ½ teaspoon cinnamon - Pinch of salt - Toppings: additional banana slices, chopped nuts, drizzle of honey or maple syrup If you can't find rolled oats, you can use quick oats. They will work, but the texture changes slightly. For almond milk, any milk works, such as cow's milk, soy milk, or oat milk. If you want to skip the honey, try agave syrup or leave it out. You can also use almond butter instead of peanut butter for a nut-free twist. - Rolled oats: Great for fiber and keeps you full. - Almond milk: Low in calories and good for hydration. - Bananas: Packed with potassium and natural sweetness. - Peanut butter: Provides healthy fats and protein. - Chia seeds: A source of omega-3s and fiber. - Cinnamon: Adds flavor and may help regulate blood sugar. - Honey or maple syrup: Natural sweeteners that add flavor. These ingredients make your overnight oats nutritious and tasty. Enjoy experimenting with them! For the full recipe, check out the Creamy Peanut Butter Banana Delight. Making peanut butter banana overnight oats is easy and fun. This recipe takes only ten minutes to prepare. You can enjoy it for breakfast or a snack. The oats need time to soak, so do this the night before. Let’s get started! First, gather your ingredients. You will need: - 1 cup rolled oats - 1 ½ cups almond milk (or any milk of choice) - 2 ripe bananas (1 mashed, 1 sliced) - 3 tablespoons peanut butter - 1 tablespoon honey or maple syrup (optional) - 1 teaspoon chia seeds (optional) - ½ teaspoon cinnamon - Pinch of salt In a medium bowl, mix the rolled oats and almond milk. If you choose to use chia seeds, add them now. Stir until everything combines well. Next, add the mashed banana, peanut butter, honey or maple syrup, cinnamon, and a pinch of salt. Mix until it looks creamy and smooth. Now, it’s time to divide the mixture. Split it evenly into two jars or bowls. Cover them tightly. Place the jars in the fridge overnight. If you are short on time, let them sit for at least 4 to 6 hours. This soaking time helps the oats absorb the yummy flavors. When you are ready to eat, stir the oats well. Top with sliced banana, chopped nuts, or a drizzle of honey or maple syrup. This recipe is a great way to start your day! For the full recipe, check out the details above. To make the best peanut butter banana overnight oats, focus on your ratios. You want the oats to soak up enough liquid without being too runny. For perfect texture, use 1 cup of rolled oats with 1 ½ cups of almond milk. This ratio provides a creamy feel. Adding a pinch of salt enhances the flavors. I love serving these oats in clear mason jars. It shows off the layers and makes breakfast fun. Top with sliced bananas and a sprinkle of nuts for crunch. You can also drizzle honey or maple syrup on top for extra sweetness. This adds a nice touch to your meal. Feel free to play with flavors! Try adding cocoa powder for a chocolate twist. You can also mix in vanilla or nutmeg for a warm, cozy flavor. If you like crunch, add seeds or granola. You can change the fruit too! Berries or apples are great alternatives. Get creative and make it your own! For the full recipe, check out the link above. {{image_2}} If you want a nut-free version of these oats, swap the peanut butter. Use sunflower seed butter. It gives you a similar creaminess and taste. You can also try tahini, which is made from sesame seeds. This keeps the dish tasty while being safe for those with nut allergies. To make this recipe dairy-free, use plant-based milk. Almond milk works great, but oat or coconut milk is also good. For a vegan option, skip the honey. Use maple syrup instead for a sweet touch. This change keeps your oats fully vegan and just as delicious. Feel free to add more flavors to your oats. Stir in cocoa powder for a chocolatey twist. Try adding vanilla extract for a warm, sweet note. You can also mix in berries or sliced apples for a fruity kick. Experiment with spices like nutmeg or ginger for extra warmth. Each option makes your oats unique and fun! For the full recipe, check out the detailed steps for making creamy peanut butter banana delight. Store your peanut butter banana overnight oats in airtight jars or containers. This keeps them fresh. Always let the oats cool down if they were warm. I prefer using glass jars because they are easy to clean and look nice when serving. Label your jars with the date to know when you made them. These oats last about 3 to 5 days in the fridge. The flavors get better as they sit. If you notice any change in smell or texture, it’s best to toss them out. Always stir before eating, as some ingredients may settle at the bottom. Enjoy them cold straight from the fridge or warm them a bit for a cozy feel. To reheat, transfer the oats to a microwave-safe bowl. Heat for about 30 to 60 seconds. Stir well to avoid hot spots. If the oats seem too thick, add a splash of almond milk or water. This will bring back their creamy texture. When ready, top with fresh banana slices or nuts for extra crunch. Yes, you can use quick oats. Quick oats cook faster and absorb liquid more quickly. This makes them softer than rolled oats. If you prefer a creamier texture, quick oats work well. Just remember, the oats will be mushier. Overnight oats can last up to five days in the fridge. Store them in airtight jars to keep them fresh. I recommend eating them within three days for the best taste. If you notice any change in smell or texture, toss them out. Yes, you can make these oats gluten-free. Just choose gluten-free rolled oats. They are made from oats that did not touch gluten-containing grains. This way, you can enjoy your oats without worry. - Additional Common Questions You may wonder about adding other fruits or toppings. Feel free to mix in berries, nuts, or seeds. This will boost flavor and nutrition. You can also adjust sweetness with honey or maple syrup to your taste. This blog covered everything you need for delicious overnight oats. We went through the ingredients, step-by-step instructions, and helpful tips. I shared ways to customize flavors, adapt for allergies, and store your oats well. Now, you can enjoy a healthy breakfast that fits your taste. Remember, you have many options to make it your own. Happy eating!

Peanut Butter Banana Overnight Oats Simple Recipe

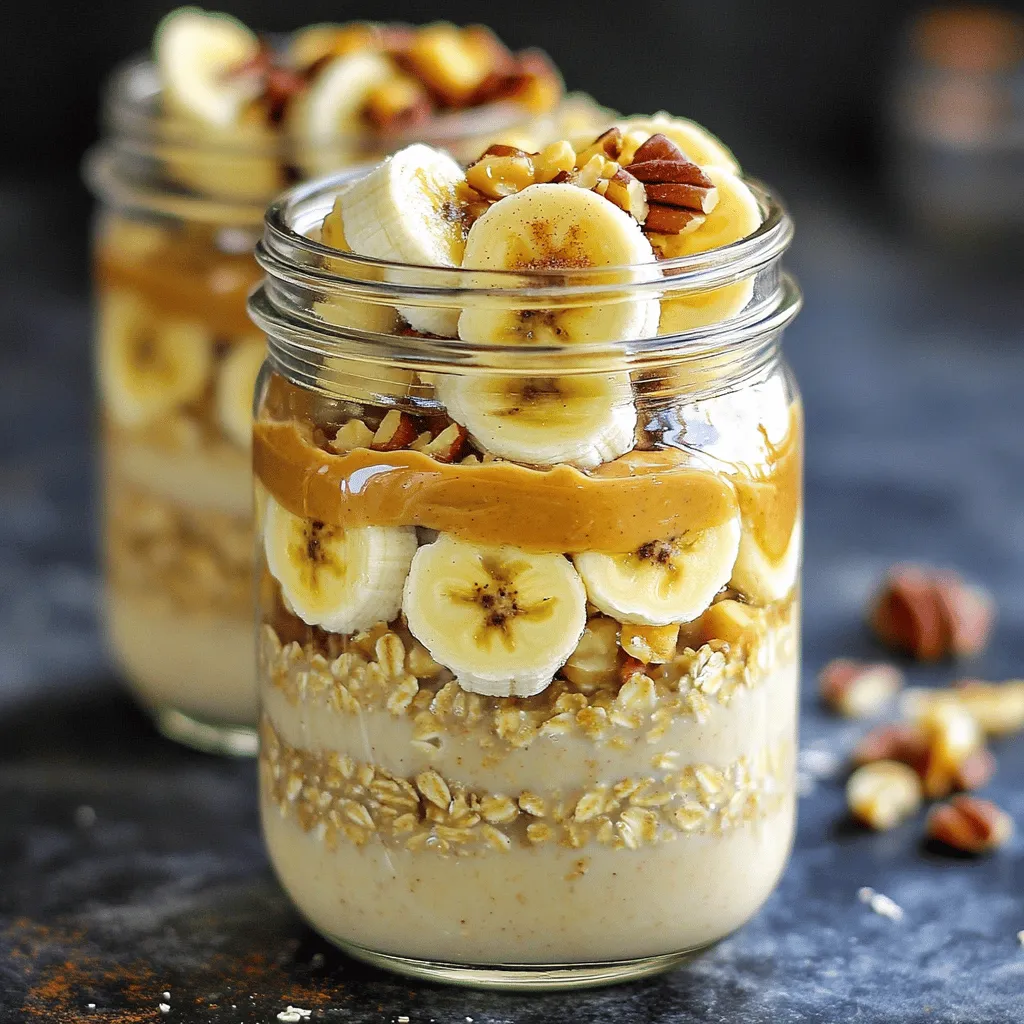
Ready for a quick, tasty breakfast? Peanut butter banana overnight oats are perfect for you! This simple recipe combines creamy

- 8 oz fettuccine or spaghetti - 3 tablespoons unsalted butter - 4 cloves garlic, minced - 1 cup heavy cream - 1 cup freshly grated Parmesan cheese - 1 teaspoon Italian seasoning - Salt and pepper to taste - Fresh parsley, chopped (for garnish) - Crushed red pepper flakes for heat When I make creamy garlic Parmesan pasta, I focus on fresh, high-quality ingredients. The main star is the pasta, either fettuccine or spaghetti. I love how fettuccine holds the sauce so well. The butter adds richness, while the garlic gives that lovely aroma and flavor. Next, the heavy cream blends perfectly with the cheese to create a smooth sauce. I always use freshly grated Parmesan. It melts better and tastes fresher than pre-grated options. Italian seasoning adds depth to the dish without overwhelming it. For those who enjoy a little kick, I recommend crushed red pepper flakes. They bring heat to the dish and balance the creaminess. Chopped parsley not only looks good but adds a fresh taste too. This creamy garlic Parmesan pasta is simple yet satisfying. You can find the complete recipe in the Full Recipe section. Enjoy cooking! Start by boiling water in a large pot. Add salt to the water for flavor. Once the water reaches a rolling boil, add 8 oz of fettuccine or spaghetti. Cook the pasta as the package says, usually about 8 to 10 minutes. You want it al dente, which means it should be firm but not hard. When the pasta is done, reserve ½ cup of the pasta water in a bowl. Then, drain the rest and set the pasta aside. In a large skillet, melt 3 tablespoons of unsalted butter over medium heat. Once the butter is melted, add 4 minced garlic cloves. Sauté the garlic for 1 to 2 minutes. You want it fragrant but not browned, as this can make it bitter. Next, pour in 1 cup of heavy cream and let it simmer gently. Gradually whisk in 1 cup of freshly grated Parmesan cheese. Keep stirring until the cheese melts and the sauce is creamy. Add the drained pasta directly into the skillet with the sauce. Toss it well, so the pasta gets coated in the creamy garlic Parmesan sauce. If the sauce is too thick, use the reserved pasta water to thin it out. Add a little at a time until you reach your preferred consistency. This step ensures every bite is rich and flavorful. For a bit of heat, you can mix in crushed red pepper flakes if you like. How to avoid clumping To keep your pasta from clumping, make sure to stir it while it cooks. Adding salt to the boiling water also helps. Once the pasta is done, drain it quickly. Do not rinse the pasta, as this washes away the starch that helps the sauce stick. Adjusting thickness with pasta water If your sauce seems too thick, use the reserved pasta water. Add a little at a time. This water contains starch, which can help thin the sauce while keeping it creamy. It’s a game-changer for the perfect texture. Recommended seasonings and add-ins To boost flavor, try adding fresh herbs like basil or thyme. A pinch of nutmeg can add warmth, too. For extra zing, consider lemon juice or zest. These small tweaks can make a big difference in taste. Suggestions for protein or vegetables to add You can add grilled chicken or sautéed shrimp for protein. For veggies, try spinach, sun-dried tomatoes, or peas. They not only taste great but also add color and nutrition to your dish. Best pairings for garlic Parmesan pasta This creamy pasta pairs well with a simple side salad or garlic bread. A light white wine, like Pinot Grigio, complements the dish nicely. These pairings can elevate your meal. Creative garnishing ideas Garnish with chopped parsley for color. You can also sprinkle extra Parmesan or a dash of crushed red pepper flakes on top. These small touches enhance both taste and presentation. For the full recipe, click [Full Recipe]. {{image_2}} To make a vegan version, swap the butter and cream with plant-based options. Use olive oil or vegan butter instead of regular butter. For cream, try coconut cream or cashew cream. Nutritional yeast can replace Parmesan cheese. It adds a cheesy flavor without dairy. You can also add fresh herbs for extra taste. If you need gluten-free pasta, there are great options. Look for pasta made from rice, quinoa, or lentils. These types taste good and hold sauce well. They are perfect for this creamy dish. Always check the package for cooking times, as they may differ from regular pasta. You can easily change the dish by adding proteins. Cooked chicken or shrimp works well. Just add them to the sauce before mixing in the pasta. For veggies, try spinach, broccoli, or peas. They add color and nutrients. Sauté the vegetables briefly in the butter before adding the sauce. This keeps them crisp and fresh. For the full recipe, check out the previous section. To reheat creamy garlic Parmesan pasta, use a skillet. This method helps keep the pasta moist. Add a splash of water or cream to the pan. Heat on low, stirring gently. Avoid high heat; it can dry out the sauce. You can also use the microwave. Place the pasta in a microwave-safe bowl. Add a little cream or water. Cover the bowl with a lid or a damp paper towel. Heat in short bursts, stirring in between. You can freeze creamy garlic Parmesan pasta, but it’s best to do it without the sauce. Cook the pasta, then let it cool. Place it in a freezer-safe bag. Remove as much air as you can. For the sauce, store it in a separate container. When you're ready to eat, thaw both in the fridge overnight. Reheat the sauce on the stove. Once warm, mix it with the pasta for a fresh dish. Creamy garlic Parmesan pasta lasts in the fridge for about 3 to 5 days. Make sure to store it in an airtight container. If you notice any change in smell or color, it’s best to throw it away. To keep it fresh longer, you can freeze it. This way, you can enjoy a tasty meal later on! For the complete recipe, check the Full Recipe section. To boost the taste of creamy garlic Parmesan pasta, try these easy tips: - Add fresh herbs: Incorporate basil or thyme for a fresh kick. - Use good-quality cheese: Freshly grated Parmesan packs more flavor. - Mix in spices: Add garlic powder or onion powder for depth. - Include protein: Grilled chicken or shrimp can enhance the dish. - Add vegetables: Spinach, sun-dried tomatoes, or mushrooms enrich flavor and nutrition. These tweaks can elevate the dish and make your meal even more delightful. Yes, you can prep creamy garlic Parmesan pasta in advance. Here’s how: - Cook the pasta: You can cook the pasta a day ahead. Toss it with a bit of olive oil to prevent sticking. - Make the sauce: Prepare the creamy sauce separately and store it in the fridge. - Mix before serving: When ready to serve, warm the sauce and combine it with the pasta. This keeps the pasta from getting soggy. This method allows you to enjoy a quick dinner without losing any flavor. If you need a substitute for Parmesan cheese, consider these options: - Pecorino Romano: It has a strong flavor but is saltier than Parmesan. - Grana Padano: Similar taste but milder and less nutty. - Asiago: Offers a sharp flavor, great for pasta dishes. - Nutritional yeast: A vegan option with a cheesy flavor. Each cheese brings its unique taste, so choose one that fits your preference. This blog post covered how to make creamy garlic Parmesan pasta. We explored the main ingredients, the step-by-step cooking process, and useful tips. We also discussed variations for different diets and how to store leftovers. You can now create a delicious dish tailored to your taste. Whether you prefer it vegan or gluten-free, this pasta is easy to make. Enjoy cooking, and remember, the best meals bring joy.

Creamy Garlic Parmesan Pasta Flavorful Dinner Option

Looking for a delicious dinner that’s easy to make? Try Creamy Garlic Parmesan Pasta! With its rich flavors and simple

Here’s everything you need to make savory stuffed bell peppers with quinoa: - 4 large bell peppers (any color) - 1 cup quinoa, rinsed - 2 cups vegetable broth - 1 cup black beans, drained and rinsed - 1 cup corn (fresh or frozen) - 1 medium onion, finely chopped - 2 cloves garlic, minced - 1 teaspoon cumin - 1 teaspoon smoked paprika - 1 teaspoon chili powder - Salt and pepper to taste - 1 cup diced tomatoes (canned or fresh) - 1 cup shredded cheese (cheddar or a dairy-free alternative) - Fresh cilantro, chopped (for garnish) These ingredients come together to create a dish that is not just colorful but also full of flavor. Using fresh ingredients, like colorful bell peppers, makes the dish even more appealing. Quinoa is a fantastic base here; it is healthy and packed with protein. The black beans and corn add texture and sweetness, while spices like cumin and smoked paprika bring warmth and depth. Don't forget the cheese on top for that perfect melt! For the complete cooking steps, check out the Full Recipe. - Preheat your oven to 375°F (190°C). - Slice the tops off the bell peppers and remove the seeds and membranes. This helps the peppers cook evenly. - In a medium saucepan, combine rinsed quinoa and vegetable broth. Bring it to a boil. - Once boiling, reduce to a simmer and cover the pot. Cook for about 15 minutes until fluffy. This gives you great texture and flavor. - Heat a splash of olive oil in a skillet over medium heat. - Add the chopped onion and minced garlic. Sauté until they become translucent, which takes about 3-4 minutes. This step builds a nice base for your filling. - Stir in black beans, corn, cumin, smoked paprika, chili powder, salt, and pepper. Cook this mixture through for 3-5 minutes. - Once the quinoa is fluffy, fluff it with a fork and add it to the skillet. Mix in diced tomatoes and half of the shredded cheese. This creates a colorful and tasty filling. - Pack the quinoa mixture into the prepared peppers. Press down gently to fill them well. - Place the stuffed peppers upright in a baking dish. Sprinkle the remaining cheese on top. - Cover the dish with foil and bake for 30 minutes. After that, remove the foil and bake for an additional 10-15 minutes. This gives you bubbly cheese and tender peppers. These steps help you create delicious stuffed bell peppers with quinoa. Enjoy the process and the tasty results! For the specific amounts, see the Full Recipe. Look for bell peppers that are firm and vibrant. The colors can be green, red, yellow, or orange. Avoid peppers with blemishes or soft spots. Fresh peppers will have a shiny skin. You want them to feel heavy for their size. This means they are juicy and full of flavor. After cooking quinoa, let it sit covered for about five minutes. This helps the grains absorb any remaining moisture. Use a fork to fluff the quinoa gently. This makes it light and airy. Fluffed quinoa mixes well and adds texture to your stuffed peppers. To boost the taste, try adding spices. Cumin, smoked paprika, and chili powder work great here. You can also use homemade vegetable broth instead of water for cooking quinoa. This adds depth to the flavor. Taste your filling as you cook. Adjust the spices based on your preference. Enjoy the process of making it your own! {{image_2}} You can easily make this dish vegan. Just swap regular cheese for a dairy-free alternative. Many brands offer great cheese substitutes that melt well. This way, you keep the creamy texture without dairy. Want more protein? Add cooked ground turkey, chicken, or even mushrooms. Ground turkey has a mild taste and works well with the spices. Chicken adds a nice flavor, while mushrooms give a hearty feel. All these options boost your meal’s nutrient value. If you prefer something different, switch quinoa for other grains. Couscous, brown rice, and farro are excellent choices. Couscous cooks fast and has a fluffy texture. Brown rice is nutritious and filling. Farro has a nutty flavor that pairs well with vegetables. Each grain gives a unique twist to the dish. You can store your leftover stuffed bell peppers in an airtight container. They last in the fridge for up to 5 days. Make sure to let them cool first. This way, you keep the taste fresh. To freeze the stuffed bell peppers, wrap each one tightly in plastic wrap. Then, place them in a freezer-safe bag. Label the bag with the date. They can stay frozen for up to 3 months. When you're ready to eat, just thaw them in the fridge overnight. To reheat, the best way is to use the oven. Preheat it to 350°F (175°C). Place the peppers in a baking dish. Cover them with foil to keep moisture in. Heat for about 20 minutes. This keeps the peppers soft and the filling tasty. You can also microwave them, but the oven gives better texture. For the microwave, heat one pepper at a time for about 2-3 minutes. Yes, you can prep stuffed bell peppers ahead of time. Here’s how: - Prepare the filling: Cook the quinoa and mix it with your veggies and spices. - Stuff the peppers: Fill the bell peppers with the quinoa mixture. - Store: Place them in an airtight container in the fridge. - Bake later: When ready to eat, bake them as directed. This method saves time and makes meal prep easy. You can tell when stuffed bell peppers are done by looking for these signs: - Tenderness: The peppers should be soft but still hold their shape. - Cheese: The cheese on top should be melted and bubbly. - Color: The peppers should be a bit darker, indicating they are cooked through. Absolutely! Here are some tasty alternatives to quinoa: - Rice: Use brown rice or white rice for a different texture. - Meats: Ground turkey, beef, or chicken work well. - Legumes: Lentils or chickpeas can add great protein. - Veggies: Mix in more vegetables like spinach, zucchini, or mushrooms for added nutrition. Stuffed bell peppers with quinoa are healthy and packed with nutrients: - Protein: Quinoa offers a complete source of protein. - Fiber: The beans and peppers provide plenty of fiber for digestion. - Vitamins: Bell peppers are rich in vitamins A and C. - Low calories: This dish is low in calories, making it a good option for weight control. For detailed steps, check out the [Full Recipe](#) to make these delicious stuffed peppers. Stuffed bell peppers are a tasty and healthy dish. You start by preparing bell peppers and cooking quinoa. Next, you mix in beans, corn, and spices. After stuffing the peppers, you bake them to perfection. You can also switch ingredients to suit your taste. Don’t forget to store leftovers properly for later meals. This dish is not only fun to make but also offers great nutrition. Explore different flavors and enjoy your cooking journey!

Savory Stuffed Bell Peppers with Quinoa Recipe

Are you ready to dive into a delicious and healthy meal? My Savory Stuffed Bell Peppers with Quinoa recipe is

- 1 ½ cups all-purpose flour - ¾ cup granulated sugar - ½ teaspoon baking powder - ½ teaspoon baking soda - ¼ teaspoon salt - 1 large lemon (zest and juice) - ½ cup unsalted butter, melted - 1 large egg - ½ cup buttermilk - 1 cup fresh blueberries - 1 teaspoon vanilla extract - 2 tablespoons coarse sugar (for topping) You can use milk mixed with vinegar as a substitute for buttermilk. This gives a similar tangy flavor. Fresh blueberries work best, but frozen blueberries can be used if needed. Just remember they may color the batter a bit. To make these muffins, you'll need: - Muffin tin - Mixing bowls - Whisk and spatula These items help you mix and bake your muffins easily. For the full recipe, check the details in the section above. - Preheat your oven to 350°F (175°C). - Line a muffin tin with paper liners or grease it with cooking spray. - In a large bowl, mix 1 ½ cups of all-purpose flour, ¾ cup of granulated sugar, ½ teaspoon of baking powder, ½ teaspoon of baking soda, and ¼ teaspoon of salt. Whisk well to combine. - In another bowl, combine ½ cup of melted butter, the zest and juice of 1 large lemon, and 1 large egg. Stir until smooth. - Add ½ cup of buttermilk and 1 teaspoon of vanilla extract, mixing gently until just combined. - Gradually fold the wet mixture into the dry ingredients. Mix until just combined. - Be careful not to overmix, as this can make the muffins tough. - Gently fold in 1 cup of fresh blueberries. Make sure they are evenly distributed but do not break them. - Fill the muffin tins about ¾ full with the batter. - Sprinkle 2 tablespoons of coarse sugar on top for a crunchy finish. - Bake for 18-20 minutes. Check for doneness by inserting a toothpick; it should come out clean. - Allow the muffins to cool in the tin for 5 minutes. Then, transfer them to a wire rack to cool completely. Follow these steps to make tasty Lemon Blueberry Muffins. For the full recipe, check out the complete instructions above! To get fluffy muffins, avoid overmixing. When you mix the batter, do it gently. Overmixing can make your muffins dense. Use room temperature ingredients for the best results. Cold butter or eggs can lead to uneven baking. Want to boost the lemon flavor? Consider adding lemon extract or extra zest. These small changes make a big difference. You can also play with the amount of blueberries. More blueberries add sweetness and moisture. When it comes to serving, arrange your muffins on a pretty platter. This makes them look inviting. Garnish your muffins with fresh blueberries and a sprinkle of lemon zest. This adds color and shows off your effort. For the full recipe, check the steps I've shared. {{image_2}} You can easily add fun twists to your muffins. Consider adding poppy seeds. They give a great crunch and a nice flavor. Just mix in about 1-2 tablespoons with the dry ingredients. You can also change the fruit. Raspberries or strawberries work well too. They add a sweet and tangy punch to each bite. Just make sure to chop larger fruits into smaller pieces. If you want a healthier muffin, try using whole wheat flour. It adds fiber and a nutty taste. You can also cut back on the sugar. Try using half the amount, or swap it for honey or maple syrup. This keeps the muffins tasty but lowers the calories. For those who follow a vegan diet, it’s easy to make these muffins plant-based. Use a flax egg instead of a regular egg. To make a flax egg, mix 1 tablespoon of ground flaxseed with 2.5 tablespoons of water. Let it sit for a few minutes to thicken. You can also swap butter for coconut oil. This keeps the muffins moist and adds a hint of coconut flavor. To keep your lemon blueberry muffins fresh, store them in an airtight container. This helps keep moisture in and prevents them from drying out. If you plan to eat them within a few days, room temperature is fine. For longer storage, move them to the fridge. You can freeze these muffins for later use. Allow them to cool completely first. Then, wrap each muffin in plastic wrap. Place the wrapped muffins in a freezer bag. Label the bag with the date. They will stay fresh for up to three months. When you want to enjoy your muffins again, simply reheat them. You can use the microwave for a quick warm-up. Heat them for about 15-20 seconds. Alternatively, warm them in the oven at 350°F for 5-10 minutes. This helps restore their fluffy texture. For the full recipe, check the earlier sections. Yes, but they may color the batter slightly. Frozen blueberries can add great flavor. Just remember to fold them in gently to avoid breaking them apart. To make them fluffier, add a bit more baking powder. Using fresh ingredients helps too. Fresh eggs and butter can trap more air, resulting in a lighter muffin. If your muffins are too dense, check if you overmixed the batter. Mix just until combined. Also, check the freshness of your baking powder. Old baking powder won't rise well. To check if the muffins are done, insert a toothpick into the center. If it comes out clean, your muffins are ready. If it has wet batter on it, bake a few more minutes. These Lemon Blueberry Muffins are simple and fun to make. You learned how to mix ingredients, choose substitutes, and enhance flavors. Following the steps and tips will lead you to perfect muffins. Always store them right for lasting freshness. With these ideas, you can enjoy a tasty treat any time. Try new flavors and share your creations with friends. Happy baking!

Lemon Blueberry Muffins Tasty and Fluffy Delight

Are you craving a delicious treat that bursts with flavor? Look no further than my Lemon Blueberry Muffins. They are

To make a great homemade tomato basil soup, you need some fresh and simple ingredients. Here is the list: - Olive oil - Onion - Garlic - Ripe tomatoes - Vegetable broth - Sugar - Salt and pepper - Fresh basil leaves - Balsamic vinegar - Heavy cream These ingredients come together to create a rich and tasty soup. I love using ripe tomatoes for the best flavor. You can use fresh tomatoes from the farmer's market or canned ones if you’re in a pinch. The onion and garlic add depth to the soup. I always pick a good-quality olive oil, as it helps enhance the taste. If you want a hint of sweetness, the sugar is optional. I often skip it if the tomatoes are sweet enough. Basil is key in this recipe. It brings a fresh and bright note to the soup. The balsamic vinegar adds a layer of flavor that many people overlook. Lastly, the heavy cream makes the soup rich and smooth, but you can swap it for coconut cream for a vegan twist. For the full recipe, check out the section above. This soup is not just easy to make; it's also a comforting dish perfect for any meal. Enjoy crafting this simple yet flavorful soup! 1. Sauté onions and garlic Start by heating olive oil in a large pot over medium heat. Add the diced onion. Cook it until it turns soft and clear, about 5 minutes. Then, mix in the minced garlic. Cook for another minute or two until it smells great. 2. Add tomatoes and broth Next, stir in the chopped tomatoes and vegetable broth. This is where the magic begins! Bring the mix to a simmer. If you use fresh tomatoes, let the soup cook for around 20 minutes. If you use canned ones, simmer for about 10 minutes. 3. Simmering times for fresh vs. canned tomatoes Fresh tomatoes need a little longer to break down and release their flavors. Canned tomatoes are already soft, so they need less time. Keep an eye on your soup and enjoy the smells! 4. Adjust seasoning Now, add sugar, salt, and pepper to taste. Sugar helps balance the flavors. Taste the soup and tweak the seasoning until it makes your taste buds happy. 1. Using an immersion blender vs. traditional blender Once your soup is ready, it’s time to blend. Use an immersion blender right in the pot for ease. If you have a traditional blender, you can pour the soup in batches. Just be careful, as it’s hot! 2. Incorporating cream and balsamic vinegar After blending, stir in balsamic vinegar and heavy cream if you want a creamy touch. Heat the soup gently over low heat. Make sure it doesn’t boil, or the cream might curdle. Taste it again and adjust the seasoning if needed. 1. Presentation tips Serve your soup in bowls. Drizzle a bit of olive oil on top. Add a sprinkle of fresh basil leaves for a pop of color. For a nice touch, swirl some cream on top. 2. Accompaniments for the soup This soup pairs well with crusty bread. You can also serve a side salad for a complete meal. Enjoy your homemade tomato basil soup! To make your tomato basil soup shine, choose your tomatoes wisely. Fresh tomatoes offer a bright, vibrant taste. If fresh tomatoes are not available, canned tomatoes are a great choice. They provide a rich flavor, especially when cooked down. Add optional ingredients like balsamic vinegar for depth. A touch of sugar can balance the acidity too. Blending the soup is key to a smooth texture. An immersion blender works best, as it can blend directly in the pot. If you use a traditional blender, let the soup cool a bit first. This helps avoid splatters. After adding cream, keep the soup on low heat. Boiling can cause the cream to curdle, which is not what we want. One common mistake is overcooking basil. Add it at the end to keep its fresh flavor. Another mistake is not adjusting seasoning. Taste the soup before serving. You might need extra salt or pepper. Small changes can make a big difference in flavor. Use these tips from the [Full Recipe] to create a delicious dish. {{image_2}} To make a vegan version of this soup, you can easily swap out the heavy cream. Use coconut cream instead. It adds a nice creaminess and a hint of sweetness. You can also choose almond milk or cashew cream for a lighter option. For added flavor, consider using nutritional yeast. It gives a cheesy taste without dairy. You can also add a splash of lemon juice for brightness. It will lift the flavors and make the soup taste fresh. You can customize your soup with some fun add-ins. Try adding vegetables like spinach, carrots, or bell peppers. They add color and extra nutrients. You can also mix in cooked lentils or chickpeas for protein. Seasonal ingredients work great too. In summer, fresh corn or zucchini shines in this soup. In fall, roasted squash or sweet potatoes can add a warm flavor. If you want to serve more people, it’s easy to scale up the recipe. Just double or triple the ingredients. Keep the same cooking steps. It works well for gatherings or family dinners. For meal prep, make a big batch and store it in containers. This soup freezes well too. It’s perfect for a quick lunch or dinner later on. Just reheat, and you’re good to go! To store your leftover soup, place it in an airtight container. This helps keep the soup fresh. You can also use glass jars with tight lids. Your soup will stay good in the fridge for about 3 to 5 days. Always let the soup cool down before placing it in the fridge. This helps avoid raising the temperature inside your fridge. If you want to keep your soup longer, freezing is a great choice. Pour the cooled soup into freezer-safe containers. Leave some space at the top since it will expand when frozen. You can freeze the soup for up to 3 months. When you’re ready to eat it, take the soup out and place it in the fridge overnight to thaw. This slow thawing helps keep the flavor. To reheat your soup, you have a few options. The best way is to use a pot on the stove. Heat it over low to medium heat, stirring often. This method keeps the soup smooth and tasty. You can also use a microwave, but be careful. Heat it in short bursts, stirring in between to avoid hot spots. No matter which method you choose, make sure the soup is hot all the way through before serving. Enjoy your warm, flavorful soup! Homemade tomato basil soup lasts about 3 to 5 days in the fridge. Store it in an airtight container. For the best taste, eat it within the first few days. You can also freeze it for up to 3 months. Just make sure to cool it first before freezing. Yes, you can use dried basil instead of fresh. Use one teaspoon of dried basil for every tablespoon of fresh. Dried basil has a stronger flavor, so start small. Adjust to taste as you cook. Fresh basil adds a bright taste, but dried works great in a pinch. You can serve tomato basil soup with a variety of sides. Here are some ideas: - Grilled cheese sandwiches - Crusty bread or baguette - A fresh garden salad - Garlic bread These pair well and make for a comforting meal. Yes, this soup is gluten-free! All the ingredients, like tomatoes and basil, are naturally gluten-free. If you serve it with bread, make sure to choose a gluten-free option. Absolutely! You can make this soup ahead of time. It tastes even better the next day as the flavors meld. Just cool it down and store it in the fridge. Reheat it on the stove over low heat before serving. For a quick meal, this is a great option! For the full recipe, check out the Tomato Basil Bliss section! This blog post covered making a delicious tomato basil soup. We explored the key ingredients and step-by-step instructions. I shared tips on enhancing flavor and cooking techniques. You learned about variations, storage info, and common mistakes to avoid. Remember, you can adjust the recipe to your taste. Making this soup can be fun and rewarding. Enjoy creating your own bowl of comfort!

Homemade Tomato Basil Soup Simple and Flavorful Recipe

If you’re craving a warm, comforting bowl of soup, you’ve come to the right place! My homemade tomato basil soup

- Zucchini, sliced into rounds - Bell pepper (red or yellow), cut into chunks - Red onion, cut into wedges - Cherry tomatoes, whole - Mushrooms, whole or halved - Olive oil - Balsamic vinegar - Dried oregano - Garlic powder - Salt and pepper to taste - You can choose between wooden or metal skewers. - If you use wooden skewers, soak them in water for 30 minutes. This prevents burning on the grill. Metal skewers are great because they are reusable and heat up quickly. When you gather these ingredients, you unlock many flavors. The fresh veggies provide vibrant colors and textures. The marinade adds depth and deliciousness. Feel free to mix and match veggies based on what you love. This recipe makes it easy to enjoy grilled vegetables. For the full recipe, check out the details above. To make our grilled vegetable skewers, start by marinating the vegetables. First, gather a large bowl. In that bowl, mix together: - 2 tablespoons olive oil - 2 tablespoons balsamic vinegar - 1 teaspoon dried oregano - 1 teaspoon garlic powder - Salt and pepper to taste Whisk these ingredients well to make a tasty marinade. Now, add the vegetables: - 1 zucchini, sliced into rounds - 1 bell pepper (red or yellow), cut into chunks - 1 red onion, cut into wedges - 1 cup cherry tomatoes - 1 cup mushrooms, whole or halved Gently toss them all in the marinade. Make sure every piece is coated. Let the veggies sit for about 15-20 minutes. This helps the flavors blend and the vegetables soak up the marinade. Next, it’s time to grill! Preheat your grill to medium-high heat. While it heats, prepare your skewers. If you're using wooden skewers, make sure to soak them in water for about 30 minutes. This helps prevent burning. Now, thread the marinated vegetables onto the skewers. Alternate the veggies for a colorful look. This also helps with even cooking. Place the skewers on the hot grill. Cook them for about 10-12 minutes. Remember to turn them occasionally. This ensures the vegetables are tender and have nice grill marks. They should be soft but not mushy. Once done, remove them from the grill and serve warm. These skewers look great on a platter, and you can even add fresh herbs for garnish. For the full recipe, check the details provided earlier. To get those perfect grill marks, heat your grill to medium-high. Place the skewers on the grill and avoid moving them too much. Let them sit for a few minutes. This helps form those nice lines. You should check for doneness after about 10 minutes. The vegetables should be tender but not mushy. For extra flavor, consider adding fresh herbs like thyme or rosemary to your marinade. You can also sprinkle some chili flakes for a little heat. Marinades with citrus juice, like lemon or lime, can brighten the taste. Don't forget to try different sauces like teriyaki or a simple garlic butter for variety. When serving, arrange the skewers on a large platter. You can alternate colors for a vibrant look. Garnish with fresh herbs like parsley or basil. Adding a small bowl of tzatziki or hummus next to the skewers makes for a fun dip. This not only looks nice but also gives your guests a tasty option. {{image_2}} You can change the veggies for your skewers. Try these options: - Eggplant, cut into cubes - Asparagus, trimmed - Pineapple, cut into chunks - Bell peppers in different colors - Carrots, sliced into thick rounds - Cauliflower florets Mixing these vegetables adds more color and flavor. Each vegetable gives a unique taste. You can even use seasonal veggies for freshness. This can make your skewers exciting and fun. The marinade can change the taste of your skewers. Here are some tasty ideas: - Lemon juice and zest with herbs - Soy sauce for an Asian twist - Honey and mustard for sweetness - Chili powder for a kick - Yogurt with garlic for creaminess Mix these ingredients well. Let your veggies soak up the flavors for at least 20 minutes. This makes each bite delicious. Experiment with flavors you love. Serve your skewers with fun dips or sides. Here are some great ideas: - Tzatziki sauce for a cool touch - Hummus for a creamy dip - A fresh salad with lemon dressing - Grilled bread or pita on the side - Rice or quinoa for a filling meal You can even make a festival vibe! Set up a grill station for friends. Let everyone choose their veggies and marinades. This adds fun and makes great memories. Check out the Full Recipe for more details on making your skewers shine! After enjoying your grilled vegetable skewers, it's key to store any leftovers well. Place them in an airtight container. This keeps them fresh for longer. Make sure to refrigerate them within two hours of cooking. They will last in the fridge for about three to four days. If you have extra skewers, take the veggies off the sticks. It saves space and keeps them from getting soggy. When you're ready to eat your leftovers, reheating is simple. The best way is to use a grill or oven. This brings back the nice grilled flavor. Preheat your grill or oven to medium heat. Place the vegetables on the grill or a baking sheet in the oven. Heat for about five to seven minutes. Check that they are warm all the way through. You can also use a microwave, but it might make them soft. Can you freeze skewers? Yes, you can! Freezing is a great option if you want to save them longer. First, let the skewers cool completely. Then, remove the veggies from the skewers. Place them in a freezer-safe bag or container. Make sure to squeeze out as much air as possible. They can last in the freezer for up to three months. When you're ready to eat, thaw them in the fridge overnight. Reheat as mentioned above for the best taste. The best vegetables for grilling are those that hold up well to heat. Good choices include: - Zucchini - Bell peppers - Red onions - Cherry tomatoes - Mushrooms These veggies become soft and sweet when grilled. They also absorb flavors from marinades very well. To add more flavor, try these tips: - Use a tasty marinade. - Add fresh herbs like basil or parsley. - Sprinkle some cheese before serving. - Mix in spices like cumin or paprika. Marinating your veggies for at least 20 minutes makes a big difference. It allows the flavors to soak in deeply. Yes, you can prepare skewers ahead of time! Just follow these steps: 1. Marinate your veggies. 2. Assemble the skewers. 3. Store them in the fridge. You can keep them for up to a day. Just grill them when you're ready to eat. Absolutely! Grilled vegetable skewers are perfect for vegan diets. They contain no animal products and are packed with nutrients. You can also pair them with vegan dips like hummus or guacamole. Dipping sauces can take your skewers to the next level. Here are some great options: - Tzatziki sauce - Hummus - Chimichurri - Balsamic glaze These sauces add flavor and keep things exciting. Enjoy experimenting with different pairings! Grilling vegetable skewers is fun and easy. You learned about choosing fresh veggies, making a tasty marinade, and grilling tips. Remember to experiment with flavors and serving ideas. Use alternative veggies and marinades to keep things exciting. Store leftovers safely and enjoy them later. Grilled vegetable skewers are perfect for any meal and fit any diet. Get started today and savor your delicious creations!

Grilled Vegetable Skewers Simple and Tasty Recipe

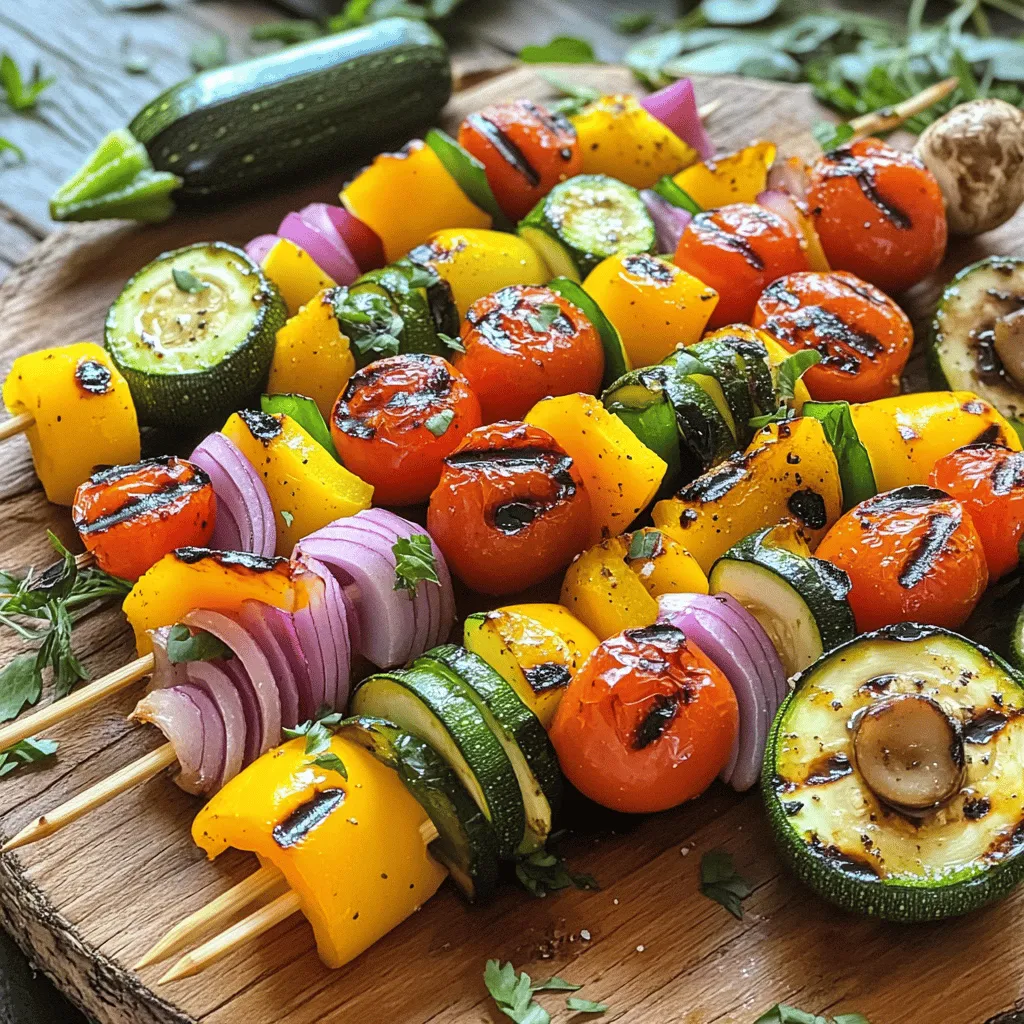
Looking for a simple and tasty dish to impress your family or friends? Grilled vegetable skewers are the perfect option!

- 2 cups fresh strawberries, hulled and sliced - Fresh mint leaves (for garnish) - 1 tablespoon sugar (for strawberries) - 1 pound pound cake, cut into cubes - 1 cup heavy whipping cream - 1/2 cup powdered sugar - 1 teaspoon vanilla extract - 1 cup vanilla yogurt - A medium bowl for mixing - A mixing bowl for whipping cream - A hand mixer for easy whipping - A trifle dish or individual glasses for layering - A spatula for folding ingredients - A knife and cutting board for slicing strawberries Gather all these items before you start. Having everything ready makes cooking fun and smooth! For the full recipe, check the notes above. First, grab 2 cups of fresh strawberries. Start by hulling and slicing them. Put the sliced strawberries in a medium bowl. Add 1 tablespoon of sugar to the bowl. This helps the strawberries taste sweet. Toss the strawberries gently to mix in the sugar. Let them sit for about 15 minutes. This step helps the strawberries release their juicy goodness. Next, take 1 cup of heavy whipping cream. Pour it into a mixing bowl. Add 1/2 cup of powdered sugar and 1 teaspoon of vanilla extract. Use a hand mixer to whip the cream. Aim for soft peaks, but don’t overwhip. You want it to be light and fluffy. In a separate bowl, mix 1 cup of vanilla yogurt with a spoonful of whipped cream. This lightens the yogurt. Then, gently fold in the rest of the whipped cream until it's all combined. Now, it’s time to layer the trifle. Start with a layer of pound cake cubes in your trifle dish. Use about half of your 1 pound of pound cake. Next, add a layer of the whipped cream and yogurt mixture. After that, layer the macerated strawberries on top. Repeat these layers until the dish is full. Finish with a layer of whipped cream on top. For a nice touch, garnish with fresh strawberry slices and mint leaves. Chill your trifle in the fridge for at least 1 hour before serving. This lets the flavors blend together nicely. Enjoy your delicious creation! For the complete recipe, check the Full Recipe link. To make light, fluffy whipped cream, start with cold heavy cream. Chill your mixing bowl and beaters too. This keeps the cream from warming up. Whip the cream on medium speed until you see soft peaks. Soft peaks mean the cream holds its shape but is still soft. If you whip too long, it can turn grainy. Add powdered sugar and vanilla for sweetness. Mix just until combined. Layering is key for a great trifle. Start with cake cubes at the bottom. This lets the cake soak up the strawberry juices. Next, add a layer of the whipped cream mix. Then, add a layer of macerated strawberries. Repeat these layers until you reach the top. Finish with whipped cream to get a smooth surface. You can use a spatula to spread it evenly. For a beautiful presentation, use clear trifle dishes or glass cups. This lets everyone see the lovely layers. Garnish with fresh strawberry slices and mint leaves on top. You can also drizzle extra strawberry juice over the top for color. Serve chilled for the best taste. This makes each bite a treat! Check the Full Recipe for more tips. {{image_2}} You can change the fruit in your trifle. Instead of strawberries, use mixed berries like blueberries and raspberries. Peaches also work well. They add a sweet and juicy touch. You can even use bananas for a fun twist. Just slice them thinly and layer them in. Each fruit brings its own taste, so feel free to get creative. If you want a dairy-free option, try coconut cream. Chill a can of coconut milk overnight. Then scoop out the solid part and whip it. It adds a rich, tropical flavor to your trifle. You can also use whipped cream cheese for a thicker texture. Just mix it with a bit of yogurt for a tasty blend. For a gluten-free trifle, you can find gluten-free pound cake at many stores. You can also make your own using almond flour or gluten-free flour blends. These options keep the trifle light and delicious. Just ensure you check the labels to avoid any gluten. This way, everyone can enjoy your tasty creation! For the full recipe, just refer to the earlier section. To store leftovers, place the trifle in an airtight container. Cover it well to keep it fresh. If you used individual glasses, cover each glass with plastic wrap. This keeps the layers intact and moist. Refrigerate the trifle and enjoy within two days for the best taste. When prepping, make sure to layer the trifle just before serving. This keeps the cake from getting soggy. You can prepare the strawberries and whipped cream ahead of time. Store them separately in the fridge. This way, you can assemble your trifle quickly when guests arrive. You can freeze the trifle, but it’s best to freeze the layers separately. Wrap the pound cake in plastic wrap and place it in a freezer bag. Store the whipped cream and strawberries in airtight containers. When you’re ready to serve, thaw everything in the fridge overnight. Assemble the trifle fresh for the best taste. Yes, you can prepare this trifle ahead of time. Make it up to a day in advance. This helps the flavors mix well. Just store it in the fridge until you're ready to serve. I recommend using a classic pound cake. It has a dense texture that holds up well. You can also use flavored pound cakes like lemon or vanilla for a twist. The trifle can last about 2 to 3 days in the fridge. After that, the layers may start to lose their texture. For the best taste, enjoy it fresh! You can find the Full Recipe for detailed steps. This blog post walked you through making a yummy strawberry shortcake trifle. You learned about fresh ingredients, pantry items, and tools needed. We covered step-by-step instructions, from prepping strawberries to layering the trifle. Tips helped you whip cream perfectly and serve it well. You can even explore fun variations and storage tips! Try this trifle to impress friends and family. With simple steps and ideas, you’ll make a treat they’ll love. Enjoy the process and the sweet rewards!

Strawberry Shortcake Trifle Easy and Tasty Delight

Are you ready to impress your friends and family with a stunning dessert? My Strawberry Shortcake Trifle is easy to

To make a tasty avocado toast, you need a few key ingredients. Here’s what you will need: - 2 ripe avocados - 4 slices of multigrain or sourdough bread - 1 cup cherry tomatoes, halved - 1 small red onion, thinly sliced - 1 tablespoon olive oil - 1 tablespoon lemon juice - 1 teaspoon chili flakes - Salt and pepper to taste - Fresh herbs for garnish (like basil or cilantro) These ingredients create a fresh and creamy base for your toast. You can add fun toppings to switch up your avocado toast. Here are some ideas: - Feta cheese for a salty kick - Radish slices for crunch - Poached eggs for protein - Smoked salmon for a rich flavor Feel free to mix and match these toppings. They can add color and taste to your dish. Avocado toast is not just delicious; it’s also good for you. Here are some health benefits: - Avocados are rich in healthy fats. They help your heart and keep you full. - Tomatoes provide vitamins. They support your immune system. - Onions can boost your health. They have antioxidants and may reduce inflammation. - Olive oil is full of healthy fats. It can help lower bad cholesterol. These ingredients work together to create a tasty and nutritious meal. For the full cooking process, check out the Full Recipe. To start, pick your favorite bread. I love using multigrain or sourdough. Slice four pieces about half an inch thick. Toast them until they are golden brown and crispy. This step gives your avocado toast a great crunch. You can use a toaster, an oven, or a pan. If you want more flavor, brush the bread with olive oil before toasting. While the bread toasts, grab two ripe avocados. Cut them in half and remove the pit. Use a spoon to scoop the green flesh into a bowl. Now, mash the avocado with a fork until it’s creamy. I like to mix in one tablespoon of lemon juice, salt, and pepper. This adds flavor and keeps the avocado from browning. Once the bread is ready, spread the mashed avocado evenly on each slice. Next, take one cup of halved cherry tomatoes and one small red onion, thinly sliced. Mix them in a small bowl with one tablespoon of olive oil and one teaspoon of chili flakes. Season with salt and let it sit for a few minutes. Then, spoon this mixture over the avocado. For extra flavor, add optional toppings like feta cheese, radish slices, poached eggs, or smoked salmon. Finally, finish with fresh herbs to make it pop. For the full step-by-step recipe, check out the Full Recipe section. To get smooth avocado, pick ripe ones. They should feel soft but not mushy. Cut the avocado in half and remove the pit. Use a fork to mash the flesh in a bowl. Mix it gently to keep some texture. A little lemon juice helps keep it fresh and adds flavor. Avocado toast is great on its own, but you can make it a full meal. Serve it with a side salad for crunch. A bowl of soup also works well, especially in cold weather. You can add protein, like a poached egg or smoked salmon, for more filling options. Pairing it with fresh fruit adds sweetness and color. Avocados turn brown quickly. To slow this down, use lemon juice or lime juice. The acid in these juices helps keep the green color. Store any unused avocado in an airtight container. Cover it tightly with plastic wrap, pressing it against the surface to limit air contact. If you do see browning, just scrape it off before serving. For more ideas, check out the Full Recipe for Avocado Toast Delight! {{image_2}} If you love sweet treats, try this twist on avocado toast! You can add honey and fruit for a delightful flavor. Start with your toasted bread and spread the creamy avocado on top. Then, drizzle honey over the avocado. Next, add slices of banana, strawberries, or blueberries. These fruits give a fresh taste. You can also sprinkle some cinnamon for extra warmth. This sweet version is perfect for breakfast or a snack! For a heartier option, eggs and cheese are fantastic! Begin by toasting your bread. While it toasts, cook an egg the way you like it. A poached egg works great, but a fried or scrambled egg is fine too. Spread the avocado on the toast, then place the egg on top. Add a slice of cheese, like cheddar or feta. If you want some kick, sprinkle chili flakes or add hot sauce. This savory toast keeps you full and satisfied. You can enjoy avocado toast even if you're vegan or gluten-free! Use gluten-free bread as your base. For toppings, stick with fresh veggies like radishes, cucumbers, or sprouts. You can also add hummus or a spread made from beans. These add protein and flavor. If you want sweet, use nut butter instead of honey. You can top it with sliced bananas or apples. These options make healthy, tasty meals that fit your diet. For all these variations, the Full Recipe includes the basics to get you started. Enjoy creating your own delicious avocado toast! If you have leftover avocado toast, wrap it in plastic wrap. This helps keep it fresh. Store it in the fridge for up to one day. The bread may soften, but it will still taste good. If you can, eat it right away for the best taste. To keep avocados fresh, store them at room temperature if they are not ripe. Once ripe, put them in the fridge. If you cut an avocado, sprinkle lemon juice on the flesh. This slows down browning. Cover it tightly with plastic wrap or store it in an airtight container. For reheating, use a toaster or an oven. Toasting it again makes it crispy. If you use the oven, set it to 350°F (175°C) and heat for about 5-10 minutes. Avoid microwaving, as it can make the toast soggy. Enjoy your avocado toast warm and fresh! To make avocado toast, you start by toasting your bread. I like multigrain or sourdough. While it toasts, cut your ripe avocados in half, remove the pit, and scoop the flesh into a bowl. Mash the avocado with a fork until it’s creamy. Add lemon juice, salt, and pepper to taste. Once the bread is crispy, spread the mashed avocado on top. You can find the full recipe above for step-by-step details. You can get really fun with toppings! Here are some ideas: - Feta cheese adds a salty twist. - Radish slices give a nice crunch. - A poached egg adds protein and richness. - Smoked salmon brings a savory depth. - Fresh herbs like basil or cilantro brighten the dish. - For a sweet touch, try honey and fruit like strawberries or bananas. These toppings can change the flavor and make each toast unique! Avocado toast is best fresh but you can prep some parts ahead. Toast your bread and store it in a sealed bag. Cut and mash the avocados right before serving to avoid browning. You can also mix toppings and store them separately. This way, your avocado toast stays fresh and tasty! Avocado toast is simple yet tasty. We covered essential ingredients and fun toppings. You learned how to make it, store it, and keep it fresh. Enjoy your variations like sweet honey or savory eggs. Healthy and delicious, avocado toast fits any diet. Use these tips to impress friends and family. Now, you can create the perfect avocado toast at home. Dive in and savor the flavors of this easy dish!

Flavorful Avocado Toast Variations for Everyone

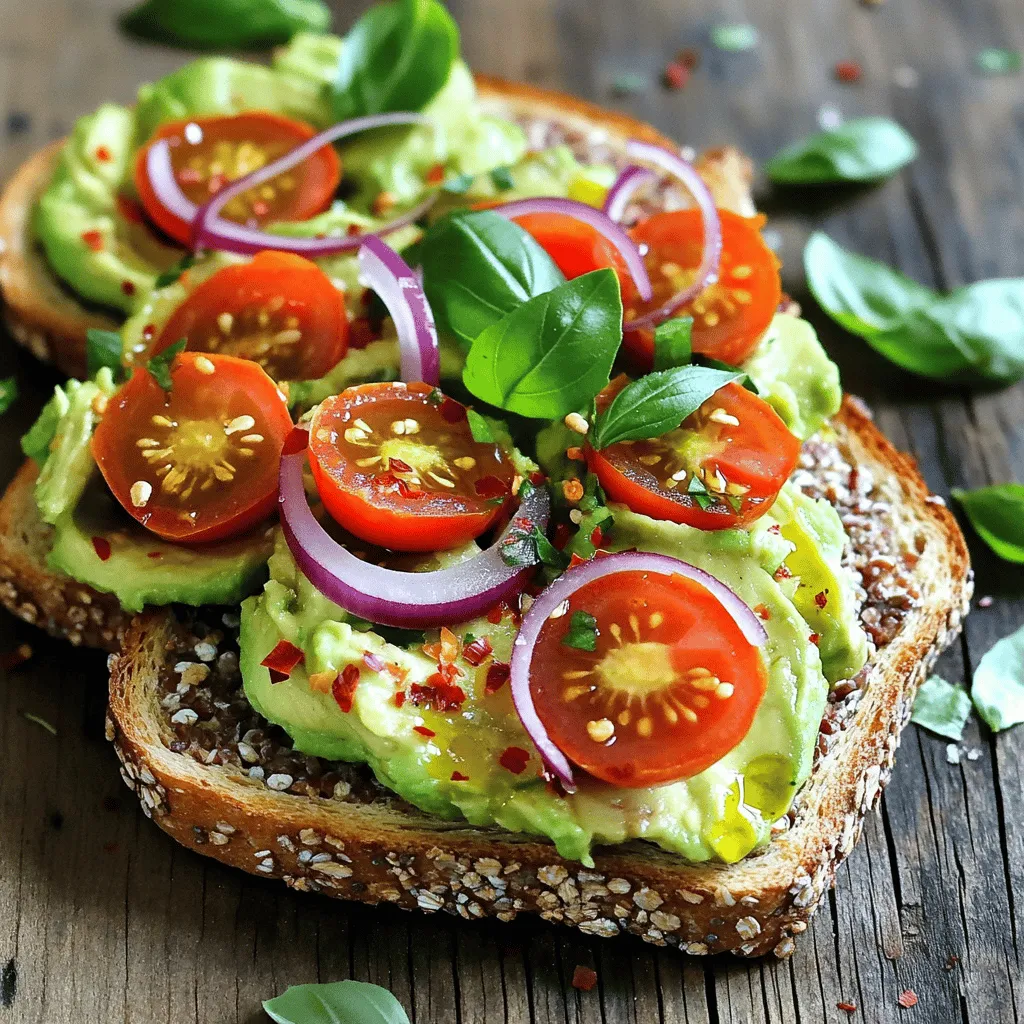
If you love avocado toast, get ready for a tasty journey! I’ll show you fun variations that fit everyone’s taste.

To make a perfect chocolate lava cake, you need simple ingredients. Here’s what you will need: - 1/2 cup unsalted butter - 1 cup dark chocolate chips (70% cocoa) - 1 cup powdered sugar - 2 large eggs - 2 large egg yolks - 1 teaspoon vanilla extract - 1/2 cup all-purpose flour - 1/4 teaspoon salt - 1/2 teaspoon espresso powder (optional) - Butter and cocoa powder for greasing ramekins - Vanilla ice cream or whipped cream for serving These ingredients create a delightful cake that has a rich, gooey center. The dark chocolate chips bring deep flavor, while the butter adds richness. The eggs and yolks make it light and fluffy. The espresso powder is optional but enhances the chocolate taste. In the Full Recipe, you will see how to combine these ingredients to create a dessert that impresses everyone. Enjoy your baking! First, preheat your oven to 425°F (220°C). This step is key for perfect baking. Grease four 6-ounce ramekins with butter. Then, dust them with cocoa powder to help release the cakes later. Next, in a medium microwave-safe bowl, melt 1/2 cup unsalted butter and 1 cup dark chocolate chips together. Use 30-second bursts in the microwave, stirring after each until smooth. Let this mixture cool slightly. In a new bowl, whisk together 1 cup powdered sugar, 2 large eggs, 2 large egg yolks, and 1 teaspoon vanilla extract. Mix until it looks well blended and frothy. Now, combine the melted chocolate mixture with the egg mixture. Stir gently until you blend them well. Sift in 1/2 cup all-purpose flour, 1/4 teaspoon salt, and 1/2 teaspoon espresso powder (if using). Fold these dry ingredients in gently—don’t overmix! Pour the batter into your prepared ramekins, filling them about 3/4 full. Place these ramekins on a baking sheet for easy handling. Bake them in your preheated oven for 12-14 minutes. The edges should be firm, while the center stays soft and gooey. After baking, take them out and let them cool for 1 minute. Use a knife to run around the edges to loosen the cakes. Now, invert each ramekin onto a plate. Lift them gently to release the lava cake. Serve the cakes hot, topped with a scoop of vanilla ice cream or a dollop of whipped cream. This adds a nice balance to the rich chocolate flavor. For the full recipe, check the section above. To get that gooey center, timing is key. Bake your cakes for 12 to 14 minutes. Keep an eye on them. The edges should be firm, while the middle stays soft. This is the sweet spot for lava flow. Let the cakes cool for one minute after baking. This step keeps them from falling apart. Run a knife around the edge to help them release easily. If your cakes turn out overcooked, don't worry. You can still enjoy them. They will not have the classic lava center, but they will still taste great. Serve them warm with ice cream. It makes them better! If your cakes stick to the ramekins, try these tips. Use butter and cocoa powder to grease them well before pouring in the batter. If they still stick, run a knife around the edges again. For this recipe, I recommend 6-ounce ramekins. They are the right size for perfect lava cakes. Use a baking sheet to catch any drips while they bake. Consider handy kitchen gadgets too. A silicone spatula can help mix your ingredients smoothly. A microwave-safe bowl makes melting chocolate easy. For the full recipe, check the details above. Enjoy making your chocolate lava cake! {{image_2}} You can easily play with flavors in chocolate lava cake. Adding flavored extracts can make a big difference. Try a splash of orange extract for a citrus twist. Mint extract adds a fresh, cool taste. You can also switch up the chocolate. Use milk chocolate for a sweeter cake. White chocolate gives a creamy taste that pairs well with berries. Want a gluten-free option? You can use almond flour instead of regular flour. This keeps the cake soft and delicious. For a vegan version, swap eggs with flaxseed meal or applesauce. These substitutes work well, making the cake just as tasty. How you serve your lava cake can impress your guests. Use different vessels like small mason jars or mini cast iron pans. This adds a fun touch. Toppings can elevate the dish too. Fresh berries add color and tartness. Chopped nuts provide crunch and flavor. For the ultimate treat, don’t forget a scoop of vanilla ice cream on top. It balances the rich chocolate perfectly. For the full recipe, check out Choco-Melt Lava Explosion . You can store the unbaked batter in the fridge. Make sure to cover the bowl tightly with plastic wrap. The batter stays fresh for up to 24 hours. Just remember to let it sit at room temperature for about 30 minutes before baking. This helps the batter regain its texture. If you have leftovers, store them in an airtight container. They keep well in the fridge for about 2 days. To reheat, place the cakes in the microwave for 15-20 seconds. Check every few seconds to avoid overcooking. This way, you maintain that gooey center. Yes, you can freeze cooked lava cakes! Wrap them well in plastic wrap, then place in a freezer bag. They stay good for up to 3 months. To thaw, move them to the fridge overnight. Reheat in the microwave as mentioned before for the best texture. For a complete guide, check out the Full Recipe. A chocolate lava cake is a warm dessert that has a gooey, melted chocolate center. It is also known as molten chocolate cake. The outside is baked until firm while the inside stays soft and liquid. When you cut into it, rich chocolate flows out, creating a delicious surprise. This cake is often served with ice cream or whipped cream for extra delight. To check if your lava cake is done, look at the edges. They should be firm, but the center still needs to jiggle slightly. You can also insert a toothpick into the edge. If it comes out clean, the edges are done, but the center should still feel soft. Remember, the key is to avoid overbaking. Yes, you can prepare lava cakes ahead of time. You can make the batter and pour it into ramekins. Cover them and store them in the fridge for up to 24 hours. When you are ready to bake, just take them out and bake them straight from the fridge. This makes it easy to serve a warm dessert anytime. For the full recipe, check out my detailed instructions to ensure success! You now know how to make a rich chocolate lava cake. I covered the key ingredients and provided steps for preparation, baking, and serving. With the tips I shared, you can avoid common mistakes and achieve that perfect gooey center. Remember, variations can add fun twists to your recipe. Store your creations properly to enjoy them later. Baking should be enjoyable. With practice, you'll impress everyone with this tasty dessert. Go ahead and create your sweet masterpiece!

Chocolate Lava Cake Irresistible Dessert Delight

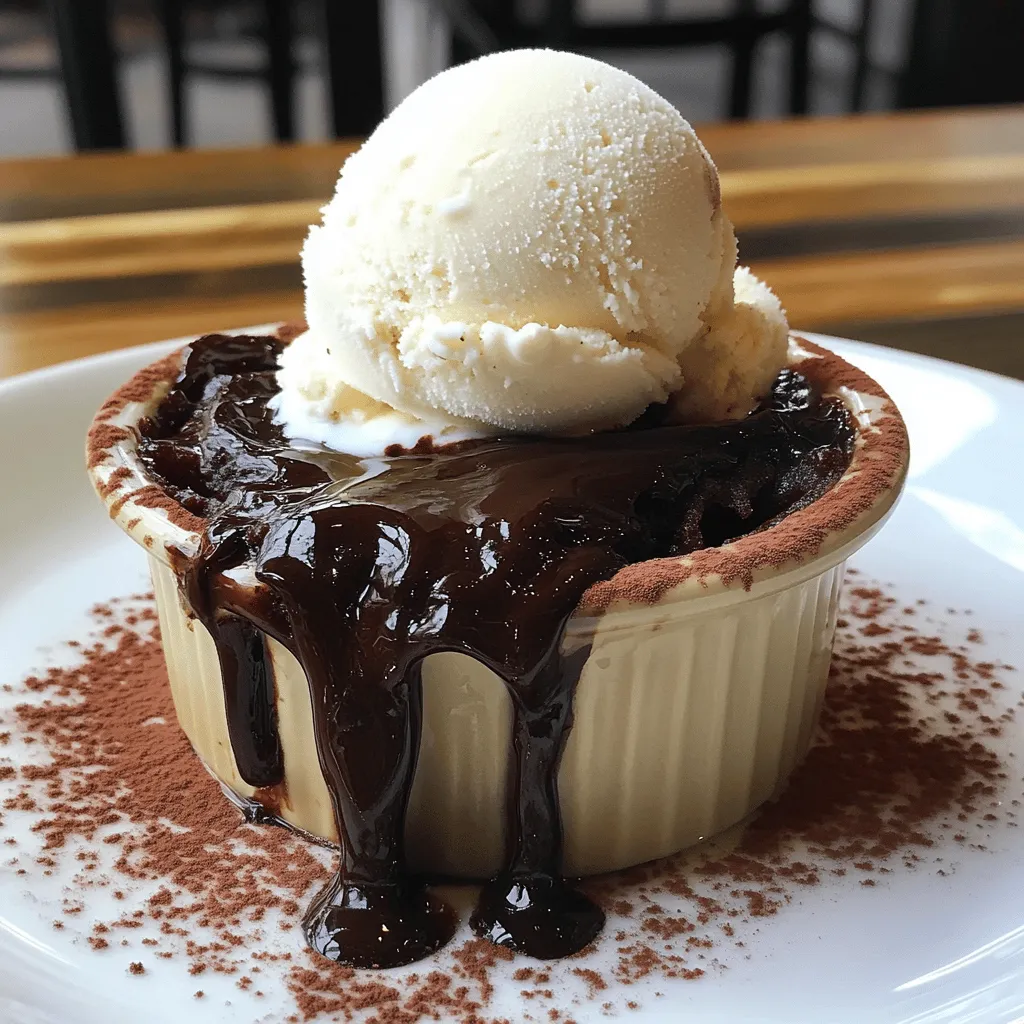
Craving something sweet and indulgent? Look no further than chocolate lava cake! This irresistible dessert delight features a warm, gooey

Older posts
Newer posts
← Previous Page1 … Page47 Page48 Page49 … Page59 Next →

dsad

© 2025 Cooking Wells • Built with GeneratePress

Our Policies

  • Copyright Policy
  • Cookie Policy
  • GDPR Policy
  • Privacy Policy
  • Disclaimer
  • Terms Of Use

More Information

  • Home
  • About
  • Contact
  • Appetizers
  • Dessert
  • Dinner
  • Drinks
©2025, Cooking Wells About Back To Top