Skip to content
DisclaimerTerms Of UseGDPR PolicyCookie Policy

Cooking Wells

  • Home
  • Drinks
  • Appetizers
  • Dinner
  • Dessert
  • About
  • Contact
  • Privacy Policy
DisclaimerTerms Of UseGDPR PolicyCookie Policy

Mia

- 1 ½ cups all-purpose flour - ½ cup cornmeal - 2 tablespoons baking powder - ½ teaspoon salt - ¼ teaspoon black pepper - 1 teaspoon garlic powder These dry ingredients form the base of our muffins. The flour gives structure, while cornmeal adds a nice crunch. Baking powder helps the muffins rise, making them fluffy. Salt, black pepper, and garlic powder boost the flavor profile. - 1 cup milk - 2 large eggs - ¼ cup melted butter The wet ingredients bring moisture to the mix. Milk adds creaminess, and eggs bind everything together. Melted butter adds richness and depth to the flavor. - 1 cup shredded cheddar cheese - ½ cup cooked bacon or sausage, crumbled (optional) - 1 small zucchini, grated - 2 green onions, chopped These savory additions make the muffins exciting. Shredded cheddar cheese melts beautifully, giving a gooey texture. Cooked bacon or sausage offers a hearty bite. Grated zucchini adds moisture and nutrition without being too wet. Chopped green onions give a fresh, crisp taste. By using this mix of ingredients, you create a delicious muffin that's perfect for breakfast or a snack. For the full recipe, check out the details above! First, I preheat the oven to 400°F (200°C). This high heat helps the muffins rise well. Next, I prepare the muffin tin. I grease it lightly or use paper liners for easy removal. This step keeps the muffins from sticking. In a large bowl, I combine 1 ½ cups of all-purpose flour and ½ cup of cornmeal. These two add a nice texture. Then, I add 2 tablespoons of baking powder, ½ teaspoon of salt, ¼ teaspoon of black pepper, and 1 teaspoon of garlic powder. Mixing these dry ingredients well makes sure each bite is flavorful. In another bowl, I whisk together 1 cup of milk, 2 large eggs, and ¼ cup of melted butter. This mixture brings moisture and richness to the muffins. Once mixed, I pour this wet blend into the dry ingredients. I stir gently, just until I see no dry flour. A few lumps are fine; they help keep the muffins light. Now, I divide the batter evenly among the 12 muffin cups. Each cup should be about ¾ full. This gives the muffins room to rise without spilling over. I bake them for 18 to 20 minutes. I check if they are golden brown and use a toothpick to see if they are done. It should come out clean. After baking, I let the muffins cool for 5 minutes in the tin before moving them to a wire rack. For more details, check the Full Recipe. To get the right texture in your muffins, mixing is key. Start by whisking the dry ingredients well. This ensures even distribution of baking powder and spices. When adding the wet mix, stir gently. You want a good blend but don’t overmix. Overmixing can make your muffins tough. A few lumps are totally fine! Want to kick up the flavor? Try adding fresh herbs like basil or parsley. They add a nice brightness. You can also swap the cheddar for other cheeses. Feta or goat cheese can give a creamy twist. If you like a kick, add some chili flakes or diced jalapeños. These muffins shine when served warm. A pat of butter on top makes them even better. For a fun twist, pair them with salsa or a dollop of sour cream. Garnish with fresh herbs or a sprinkle of green onions for color. You can also serve them alongside a fresh salad for a complete meal. For the full recipe, visit the linked section. {{image_2}} Gluten-free options: You can easily make these muffins gluten-free. Use a gluten-free flour blend instead of all-purpose flour. Make sure the cornmeal is also gluten-free. This swap keeps the texture light and fluffy. Vegetarian alternatives: To make a vegetarian muffin, skip the bacon or sausage. Add extra veggies like bell peppers or spinach. You might also increase the cheese for added flavor. Mediterranean savory muffins: Try adding sun-dried tomatoes, olives, and feta cheese. This mix gives your muffins a bright, tangy taste. Fresh herbs like oregano or basil can enhance the flavor even more. Spicy jalapeño and cheese muffins: If you like a kick, add chopped jalapeños and pepper jack cheese. This combo makes the muffins spicy and fun. A little chopped cilantro can add freshness. Fall flavors: pumpkin and sage: For a cozy twist, mix in pumpkin puree and chopped sage. These ingredients bring warmth to your breakfast. Plus, they make the muffins moist and tasty. Spring flavors: asparagus and feta: In spring, add blanched asparagus and crumbled feta. This combination feels fresh and light. It’s perfect for a bright morning meal. For the full recipe, check out the [Full Recipe]. After you bake your savory breakfast muffins, let them cool in the pan for about five minutes. This time helps them firm up and makes them easier to remove. Use a wire rack to cool them fully. This allows air to circulate around the muffins, keeping them from getting soggy. To store your muffins, place them in an airtight container. This keeps them fresh for up to three days at room temperature. If you want to store them longer, freezing is a great option. Wrap each muffin tightly in plastic wrap, then place them in a freezer bag. They can last for up to three months in the freezer. For reheating, the oven works best. Preheat it to 350°F (175°C). Place the muffins on a baking sheet and heat for about 10-15 minutes. This method keeps the muffins soft and warm. You can also use the microwave for quick reheating. Heat them for about 20-30 seconds. Just be careful; microwaving can make them a bit rubbery. Enjoy your muffins with a pat of butter or some salsa for a tasty treat! If you want to learn how to make these muffins, check out the Full Recipe. Yes, you can make Savory Breakfast Muffins in advance. Here are a few tips to help you: - Make the batter ahead: You can mix the dry and wet ingredients separately. Keep them in the fridge overnight. Just combine them when you are ready to bake. - Bake and store: Bake the muffins and let them cool completely. Store them in an airtight container at room temperature for up to three days. - Freezing: For longer storage, wrap muffins tightly in plastic wrap and freeze them. They can last up to three months in the freezer. You can customize your Savory Breakfast Muffins easily. Here are some ideas: - Cheese: Swap cheddar for feta, mozzarella, or goat cheese. - Meat: Replace bacon or sausage with ham or turkey. - Vegetables: Add peppers, spinach, or carrots for extra flavor and nutrition. - Spices: Experiment with herbs like basil, oregano, or thyme to change the taste. The cheese you choose can change the flavor of your muffins. Here are some great options: - Cheddar: This is a classic choice with a sharp taste. - Feta: It adds a creamy texture and a tangy flavor. - Parmesan: This brings a nutty flavor and adds depth. - Mozzarella: For a milder, gooey texture, mozzarella is perfect. For the full recipe, check out the detailed instructions above! The blog post detailed how to make savory breakfast muffins. We covered dry and wet ingredients, from flour to milk. You learned to mix, bake, and enhance flavors. Tips helped you achieve great texture and suggested tasty variations. In conclusion, these muffins are easy to make and delicious. Customize them to suit your taste. Enjoy serving them fresh, reheating leftovers, or storing them for later. Happy baking!

Savory Breakfast Muffins for a Tasty Start

Start your day off right with Savory Breakfast Muffins! These tasty bites combine simple ingredients like cheese, bacon, and veggies.

Here’s what you need to make caramel apple nachos. Gather these ingredients for a sweet treat that everyone will love. - 3 medium-sized apples (Fuji or Honeycrisp) - 1 cup granola clusters - 1/2 cup caramel sauce - 1/4 cup peanut butter or almond butter - 1/2 cup mini chocolate chips - 1/4 cup chopped nuts (walnuts or pecans) - 1/4 teaspoon cinnamon (optional) - Whipped cream for drizzling (optional) These ingredients blend perfectly to create a fun dessert. The crisp apples hold up well under the warm caramel and nut butter. You can mix and match toppings based on what you like. For example, if you want a crunch, go for granola. If you prefer creamy textures, add more nut butter. You can find the full recipe in the cooking section to get all the details. Enjoy crafting this delicious dessert! 1. Washing and coring the apples: Start by rinsing your apples under cold water. This removes dirt and wax. Use a sharp knife to core the apples. Make sure to remove the seeds. 2. Slicing apples into wedges: Slice the apples into thin wedges. Aim for even pieces. This helps with even caramel coverage. 3. Arranging the apple slices on a platter: Place the apple slices on a large platter. You can overlap them for a nice look. A circular pattern works well for presentation. 1. Preparing the sugar: In a saucepan, add 1 cup of sugar. Heat it over medium heat. Stir until the sugar melts and turns golden brown. 2. Adding cream and butter: Once the sugar is melted, slowly mix in 1/2 cup of heavy cream and 1/4 cup of butter. Stir constantly until it is smooth. 1. Drizzling caramel and peanut butter: Pour the warm caramel over the apple slices. Let it flow down the wedges. Then, warm 1/4 cup of peanut butter in the microwave. Drizzle it over the apples too. 2. Adding granola, chocolate chips, and nuts: Sprinkle 1 cup of granola over the apples. Follow with 1/2 cup of mini chocolate chips. Finally, add 1/4 cup of chopped nuts for crunch. 3. Optional toppings and presentation: If you like, add a pinch of cinnamon on top. For a creamy touch, drizzle whipped cream over the nachos. Serve right away for the best taste. For a full recipe, check the mentioned sections. - Use a sharp knife for clean cuts. - Cut apples into wedges about 1/4 inch thick. - Choose sweet apples like Fuji or Honeycrisp for better flavor. - A mandoline slicer can help achieve even slices quickly. - Melt 1 cup of sugar in a pan on medium heat. - Stir until it turns golden brown, then add 1/2 cup heavy cream. - Add 1/4 cup butter and stir until smooth. - For a thicker sauce, let it cool slightly before using. - Use colorful plates to make the dish pop. - Arrange apple slices in a circle for a beautiful look. - Drizzle extra caramel on top for a glossy finish. - Garnish with a sprinkle of chopped nuts or cinnamon for flair. - Serve immediately for the best taste and crunch. For the full recipe, you can check out the detailed steps and ingredients. {{image_2}} If you or your friends have dietary needs, you can still enjoy caramel apple nachos. Here are some great options: - Nut-free options: Use sunflower seed butter instead of peanut or almond butter. It adds creaminess without nuts. - Alternative sweeteners for caramel: If you want something less sweet, try using maple syrup or agave. They give a nice flavor while keeping it healthier. You can make your nachos even more special with a few tweaks: - Adding spices like nutmeg or ginger: A sprinkle of nutmeg or ginger can enhance the taste. These spices add warmth and depth to your dessert. - Including fresh fruits or berries: Try adding sliced strawberries or bananas on top. Fresh fruits bring a burst of flavor and color. Caramel apple nachos are fun to serve in new ways: - Turning into a dessert dip: Instead of arranging apples, chop them into pieces. Serve them with caramel and nut butter as a dip. It’s perfect for parties! - Serving in a bowl for a casual gathering: You can layer apple slices, toppings, and sauces in a bowl. This way, everyone can dig in easily. For the full recipe, refer to the [Full Recipe]. Store any leftover caramel apple nachos in an airtight container. Keep them in the fridge. Use them within two days for best taste and quality. The apples may get a bit soft, but they still taste great. Avoid stacking them too high to prevent squishing the toppings. To refresh the dish, try the microwave. Heat the nachos for about 10-15 seconds. This warms the caramel and peanut butter, making them gooey again. Don’t overheat; you want to keep the apples crisp! You can freeze caramel apple nachos, but it's not ideal. The apples lose their crunch when thawed. If you still want to freeze, store them in a freezer-safe container. Enjoy them within a month for the best flavor. When ready to eat, let them thaw in the fridge before serving. Yes, you can prepare some parts in advance. Slice the apples and store them in a bowl with water and lemon juice. This keeps them fresh. You can also warm the caramel and nut butter ahead. Just store them in separate containers. When you are ready to serve, assemble everything quickly for the best taste. If you have nut allergies, try sun butter or soy nut butter. These alternatives work well and taste great. You can also use cream cheese or yogurt for a creamy drizzle. Adjust the amount to your taste. To stop apples from turning brown, soak them in lemon juice and water. A mix of one tablespoon of lemon juice in two cups of water works well. You can also use a product like ascorbic acid. This keeps your apples looking fresh and bright. You learned how to make delicious caramel apple nachos using simple ingredients. With step-by-step instructions, you can create a fun and tasty treat. Remember to customize it with your favorite toppings and variations. These nachos are perfect for gatherings or snacks. Store any leftovers correctly to enjoy them later. Now get creative and impress everyone with your new dessert skill!

Caramel Apple Nachos Irresistible Sweet Treat Delight

Are you ready to satisfy your sweet tooth? Caramel Apple Nachos are the perfect mix of crunchy and creamy. With

- 1 medium butternut squash, peeled and diced into small cubes - 1 cup Arborio rice - 4 cups vegetable broth - 1 small onion, finely chopped - 2 cloves garlic, minced - 1 cup grated Parmesan cheese (or a vegan alternative) - 2 tablespoons olive oil - 1 tablespoon butter (or plant-based butter) - Salt and pepper to taste - Fresh sage leaves for garnish - A pinch of nutmeg (optional) The butternut squash brings a lovely sweetness to the dish. Its creamy texture enhances the risotto. Arborio rice is key for that perfect creaminess. This short-grain rice absorbs flavors well. The vegetable broth adds warmth and depth, making the risotto rich. You can choose Parmesan cheese for a classic touch. If you prefer vegan, there are great plant-based options. - Heavy-bottomed pot - Saucepan - Ladle - Cooking utensils Using a heavy-bottomed pot is vital. It helps distribute heat evenly. This prevents the rice from burning. A saucepan keeps your broth warm, which is essential for risotto. A ladle makes it easy to add broth gradually. Having good cooking utensils helps you stir and mix well. These tools make the cooking process smooth and enjoyable. For the full recipe, check out Butternut Bliss Risotto. 1. Start by peeling the butternut squash. Use a sharp knife to remove the skin. Then, cut the squash in half and scoop out the seeds. 2. Dice the squash into small cubes. Aim for uniform pieces to ensure even cooking. 3. Next, finely chop one small onion. The onion adds a nice sweetness to the dish. 4. Mince two cloves of garlic. Fresh garlic gives great flavor. Set these aside for later. 1. In a saucepan, heat four cups of vegetable broth over low heat. Keeping it warm helps the risotto cook evenly. 2. In a large, heavy-bottomed pot, add two tablespoons of olive oil and one tablespoon of butter. Heat this over medium heat. 3. Once hot, add the chopped onion. Sauté for about five minutes. The onion should be soft and translucent. 4. Stir in the minced garlic and cook for one more minute. You want it fragrant but not burnt. 5. Now, add the diced butternut squash to the pot. Stir for five to seven minutes. You want the squash to become slightly tender. 6. Pour in one cup of Arborio rice. Stir continuously for about two minutes. This helps the rice coat well with the flavors. 7. Start adding the warm vegetable broth, one ladle at a time. Stir often and wait until the liquid absorbs before adding more. This step takes about 18-20 minutes. The rice should be creamy and al dente. 1. Once the rice is cooked, stir in one cup of grated Parmesan cheese. This adds creaminess and richness. 2. Season with salt and pepper to taste. If you like, add a pinch of nutmeg for warmth. 3. Mix everything well until it’s creamy. 4. Remove the pot from heat and let the risotto sit covered for two minutes. This helps all the flavors meld together. Enjoy your warm, creamy butternut squash risotto, garnished with fresh sage leaves! You can find the full recipe for this dish to explore more details and tips. To make your risotto creamy, stirring is key. When you stir, you help release the starch from the rice. This makes the dish rich and smooth. Stirring also keeps the rice from sticking to the pot. Use a wooden spoon or a silicone spatula for the best results. Adjusting the broth amount is also important. Start by adding one ladle at a time. Wait for the rice to absorb the broth before adding more. This slow process helps create that creamy texture we all love. If you add too much broth too soon, your risotto can become watery and lose its charm. Using fresh herbs and spices can elevate your risotto. I love adding fresh sage leaves. They pair perfectly with butternut squash. Try mixing in a little rosemary or thyme for extra flavor. Consider using different cheeses for a twist. While Parmesan is classic, goat cheese or feta can add a unique taste. They bring a creaminess and tang that will surprise your taste buds. You can even try a vegan cheese if you want a plant-based option. For more details, check out the Full Recipe. {{image_2}} You can easily make butternut squash risotto vegan and gluten-free. First, use plant-based cheese alternatives instead of Parmesan. Look for options made from nuts or soy. They melt well and add creaminess. For a gluten-free base, ensure you choose gluten-free Arborio rice. This rice is crucial for that creamy texture. You can customize your risotto by adding proteins. Chicken or shrimp can make it heartier. Just cook the proteins separately and mix them in at the end. For a nutritious boost, try incorporating greens like spinach or kale. Stir them in a few minutes before serving. They will wilt nicely and add color. For the full recipe, check Butternut Bliss Risotto . To keep your butternut squash risotto fresh, store it correctly. Place leftover risotto in an airtight container. It will last in the fridge for about three days. Make sure to let the risotto cool before sealing it. This helps prevent excess moisture. If you want to save it for later, freezing is a great option. Use a freezer-safe container or bag. Portion the risotto into smaller amounts for easy reheating. It can last up to three months in the freezer. When you are ready to eat it, thaw it in the fridge overnight. Reheating risotto can be tricky. The best method is on the stove. Place the risotto in a pot. Add a splash of vegetable broth or water. Heat it over low to medium heat. Stir often to keep it creamy. Avoid using the microwave if you can. It can make the risotto mushy. If you must use it, heat in short bursts. Stir between each burst to help it heat evenly. This way, your risotto stays delicious and creamy. How to make risotto creamy? To make risotto creamy, stir the rice often. This releases starch, which thickens the dish. Use Arborio rice, as it has a high starch content. Adding warm broth gradually helps the rice absorb moisture while cooking. Can I use other types of squash? Yes, you can use other types of squash. Acorn squash and pumpkin work well. Just remember to adjust cooking times if they vary. Caloric content of butternut squash risotto A serving of butternut squash risotto has about 400-450 calories. The exact amount can change based on your cheese and oil choices. Health benefits of key ingredients Butternut squash is rich in vitamins A and C. It also has fiber, which helps digestion. Arborio rice provides energy and is gluten-free. Parmesan cheese adds calcium and protein. How long does risotto take to cook? Risotto usually takes about 18-20 minutes to cook. You need to stir it often. This helps the rice cook evenly and become creamy. Can I prep ingredients in advance? Yes, you can prep ingredients ahead. Chop the squash, onion, and garlic beforehand. Store them in the fridge to save time during cooking. Butternut squash risotto is a delightful dish you can master with just a few key ingredients and tools. Start with the butternut squash, Arborio rice, and a good broth. Follow simple steps to prepare and cook, adding your favorite cheese for that creamy texture. Don’t forget to stir well and try fresh herbs for flavor. You can even customize it by adding various proteins or greens. Lastly, remember to store it properly for later enjoyment. Enjoy making this delicious dish and impress everyone with your cooking skills!

Butternut Squash Risotto Creamy and Flavorful Dish

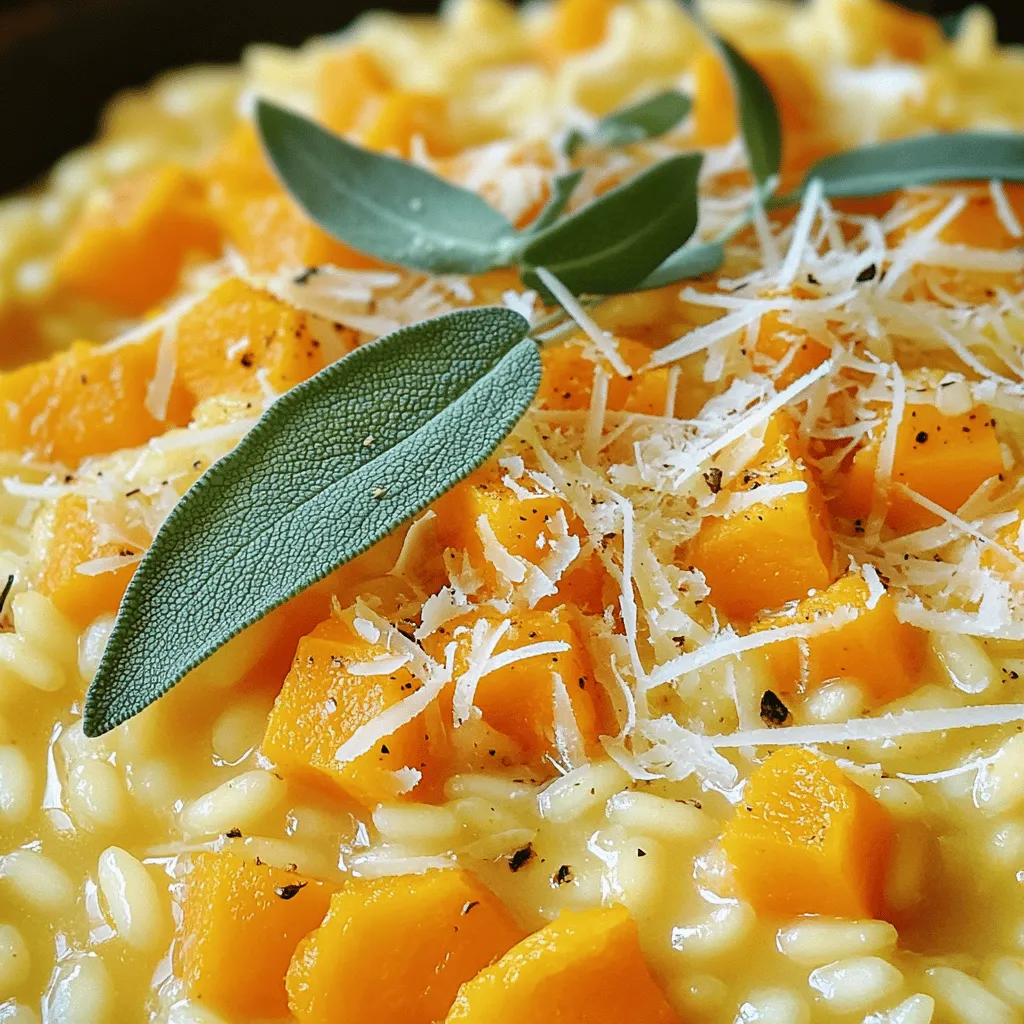
If you’re searching for a creamy and flavorful dish that warms the soul, look no further than butternut squash risotto.

To make a tasty chocolate peanut butter smoothie bowl, you need a few key items. Here’s what to gather: - 2 ripe bananas, frozen - 1 tablespoon unsweetened cocoa powder - 2 tablespoons natural peanut butter - 1 cup almond milk (or any milk of choice) - 1/2 teaspoon vanilla extract These ingredients blend together to create a creamy and rich base. The frozen bananas give it a smooth texture. The cocoa powder adds a deep chocolate flavor, while the peanut butter brings in that nutty goodness. Sometimes, you may want to add a little extra sweetness. Here are some options: - 1 tablespoon honey - 1 tablespoon maple syrup You can pick one of these sweeteners to enhance the flavor. If you prefer a less sweet bowl, you can skip this step. Toppings can take your smoothie bowl to the next level. Here are some fun ideas: - Sliced fresh banana - Granola - Cacao nibs - Crushed peanuts These toppings add texture and crunch. You can mix and match them based on your taste. For the full recipe, please refer to the section above. First, gather all your ingredients. You will need: - 2 ripe bananas, frozen - 1 tablespoon unsweetened cocoa powder - 2 tablespoons natural peanut butter - 1 cup almond milk (or any milk of choice) - 1 tablespoon honey or maple syrup (optional) - 1/2 teaspoon vanilla extract - Toppings: sliced fresh banana, granola, cacao nibs, and crushed peanuts Make sure your bananas are ripe and frozen. This makes the smoothie thick and creamy. Measure out the cocoa powder and peanut butter. You can use creamy or crunchy peanut butter based on your taste. Set everything close by for easy access. Now, it’s time to blend! In a blender, add the frozen bananas, cocoa powder, peanut butter, almond milk, honey or maple syrup (if using), and vanilla extract. Blend on high speed until smooth. If the mix is too thick, add a bit more almond milk. Stop the blender and scrape down the sides if needed. This will ensure everything mixes well. Aim for a creamy texture without any chunks. Once your smoothie is ready, pour it into a bowl. Use a spoon to smooth the top. Now comes the fun part—decorating! Place slices of fresh banana around the edge. This adds color and freshness. Next, sprinkle granola in the center for crunch. You can also add cacao nibs and crushed peanuts on top. This not only looks good, but tastes great too! Serve your delicious smoothie bowl right away. Enjoy every bite of this tasty and filling treat. For the full recipe, check out the earlier sections! To make your smoothie bowl smooth and creamy, use frozen bananas. They add a nice chill and thickness. Blend your ingredients well. If you find it too thick, add more almond milk a little at a time. You want a consistency that’s thick but still pourable. This helps it stay in the bowl and hold toppings well. A high-speed blender works best for this. Want to jazz up your bowl? You can add other fruits. Strawberries or spinach mix well. They add color and taste. A pinch of sea salt can make flavors pop, too. For a richer chocolate taste, try extra cocoa powder. If you love a nutty flavor, add some chopped nuts or seeds. You can switch up the nut butter for almond or cashew butter for a fun twist. One mistake is using unripe bananas. They won’t blend as smoothly and can taste bitter. Also, don’t skip the vanilla extract; it brings everything together. A common error is over-blending, which can make it too runny. Blend just enough until smooth. Finally, don’t forget the toppings! They add texture and make your bowl look inviting. For a great bowl, remember these tips! Check the Full Recipe for more guidance. {{image_2}} To make a vegan version of this smoothie bowl, simply swap the regular milk with plant-based milk. Almond, soy, or oat milk work great. You can also skip the honey and use maple syrup instead for sweetness. This keeps your bowl fully vegan while still tasting amazing. If you want extra protein, add a scoop of your favorite protein powder. You can also blend in Greek yogurt, tofu, or nut butter. These additions help keep you full longer and boost your energy for the day. Toppings can change with the seasons. In summer, use fresh berries like strawberries and blueberries. In fall, add sliced apples or pears. You can even sprinkle some pumpkin seeds for a fun crunch. Each fruit adds a new flavor to your bowl, making it exciting every time. For the full recipe, check the main recipe section. If you have leftover smoothie bowl, store it in an airtight container. Keep it in the fridge. It stays fresh for up to 24 hours. The smoothie might thicken as it sits. You can add a splash of milk to loosen it up before eating. Just stir it well and enjoy. You can freeze extra smoothie ingredients for later use. Slice ripe bananas and freeze them in a single layer. This way, they won’t stick together. You can also freeze peanut butter in ice cube trays. Just scoop out the amount you need later. Cocoa powder and almond milk store well in your pantry or fridge. Meal prep makes smoothie bowls easy and quick. Portion out your ingredients in containers. This saves time in the morning. You can blend everything fresh when you're ready to eat. Freeze your cut fruit and store your dry ingredients together. This keeps everything organized and ready to use. For full details, check the Full Recipe. You can use any milk you like. Options include cow's milk, soy milk, or oat milk. Each type adds its own flavor. If you prefer non-dairy options, coconut milk works well too. Just choose whatever fits your taste or diet needs. Yes, you can make the smoothie bowl ahead of time. Blend all the ingredients and store it in the fridge. Just keep in mind that it may thicken. You might need to add a splash of milk before serving. For best taste, eat it fresh, but it’s fine to prep in advance. To boost nutrition, add a handful of spinach or kale. These greens blend well and don't change the taste much. You can also mix in chia seeds or flaxseeds for extra fiber and omega-3s. Another option is to use Greek yogurt for added protein. These small changes make your bowl even healthier. For the full recipe, check out the detailed steps to create your own Chocolate Peanut Butter Smoothie Bowl! This blog post covered how to create a delicious chocolate peanut butter smoothie bowl. You learned about the key ingredients, optional sweeteners, and great toppings. I provided step-by-step instructions and helpful tips to get the right texture. You also discovered fun variations and storage tips for leftovers. With all this info, you can now enjoy a tasty and healthy treat. Dive in, try it out, and get the most from your smoothie bowl!

Chocolate Peanut Butter Smoothie Bowl Tasty and Filling

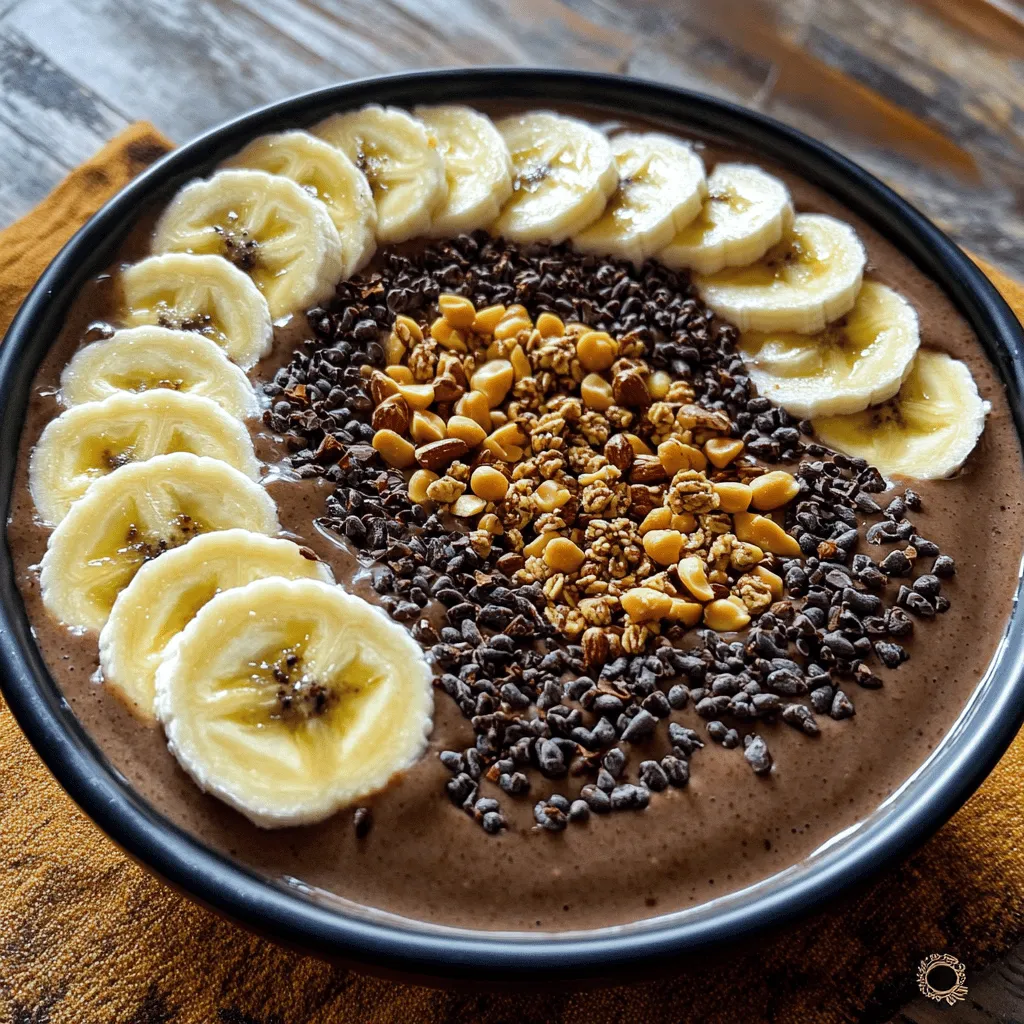
If you crave a sweet treat that satisfies and fuels your day, you’ll love this Chocolate Peanut Butter Smoothie Bowl.

- Fresh asparagus - Olive oil - Garlic To make Lemon Garlic Roasted Asparagus, start with fresh asparagus. Look for bright green stalks that are firm and crisp. You need about one pound for this recipe. Next, grab some olive oil. This helps the flavors blend and gives a nice sheen. Lastly, you need garlic. Four cloves, minced, add a wonderful depth to the dish. - Lemon zest and juice - Sea salt and black pepper - Optional red pepper flakes Now, let’s talk about flavor enhancers. Fresh lemon zest and juice are key. They brighten the dish and pair well with the asparagus. Use the zest of one lemon and two tablespoons of juice. Then, add sea salt and black pepper to taste. These seasonings bring out the natural flavors. If you like a bit of heat, consider adding red pepper flakes. Just 1/4 teaspoon will do! - Grated Parmesan cheese - Fresh parsley for garnish Finally, let’s discuss optional toppings. Grated Parmesan cheese adds a savory touch. You can sprinkle about 1/4 cup on top during the last few minutes of roasting. It adds a nice, cheesy crust. For a fresh look, use chopped parsley to garnish. It adds color and a hint of freshness to the finished dish. For the full recipe, check out the detailed instructions provided earlier. - Preheat your oven to 425°F (220°C). This high heat helps to crisp the asparagus. - Next, trim the tough ends off the asparagus. You can snap them off where they break easily. Then, wash the asparagus under cold water. This removes dirt and keeps your dish clean and fresh. - In a large mixing bowl, combine 3 tablespoons of olive oil, 4 cloves of minced garlic, the zest of 1 lemon, and 2 tablespoons of fresh lemon juice. - Add 1 teaspoon of sea salt, 1/2 teaspoon of black pepper, and 1/4 teaspoon of red pepper flakes if you want heat. Mix these ingredients well. This marinade will give your asparagus a bright and tasty flavor. - Toss the washed asparagus in the lemon garlic marinade. Make sure each spear gets a good coating. - Spread the asparagus out in a single layer on a baking sheet lined with parchment paper. This helps prevent sticking and makes cleanup easier. - Roast the asparagus in the oven for 12 to 15 minutes. I recommend tossing them halfway through. This ensures even cooking and crispiness. If you like cheese, sprinkle 1/4 cup of grated Parmesan cheese on top during the last 2 to 3 minutes of cooking. This adds a rich flavor. - Once they’re done, let them cool for a minute. Transfer the asparagus to a serving platter and garnish with fresh parsley. For the complete details, check the Full Recipe. To pick fresh asparagus, look for bright green stalks. They should feel firm and not bend easily. The tips should be tightly closed and not wilted. If you see any purple or brown spots, skip that bunch. For storage, keep asparagus in the fridge. Place it upright in a jar with an inch of water. Cover the tops with a plastic bag. This helps keep them fresh for up to a week. Tossing the asparagus halfway through cooking makes a big difference. This ensures even cooking and crispiness. I recommend checking them at about 6 minutes. If you want softer asparagus, add a few extra minutes. Watch for the bright green color and slight browning. This means they are ready to eat! To add depth, sprinkle grated Parmesan cheese on top during the last few minutes of roasting. The cheese melts and adds a savory touch. You can also balance flavors by adding fresh herbs. Try thyme or basil for a twist. They bring a fresh taste that complements the lemon and garlic well. For the full recipe, check out the details! {{image_2}} To make Lemon Garlic Roasted Asparagus vegan, skip the Parmesan cheese. Instead, try using nutritional yeast. It gives a cheesy flavor without dairy. You can also add other veggies like cherry tomatoes or bell peppers. Roasting them with asparagus adds color and taste. If you like heat, make your dish spicy! Increase the red pepper flakes to suit your taste. You can also add spicy seasonings like cayenne pepper or chili powder. This will give your asparagus a kick and make it exciting. Want to add more flavor? Try fresh herbs! Thyme and rosemary work great with lemon and garlic. Just chop them and mix them in with the marinade. You can also pair asparagus with flavors like balsamic vinegar or lemon zest for a tasty twist. These variations can make your Lemon Garlic Roasted Asparagus fun and new! For the full recipe, check out the details above. To keep your leftover asparagus fresh, place it in the fridge. Wrap the asparagus in a damp paper towel. Then, place it in a resealable plastic bag or an airtight container. This method helps keep it crisp. Make sure to remove as much air as possible from the bag. Fresh asparagus can last for up to three days in the fridge. You can reheat roasted asparagus in the oven or microwave. The oven gives you better results. Preheat it to 350°F (175°C). Place the asparagus on a baking sheet. Heat for about 5-10 minutes until warm. If you use the microwave, heat in short bursts of 30 seconds. This method can make it soggy. To keep it crispy, avoid covering the dish. If you have more asparagus than you can eat, freezing is a great option. First, blanch the asparagus in boiling water for 2-3 minutes. Transfer it to ice water to stop the cooking. After it cools, drain and dry the asparagus. Use a freezer-safe bag or container to store it. Frozen roasted asparagus can last for up to 6 months. For the best flavor and texture, use it within 3 months. Don’t forget to check out the Full Recipe for perfect cooking times! Asparagus is a superfood. It is low in calories and rich in vitamins. One serving gives you vitamin K, vitamin C, and folate. It also has fiber, which helps digestion. Lemon adds bright flavor and vitamin C. It helps your body absorb iron. Garlic has many health perks too. It boosts your immune system and lowers blood pressure. Together, they make a tasty and healthy dish. Yes, you can prep this dish in advance. Simply wash and trim the asparagus. Toss them in the lemon-garlic mixture. Store in the fridge for up to two days. To keep them fresh, use an airtight container. When ready, just roast them straight from the fridge. This saves time on busy days. To make this dish low-carb, focus on the asparagus. You can skip the cheese if you want. Use olive oil and spices to add flavor instead. Roasting is a great method for low-carb meals. You keep the crunch and taste without adding carbs. Try grilling or steaming if you prefer different cooking styles. This blog post covered how to make Lemon Garlic Roasted Asparagus. We looked at the key ingredients, step-by-step cooking instructions, and tips for the best flavor. We explored tasty variations, how to store leftovers, and answered common questions. Now you have everything you need to enjoy this simple, healthy dish. Cooking should be fun and easy, so try different flavors and share with friends! Enjoy your delicious asparagus!

Lemon Garlic Roasted Asparagus Flavorful Side Dish

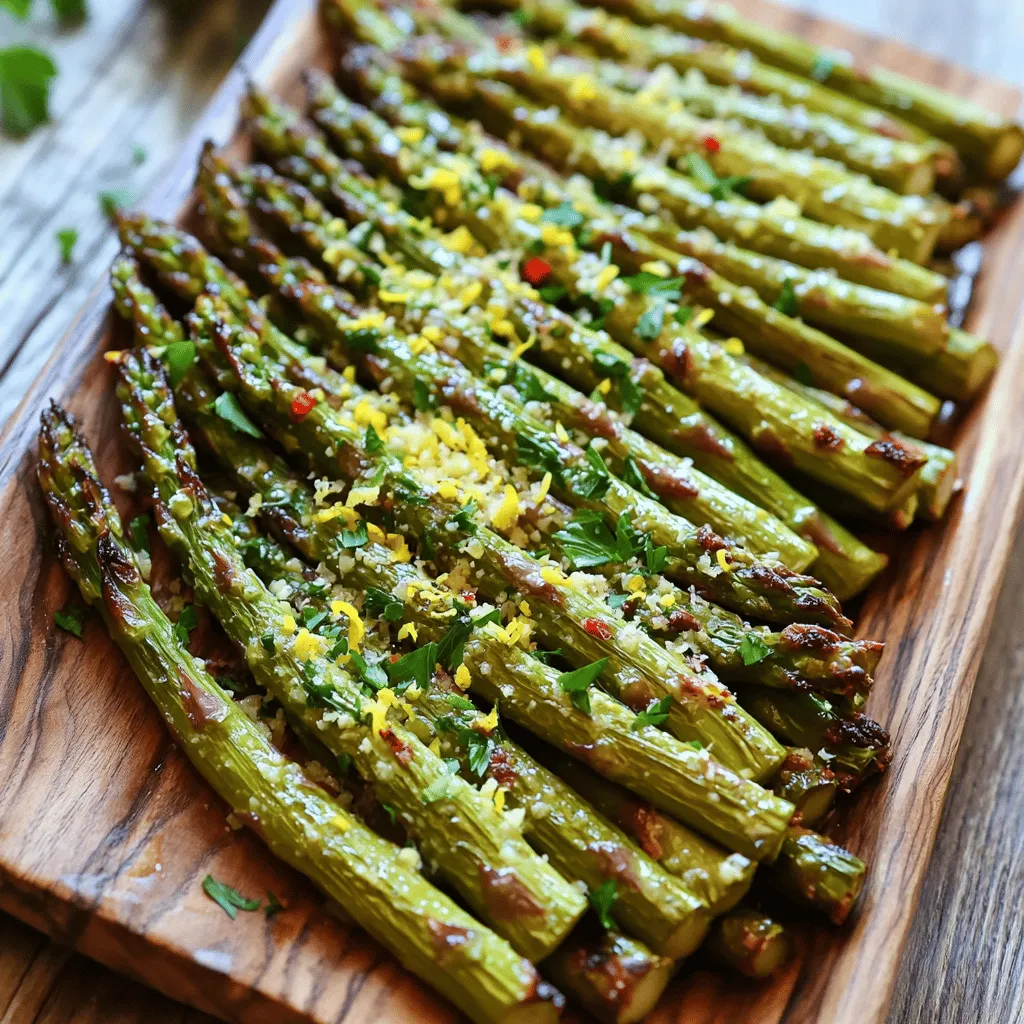
Looking for a delicious side dish that’s quick to prepare? Lemon Garlic Roasted Asparagus is a vibrant choice that bursts

To make these tasty pumpkin spice pancakes, you need some key ingredients. Here is what you will need: - 1 cup all-purpose flour - 2 tablespoons brown sugar - 1 teaspoon baking powder - 1/2 teaspoon baking soda - 1/2 teaspoon salt - 1 teaspoon ground cinnamon - 1/2 teaspoon ground nutmeg - 1/4 teaspoon ground ginger - 1/4 teaspoon ground cloves - 1 cup pumpkin puree (canned or fresh) - 1 large egg - 1 cup milk (dairy or non-dairy) - 2 tablespoons melted butter (or coconut oil) - 1 teaspoon vanilla extract These ingredients work together to create soft, warm pancakes. They have a rich flavor thanks to the pumpkin and spices. You can dress up your pancakes with fun toppings. Here are some ideas: - Maple syrup - Whipped cream - Cinnamon sugar - Chopped nuts, like pecans or walnuts - Fresh fruit, like bananas or berries These toppings add extra sweetness and texture. You can mix and match them based on your taste. If you need to swap some items, here are some great substitutions: - Use whole wheat flour for a healthier option. - Replace brown sugar with coconut sugar for a different flavor. - Almond milk or oat milk can work instead of regular milk. - Applesauce can replace butter for a lower-fat option. These substitutions keep the recipe easy and tasty, ensuring you can enjoy pumpkin spice pancakes any time. For the full recipe, check the detailed instructions above. 1. Start by gathering your ingredients. You will need: - 1 cup all-purpose flour - 2 tablespoons brown sugar - 1 teaspoon baking powder - 1/2 teaspoon baking soda - 1/2 teaspoon salt - 1 teaspoon ground cinnamon - 1/2 teaspoon ground nutmeg - 1/4 teaspoon ground ginger - 1/4 teaspoon ground cloves - 1 cup pumpkin puree - 1 large egg - 1 cup milk - 2 tablespoons melted butter - 1 teaspoon vanilla extract 2. In a medium bowl, whisk together the dry ingredients. Mix the flour, brown sugar, baking powder, baking soda, salt, and spices until they are well combined. 3. In a larger bowl, mix the wet ingredients. Add the pumpkin puree, egg, milk, melted butter, and vanilla extract. Stir until you have a smooth blend. 4. Gradually add the dry mix to the wet mix. Stir gently until just combined. A few lumps are okay; don’t overmix! - Preheat your skillet over medium heat. A non-stick skillet works best. - Lightly grease the skillet with butter or cooking spray to prevent sticking. - Use about 1/4 cup of batter for each pancake. Pour it onto the skillet. - Watch for bubbles on the surface. This usually takes 2-3 minutes. - Flip the pancake carefully. Cook for another 1-2 minutes until golden brown. 1. Mixing Ingredients: Show your mixing bowls, with dry ingredients on one side and wet on the other. 2. Batter Consistency: Display the batter’s texture. It should be thick but pourable. 3. Cooking: Capture the moment when bubbles form. This indicates it’s time to flip! 4. Final Presentation: Stack your pancakes high, drizzle with syrup, and top with whipped cream. Garnish with a sprinkle of cinnamon for that extra touch. For the full recipe, refer to the earlier section. Enjoy making your savory pumpkin spice pancakes! To boost flavor in your pumpkin spice pancakes, use fresh spices. Freshly ground spices give a stronger taste. You can also add a pinch of salt to enhance sweetness. Using high-quality pumpkin puree makes a big difference, too. If you want more depth, mix in some vanilla extract. It adds warmth and richness. Lastly, serve your pancakes with pure maple syrup for a tasty touch. Sometimes pancakes can turn out dense. This happens when you overmix the batter. Stir gently until ingredients just blend. If your pancakes are too flat, check your baking powder. It should be fresh. Also, make sure your skillet is hot enough. If pancakes stick, try using more butter or cooking spray. If they burn, lower the heat and cook longer. Store leftover pancakes in an airtight container. They stay fresh in the fridge for up to three days. For longer storage, freeze them. Place parchment paper between pancakes to prevent sticking. Warm them up in the toaster or microwave. Enjoy your pancakes again without losing flavor or texture. For the full recipe, check out the complete guide. {{image_2}} You can change the flavor of your pumpkin spice pancakes easily. Here are some fun ideas: - Chocolate Chip: Add a handful of chocolate chips to the batter for a sweet touch. - Apple Cinnamon: Mix in small apple pieces and a bit more cinnamon. - Maple Pecan: Stir in chopped pecans and use maple extract instead of vanilla. Each of these variations adds a unique taste to the pancakes while keeping the pumpkin flavor intact. You can still enjoy pumpkin spice pancakes if you need gluten-free or vegan recipes. Here’s how: - Gluten-Free: Use gluten-free flour instead of all-purpose flour. Almond or oat flour works great. - Vegan: Replace the egg with a flax egg (1 tablespoon ground flaxseed mixed with 2.5 tablespoons water) and use non-dairy milk. These simple swaps keep the pancakes delicious and inclusive for everyone. You can make your pancakes even more fun with add-ins. Here are some ideas: - Nuts and Seeds: Chopped walnuts, almonds, or sunflower seeds add crunch. - Dried Fruits: Raisins or cranberries bring sweetness and chewiness. - Spices: Try adding a pinch of cardamom or allspice for extra warmth. These creative touches will make your pumpkin spice pancakes unique and enjoyable. For a complete recipe, check out the Full Recipe mentioned earlier. If you have leftover pancake batter, store it in a clean, airtight container. Make sure to cover it well to keep out air. You can keep it in the fridge for up to two days. When you're ready to cook, stir the batter gently to mix it again. For pancakes you don't eat right away, let them cool completely first. Then, stack them with parchment paper in between to prevent sticking. Place them in a freezer bag or airtight container. You can freeze pancakes for up to three months. This way, you can enjoy a tasty breakfast anytime! To reheat pancakes, use a microwave or a skillet. If using a microwave, place a few pancakes on a plate and cover them with a damp paper towel. Heat them for about 20-30 seconds. If you prefer the skillet, cook them on low heat for 1-2 minutes on each side. This keeps them soft and warm. Enjoy your pancakes with your favorite toppings from the Full Recipe! Pumpkin spice pancakes are fluffy, warm treats made with pumpkin puree and spices. They have flavors of cinnamon, nutmeg, and cloves. These pancakes bring the taste of fall to your breakfast. You can serve them with maple syrup, whipped cream, or even nuts. They are fun to make and eat! Yes, you can make pumpkin spice pancakes ahead of time. Simply cook the pancakes and let them cool. Then, stack them between layers of parchment paper. Place the stack in a zip-top bag or airtight container. You can store them in the fridge for about three days. For longer storage, freeze them for up to two months. Reheat in the toaster or microwave before serving. To ensure fluffy pancakes, I recommend a few tips. First, do not overmix the batter. Stir until just combined; lumps are okay. Second, make sure your baking powder is fresh. Old baking powder can lead to flat pancakes. Lastly, use a hot skillet. When the batter hits the pan, it should sizzle. Follow these tips for light, airy pancakes every time! In this blog post, we explored how to make delicious pumpkin spice pancakes. We covered the key ingredients and possible toppings. I shared my cooking process and tips for perfect pancakes. You learned about variations, storage advice, and answers to common questions. Enjoy experimenting with flavors and techniques. These pancakes can be your new fall favorite. When you master these recipes, every bite will taste delightful. Happy cooking!

Savory Pumpkin Spice Pancakes Easy and Tasty Recipe

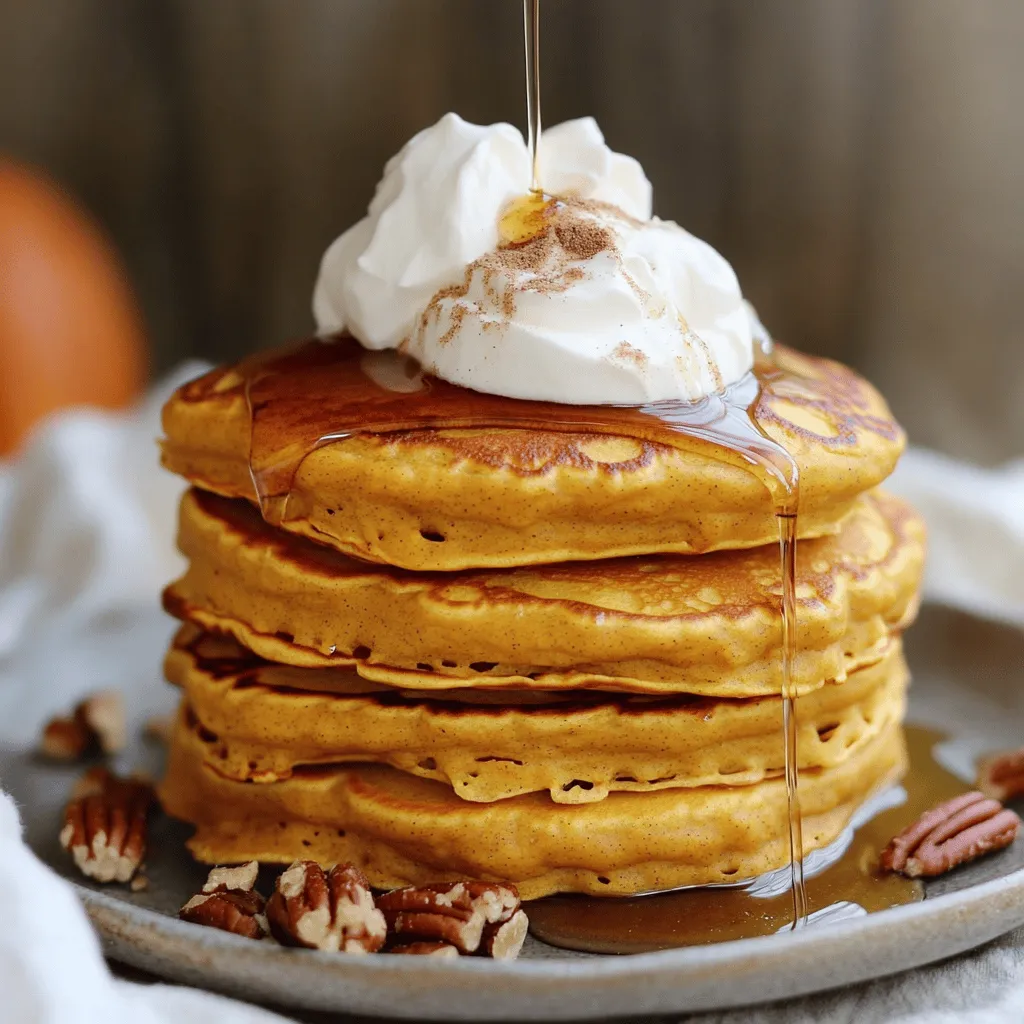
If you love fall flavors, you’ll adore my easy pumpkin spice pancakes! This recipe mixes warm spices with fluffy pancakes

- 8 ounces of fusilli or rotini pasta - 1 cup cherry tomatoes, halved - 1 cup fresh mozzarella balls (bocconcini), halved - 1 cup fresh basil leaves, roughly chopped - 1 clove garlic, minced - 3 tablespoons balsamic glaze - 4 tablespoons extra virgin olive oil - Salt and freshly cracked black pepper to taste - 1/4 teaspoon red pepper flakes (optional) - 1/2 cup arugula (for added freshness) I love using fresh ingredients in Caprese Pasta Salad. The pasta gives you a nice base. Fusilli or rotini works well because it holds the dressing. Cherry tomatoes add a burst of flavor. They are sweet and juicy. Fresh mozzarella provides a creamy texture. It pairs perfectly with the tomatoes. Basil brings a lovely aroma and taste. You can chop it roughly, which adds a rustic feel. For the dressing, I prefer making it myself. Minced garlic gives a nice kick. Balsamic glaze adds a sweet tang. Olive oil keeps it smooth. Salt and pepper enhance all the flavors. If you like some heat, add red pepper flakes. They give a nice touch without being too spicy. If you want extra freshness, try adding arugula. It adds a peppery note that complements the other ingredients well. You can find all the details in the Full Recipe. - Bring a large pot of salted water to a boil. - Add 8 ounces of fusilli or rotini pasta. - Cook the pasta until al dente and then drain. Cooking pasta right is key for a great salad. Al dente means it has a slight bite. This texture helps the pasta hold up with the dressing and other ingredients. Rinsing the pasta under cool water stops it from cooking further. This step keeps your pasta fresh and ready to mix. - In a small bowl, whisk together: - 1 clove garlic, minced - 3 tablespoons balsamic glaze - 4 tablespoons extra virgin olive oil - Salt and freshly cracked black pepper to taste - 1/4 teaspoon red pepper flakes (optional) The dressing brings everything together. Use fresh garlic for the best taste. Balsamic glaze adds sweetness and depth. Olive oil gives a rich flavor. Adjust salt and pepper to your liking. If you want heat, add the red pepper flakes. This mix adds a bright kick to your salad. - In a large mixing bowl, mix the cooked pasta with: - 1 cup cherry tomatoes, halved - 1 cup fresh mozzarella balls (bocconcini), halved Gently toss the pasta with the tomatoes and mozzarella. The tomatoes burst with flavor, and the mozzarella adds creaminess. - Fold in 1 cup of fresh basil leaves, roughly chopped, and 1/2 cup arugula. - Drizzle the prepared dressing over the pasta salad. Toss gently until everything is well-coated. Basil and arugula give a fresh, peppery taste. Tossing gently helps keep the pasta intact. Let the salad sit for about 10 minutes. This resting time lets the flavors blend nicely. Serve the salad at room temperature or chilled. It looks great in a large bowl. To impress, garnish with whole basil leaves. You can also drizzle extra balsamic glaze on top for a beautiful finish. For the full recipe, check out the Caprese Pasta Salad Delight. - Use plenty of salted water for cooking. This helps the pasta absorb flavor. - Rinse pasta under cool water to halt cooking. It prevents the pasta from getting mushy. - Allow dressing to sit briefly to enhance flavor. This helps the ingredients blend well. - Adjust ratios based on taste preference. You may want more garlic or balsamic glaze. - Serve at room temperature or chilled. Both options bring out the salad's fresh taste. - Garnish with whole basil leaves and balsamic glaze. This adds beauty and extra flavor. You can find the full recipe to create this delicious Caprese Pasta Salad. Enjoy making it! {{image_2}} You can give your Caprese pasta salad a classic Italian twist. Adding olives or sun-dried tomatoes boosts the flavor. The briny taste of olives or the sweet tang of sun-dried tomatoes brightens the dish. These additions add depth and make each bite exciting. If you want a heartier meal, consider adding protein. Grilled chicken or shrimp works well with the salad. Chicken adds a nice texture, while shrimp brings a sweet flavor. This makes the salad filling and great for lunch or dinner. For a lighter option, swap out the mozzarella. You can use vegan cheese or leave it out entirely. This change keeps the salad fresh and vibrant. It also makes it suitable for those who avoid dairy. Store your Caprese pasta salad in an airtight container in the refrigerator. This keeps the salad fresh and tasty. Make sure to seal it well to avoid any odors from other foods. When stored properly, your salad stays good for up to 3 days. After that, the ingredients may lose their crunch and flavor. It’s best to enjoy it within that time to savor every bite. I do not recommend reheating this salad. Caprese pasta salad shines when served cold. The flavors mix well when chilled, giving you that refreshing taste. Enjoy it straight from the fridge for the best experience. Prep time is 15 minutes, total time is about 30 minutes. This quick dish comes together fast, making it perfect for busy days. Yes, it's best when allowed to sit for flavors to meld. Letting it rest for a bit brings all the tastes together. Consider adding herbs like oregano or a squeeze of lemon juice. These simple additions can elevate the taste and give it a fresh twist. Yes, use gluten-free pasta if desired for a gluten-free option. Many brands offer tasty alternatives that work well. Experiment with seasonal vegetables or different dressings to enhance flavors. Adding roasted peppers or a splash of pesto can make it unique. You can check the Full Recipe for more ideas! This Caprese Pasta Salad is simple and fun to make. We covered the key ingredients, like pasta, tomatoes, and mozzarella. The easy steps take about 30 minutes, making this dish quick for any meal. You learned tips for cooking pasta and serving options to keep it fresh. Consider adding your favorite proteins or veggies for a twist. This recipe stores well and tastes great cold. Enjoy making this meal your own and share it with friends!

Caprese Pasta Salad Flavorful and Fresh Recipe

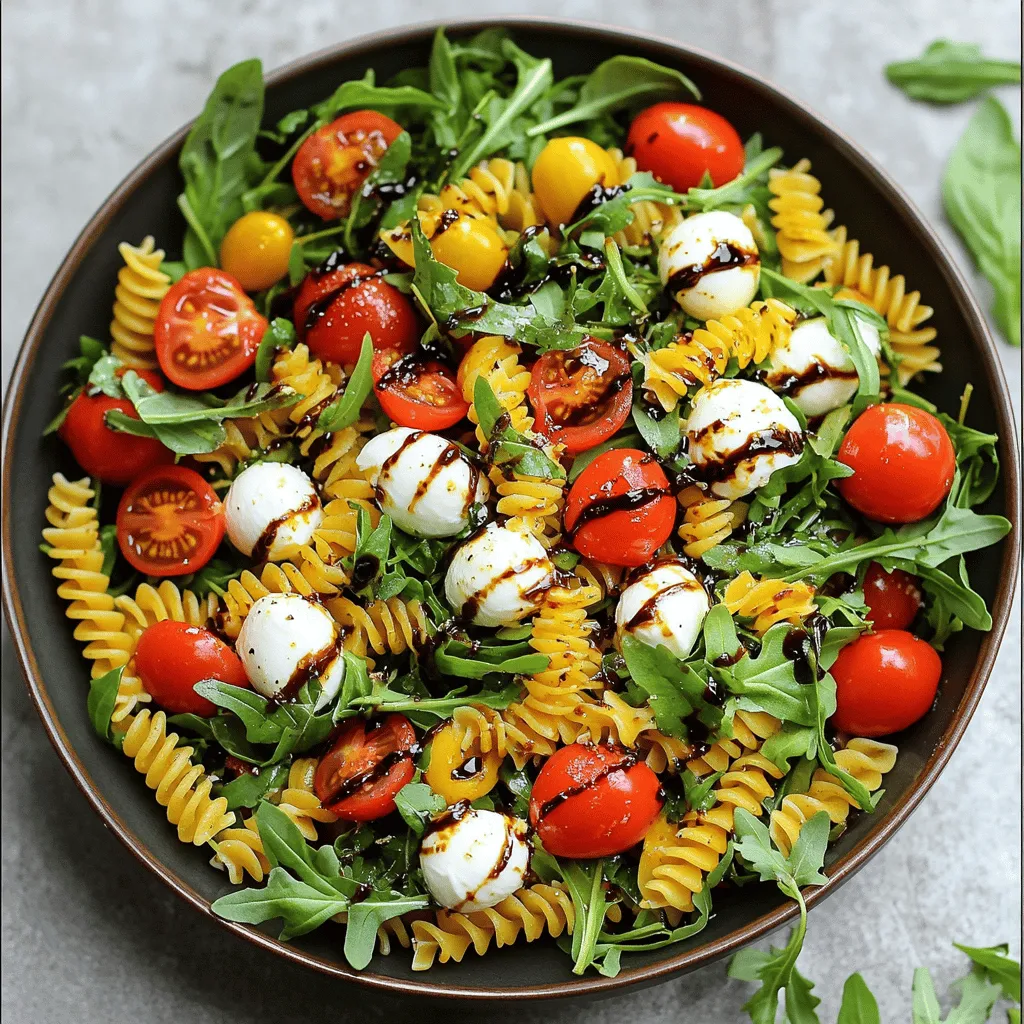
Are you ready to whip up a fresh and delightful dish? This Caprese Pasta Salad combines sweet cherry tomatoes, creamy

- 1 cup rolled oats - 1 cup almond milk (or your choice of milk) - 1 ripe banana, mashed - 2 tablespoons natural peanut butter - 1 tablespoon honey or maple syrup (optional for sweetness) - 1/2 teaspoon vanilla extract - 1/4 teaspoon cinnamon - A pinch of salt - Sliced banana and chopped peanuts for topping The main ingredients for peanut butter banana overnight oats are simple. I love using rolled oats because they absorb liquid well. Almond milk creates a creamy texture, but any milk works. A ripe banana adds natural sweetness and flavor. Natural peanut butter is my go-to for richness. Honey or maple syrup can sweeten it up if you like. Vanilla extract adds warmth, while cinnamon gives a nice spice. Finally, a pinch of salt brightens all the flavors. - Alternatives for almond milk: You can use oat milk, soy milk, or regular cow's milk. Each option brings a different flavor and creaminess. - Options for sweeteners: If you don’t have honey or maple syrup, try agave syrup or stevia. You can even skip sweeteners if you prefer less sugar. - Variations in nut butter choices: While peanut butter is classic, almond or cashew butter also works. Sunflower seed butter is great for nut-free options. These substitutions keep the dish flexible for your taste and diet. Feel free to mix and match based on what you have at home! For the full recipe, check the section above. - Step 1: Combine oats and milk In a medium bowl or jar, add 1 cup of rolled oats and 1 cup of almond milk. Mix well. Make sure the oats soak in the milk. - Step 2: Mix in banana and peanut butter Next, add 1 ripe banana, mashed, and 2 tablespoons of natural peanut butter. Stir until smooth. The banana gives sweetness, while the peanut butter adds creaminess. - Step 3: Incorporate additional ingredients For extra flavor, mix in 1 tablespoon of honey (if you want it sweeter), 1/2 teaspoon of vanilla extract, 1/4 teaspoon of cinnamon, and a pinch of salt. This step makes the oats taste amazing. - Transfer to jars for individual servings Pour the mixture into jars or containers with lids. This makes for easy grab-and-go breakfasts. - Seal containers properly Make sure to seal each container tightly. This keeps the oats fresh and prevents spills. - Recommended refrigeration time Place the jars in the refrigerator overnight. If you’re in a hurry, let them sit for at least 4 hours. This allows the oats to soak up all the flavors. - Stirring before serving When ready to eat, stir the oats well. This ensures an even mix of flavors. - Adjusting consistency with milk If the oats are too thick, add a splash of milk. This helps you reach your preferred texture. - Topping ideas Top your oats with sliced banana and chopped peanuts. You can also drizzle a little extra honey or peanut butter on top for added flavor. Enjoy! For the complete recipe, visit the [Full Recipe]. To enhance the peanut butter flavor, use natural peanut butter. It has a richer taste than processed kinds. You can also add a bit more peanut butter if you want a stronger taste. For perfectly ripe bananas, look for bananas with yellow skin and a few brown spots. They should be soft but not mushy. This ripeness adds sweetness and creaminess to your oats. Adjust spices to your liking. A pinch of salt can bring out the flavors. You might also try adding a bit more cinnamon or even a dash of nutmeg for a warm touch. Making these oats ahead is a smart choice for busy mornings. You can mix them up the night before. Just place the jars in the fridge, and they are ready when you wake up. Layering works well for meal prep. Start with oats and milk. Then, add the banana and peanut butter. Finish with your spices. This helps keep flavors separate until you are ready to eat. For optimal freshness, store your oats in airtight containers. This keeps them from drying out. They stay good for up to five days in the fridge. If you want to add protein, try adding Greek yogurt or protein powder. This makes your breakfast even more filling. You can swap out bananas for other fruits. Try berries, apples, or even peaches. Each one gives a different taste and nutrition. Adjust portion sizes based on your needs. If you want a smaller snack, use half the ingredients. For a bigger meal, double the recipe. This makes it easy to fit your hunger. {{image_2}} You can play with flavors to keep your peanut butter banana overnight oats exciting. Here are a few tasty ideas: - Chocolate peanut butter banana overnight oats: Just add 2 tablespoons of cocoa powder to the mix. This option gives your oats a rich, chocolatey twist. - Berry-infused overnight oats: Mix in 1/2 cup of fresh or frozen berries. Blueberries, strawberries, or raspberries work well. They add natural sweetness and color. - Tropical coconut and pineapple option: Swap almond milk for coconut milk. Add 1/2 cup of diced pineapple. This variation brings a sunny flavor to your breakfast. You can adapt this recipe to fit different diets. Here are some suggestions: - Gluten-free alternatives: Use certified gluten-free rolled oats. This way, everyone can enjoy your oats without worry. - Nut-free variations using seeds: Replace peanut butter with sunflower seed butter. This option keeps the creaminess without nuts. - Vegan substitutions: Use maple syrup instead of honey. Also, make sure to choose a plant-based milk. This keeps your oats fully vegan. Add seasonal ingredients for a fun twist. Here are some ideas: - Adding pumpkin or apple in fall: Mix in 1/2 cup of pumpkin puree or chopped apple. This adds warmth and seasonal flavor. - Incorporating berries in summer: Fresh berries add a bright touch. Try adding them right before serving for a burst of freshness. - Using dried fruits in winter: Dried apricots or raisins can bring sweetness during colder months. Just chop them small and mix in with the oats. These variations make your peanut butter banana overnight oats fun and unique every time! For the full recipe, check out the detailed instructions above. - Use glass jars or BPA-free plastic containers for overnight oats. - Seal them tightly to keep the oats fresh. - In the fridge, they last up to 5 days. - Check for signs of spoilage like off smell or mold. - You can freeze overnight oats for longer storage. - Divide them into portions and place in freezer-safe containers. - To thaw, move them to the fridge overnight for best results. - Frozen oats can last up to 3 months. - You can eat them cold or warm them up in the microwave. - If reheating, add a splash of milk for moisture. - Stir well to mix and keep the flavor and texture intact. How to make overnight oats without dairy? You can use almond milk, coconut milk, or oat milk instead of dairy. These options add creaminess. Just measure one cup of your chosen milk. Mix it with the oats and other ingredients. Can I use quick oats instead of rolled oats? Yes, you can use quick oats. They will soften faster, but the texture will be different. Your oats may turn mushy, so adjust soaking time to your taste. How long can I keep peanut butter banana overnight oats? You can store them in the fridge for up to five days. Keep them sealed in jars or containers. This makes breakfast easy all week long. What to do if oats are too thick? If your oats are too thick, just add a splash of milk. Stir well to mix. This will help achieve your preferred consistency. How to fix bland overnight oats? To fix bland oats, add a pinch of salt or more peanut butter. You can also mix in some honey or maple syrup for sweetness. Spices like cinnamon can boost flavor too. Can I heat overnight oats before eating? Yes, you can heat them in the microwave. Just pour them into a bowl and warm for about one minute. Add a little milk to keep them creamy. Breakdown of calories per serving Each serving has about 400 calories. This includes oats, peanut butter, and banana. The exact amount may change based on your choices. Health benefits of oats and bananas Oats are high in fiber, which helps digestion. Bananas provide potassium and natural sweetness. Together, they make a great start to your day. Allergen information regarding peanut butter Peanut butter may cause allergies in some people. Always check labels for cross-contamination. Choose other nut butters or sunflower seed butter if you have allergies. You now know how to make tasty overnight oats using simple ingredients. We explored ingredient options, step-by-step prep, and ways to customize your dish. You learned about storage methods and how to modify recipes for your taste and diet. Remember, overnight oats are versatile and easy to prepare. Enjoy experimenting with flavors and toppings. This way, you can create a breakfast that suits your needs and keeps you full. Now, grab your ingredients and start making your perfect bowl!

Peanut Butter Banana Overnight Oats Quick and Easy Recipe

Looking for a fast, tasty breakfast? Try my Peanut Butter Banana Overnight Oats! This easy recipe is perfect for busy

- 4 large bell peppers (any color) - 1 cup quinoa, rinsed - 2 cups vegetable broth - 1 can (15 oz) black beans, drained and rinsed - 1 cup corn kernels (fresh or frozen) - Diced tomatoes (canned or fresh) - 1 teaspoon cumin - 1 teaspoon smoked paprika - 1 cup shredded cheddar cheese (or dairy-free alternative) Stuffed bell peppers are a joy to make. The colors of the peppers pop, and they look great on the plate. Each bite is a mix of flavors and textures. You get the crunch from the peppers, the softness of the quinoa, and the hearty beans. Using quinoa as a base is smart. It’s not just tasty; it’s packed with nutrients. This meal is filling and good for you. The black beans add protein. They also bring a nice earthiness to the dish. Corn adds a sweet note that brightens every bite. The spices are simple but powerful. Cumin gives a warm, nutty flavor. Smoked paprika adds a bit of depth. Together, they make the stuffing sing. Finally, the cheese brings everything together. It melts beautifully and adds creaminess to the dish. You can find the full recipe for these stuffed bell peppers in our guide. Enjoy crafting a meal that is both colorful and nutritious! First, you need to preheat your oven to 375°F (190°C). This step warms the oven so your peppers bake evenly. While the oven heats, trim the tops off the bell peppers. Remove the seeds and membranes inside. This way, the peppers are ready to hold your tasty filling. I like to brush the outside with a little olive oil. This gives them a nice color and flavor when baking. In a saucepan, combine 1 cup of rinsed quinoa with 2 cups of vegetable broth. Bring this mixture to a boil. Once it boils, lower the heat to a simmer. Cover the pan and cook for about 15 minutes. This helps the quinoa become fluffy and absorb all the liquid. After cooking, take it off the heat and let it cool for a few minutes. In a large mixing bowl, combine your cooked quinoa with the other ingredients. Add the black beans, corn, diced tomatoes, and spices like cumin and paprika. It's important to season this mixture to taste with salt and pepper. Mixing well ensures every bite is full of flavor. Now, it’s time to fill the peppers. Spoon the quinoa mixture into each bell pepper. Press down gently to pack the filling well. Once filled, sprinkle the remaining cheddar cheese on top. Cover the baking dish with foil and place it in the oven. Bake for 25 minutes. After that, take off the foil and bake for another 10-15 minutes. You want the cheese to be bubbly and golden. Once done, let them cool for a few minutes before serving. Enjoy your delicious stuffed bell peppers! For the complete recipe, check out the Full Recipe. To ensure even filling distribution, fill each pepper with care. Start by spooning in the mixture and press down lightly. This helps pack the filling inside. When you fill the peppers evenly, every bite is full of flavor. To prevent peppers from getting soggy, avoid overcooking. Bake them just until the cheese is bubbly and golden. If you want extra crispiness, bake them uncovered for the last few minutes. You can also lightly brush the insides with olive oil before filling. Consider adding more spices for a kick. A pinch of cayenne or chili powder can add heat. You can also mix in herbs like oregano or basil for fresh flavors. If you like a tangy taste, add a splash of lime juice to the filling. Pair your stuffed peppers with fresh salad or a side of rice. A light, zesty dressing goes well with the dish. For drinks, serve a crisp white wine or sparkling water with lime. Modify cook times based on pepper size. Smaller peppers cook faster than larger ones. Start checking for doneness after 20 minutes if you use small peppers. You want them tender but not mushy. If you swap cheeses, adjust the cooking time. Soft cheeses melt fast, while hard cheeses take longer. Keep an eye on your peppers to avoid burning the cheese. For the full recipe, check the instructions above. {{image_2}} For a tasty vegetarian meal, you can swap meat with hearty beans or lentils. Black beans are a great choice, as they add fiber and protein. You can also use lentils for a slightly different texture. To boost flavor and crunch, add extra veggies, like zucchini or mushrooms. Chop them small so they mix well and keep the peppers light. If you want a lower-carb meal, try using cauliflower rice instead of quinoa. This swap cuts carbs and adds a nice crunch. You can simply pulse cauliflower florets in a food processor until they look like rice. For protein, use shredded chicken or turkey. These options keep the dish filling without the carbs from grains. Changing spices can take your stuffed peppers to new levels. For a Mexican twist, add taco seasoning and top with avocado. If you prefer Italian, use oregano and basil, then finish with mozzarella cheese. You can also switch up the cheese. Try feta for a tangy flavor or a dairy-free cheese for a vegan option. Get creative and find what flavors you love! For the full recipe, check out my cheesy quinoa and black bean stuffed bell peppers. After you enjoy your stuffed bell peppers, store any leftovers in the fridge. Keep them in an airtight container. This keeps the peppers fresh and tasty. If you have a lot, you can divide them into smaller portions. This way, it's easier to reheat later. If you want to save some for later, freezing is a great option. First, let the stuffed peppers cool completely. Then, wrap each pepper in plastic wrap. Place them in a freezer-safe bag or container. This method helps keep out air and prevents freezer burn. When you’re ready to eat, thaw them in the fridge overnight. For reheating, pop them in the oven at 350°F (175°C) until heated through. Stuffed bell peppers stay fresh in the fridge for about 3-4 days. If you freeze them, they can last for up to 3 months. Always check for signs of spoilage. If the peppers smell off or look slimy, it’s best to toss them. Keeping track of how long they’ve been stored helps you enjoy them at their best! To cook stuffed bell peppers, you need about 50 minutes. This includes 15 minutes for prep and 35 minutes for baking. You can make the filling while the oven heats up. Once the peppers bake, they become soft and tasty. Yes, you can make stuffed bell peppers ahead. Prepare the filling and stuff the peppers. Cover them and store them in the fridge for up to two days. Just bake them when ready to serve. This saves time on busy days. Stuffed bell peppers pair well with many sides. Try a fresh salad or garlic bread. Rice or quinoa works too. For drinks, serve iced tea or a light white wine. These choices balance the flavors and create a complete meal. You can easily customize the fillings. For a meat option, use ground turkey or beef. For a vegetarian dish, add more beans or any veggies you like. You can also use rice, farro, or even lentils. This makes the dish fit any diet. Stuffed bell peppers offer a fun and healthy meal. We explored main and additional ingredients, spices, and toppings. I provided clear step-by-step instructions for easy prep. You learned tips for perfecting texture and flavor. There are endless variations to suit your taste. Plus, I shared useful storage info for leftovers. Now you can create your own delicious stuffed peppers. Enjoy experimenting with flavors and ingredients. Your tasty dish awaits!

Stuffed Bell Peppers Flavorful and Nutritious Meal

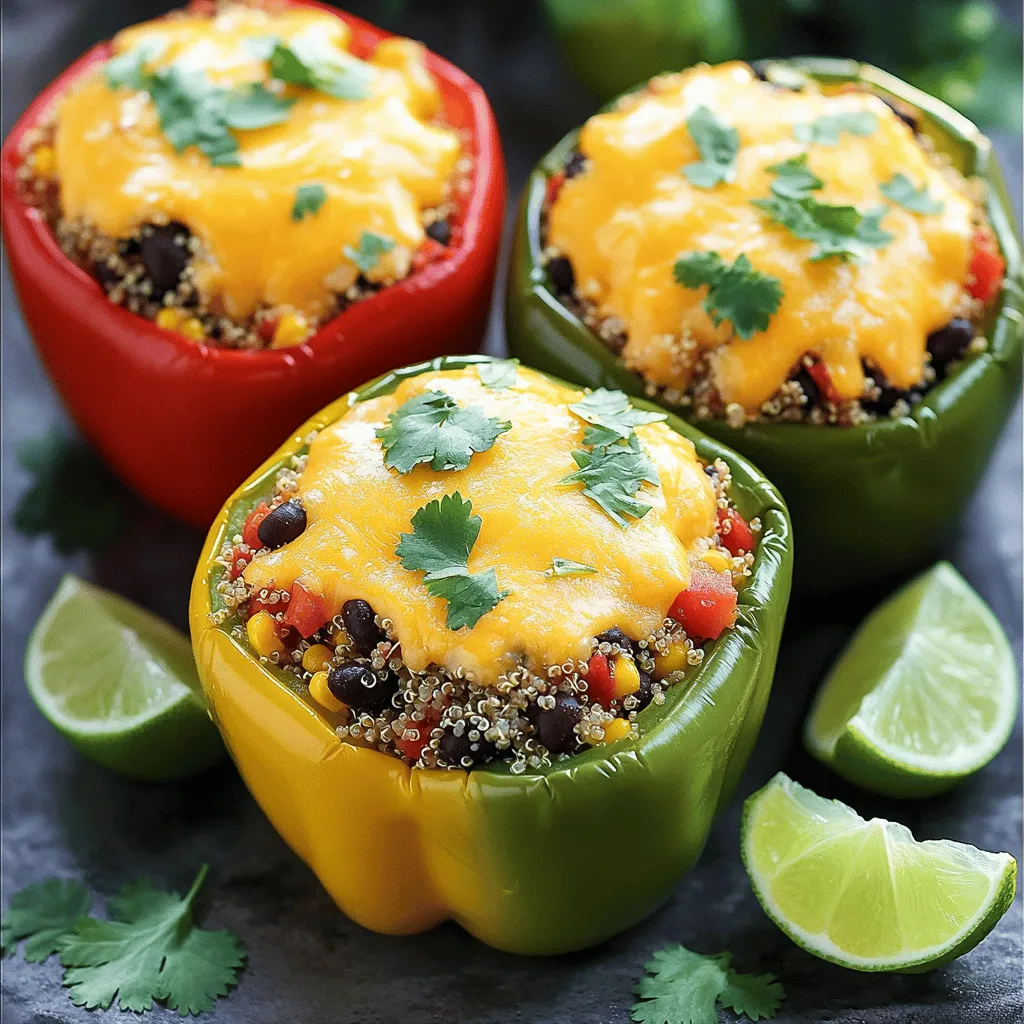
Stuffed bell peppers are a tasty and healthy meal you’ll love to make. Packed with colorful veggies, quinoa, and flavor,

- 1 pound Brussels sprouts, trimmed and halved - 3 tablespoons olive oil - 1/4 cup pure maple syrup - 2 tablespoons balsamic vinegar - 1 teaspoon garlic powder - 1/2 teaspoon salt - 1/4 teaspoon black pepper - 1/4 cup chopped pecans (optional) - Fresh thyme leaves for garnish (optional) To add more depth to your Brussels sprouts, consider using: - A pinch of cayenne pepper for heat - A dash of smoked paprika for a smoky flavor - Some lemon zest for brightness Each serving contains: - Calories: 183 - Total Fat: 11g - Carbohydrates: 23g - Fiber: 4g - Protein: 3g Brussels sprouts are not just tasty; they pack a nutritional punch. They offer fiber, vitamins, and minerals. Eating them can support your health in many ways. For the full recipe, don't forget to check the earlier section. - First, preheat your oven to 425°F (220°C). This will help the Brussels sprouts roast perfectly. - Next, trim the ends off the Brussels sprouts. Remove any yellow or damaged leaves. Then, cut each sprout in half. This helps them cook evenly and absorb the glaze better. - In a large bowl, combine the halved Brussels sprouts with 3 tablespoons of olive oil, 1 teaspoon of garlic powder, 1/2 teaspoon of salt, and 1/4 teaspoon of black pepper. Toss everything well to coat. - Spread the Brussels sprouts on a baking sheet in a single layer. Make sure they aren’t crowded, or they won’t roast well. - Roast them in the preheated oven for about 20 minutes. Stir halfway through for even cooking. - While they roast, make the maple glaze. In a small saucepan over medium heat, mix 1/4 cup of pure maple syrup and 2 tablespoons of balsamic vinegar. Bring it to a gentle simmer. Let it reduce for about 5 minutes until it thickens slightly. - After 20 minutes, take the Brussels sprouts out of the oven. Drizzle the maple glaze over them and stir to coat. - Put the Brussels sprouts back in the oven. Roast for another 10 minutes to let the glaze caramelize. - If you want to add pecans, sprinkle them on during the last 5 minutes of roasting for extra crunch. - To get the best caramelization, make sure the sprouts are in a single layer. This allows for even heat distribution. - If your Brussels sprouts are larger, you might need to adjust the baking time. Check for tenderness and caramelization to know when they are done. For the full recipe, check out the ingredients and instructions provided above. When you shop for Brussels sprouts, look for bright green ones. They should feel firm and not squishy. Avoid any that have yellow leaves or dark spots. Fresh sprouts should be small and compact. This means they are young and tender. Larger sprouts can taste bitter. You can boost the flavor of your dish with spices and herbs. Try adding paprika for smokiness or chili flakes for heat. Fresh herbs like rosemary or sage add a lovely touch. If you want a different glaze, mix honey with soy sauce. This gives a sweet and salty flavor that pairs well. Use a heavy baking sheet for roasting. This helps the Brussels sprouts caramelize better. A rimmed sheet keeps the glaze from spilling. Use a spatula for tossing the sprouts. A large bowl helps mix everything evenly. Make sure to line your baking sheet with parchment paper for easy cleanup. For the full recipe, check out the detailed steps in the main article. {{image_2}} If you want to skip the pecans, try sunflower seeds instead. They add a nice crunch. You can also use pumpkin seeds for a different flavor. Both options keep the dish nut-free while still adding texture. To make this dish vegan, just omit the pecans or replace them with seeds. You can also substitute maple syrup with agave nectar. This keeps the sweet flavor while ensuring it's fully plant-based. Consider adding seasonal herbs like rosemary or sage. These herbs pair well with the sweet glaze. You could also mix in root vegetables like carrots or sweet potatoes for extra color and nutrition. Using seasonal veggies enhances the dish's flavor and makes it more vibrant. If you want the full recipe, check the earlier part of this article. Store leftover maple glazed Brussels sprouts in an airtight container. Keep them in the fridge for up to three days. If you want to freeze them, place the sprouts in a freezer-safe bag. They can last up to three months in the freezer. Make sure to remove as much air as possible from the bag. This helps prevent freezer burn. To reheat your Brussels sprouts, use the oven for the best results. Preheat the oven to 350°F (175°C). Spread the sprouts on a baking sheet and cover with foil to keep them moist. Heat for about 10-15 minutes. You can also microwave them, but this may make them softer. To maintain the texture and flavor, avoid reheating more than once. You can prepare Brussels sprouts in advance for easy meals. Trim and halve them a day before cooking. Store them in the fridge until you're ready to roast. You can also make the maple glaze ahead of time. Store it in the fridge for up to a week. When you are ready to serve, just warm the glaze slightly before drizzling it over the sprouts. This makes meal assembly fast and simple. For the full recipe, check the link above. Yes, you can prepare Maple Glazed Brussels Sprouts ahead of time. Cook them fully and let them cool. Store them in an airtight container in the fridge for up to three days. Reheat in the oven at 350°F until warm. This method keeps them tasty and fresh. Maple Glazed Brussels Sprouts pair well with many dishes. Try serving them with roasted chicken or grilled salmon. They also taste great with pork chops or a hearty grain like quinoa. Add some rice for a full meal. To thicken the glaze, you can simmer it longer until it reduces. This process helps to concentrate the flavors. Another option is to add a cornstarch slurry. Mix one tablespoon of cornstarch with two tablespoons of water. Stir it into the glaze while it simmers. You can use frozen Brussels sprouts, but fresh ones taste better. If using frozen, thaw and drain them first. Then, follow the same steps in the recipe. Keep in mind that frozen sprouts may have more moisture, affecting the glaze. Brussels sprouts are packed with nutrients. They are high in vitamins C and K. They also contain fiber, which aids digestion. Eating Brussels sprouts may help lower cholesterol and boost your immune system. Including them in your diet can support your overall health. Don't miss out on these small but mighty veggies! Check out the Full Recipe for more delicious ideas. In this article, we explored how to make delicious Maple Glazed Brussels sprouts. You learned about the key ingredients, preparation steps, and essential cooking tips for perfect results. We also discussed variations, storage tips, and answers to common questions. Brussels sprouts can be a tasty addition to your meals. Experiment with flavors and enjoy the health benefits they bring. Happy cooking!

Maple Glazed Brussels Sprouts Flavorful and Easy Dish

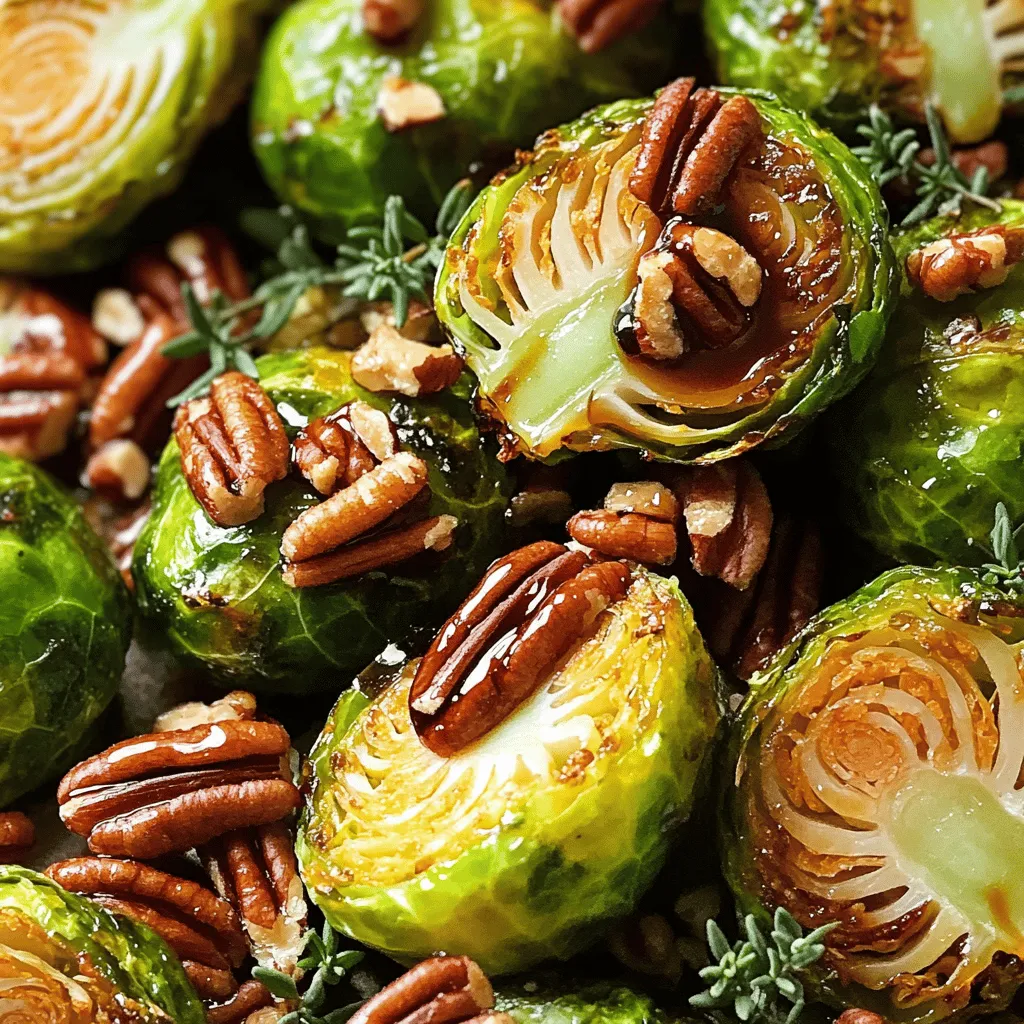
Are you ready to elevate your vegetable game? Maple Glazed Brussels Sprouts are a tasty and easy dish that even

Older posts
Newer posts
← Previous Page1 … Page48 Page49 Page50 … Page58 Next →

dsad

© 2025 Cooking Wells • Built with GeneratePress

Our Policies

  • Copyright Policy
  • Cookie Policy
  • GDPR Policy
  • Privacy Policy
  • Disclaimer
  • Terms Of Use

More Information

  • Home
  • About
  • Contact
  • Appetizers
  • Dessert
  • Dinner
  • Drinks
©2025, Cooking Wells About Back To Top