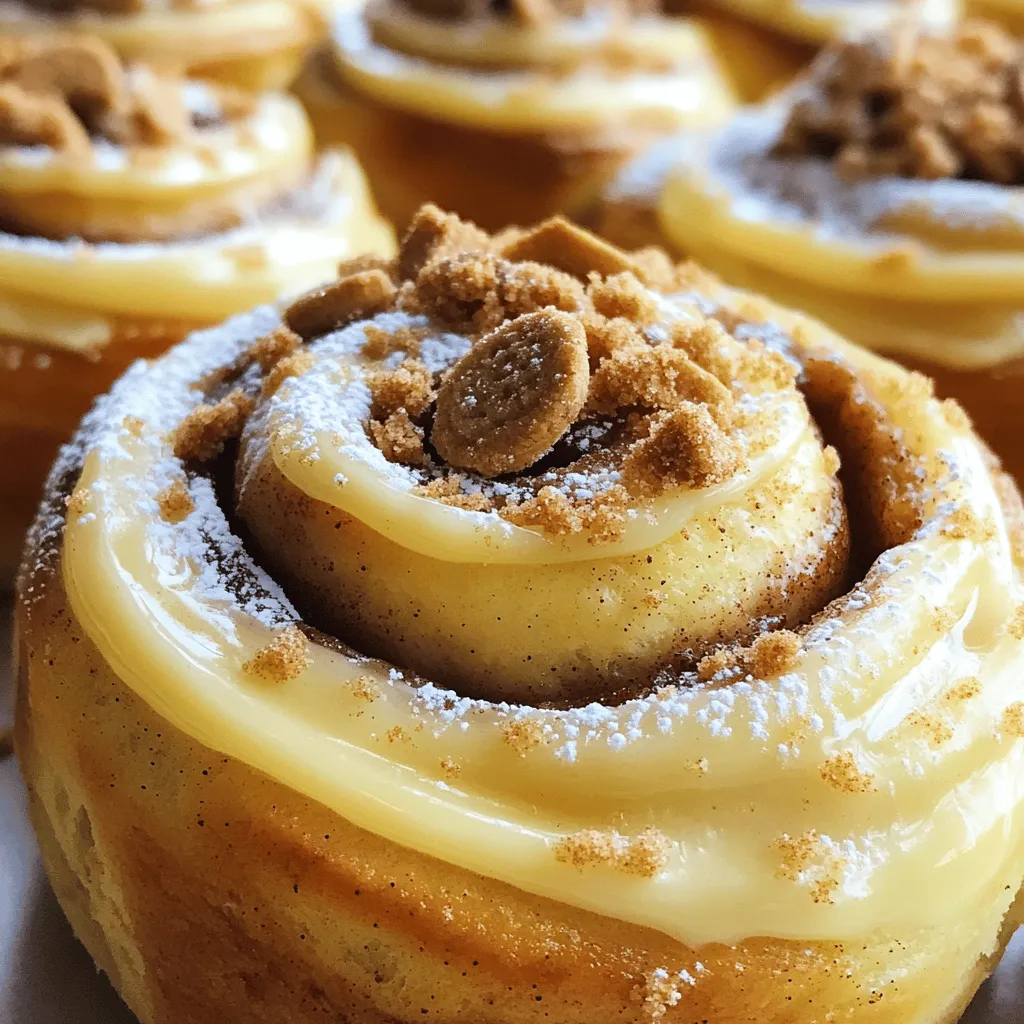
Are you ready to elevate your breakfast game? These Biscoff Cookie Butter Cinnamon Rolls are the ultimate treat for cookie lovers. Imagine warm, fluffy rolls filled with creamy Biscoff cookie butter and topped with sweet frosting. In this post, I’ll guide you through each step to create this delight in your kitchen. Gather your ingredients and tools, and let’s dive into a delicious baking adventure!
Ingredients
Main Ingredients List
– 2 cups all-purpose flour
– 2 tablespoons granulated sugar
– 1 teaspoon instant yeast
– 1/2 teaspoon salt
– 3/4 cup warm milk
– 3 tablespoons unsalted butter, melted
– 1/2 cup Biscoff cookie butter
– 2 tablespoons brown sugar
– 1 teaspoon ground cinnamon
– 1/2 cup powdered sugar (for frosting)
– 2 tablespoons milk (for frosting)
– 1/4 teaspoon vanilla extract (for frosting)
Tools You Will Need
– Mixing bowls
– Measuring cups and spoons
– Rolling pin
– Sharp knife or dough cutter
– Baking dish
Gathering the right ingredients and tools is key to making Biscoff cookie butter cinnamon rolls. For the dough, you’ll need the flour, sugar, yeast, salt, warm milk, and melted butter. The warm milk helps the yeast bloom, making your rolls fluffy.
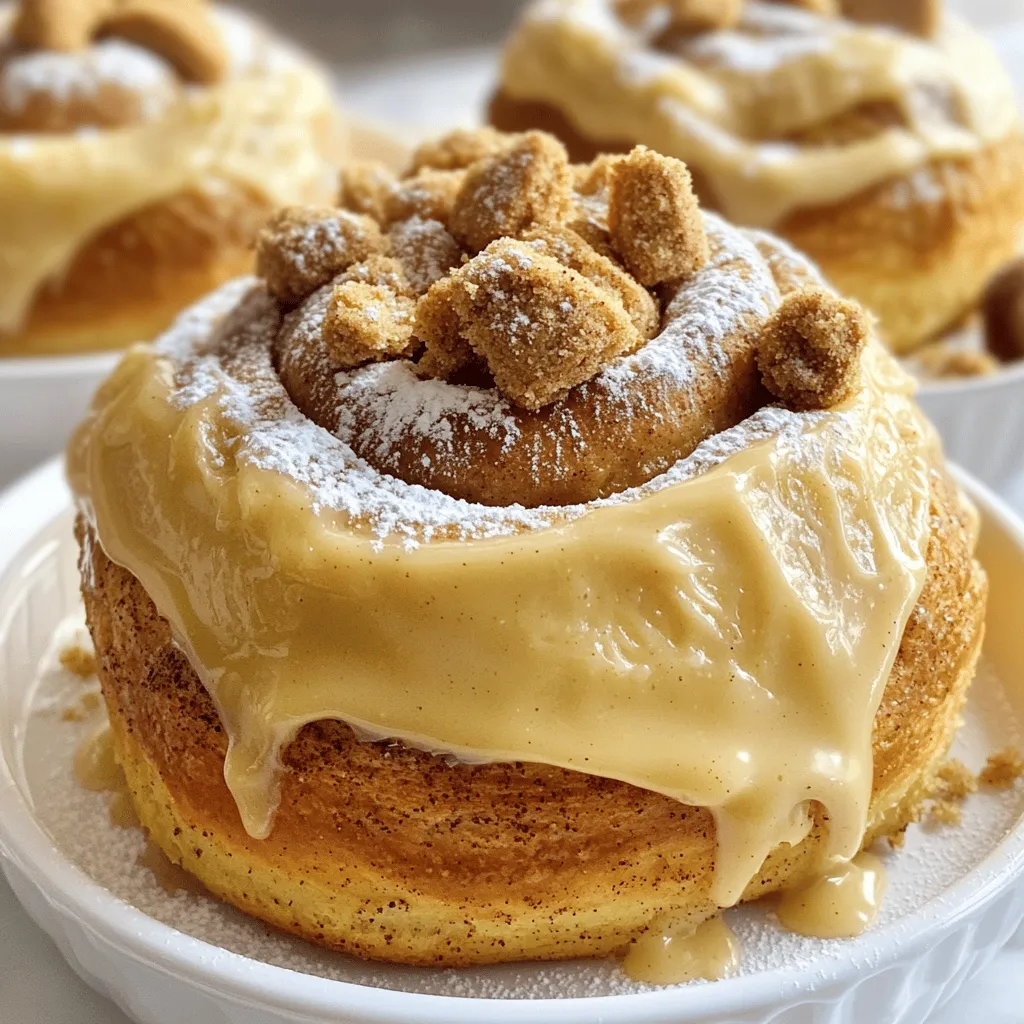
The Biscoff cookie butter is the star here. It adds a rich flavor that no one can resist. You also need brown sugar and cinnamon for the filling—it brings warmth and sweetness to each bite.
For the frosting, powdered sugar, milk, and vanilla extract will make a sweet glaze that ties everything together.
Make sure to have all your tools ready: mixing bowls for combining, measuring cups for accuracy, a rolling pin for shaping, and a baking dish for the final rise and bake.
This setup will help you create a delightful treat that’s perfect for any occasion!
Step-by-Step Instructions
Preparing the Dough
First, grab a large bowl. Combine warm milk, granulated sugar, and instant yeast in it. Let this mixture sit for about 5 minutes until it gets foamy. This shows the yeast is active. In a separate bowl, whisk together 2 cups of flour and 1/2 teaspoon of salt. Slowly add this flour mix into the yeast mixture. Add 3 tablespoons of melted butter too. Stir until a dough forms.
Kneading and Rising
Now, take the dough and place it on a floured surface. Knead it for about 5 to 7 minutes. You want the dough to feel smooth and elastic. After kneading, place the dough in a lightly greased bowl. Cover it with a kitchen towel and let it rise in a warm spot for about 1 hour. The dough should double in size.
Filling and Shaping
While the dough is rising, prepare the Biscoff filling. In a small bowl, mix together 1/2 cup of Biscoff cookie butter, 2 tablespoons of brown sugar, and 1 teaspoon of ground cinnamon. Once the dough has risen, punch it down to remove air. Roll it out into a rectangle about 1/4 inch thick on a floured surface. Spread the Biscoff filling over the rolled-out dough, leaving a small border around the edges. Starting from the long side, tightly roll the dough into a log. Pinch the seam to seal it. Cut the log into 12 equal pieces.
Final Rising and Baking
Place the rolls in a greased baking dish. Cover them and let them rise again for 30 to 45 minutes until they puff up. Preheat your oven to 350°F (175°C) while the rolls rise. Once ready, bake the rolls for 20 to 25 minutes. They should be golden brown when done.
Making and Adding Frosting
To make the frosting, whisk together 1/2 cup of powdered sugar, 2 tablespoons of milk, and 1/4 teaspoon of vanilla extract in a bowl. Adjust the frosting’s thickness with more milk or powdered sugar if needed. Once the rolls are out of the oven, let them cool slightly. Drizzle the frosting over the warm rolls, and enjoy this sweet treat!
Tips & Tricks
Perfecting Your Rolls
– Ensuring the right dough consistency: Start with warm milk at 110°F. This helps the yeast activate. Mix until the dough is smooth. It should feel soft but not sticky. If too sticky, add a little flour.
– Tips for achieving fluffy rolls: Knead the dough well for 5-7 minutes. This builds gluten, giving your rolls a nice rise. Let the dough rise in a warm spot until it doubles. A warm oven turned off works great!
Flavor Enhancements
– Adding spices or extras to the filling: You can mix in nutmeg or ginger for a spicy twist. Try adding chopped nuts or chocolate chips to the filling for extra crunch and flavor.
– Ideas for alternative frostings: Cream cheese frosting pairs well with Biscoff flavors. A simple vanilla glaze or a chocolate drizzle can also lift your rolls. Get creative with what you have at home!
Variations
Alternate Fillings
You can change the filling to mix things up. Try using Nutella or peanut butter instead of Biscoff cookie butter. You will still get a sweet and rich flavor. You can also add fruits like bananas or apples for a fresh twist. Nuts, such as walnuts or pecans, add a nice crunch and flavor.
Gluten-Free Options
If you need a gluten-free version, swap traditional flour with gluten-free flour. Be careful to choose a blend that works well for baking. You may need to adjust the amount of liquid to make the dough right. This helps those with gluten sensitivity enjoy the rolls too.
Vegan Modifications
To make this recipe vegan, replace dairy ingredients with plant-based ones. Use almond milk or oat milk in place of regular milk. For the frosting, mix powdered sugar with a plant-based milk and a bit of vanilla extract. This way, everyone can enjoy these tasty rolls, no matter their diet.
Storage Info
Short-Term Storage
To keep leftover cinnamon rolls fresh, wrap them in plastic wrap. This helps retain moisture. Store them in an airtight container at room temperature. They stay good for 2-3 days. If you want a warm treat, just pop them in the microwave for 10-15 seconds.
Long-Term Storage
For long-term storage, you can freeze your rolls. You have two options: freeze unbaked or baked rolls. If you freeze unbaked rolls, cover them tightly. Place them in a freezer bag. They can last for up to three months. When you’re ready to bake, let them thaw in the fridge overnight. Then, let them rise before baking.
If you prefer freezing baked rolls, allow them to cool completely. Wrap them in plastic wrap and then foil. They will also last for about three months. To reheat, take them out of the freezer and let them thaw at room temperature. Then, warm them in the oven at 350°F for about 10-15 minutes. Enjoy your Biscoff cookie butter cinnamon rolls anytime!
FAQs
How do I get my cinnamon rolls to rise?
To help your cinnamon rolls rise, you need warm conditions. Here are some tips:
– Use warm milk, not hot, for the dough.
– Let the dough rise in a warm spot, like near the oven.
– Cover the dough with a towel to keep it warm and moist.
– Be patient; let it rise until doubled in size.
These steps help create a light and fluffy roll. The yeast needs warmth and time to work its magic.
Can I use homemade Biscoff cookie butter?
Yes, you can use homemade Biscoff cookie butter. However, store-bought options are more consistent. Homemade versions might differ in texture or flavor. Ensure your homemade butter is smooth and spreadable. This can affect how well it spreads on the dough. If your cookie butter is too thick, warm it slightly to make it easier to work with.
What can I serve with Biscoff Cookie Butter Cinnamon Rolls?
These cinnamon rolls pair well with many drinks and snacks. Here are some ideas:
– Coffee or chai tea enhances the cinnamon flavor.
– Milk or almond milk offers a nice balance of creaminess.
– Fresh fruit, like berries or banana slices, adds a refreshing touch.
– Whipped cream can be a tasty topping for extra sweetness.
You can explore these options to make your treat even better. Enjoy your cinnamon roll experience!
You now have a solid recipe for Biscoff cookie butter cinnamon rolls. We covered the list of ingredients, tools, and each step to make them. I shared tips to improve your rolls and variations to try. Store your rolls properly to keep them fresh. With practice, you’ll impress everyone with your baking. Enjoy every delicious bite!