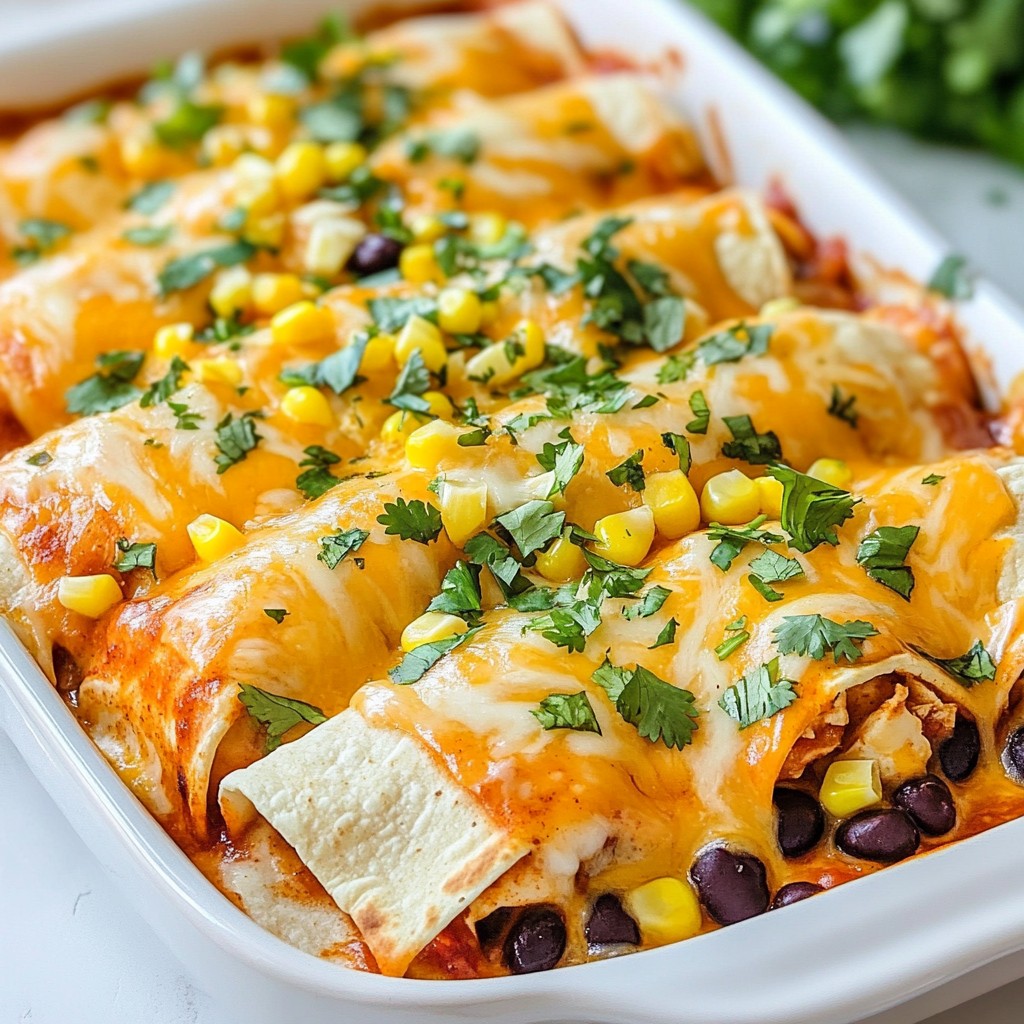
Are you looking for a delicious, easy meal that’s perfect for busy nights? My Cheesy Freezer-Friendly Chicken Enchilada Bake is the answer! This dish is loaded with flavor, and you can make it ahead of time. It freezes well, so you’ll always have a tasty meal ready to go. Get your ingredients ready and let’s make something special that will delight your taste buds and save you time!
Why I Love This Recipe
- Deliciously Cheesy: This recipe is loaded with gooey cheddar cheese that pulls apart beautifully, making every bite a cheesy delight.
- Freezer-Friendly: Perfect for meal prep, you can make a big batch and freeze it for later, ensuring you always have a hearty meal ready to go.
- Quick to Prepare: With just 20 minutes of prep time, this dish comes together quickly, making it ideal for busy weeknights.
- Nutritious Ingredients: Packed with protein from chicken and fiber from black beans, this recipe is not only tasty but also nutritious!
Ingredients
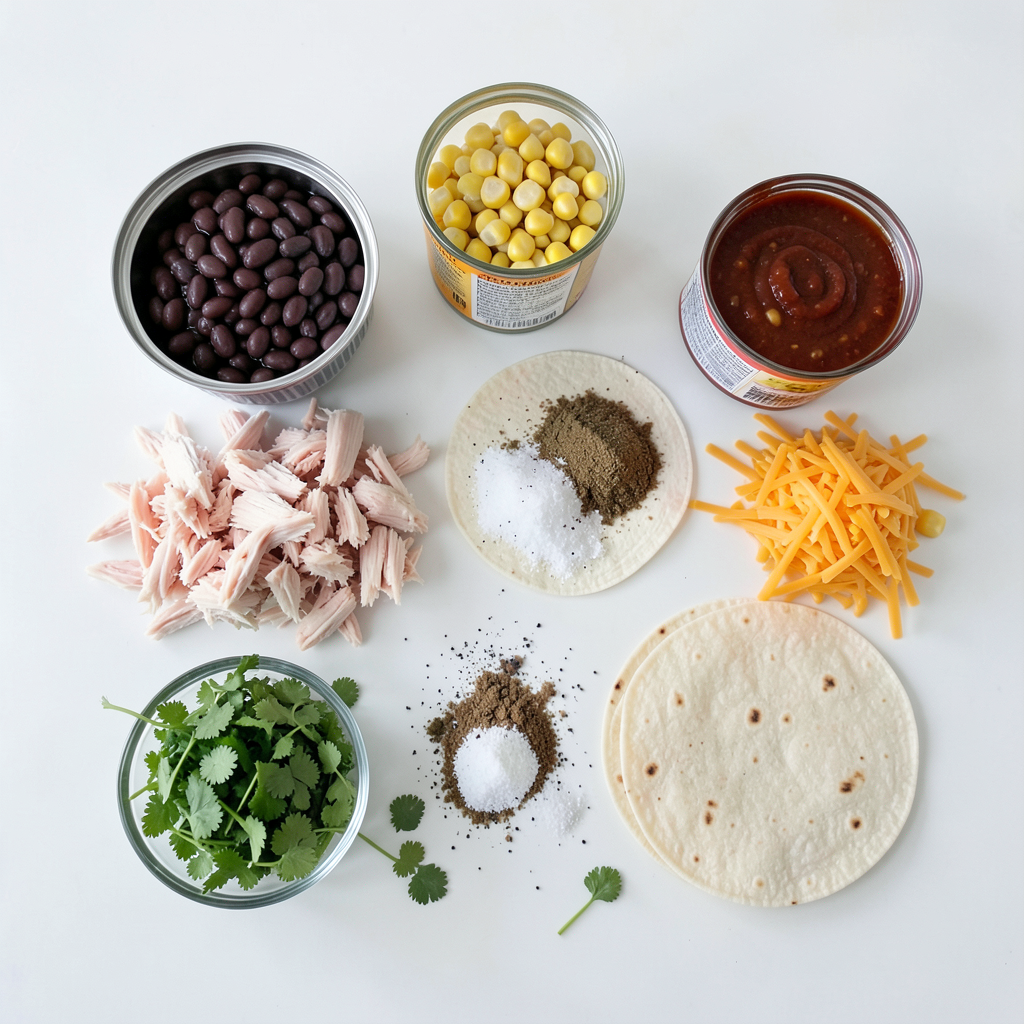
List of Ingredients
- 3 cups cooked chicken, shredded
- 1 can (15 oz) black beans, rinsed and drained
- 1 cup corn, frozen or canned (drained)
- 1 can (10 oz) red enchilada sauce
- 1 can (4 oz) diced green chilies
- 2 cups shredded cheddar cheese
- 8 small flour tortillas (or large ones cut in half)
- 1 teaspoon ground cumin
- 1 teaspoon garlic powder
- Salt and pepper to taste
- ¼ cup chopped fresh cilantro (optional for garnish)
Optional Ingredients and Substitutions
You can change up this recipe to fit your taste. Here are some ideas:
- Use rotisserie chicken for quick prep.
- Swap black beans for pinto beans or kidney beans.
- Try fresh corn instead of canned for a sweeter taste.
- Substitute cheddar cheese with Monterey Jack or pepper jack for a kick.
- Add diced onions or bell peppers for extra crunch.
Cooking Tools and Utensils Needed
Gather these tools to make cooking easy:
- Large mixing bowl
- 9x13 inch baking dish
- Aluminum foil
- Spoon for mixing
- Measuring cups and spoons
- Oven mitts for safety
- Knife and cutting board for any chopping needed
Step-by-Step Instructions
Preparation of Ingredients
Start by gathering your ingredients. You will need:
- 3 cups cooked chicken, shredded
- 1 can (15 oz) black beans, rinsed and drained
- 1 cup corn, frozen or canned (drained)
- 1 can (10 oz) red enchilada sauce
- 1 can (4 oz) diced green chilies
- 2 cups shredded cheddar cheese
- 8 small flour tortillas (or large ones cut in half)
- 1 teaspoon ground cumin
- 1 teaspoon garlic powder
- Salt and pepper to taste
- ¼ cup chopped fresh cilantro (optional for garnish)
Once you gather everything, preheat your oven to 375°F (190°C). This ensures the dish cooks evenly.
Layering the Enchiladas
In a large bowl, mix the cooked chicken, black beans, corn, green chilies, cumin, garlic powder, and 1 cup of enchilada sauce. Stir well and add salt and pepper to taste. This mix is the heart of your dish.
In a 9x13 inch baking dish, spread a thin layer of the remaining enchilada sauce on the bottom. Place half of the tortillas on top, overlapping them slightly. Then, spoon half of the chicken mixture over the tortillas. Sprinkle 1 cup of shredded cheddar cheese on top.
Repeat the layers with the remaining tortillas, chicken mixture, and finish with the last cup of cheese on top.
Baking Instructions
Cover the baking dish with aluminum foil. This keeps the moisture in and prevents drying out. Bake for 25 minutes. After that, remove the foil and bake for another 15 minutes. Your cheese should be bubbly and golden.
Once done, take it out and let it sit for about 5 minutes. This makes cutting easier. If you like, garnish with chopped cilantro before serving. Enjoy your tasty creation!
Tips & Tricks
How to Make Freezer-Friendly Enchilada Bake
To make this dish freezer-friendly, first cool it completely. Then, cover it tightly with plastic wrap. Add a layer of foil on top for extra protection. This keeps it fresh for up to three months. When you're ready to eat, just thaw it in the fridge overnight. Reheat in the oven at 350°F until it's hot all the way through.
Best Practices for Storing Leftovers
For any leftovers, let them cool first. Store them in an airtight container. This helps keep the flavors nice. Consume within three to four days for the best taste. If you want to freeze leftovers, follow the same steps as above. It’s a great way to enjoy this dish later!
Suggestions for Extra Flavor Enhancements
Want to amp up the flavor? Try adding some taco seasoning to the chicken mix. A squeeze of lime juice can brighten the dish. You can also toss in some diced bell peppers or onions for a crunchy texture. If you like heat, add sliced jalapeños to the layers. These simple tips can make your enchilada bake even more delightful!
Pro Tips
- Freezer Storage: To make it freezer-friendly, allow the dish to cool completely, cover it with plastic wrap and then foil, and store it in the freezer for up to 3 months.
- Thawing Method: When ready to serve, thaw in the refrigerator overnight to ensure even reheating.
- Cheese Variations: Feel free to mix different types of cheese, like Monterey Jack or Pepper Jack, for added flavor.
- Make it Spicy: Add jalapeños or a splash of hot sauce to the filling for an extra kick.
Variations
Vegetarian Version
To make a vegetarian version, swap chicken for more beans. Use 4 cups black beans or pinto beans instead. Add extra veggies like bell peppers or zucchini for crunch. You can also mix in some spinach or kale for added nutrients. This makes a hearty meal that everyone will love.
Spicy Version with Jalapeños
For a spicy kick, add diced jalapeños to your filling. Use one to two fresh jalapeños, depending on your heat level. Mix them in with the chicken, beans, and corn. You can also sprinkle more jalapeños on top before baking. This spicy twist will excite your taste buds!
Alternative Sauces for Different Flavor Profiles
Changing the sauce can shift the flavor. Try using green enchilada sauce instead of red for a fresh taste. Salsa verde gives a tangy twist. You can even use a homemade sauce for a personal touch. Mix roasted tomatoes, garlic, and spices to create a unique flavor profile.
Storage Info
How to Properly Freeze the Dish
To freeze your Cheesy Chicken Enchilada Bake, first let it cool down completely. This helps keep the texture right. Next, cover the dish tightly with plastic wrap. Then, add a layer of aluminum foil to protect it from freezer burn. Label the dish with the date, so you remember when you made it. You can freeze it for up to three months.
Thawing and Reheating Instructions
When you're ready to enjoy your enchilada bake, move it from the freezer to the fridge. Let it thaw overnight for the best results. If you're short on time, you can also thaw it in the microwave. After thawing, preheat your oven to 350°F (175°C). Bake it until it's hot all the way through, usually around 20-30 minutes. You want the cheese to be melted and bubbly.
Shelf Life and Best Use Timeline
The Cheesy Chicken Enchilada Bake stays good in the freezer for three months. After thawing, eat it within three days for the best taste and quality. If you notice any changes in smell or texture, it’s best to discard it. Enjoying it fresh is always the best choice!
FAQs
Can I use different types of cheese?
Yes, you can use different types of cheese. Try Monterey Jack, pepper jack, or even mozzarella. Each adds a unique flavor. Mixing cheeses can make the dish more exciting. Just keep the total amount around two cups.
How long can this dish stay in the freezer?
This dish can stay in the freezer for up to three months. Make sure it is well wrapped. Use plastic wrap and then foil to prevent freezer burn. Label the dish with the date. This way, you’ll know when to use it.
Can I prepare it ahead of time without freezing?
Yes, you can prepare it ahead of time without freezing. Assemble the dish, then cover it and keep it in the fridge. It can sit for up to 24 hours. When ready, bake it straight from the fridge. Just add a few extra minutes to the baking time.
You learned about the key ingredients, tools, and steps to make enchiladas. I shared tips for storage and creating variations to suit your taste. You can easily make this dish your own. Remember, frozen enchilada bake is a great meal for busy nights. With my tips, you’ll enjoy every bite. Now, get cooking and have fun!