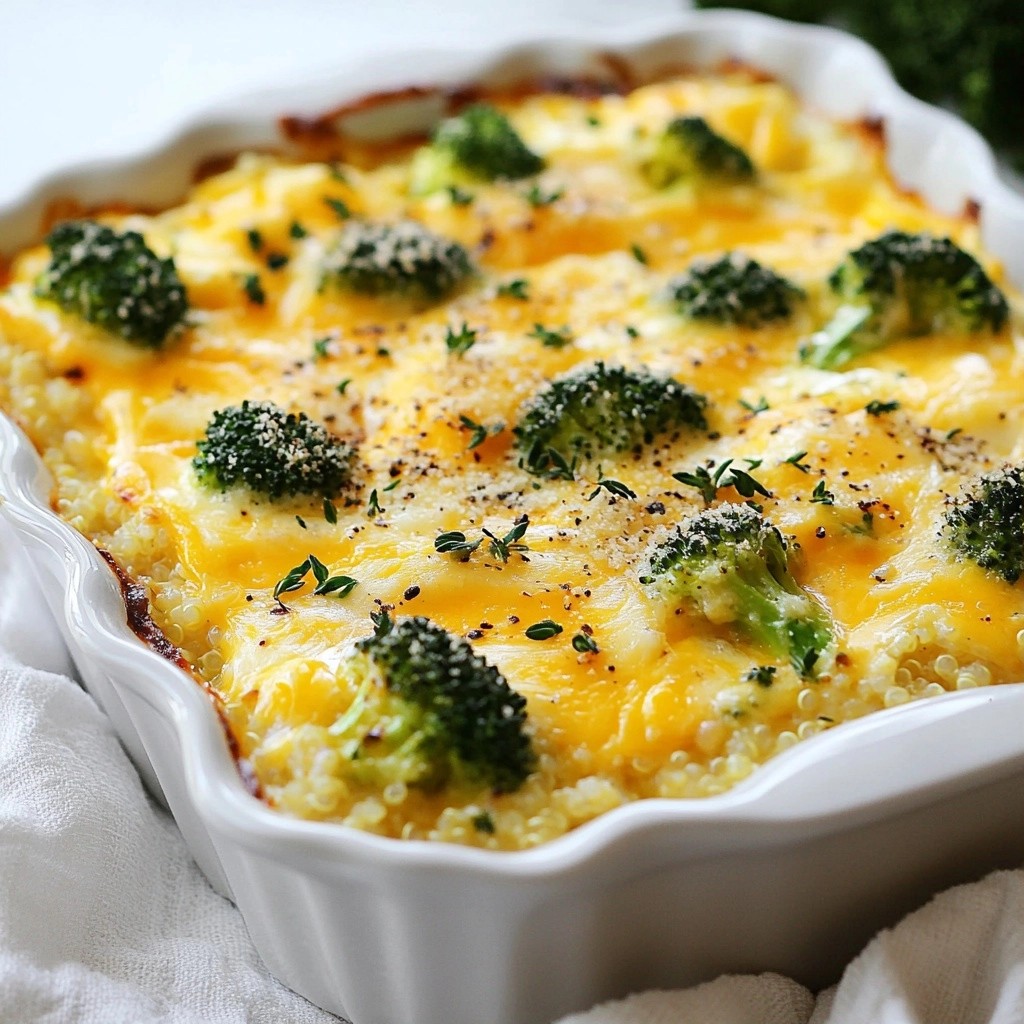
Looking for an easy and tasty meal that you can make ahead and freeze? You’re in the right place! My Cheesy Freezer-Friendly Quinoa and Broccoli Bake is packed with flavor and nutrition. It combines fluffy quinoa, fresh broccoli, and your favorite cheeses for a dish everyone will love. Whether you need quick lunches or cozy dinners, this bake has you covered. Let's dive into the ingredients and instructions!
Why I Love This Recipe
- Healthy and Nutritious: This dish is packed with protein from quinoa and vitamins from broccoli, making it a wholesome meal option.
- Freezer-Friendly: Perfect for meal prep, this bake can be made ahead of time and stored in the freezer for quick, easy meals later.
- Cheesy Goodness: The combination of cheddar and cream cheese creates a creamy, cheesy texture that everyone will love.
- Easy to Customize: Feel free to add your favorite vegetables or proteins to make this dish your own!
Ingredients
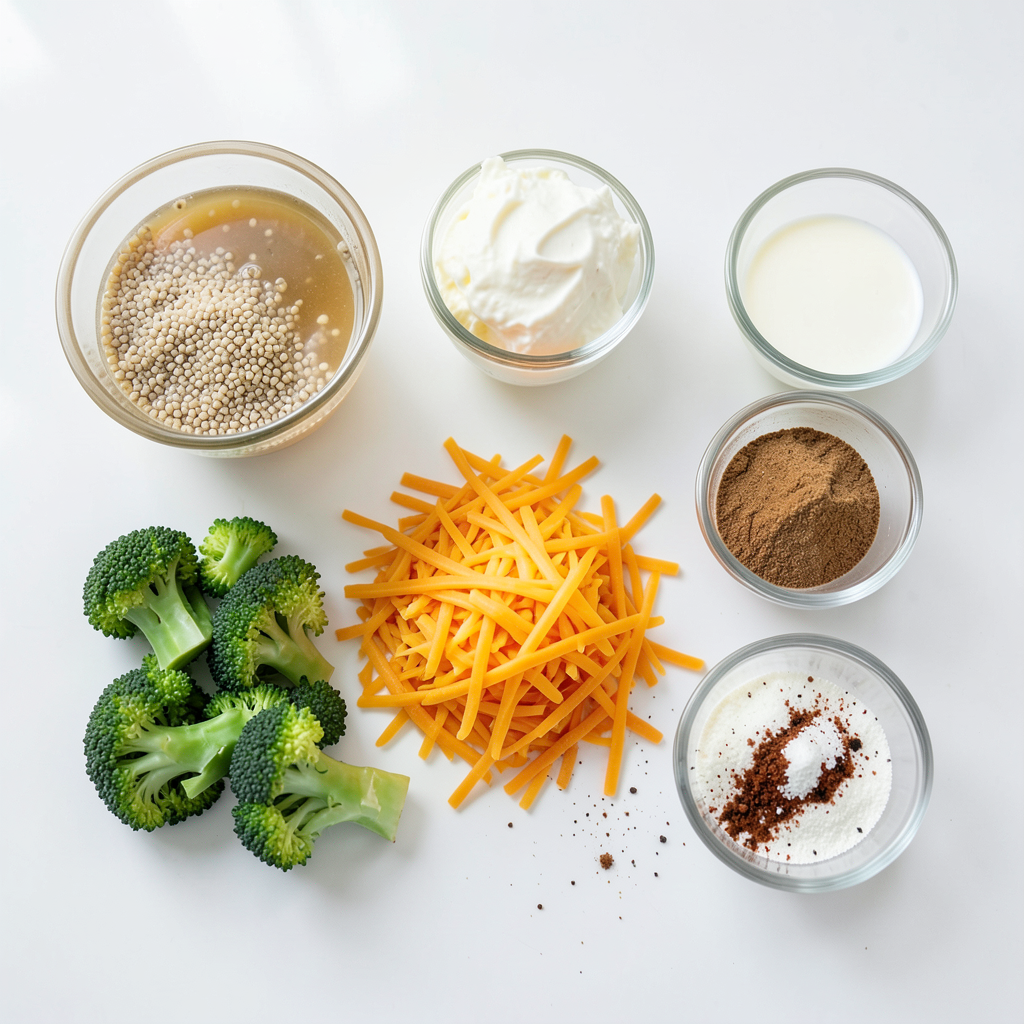
Main Ingredients
- 1 cup quinoa, rinsed
- 2 cups vegetable broth
- 2 cups broccoli florets (fresh or frozen)
- 1 cup shredded cheddar cheese
- 1/2 cup cream cheese, softened
Quinoa is the star of this dish. It cooks fluffy and adds protein. Broccoli brings color, crunch, and vitamins. The cheese adds creaminess and flavor. I love using both cheddar and cream cheese for the best blend.
Additional Ingredients
- 1/2 cup milk (dairy or non-dairy)
- 1/2 teaspoon garlic powder
- 1/2 teaspoon onion powder
- 1/4 teaspoon smoked paprika
- Salt and pepper to taste
Milk makes the bake creamy. You can use any milk you like. Garlic powder and onion powder add depth. Smoked paprika gives a nice twist. Don’t forget to season with salt and pepper!
Optional Toppings
- 1/4 cup grated Parmesan cheese (optional for topping)
- Fresh herbs for garnish (optional)
Parmesan adds a salty kick on top. Fresh herbs like parsley can brighten the dish. These toppings make your bake look and taste even better!
Step-by-Step Instructions
Preparing the Quinoa
Cooking the quinoa Start by rinsing 1 cup of quinoa under cold water. This removes the natural coating called saponin, which can make quinoa taste bitter. After rinsing, put it in a medium saucepan. Add 2 cups of vegetable broth. Bring this to a boil on high heat. Once it boils, reduce the heat to low. Cover the pot and let it simmer for about 15 minutes. Check that the liquid is absorbed and the quinoa is fluffy. Remove it from heat and let it cool for a few minutes.
Tips for rinsing quinoa Make sure to use a fine mesh strainer. This keeps the quinoa from slipping through. Rinse under cold running water for about 1-2 minutes. Give it a good shake to remove excess water before cooking.
Steaming the Broccoli
Method for fresh broccoli Take 2 cups of fresh broccoli florets. Steam them in a pot for about 4-5 minutes. You want them bright green and tender but still crunchy. A steamer basket works great for this.
Instructions for frozen broccoli If you use frozen broccoli, just follow the package instructions. Usually, you can microwave it for a few minutes until it’s hot and tender.
Combining Ingredients
Mixing the ingredients In a large mixing bowl, combine the cooked quinoa and steamed broccoli. Add 1 cup of shredded cheddar cheese, 1/2 cup of softened cream cheese, and 1/2 cup of milk. Sprinkle in 1/2 teaspoon of garlic powder, 1/2 teaspoon of onion powder, and 1/4 teaspoon of smoked paprika. Season with salt and pepper to taste. Mix everything with a spoon until well combined.
Transfer to baking dish Take a greased 9x9 inch baking dish and pour the mixture in. Spread it evenly. If you like, you can top it with 1/4 cup of grated Parmesan cheese for an extra cheesy bite.
Tips & Tricks
Perfecting Texture
To get the right texture, use the right water to quinoa ratio. I like 2 cups of vegetable broth for 1 cup of quinoa. Cook the quinoa until it’s fluffy and the liquid is gone. After cooking, let it cool a bit. Cooling helps it firm up and mix well with other ingredients.
Enhancing Flavor
You can change the taste by adding spices. Try more garlic powder or a bit of cayenne for heat. Change the cheese too. Cheddar is great, but you can mix in mozzarella or gouda for extra creaminess. Each cheese brings a new layer of flavor.
Presentation Ideas
When serving, scoop the bake into individual bowls. This looks nice and makes it easy to eat. Add a sprinkle of extra cheese on top for a pop of color. You can use fresh herbs as a garnish. They add a fresh taste and make the dish look pretty.
Pro Tips
- Storage Tip: This dish can be frozen for up to 3 months, making it a perfect make-ahead meal for busy days.
- Cheese Variation: Feel free to experiment with different types of cheese like mozzarella or gouda for a unique flavor twist.
- Broccoli Alternatives: You can substitute broccoli with other vegetables such as spinach, kale, or cauliflower for variety.
- Spice It Up: Add a pinch of red pepper flakes or a dash of hot sauce for a spicy kick to the dish!
Variations
Dietary Adjustments
Making it vegan: To turn this dish vegan, swap out the cheese for plant-based options. Use vegan cream cheese and dairy-free milk. Nutritional yeast adds a cheesy flavor without dairy.
Gluten-free options: This recipe is naturally gluten-free. Just ensure your vegetable broth is labeled gluten-free. It’s a great choice for those with gluten sensitivities.
Adding Protein
Suggestions for meats or legumes: You can add cooked chicken, turkey, or ground beef for extra protein. If you prefer plant-based protein, mix in some black beans or chickpeas. They add texture and nutrition.
Alternative veggies: Feel free to swap broccoli for other veggies. Spinach, bell peppers, or zucchini work well. Just make sure they are cooked before mixing in.
Different Cheeses
Exploring other cheese options: While cheddar is a classic choice, you can experiment with other cheeses. Try mozzarella for a gooey texture or feta for a tangy kick.
Unique flavor combinations: Mixing cheeses can create exciting flavors. Combine smoked gouda with sharp cheddar for a rich taste. Add fresh herbs like basil or thyme for an extra layer of flavor.
Storage Info
Freezer Instructions
To freeze the Cheesy Freezer-Friendly Quinoa and Broccoli Bake, let it cool completely. Next, cover it tightly with plastic wrap and aluminum foil. You can also use an airtight freezer-friendly container. This method keeps the bake fresh and prevents freezer burn. It can last in the freezer for up to three months.
Reheating Guidelines
When you are ready to enjoy your bake, thaw it overnight in the refrigerator. This helps it heat evenly. Preheat your oven to 350°F (175°C) for reheating. Bake the dish for 20-25 minutes until it is hot throughout.
Shelf Life
The baked dish can stay in the freezer for three months without losing quality. After that, it may still be safe to eat, but the taste and texture might change. Always check for signs of spoilage before eating. Look for any off smells or unusual colors. If anything seems off, it’s best to toss it.
FAQs
What is the best way to reheat the quinoa bake?
The best way to reheat the quinoa bake is in the oven. Preheat the oven to 350°F (175°C). Place the quinoa bake in a baking dish. Cover it with foil to keep it moist. Heat for 20-25 minutes or until hot. You can also microwave it, but the oven gives better texture.
Can I prepare this dish ahead of time?
Yes, you can prepare this dish ahead of time. Make the quinoa bake and let it cool. After cooling, cover it tightly. You can store it in the fridge for up to 3 days. Just remember to reheat it before serving. It’s a great make-ahead meal for busy days.
Is quinoa bake healthy?
Yes, quinoa bake is healthy. Quinoa is a complete protein, meaning it has all the essential amino acids. It is also high in fiber, which helps with digestion. Broccoli adds vitamins and minerals like C and K. Using low-fat cheese can keep it lighter. Overall, it’s a tasty and nutritious option.
This blog post covered the key ingredients in a tasty quinoa bake. You learned about the main items like quinoa, broccoli, and cheese, as well as helpful cooking steps. We explored tips for perfecting the bake's texture and flavor. Variations allow for personal tastes and dietary needs. Lastly, proper storage helps keep this dish fresh longer.
Enjoy making this easy, healthy meal. It’s fun to create something delicious and good for you!