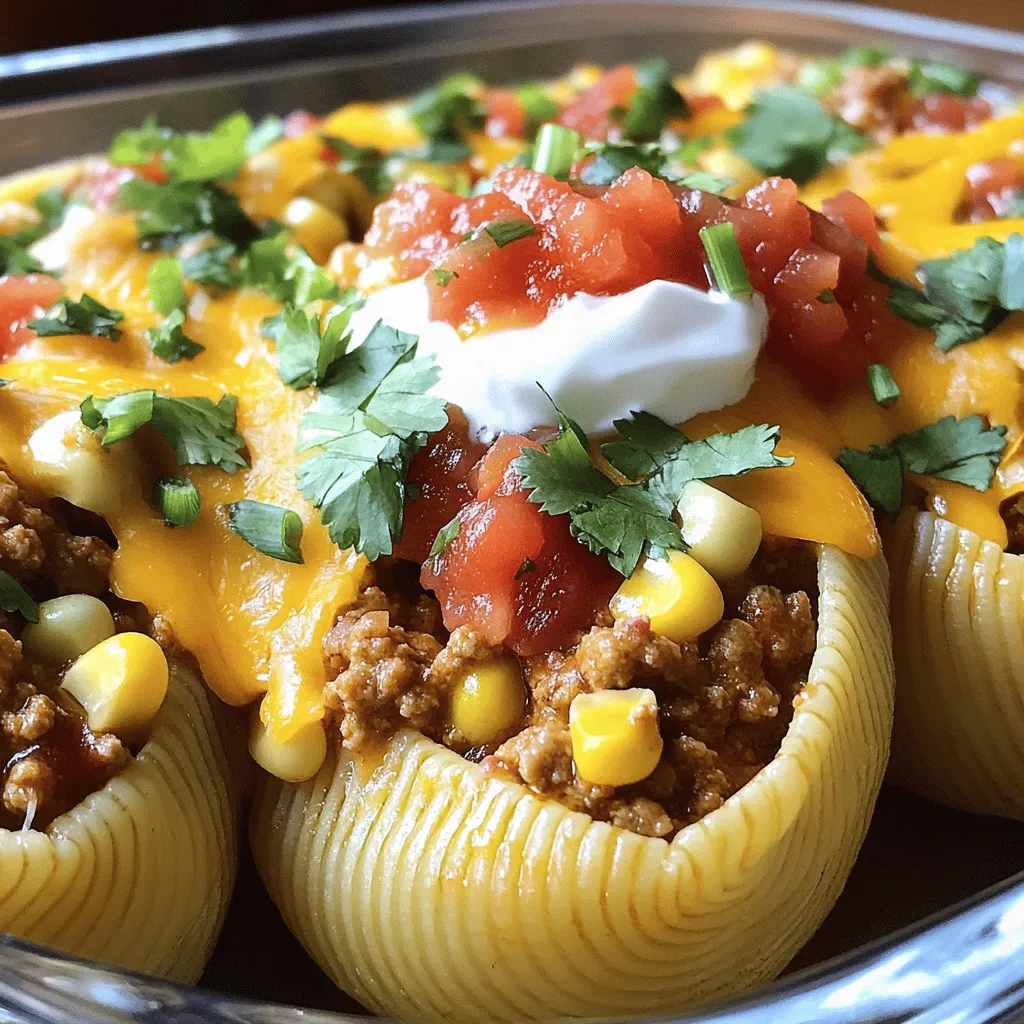
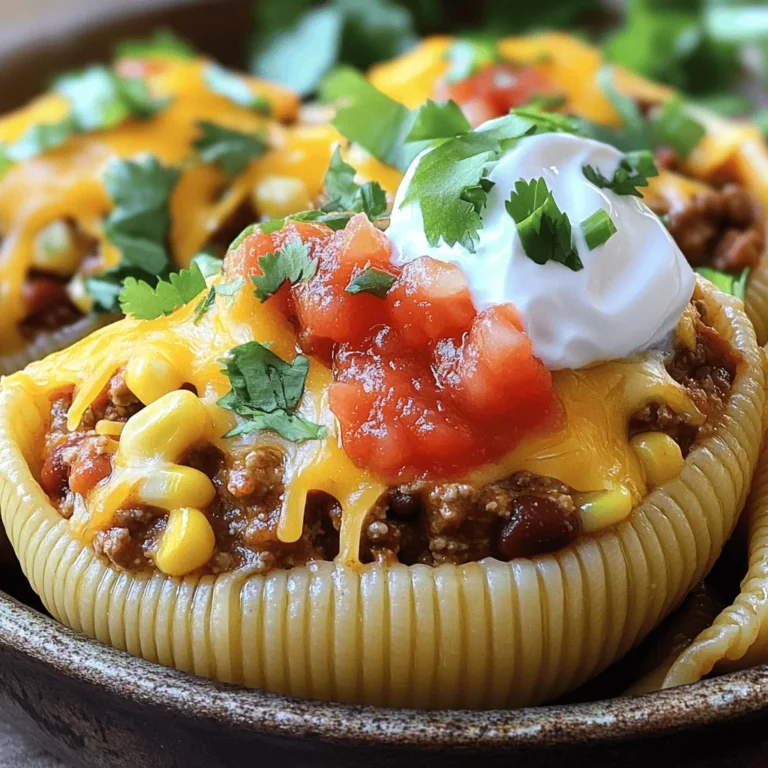
Do you love tacos and pasta? Then you’ll adore my Cheesy Taco Stuffed Shells! This fun dish combines two favorites into one tasty meal. With simple steps and easy ingredients, you’ll impress your family and friends. Get ready to enjoy cheesy goodness that’s packed with flavor. Let’s dive into this quick and delicious recipe you can make any night of the week!
Ingredients
Full list of ingredients
- 20 jumbo pasta shells
- 1 lb ground beef or turkey
- 1 packet taco seasoning
- 1 cup refried beans
- 1 cup corn (canned or frozen)
- 1 cup salsa
- 2 cups shredded Mexican cheese blend
- 1/2 cup chopped green onions
- 1/2 cup sour cream (for topping)
- Fresh cilantro (for garnish)
- Salt and pepper to taste
To make cheesy taco stuffed shells, gather these tasty ingredients. Jumbo pasta shells hold everything inside. You can use ground beef or turkey for protein. Taco seasoning adds flavor. Refried beans give a creamy texture. Corn adds sweetness and crunch. Salsa brings spice and moisture.
You need two cups of shredded Mexican cheese blend for a gooey touch. Don’t forget the green onions for a fresh kick. Sour cream on top makes it rich and cool. Fresh cilantro adds brightness. Lastly, season with salt and pepper to your liking.
This mix of ingredients creates a fun and delicious dish. It’s perfect for dinner or a gathering. Enjoy these flavors together in each bite!
Step-by-Step Instructions
Preheat and Prepare
First, preheat your oven to 375°F (190°C). This step is key. It ensures even cooking for your stuffed shells. While the oven heats, fill a large pot with water. Add some salt and bring it to a boil. Once the water is bubbling, add the jumbo pasta shells. Cook them according to the package, which is about 8-10 minutes. You want them al dente, so they hold up when stuffed. After cooking, drain the shells and set them aside to cool.
Cooking the Filling
Next, grab a large skillet and place it over medium heat. Add your ground beef or turkey to the pan. Cook this meat until it turns brown. This usually takes about 5-7 minutes. Drain any extra fat from the pan. Now, sprinkle in the taco seasoning. Pour in 3/4 cup of water, too. Stir it well and let it cook for another 5 minutes. This lets the flavors blend. After that, add in the refried beans, corn, and 1 cup of salsa. Mix everything until well combined. Taste it and add salt and pepper as needed.
Assembling the Dish
Now, it’s time to stuff the shells! Take each cooked shell and carefully spoon in the taco filling. Place the filled shells open side up in a greased baking dish. Once all shells are filled, pour the remaining salsa over them. This adds flavor and moisture. Finally, sprinkle the shredded Mexican cheese blend on top evenly.
Baking the Cheesy Taco Stuffed Shells
Cover your baking dish with aluminum foil. This helps keep the shells moist while they cook. Place the dish in the preheated oven and bake for 20 minutes. After that, remove the foil and bake for an additional 10 minutes. This last step melts the cheese and makes it bubbly.
Garnishing and Serving Suggestions
Once baked, take the dish out and let it cool for a few minutes. This helps avoid burns when serving. Top each shell with a dollop of sour cream. Then, sprinkle on some sliced green onions and fresh cilantro. These toppings add freshness and flavor, making your dish look great!
Tips & Tricks
Cooking Method Insights
You can cook Cheesy Taco Stuffed Shells in different ways. You might use an air fryer or stovetop. Both methods can give you tasty results. For air frying, cook at 375°F for about 15 minutes. For stovetop, cover and simmer on low for 20 minutes.
To get the best texture, make sure the pasta shells are al dente. If they cook too long, they can break. Drain them well and let them cool before stuffing. This helps keep them firm.
Ingredient Substitutions
If you want to skip the meat, use black beans or lentils. Both options give great flavor. You can also use tempeh or tofu for a protein boost.
For a vegan option, replace sour cream with cashew cream or avocado. You can find plant-based cheese in stores too. Just check the labels to ensure they fit your diet.
Presentation Tips
To serve, place the stuffed shells on a big platter. This looks nice and invites sharing. Drizzle some extra salsa on top for color.
For plating, stack the shells in a pyramid shape. This adds height and looks fancy. Finish with green onions and cilantro for a pop of color. Each bite will be as beautiful as it is delicious!

Variations
Different Meat Options
You can switch out the ground beef for other meats. Chicken or turkey works well. These meats keep the dish light and tasty. If you use chicken, try shredded rotisserie chicken for a quick option. Turkey adds a nice lean touch without losing flavor. Both options pair perfectly with the taco seasoning, making them fun and easy swaps.
Flavor Enhancements
Want to spice things up? Add some chili powder or cumin to the filling. You can also mix in diced jalapeños for heat. Toppings can also change the dish. Try adding sliced olives, diced tomatoes, or avocado. Fresh lime juice can brighten the flavor too. Experimenting with these extras keeps the recipe exciting and new.
Dietary Adjustments
If you need gluten-free options, use gluten-free pasta shells. Make sure to check the labels. For those on a low-carb diet, replace pasta with zucchini noodles. You can also use cauliflower rice as a filling base. These swaps keep the taste while fitting your diet.
Storage Info
How to Store Leftovers
To keep your cheesy taco stuffed shells fresh, follow these steps:
- Storing in the fridge: Place any leftovers in an airtight container. Store them in the fridge for up to three days. Make sure to cool them down before sealing the container.
- Freezing instructions: If you want to save them longer, freeze the stuffed shells. Wrap them tightly in plastic wrap, then place them in a freezer-safe bag. They can last up to three months in the freezer.
Reheating Tips
When it’s time to enjoy your leftovers, reheating them correctly matters. Here are the best methods for reheating stuffed shells:
- Oven method: Preheat your oven to 350°F (175°C). Place the stuffed shells in a baking dish. Add a splash of water or salsa to keep them moist. Cover with foil and bake for about 20 minutes.
- Microwave method: Put the shells on a microwave-safe plate. Add a little salsa or water to keep them from drying out. Heat in the microwave for about 2-3 minutes, checking every minute.
Using these methods will keep your cheesy taco stuffed shells tasty and enjoyable!
FAQs
What can I substitute for taco seasoning?
You can make your own taco seasoning. Use these spices:
- 1 tsp chili powder
- 1 tsp cumin
- 1 tsp garlic powder
- 1 tsp paprika
- 1/2 tsp onion powder
- Salt and pepper to taste
Mix these spices together. This blend gives great flavor and is easy to make.
Can I prepare Cheesy Taco Stuffed Shells ahead of time?
Yes, you can prep these shells in advance. Just follow these steps:
1. Cook and stuff the shells.
2. Cover them well and refrigerate.
3. Bake them when ready. Just add a few extra minutes to the baking time.
This makes weeknight dinners a breeze!
How do I make this dish spicier?
To add heat, try these options:
- Add diced jalapeños to the filling.
- Include a dash of hot sauce in the salsa.
- Use pepper jack cheese instead of regular cheese.
These small changes can really kick up the spice!
Can I use other types of cheese?
Absolutely! Here are some great options:
- Cheddar cheese for a sharper taste.
- Monterey Jack for a creamy texture.
- Queso fresco for a crumbled topping.
Mix and match to find your favorite cheese combo!
What’s the best way to reheat stuffed shells?
For the best results, use the oven. Follow these steps:
1. Preheat your oven to 350°F (175°C).
2. Place shells in a baking dish. Add a bit of salsa or water to keep them moist.
3. Cover with foil and heat for 15-20 minutes.
This keeps the cheese melted and the pasta soft!
You can create delicious Cheesy Taco Stuffed Shells using simple ingredients and steps. Remember to preheat your oven and prepare your pasta shells. Whether you choose beef or a meat alternative, the filling is key to flavor. Garnish with fresh toppings for a pleasing look and taste. Don’t forget about storage and reheating options for leftovers.
Lastly, feel free to explore variations that suit your diet. Enjoy making this fun dish, and share it with family and friends. It’s sure to be a hit!


