Chocolate Chip Cookie Dough Bites Tempting Sweet Treat

WANT TO SAVE THIS RECIPE?

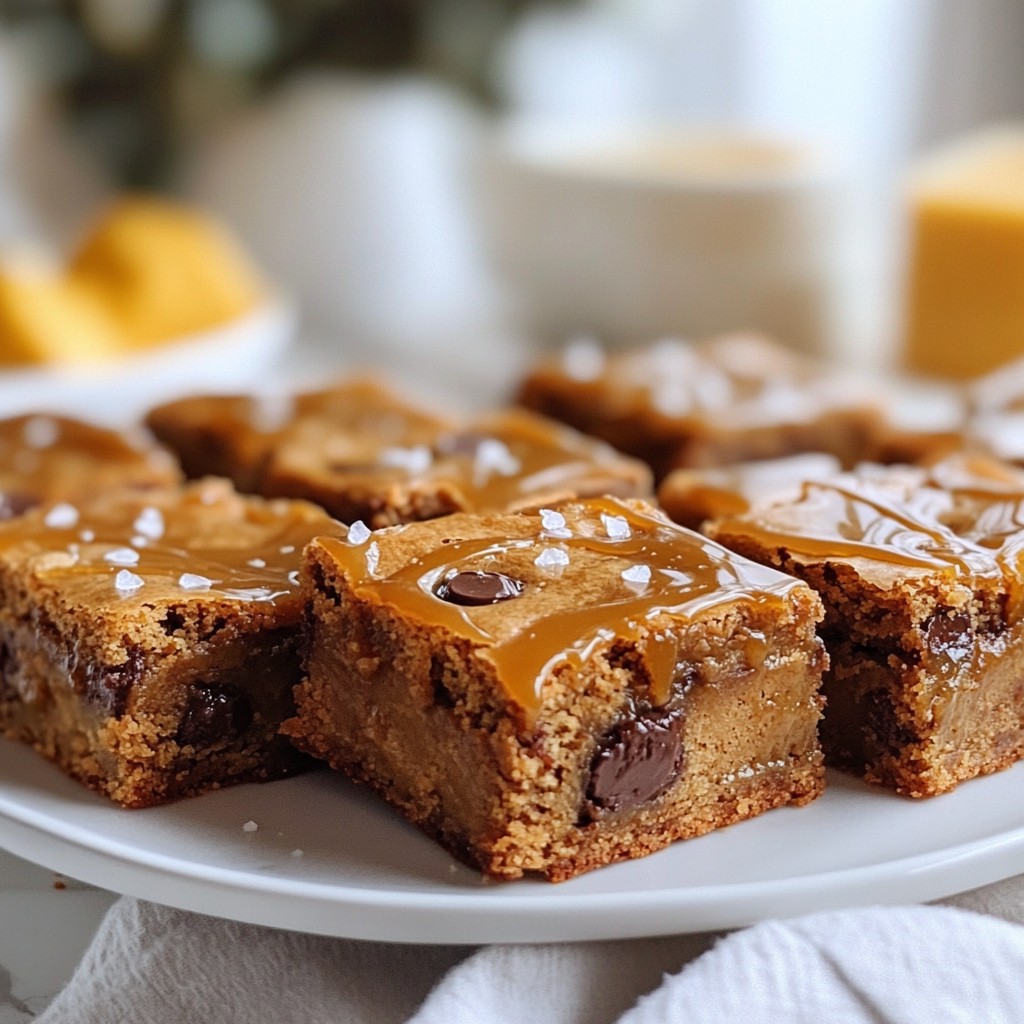
Craving a sweet treat that’s both fun and easy to make? Let me introduce you to Chocolate Chip Cookie Dough Bites! These bites are a delicious way to enjoy classic cookie dough in a safe, no-bake form. Made with just a handful of simple ingredients, they can cater to various dietary needs. So, gather your supplies and get ready to whip up this tempting treat that will satisfy your sweet tooth!

Why I Love This Recipe

  1. Deliciously Safe: By heat-treating the flour, these bites are safe to enjoy without the worry of raw ingredients.
  2. Customizable Treats: You can easily modify the mix-ins, whether you prefer chocolate chips, nuts, or even dried fruits!
  3. Quick and Easy: With just 15 minutes of prep time, you can whip up a batch of these delightful bites in no time.
  4. Perfect for Sharing: These cookie dough bites make for an excellent treat at parties, or a sweet snack to enjoy with friends!

Ingredients

List of Required Ingredients
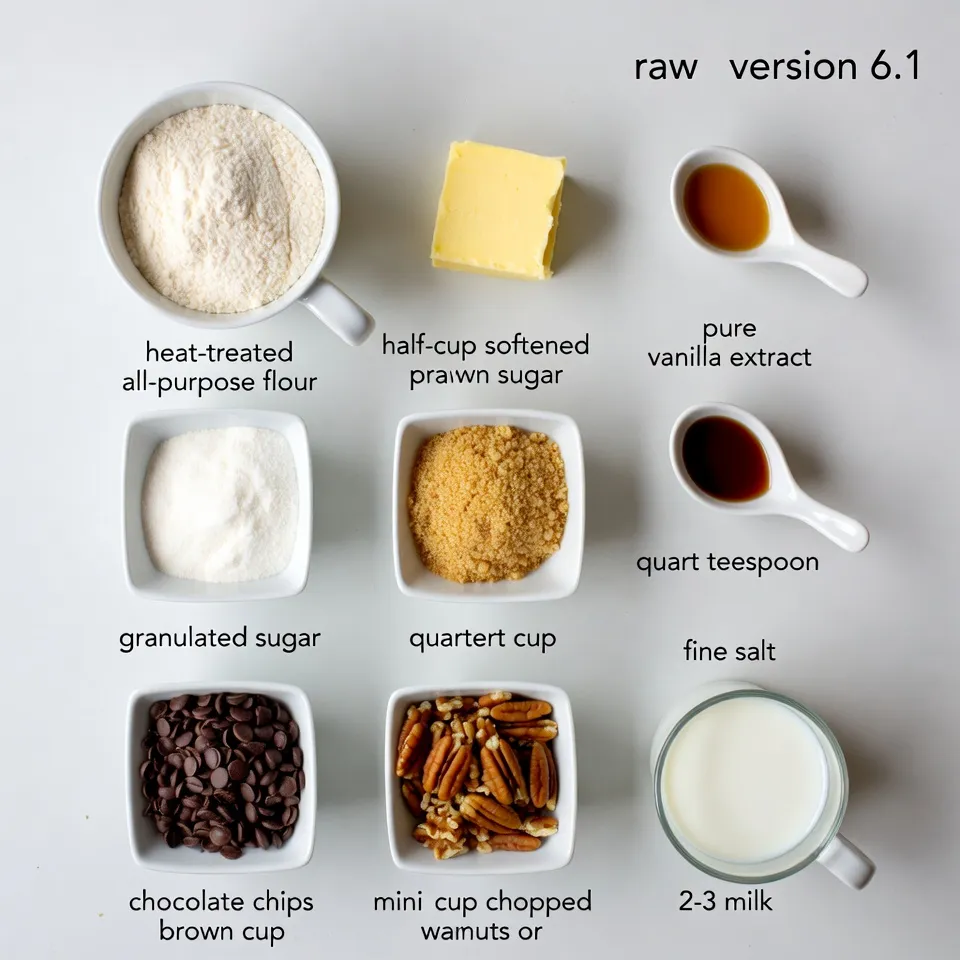
  • 1 cup all-purpose flour (heat-treated for safety)
  • 1/2 cup unsalted butter, softened
  • 1/4 cup granulated sugar
  • 1/4 cup packed brown sugar
  • 1 teaspoon vanilla extract
  • 1/4 teaspoon salt
  • 1/2 cup mini chocolate chips
  • 1/4 cup chopped nuts (optional)
  • 2-3 tablespoons milk (as needed)

Alternative Ingredients

You can make these bites fit your needs.

  • For gluten-free options, use gluten-free flour blends.
  • For dairy-free bites, swap the butter for coconut oil or vegan butter.
  • If you want to change the chocolate chips, use dark chocolate or white chocolate.
  • For nut-free bites, simply skip the nuts or use seeds instead.

These swaps allow everyone to enjoy these tasty treats!

Step-by-Step Instructions

Preparation of Ingredients

Heat-treating the flour for safety

To keep your bites safe, you need to heat-treat the flour. Preheat your oven to 350°F (175°C). Spread the flour on a baking sheet. Bake it for 5 to 7 minutes. This step kills any germs in the flour.

Softening the butter effectively

Softening butter is key for a creamy dough. Take your butter out of the fridge. Let it sit for about 30 minutes. You can also cut it into small cubes. This helps it soften faster. The butter should feel cool but not hard.

Making the Cookie Dough

Creaming the butter and sugars together

In a large bowl, mix the softened butter, granulated sugar, and brown sugar. Use a hand mixer or stand mixer on medium speed. Beat until the mixture is light and fluffy. This takes about 2 to 3 minutes. It helps the bites stay soft.

How to mix in the dry ingredients

After creaming, you will add the heat-treated flour. Gradually mix it in at low speed. This helps prevent a flour cloud! Stop mixing when the flour is almost combined. If the dough is dry, add milk one tablespoon at a time until it feels right.

Shaping and Chilling

Forming uniform bites using a cookie scoop

To shape the dough, use a small cookie scoop or your hands. Make each ball about one inch wide. Place them on a baking sheet lined with parchment paper. This keeps them from sticking.

Importance of chilling the dough for the proper texture

Once shaped, chill the bites in the fridge for at least 30 minutes. Chilling firms up the dough. This step is crucial for the right texture. It helps the bites hold their shape when you eat them.

Tips & Tricks

Achieving the Perfect Texture

To get the right dough consistency, look for a smooth and slightly sticky feel. The dough should hold together but not be too wet. If your dough is too dry, add milk one tablespoon at a time. This helps reach the desired thickness. Mixing slowly can also help keep the texture just right.

Enhancing Flavor and Presentation

You can make your cookie dough bites even better by adding flavors. Try almond extract or a splash of espresso for a twist. For fun serving ideas, place the bites on a fancy platter. Drizzle melted chocolate over them or roll them in crushed nuts or sprinkles. These touches make your treats more inviting.

Common Mistakes to Avoid

One common mistake is overmixing or undermixing the dough. Overmixing makes the bites tough. Undermixing can leave dry flour lumps. Aim for a good mix but stop once it’s combined. Another mistake is not chilling the dough long enough. Chilling helps the bites firm up and keeps their shape. Make sure to cool them for at least 30 minutes before serving.

Pro Tips

  1. Heat-Treating Flour: Always heat-treat your flour before using it in no-bake recipes to ensure safety from potential bacteria.
  2. Butter Softening: For best results, let your butter sit at room temperature for about 30 minutes before creaming it with sugars for a smooth texture.
  3. Consistent Size: Use a cookie scoop to ensure all your bites are the same size, which helps them chill evenly and look uniform.
  4. Storage Tips: Keep the cookie dough bites in an airtight container in the fridge to maintain their freshness for up to a week.

Variations

Flavor Variations

You can make cookie dough bites even more fun by adding new flavors. Try mixing in dried fruits like raisins or cranberries. They add a chewy texture and a pop of flavor. You can also add toffee bits for a sweet crunch. For special occasions, think about themed bites. Add peppermint extract for winter holidays or pumpkin spice for fall. These little changes can make your bites feel fresh and exciting.

Dietary Adaptations

If you want a vegan version, swap the butter for coconut oil or vegan butter. Use maple syrup instead of brown sugar for sweetness. You can also find vegan chocolate chips for a tasty treat. For those watching sugar, there are low-sugar options too. You can use almond flour and a sugar substitute for a keto-friendly take. These changes keep the fun without the guilt.

Serving Suggestions

Serve your cookie dough bites with ice cream for a delightful dessert. The cold creaminess pairs well with the sweet bites. You can also whip up some fresh cream to add on top. If you’re giving them as gifts, package them in cute boxes or jars. Add a ribbon for a nice touch. These creative ideas make your treats look as good as they taste.

Storage Info

Best Storage Practices

To keep your cookie dough bites fresh, store them in an airtight container. Place the container in the fridge. They will stay good for up to a week. If you want to store them longer, freeze the bites. To freeze, lay them on a baking sheet. Freeze for an hour, then transfer them to a freezer-safe bag. This method helps prevent sticking.

Shelf Life and Quality

Check for spoilage before enjoying your bites. Signs of spoilage include an off smell or a dry texture. If you notice these signs, discard the bites. In the fridge, the bites last up to one week. In the freezer, they can last up to three months. Be sure to label your container with the date you stored them.

Reheating Tips

To thaw frozen cookie dough bites, place them in the fridge overnight. This keeps them from getting too soft. If you need them faster, you can let them sit at room temperature for about 30 minutes. After thawing, serve them chilled or let them sit out for a few minutes. Enjoy them plain, or drizzle some melted chocolate on top for extra fun!

FAQs

How long do homemade cookie dough bites last?

Homemade cookie dough bites can last up to one week in the fridge. Store them in an airtight container to keep them fresh. If you want to save them longer, you can freeze them. They stay good in the freezer for about three months. Just remember to wrap them well to avoid freezer burn.

Can I eat raw cookie dough?

Yes, you can eat raw cookie dough if the flour is heat-treated. Heat-treating flour kills any harmful bacteria. This step is very important for safety. It makes your cookie dough bites safe to enjoy without baking. You still want to keep the portions moderate, as raw dough can be rich.

How can I make cookie dough bites healthier?

To make cookie dough bites healthier, you can reduce the sugar or fat. Try using less sugar by swapping some for a natural sweetener, like honey or maple syrup. You could also use unsweetened chocolate chips instead of regular ones. Another option is to replace some butter with applesauce for a lower-fat version. You can enjoy your treats while being mindful of health!

This blog post covers the key ingredients, step-by-step directions, and tips for making cookie dough bites. You’ll learn about alternatives, variations, and the best ways to store your treats. Remember, the joy of baking is in trying new flavors or dietary options. Enjoy creating tasty bites that suit your needs and share them with friends. Baking can be fun and easy. Your cookie dough journey starts no

- 1 cup all-purpose flour (heat-treated for safety) - 1/2 cup unsalted butter, softened - 1/4 cup granulated sugar - 1/4 cup packed brown sugar - 1 teaspoon vanilla extract - 1/4 teaspoon salt - 1/2 cup mini chocolate chips - 1/4 cup chopped nuts (optional) - 2-3 tablespoons milk (as needed) You can make these bites fit your needs. - For gluten-free options, use gluten-free flour blends. - For dairy-free bites, swap the butter for coconut oil or vegan butter. - If you want to change the chocolate chips, use dark chocolate or white chocolate. - For nut-free bites, simply skip the nuts or use seeds instead. These swaps allow everyone to enjoy these tasty treats! {{ingredient_image_1}} Heat-treating the flour for safety To keep your bites safe, you need to heat-treat the flour. Preheat your oven to 350°F (175°C). Spread the flour on a baking sheet. Bake it for 5 to 7 minutes. This step kills any germs in the flour. Softening the butter effectively Softening butter is key for a creamy dough. Take your butter out of the fridge. Let it sit for about 30 minutes. You can also cut it into small cubes. This helps it soften faster. The butter should feel cool but not hard. Creaming the butter and sugars together In a large bowl, mix the softened butter, granulated sugar, and brown sugar. Use a hand mixer or stand mixer on medium speed. Beat until the mixture is light and fluffy. This takes about 2 to 3 minutes. It helps the bites stay soft. How to mix in the dry ingredients After creaming, you will add the heat-treated flour. Gradually mix it in at low speed. This helps prevent a flour cloud! Stop mixing when the flour is almost combined. If the dough is dry, add milk one tablespoon at a time until it feels right. Forming uniform bites using a cookie scoop To shape the dough, use a small cookie scoop or your hands. Make each ball about one inch wide. Place them on a baking sheet lined with parchment paper. This keeps them from sticking. Importance of chilling the dough for the proper texture Once shaped, chill the bites in the fridge for at least 30 minutes. Chilling firms up the dough. This step is crucial for the right texture. It helps the bites hold their shape when you eat them. To get the right dough consistency, look for a smooth and slightly sticky feel. The dough should hold together but not be too wet. If your dough is too dry, add milk one tablespoon at a time. This helps reach the desired thickness. Mixing slowly can also help keep the texture just right. You can make your cookie dough bites even better by adding flavors. Try almond extract or a splash of espresso for a twist. For fun serving ideas, place the bites on a fancy platter. Drizzle melted chocolate over them or roll them in crushed nuts or sprinkles. These touches make your treats more inviting. One common mistake is overmixing or undermixing the dough. Overmixing makes the bites tough. Undermixing can leave dry flour lumps. Aim for a good mix but stop once it's combined. Another mistake is not chilling the dough long enough. Chilling helps the bites firm up and keeps their shape. Make sure to cool them for at least 30 minutes before serving. Pro Tips Heat-Treating Flour: Always heat-treat your flour before using it in no-bake recipes to ensure safety from potential bacteria. Butter Softening: For best results, let your butter sit at room temperature for about 30 minutes before creaming it with sugars for a smooth texture. Consistent Size: Use a cookie scoop to ensure all your bites are the same size, which helps them chill evenly and look uniform. Storage Tips: Keep the cookie dough bites in an airtight container in the fridge to maintain their freshness for up to a week. {{image_2}} You can make cookie dough bites even more fun by adding new flavors. Try mixing in dried fruits like raisins or cranberries. They add a chewy texture and a pop of flavor. You can also add toffee bits for a sweet crunch. For special occasions, think about themed bites. Add peppermint extract for winter holidays or pumpkin spice for fall. These little changes can make your bites feel fresh and exciting. If you want a vegan version, swap the butter for coconut oil or vegan butter. Use maple syrup instead of brown sugar for sweetness. You can also find vegan chocolate chips for a tasty treat. For those watching sugar, there are low-sugar options too. You can use almond flour and a sugar substitute for a keto-friendly take. These changes keep the fun without the guilt. Serve your cookie dough bites with ice cream for a delightful dessert. The cold creaminess pairs well with the sweet bites. You can also whip up some fresh cream to add on top. If you're giving them as gifts, package them in cute boxes or jars. Add a ribbon for a nice touch. These creative ideas make your treats look as good as they taste. To keep your cookie dough bites fresh, store them in an airtight container. Place the container in the fridge. They will stay good for up to a week. If you want to store them longer, freeze the bites. To freeze, lay them on a baking sheet. Freeze for an hour, then transfer them to a freezer-safe bag. This method helps prevent sticking. Check for spoilage before enjoying your bites. Signs of spoilage include an off smell or a dry texture. If you notice these signs, discard the bites. In the fridge, the bites last up to one week. In the freezer, they can last up to three months. Be sure to label your container with the date you stored them. To thaw frozen cookie dough bites, place them in the fridge overnight. This keeps them from getting too soft. If you need them faster, you can let them sit at room temperature for about 30 minutes. After thawing, serve them chilled or let them sit out for a few minutes. Enjoy them plain, or drizzle some melted chocolate on top for extra fun! Homemade cookie dough bites can last up to one week in the fridge. Store them in an airtight container to keep them fresh. If you want to save them longer, you can freeze them. They stay good in the freezer for about three months. Just remember to wrap them well to avoid freezer burn. Yes, you can eat raw cookie dough if the flour is heat-treated. Heat-treating flour kills any harmful bacteria. This step is very important for safety. It makes your cookie dough bites safe to enjoy without baking. You still want to keep the portions moderate, as raw dough can be rich. To make cookie dough bites healthier, you can reduce the sugar or fat. Try using less sugar by swapping some for a natural sweetener, like honey or maple syrup. You could also use unsweetened chocolate chips instead of regular ones. Another option is to replace some butter with applesauce for a lower-fat version. You can enjoy your treats while being mindful of health! This blog post covers the key ingredients, step-by-step directions, and tips for making cookie dough bites. You'll learn about alternatives, variations, and the best ways to store your treats. Remember, the joy of baking is in trying new flavors or dietary options. Enjoy creating tasty bites that suit your needs and share them with friends. Baking can be fun and easy. Your cookie dough journey starts now!

Cookie Dough Bliss Bites

Delicious and safe-to-eat cookie dough bites made with heat-treated flour and chocolate chips.
Prep Time 15 minutes
Cook Time 7 minutes
Total Time 1 hour
Course Dessert
Cuisine American
Servings 20
Calories 100 kcal

Ingredients
  

  • 1 cup all-purpose flour (heat-treated for safety)
  • 1/2 cup unsalted butter, softened
  • 1/4 cup granulated sugar
  • 1/4 cup packed brown sugar
  • 1 teaspoon vanilla extract
  • 1/4 teaspoon salt
  • 1/2 cup mini chocolate chips
  • 1/4 cup chopped nuts (e.g., walnuts or pecans, optional)
  • 2-3 tablespoons milk (as needed)

Instructions
 

  • Preheat your oven to 350°F (175°C) and spread the all-purpose flour on a baking sheet. Bake for 5-7 minutes to heat-treat the flour, which will eliminate any potential bacteria.
  • In a large mixing bowl, combine the softened butter, granulated sugar, and brown sugar. Beat them together with a hand mixer or stand mixer on medium speed until creamy and well combined.
  • Pour in the vanilla extract and add salt. Mix until incorporated.
  • Gradually add in the baked flour, mixing on low speed until just combined. If the dough seems too dry, add milk one tablespoon at a time until the desired consistency is achieved.
  • Gently fold in the mini chocolate chips and nuts (if using) until evenly distributed throughout the dough.
  • Use a small cookie scoop or your hands to form small balls (about one inch in diameter) of the cookie dough and place them on a baking sheet lined with parchment paper.
  • Transfer the baking sheet to the refrigerator for at least 30 minutes to allow the cookie dough bites to firm up.
  • Once chilled, enjoy them directly or store them in an airtight container in the fridge for up to a week.

Notes

For added fun, drizzle melted chocolate over them or roll in crushed nuts or sprinkles.
Keyword cookie dough, dessert, no-bake

WANT TO SAVE THIS RECIPE?

Leave a Comment

Recipe Rating