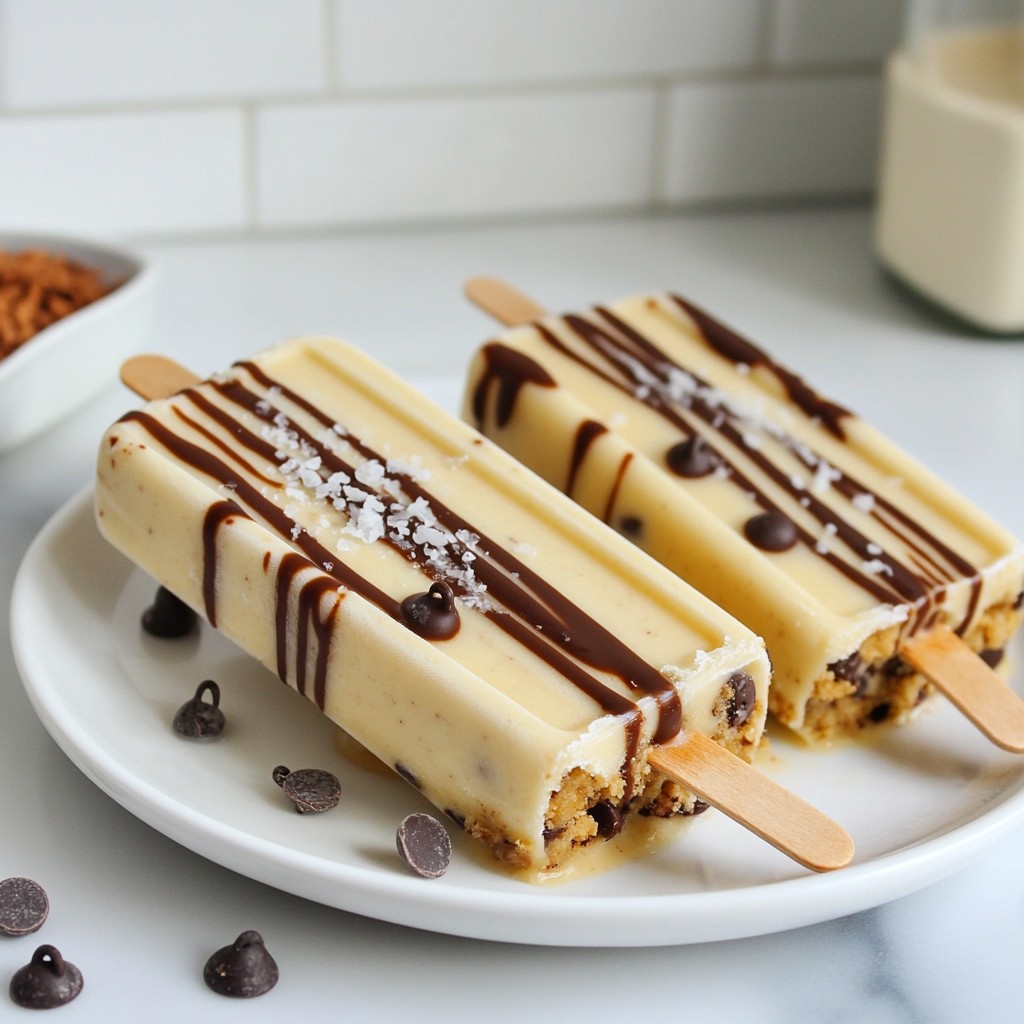
Are you craving a cool treat that’s also a little indulgent? Chocolate Chip Cookie Dough Popsicles are the perfect mix of fun and flavor! In this post, I'll share easy steps to make these tasty delights, along with tips to customize them. Whether you're treating yourself or sharing with friends, these popsicles are sure to impress. Let’s dive in and get those popsicles ready to enjoy!
Why I Love This Recipe
- Easy to Make: This recipe requires minimal effort and time, making it perfect for a quick treat on a hot day.
- No-Bake Delight: Since there’s no baking involved, you can whip these up without heating your kitchen.
- Customizable: You can easily adjust the ingredients or add your favorite mix-ins to the cookie dough for a personalized touch.
- Kid-Friendly: Kids will love helping to make these popsicles, and they’re a fun way to enjoy cookie dough safely!
Ingredients
Essential Ingredients List
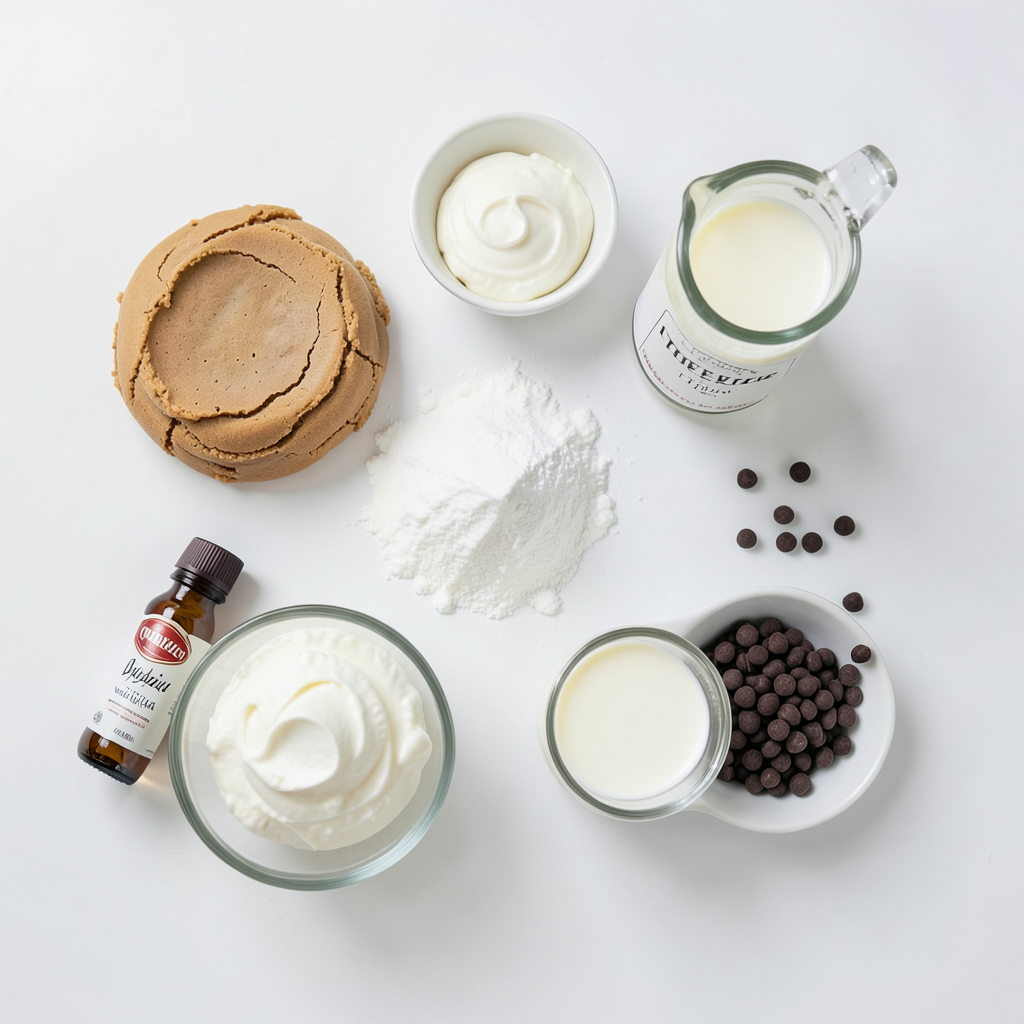
To make these tasty Chocolate Chip Cookie Dough Popsicles, gather these key items:
- 1 cup cookie dough (store-bought or homemade, no eggs)
- 1 cup cream cheese, softened
- 1/2 cup powdered sugar
- 1 teaspoon vanilla extract
- 1/2 cup heavy cream
- 1/2 cup mini chocolate chips
- 1/4 cup milk (dairy or non-dairy)
These ingredients create a rich and creamy base. The cookie dough adds a fun flavor, while the cream cheese gives it a nice texture.
Optional Ingredients for Customization
You can change these popsicles to match your taste. Here are some ideas:
- Add a pinch of sea salt for a sweet and salty mix.
- Swap mini chocolate chips for dark chocolate or peanut butter chips.
- Mix in nuts like walnuts or pecans for crunch.
Feel free to get creative!
Suggested Tools and Equipment
You will need a few simple tools to make these popsicles:
- Mixing bowl
- Electric mixer
- Popsicle molds
- Popsicle sticks
Having these tools ready will help you make the process smooth and fun.
Step-by-Step Instructions
Preparation Process Overview
To start, gather all your ingredients. You will need cookie dough, cream cheese, powdered sugar, vanilla, heavy cream, mini chocolate chips, and milk. Make sure to use cookie dough that has no eggs. This keeps it safe to eat!
Detailed Mixing Instructions
First, take a mixing bowl and add the softened cream cheese and powdered sugar. Use an electric mixer to beat them together until smooth. This is the base for your popsicles. Next, add the vanilla extract and heavy cream. Mix until everything blends well.
Once mixed, it’s time to fold in the cookie dough. Use a spatula to gently combine the dough into the mix. You want to keep the chunky bits of dough intact. After that, add the mini chocolate chips. These will give your popsicles a tasty crunch!
Now, add the milk. This helps make the mix smooth and pourable. If it feels too thick, just add a bit more milk. You want the right consistency for pouring.
Molding and Freezing Procedure
Grab your popsicle molds and pour the mixture into them. Fill each mold about 3/4 full. This space allows the popsicles to expand as they freeze. Next, insert the popsicle sticks into the molds. Make sure they stand up straight.
Now, it’s time to freeze! Place the molds in the freezer for at least 4 to 6 hours. You want them completely solid before removing. When you’re ready, run warm water over the outside of the molds for a few seconds. This helps to loosen the popsicles. Gently pull them out, and enjoy your cool treat!
Tips & Tricks
Best Practices for Mixing Ingredients
Mixing the right way makes a big difference. Start with room-temperature cream cheese. This helps it blend well with the sugar. Use an electric mixer to beat the cream cheese and powdered sugar. Mix until it is smooth and creamy. Add the vanilla and heavy cream next. Mix on low so you don’t splash.
Once the base is ready, gently fold in the cookie dough. Use a spatula for this. This keeps the dough intact and adds nice bites. Finally, mix in the mini chocolate chips. This gives you that chocolatey goodness in every bite.
How to Achieve the Perfect Texture
The texture should be creamy but not too runny. If it feels too thick, add more milk, one tablespoon at a time. This helps it pour into molds easily. Aim for a pourable consistency, but still thick enough to hold the cookie dough bits.
When you pour the mixture into molds, fill them about 3/4 full. This allows space for the pops to expand as they freeze.
Troubleshooting Common Issues
If your popsicles are hard to remove, run warm water over the outside of the molds. This will help loosen them. If they break when you try to pull them out, they may not have frozen long enough. Make sure to freeze them for at least 4-6 hours.
If your popsicles are too soft after freezing, check the milk amount. Too much milk can lead to a softer texture. Adjust the amount next time to get it just right.
Pro Tips
- Use Softened Cream Cheese: Ensure your cream cheese is fully softened to avoid lumps in your mixture, resulting in a smoother texture for your popsicles.
- Adjust Consistency: If your mixture is too thick, add a little more milk gradually until you reach the desired pourable consistency, making it easier to fill the molds.
- Freezing Time: For the best texture, allow the popsicles to freeze for a minimum of 6 hours, or overnight if possible, ensuring they are fully set before removing from molds.
- Decorative Touch: Before serving, consider drizzling melted chocolate or sprinkling sea salt on top of the popsicles for an extra flavor boost and beautiful presentation.
Variations
Healthier Alternatives
You can make these popsicles lighter without losing taste. Swap cream cheese for Greek yogurt. This change gives a tangy twist and cuts fat. Use a sugar substitute for the powdered sugar. You can try stevia or monk fruit sweetener. These options reduce calories while keeping it sweet.
Flavor Enhancements
Want to mix up the flavor? Add a splash of almond extract for a nutty taste. You can also stir in some peanut butter or almond butter. This adds richness and a fun new layer. If you love fruit, try adding pureed bananas or strawberries. These fruits offer natural sweetness and a fresh twist.
Seasonal Add-ins
Seasonal add-ins make these popsicles even more special. In spring, add fresh mint leaves for a refreshing kick. During fall, mix in pumpkin spice for a cozy vibe. In winter, crushed candy canes can give a festive crunch. These choices keep the popsicles exciting all year round.
Storage Info
How to Store Leftover Popsicles
To keep your popsicles fresh, wrap each one in plastic wrap. This helps prevent freezer burn. You can also place them in a zip-top bag. Make sure to squeeze out all the air before sealing.
Shelf Life and Freezing Tips
These popsicles stay tasty for about two months in the freezer. Label the bag or container with the date. Be sure to freeze them at zero degrees Fahrenheit for best results. If you plan to enjoy them later, avoid leaving them out too long.
Reheating or Reviving Frozen Popsicles
If your popsicles harden too much, run warm water over the molds. This loosens them up. Avoid using a microwave. It can melt them unevenly. If you follow these steps, your treats will stay delicious and fun to eat!
FAQs
Can I use different cookie dough types?
Yes, you can use different cookie dough types. You can choose any kind of cookie dough you like. Store-bought options are quick and easy. Homemade dough works great too, just make sure it has no eggs. You can try flavors like peanut butter or oatmeal. Each type will bring a unique taste to your popsicles.
How do I make these popsicles dairy-free?
To make these popsicles dairy-free, swap out the cream cheese and heavy cream. Use dairy-free cream cheese and coconut cream as great replacements. For milk, choose almond, soy, or oat milk. These swaps keep the popsicles creamy and delicious without any dairy. You won’t lose any flavor or texture!
What to do if the popsicles are difficult to remove from molds?
If your popsicles are hard to remove, don’t worry. Run warm water over the outside of the molds for a few seconds. This will help loosen the popsicles. Gently pull on the sticks to remove them. If they still won’t budge, wait a few more minutes. The warmth will make it easier to get them out.
You now have all the details to make your popsicles. From the essential and optional ingredients to the right tools, every step helps you create a tasty treat. I shared tips for mixing and achieving the perfect texture. You can explore variations to suit your taste and discover how to store leftovers well. Always feel free to customize. Making popsicles is fun and easy. Enjoy this cool treat anytime!