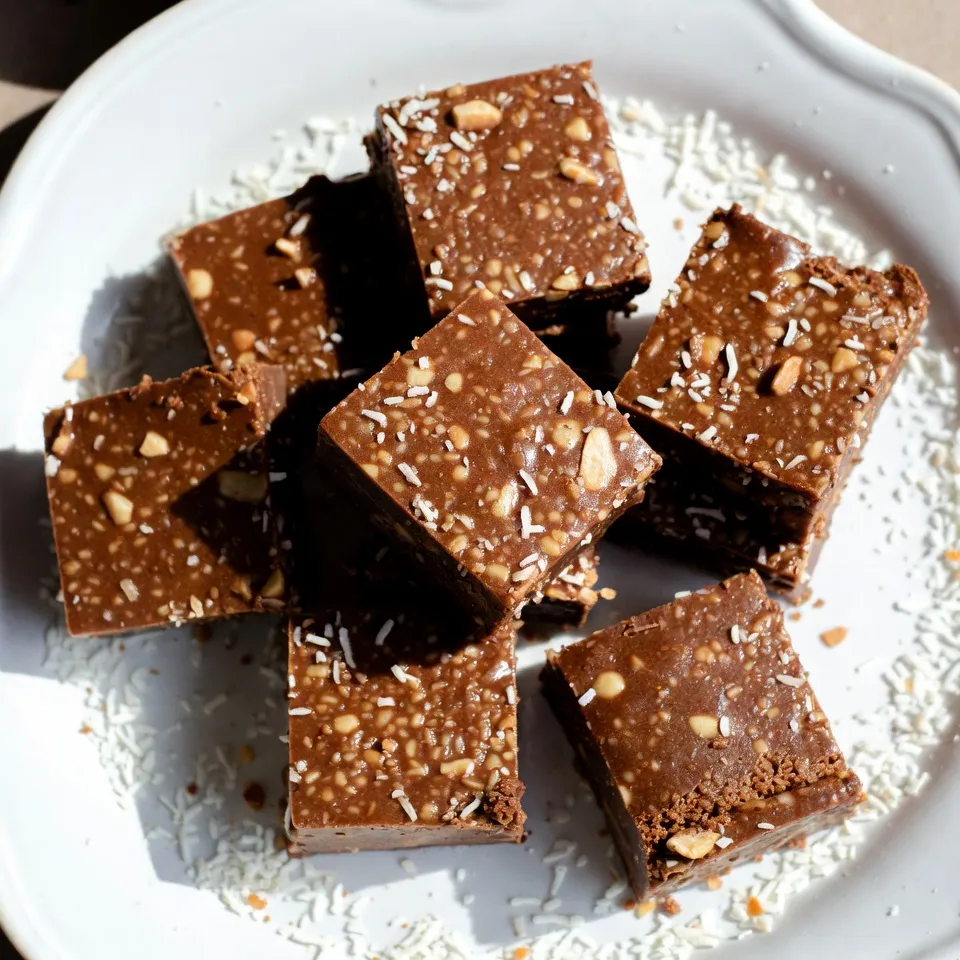
Are you ready to indulge in a quick and easy treat? This delightful no-bake Chocolate Coconut Fudge will satisfy your sweet tooth in no time. With just a few simple ingredients like sweetened condensed milk and chocolate chips, you can create a rich and creamy dessert that everyone will love. Let’s get started on this delicious journey of flavors and textures that will impress your friends and family!
Why I Love This Recipe
- Decadent Flavor: The combination of rich chocolate and toasted coconut creates a heavenly treat that satisfies any sweet tooth.
- Easy to Make: With just a few simple ingredients and minimal prep time, this fudge can be whipped up in no time.
- Customizable: Feel free to add your favorite nuts or even swap in different extracts to make this fudge uniquely yours.
- Perfect for Sharing: Cut into bite-sized pieces, this fudge is ideal for gifting or serving at parties and gatherings.
Ingredients
List of Ingredients
– Sweetened Condensed Milk
– Semi-Sweet Chocolate Chips
– Shredded Unsweetened Coconut
– Vanilla Extract
– Sea Salt
– Optional: Chopped Nuts
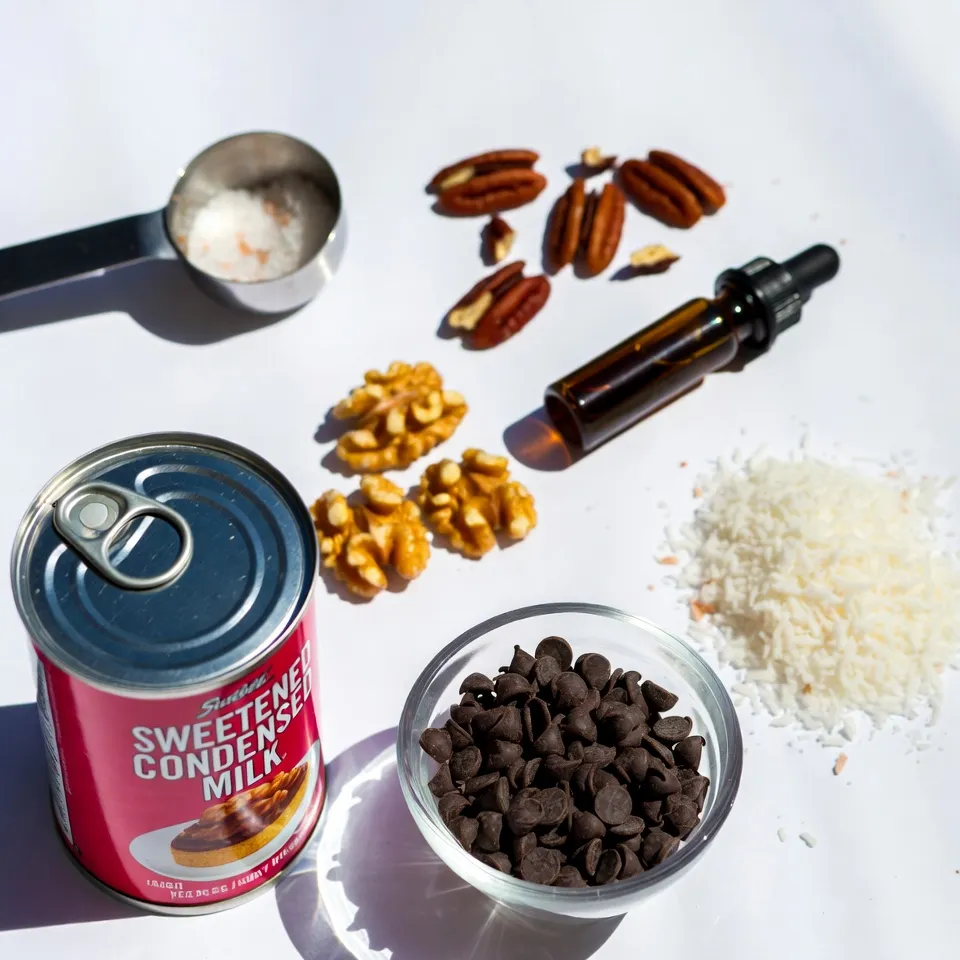
To make Chocolate Coconut Fudge, gather these simple ingredients. You need one can of sweetened condensed milk. This gives the fudge its rich and creamy base. Next, grab two cups of semi-sweet chocolate chips. They melt into a smooth, chocolatey mix.
You’ll also need one cup of shredded unsweetened coconut. This adds a lovely chew and coconut flavor. Don’t forget one teaspoon of vanilla extract. This brings warmth and depth to the fudge. A pinch of sea salt, about 1/4 teaspoon, helps balance the sweetness. If you like nuts, you can add 1/2 cup of chopped nuts, like pecans or walnuts. They add a nice crunch and taste.
Once you have these ingredients, you are ready to create a delightful treat! Each ingredient plays a vital role in making this fudge a hit.
Step-by-Step Instructions
Preparing the Baking Pan
First, get your baking pan ready. Use an 8×8-inch square pan. Line it with parchment paper. Leave some paper hanging over the edges. This helps you lift the fudge out later.
Melting the Chocolate Mixture
Next, melt the chocolate. Take a medium saucepan. Add the sweetened condensed milk and the semi-sweet chocolate chips. Heat it on low. Stir the mix constantly. Keep stirring until the chocolate is melted and smooth.
Incorporating Vanilla and Sea Salt
Once the chocolate is smooth, take it off the heat. Now, stir in the vanilla extract. Add the sea salt next. This gives the fudge a great flavor boost.
Mixing in Coconut and Nuts
Now it’s time to add coconut. Fold in the shredded unsweetened coconut. If you want, add chopped nuts too. Pecans or walnuts work well. Mix it gently until everything combines well.
Transferring to the Baking Pan
Pour this fudgy mix into your prepared pan. Use a spatula to spread it evenly. Make sure it fills the pan well and looks nice.
Chilling and Setting the Fudge
Now, put the pan in the fridge. Let it chill for about 2 to 3 hours. This time helps the fudge set and become firm.
Cutting and Serving
After the fudge is set, lift it out using the parchment paper. Place it on a cutting board. Cut it into squares or rectangles. Serve it on a nice plate. Enjoy your delicious treat!
Tips & Tricks
Perfecting the Chocolate Coconut Fudge Texture
To get the best texture, use low heat when melting chocolate. This keeps the chocolate smooth and creamy. Stir often to prevent burning. After adding coconut and nuts, mix gently. Overmixing can make it too dense. If the fudge feels too soft after chilling, it likely needs more time in the fridge. Aim for a firm but not rock-hard consistency.
Serving Suggestions for Presentation
Presentation makes a big difference. Place the fudge on a nice plate. A sprinkle of shredded coconut on top adds charm. You can also dust it with cocoa powder for a touch of class. For extra flair, add whole nuts on top. They make it look fancy and appetizing. Serve with a small scoop of ice cream on the side for a delightful treat.
How to Ensure Clean Cuts
To cut your fudge neatly, use a sharp knife. Warm the knife with hot water, then dry it before cutting. This helps the knife glide through smoothly. Cut the fudge into small squares or rectangles. Clean the knife between cuts to keep edges sharp. This way, each piece looks perfect and inviting.
Pro Tips
- Use Quality Chocolate: The flavor of your fudge largely depends on the chocolate you choose. Opt for high-quality semi-sweet chocolate chips for the best results.
- Chill Before Cutting: Allow the fudge to chill completely in the refrigerator before cutting. This ensures clean cuts and a firmer texture.
- Customize Your Nuts: Feel free to experiment with different nuts such as almonds, hazelnuts, or macadamia nuts for a unique flavor twist.
- Storage Tips: For longer shelf life, store the fudge in the refrigerator. Ensure it’s in an airtight container to maintain its freshness.
Variations
Additional Flavors and Add-ins
You can easily change this fudge to suit your taste. Here are some ideas:
– Mint Extract: Add a teaspoon of mint extract for a refreshing twist.
– Coffee: Mix in a tablespoon of instant coffee for a rich depth.
– Fruit: Dried fruits like cranberries or cherries add a sweet and chewy touch.
– Spices: A dash of cinnamon or nutmeg can warm up the flavor.
– Marshmallows: Tiny marshmallows can make the fudge even softer and more fun.
These additions make your fudge even more special. You can mix and match to find your favorite combo.
Dietary Adjustments (Vegan, Gluten-Free)
To make this fudge fit different diets, here are some swaps:
– Condensed Milk: Use coconut condensed milk for a vegan version.
– Chocolate Chips: Look for dairy-free chocolate chips to keep it vegan.
– Nut-Free: Leave out the nuts for a nut-free option.
– Gluten-Free: All the listed ingredients are naturally gluten-free.
These easy swaps let everyone enjoy this treat without worry.
Alternative Chocolate Types
You can switch the chocolate for different flavors. Here are great options:
– Dark Chocolate: Use dark chocolate chips for a richer taste.
– Milk Chocolate: Milk chocolate gives a creamier, sweeter fudge.
– White Chocolate: White chocolate makes a sweeter, unique fudge.
Experimenting with chocolate types can lead to new favorites. Each type changes the fudge’s flavor and texture.
Storage Info
Best Practices for Storage
To keep your chocolate coconut fudge fresh, store it in an airtight container. This helps prevent it from drying out or absorbing other smells from the fridge. Line the container with parchment paper for easy removal later. If you use nuts, they can stay crunchy longer if stored separately.
Shelf Life at Room Temperature vs Refrigeration
At room temperature, your fudge will last up to a week. Keep it in a cool, dry place away from sunlight. If you want to enjoy your fudge for longer, store it in the fridge. In the fridge, it can last up to two weeks. The cold helps keep it firm and tasty.
Freezing Fudge for Longer Storage
If you want to save fudge for a special occasion, freezing is a great option. Wrap individual pieces tightly in plastic wrap or foil. Then, place them in a freezer bag or container. Your fudge can stay good for up to three months in the freezer. When you’re ready to enjoy it, let it thaw in the fridge overnight. This keeps the texture perfect.
FAQs
How long does it take for Chocolate Coconut Fudge to set?
Chocolate coconut fudge takes about 2 to 3 hours to set in the fridge. I recommend checking it after two hours. The fudge should feel firm to the touch. If it’s still soft, give it more time.
Can I use sweetened coconut instead of unsweetened?
Yes, you can use sweetened coconut if you like more sweetness. This change will make the fudge sweeter overall. Just keep in mind that it might change the taste a bit.
Is it possible to make chocolate coconut fudge without nuts?
Absolutely! You can skip the nuts if you prefer a nut-free option. The fudge will still taste great without them. Just make sure to adjust your recipe if you add extra coconut to balance the flavors.
What’s the best way to cut fudge cleanly?
To cut fudge cleanly, use a warm knife. Run it under hot water, then dry it off. This method helps the knife glide through the fudge. Cut into small squares for easy serving.
How do I know when the fudge is ready to eat?
The fudge is ready when it feels firm and holds its shape. You can also check by cutting a small piece. If it holds together well, it’s ready to enjoy!
Making chocolate coconut fudge is simple and fun. We covered the key ingredients like sweetened condensed milk and chocolate chips. You learned the step-by-step process, from melting chocolate to cutting the fudge. Tips helped ensure a perfect texture and presentation. Variations let you adjust flavors and meet diet needs. Finally, proper storage keeps fudge fresh for longer.
Now, you can enjoy delicious fudge any tim