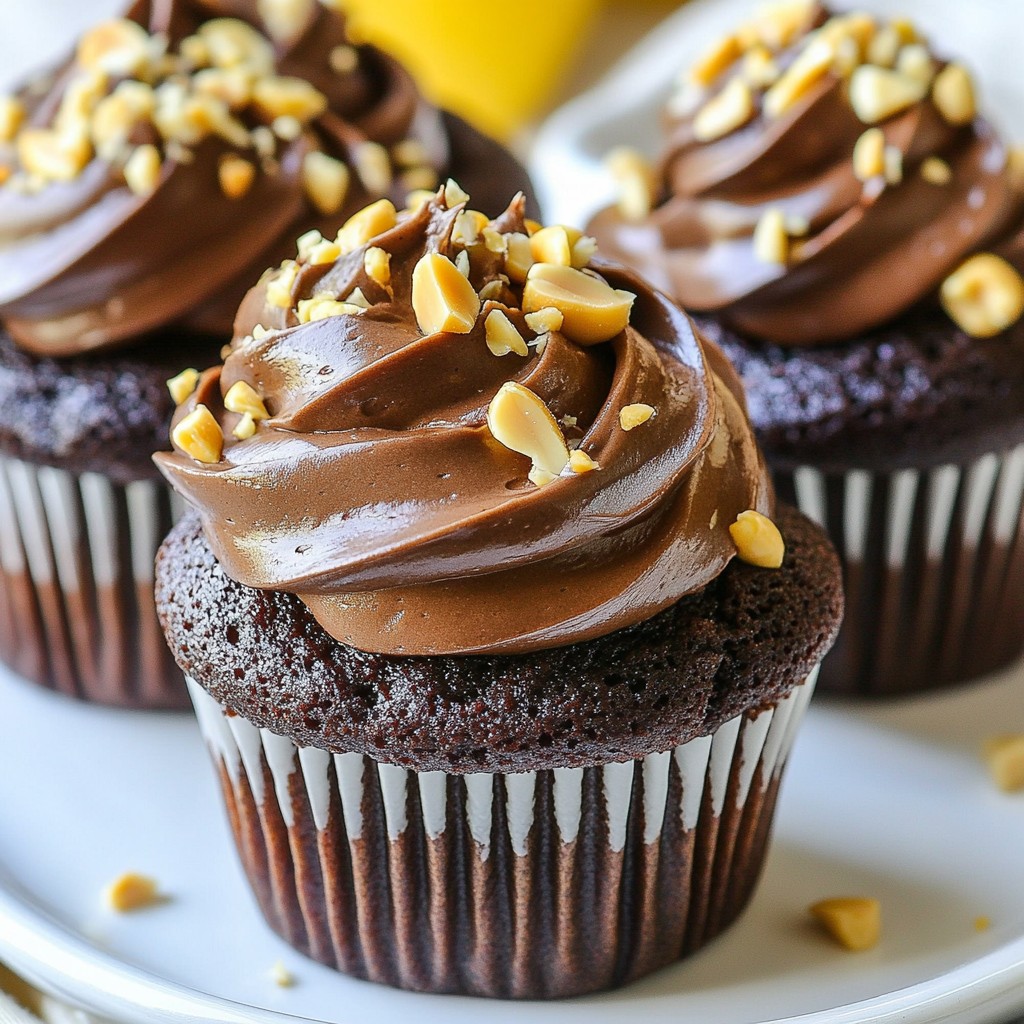
If you crave a sweet treat that combines rich chocolate and creamy peanut butter, you're in the right place! In this post, I’ll guide you through the steps to create chocolate peanut butter cupcakes that are both fun to bake and delightful to eat. With simple ingredients and easy instructions, you’ll whip up these decadent desserts in no time. Ready to satisfy your sweet tooth? Let’s get started!
Why I Love This Recipe
- Decadent Flavor: The combination of rich chocolate and creamy peanut butter creates an irresistible flavor profile that satisfies any sweet tooth.
- Easy to Make: With simple ingredients and straightforward steps, these cupcakes are perfect for both novice and experienced bakers.
- Perfect for Any Occasion: Whether it’s a birthday, holiday, or just a regular Tuesday, these cupcakes are sure to impress and delight your guests.
- Gooey Surprise: The hidden peanut butter center adds a delightful surprise that keeps everyone coming back for more.
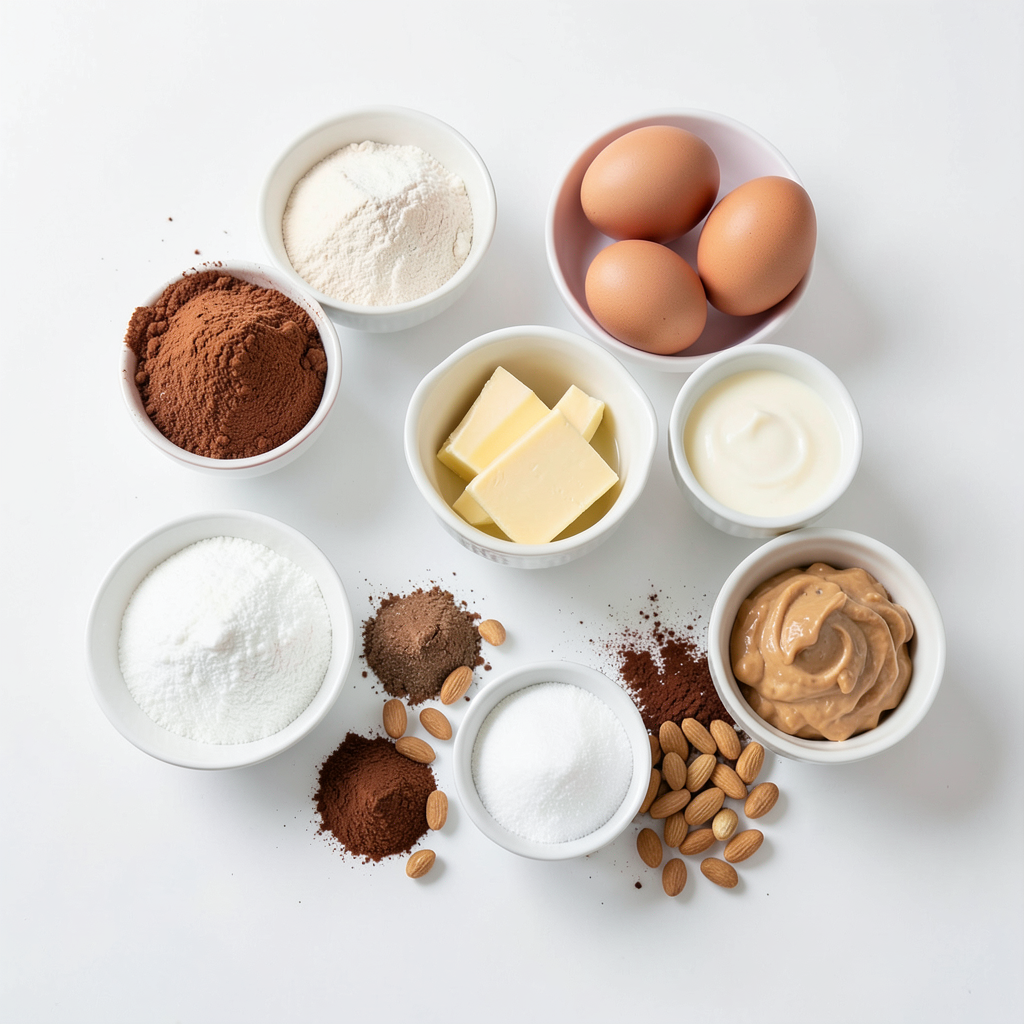
Ingredients
List of Ingredients
- 1 cup all-purpose flour
- 1/2 cup unsweetened cocoa powder
- 1 cup granulated sugar
- 1 tsp baking powder
- 1/2 tsp baking soda
- 1/4 tsp salt
- 1/2 cup unsalted butter, melted
- 2 large eggs
- 1 tsp vanilla extract
- 1/2 cup buttermilk
- 1/2 cup creamy peanut butter (for filling)
Ingredients for Frosting
- 1/2 cup powdered sugar
- 1/4 cup unsweetened cocoa powder
- 1/4 cup heavy cream
- 1/2 tsp vanilla extract
Optional Garnishes
- Creamy peanut butter (for filling)
- Chopped peanuts (for garnish)
The ingredients work together to create a rich cupcake. The flour gives structure, while cocoa powder adds deep chocolate flavor. Sugar brings sweetness, and the baking powder and soda help the cupcakes rise. Salt balances the flavors and enhances the chocolate.
In the frosting, powdered sugar provides sweetness, and cocoa adds more chocolatey goodness. Heavy cream makes it smooth and rich. Vanilla extract adds an extra layer of flavor.
For a special touch, you can add creamy peanut butter in the center of each cupcake. Chopped peanuts on top make for a delightful crunch.
Step-by-Step Instructions
Preparing the Cupcake Batter
First, preheat your oven to 350°F (175°C). This step is key for even baking. Next, grab a large mixing bowl. In it, whisk together the following dry ingredients:
- 1 cup all-purpose flour
- 1/2 cup unsweetened cocoa powder
- 1 cup granulated sugar
- 1 tsp baking powder
- 1/2 tsp baking soda
- 1/4 tsp salt
Mix these well until they look uniform. In another bowl, combine the wet ingredients:
- 1/2 cup unsalted butter, melted
- 2 large eggs
- 1 tsp vanilla extract
- 1/2 cup buttermilk
Stir these until smooth. Now, slowly add the wet mix to the dry mix. Stir gently until just combined. Be careful not to over mix.
Filling the Cupcake Liners
Line your cupcake tray with paper liners. Use a spoon or a scoop to fill each liner with about 2/3 of the batter. This is the filling technique. Next, take 1 teaspoon of creamy peanut butter and place it in the center of each filled liner. Press down lightly to ensure it stays in the cupcake.
Baking and Cooling
Bake the cupcakes in your preheated oven for 18-20 minutes. To test for doneness, insert a toothpick into the cupcake part. It should come out clean, while the peanut butter center stays nice and gooey. After baking, let the cupcakes cool in the tray for 5 minutes. Then, transfer them to a wire rack to cool completely. This cooling process helps keep them moist and fluffy.
Tips & Tricks
Baking Tips
- Avoiding over-mixing: When you mix the batter, do it gently. Stop mixing as soon as you see no dry flour. Over-mixing makes the cupcakes tough. You want them light and fluffy.
- Perfecting the peanut butter center: After filling the cupcake liners, add a teaspoon of creamy peanut butter. Press it down gently, but don't cover it fully with batter. This keeps the center gooey and rich.
Frosting Tips
- Achieving the right consistency: Mix the powdered sugar, cocoa powder, heavy cream, and vanilla until light and fluffy. If it’s too thick, add a bit more cream. You want it spreadable but not runny.
- Creative frosting techniques: Use a piping bag for a fun look. Swirl the frosting high for a bakery-style finish. You can also use a spatula for a smooth top. Both styles are tasty and pretty.
Presentation Tips
- Decorating suggestions: Top each cupcake with chopped peanuts for crunch. You can also drizzle melted chocolate on top for extra flair. Fresh fruit adds color and flavor too!
- Serving options: Serve the cupcakes on a pretty platter. They look lovely at parties. You can also wrap them in clear bags for gifts. Everyone loves a homemade treat!
Pro Tips
- Use Room Temperature Ingredients: Bringing your eggs and buttermilk to room temperature helps create a smoother batter and results in a lighter cupcake.
- Don't Overmix: Mixing the batter just until combined ensures your cupcakes remain tender and fluffy. Overmixing can lead to dense cupcakes.
- Test for Doneness: Since the peanut butter filling will stay gooey, make sure to check the cake part with a toothpick to ensure it comes out clean.
- Frost When Cool: Allow your cupcakes to cool completely before frosting to prevent the frosting from melting and ensure a beautiful presentation.
Variations
Flavor Options
You can change the flavor of your cupcakes easily.
- Adding chocolate chips: Stir in 1/2 cup of chocolate chips into the batter. This adds extra chocolatey goodness. You can use milk, dark, or even white chocolate chips. Each type brings a unique taste.
- Using different nut butters: Try almond or cashew butter instead of peanut butter. Each nut butter has its own taste. This makes your cupcakes fun and new.
Dietary Modifications
Making these cupcakes fit different diets is simple.
- Gluten-free adjustments: Use a gluten-free flour blend in place of all-purpose flour. This keeps the texture light and fluffy. Be sure to check that your baking powder is gluten-free too.
- Vegan alternatives: Replace eggs with flax eggs. Mix 1 tablespoon of flaxseed meal with 2.5 tablespoons of water. Let it sit for five minutes. For the butter, use coconut oil or vegan butter. Swap buttermilk for almond milk mixed with vinegar.
Seasonal Variations
You can make these cupcakes special for any holiday.
- Holiday-themed decorations: Use festive sprinkles or edible glitter. For Halloween, add orange and black sprinkles. For Christmas, try red and green colors.
- Flavors for special occasions: Add peppermint extract for winter treats. Or mix in some cinnamon for a warm fall flavor. Each season can bring a new twist to these rich and decadent cupcakes.
Storage Info
How to Store Cupcakes
To keep your chocolate peanut butter cupcakes fresh, use an airtight container. This helps keep them moist and tasty. If you leave them uncovered, they may dry out quickly. Always place a piece of parchment paper between layers if you stack them. This way, the frosting won't stick to the lid.
Refrigeration vs. Freezing
Refrigeration can dry out your cupcakes, so it’s not the best choice. However, if your kitchen is warm, you may need to refrigerate them for safety. For longer storage, freezing is the best option. Just wrap the cupcakes tightly in plastic wrap and then in foil. This method keeps them fresh for up to three months. When ready to enjoy, let them thaw at room temperature.
How Long Do They Last?
Chocolate peanut butter cupcakes last up to three days at room temperature. If stored in the fridge, they can last about a week. In the freezer, they maintain quality for three months. Always check for any signs of spoilage before eating. If they smell off or have a strange texture, it's better to discard them.
FAQs
What can I substitute for buttermilk?
You can use regular milk mixed with vinegar or lemon juice. For each cup of buttermilk, mix 1 tablespoon of vinegar or lemon juice with enough milk to make 1 cup. Let it sit for 5 minutes. This gives a similar taste and acidity. You can also use yogurt or sour cream thinned with water. These options work great in recipes.
How do I know when cupcakes are done?
To check if your cupcakes are done, use the toothpick test. Insert a toothpick into the center of a cupcake. If it comes out clean, the cupcakes are ready. A few crumbs on the toothpick are fine, but no wet batter should stick. This method helps you avoid overbaking.
Can I make these cupcakes ahead of time?
Yes, you can prepare these cupcakes in advance. Bake them and let them cool completely. Store them in an airtight container at room temperature for up to three days. You can also frost them ahead of time. If you want to keep them longer, freeze them without frosting. Just wrap them well in plastic wrap. They can last up to three months in the freezer.
To sum up, we explored everything you need for perfect cupcakes. We covered key ingredients like flour and cocoa. I shared step-by-step instructions for making the batter and filling. You learned helpful tips for baking and frosting. Plus, we discussed fun variations and how to store your treats.
These cupcakes are easy and fun to make. Don't be afraid to experiment with flavors and decorations. Enjoy the process, and your taste buds will thank you!