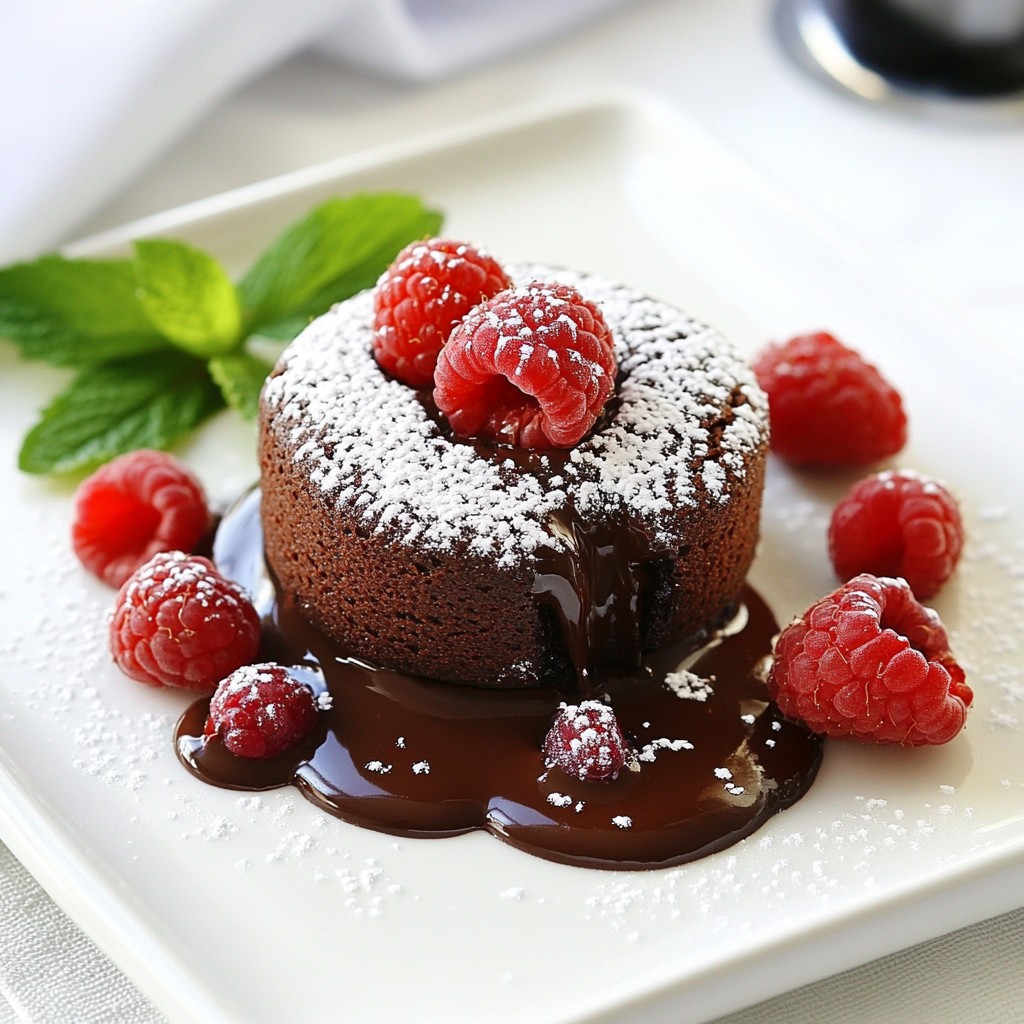
Indulging in a rich chocolate raspberry lava cake is pure bliss! Imagine gooey chocolate flowing from the center, paired with tart raspberries. This dessert is perfect for any occasion. In this post, I’ll guide you through easy steps to create this showstopper. Plus, I’ll share tips, variations, and storage ideas to make your baking journey a success. Let’s dive into this irresistible dessert delight!
Why I Love This Recipe
- Decadent Flavor: This recipe combines rich chocolate and tart raspberries for a perfect balance of flavors that’s simply irresistible.
- Easy to Make:
- Showstopper Presentation: When you cut into the lava cake, the molten chocolate flows out, creating a stunning visual that will wow your guests.
- Perfect for Any Occasion: Whether it’s a romantic dinner or a festive gathering, these lava cakes are sure to impress and satisfy everyone.
Ingredients
List of Ingredients
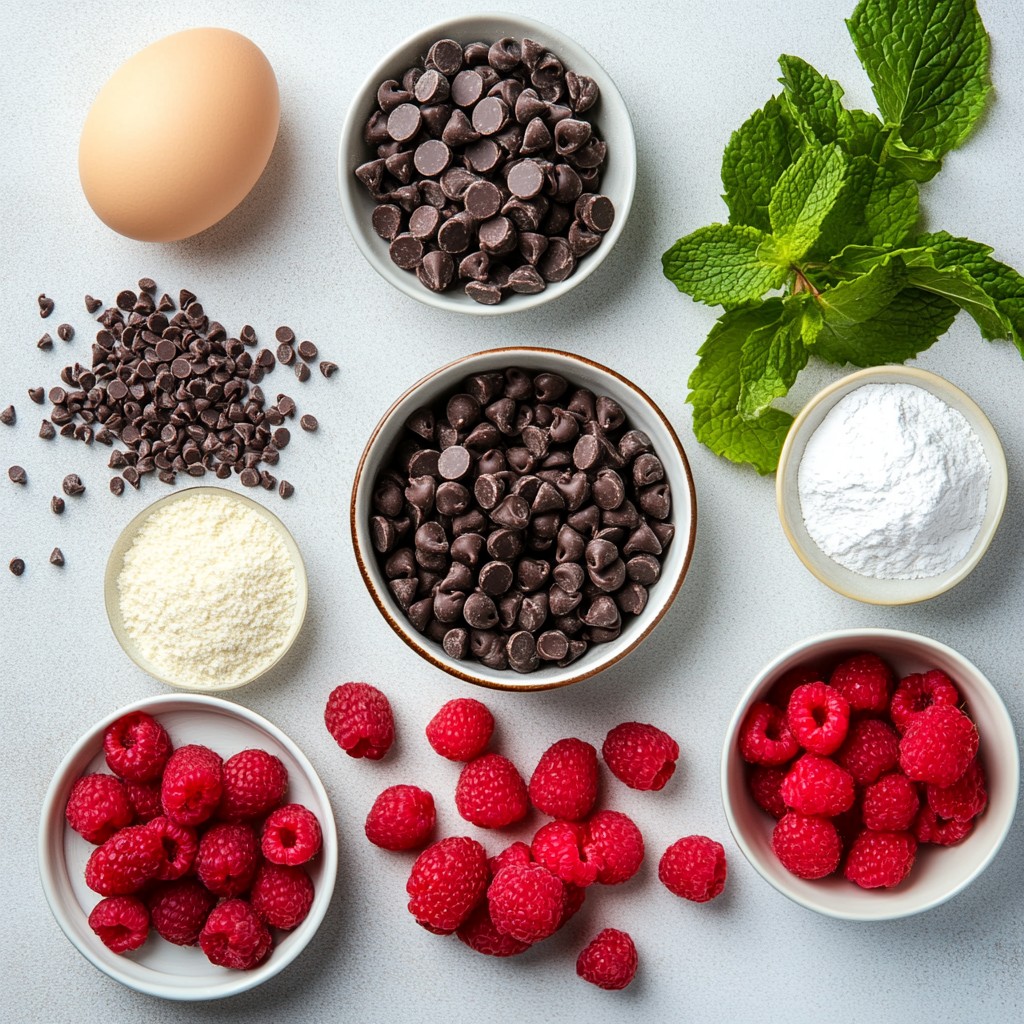
To make the chocolate raspberry lava cakes, you will need:
- 1/2 cup unsalted butter
- 1 cup semi-sweet chocolate chips
- 2 large eggs
- 1/2 cup granulated sugar
- 1/4 cup all-purpose flour
- 1/4 teaspoon salt
- 1/2 cup fresh raspberries
- Powdered sugar for dusting
Optional Garnishes
You can enhance your dessert with:
- Fresh mint leaves
- Extra fresh raspberries
Ingredient Substitutions
If you need alternatives, consider these swaps:
- Use coconut oil instead of butter for a dairy-free option.
- Try dark chocolate chips for a richer taste.
- Use egg substitutes like applesauce or flaxseed meal for a vegan version.
- For gluten-free, replace all-purpose flour with almond flour or a gluten-free blend.
Step-by-Step Instructions
Preheating and Preparing Ramekins
First, preheat your oven to 425°F (220°C). This high heat helps create the gooey center. Next, take four ramekins that hold about 6 ounces. Grease each ramekin with unsalted butter. Sprinkle some flour inside to coat the sides. This step helps prevent sticking. Tap out any excess flour.
Melting Butter and Chocolate
In a microwave-safe bowl, add 1/2 cup of unsalted butter and 1 cup of semi-sweet chocolate chips. Heat it in the microwave in 30-second bursts. Stir after each burst. Keep doing this until the mixture is smooth and creamy. Let it cool a bit so it won’t cook the eggs later.
Mixing Egg and Sugar Mixture
Grab a large bowl and crack 2 large eggs into it. Add 1/2 cup of granulated sugar. Use a whisk to mix them together. Whisk until the mixture looks light and fluffy. This should take about 2-3 minutes. This step adds air, making your cakes light.
Combining Ingredients
Now, gently fold the melted chocolate mixture into the egg and sugar mix. Be careful not to stir too hard. You want to keep the air you just added. Once they mix well, it’s time to add the dry ingredients.
Baking the Lava Cakes
Sift in 1/4 cup of all-purpose flour and 1/4 teaspoon of salt into the chocolate mix. Fold carefully until just combined. Don’t overmix! Now, scoop half of this batter into each ramekin. Place 3-4 fresh raspberries in the center of each. Top with the rest of the batter until they are three-quarters full. Place the ramekins on a baking sheet and bake them for 12-14 minutes. The edges should be firm, but the center must stay soft.
Cooling and Serving Instructions
After baking, take them out and let them sit for 1 minute. Carefully turn each ramekin upside down onto a plate. The cakes should easily fall out. Dust the tops with powdered sugar for a sweet touch. Add fresh mint leaves on top if you want. Enjoy your delicious, gooey chocolate raspberry lava cakes!
Tips & Tricks
Achieving the Perfect Lava Texture
To get that gooey center, bake the cakes for just 12 to 14 minutes. The edges should feel firm while the center remains soft. Keep an eye on them; timing is key. If you bake too long, the lava won’t flow. Trust your oven and use a timer to help.
How to Avoid Overmixing
Mix the batter gently. After adding the flour and salt, fold the mixture just until you see no dry spots. Overmixing can make the cakes tough. You want a light touch here. If you see streaks of flour, that’s okay! It’s better than a dense cake.
Best Practices for Serving
Once the cakes come out of the oven, let them sit for one minute. This helps them hold their shape. When you flip them onto a plate, give the ramekin a gentle tap. Dust with powdered sugar for a sweet touch. Fresh mint leaves add a pop of color. Enjoy your dessert warm for the best lava flow!
Pro Tips
- Use Quality Chocolate: Opt for high-quality semi-sweet chocolate chips for a richer flavor. The better the chocolate, the more decadent your lava cake will be!
- Don’t Overbake: Keep an eye on the baking time; the center should remain gooey. Overbaking will result in a cake that’s more like a brownie than a lava cake.
- Cool Briefly: Allow the cakes to cool for only a minute before inverting. This helps maintain the lava effect while ensuring they release easily from the ramekins.
- Experiment with Fillings: Feel free to add other fillings like peanut butter or a dollop of caramel for an exciting twist on the classic recipe!
Variations
Different Flavor Combinations
You can switch up flavors in lava cakes. Try adding orange zest for a citrus kick. A hint of espresso gives a rich depth. For a minty twist, use peppermint extract. Mix in different chocolates, like dark or white, for unique tastes. This flexibility makes each bake an adventure.
Replacing Raspberries with Other Fruits
Raspberries shine in this recipe, but you can swap in other fruits. Fresh cherries work well for a sweet-sour blend. Blueberries offer a juicy burst, while strawberries add a classic touch. If you want a tropical vibe, try diced mango. Just make sure any fruit is fresh and ripe for the best flavor.
Gluten-Free Options
You can easily make this recipe gluten-free. Replace all-purpose flour with a gluten-free blend. Almond flour adds a nutty twist. Another option is to use oat flour for a hearty texture. Always check labels to ensure your ingredients are gluten-free. This way, everyone can enjoy a delicious lava cake.
Storage Info
How to Store Leftover Lava Cakes
To store leftover lava cakes, let them cool completely. Place them in an airtight container. This keeps the cakes fresh. You can store them in the fridge for up to three days. When ready to enjoy, remove them from the fridge.
Freezing Instructions
You can freeze lava cakes for later enjoyment. Wrap each cooled cake tightly in plastic wrap. Then, place them in a freezer-safe bag or container. They can stay fresh in the freezer for up to two months. When you are ready, thaw them in the fridge overnight.
Reheating Tips
To reheat lava cakes, preheat your oven to 350°F (175°C). Place the cakes on a baking sheet. Heat for about 10-12 minutes. You want the edges warm and the center gooey. If you use a microwave, heat for 15-20 seconds. Be careful not to overheat them. Enjoy your warm, oozing dessert again!
FAQs
How do I know when the lava cakes are done?
You can tell when the lava cakes are done by checking the edges. The edges should feel firm. The center must still look a bit soft. If you press gently, it should feel like a pillow. Bake them for 12 to 14 minutes. If you see cracks, they are ready!
Can I use different types of chocolate?
Yes, you can use different types of chocolate. Dark chocolate gives a rich taste. Milk chocolate makes it sweeter and creamier. You can also mix chocolates for a unique flavor. Just make sure to melt it the same way as the recipe shows.
What can I serve with Chocolate Raspberry Lava Cakes?
Chocolate raspberry lava cakes pair well with many treats. Vanilla ice cream adds creaminess and coolness. Fresh raspberries on the side make it fresh. Whipped cream gives a light touch. You can even add a drizzle of chocolate sauce for extra fun!
How do I prevent the cakes from sticking to the ramekins?
To stop the cakes from sticking, grease the ramekins well. Use unsalted butter and coat them evenly. Then, sprinkle flour inside and tap out the extra. This step helps the cakes slide out easily after baking.
This blog post covered how to make delicious chocolate lava cakes. We talked about the right ingredients, optional garnishes, and smart substitutions. You learned step-by-step instructions, from mixing to baking. I shared tips for perfect texture and serving. We also explored fun variations and how to store your cakes.
In closing, making lava cakes can be a simple joy. With practice, you'll wow your friends and family. Enjoy the sweet rewards of your baking journey!