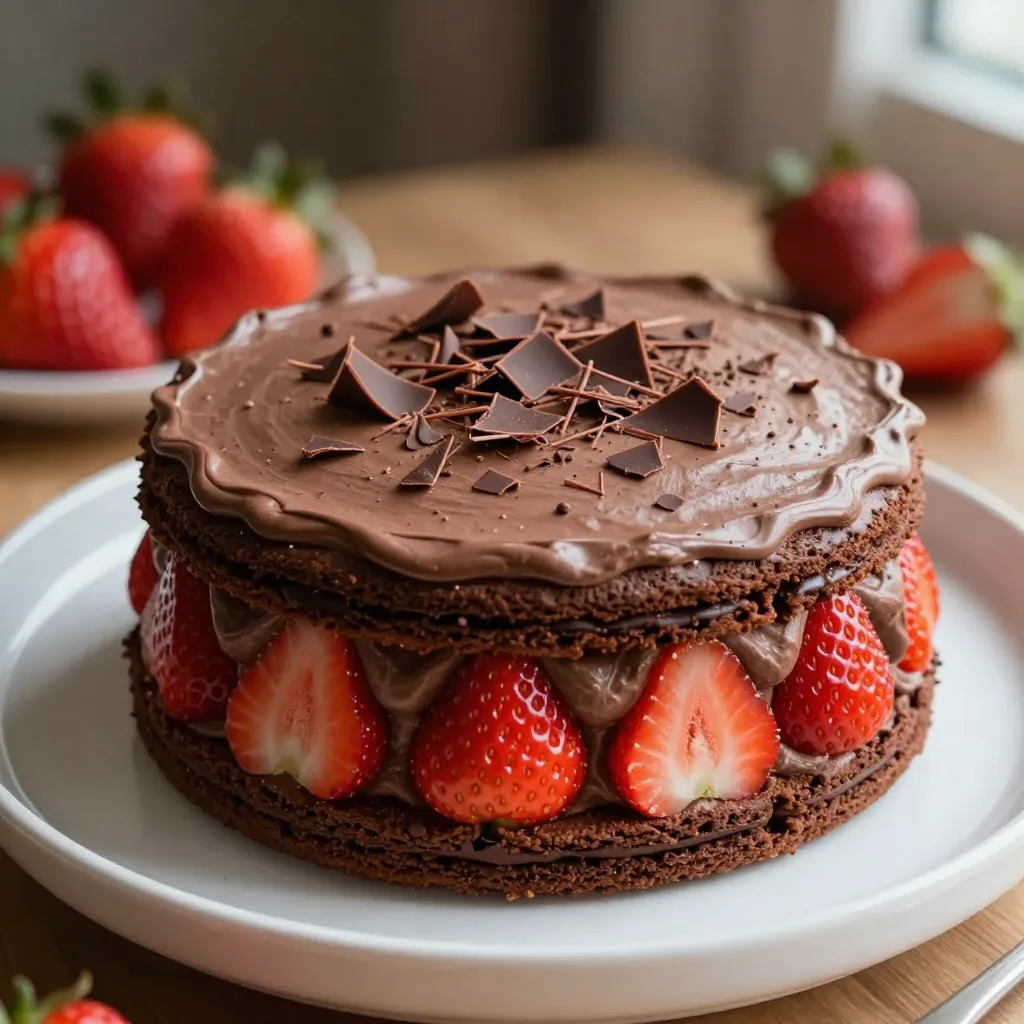
If you’re craving a sweet treat that looks stunning and tastes even better, you’ve found it! My Chocolate Strawberry Icebox Cake combines rich chocolate, fresh strawberries, and creamy whipped chocolate filling. It’s an easy no-bake dessert perfect for any occasion. Join me on this journey to create a dessert that will impress everyone at your table. Let’s dive into the recipe and bring this delight to life!
Why I Love This Recipe
- Decadent Layers: This icebox cake features layers of rich chocolate cream and fresh strawberries, creating a perfect balance of flavors and textures.
- No-Bake Convenience: It’s an easy no-bake dessert that requires minimal effort, making it perfect for warm days or busy occasions.
- Make-Ahead Marvel: This cake can be prepared in advance, allowing the flavors to meld beautifully while the cookies soften in the fridge.
- Gorgeous Presentation: With chocolate shavings on top, this dessert not only tastes amazing but also looks stunning on any table.
Ingredients
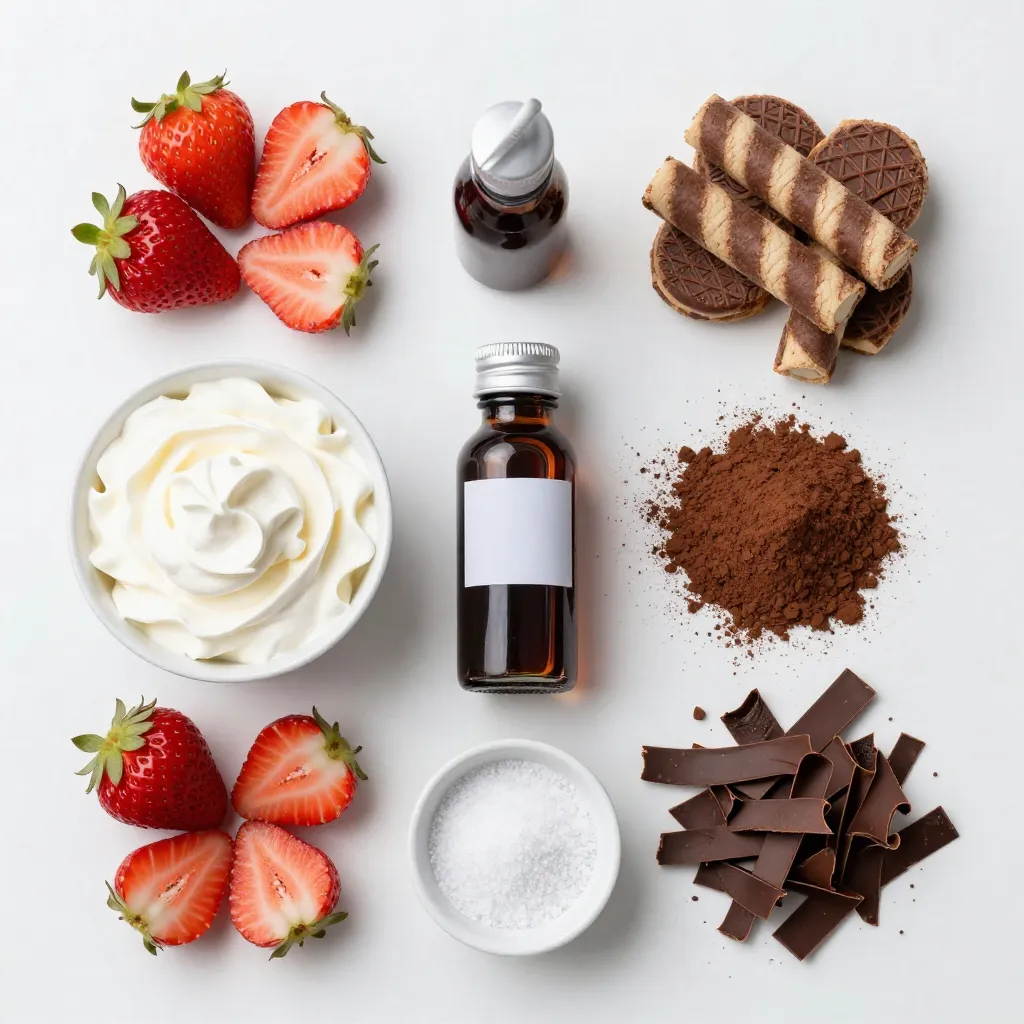
List of Ingredients
To make the Chocolate Strawberry Icebox Cake, you need:
– 1 lb fresh strawberries, sliced
– 2 cups heavy whipping cream
– 1/2 cup powdered sugar
– 1 teaspoon pure vanilla extract
– 12 ounces chocolate wafer cookies
– 2 tablespoons cocoa powder
– A pinch of salt
– Chocolate shavings or curls, for garnish
Ingredient Substitutions
If you need to swap some ingredients, here are good options:
– Heavy whipping cream: You can use coconut cream for a dairy-free option.
– Powdered sugar: Granulated sugar works, but blend it to a fine powder first.
– Chocolate wafer cookies: Graham crackers make a great substitute. They add a nice crunch.
– Cocoa powder: You can use dark cocoa powder for a richer taste.
– Vanilla extract: Almond extract can add a unique flavor twist.
Importance of Fresh Strawberries
Fresh strawberries are key to this dessert. They provide a bright flavor and juicy texture. Using ripe, sweet strawberries makes the cake taste amazing. Look for berries that are red and firm. Avoid any that are mushy or have dark spots. Fresh strawberries also add color and make your dessert look beautiful. This cake showcases the fruit’s flavor, so choose the best ones!
Step-by-Step Instructions
Preparation of Whipped Chocolate Cream
First, grab a large mixing bowl. Add 2 cups of heavy whipping cream. Then, sprinkle in 1/2 cup of powdered sugar. Next, pour in 1 teaspoon of pure vanilla extract. Add 2 tablespoons of cocoa powder and a pinch of salt. Now, use an electric mixer on medium-high speed. Whip until stiff peaks form. This step makes a rich, chocolatey cream.
Layering the Cake
Take a 9×13 inch baking dish. Spread a thin layer of the whipped chocolate cream on the bottom. Next, layer half of the chocolate wafer cookies. You will need about 6-8 cookies. Make sure they slightly overlap. Then, add half of the sliced strawberries over the cookies. Now, spoon on another layer of whipped chocolate cream. Repeat these layers: more cookies, the rest of the strawberries, and finish with the last layer of chocolate cream. Smooth the top layer with a spatula for an even finish.
Refrigeration and Setting Time
Cover the baking dish with plastic wrap. Put it in the refrigerator for at least 4 hours. For the best results, let it set overnight. This waiting time helps the cookies soften. It also allows the flavors to blend nicely. Before serving, add chocolate shavings or curls on top for a fancy touch. Enjoy your delicious creation!
Tips & Tricks
How to Achieve Stiff Peaks in Whipped Cream
To make whipped cream with stiff peaks, start with cold ingredients. Use heavy whipping cream for the best results. Pour the cream into a mixing bowl. Add powdered sugar, vanilla extract, cocoa powder, and a pinch of salt. Mix on medium-high speed with an electric mixer. Watch closely as it thickens. Stop when you see firm peaks that hold their shape. This texture gives your cake a light and fluffy feel.
Serving Suggestions and Presentation Ideas
When serving your cake, slice it into squares for easy portions. Place each square on individual plates. You can add extra strawberry slices on the side. A drizzle of chocolate syrup adds a nice touch. For a fancy finish, sprinkle chocolate shavings or curls on top. This makes your dessert look even more inviting.
Common Mistakes to Avoid
One common mistake is over-whipping the cream. If you whip too long, it can turn grainy. Keep an eye on the cream as it whips. Another mistake is not letting the cake chill long enough. Chilling helps the cookies soften and flavors meld. Make sure to refrigerate your cake for at least four hours, or better yet, overnight. This way, every bite is smooth and tasty.
Pro Tips
- Whip to Perfect Peaks: Ensure your heavy cream is very cold before whipping, as this helps achieve stiff peaks more easily.
- Layering Technique: For even layers, press the cookies slightly into the whipped cream before adding the strawberries, allowing for better integration.
- Flavor Infusion: For an extra flavor boost, consider adding a splash of liqueur, like strawberry or chocolate, to the whipped cream mixture.
- Chill Time: The longer you chill the cake, the better the flavors meld together, so if possible, let it sit overnight.
Variations
Using Different Fruits
You can switch up the fruits in your Chocolate Strawberry Icebox Cake. Raspberries add a nice tart flavor. They pair well with chocolate. Blueberries bring a sweet note and bright color. You can even mix fruits for a fun twist. Just slice them thin like the strawberries. Layer them the same way. Your cake will look and taste amazing!
Alternative Cookie Options
Don’t feel stuck with chocolate wafer cookies. Graham crackers offer a lighter, sweeter taste. They can add a fun crunch to your cake layers. Oreo cookies can give a rich, creamy twist. Just crush them a bit for better layering. Both options will keep the spirit of your cake while adding variety.
Vegan and Dairy-Free Adaptations
You can make this cake vegan and dairy-free easily. Use coconut cream or almond milk instead of heavy cream. Both will whip up nicely. For sweetening, try maple syrup or coconut sugar. Swap the chocolate wafer cookies for dairy-free ones. Your cake will still be rich and tasty, perfect for everyone to enjoy!
Storage Info
Best Ways to Store the Cake
To keep your Chocolate Strawberry Icebox Cake fresh, store it in the fridge. Use an airtight container or cover it tightly with plastic wrap. This helps to lock in moisture and flavor. The cake needs to stay chilled until you serve it. If you leave it out for too long, it can get too soft.
Freezing Instructions
You can freeze this cake if you want to save some for later. First, cut the cake into slices. Wrap each slice in plastic wrap. Then, place the wrapped slices in a freezer-safe bag. Make sure to remove as much air as possible to prevent freezer burn. When you want to enjoy it again, just thaw it in the fridge overnight.
Shelf Life and Reheating Tips
In the fridge, the cake will last for about 3 to 5 days. It’s best to eat it fresh for the best taste. If you freeze it, aim to eat it within 2 months for the best flavor. There’s no need to reheat the cake. It’s best served cold, as the layers stay firm and delicious.
FAQs
Can I make Chocolate Strawberry Icebox Cake in advance?
Yes, you can make this cake a day ahead. It tastes even better after resting. The cookies soak up the flavors and soften, making each bite delightful. Just cover it well with plastic wrap to keep it fresh.
How long will the cake last in the fridge?
The cake will last about 3 to 4 days in the fridge. Make sure it stays covered. After that, the cookies may get too soft, and the strawberries might lose their freshness.
Can I use store-bought whipped cream instead?
Yes, you can use store-bought whipped cream. It saves time and works well. Just make sure to choose a brand with good flavor. Homemade whipped cream gives a richer taste, but store-bought is a great shortcut.
Is there a gluten-free version of this recipe?
Yes, you can make a gluten-free version. Look for gluten-free chocolate wafer cookies. Many brands offer tasty options. This way, you can enjoy the cake without gluten. You can also try using gluten-free graham crackers.
This post shared how to make a delicious Chocolate Strawberry Icebox Cake. We reviewed the key ingredients and even substitutions. You learned how to prepare whipped cream and layer the cake. I provided tips for stiff peaks and common mistakes to avoid. You also explored ways to personalize the cake with fruits and cookies. Finally, we discussed storage, shelf life, and answered FAQs. Enjoy your baking adventur