Indulging in a chocolate strawberry icebox cake is a true delight. This easy recipe will impress your family and friends. Imagine layers of creamy chocolate, fresh strawberries, and crunchy cookie crumbs, all coming together in a no-bake treat. Perfect for hot days or special occasions, this cake is fun to make! Let me guide you through the ingredients and steps to create this mouthwatering dessert. Dive in and discover the joy of icebox cake!
Why I Love This Recipe
- Decadent Flavors: This cake combines the rich taste of chocolate with the fresh sweetness of strawberries, creating a delightful balance that is hard to resist.
- No-Bake Convenience: As a no-bake dessert, it’s perfect for warm days and makes preparation easy, requiring minimal effort while still impressing guests.
- Make Ahead Option: The icebox cake can be prepared in advance, allowing the flavors to meld together, making it an ideal choice for parties or gatherings.
- Customizable Layers: You can easily switch up the ingredients by using different fruits or cookies, allowing for creative variations every time you make it.
Ingredients
Main Ingredients List
- 2 cups heavy whipping cream
- 1/2 cup powdered sugar
- 1 teaspoon vanilla extract
Additional Ingredients
- 1 cup chocolate cookie crumbs (such as Oreo)
- 2 cups fresh strawberries, hulled and sliced
- 8 ounces cream cheese, softened
- 1/2 cup dark chocolate chips, melted
- 1 cup graham crackers, crushed
- Fresh mint leaves for garnish
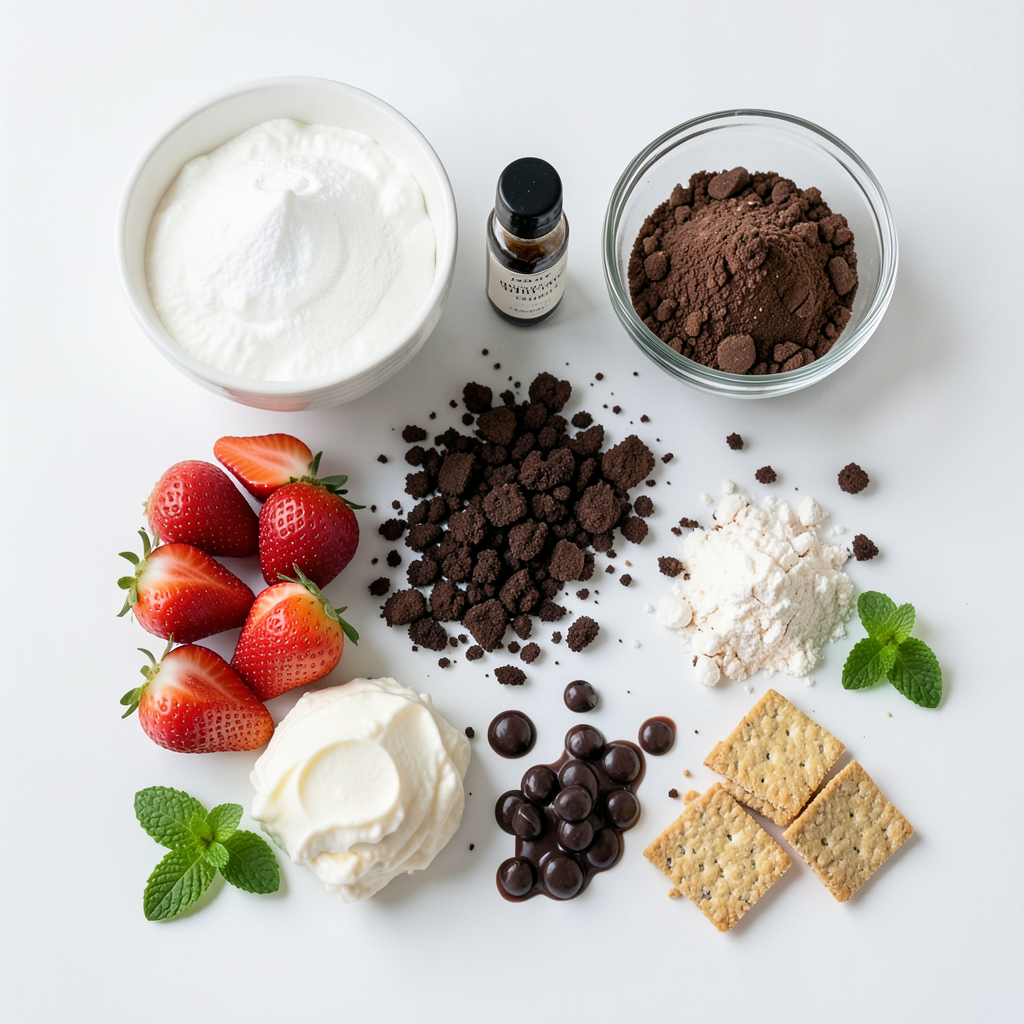
To make this delightful cake, you need a mix of rich and fresh ingredients. The heavy whipping cream gives the cake a light and fluffy texture. Powdered sugar adds sweetness, while vanilla extract lifts the flavors.
Chocolate cookie crumbs bring a fun crunch. Fresh strawberries add a burst of juicy flavor. Cream cheese makes the filling smooth and rich. The melted dark chocolate chips give a deep chocolate taste. Crushed graham crackers add more texture.
Garnish with fresh mint leaves for a pop of color and freshness. These simple ingredients come together to create a delicious treat!
Step-by-Step Instructions
Preparation Steps
1. Start by beating the heavy cream. In a large bowl, combine 2 cups of heavy whipping cream, 1/2 cup of powdered sugar, and 1 teaspoon of vanilla extract. Use a mixer to beat the cream until soft peaks form. This step adds volume and lightness.
2. Next, mix the cream cheese and chocolate. In another bowl, take 8 ounces of softened cream cheese and 1/2 cup of melted dark chocolate chips. Blend these together until smooth. This mixture will give your cake a rich, chocolate flavor.
Layering the Cake
1. Now, spread the chocolate mixture. Grab an 8x8-inch dish and layer the bottom with a thin spread of the chocolate mixture. This helps to start the layering process.
2. Add layers of crumbs and strawberries. First, sprinkle a layer of 1 cup of chocolate cookie crumbs. Then, add a layer of 2 cups of sliced strawberries. Repeat this process: chocolate mixture, cookie crumbs, sliced strawberries.
3. Finish with the final layer. Make sure to end with a layer of the chocolate mixture on top. This will provide a nice finish to your cake.
Chilling and Serving
1. Refrigerate your cake. Cover the dish with plastic wrap and place it in the fridge for at least 4 hours. For the best texture, let it chill overnight. This step allows the flavors to blend beautifully.
2. When you're ready to serve, garnish your cake. Add more sliced strawberries and fresh mint leaves on top for a pop of color. For an extra treat, drizzle a bit of chocolate sauce over the slices. Enjoy your delicious creation!
Tips & Tricks
Perfecting the Whipped Cream
To get soft peaks, start with cold heavy whipping cream. Use a chilled bowl and beaters. Whip until it thickens but still holds shape. Be careful not to overbeat. Overbeating turns cream into butter.
Common mistakes include using warm cream or not chilling your tools. Warm cream won’t whip well. Always check the texture as you whip. Soft peaks look like gentle waves.
Layering Tips
For even layers, use a measuring cup. Pour the chocolate mixture in a thin layer. Spread it out evenly before adding crumbs. Use a spatula to help with this.
Get creative with your layers! Try adding toasted nuts or coconut. You can also mix in different fruits. Alternating layers keeps it fun and exciting.
Presentation Tips
Garnishing makes your cake pop! Use fresh sliced strawberries on top. Mint leaves add a bright touch. Drizzle a bit of chocolate sauce for extra flair.
When serving, slice into squares for easy portions. Serve chilled for the best taste. A cold cake on a warm day is delightful!
Pro Tips
- Chill Your Mixing Bowls: For an extra fluffy whipped cream, chill your mixing bowls and beaters in the freezer for about 10-15 minutes before whipping the cream.
- Use Fresh Strawberries: Opt for ripe, fresh strawberries for the best flavor. If they are not in season, consider using frozen strawberries that have been thawed and drained.
- Layer Strategically: For a visually appealing presentation, alternate the layers of chocolate mixture, cookie crumbs, and strawberries carefully, ensuring that the top layer is the chocolate mixture.
- Allow for Set Time: Refrigerate the cake for at least 4 hours, but overnight is best. This allows the flavors to meld and the layers to set properly.
Variations
Different Flavor Profiles
You can change the taste of your cake easily. Try using different fruits. Instead of strawberries, use raspberries or blueberries. They add a new twist. You can also mix fruits for a fun flavor. For chocolate types, use milk chocolate or white chocolate. Each choice gives a unique taste. Experiment to see what you like best!
Gluten-Free Option
If you need a gluten-free cake, it’s simple to make. Just swap regular cookies for gluten-free ones. Look for gluten-free chocolate cookies. They work great in this recipe. You won’t lose any taste, and everyone can enjoy the cake.
Vegan Version
To make a vegan icebox cake, change a few ingredients. Use plant-based cream cheese instead of regular cream cheese. For the whipped cream, choose a coconut cream or another plant-based option. That way, everyone can enjoy this treat. You can still have the same yummy flavor without the dairy!
Storage Info
Storing Leftover Cake
To keep your Chocolate Strawberry Icebox Cake fresh, store it in the fridge. First, cover the dish tightly with plastic wrap or aluminum foil. This keeps the cake from drying out. The cool air helps maintain its creamy texture. It’s best if you eat leftovers within three days for optimal taste.
Freezing the Icebox Cake
If you want to save some for later, you can freeze the cake. Cut it into squares before freezing. Place the pieces in an airtight container or wrap them in plastic wrap. Make sure to add a layer of aluminum foil for extra protection. This prevents freezer burn. You can freeze it for up to three months. When ready to enjoy, let it thaw in the fridge overnight.
Shelf Life
In the fridge, your cake will last for about three to four days. If you freeze it, it’s good for about three months. Just remember to check for any signs of spoilage before eating. Enjoy your delicious cake while it’s fresh!
FAQs
What is an icebox cake?
An icebox cake is a layered dessert. It uses cream, cookies, and fruit. You chill it in the fridge to set. The layers soften and meld together. This makes it creamy and delicious.
Can I make this cake ahead of time?
Yes, you can make this cake ahead of time. In fact, it tastes better after chilling. I recommend making it the night before. This gives the flavors time to blend.
What can I substitute for heavy whipping cream?
You can use coconut cream instead of heavy whipping cream. You can also try almond cream. Both add a nice flavor. Just make sure to chill them first. This helps achieve the right texture.
How do I prevent the cake from becoming soggy?
To keep your cake from getting soggy, use fresh cookies. Avoid soaking them in liquid. Layer the cake quickly after mixing. Chilling the cake helps, too. It allows the layers to set properly.
Is it possible to use frozen strawberries?
Yes, you can use frozen strawberries. Just thaw them first and drain excess liquid. This prevents the cake from becoming too wet. Fresh strawberries give the best flavor, but frozen works in a pinch.
In this post, we explored how to create a delicious icebox cake. We covered essential ingredients like heavy whipping cream and chocolate cookie crumbs. You learned clear steps for preparation, layering, and chilling. I shared tips to perfect your whipped cream and ideas for fun variations. Remember to store your cake properly to keep it fresh. Enjoy making this simple treat and impress your friends and family with your skills! This cake is a great way to end any meal.