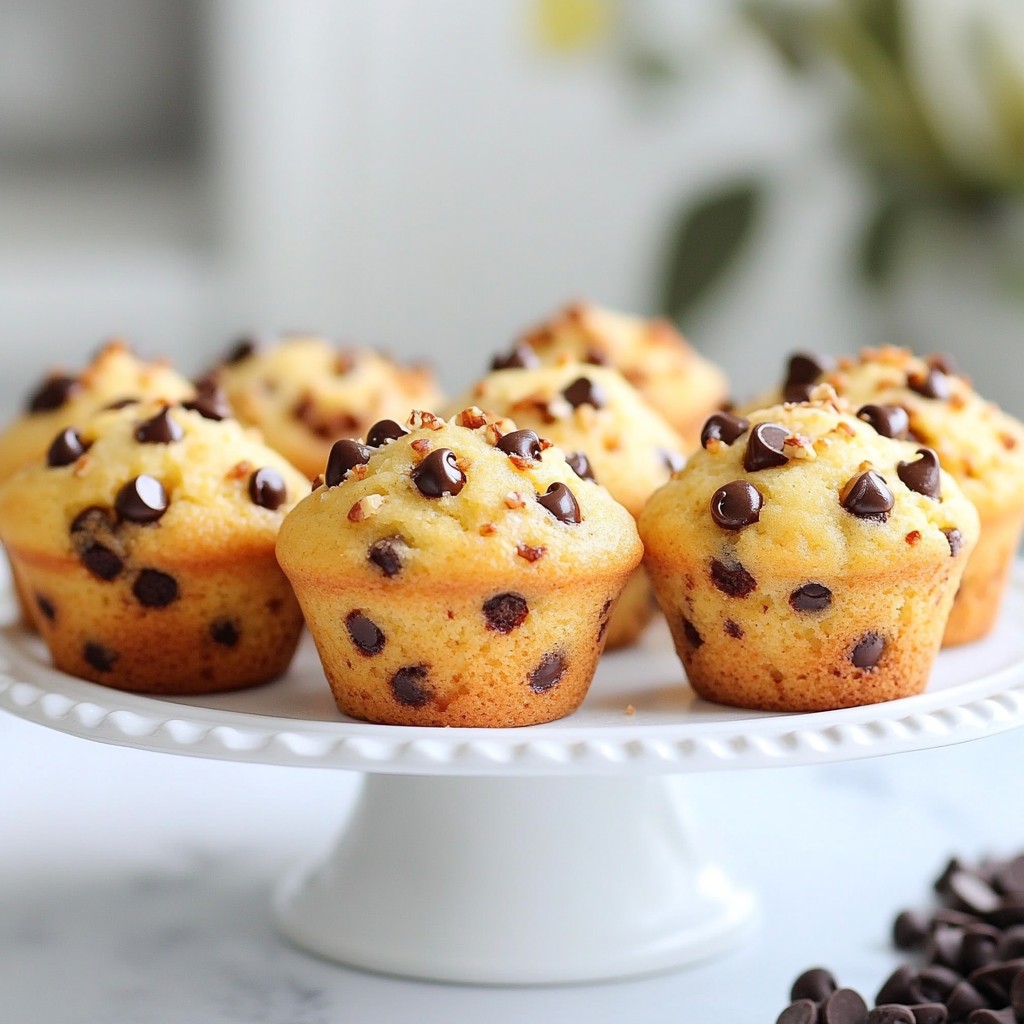
Craving a tasty treat that’s easy to make ahead? My fluffy chocolate chip muffins are just the answer! With rich chocolate bits and a soft texture, these muffins are perfect for breakfast or snacks. You can whip them up in no time and store them for later. Let’s dive into the simple steps and make your mornings a little sweeter!
Why I Love This Recipe
- Make-Ahead Convenience: These muffins can be made ahead of time, making them perfect for busy mornings or unexpected guests.
- Fluffy Texture: With the right mix of ingredients, these muffins turn out incredibly fluffy and soft, making each bite a delight.
- Chocolatey Goodness: The addition of semi-sweet chocolate chips adds a rich flavor that pairs perfectly with the muffin's sweetness.
- Customizable Options: You can easily modify the recipe by adding nuts or substituting different types of chocolate for a personal touch.
Ingredients
List of Ingredients
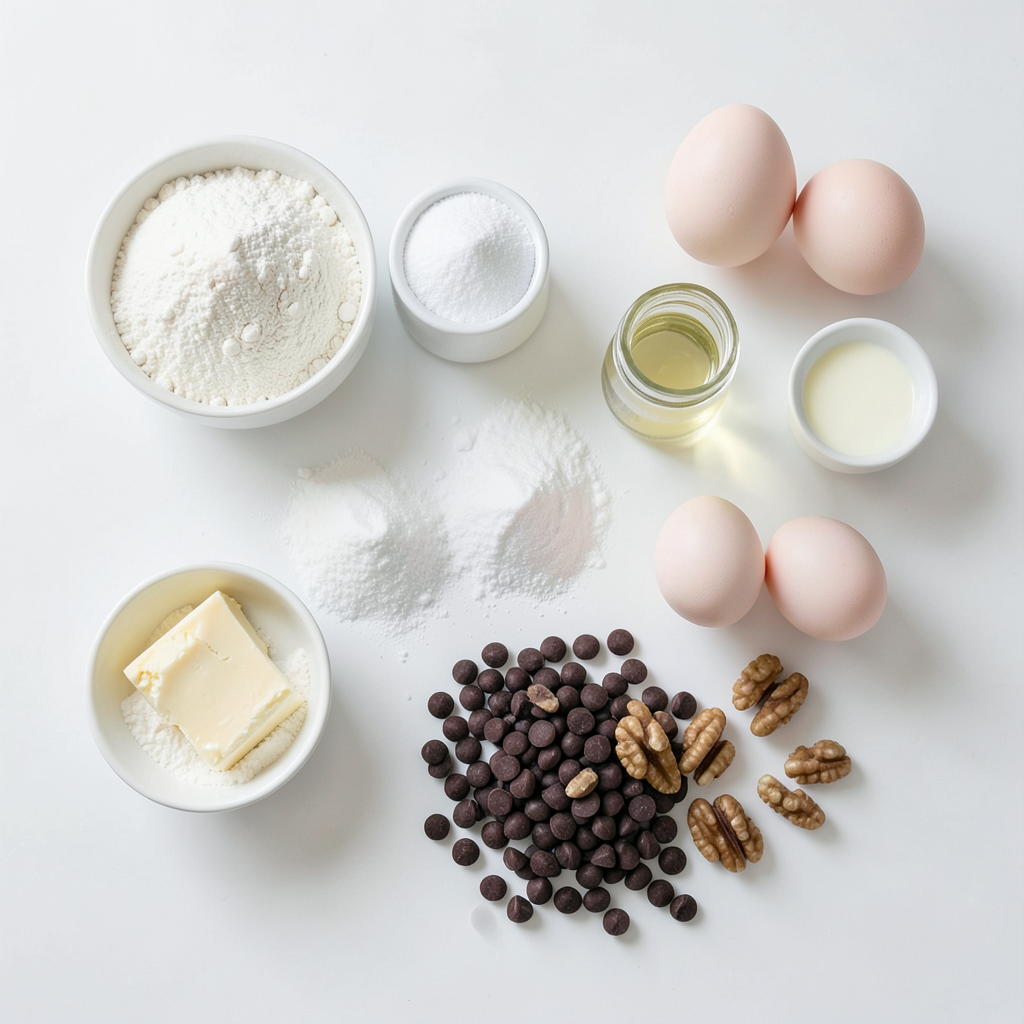
To make fluffy chocolate chip muffins, gather these ingredients:
- 2 cups all-purpose flour
- 1 cup granulated sugar
- 1 tablespoon baking powder
- 1/2 teaspoon baking soda
- 1/2 teaspoon salt
- 1/2 cup unsalted butter, melted
- 1 cup buttermilk (or regular milk with 1 tablespoon lemon juice added)
- 2 large eggs
- 2 teaspoons vanilla extract
- 1 cup semi-sweet chocolate chips
- Optional: 1/4 cup chopped nuts (walnuts or pecans)
Optional Add-ins
You can add some fun twists to your muffins. Here are a few ideas:
- Chopped nuts add a nice crunch.
- Dried fruits like cranberries or blueberries bring sweetness.
- Spices like cinnamon can add warmth.
- Swap in dark chocolate chips for a richer taste.
Ingredient Substitutions
If you need alternatives, here are some great swaps:
- Use whole wheat flour for a healthier muffin.
- Coconut oil can replace butter for a dairy-free option.
- Almond milk or oat milk works instead of buttermilk.
- Try flax eggs instead of regular eggs for a vegan choice.
These ingredients will help you create delicious muffins that you can enjoy any time!
Step-by-Step Instructions
Preheating the Oven
First, you need to set your oven. Preheat it to 375°F (190°C). This step warms the oven, so your muffins bake evenly. Line a muffin tin with paper liners. You can also spray it with non-stick spray.
Mixing Dry Ingredients
Grab a large bowl. In this bowl, mix all the dry items. Add 2 cups of all-purpose flour, 1 cup of granulated sugar, 1 tablespoon of baking powder, 1/2 teaspoon of baking soda, and 1/2 teaspoon of salt. Use a whisk to combine everything well. This creates a good base for your muffins.
Combining Wet Ingredients
Now, take another bowl. In this bowl, you will mix the wet items. Pour in 1/2 cup of melted unsalted butter. Add 1 cup of buttermilk, 2 large eggs, and 2 teaspoons of vanilla extract. Whisk them together until smooth. This mixture adds moisture and flavor.
Incorporating Dry and Wet Mixtures
Pour the wet mixture into the dry one. Gently fold them together using a spatula. Be careful not to overmix. It’s fine if you see a few flour streaks. This keeps the muffins light and fluffy.
Filling the Muffin Tin
Now it’s time to fill the muffin tin. Use a scoop or spoon to divide the batter. Fill each muffin cup about 2/3 full. This gives them room to rise without spilling over.
Baking and Cooling
Place the muffin tin in the preheated oven. Bake for 18 to 22 minutes. To check if they are done, insert a toothpick into the center of a muffin. If it comes out clean, they are ready. Let them cool in the pan for 5 minutes. Then, move them to a wire rack to cool completely. Enjoy the delicious smell filling your kitchen!
Tips & Tricks
Ensuring Muffin Fluffiness
To make your muffins fluffy, start with room temperature ingredients. Cold eggs and milk can make the batter dense. Use fresh baking powder. Old leavening agents won't make your muffins rise well. When mixing, combine wet and dry ingredients gently. Overmixing can lead to tough muffins. Aim for a few flour streaks for the best texture.
How to Store Muffins for Freshness
Store your muffins in an airtight container. This keeps them soft and prevents drying out. You can keep them at room temperature for three days. If you want them to last longer, freeze them. Wrap each muffin tightly in plastic wrap, then place in a freezer bag. They can last for up to a month in the freezer.
Reheating Leftover Muffins
To reheat muffins, use the microwave for quick warming. Heat for about 10-15 seconds for one muffin. If you prefer a crispier texture, use the oven. Preheat it to 350°F (175°C). Place the muffins on a baking sheet and warm them for about 5-7 minutes. Enjoy your warm and fluffy muffins just like fresh!
Pro Tips
- Use Room Temperature Ingredients: For the best texture, let your eggs and buttermilk come to room temperature before mixing. This helps create a smoother batter and fluffier muffins.
- Don't Overmix: Gently fold the batter until just combined. Overmixing can lead to dense muffins; a few flour streaks are perfectly fine.
- Experiment with Mix-Ins: Feel free to customize your muffins by adding other ingredients like dried fruits, coconut flakes, or different types of chocolate chips for variety.
- Store Properly: To keep muffins fresh, store them in an airtight container at room temperature for up to 3 days or freeze them for longer shelf life.
Variations
Different Chocolate Types
You can switch up the chocolate chips in this recipe. Try using dark chocolate chips for a richer taste. Milk chocolate chips will make your muffins sweeter. You can even use white chocolate for a fun twist. For a touch of luxury, consider adding chocolate chunks. They create gooey pockets of chocolate. Each type of chocolate adds its own flavor and texture.
Nut-Free or Dairy-Free Options
If you need nut-free muffins, just leave out the nuts. You can still enjoy the chocolate flavor. For dairy-free muffins, use a non-dairy milk like almond or oat milk. Replace the unsalted butter with coconut oil or a vegan butter substitute. This way, everyone can enjoy a fluffy muffin without worry.
Flavor Additions (e.g., spices, fruits)
Want to get creative? Add spices like cinnamon or nutmeg for warmth. You can also mix in fruits like bananas or blueberries. This adds moisture and a burst of flavor. Try adding a teaspoon of orange zest for a fresh twist. Each of these ideas makes the muffins unique and fun to eat.
Storage Info
Room Temperature Storage
You can keep your muffins at room temperature. Place them in an airtight container. They stay fresh for up to three days. Be sure to store them in a cool, dry place. This helps maintain their fluffiness.
Freezing Muffins
Freezing is a great way to save muffins for later. First, let them cool completely. Then, wrap each muffin in plastic wrap. Place them in a freezer-safe bag or container. You can freeze them for up to one month. This keeps their taste and texture intact.
Thawing Instructions
To thaw your muffins, remove them from the freezer. Unwrap them and place them on a plate. Leave them at room temperature for about an hour. For a quick option, microwave them for 15-20 seconds. Enjoy them warm for the best taste!
FAQs
Can I use whole wheat flour?
Yes, you can use whole wheat flour. It may make the muffins denser. To keep them fluffy, mix half whole wheat and half all-purpose flour. This way, you get the benefits of whole grains without losing fluffiness.
How long can I store the muffins?
You can store the muffins for up to three days at room temperature. Keep them in an airtight container to keep them fresh. If you want them to last longer, freeze them for up to a month.
What can I substitute for buttermilk?
If you don’t have buttermilk, you can use regular milk. Just add one tablespoon of lemon juice to the milk and let it sit for five minutes. This creates a similar acidity, making your muffins rise well.
Can I make the batter in advance?
Yes, you can make the batter in advance. Just cover it and keep it in the fridge for up to 24 hours. When you're ready to bake, stir the batter gently before filling the muffin tin. This helps keep the muffins airy and light.
You learned how to make great muffins with simple steps. We covered the right ingredients, baking methods, and storage tips. You can customize your muffins with tasty add-ins and substitutions.
Baking is fun and easy. Enjoy your muffins fresh or reheated. Keep experimenting with flavors and enjoy your baking journey. Happy baking!