If you love dessert that’s both tangy and creamy, then these Key Lime Pie Cheesecake Bars are for you! This recipe combines the classic flavors of key lime pie with the richness of cheesecake. Whether you’re new to baking or a pro, you’ll find simple steps and tips to make these bars a hit. Get ready to enjoy a sweet treat that everyone will love!
Why I Love This Recipe
- Deliciously Tangy: The combination of key lime and cream cheese creates a perfect balance of tart and sweet, making each bite refreshing and delightful.
- Easy to Make: With straightforward steps and minimal prep time, these cheesecake bars can be whipped up quickly, perfect for any occasion.
- Perfectly Creamy Texture: The addition of sour cream ensures that the cheesecake bars have a rich and smooth texture that melts in your mouth.
- Great for Sharing: Cut into bars, they are easy to serve and share with friends and family, making them ideal for gatherings and parties.
Ingredients
Full list of ingredients
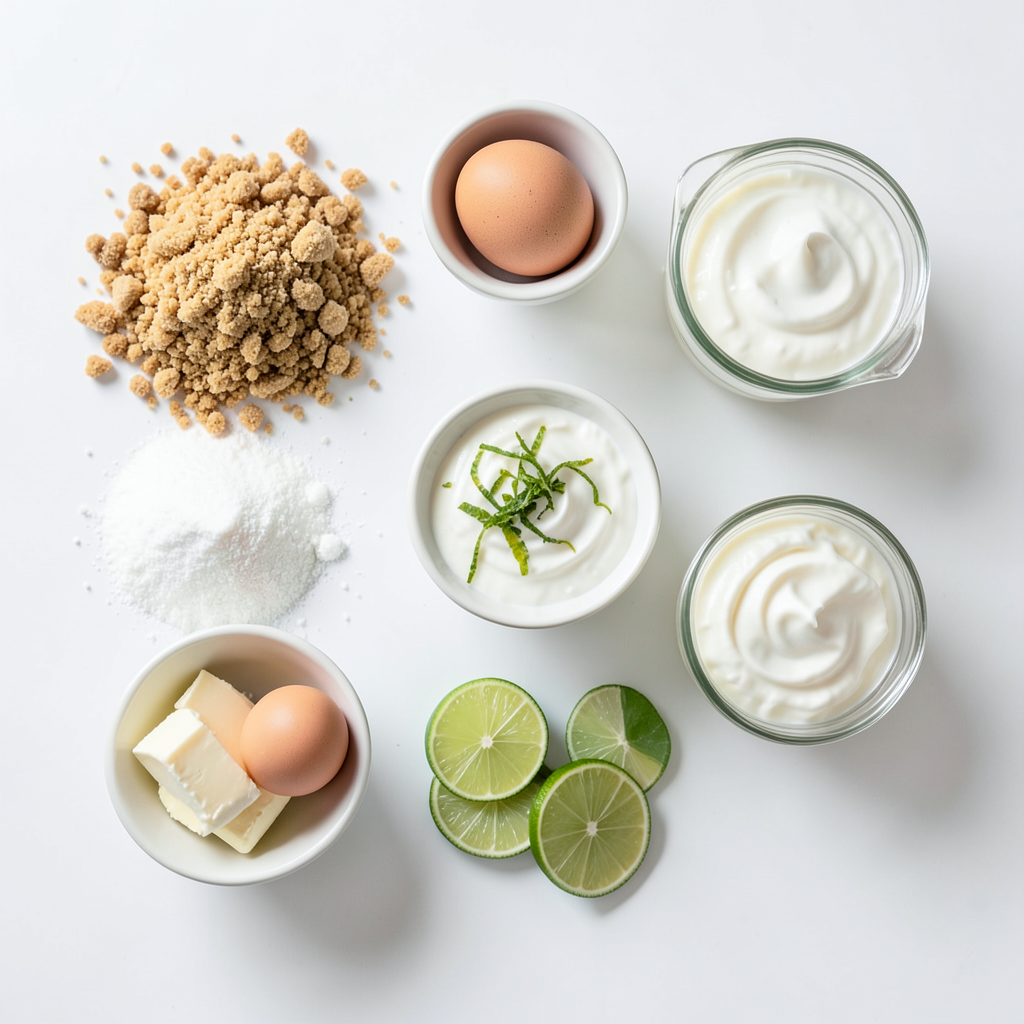
- 1 ½ cups graham cracker crumbs
- ⅓ cup granulated sugar
- ¼ cup unsalted butter, melted
- 16 oz cream cheese, softened
- 1 cup granulated sugar
- 3 large eggs
- ½ cup sour cream
- ¾ cup fresh lime juice
- Zest of 2 limes
- 1 teaspoon vanilla extract
- Whipped cream for topping
- Lime slices for garnish
Important notes on ingredient quality
Using fresh ingredients makes a big difference. Choose ripe limes for juice and zest. Fresh lime juice gives a bright flavor. For cream cheese, get high-quality brands. They beat up smoother and taste richer. Use unsalted butter for a balanced taste in the crust.
Substitutions for key ingredients
You can swap graham crackers for digestive biscuits. They work well and taste great. For a gluten-free option, use gluten-free graham crackers. If you want a dairy-free version, try vegan cream cheese. This will give a similar texture. You can replace sour cream with Greek yogurt if needed.
Step-by-Step Instructions
Prepping the crust
To start, preheat your oven to 325°F (160°C). This step is crucial for a nice bake. Line an 8x8 inch baking dish with parchment paper. Make sure some paper hangs over the edges. This helps you lift out the bars later.
In a medium bowl, combine 1 ½ cups of graham cracker crumbs, ⅓ cup of sugar, and ¼ cup of melted unsalted butter. Mix these ingredients well until the mixture looks like wet sand. Press this mixture firmly into the bottom of your baking dish. This forms a solid crust. Bake the crust for 10 minutes, then take it out and let it cool slightly.
Making the cheesecake filling
Now, grab a large mixing bowl. Beat 16 oz of softened cream cheese with an electric mixer. Mix until it's smooth and creamy. This should take about 2 minutes. Gradually add in 1 cup of sugar while you continue to beat the mixture. It should blend well.
Next, add 3 large eggs, one at a time. Mix on low speed after each egg. This keeps the mixture smooth. Then, mix in ½ cup of sour cream, ¾ cup of fresh lime juice, the zest of 2 limes, and 1 teaspoon of vanilla extract. Blend everything until it's smooth and well mixed.
Baking and cooling process
Pour the creamy cheesecake mixture over the cooled crust. Spread it evenly with a spatula. Bake in your preheated oven for 25-30 minutes. The center should be set but still a bit jiggly when done.
After baking, turn off the oven and crack the door open. Let the cheesecake cool inside for another 30 minutes. This helps prevent cracks. Once cooled, place it in the refrigerator for at least 4 hours, or overnight for best results.
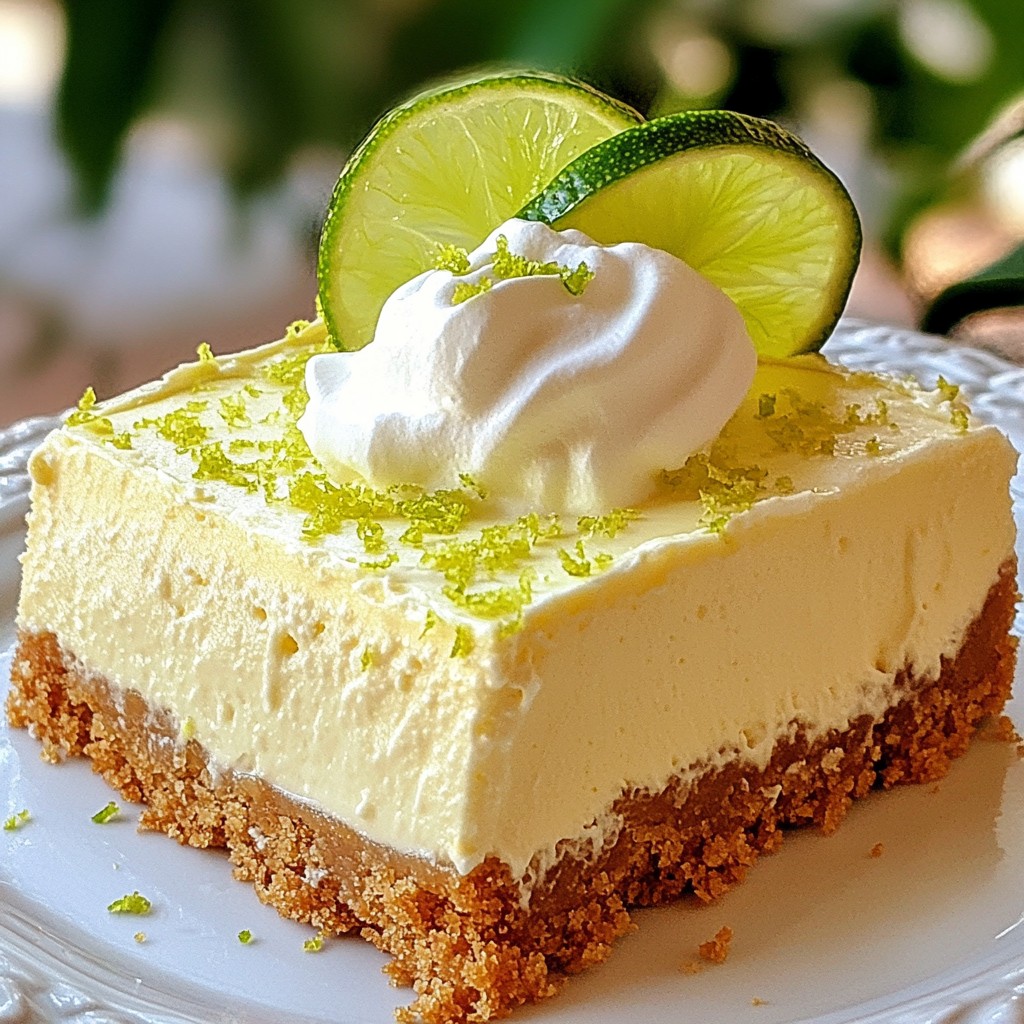
When ready to serve, lift the cheesecake out using the parchment paper. Cut it into bars. Top each bar with whipped cream and a slice of lime for a nice touch. Enjoy this tangy and creamy treat!
Tips & Tricks
How to achieve the perfect texture
To get a smooth and creamy texture, blend the cream cheese first. Make sure it's soft. You want to mix it for about two minutes. This helps break down any lumps. Add the sugar slowly. Each egg should mix in one at a time. This keeps the batter light. Lastly, fold in the sour cream, lime juice, and zest gently. This preserves the fluffiness.
Making ahead and storing options
You can make these bars a day in advance. Let them chill in the fridge for at least four hours. This allows the flavors to blend. To store, cover the dish with plastic wrap. If you want to keep them longer, freeze them. Cut bars into pieces before freezing. Use parchment paper between layers to prevent sticking.
Serving suggestions and presentation ideas
For serving, lift the cheesecake out using the parchment paper. Cut bars into squares for neat portions. Top each square with a dollop of whipped cream. Add a lime slice on top for a pop of color. Consider serving on a bright plate to make them stand out. You can also drizzle some lime juice on the plate for extra flair. Enjoy these bars chilled for the best taste!
Pro Tips
- Chill for Best Flavor: Allow the cheesecake bars to chill in the refrigerator overnight for a richer flavor and creamier texture.
- Use Fresh Limes: For the best taste, always use fresh lime juice and zest instead of bottled varieties.
- Prevent Cracking: To prevent cracks on the surface, avoid overmixing the batter and let the cheesecake cool gradually in the oven.
- Garnish Creatively: Elevate your presentation by adding fresh berries or mint leaves along with the lime slices on top of the whipped cream.
Variations
Alternative flavors (like lemon or berry)
You can change the flavor of these cheesecake bars easily. Instead of lime, try lemon juice and zest for a bright twist. You can also use berries like strawberries or blueberries. For berry bars, blend the fresh fruit into the cheesecake mix. This swaps the tangy lime for sweet fruit flavors. Each option gives the bars a new taste.
Gluten-free crust options
If you need a gluten-free option, use gluten-free graham crackers. Simply crush them and mix with sugar and melted butter as you would with regular graham crackers. You can also try almond flour or ground oats for a tasty crust. This allows everyone to enjoy the bars without gluten.
Vegan adaptations
For a vegan version, swap cream cheese with a vegan alternative, like cashew cream or tofu. Use flax eggs instead of regular eggs. To make a flax egg, mix one tablespoon of flaxseed meal with two and a half tablespoons of water. Let it sit for five minutes to thicken. For the crust, ensure you use vegan butter or coconut oil. These simple swaps keep the creamy texture while making it plant-based.
Storage Info
Best storage methods
Store your key lime pie cheesecake bars in an airtight container. Use parchment paper to separate layers if you stack them. This keeps them fresh and prevents sticking. Make sure to keep them in the fridge for best taste and texture.
How long do they last in the fridge?
These cheesecake bars last up to one week in the fridge. The flavors actually get better as they sit. Just make sure your container is sealed well to avoid drying out.
Freezing cheesecake bars for future enjoyment
You can freeze these bars for up to three months. First, cut them into individual bars. Wrap each bar tightly in plastic wrap. Then place them in a freezer-safe bag or container. When you’re ready to enjoy, let them thaw in the fridge overnight.
FAQs
How can I tell when the cheesecake bars are done?
You can check the cheesecake bars by looking at the center. It should be set but still slightly jiggly. If the surface looks firm and the edges are pulling away from the pan, it’s a good sign. You can also insert a toothpick in the center. If it comes out clean or with a few moist crumbs, they are done. Let them cool in the oven for 30 minutes to finish setting.
Can I use bottled lime juice instead of fresh?
Yes, you can use bottled lime juice if you need to. However, fresh lime juice gives a brighter taste. It also adds a fresh, zesty flavor that makes these bars special. If you use bottled juice, check that it has no added sugars or preservatives. This will help keep the taste as fresh as possible.
What is the best way to cut cheesecake bars?
To cut cheesecake bars neatly, use a sharp knife. First, dip the knife in hot water and wipe it dry. This helps make clean cuts. Start at one edge and cut straight down. You can also score the top lightly before cutting to guide your knife. After each cut, wipe the knife clean to keep your edges sharp and neat.
You’ve learned how to make delicious cheesecake bars from scratch. We covered the essential ingredients, tips for perfect texture, and fun flavor variations. Understanding proper storage and serving ideas can help you enjoy these treats longer. Remember, quality ingredients matter. Try different flavors and adapt the recipe to fit your needs. Now, you have the tools to create cheesecake bars that will impress everyone. Enjoy your baking journey!