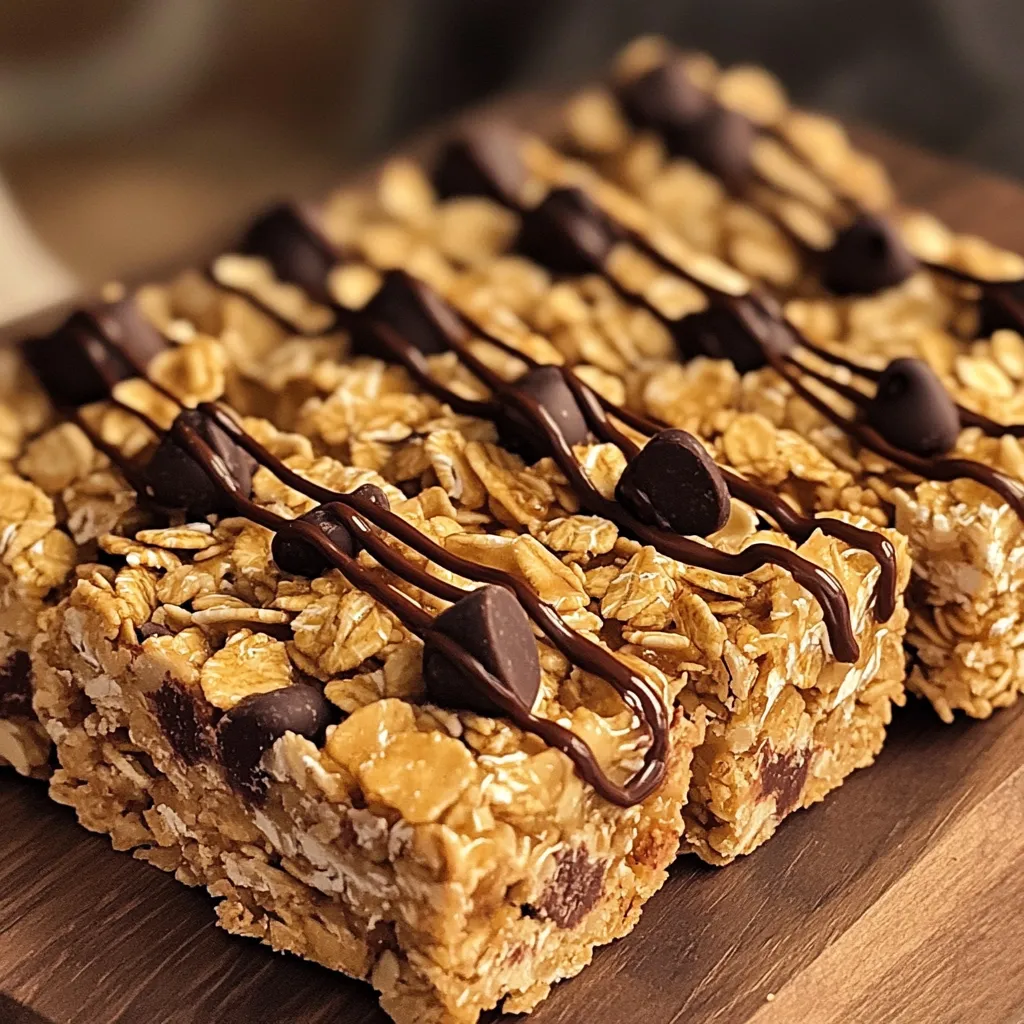
Looking for a sweet snack that’s easy and quick? No-Bake Chocolate Chip Granola Bars are your answer! You only need a few simple ingredients, and you can whip them up in no time. Perfect for busy days or a fun treat, these bars pack flavor and nutrition. Join me as we dive into how to make these delicious snacks that will keep you coming back for more!
Ingredients
To make no-bake chocolate chip granola bars, you’ll need simple and wholesome ingredients. Each item plays a key role in flavor and texture. Here’s what you need:
– 2 cups rolled oats
– 1 cup almond butter (or peanut butter)
– 1/2 cup honey (or maple syrup)
– 1/2 cup mini chocolate chips
– 1/2 cup chopped nuts (e.g., almonds, walnuts, or pecans)
– 1/4 cup chia seeds (optional)
– 1 teaspoon vanilla extract
– A pinch of salt
These ingredients come together to create a tasty treat. The rolled oats provide a hearty base. Nut butter adds creaminess and binds everything. Honey or maple syrup gives a touch of sweetness. Mini chocolate chips add fun bursts of flavor. Chopped nuts add crunch and nutrition, while chia seeds boost health benefits. The vanilla and salt enhance all the flavors.
Feel free to mix things up. You can swap almond butter for peanut butter or use maple syrup instead of honey. Your taste buds will thank you!
Step-by-Step Instructions
Preparing the Pan
First, grab an 8×8 inch baking dish. Line it with parchment paper, letting some hang over the edges. This helps you lift out the bars later. For easier removal, press the paper into the corners well. This way, your bars won’t stick.
Mixing Wet Ingredients
Next, we will mix the wet ingredients. Take a small saucepan and add the almond butter and honey (or maple syrup). Heat it on low. Stir it gently until it melts and becomes smooth. Remove it from the heat. Now, add the vanilla extract and a pinch of salt. Stir again to combine everything.
Combining Dry Ingredients
In a large mixing bowl, add the rolled oats, chopped nuts, and chia seeds if you are using them. Pour your warm almond butter mixture over these dry ingredients. Stir the mixture well until it all comes together. This is where the magic begins!
Chilling and Cutting
Now it’s time to chill the mixture. Pour it into the prepared baking dish. Use a spatula or your hands to press it down firmly. This makes sure it holds together as bars. Place the dish in the refrigerator for at least 1 hour. Once firm, lift the granola out using the parchment paper. Place it on a cutting board and cut it into bars or squares. Enjoy your delicious treat!
Tips & Tricks
Perfecting Your Granola Bars
To ensure your granola bars hold together, use the right amounts of wet and dry ingredients. The almond butter and honey act as a glue. If you feel the mix is crumbly, add a bit more almond butter.
When pressing the mixture into the pan, use a spatula or your hands. Start from the center and press firmly toward the edges. This helps to compact the mixture well. A good press-down technique makes a big difference in the final bars.
Presentation Ideas
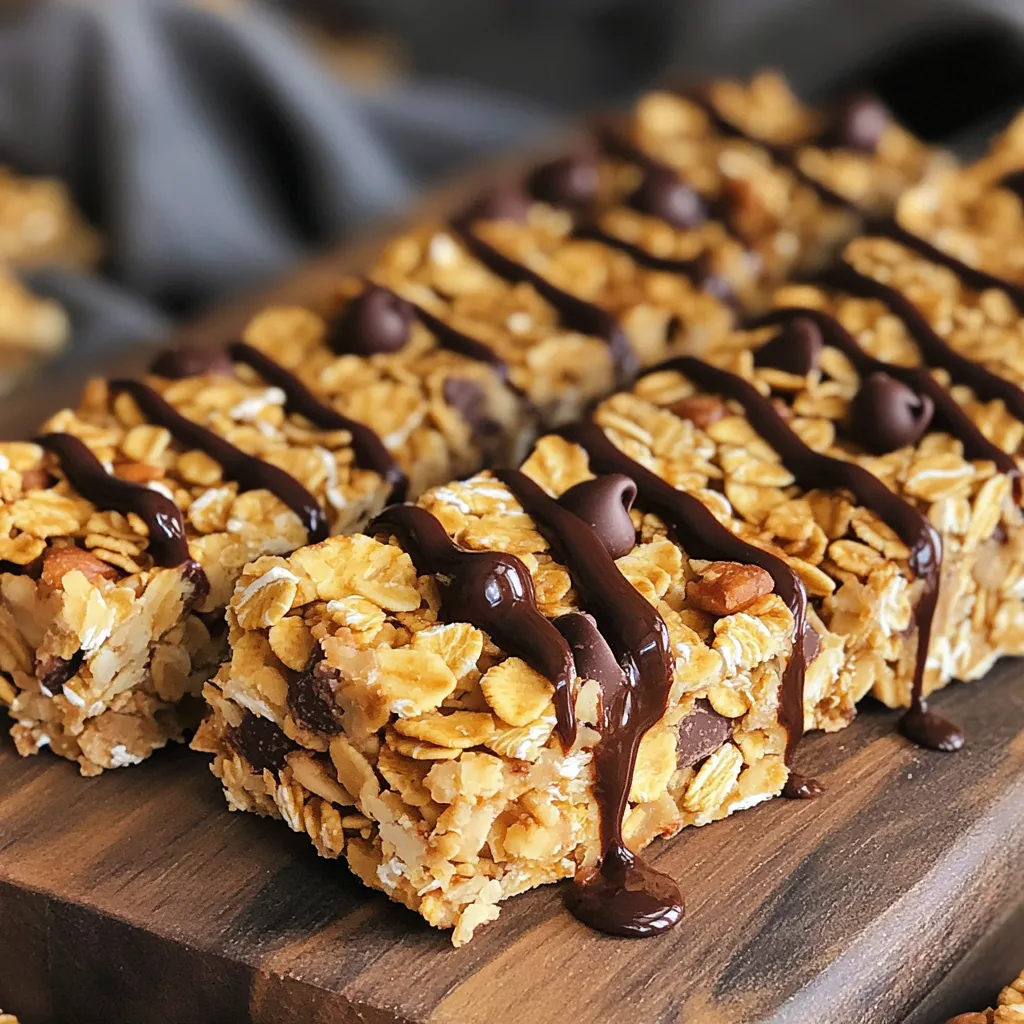
Get creative with how you serve your granola bars. You can drizzle melted chocolate on top for a sweet touch. Serve the bars on a wooden platter for a rustic look.
For easy grab-and-go snacks, wrap each bar in parchment paper. Tie it with twine for a charming finish. This makes them perfect for lunchboxes or a quick snack on the run.
Variations
Flavor Alterations
You can change the flavor of your bars with different nut butters. Almond butter gives a nice, creamy taste. Peanut butter adds a classic flavor. Sunflower seed butter is also a great swap if you want a nut-free option.
For sweeteners, use honey or maple syrup. You can try agave syrup for a lighter taste. If you prefer less sugar, try using mashed bananas or applesauce. Each choice adds a unique twist.
Additional Mix-Ins
Adding dried fruits or seeds can enhance your bars. Consider raisins, cranberries, or apricots for a fruity kick. You can also add pumpkin seeds or sunflower seeds for extra crunch and nutrition.
Adjust the mixture based on what you add. If you include more dry ingredients, you might need a little more nut butter or sweetener. This keeps your bars moist and tasty.
Storage Info
Storing the Bars
To keep your no-bake chocolate chip granola bars fresh, store them in a cool place. Use an airtight container to keep moisture out. You can place parchment paper between layers to avoid sticking. This helps keep the bars intact and easy to grab.
Shelf Life
These granola bars last about one week at room temperature. If you want to save them longer, consider freezing. Wrap each bar in plastic wrap, then place them in a freezer bag. They can last up to three months in the freezer. To enjoy, thaw overnight in the fridge.
FAQs
Can I make these granola bars vegan?
Yes, you can easily make these granola bars vegan. To do this, swap almond butter for a nut-free option like sunflower seed butter. Use maple syrup instead of honey. The rest of the ingredients, like oats and chocolate chips, are typically vegan. For chocolate chips, look for ones labeled as dairy-free. This way, you keep all the great flavors while making the bars suitable for a vegan diet.
How do I make these granola bars nut-free?
To make these granola bars nut-free, use sunflower seed butter instead of almond or peanut butter. You can also leave out the chopped nuts. For added crunch, consider using seeds like pumpkin seeds or sunflower seeds. These will help maintain texture without using any nuts. Just ensure you check labels to avoid cross-contamination if allergies are a concern.
What can I do if the mixture is too dry or too wet?
If your mixture is too dry, add a splash of water or more almond butter. This helps everything stick together. If it feels too wet, add more rolled oats or a bit of chia seeds to absorb the extra moisture. Mix well after each addition. The goal is to have a sticky but not soggy mixture that holds together when pressed into the pan.
These homemade granola bars are simple and tasty. We covered the right ingredients, step-by-step instructions, and helpful tips. You can mix flavors and customize them to your liking. Best of all, you can store them well for lasting freshness. Enjoy experimenting with these bars, and share them with friends or family. You’ll create delicious snacks that everyone will love. So, get started today and make your own healthy treat!