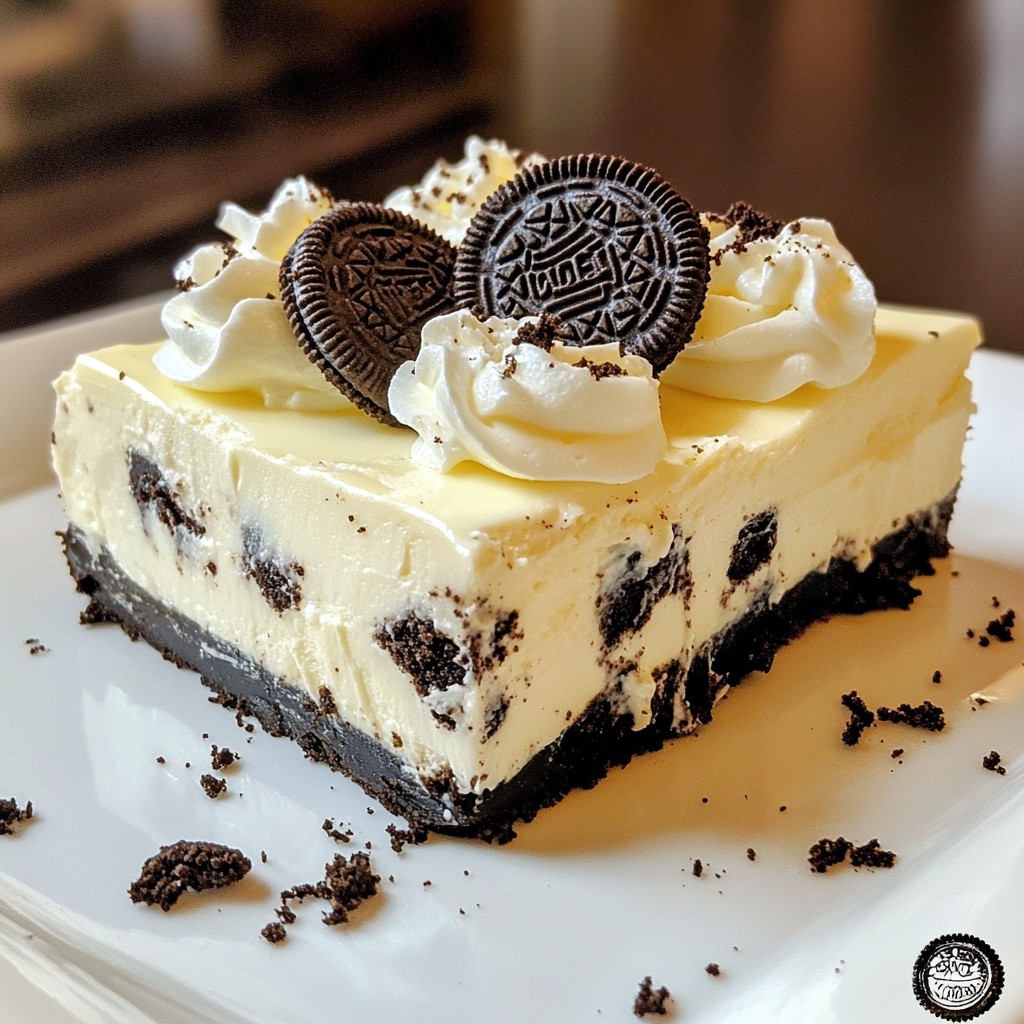
If you’re craving a sweet treat that's easy to make, you've come to the right place! My No-Bake Oreo Cheesecake combines rich cream cheese and crunchy Oreos for a delightful dessert. No oven required means less fuss and more fun. Perfect for gatherings or a simple night in, this creamy dessert is a hit with everyone. Let’s dive into the ingredients and steps to whip up this delicious cheesecake!
Error: Connection error.
Ingredients
Main Ingredients Overview
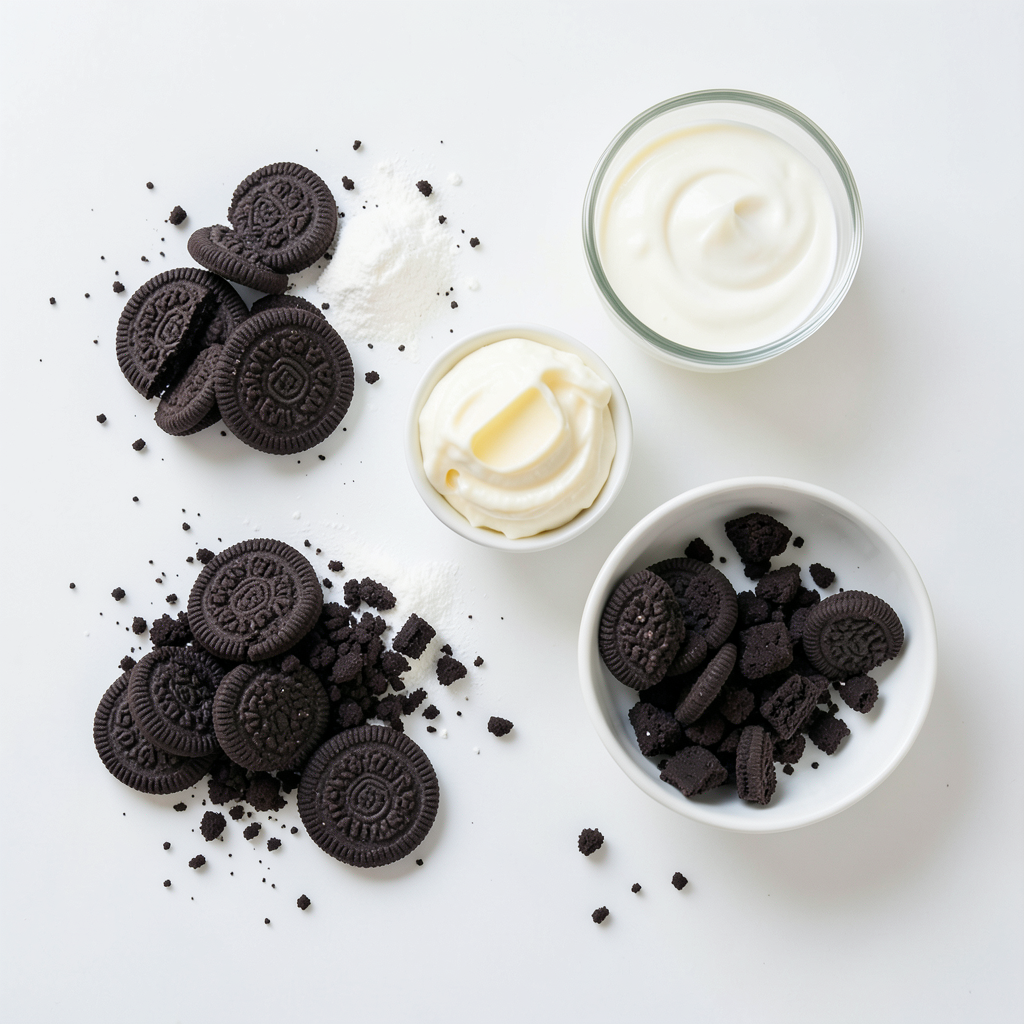
For this no-bake Oreo cheesecake, we use three main ingredients:
- Oreo cookies: They give the cheesecake a rich chocolate flavor and crunchy texture.
- Cream cheese: This is the base of our filling, providing creaminess and tang.
- Heavy whipping cream: Whipping cream adds lightness and makes the filling fluffy.
Detailed Ingredient List
Here’s what you need to make this dessert:
- 24 Oreo cookies, crushed
- 4 tablespoons unsalted butter, melted
- 16 oz cream cheese, softened
- 1 cup powdered sugar
- 1 teaspoon vanilla extract
- 1 cup heavy whipping cream
- 12 Oreo cookies, roughly chopped (for filling)
- Additional crushed Oreos for topping
Using unsalted butter is key. It lets the sweet flavors shine without adding extra salt.
Optional Ingredients
You can get creative with toppings! Here are some ideas:
- Whipped cream for extra fluffiness
- Chocolate sauce drizzled on top
- Fresh berries for a fresh touch
- Mint leaves for a pop of color
These options can add flavor and make your cheesecake look even better!
Step-by-Step Instructions
Preparing the Oreo Crust
To start, take 24 Oreo cookies and crush them in a bowl. You can use a food processor or a zip-top bag with a rolling pin. Then, melt 4 tablespoons of unsalted butter. Mix the crushed Oreos with the melted butter. Ensure you coat all the crumbs well.
Next, grab a 9-inch springform pan. Press the Oreo mixture into the bottom of the pan. Use the back of a measuring cup or your fingers. Make sure it is even and firm. This helps the crust hold together. Chill it in the fridge for about 15 minutes. This step sets the crust nicely.
Making the Cheesecake Filling
Now, let’s make the filling. In a large mixing bowl, take 16 ounces of softened cream cheese. Beat it with an electric mixer until it’s smooth and creamy. This should take a few minutes. Gradually add in 1 cup of powdered sugar and 1 teaspoon of vanilla extract. Mix until everything is fluffy and well combined.
Folding Techniques
In a separate bowl, whip 1 cup of heavy cream. Whip it until stiff peaks form. Be careful not to overwhip, as this can make it grainy. Once whipped, gently fold the cream into the cream cheese mixture. Use a spatula and fold carefully. This keeps the mixture light and airy.
Now, fold in 12 roughly chopped Oreo cookies. This adds little chunks of flavor throughout the cheesecake. Make sure everything is mixed well but be gentle. Now, pour the cheesecake mixture over your chilled Oreo crust. Spread it evenly across the surface.
Chill the cheesecake for at least 4-6 hours, or overnight for best results. This waiting time helps it set properly.
Tips & Tricks
Achieving the Perfect Texture
To avoid a soggy crust, press the Oreo mixture firmly. Make sure it covers the bottom evenly. Chill the crust for at least 15 minutes. This helps it firm up nicely.
For a fluffy cheesecake filling, beat the cream cheese until it's smooth. Gradually add the sugar and vanilla while mixing. This makes the filling light and creamy. When whipping the heavy cream, stop as soon as stiff peaks form. Overwhipping can lead to a grainy texture.
Common Mistakes to Avoid
One common mistake is overwhipping the cream. This can ruin the light texture of your cheesecake. Watch the cream closely as it whips. Once you see stiff peaks, stop mixing.
Another mistake is not chilling long enough. The cheesecake needs at least 4-6 hours to set. Chilling overnight is best for a firmer slice.
Presentation Suggestions
For serving, add a dollop of whipped cream on each slice. This adds creaminess and looks great. Sprinkle crushed Oreos on top for extra crunch and flavor.
Get creative with garnishes. Use fresh berries or chocolate shavings for a pop of color. You can even drizzle chocolate sauce for a fun touch. These small details make your cheesecake look even more special.
Error: Connection error.
Variations
Different Flavor Profiles
You can switch up the flavor of your cheesecake in fun ways. For a chocolate twist, mix in cocoa powder or use chocolate Oreos. If you love peanut butter, blend in some creamy peanut butter for a rich taste. Seasonal flavors make it more exciting too. Try pumpkin spice in fall or fresh strawberries in summer. These changes can make the cheesecake feel new and special.
Alternative Cookie Options
If you want a different crust, think outside the Oreo box. You can use graham crackers or even digestive biscuits. For a gluten-free version, choose gluten-free cookies that you love. The crust will still be crunchy and tasty. These swaps can help you make a dessert that fits your needs and preferences.
Mini Cheesecake Options
Making mini cheesecakes is a great idea for parties. Start by using cupcake liners in a muffin tin. Fill each liner with the cheesecake batter. Bake for about 12-15 minutes, but watch closely. You want them to set but stay creamy. These mini treats are easy to serve and perfect for sharing.
Storage Info
How to Store Leftovers
To keep your No-Bake Oreo Cheesecake fresh, refrigerate it right away. Cover the cheesecake with plastic wrap or use an airtight container. This method prevents it from drying out and keeps it safe from other odors in the fridge. If you have leftovers, it’s best to eat them within 3 to 5 days for the best taste and texture.
If you want to save it for longer, you can freeze the cheesecake. Just slice it first, then wrap each piece in plastic wrap. Place the wrapped slices in a freezer-safe container or bag. This way, you can enjoy individual pieces later!
Shelf Life
Your No-Bake Oreo Cheesecake will last in the fridge for about 5 days. After that, it may not taste as good. Keep an eye out for signs of spoilage. If you see any mold, or if it smells off, it’s time to throw it away.
When frozen, the cheesecake can last for up to 2 months. Just remember that the texture may change a bit after thawing, but the flavor should still be great!
Reheating Guidance
You don’t need to reheat the No-Bake Oreo Cheesecake. It’s meant to be served chilled. To enjoy it after refrigeration, simply slice it and serve. If you want a little warmth, let it sit at room temperature for about 15 minutes before serving. This will soften it slightly, making it easier to eat. Enjoy your creamy dessert!
FAQs
Can I use low-fat cream cheese?
Yes, you can use low-fat cream cheese. However, it will change the texture and taste. Low-fat cream cheese may not be as creamy or rich. Your cheesecake might feel lighter and have less flavor. For the best results, I recommend using full-fat cream cheese. It gives the cheesecake a thick and smooth texture.
How long does this cheesecake need to set?
This cheesecake needs to set for at least 4 to 6 hours. If you can, let it chill overnight for the best taste. Setting time is crucial for the cheesecake to firm up. It helps the flavors meld together and makes slicing easier. If you skip this step, your cheesecake may be too soft to cut.
Can I make this recipe ahead of time?
Absolutely! This recipe is great for meal prep. You can make it a day or two ahead. Just cover it with plastic wrap and store it in the fridge. It will stay fresh and tasty. If you plan to freeze it, allow it to thaw in the fridge before serving. Enjoy your cheesecake stress-free!
This cheesecake recipe is simple and fun. You learned about the key ingredients, like Oreo cookies and cream cheese. I shared easy steps to make a tasty crust and a smooth filling. Remember to avoid overwhipping the cream and giving it enough chill time.
Explore variations for different flavors and mini options. Store leftovers properly and watch for spoilage signs. Enjoy creating this treat and impressing friends and family with your skills!