Looking for a snack that satisfies your sweet tooth and packs a healthy punch? These Peanut Butter Chocolate Banana Bars are just what you need! With ripe bananas, creamy peanut butter, and rich dark chocolate, they’re a treat you can feel good about eating. Let’s dive into the simple ingredients and step-by-step instructions, so you can whip up this delicious delight in no time!
Why I Love This Recipe
- Healthy Ingredients: This recipe is packed with nutritious ingredients like bananas and oats, making it a guilt-free treat.
- Quick and Easy: With only 10 minutes of prep time, these bars are perfect for busy days or last-minute snacks.
- Delicious Flavor: The combination of peanut butter, chocolate, and banana creates a mouthwatering flavor that everyone loves.
- Customizable: You can easily adjust the sweetness or add your favorite mix-ins, making this recipe versatile for all tastes.
Ingredients
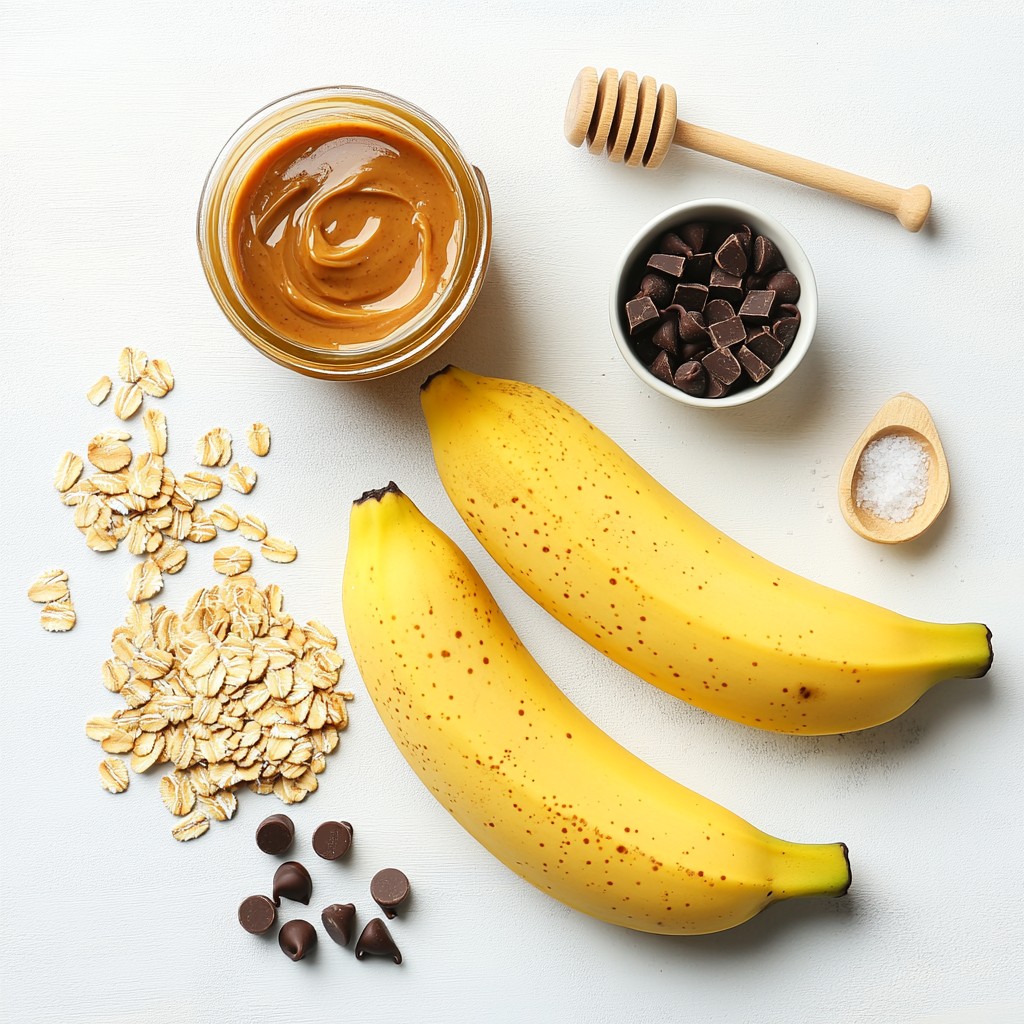
List of Ingredients
- 2 ripe bananas, mashed
- 1 cup creamy peanut butter
- 1/2 cup honey or maple syrup
- 1/2 cup rolled oats
- 1/2 cup dark chocolate chips
- 1/2 teaspoon vanilla extract
- 1/2 teaspoon baking powder
- Pinch of salt
These ingredients create a tasty and healthy snack. The ripe bananas add natural sweetness and moisture. They also make the bars soft and chewy. Creamy peanut butter gives a rich flavor and healthy fats. Honey or maple syrup serves as a natural sweetener. The rolled oats provide texture and fiber. Dark chocolate chips add a delightful touch of chocolatey goodness.
Nutritional Information
- Calories per serving: About 150 calories
- Macronutrient breakdown: Each bar has around 6g protein, 8g fat, and 15g carbs
- Dietary considerations: This recipe is vegan and gluten-free.
With just a few simple ingredients, you get a snack that is both nutritious and delicious. These bars are perfect for lunchboxes or a quick snack on the go. Plus, they fit many dietary needs. Enjoying a treat that is both tasty and healthy is a win-win!
Step-by-Step Instructions
Preparation Steps
1. Start by preheating your oven to 350°F (175°C). This step is key for even baking.
2. Line an 8x8 inch baking dish with parchment paper. Leave some paper hanging over the sides. This helps you lift the bars out later.
3. In a large mixing bowl, mash the two ripe bananas. They should be smooth and creamy.
4. Add 1 cup of creamy peanut butter and 1/2 cup of honey (or maple syrup) to the bananas. Mix them well until smooth.
5. Stir in 1/2 teaspoon of vanilla extract, blending it into the mixture evenly.
Combining Ingredients
1. Next, add in 1/2 cup of rolled oats, 1/2 teaspoon of baking powder, and a pinch of salt. Stir until just combined. Don’t overmix, or the bars may turn out tough.
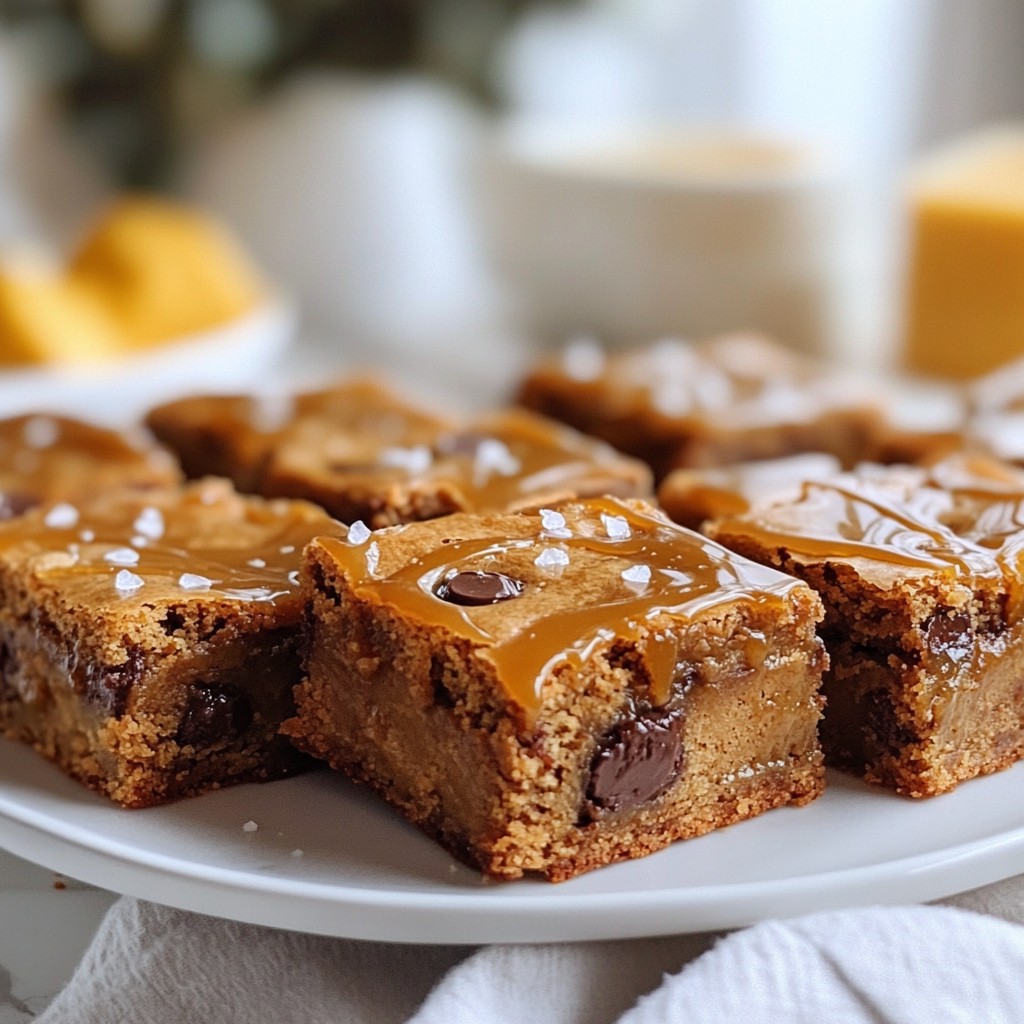
2. Gently fold in 1/2 cup of dark chocolate chips. Make sure to save a few for the top!
Baking Process
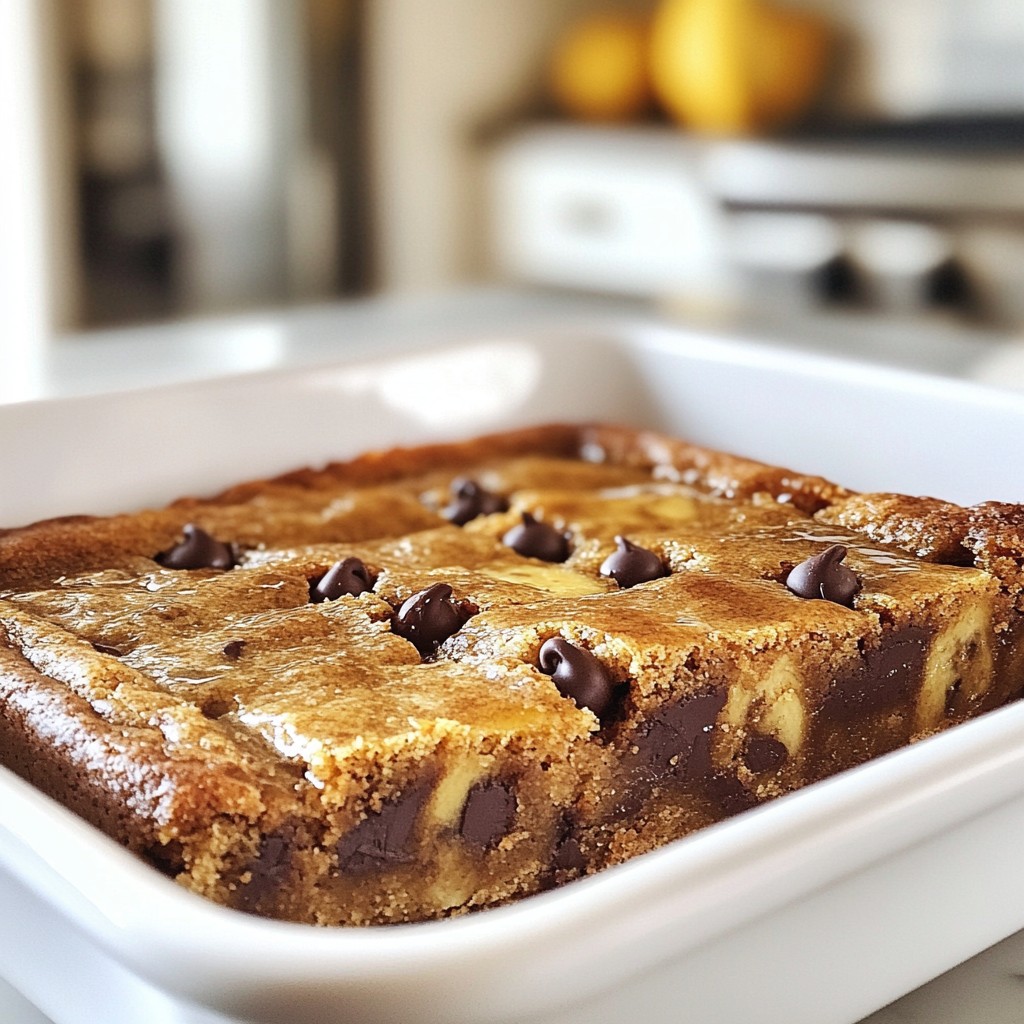
1. Pour the batter into your prepared baking dish. Use a spatula to spread it evenly.
2. Top the batter with the reserved chocolate chips for a nice look and extra flavor.
3. Bake in the preheated oven for 20-25 minutes. Check for doneness by inserting a toothpick in the center. It should come out clean when done.
4. Let the bars cool in the pan for about 10 minutes. Then, use the parchment paper to lift them out onto a wire rack. Allow them to cool completely before slicing.
Tips & Tricks
Expert Tips for Success
To achieve the perfect texture in your bars, use very ripe bananas. They add natural sweetness and moisture. Make sure your peanut butter is creamy and at room temperature. Cold peanut butter can make mixing hard.
Common Mistakes to Avoid
Overmixing the batter can lead to tough bars. Mix just until everything is combined. Also, not measuring ingredients accurately can change the outcome. Use a scale or measuring cups for best results.
Enhancing Flavor and Texture
You can use different types of chocolate to change the taste. Try milk chocolate for a sweeter bar. For dietary needs, substitute with nut butters like almond. You can also swap honey for agave for a vegan option.
Pro Tips
- Use Overripe Bananas: The riper the bananas, the sweeter and more flavorful your bars will be. Look for bananas with brown spots for the best results.
- Customize Your Sweetener: Feel free to adjust the sweetness by using more or less honey or maple syrup according to your taste preferences.
- Experiment with Mix-ins: Get creative by adding nuts, seeds, or dried fruits to the batter for extra texture and flavor.
- Store Properly: Keep the bars in an airtight container in the fridge for up to a week, or freeze for longer storage. This helps maintain their freshness.
Variations
Flavor Variations
You can make your Peanut Butter Chocolate Banana Bars even better by adding nuts or seeds. Chopped walnuts or almonds give a nice crunch. Try adding sunflower seeds for a fun twist. If you want a different taste, swap out peanut butter for almond or cashew butter. Each nut butter has its own flavor, which can change the whole bar!
Dietary Adjustments
To make your bars gluten-free, use gluten-free oats. They taste great and keep the texture right. You can also change the sweetener. Instead of honey or maple syrup, use agave or coconut sugar. This change can give you another layer of flavor while keeping it sweet!
Creative Twists
Spicing things up can give your bars a new life. Try adding a pinch of cinnamon or nutmeg to the mix for warmth. You can also layer your bars with yogurt or whipped cream when serving. This gives a nice creamy texture that pairs well with the chocolate and banana. Enjoy experimenting with these fun ideas!
Storage Info
Best Storage Practices
To keep your Peanut Butter Chocolate Banana Bars fresh, store them in an airtight container. This helps lock in moisture and flavor. You can keep them at room temperature for a few days. If it’s warm, I suggest storing them in the fridge. The fridge will help them last longer.
Freezing Instructions
You can freeze these bars to enjoy later. First, let them cool completely. Then, wrap each bar in plastic wrap. Place the wrapped bars in a freezer-safe bag or container. This way, they stay fresh. When you want to eat one, take it out and thaw it in the fridge overnight.
Shelf Life
At room temperature, these bars last about 3 to 4 days. In the fridge, they can last up to a week. Keep an eye out for signs of spoilage. If they smell off or develop a strange color, it’s best to toss them. You want to enjoy these bars at their best!
FAQs
Common Questions
Can I use ripe bananas instead of overripe? You can use ripe bananas. They will work, but overripe bananas give a sweeter taste. Overripe bananas are softer and easier to mash. This helps to blend better with peanut butter.
Can I replace oats with a gluten-free alternative? Yes, you can use gluten-free oats. These will fit well in the recipe. You might also try almond flour or coconut flour as options. These alternatives can change the texture a bit, but they still taste great.
Recipe Adaptations
How to make it without honey or syrup If you want to skip honey or syrup, use mashed dates or applesauce. These options add sweetness without using liquid sweeteners. You can also try using agave nectar or stevia.
Vegan options for other ingredients To make these bars vegan, ensure your chocolate chips are dairy-free. You can also swap honey for maple syrup. This keeps the bars sweet and vegan-friendly.
Serving Suggestions
What to serve with Peanut Butter Chocolate Banana Bars These bars pair well with a glass of almond milk or coconut milk. You can also enjoy them with yogurt or fresh fruit. They make a great snack or quick breakfast option, too.
Ideal occasions for serving these bars These bars are perfect for school lunches or parties. You can serve them at picnics or family gatherings. They also make for a tasty treat during movie nights.
This blog post covered a tasty recipe for Peanut Butter Chocolate Banana Bars. You learned about the right ingredients and step-by-step instructions. I shared tips to avoid common mistakes and ways to personalize the bars. Lastly, I discussed storage methods to keep them fresh.
These bars are easy to make and great for all kinds of diets. Try them out today. You’ll enjoy a delicious treat that you made!