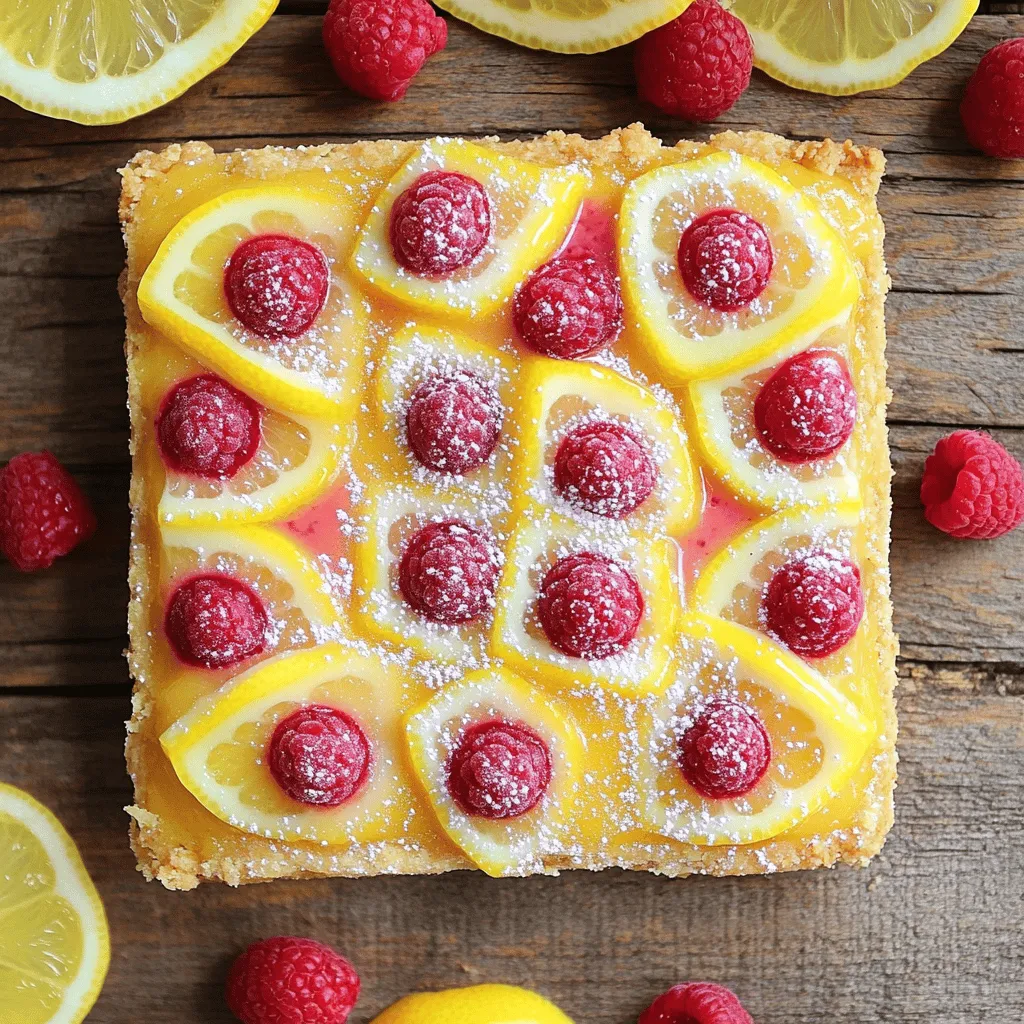
Craving a sweet and tangy treat? Raspberry Lemonade Bars offer the perfect balance of flavors that dance on your tongue. With a buttery crust and zesty filling, these bars are sure to impress friends at any gathering. In this post, I’ll share my simple recipe, important tips, and clever variations so you can whip up this delicious dessert with ease. Let’s dive into the world of raspberry lemonade goodness!
Ingredients
List of Ingredients for Raspberry Lemonade Bars
To make delicious raspberry lemonade bars, you will need the following ingredients:
– 1 cup all-purpose flour
– 1/4 cup powdered sugar
– 1/2 cup unsalted butter, softened
– 1/4 teaspoon salt
– 2 large eggs
– 1 cup granulated sugar
– 1/4 cup fresh lemon juice (about 2 lemons)
– Zest of 1 lemon
– 1 cup fresh raspberries (or frozen, thawed)
– 1 tablespoon cornstarch
– Additional powdered sugar for dusting
These ingredients blend to create a tart and sweet treat perfect for any occasion.
Substitutions for Dietary Restrictions
If you have dietary restrictions, some swaps work well. For gluten-free bars, use a gluten-free flour blend in place of all-purpose flour. If you want a dairy-free option, substitute the butter with coconut oil or a vegan butter. For a lower sugar version, consider using a sugar substitute. Keep in mind that this can affect texture and taste.
Fresh vs. Frozen Raspberries
Using fresh raspberries gives your bars a vibrant flavor and beautiful color. Fresh raspberries are also high in antioxidants. If you can’t find fresh, frozen raspberries are a great choice too. Just make sure to thaw them and drain excess juice. This helps keep your filling from getting too watery. Both options work well, so choose what suits you best.
Step-by-Step Instructions
Preheat and Prepare Your Baking Dish
First, set your oven to 350°F (175°C). This step is key for even baking. Line an 8×8 inch baking dish with parchment paper. Leave some paper hanging over the edges. This makes it easy to lift out the bars later.
How to Make the Crust
In a medium bowl, mix these ingredients:
– 1 cup all-purpose flour
– 1/4 cup powdered sugar
– 1/2 cup unsalted butter, softened
– 1/4 teaspoon salt
Use a fork or your fingers to blend until it looks like coarse crumbs. Press the mixture firmly into the bottom of your dish. Make sure it is even. This crust is the base for your tasty bars.
Crafting the Lemon and Raspberry Filling
In another bowl, whisk together:
– 2 large eggs
– 1 cup granulated sugar
– 1/4 cup fresh lemon juice (about 2 lemons)
– Zest of 1 lemon
Mix until it is smooth and well combined. Next, gently fold in:
– 1 cup fresh raspberries (or frozen, thawed)
– 1 tablespoon cornstarch
The cornstarch helps keep the raspberries from sinking. Carefully pour this mixture over your baked crust, spreading it evenly.
Baking Tips for Perfect Texture
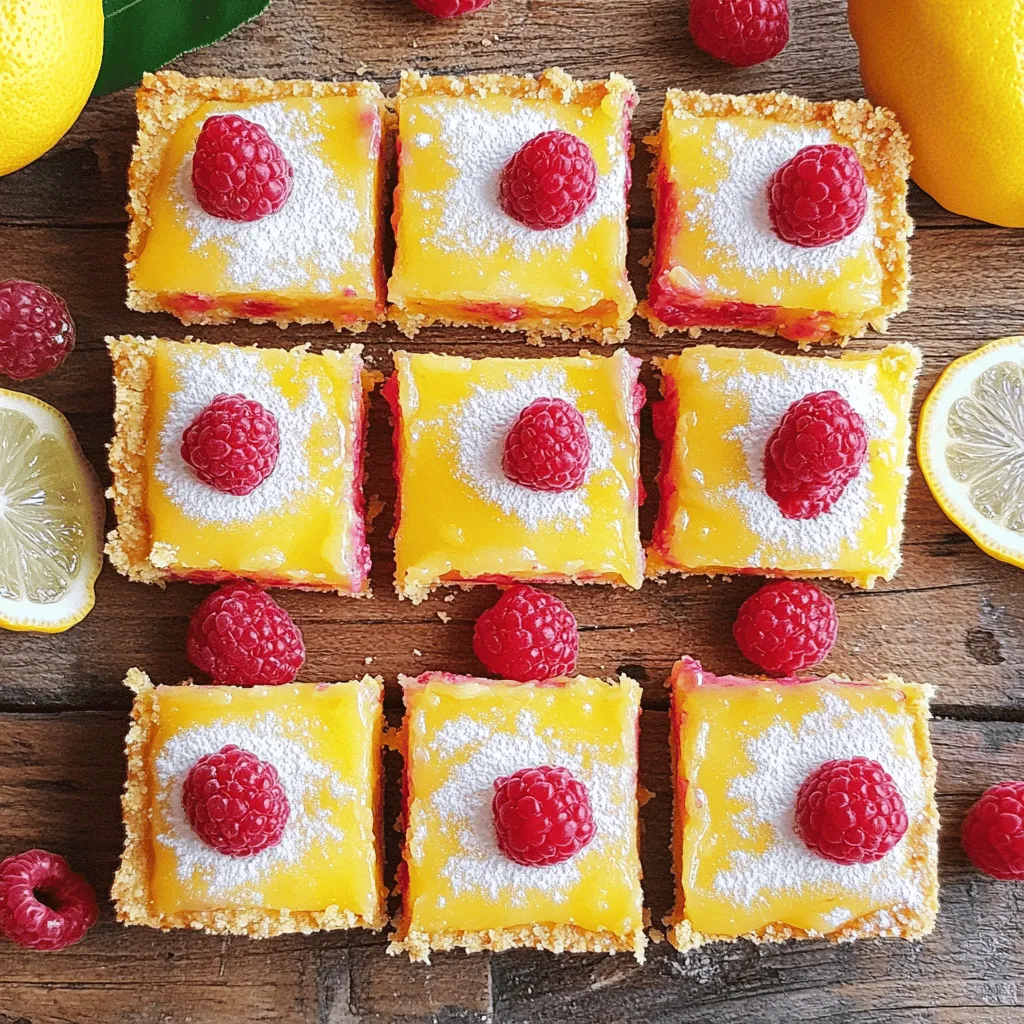
Bake your bars for 20-25 minutes. Look for the filling to be set and slightly firm on top. This means it’s ready. Once done, let the bars cool completely in the pan. This step is important for the best texture. After cooling, lift them out using the parchment paper. Dust with powdered sugar before serving for a sweet touch.
Tips & Tricks
Ensuring Bars Are Set
To make sure your raspberry lemonade bars are set, check the filling. It should be firm to the touch. If it jiggles too much, it needs more time. Bake it until the edges look slightly puffed. This will help avoid a gooey center. Let the bars cool completely before cutting. Cooling helps them firm up even more.
Common Mistakes to Avoid
One common mistake is not dusting the raspberries with cornstarch. This step is key to keeping them from sinking. Another mistake is not letting the crust cool before adding the filling. A warm crust can make the filling runny. Lastly, do not skip the cooling time after baking. Cutting too soon can lead to messy bars.
Serving Suggestions for Raspberry Lemonade Bars
These bars are perfect for summer picnics or parties. Serve them chilled or at room temperature. Adding a dollop of whipped cream on top makes them even better. Fresh mint leaves can add a nice touch, too. For a fun twist, pair them with a scoop of vanilla ice cream.
Variations
Alternative Flavors and Add-ins
You can change the flavors in your raspberry lemonade bars. Try other fruits like blueberries or blackberries. These fruits can add a nice color and taste. You can also mix in some herbs. Fresh mint or basil gives a fun twist to the bars. For a tart kick, add some lime juice instead of lemon juice. These simple swaps can make your bars unique and fun!
Gluten-Free Raspberry Lemonade Bars
If you need a gluten-free option, swap the all-purpose flour for almond flour or a gluten-free blend. Make sure the blend includes xanthan gum for the best texture. The taste remains just as delightful, and you can still enjoy the sweet and tangy treat.
Making Mini Bars or Bites
To make mini bars or bites, use a smaller baking dish, like a 9×13 inch. Adjust the baking time to about 15-20 minutes. Watch closely to avoid over-baking. You can slice these into bite-sized pieces for easy serving. These mini treats are great for parties or snacks, making them a fun way to share the deliciousness!
Storage Info
How to Store Raspberry Lemonade Bars
To store your raspberry lemonade bars, first, let them cool completely. Once cool, cut them into squares. Place the bars in an airtight container. You can layer parchment paper between the bars to prevent sticking. Store the container in the fridge. This keeps the bars fresh and zesty for later enjoyment.
Freezing Instructions
You can also freeze raspberry lemonade bars for longer storage. After cooling and cutting, wrap each bar tightly in plastic wrap. Place the wrapped bars in a freezer-safe bag or container. Label the bag with the date. They can last up to three months in the freezer. When you want to enjoy them, simply thaw them in the fridge overnight.
Shelf Life and Serving After Storage
Raspberry lemonade bars can last about five days in the fridge. After five days, they may lose some freshness. To serve after storage, simply take them out of the fridge. If you like, dust them with powdered sugar again. This adds a nice touch and makes them look great! For frozen bars, thaw them in the fridge before serving. Enjoy your tasty treat!
FAQs
Can I use bottled lemon juice instead of fresh?
You can use bottled lemon juice. However, fresh lemon juice tastes better. Fresh juice has a bright flavor that really shines in these bars. If you choose bottled juice, look for one with no added sugar.
How do I know when the bars are done baking?
The bars are done when the filling is set. It should feel slightly firm to the touch. You can also check for a light golden color around the edges. A toothpick inserted in the center should come out clean.
What can I serve with Raspberry Lemonade Bars?
Raspberry Lemonade Bars pair well with many treats. You can serve them with whipped cream or a scoop of vanilla ice cream. Fresh berries on the side add a nice touch, too. A cup of tea or lemonade complements the sweet and tangy flavor.
Is there a way to make the bars less sweet?
Yes, you can adjust the sweetness. Try using less granulated sugar. You can also swap some sugar for a sugar substitute. Adding more lemon juice can balance out the sweetness and enhance the flavor.
Raspberry lemonade bars are a treat anyone can enjoy. We covered ingredients, from fresh to frozen raspberries and their substitutes. I shared easy steps for the crust, filling, and baking. I also covered common mistakes and storage tips to keep your bars fresh. Lastly, we explored fun variations and serving ideas. Enjoy making these quick, sweet, and tangy delights. You can impress friends and family with your baking skills!