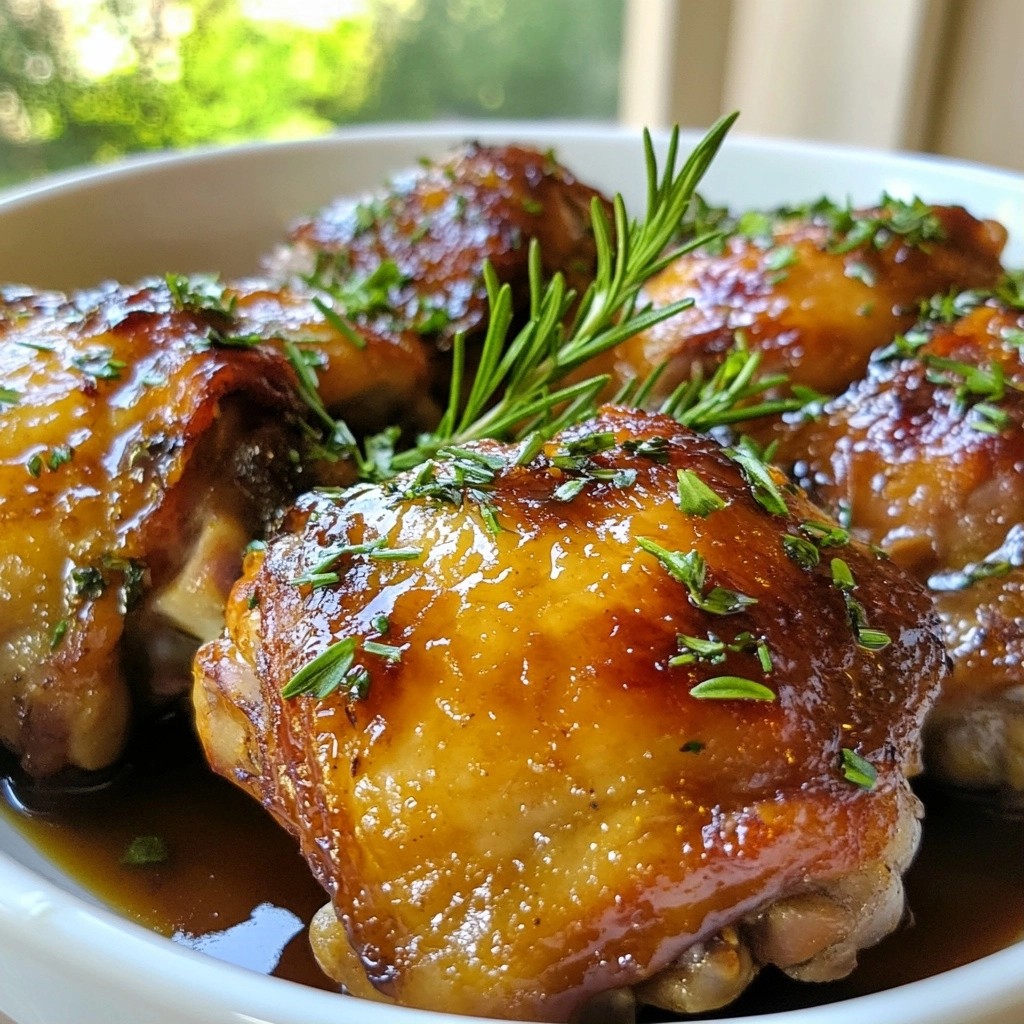
Are you ready to elevate your meal prep game? I’m excited to share my recipe for Savory Meal Prep Balsamic Glazed Chicken Thighs Delight. These juicy, flavorful thighs are easy to make and perfect for busy weeks. With simple ingredients and straightforward steps, you’ll have delicious meals ready to go. Let’s dive in and transform your weeknight dinners with this tasty dish!
Why I Love This Recipe
- Delicious Flavor Combination: The blend of balsamic vinegar, honey, and garlic creates a rich and savory glaze that enhances the chicken's flavor.
- Easy Preparation: With just a few simple steps, this recipe allows you to marinate and bake the chicken without any complicated techniques.
- Perfect for Meal Prep: This dish is great for meal prepping, as it stores well and pairs wonderfully with a variety of sides.
- Impressive Presentation: The crispy skin and glossy glaze make this chicken not only tasty but also visually appealing for any dinner table.
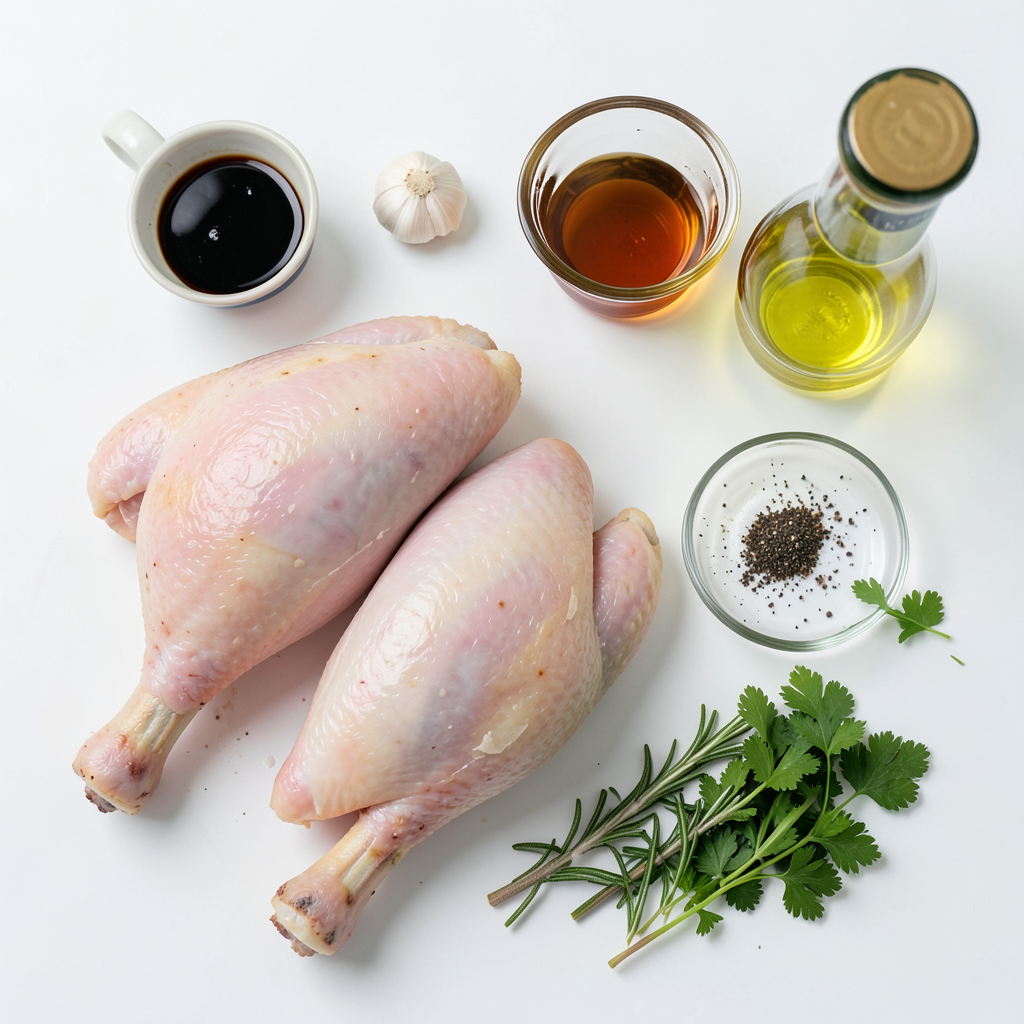
Ingredients
Measurement List
- 4 chicken thighs, skin-on and bone-in
- 1/2 cup balsamic vinegar
- 1/4 cup honey
- 2 tablespoons soy sauce (or tamari for gluten-free)
- 4 cloves garlic, minced
- 1 tablespoon fresh rosemary, chopped (or 1 teaspoon dried)
- 1 teaspoon black pepper
- 1/2 teaspoon salt
- 2 tablespoons olive oil
- Fresh parsley, chopped (for garnish)
Cooking Tools Needed
- Large oven-safe skillet
- Mixing bowl
- Whisk
- Resealable plastic bag or shallow dish
- Measuring cups and spoons
- Knife and cutting board
Pantry Items for Alternatives
- Maple syrup instead of honey
- Coconut aminos instead of soy sauce
- Thyme or sage instead of rosemary
- Any neutral oil can replace olive oil
Step-by-Step Instructions
Marinating the Chicken
First, gather your marinade ingredients. You need balsamic vinegar, honey, soy sauce, garlic, rosemary, black pepper, and salt. In a bowl, whisk them together until smooth. Place the chicken thighs in a plastic bag or dish. Pour the marinade over the chicken. Seal the bag or cover the dish. Let it marinate for at least 30 minutes. For more flavor, let it sit for up to 4 hours in the fridge.
Preheating the Oven
Once your chicken is marinated, it’s time to preheat the oven. Set it to 400°F (200°C). Preheating ensures even cooking. This step is key for juicy chicken thighs.
Searing the Chicken
Next, grab a large oven-safe skillet. Heat 2 tablespoons of olive oil over medium-high heat. Remove the chicken thighs from the marinade, saving it for later. Place the thighs skin-side down in the skillet. Sear for about 5-7 minutes. Look for that golden brown, crispy skin. This adds flavor and texture.
Baking the Chicken
After searing, flip the chicken thighs over. Pour the reserved marinade over them. Now, transfer the skillet to your preheated oven. Bake for 25-30 minutes. Check that the chicken reaches an internal temperature of 165°F (75°C). This ensures it is fully cooked and safe to eat.
Preparing for Meal Prep
Once baked, take the skillet out of the oven. Let the chicken rest for about 5 minutes. This helps keep the juices inside. After resting, slice the chicken thighs for meal prep.
Serving Suggestions
You can serve the chicken right away or store it for later. If meal prepping, divide the chicken into containers. Add sides like steamed vegetables or quinoa. For extra flavor, drizzle some glaze from the skillet over the chicken. Don’t forget to garnish with chopped parsley before serving. Enjoy your savory meal prep balsamic glazed chicken thighs!
Tips & Tricks
Best Practices for Marinating
Start by mixing balsamic vinegar, honey, soy sauce, garlic, rosemary, black pepper, and salt in a bowl. This mix creates a rich flavor for your chicken. Place the chicken thighs in a bag or dish, then pour the marinade over them. Seal the bag or cover the dish tightly. For the best taste, let the chicken marinate for at least 30 minutes, but up to 4 hours is ideal. The longer you marinate, the more flavor the chicken absorbs.
How to Achieve the Perfect Sear
To get a crispy skin, heat olive oil in a skillet over medium-high heat. Remove the chicken from the marinade and place it skin-side down in the hot oil. Sear it for 5-7 minutes until the skin turns golden brown. Don’t rush this step. A good sear locks in juices and adds flavor. If the chicken sticks, let it cook a bit longer before trying to flip.
Cooking Time Adjustments for Different Ovens
Every oven is unique. If your oven runs hot, check the chicken a few minutes early. For a cooler oven, you might need a few extra minutes. Always look for an internal temperature of 165°F (75°C) to ensure the chicken is safe to eat. Use a meat thermometer for best results. Keep in mind that rotating the skillet halfway through can help with even cooking.
Garnishing Ideas
After baking, let the chicken rest for 5 minutes. This helps juices stay locked in. When serving, drizzle extra glaze from the skillet over the chicken. For a fresh touch, sprinkle chopped parsley on top. You can also add lemon zest for brightness. These simple garnishes enhance both flavor and presentation.
Pro Tips
- Marination Time: For the best flavor, marinate the chicken thighs for at least 2 hours or overnight if possible. This allows the flavors to penetrate the meat more deeply.
- Skin Crispiness: To achieve an extra crispy skin, ensure you sear the chicken thighs skin-side down until golden brown before baking.
- Use Fresh Herbs: Fresh rosemary adds a vibrant flavor to the dish. If you have it, use fresh herbs instead of dried for a more aromatic experience.
- Resting the Chicken: Allow the chicken to rest for at least 5 minutes after baking. This helps retain the juices, making the chicken more tender and flavorful.
Variations
Gluten-Free Options
To make this dish gluten-free, swap soy sauce for tamari. Tamari offers similar flavor without gluten. Ensure all other ingredients are also gluten-free. This way, everyone can enjoy the meal.
Alternative Herbs and Spices
You can change the herbs for different tastes. Try thyme, oregano, or sage. Each adds a unique flavor to the chicken. If you want heat, sprinkle some red pepper flakes. Experiment and find your favorite mix.
Side Dish Pairings
Pairing side dishes can enhance your meal. Steamed vegetables like broccoli or green beans work well. You can also serve the chicken over quinoa or brown rice. A fresh salad with vinaigrette adds a nice crunch. Choose sides that balance the sweet and tangy chicken.
Storage Info
Proper Cooling and Storing Techniques
After cooking the chicken, let it cool for about 5 minutes. This step helps keep the chicken juicy. Place the chicken thighs in meal prep containers. Make sure to include any extra glaze from the skillet. Seal the containers with tight lids. Store them in the fridge if you plan to eat them within 4 days.
Reheating Instructions
To reheat, take a chicken thigh from the container. Place it on a microwave-safe plate. Cover it with a damp paper towel to keep it moist. Heat for 1-2 minutes on high. Check to ensure it is heated through. You can also reheat in the oven. Set the oven to 350°F (175°C) and bake for about 10-15 minutes.
Freezing Guidelines
If you want to freeze the chicken, wrap each thigh tightly in plastic wrap. Then place them in a freezer bag or container. Make sure to remove as much air as possible. Label the bag with the date. The chicken can stay in the freezer for up to 3 months. When ready to eat, thaw it in the fridge overnight before reheating.
FAQs
How to tell when chicken thighs are fully cooked?
To check if chicken thighs are done, use a meat thermometer. The chicken should reach 165°F (75°C). You can also cut into the thickest part. The juices should run clear, not pink. This shows the chicken is safe to eat.
Can I use chicken breast instead of thighs?
Yes, you can use chicken breast. Keep in mind, chicken thighs are juicier and more tender. Chicken breasts may dry out faster. If you choose breasts, reduce cooking time to avoid dryness.
How long can I store the meal-prepped chicken?
You can store the chicken in the fridge for up to four days. Make sure to keep it in an airtight container. For longer storage, you can freeze it for up to three months. Just thaw it in the fridge when ready to eat.
What can I serve with Balsamic Glazed Chicken?
Balsamic glazed chicken pairs well with many sides. Try steamed vegetables or a fresh salad. Quinoa or brown rice also makes a great choice. You can even serve it with mashed potatoes for a hearty meal.
This blog post covered how to create a delicious balsamic glazed chicken meal. We went through essential ingredients, tools, and tips. You learned how to marinate, sear, and bake chicken perfectly. We also explored variations, storage methods, and frequently asked questions.
In conclusion, follow these steps for a tasty dish. Enjoy experimenting with flavors and sides to make it your own. You have everything you need to impress anyone at your table.