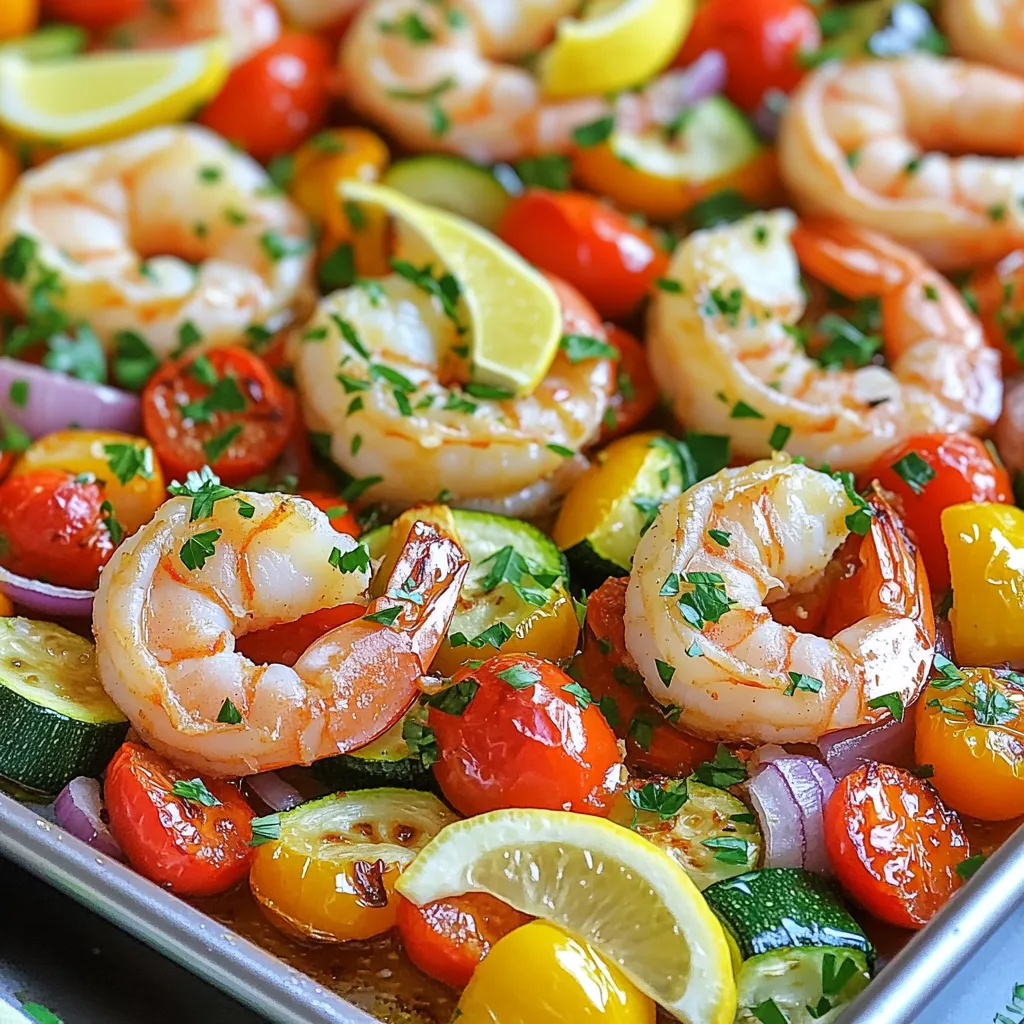
Sheet Pan Lemon Garlic Shrimp Veggies Delight
Are you ready to make a tasty meal with minimal cleanup? This Sheet Pan Lemon Garlic Shrimp Veggies Delight is
Are you ready to make a tasty meal with minimal cleanup? This Sheet Pan Lemon Garlic Shrimp Veggies Delight is
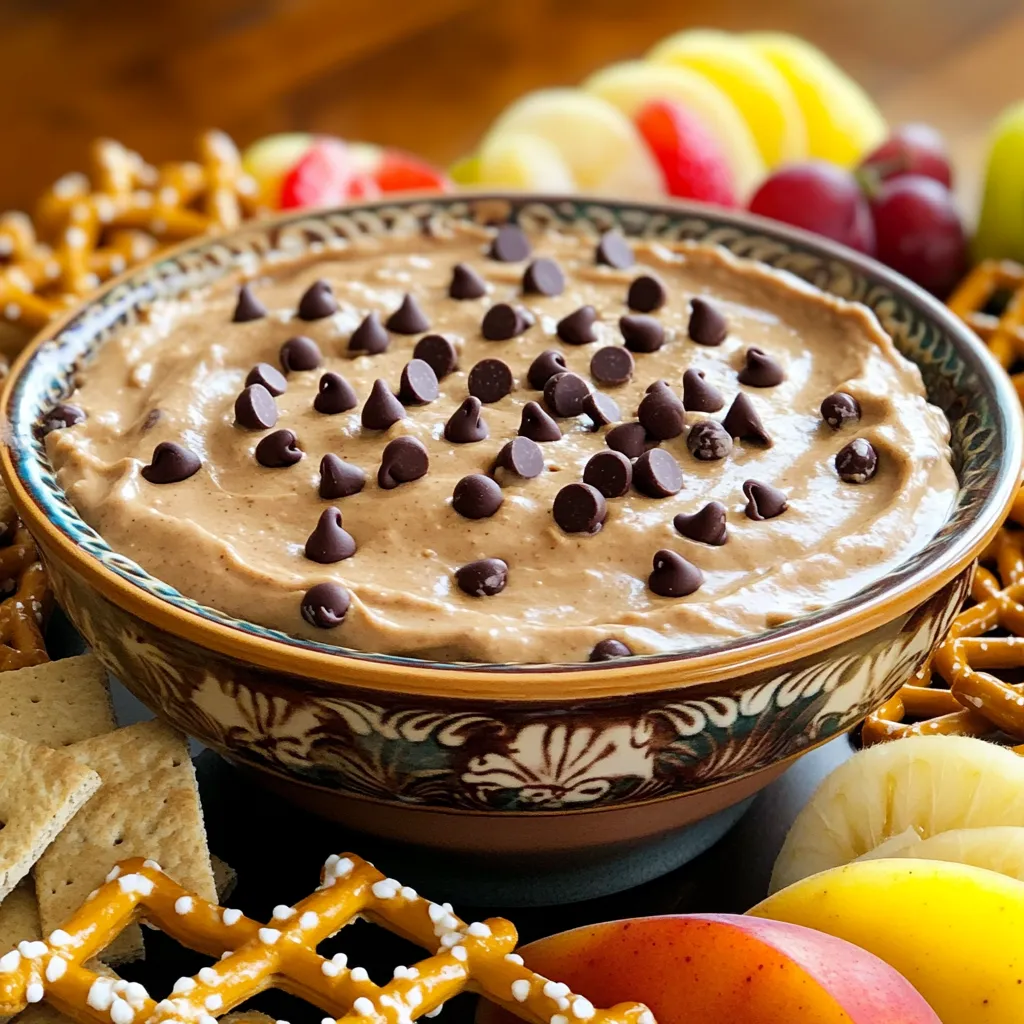
Are you ready to indulge in a sweet and creamy treat? This Delicious Chocolate Chip Cookie Dough Dip recipe will
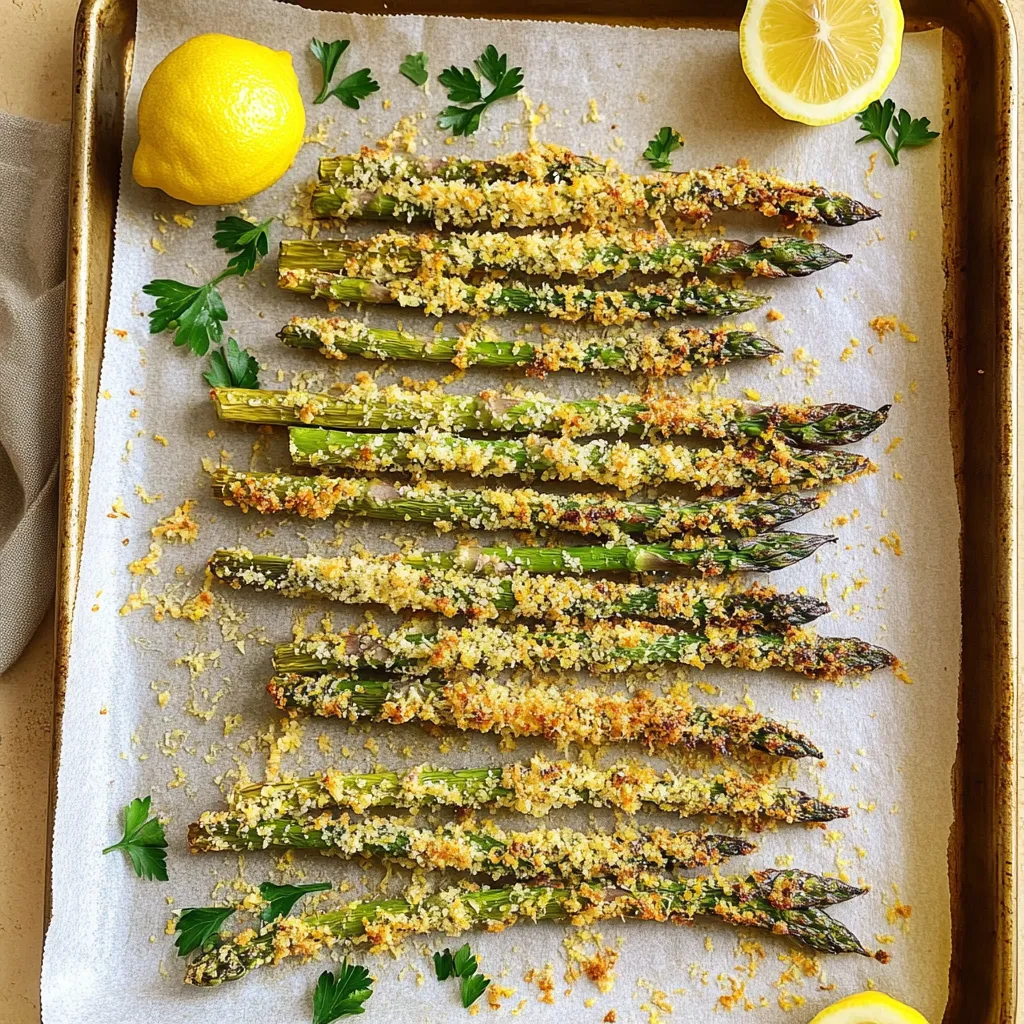
Looking for a tasty, healthy snack? You’ll love these Zesty Lemon Parmesan Asparagus Fries! This simple recipe makes crisp, flavorful

Looking for a sweet treat that’s easy to make? These White Chocolate Cranberry Blondies are a delicious choice! With a
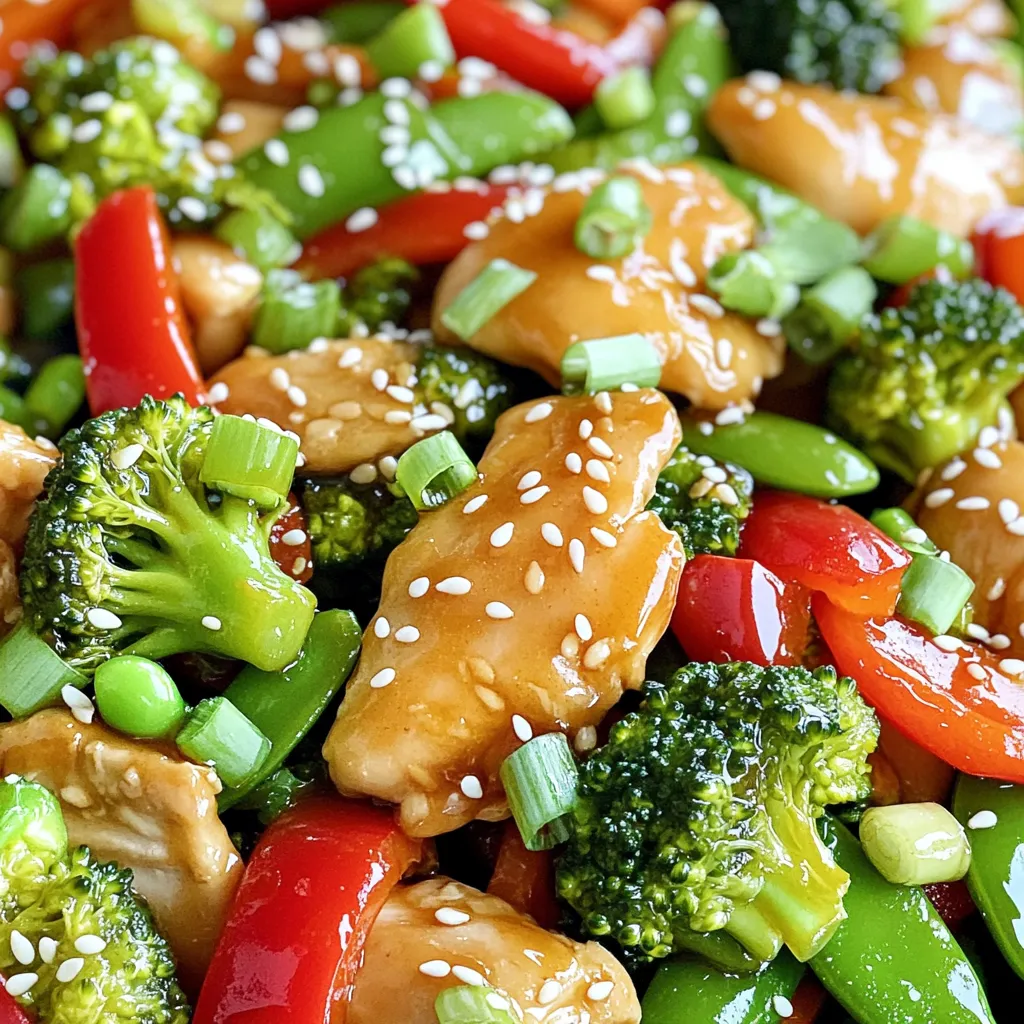
Looking for a quick and tasty meal? Honey Garlic Chicken Stir Fry is the answer! This dish is packed with

Get ready to enjoy a sweet and savory treat with my Slow Cooker Honey Garlic Chicken Drumsticks! This dish is
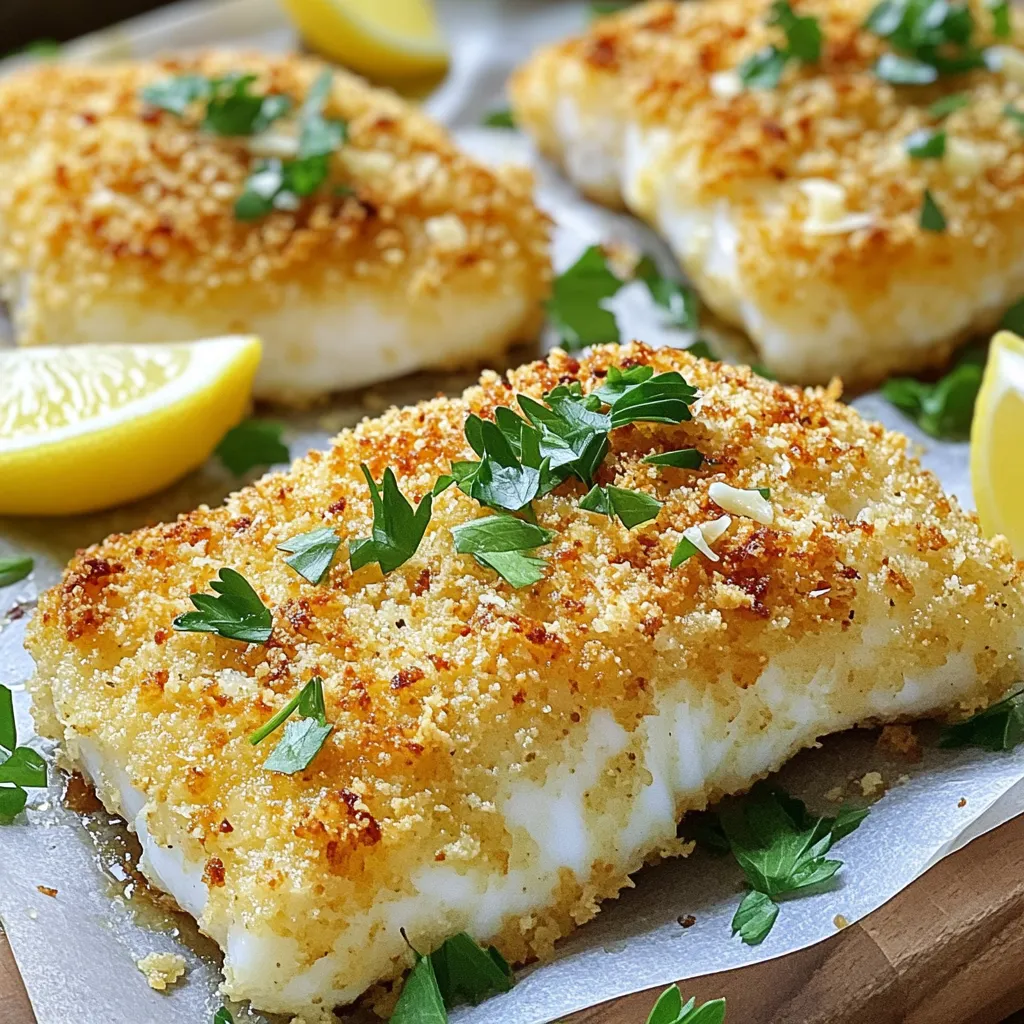
Looking to whip up a quick, delicious meal? Try my Air Fryer Parmesan Crusted Cod! This dish combines tender cod

Embrace the cozy season with the ultimate comfort drink: Pumpkin Spice Hot Chocolate! This treat combines rich chocolate and warm
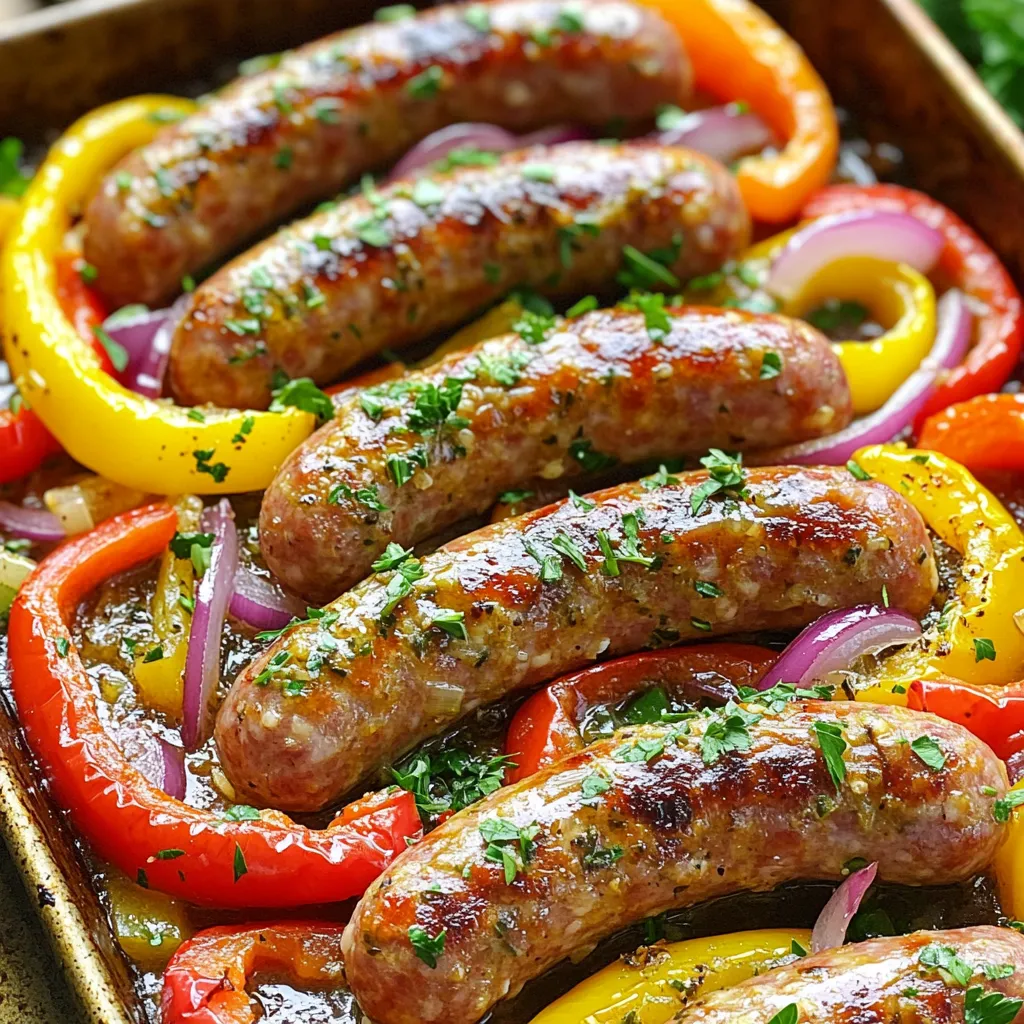
Ready for a meal that brings big flavor with little fuss? This Sheet-Pan Garlic Butter Sausage & Peppers recipe is
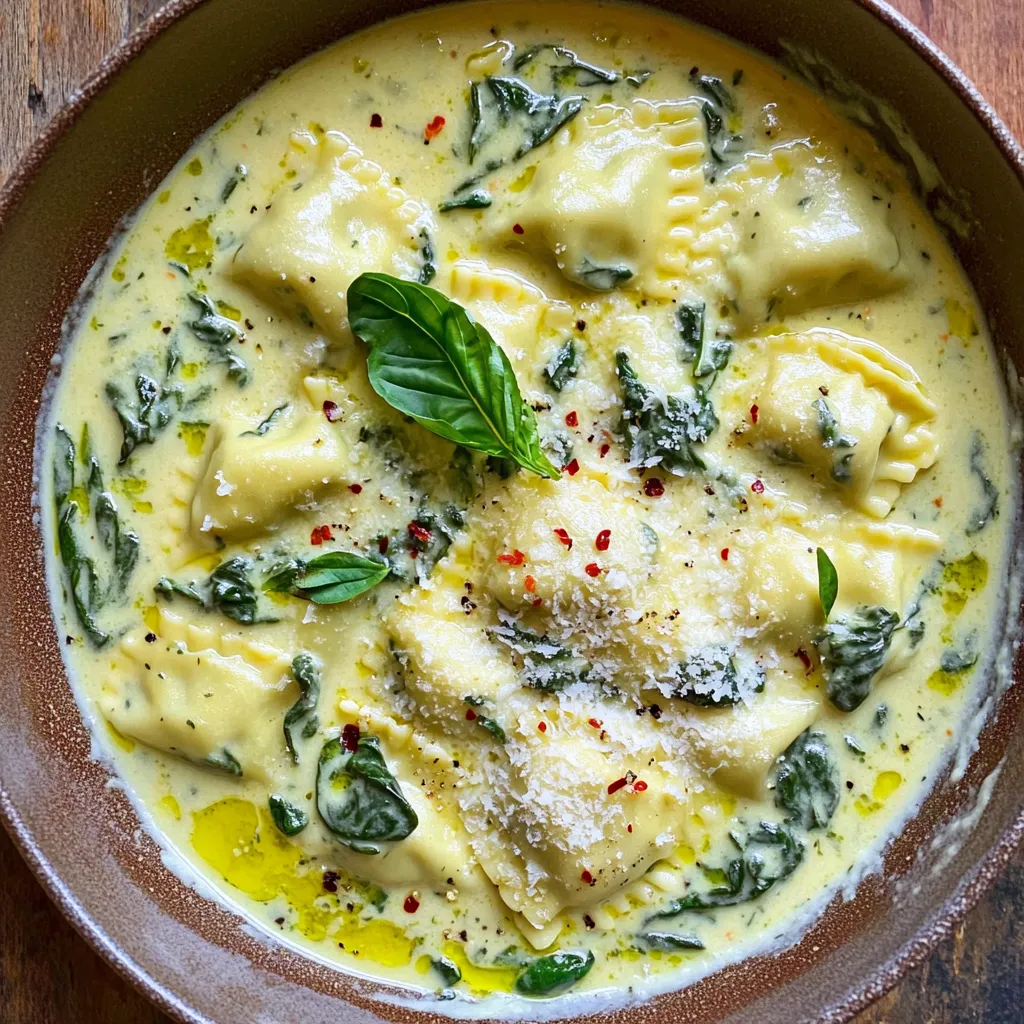
Are you ready to whip up a dish that’s both creamy and comforting? My One-Pot Creamy Spinach Ricotta Ravioli Delight
