Skip to content
DisclaimerTerms Of UseGDPR PolicyCookie Policy

Cooking Wells

  • Home
  • Drinks
  • Appetizers
  • Dinner
  • Dessert
  • About
  • Contact
  • Privacy Policy
DisclaimerTerms Of UseGDPR PolicyCookie Policy

NO-ING-IMG

For a tasty pumpkin spice mug cake, gather these simple items: - 4 tablespoons all-purpose flour - 2 tablespoons granulated sugar - 1/4 teaspoon baking powder - 1/4 teaspoon ground cinnamon - 1/4 teaspoon ground nutmeg - 1/8 teaspoon ground ginger - 1/8 teaspoon salt - 3 tablespoons canned pumpkin puree - 3 tablespoons milk (or any plant-based milk) - 1 tablespoon vegetable oil - 1/4 teaspoon vanilla extract You can swap some ingredients if you have dietary needs: - Use gluten-free flour instead of all-purpose flour. - Replace granulated sugar with coconut sugar or a sugar substitute. - Opt for almond milk, soy milk, or oat milk for a dairy-free option. - Use applesauce instead of vegetable oil for a lower-fat choice. Adding toppings makes your mug cake even better: - Whipped cream adds a fluffy texture. - A sprinkle of cinnamon gives extra warmth. - Drizzle maple syrup for a sweet touch. - Chopped nuts like pecans or walnuts add crunch. - Chocolate chips can make it more decadent. These ingredients and topping ideas help you create a delicious and quick pumpkin spice mug cake. Enjoy every bite! Start by choosing a large microwave-safe mug. Measure 4 tablespoons of all-purpose flour and add it to the mug. Then, add 2 tablespoons of granulated sugar. Next, mix in 1/4 teaspoon of baking powder. This helps the cake rise. Now, sprinkle in 1/4 teaspoon of ground cinnamon, 1/4 teaspoon of ground nutmeg, and 1/8 teaspoon of ground ginger. These spices give the cake its warm flavor. Finally, add 1/8 teaspoon of salt. Whisk these dry ingredients together until they blend well. Now it's time to add the wet ingredients. Measure 3 tablespoons of canned pumpkin puree and add it to your dry mix. This gives the cake its moist texture and rich taste. Next, pour in 3 tablespoons of milk. You can use regular milk or any plant-based milk. Then, add 1 tablespoon of vegetable oil for extra moisture. Lastly, measure 1/4 teaspoon of vanilla extract. This will enhance the flavor. Mix everything together until it is smooth. Make sure there are no lumps left in the batter. Place your mug in the microwave. Cook it on high for 1 minute and 30 seconds. Every microwave is different, so check if it’s done. Insert a toothpick in the center. If it comes out clean, your mug cake is ready. If not, microwave it in 10-15 second intervals until it’s done. Once cooked, let the mug cake cool for about a minute. You can then enjoy it plain or add toppings like whipped cream, cinnamon, or a drizzle of maple syrup. To get a soft and fluffy mug cake, follow these tips: - Use fresh ingredients to boost flavor. - Whisk the dry mix well to avoid lumps. - Make sure to mix wet ingredients until smooth. - Do not over-mix; a few lumps are okay. - Use a large mug to allow for rising. Watch out for these common errors: - Adding too much liquid can make it soggy. - Overcooking will lead to a dry texture. - Using cold ingredients affects the baking process. - Not checking the cake often can result in overcooking. - Skipping toppings makes the cake less exciting. Microwave cooking can be tricky, but here are some best practices: - Start with a lower cooking time to avoid burning. - Check doneness with a toothpick to ensure it’s ready. - Let the cake cool before eating; it continues to cook. - Clean the microwave after cooking to avoid smells. - Experiment with cooking times for your specific microwave. {{image_2}} You can make a healthier version of this mug cake. Use a sugar substitute like stevia or monk fruit to cut down on sugar. For a gluten-free option, use almond flour or coconut flour instead of all-purpose flour. These changes still give you a delicious taste. You can enjoy your treat without the guilt! Want to mix things up? Consider adding chocolate chips or nuts. Chocolate pairs well with pumpkin spice. Just stir in a tablespoon of mini chocolate chips before cooking. If you prefer nuts, walnuts or pecans add a nice crunch. Both options give your mug cake extra flavor and texture. You can get creative with the seasons! In fall, add a pinch of clove or allspice for more warmth. In winter, try a splash of peppermint extract. For spring, a little orange zest brightens the flavor. Each of these add-ins brings a new twist, making your mug cake special for any occasion. To store your leftover mug cake, let it cool completely. Then, place it in an airtight container. This helps keep it fresh. You can store it in the fridge for up to two days. If you want to enjoy it later, you can also wrap it tightly in plastic wrap. When you are ready to enjoy your mug cake again, take it out of the fridge. Place it in the microwave for about 10 to 15 seconds. Check if it is warm enough. If not, heat it longer in short bursts. This keeps the cake moist and tasty. You can freeze your mug cake, too! Wrap it tightly in plastic wrap and then place it in a freezer bag. It will stay fresh for up to a month. When you want to eat it, thaw it in the fridge overnight. Reheat it in the microwave as needed. You can check if your mug cake is done by inserting a toothpick in the center. If it comes out clean, your cake is ready. If not, microwave it for 10 to 15 more seconds. Keep an eye on it to avoid overcooking. Yes, you can make this mug cake without eggs. The canned pumpkin puree acts as a binding agent. It adds moisture and texture, so you won’t miss the eggs at all. If you don’t have canned pumpkin puree, use mashed sweet potatoes. You can also use applesauce for a different flavor. Both options will keep your mug cake moist. To make a larger batch, simply multiply the ingredients by the number of servings you need. Mix everything in a bowl, then divide it into mugs. Be sure to increase the cooking time if you use larger mugs. Yes, you can bake the mug cake instead of microwaving it. Preheat your oven to 350°F (175°C). Pour the batter into a small baking dish. Bake for about 15 to 20 minutes. Check for doneness with a toothpick. This blog post showed you how to make a mug cake quickly and easily. We covered the key ingredients and shared options for dietary needs. I walked you through the step-by-step process of cooking and even shared helpful tips to avoid mistakes. We explored tasty variations and discussed how to store your cake. With this knowledge, you can enjoy a delicious mug cake any time. I hope you have fun baking and experimenting with flavors!

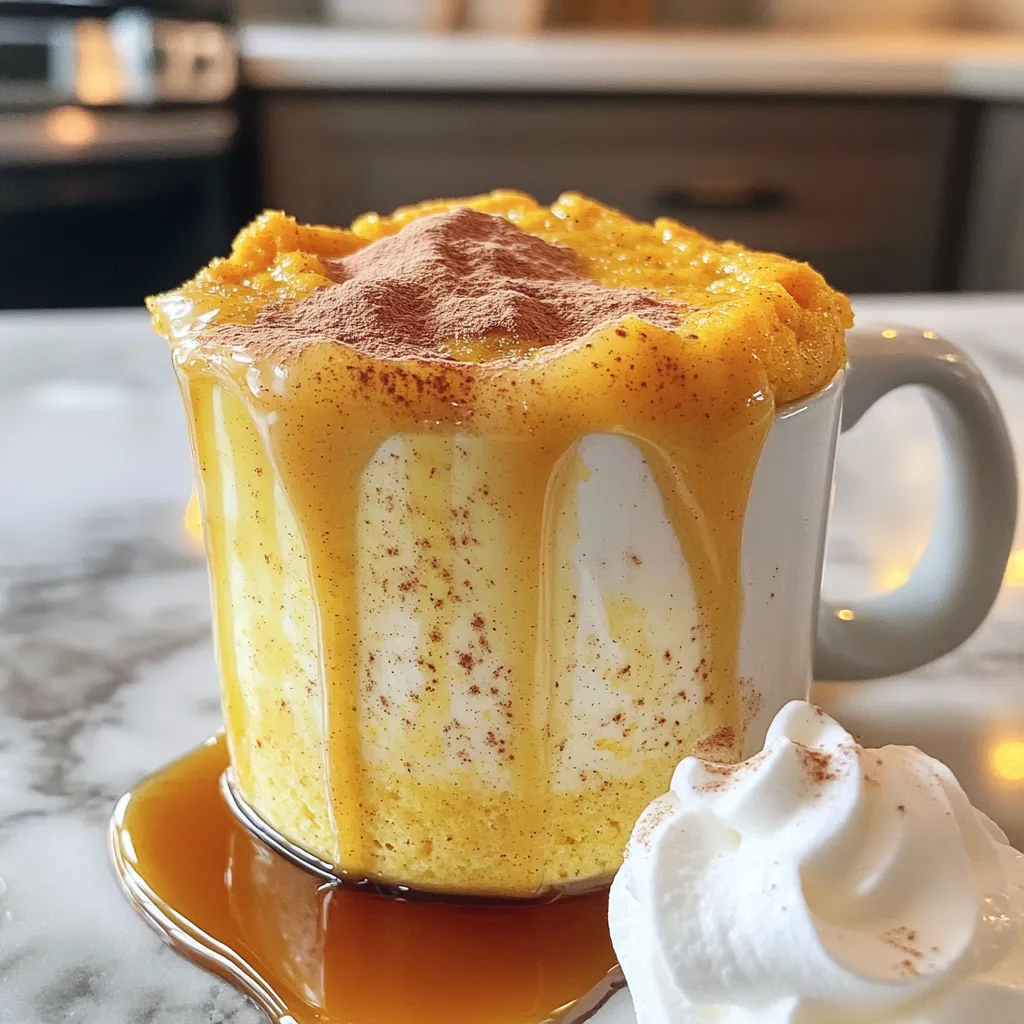
Pumpkin Spice Mug Cake Easy and Quick Delight

Get ready for a quick and tasty treat! My Pumpkin Spice Mug Cake is perfect when you crave something sweet

To make a hearty and delicious Slow Cooker Stuffed Pepper Soup, gather these simple ingredients: - 4 large bell peppers (red, yellow, and green), diced - 1 medium onion, chopped - 3 cloves garlic, minced - 1 pound ground turkey or beef - 1 can (28 oz) crushed tomatoes - 4 cups low-sodium chicken or vegetable broth - 1 cup uncooked quinoa or rice - 2 teaspoons Italian seasoning - 1 teaspoon smoked paprika - Salt and pepper to taste - 1 cup shredded cheese (cheddar or mozzarella) for topping - Fresh parsley, chopped, for garnish These ingredients come together to create a warm and filling soup. The bell peppers give a nice color and sweetness. The ground turkey or beef adds protein, while the quinoa or rice makes it hearty. I love using crushed tomatoes for their rich flavor, and the broth ties everything together. The Italian seasoning and smoked paprika bring depth to the dish. Top it off with cheese and parsley for a lovely finish! - Sauté onion and garlic Start by heating a large skillet over medium heat. Add the chopped onion and minced garlic. Cook them for about 3-4 minutes. You want them to be soft and clear. - Brown the ground turkey or beef Next, add your ground turkey or beef to the skillet. Cook it well while breaking it apart with a spoon. Make sure it turns brown and drains any extra fat. - Combine ingredients in the slow cooker In your slow cooker, add the diced bell peppers. Pour in the sautéed onion and meat mixture. Add the crushed tomatoes and broth too. Toss in the uncooked quinoa or rice. Sprinkle the Italian seasoning and smoked paprika. Stir everything well to mix. - Season and cook time options (low/high) Add salt and pepper to taste. Cover the slow cooker. Cook on low for 6-8 hours or on high for 3-4 hours. The peppers should be tender, and the quinoa or rice will be cooked through. - Stir and adjust seasoning before serving Once the cooking time is up, stir the soup well. Taste it and adjust the seasoning if needed. This step is crucial for a balanced flavor. Choosing the right peppers is key. I like to use red, yellow, and green peppers. They add color and flavor. Each pepper has a slightly different taste. Red peppers are sweet; green peppers are more grassy. Mix them for the best flavor. For meat, I recommend ground turkey or beef. Turkey is lean and keeps the soup light. Beef adds a rich flavor. You can use either, based on what you prefer. Both options work well in this soup. To avoid a watery soup, use uncooked quinoa or rice. They soak up extra liquid. If your soup is too thin, add a bit more quinoa or rice. You can also let it cook longer. This helps thicken the soup naturally. Keep stirring to mix all the flavors together. For side dishes, consider crusty bread or a fresh salad. Bread is great for dipping. A salad adds crunch and freshness. Both pair well with the rich soup. When it comes to toppings, cheese is classic, but try more! Fresh herbs like parsley or cilantro add a nice touch. You can also use sour cream for creaminess. A sprinkle of chili flakes gives a spicy kick. These options make your soup even more delicious. {{image_2}} You can swap the ground turkey or beef for ground chicken or pork. Both options bring a lighter taste to the soup. Ground chicken gives a nice flavor without being too heavy. Ground pork adds a bit of sweetness, which pairs well with the peppers. If you want a vegetarian or vegan version, use lentils or black beans instead of meat. They add protein and a hearty texture. You can also use tofu for a protein boost. If you want to change the base, try using couscous or barley instead of quinoa or rice. These grains cook well and add different flavors. You can also toss in extra veggies like corn, zucchini, or carrots. Adding more vegetables makes the soup colorful and healthy. Just chop them small so they cook evenly. These swaps keep your soup fresh and exciting every time you make it. You can keep your stuffed pepper soup in the fridge for up to five days. Store it in an airtight container to keep it fresh. When you reheat, add a splash of broth to keep it moist. You can freeze the soup for up to three months. Use freezer-safe containers or bags. To reheat, thaw it overnight in the fridge. Heat it on the stove or in the microwave. To maintain flavor and texture, avoid adding cheese before freezing. Add it just before serving. This way, your soup stays creamy and delicious when you heat it up. Can I make this recipe in a regular pot? Yes, you can. Just use a large pot on the stove. Start by sautéing the onion and garlic in the pot. Then, add the meat and cook until browned. After that, mix in the rest of the ingredients. Let it simmer on low heat for about 30-45 minutes. Stir occasionally. This method gives you a similar tasty soup. How to make it spicier? You can add more heat easily. Try adding chopped jalapeños or red pepper flakes. You could also use hot sauce to taste. If you want a kick, consider adding a dash of cayenne pepper. Start with a little, and taste. You can always add more if needed. What can I serve with stuffed pepper soup? This soup pairs well with many sides. A fresh salad adds crunch. You can also serve it with crusty bread for dipping. Grilled cheese sandwiches are another great choice. For a fun twist, try it with tortilla chips for a crunchy bite. This stuffed pepper soup combines fresh ingredients for a delicious meal. We discussed preparation steps, cooking methods, and tips to enhance flavors. Remember to experiment with different meats and veggie options for variety. Proper storage will keep your leftovers tasty for longer. Enjoy your cooking journey, and don't shy away from adjustments. Making this soup will delight your taste buds and those you serve. Keep exploring and savor every bite!

Savory Slow Cooker Stuffed Pepper Soup Recipe

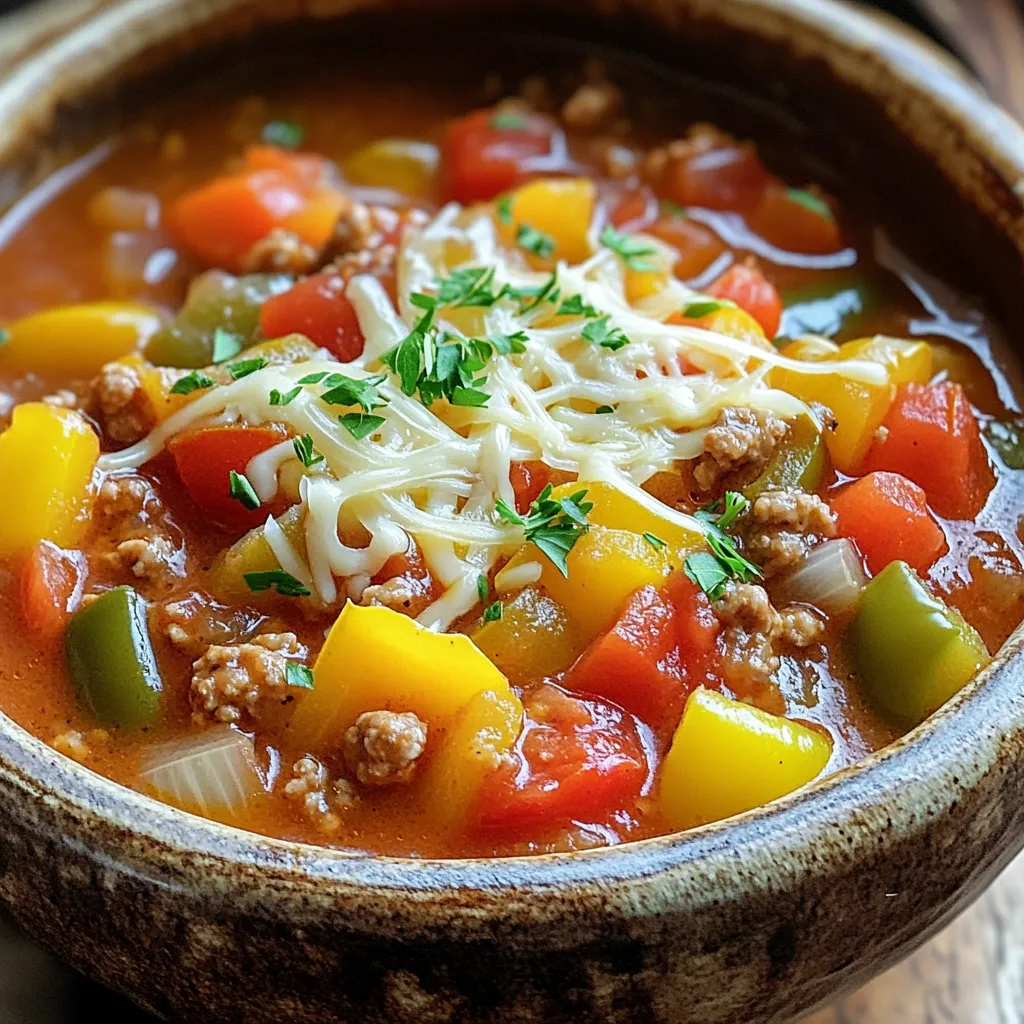
Looking for a warm and hearty meal? This Savory Slow Cooker Stuffed Pepper Soup recipe is just what you need!

- 1 pound salmon fillet, skinless and cut into bite-sized cubes - 1/4 cup teriyaki sauce (look for a low-sodium option if preferred) - 1 tablespoon sesame oil - 1 tablespoon honey - 1 tablespoon rice vinegar - 1 teaspoon ginger, freshly grated - 1 clove garlic, minced - 1 tablespoon sesame seeds - 2 green onions, finely chopped - Salt and pepper to taste For teriyaki sauce, I recommend a few brands. Kikkoman offers a classic taste. If you prefer low-sodium, try San-J. Both brands provide rich flavors without too much salt. You’ll need some basic tools. Grab a medium bowl for mixing. A whisk helps blend the marinade. An air fryer is key for cooking. Use a spatula to flip the salmon. Lastly, have a sharp knife and cutting board for prepping the fish. To make a tasty marinade, start with a medium bowl. Add 1/4 cup of teriyaki sauce, 1 tablespoon of sesame oil, 1 tablespoon of honey, and 1 tablespoon of rice vinegar. These ingredients create a sweet and salty mix that enhances the salmon’s flavor. Next, add 1 teaspoon of freshly grated ginger and 1 clove of minced garlic. Whisk everything until it's well blended. This step is vital because it infuses the salmon with flavor. Now, take 1 pound of skinless salmon fillet and cut it into bite-sized cubes. Gently add the salmon to the marinade. Toss the cubes lightly to coat them evenly. Cover the bowl with plastic wrap and place it in the refrigerator. Let it marinate for at least 30 minutes. For even more flavor, you can marinate it for up to 2 hours. This allows the salmon to absorb all those delicious flavors. Once the salmon has marinated, it’s time to cook. Preheat your air fryer to 375°F (190°C) for about 5 minutes. After preheating, take the salmon out of the fridge. Season the cubes with salt and pepper to taste. Place the salmon bites in the air fryer basket in a single layer. It’s important they don’t overlap. Cook the salmon bites for 8-10 minutes. Flip them halfway through for even cooking. When they are done, they should be cooked through and slightly crispy on the outside. Carefully remove the bites from the air fryer. For a final touch, sprinkle sesame seeds and finely chopped green onions on top. Enjoy your delicious teriyaki salmon bites! To get that perfect crunch on your salmon bites, follow these tips: - Preheat the Air Fryer: Always preheat your air fryer to 375°F (190°C). This step helps the salmon cook evenly and crisp up nicely. - Don’t Overcrowd the Basket: Place the salmon cubes in a single layer. If they touch or overlap, they won’t get the crispy texture you want. - Flip Halfway Through Cooking: Turn the salmon bites halfway through the cooking time. This action helps them brown evenly on all sides. You can easily adjust the flavors to suit your taste. Here are some ideas: - Add More Spice: If you love heat, add a pinch of red pepper flakes to your marinade. This addition gives a nice kick. - Try Different Sweeteners: Swap honey for maple syrup or agave for a unique twist. Each sweetener gives a different flavor. - Experiment with Herbs: Add fresh herbs like cilantro or basil to the garnish for extra freshness. These herbs pair well with teriyaki. To ensure your salmon bites turn out great, watch out for these common errors: - Marinating Too Short: Don’t rush the marinating process. Aim for at least 30 minutes, but letting it sit for 2 hours enhances the flavor. - Skipping the Seasoning: Always season with salt and pepper before cooking. This step adds depth to the flavor. - Not Checking for Doneness: Use a fork to check if the salmon is flaky and cooked through. If it’s still raw in the center, give it more time in the air fryer. {{image_2}} You can make this dish even better by adding veggies. Broccoli, bell peppers, and snap peas work great. Simply chop them into bite-sized pieces. Toss them in the same marinade as the salmon. Let the veggies soak up the flavors for at least 15 minutes before air frying. This adds color and nutrients to your meal. While teriyaki is tasty, you can try other flavors too. A honey soy glaze gives a sweet touch. For a spicy kick, mix soy sauce with sriracha. You could even use a citrus marinade with orange juice and zest. Each option offers a unique taste that can change your salmon bites completely. Serve your salmon bites with sides for a full meal. Jasmine rice or quinoa adds a nice base. Steamed broccoli or a fresh salad brightens the plate. Drizzle extra teriyaki sauce on top for added flavor. You can also garnish with lime wedges for a zesty finish. Mixing and matching sides makes your meal fun and exciting. To store your leftover teriyaki salmon bites, first let them cool down. Place them in an airtight container. This keeps them fresh and tasty. You can store them in the fridge for up to 3 days. If you want to enjoy them later, freezing is a good option. When you’re ready to eat the leftovers, the best way is to use an air fryer. Preheat it to 350°F (175°C). Place the salmon bites in the basket. Heat them for about 5-7 minutes. This keeps them crispy and warm. You can also use a microwave, but this may make them a bit soft. If you want to freeze the salmon bites, do it right after cooking. Let them cool completely. Then, place them in a freezer-safe bag. Remove as much air as possible before sealing. You can freeze them for up to 3 months. When ready to eat, thaw in the fridge overnight and reheat in the air fryer. Enjoy your tasty meal! For this recipe, I recommend using skinless salmon fillets. Atlantic salmon works great for its rich flavor. If you prefer a leaner option, go for sockeye salmon. Both types will absorb the teriyaki sauce well and stay moist during cooking. I suggest marinating the salmon for at least 30 minutes. This time allows the flavors to soak in nicely. For the best taste, you can marinate it for up to 2 hours. Just make sure to keep it in the fridge while it marinates. Yes, you can! If you don't have an air fryer, you can easily bake the salmon. Preheat your oven to 400°F (200°C). Place the marinated salmon on a baking sheet lined with parchment paper. Bake for 12-15 minutes or until the salmon flakes easily with a fork. This method gives you a tasty dish as well! In this article, we explored how to make tasty teriyaki salmon bites. We listed important ingredients, shared brands to trust, and named essential tools. Next, I guided you through marinating and cooking salmon in an air fryer. We covered tips for crispy bites and avoiding mistakes. I also shared ideas for variations and offered storage and reheating suggestions. With these steps and insights, you can create a delicious dish. I hope this inspires you to try it out!

Air Fryer Teriyaki Salmon Bites Tasty and Quick Meal

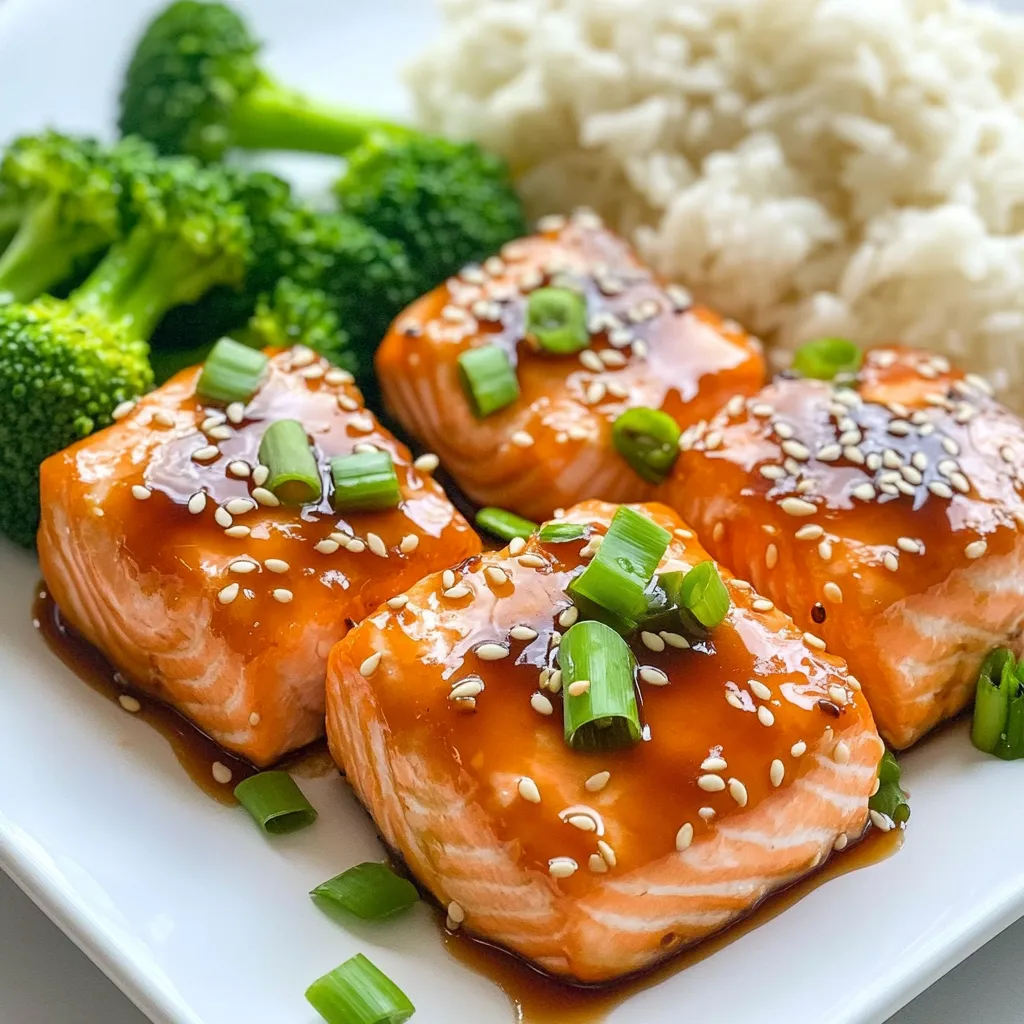
Are you ready to delight your taste buds with a quick meal? Air fryer teriyaki salmon bites are tasty, easy,

To make this delightful lemon raspberry yogurt loaf, you'll need: - 1 ½ cups all-purpose flour - 1 teaspoon baking powder - ½ teaspoon baking soda - ¼ teaspoon salt - ½ cup plain yogurt (Greek or regular) - ¾ cup granulated sugar - 2 large eggs - ⅓ cup vegetable oil - Zest of 1 lemon - 2 tablespoons fresh lemon juice - 1 cup fresh raspberries (or frozen, thawed) - 1 teaspoon vanilla extract If you need to make some changes, here are some ideas: - For yogurt, you can use sour cream. It adds creaminess. - Instead of granulated sugar, try coconut sugar for a different flavor. - You can swap vegetable oil with melted coconut oil for a hint of sweetness. - If you lack fresh raspberries, frozen ones work fine. Just thaw them first. The quality of your ingredients really matters. Using fresh raspberries gives the loaf a vibrant taste. Opt for good yogurt, too; it keeps the loaf moist. Fresh lemon zest adds brightness and flavor depth. Cheap ingredients may lead to a bland loaf. Always aim for the best you can find to make your lemon raspberry yogurt loaf shine. Start by preheating your oven to 350°F (175°C). This heat is perfect for baking. While the oven warms up, you can prepare your loaf pan. Grease a 9x5-inch loaf pan with cooking spray. Alternatively, use parchment paper to make removal easier later. This step helps your loaf come out without sticking. Next, gather your dry ingredients. In a medium bowl, whisk together 1 ½ cups of all-purpose flour, 1 teaspoon of baking powder, ½ teaspoon of baking soda, and ¼ teaspoon of salt. Mix them well. This blend gives your loaf rise and flavor. Set the bowl aside for now. In a large mixing bowl, combine ½ cup of plain yogurt and ¾ cup of granulated sugar. Use a hand mixer or a whisk to blend these together until smooth. This creamy mixture adds moisture and sweetness. Now, crack in 2 large eggs and pour in ⅓ cup of vegetable oil. Add the zest of 1 lemon, 2 tablespoons of fresh lemon juice, and 1 teaspoon of vanilla extract. Mix everything until it is well combined. Take your dry mixture and gradually add it to the wet ingredients. Stir gently until just combined. It’s fine if there are a few lumps. Be careful not to overmix. Now, gently fold in 1 cup of fresh raspberries. If you use frozen raspberries, make sure to thaw them first. Be cautious while folding. You want to keep the raspberries whole for nice bursts of flavor. Once your batter is ready, pour it into the prepared loaf pan. Smooth the top with a spatula for an even bake. Place the pan in the oven and bake for about 50-60 minutes. Check for doneness by inserting a toothpick into the center. If it comes out clean, your loaf is ready. After baking, let the loaf cool in the pan for about 10 minutes. Then, transfer it to a wire rack to cool completely. This cooling step helps the loaf set perfectly. To keep your loaf moist, use yogurt in the batter. Yogurt adds creaminess and moisture. You can also add a little extra lemon juice, which helps keep it soft. Make sure you don’t overmix the batter. Stir until just combined to avoid a dry loaf. When you add raspberries, be gentle. Use a spatula or a wooden spoon. This way, you won’t crush them too much. If you crush the raspberries, the color will bleed into the batter. This can change the look of your loaf. Aim for whole or half raspberries for pretty slices. Ovens can vary in temperature. If your oven runs hot, check your loaf a bit early. Start checking at 50 minutes. If the toothpick comes out wet, give it more time. If it’s golden brown on top, it may be done. Always trust your oven and your instincts. Serve your Lemon Raspberry Yogurt Loaf warm or at room temperature. I love to add a dusting of powdered sugar on top. This gives it a sweet touch. You can also garnish with fresh raspberries and mint leaves. For a fun twist, try pairing it with a scoop of vanilla ice cream. It adds a creamy contrast to the tartness of the lemon and raspberries. {{image_2}} If you want to change up the flavor, you can swap the raspberries. Blueberries are a great choice. They add a sweet burst to each bite. Strawberries work well too, giving a nice tartness. For a tropical twist, try diced mango or pineapple. Each fruit brings its own unique taste! To make this loaf gluten-free, use a gluten-free flour blend. Look for a blend that has xanthan gum for better texture. You can also try almond flour or oat flour. These options give a different taste and texture, but they work nicely. Just remember to check the measurements on the package. Adding spices can elevate the loaf's flavor. A pinch of cinnamon or nutmeg adds warmth. You can also try a teaspoon of almond extract for a nutty taste. If you like a floral note, a drop of rose water works wonders. These simple additions can make your loaf truly special! To keep your Lemon Raspberry Yogurt Loaf fresh, wrap it tightly. Use plastic wrap or aluminum foil. Place it in an airtight container. Store it at room temperature for up to three days. If you want to keep it longer, the fridge is a good option. In the fridge, it can last about a week. For long-term storage, freezing is perfect. First, let the loaf cool completely. Then, wrap it tightly in plastic wrap. After that, place it in a freezer-safe bag or container. Label the bag with the date. The loaf can stay in the freezer for up to three months. When you’re ready to eat it, just thaw it in the fridge overnight. To reheat the loaf, preheat your oven to 350°F (175°C). Unwrap the loaf and place it in the oven for about 10-15 minutes. This warms it up nicely without drying it out. If you prefer the microwave, slice the loaf and heat it for about 15-20 seconds. Be careful not to overheat, or it may become tough. Enjoy your warm, flavorful slice! Yes, you can use frozen raspberries! Just make sure to thaw them first. This way, they mix well into the batter without adding too much moisture. Frozen raspberries work great in this recipe. They hold their shape and flavor, making your loaf just as tasty. To make the loaf healthier, consider these options: - Use whole wheat flour instead of all-purpose flour. - Substitute Greek yogurt for regular yogurt. - Reduce the sugar by a quarter cup. - Add nuts or seeds for extra fiber and protein. These changes will still give you a delicious loaf while making it a bit better for you. Lemon Raspberry Yogurt Loaf is best served sliced. Here are some fun ideas: - Serve it on a decorative plate. - Add a few whole raspberries on top. - Garnish with a sprig of mint. - Dust with powdered sugar for a sweet touch. These simple additions make the loaf look and taste even better! A dense loaf can happen if you overmix the batter. Mixing too much can make the loaf tough. Another reason can be using too much flour. Make sure to spoon the flour into your measuring cup, then level it off. This step helps keep your loaf light and fluffy. In this blog post, we covered key ingredients, step-by-step instructions, and tips for baking a Lemon Raspberry Yogurt Loaf. We explored ingredient quality, substitutions, and variations to suit your taste. Remember, fresh ingredients lead to a better loaf. Don’t forget to adjust baking times based on your oven. Enjoy experimenting with this recipe and make it your own. Happy baking!

Lemon Raspberry Yogurt Loaf Delightfully Simple Recipe

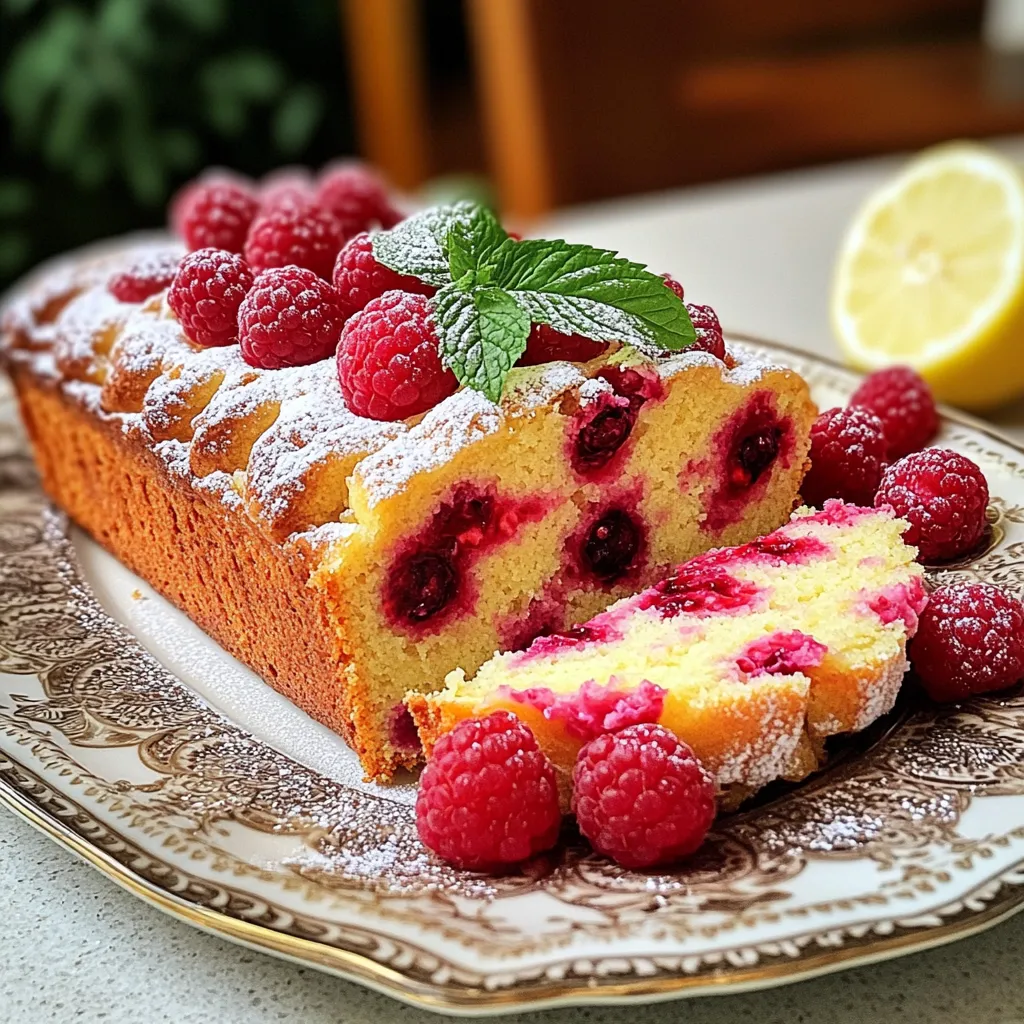
Get ready to indulge in a Lemon Raspberry Yogurt Loaf that is as delicious as it is simple! This easy

To make a tasty cranberry pecan chicken salad, you need: - 2 cups cooked chicken, shredded or diced - 1 cup celery, finely chopped - 1/2 cup dried cranberries - 1/2 cup pecans, roughly chopped - 1/2 cup Greek yogurt - 2 tablespoons honey - 1 tablespoon Dijon mustard - 1 tablespoon lemon juice - Salt and pepper to taste - 4 cups fresh mixed greens (for serving) Using fresh and dried ingredients can change the taste. Fresh celery adds a nice crunch. Dried cranberries give a sweet and tangy kick. You can mix both for great texture. Want to spice it up? Try adding some chopped apples or grapes for sweetness. You can also toss in some red onion for a bit of bite. If you like herbs, fresh dill or parsley can brighten the flavors. These add-ins can make your salad even more exciting! 1. Start with a large mixing bowl. Add 2 cups of cooked chicken, shredded or diced. 2. Next, add 1 cup of finely chopped celery. This adds a nice crunch. 3. Then, toss in 1/2 cup of dried cranberries for sweetness. 4. Add 1/2 cup of roughly chopped pecans for a nutty flavor. 5. In a smaller bowl, whisk together 1/2 cup of Greek yogurt, 2 tablespoons of honey, 1 tablespoon of Dijon mustard, and 1 tablespoon of lemon juice. 6. Season with salt and pepper to taste. This will be your dressing. 7. Pour the dressing over the chicken mixture. 8. Gently fold everything together. Make sure all the chicken and veggies are coated. 9. Taste the salad and add more salt and pepper if needed. 10. Serve the salad right away or chill it for 30 minutes. When mixing, be gentle. You want to keep the chicken pieces intact. Serve the salad in large bowls. Garnish with extra pecans and cranberries. This makes it look pretty. A drizzle of honey on top adds extra sweetness. If you want a fresh touch, add some lemon zest. Chilling the salad lets the flavors blend. It makes the salad taste better. After mixing, let it sit in the fridge for 30 minutes. This gives the cranberries time to soften. The salad becomes cool and refreshing. Enjoying it cold feels great on warm days! Store any leftover cranberry pecan chicken salad in an airtight container. This keeps it fresh. Place it in the fridge right away. It will last for up to three days. If you notice any extra liquid, just mix it again before serving. This helps to maintain the flavor and texture. The dressing should be creamy but not too thick. If it feels thick, add a little water or more lemon juice. A splash of milk can also help if you want it thinner. Always taste your dressing first. If it needs more sweetness, add a bit more honey. If it’s too sweet, just add lemon juice or a pinch of salt. You can swap Greek yogurt for a dairy-free yogurt if you prefer. For a vegan option, use maple syrup instead of honey. If you're allergic to nuts, leave out the pecans. You can also add different spices for extra flavor. Try adding a dash of cayenne for heat or some fresh herbs like dill for a unique twist. {{image_2}} You can switch up the chicken for other proteins. Turkey is a great choice. It has a similar taste and texture. You can also use canned tuna or salmon. These options add a nice twist to the salad. If you want a plant-based choice, try chickpeas or tofu. Both options bring protein and a unique flavor. Pecans add a nice crunch, but you can try other nuts too. Walnuts work well and have a rich taste. Almonds are another good choice; they add a bit of sweetness. If you want something different, try cashews. They are creamy and will blend nicely in the salad. Just remember to chop your nuts for even bites. Using fresh, seasonal ingredients can improve your salad. In spring, swap cranberries for fresh strawberries. They add a burst of flavor. In summer, try adding diced peaches or mango. These fruits bring sweetness and juiciness. In autumn, use apples or pears for a crisp texture. Winter is perfect for pomegranate seeds, which add a lovely color and taste. Each serving of cranberry pecan chicken salad has about 300 calories. This includes the chicken, nuts, and yogurt. The mixed greens add minimal calories but boost nutrition. - Chicken: This provides protein, which helps build muscles and repair tissues. - Cranberries: They are high in antioxidants, which may help protect your cells. - Pecans: These nuts are rich in healthy fats and can support heart health. - Greek yogurt: It offers probiotics, which are good for your gut health. These ingredients work together to create a meal that is both tasty and nutritious. Cranberry pecan chicken salad is a great option for a balanced meal. It includes protein from chicken, healthy fats from pecans, and fiber from the greens and cranberries. Eating this salad can help you feel full and satisfied. It can fit well into lunch or dinner, making it easy to enjoy a healthy diet. Yes, you can use leftover rotisserie chicken. It saves time and adds flavor. Just shred or dice it as needed. The mix of spices from the rotisserie chicken will enhance your salad. This makes it an easy choice for busy days. If you want a substitute for Greek yogurt, try sour cream or cottage cheese. You can also use plain regular yogurt. Each option brings its own taste, so pick what you like best. If you want a dairy-free option, use a plant-based yogurt. You can store the salad in the fridge for up to three days. Keep it in an airtight container to maintain freshness. The flavors will blend as it sits, making it even tastier. Just remember to stir it before eating. This blog post covered the essential ingredients and steps for a tasty salad. You learned how to choose fresh versus dried items and add unique flavors. I shared tips for serving and storing your salad, ensuring it stays fresh. You can customize it based on your diet and explore different variations. Remember, this salad not only tastes great but also offers health benefits. By using these ideas, you can make a salad that fits your taste and health goals. Enjoy creating your perfect dish!

Cranberry Pecan Chicken Salad Easy and Flavorful Meal

Are you ready for a delicious and easy meal that satisfies? My Cranberry Pecan Chicken Salad combines juicy chicken, tart

- 2 medium eggplants, sliced into ½-inch rounds - 1 cup panko breadcrumbs - 1 cup grated Parmesan cheese - 1 cup shredded mozzarella cheese - 2 cups marinara sauce - 2 large eggs, beaten - 1 teaspoon Italian seasoning - Salt and pepper to taste - Fresh basil leaves, for garnish To make my Air Fryer Eggplant Parmesan Stacks, I gather all these ingredients first. The eggplants are the star here. I choose medium-sized ones for the best flavor and texture. The panko breadcrumbs give a great crunch that I love. The combination of Parmesan and mozzarella cheese adds richness. Marinara sauce brings a nice acidity to balance everything. The eggs help the breadcrumbs stick, and the Italian seasoning adds a nice herb flavor. Don’t forget salt and pepper to enhance the taste! Fresh basil leaves add the finishing touch. They not only make the dish look pretty but also add a fresh flavor. With all these ingredients ready, I'm set to create a delicious dish that is both crispy and simple to prepare. Start by prepping the eggplant slices. Take your two medium eggplants and slice them into ½-inch rounds. This size helps them cook evenly. Next, sprinkle salt over the slices. Let them sit for about 30 minutes. This draws out excess moisture and reduces bitterness. After that, rinse the slices under cold water. Pat them dry with a paper towel. This step is key for a crispy texture. Now it's time to bread the eggplant. In a shallow bowl, mix together the breadcrumbs, half of the Parmesan cheese, Italian seasoning, salt, and pepper. This mix adds flavor and crunch. In another bowl, beat the two large eggs. Dip each eggplant slice into the egg first. Let any excess egg drip off. Then, coat it in the breadcrumb mixture. Make sure each slice is well covered to get a nice crust. Before frying, preheat your air fryer to 380°F (190°C) for about 5 minutes. This helps cook the eggplant evenly. Lightly spray the air fryer basket with cooking spray. Arrange a single layer of breaded eggplant in the basket. Avoid overlapping to get the best crisp. Air fry the eggplant for about 12-15 minutes. Flip the slices halfway through cooking. They should turn golden brown and crispy. Once all the eggplant rounds are cooked, it’s time to assemble. Place one slice of eggplant on a serving plate. Spoon a bit of marinara sauce on top. Sprinkle with mozzarella and a bit of Parmesan cheese. Then, add another eggplant slice on top. Repeat to create layers. Finish each stack with more marinara sauce and cheese on top. Return the stacks to the air fryer for 5 minutes. This will melt the cheese and create a bubbly topping. Choosing medium eggplants is key for this dish. They have a good balance of size and flavor. Look for firm, shiny skins. The color should be deep purple. Fresh eggplants feel heavy for their size. Avoid any with soft spots or wrinkles. Using panko breadcrumbs gives extra crunch. They are light and airy compared to regular breadcrumbs. For the best crispiness, keep the eggplant slices thin. Make sure they are well-coated. Spray the air fryer basket lightly with cooking spray. This helps prevent sticking and keeps them crispy. Garnish with fresh basil leaves for a pop of color. You can also drizzle more marinara sauce on top. For a twist, try adding a sprinkle of red pepper flakes. Pair these stacks with a simple salad or garlic bread. This makes a great meal and adds variety. {{image_2}} You can easily tweak this recipe to fit your vegetarian needs. - Alternative cheese suggestions: If you want to switch things up, try using goat cheese or ricotta. They add a nice creaminess to the stacks. - Adding veggies to the stacks: Feel free to layer in some fresh spinach or roasted bell peppers. These add color and flavor. If you need a gluten-free option, I’ve got you covered. - Gluten-free breadcrumb options: Use gluten-free panko or almond flour. Both work well and give a nice crunch. - Other binding alternatives for egg: Instead of eggs, try using flaxseed meal mixed with water. This binds the breadcrumbs just like eggs would. Want a kick? Let’s spice things up! - Adding spices to the breadcrumb mixture: Mix in some cayenne or crushed red pepper flakes. This adds great heat to your stacks. - Suggestions for spicy marinara sauces: Look for marinara with jalapeños or chipotle. These will give your dish an exciting twist. After you make your Air Fryer Eggplant Parmesan Stacks, let them cool down. You can keep them in the fridge. Use an airtight container to keep them fresh. Place parchment paper between layers to avoid sticking. They stay good for about three days. To reheat these stacks, the air fryer is best. Set it to 350°F (175°C) for about 5 minutes. This keeps them crispy. If you use a microwave, they may turn soggy. Heat them on a plate for about 1-2 minutes, but expect a softer texture. Yes, you can freeze eggplant stacks! Allow them to cool completely before freezing. Wrap each stack in plastic wrap tightly. Then, put them in a freezer-safe bag. They last up to two months in the freezer. To defrost, place them in the fridge overnight. Reheat in the air fryer for best results. Yes, you can prepare these stacks ahead of time. After cooking, let them cool. Then, store them in the fridge for up to two days. When you're ready to eat, just reheat in the air fryer or oven until warm. If you're looking for a substitute for marshmallow sauce, try using a drizzle of honey or agave syrup. Both options add a sweet touch without the marshmallow. You can also use a simple chocolate sauce for a different flavor. To reduce bitterness, sprinkle salt on the eggplant slices and let them sit for about 30 minutes. The salt draws out moisture, which helps remove the bitter taste. Rinse and pat them dry before cooking. Absolutely! Fresh herbs like basil, oregano, and thyme work well. They give a great flavor to your stacks. Just chop them finely and mix them with the breadcrumbs for a fresh twist. Serve the eggplant stacks hot, right from the air fryer. Place them on a plate with extra marinara sauce on the side. Garnish with fresh basil leaves to add a pop of color and flavor. Enjoy! In this blog post, I shared how to make delicious Air Fryer Eggplant Parmesan Stacks. We covered the necessary ingredients, step-by-step instructions, and useful tips for perfecting your dish. I also discussed fun variations and storage tips for leftovers. Trying this recipe will impress your family and friends. Enjoy your tasty stacks, and don't hesitate to get creative with the ingredients. Happy cooking!

Air Fryer Eggplant Parmesan Stacks Crispy and Simple

Are you ready to dive into a delicious twist on a classic dish? With my Air Fryer Eggplant Parmesan Stacks,

- 1 ½ cups warm water (110°F to 115°F) - 2 tablespoons granulated sugar - 1 packet active dry yeast (2¼ teaspoons) - 4 cups all-purpose flour - 1 teaspoon salt - ½ cup baking soda (for boiling) - ½ cup unsalted butter, melted - 1 cup granulated sugar (for coating) - 2 tablespoons ground cinnamon - Coarse sea salt, for sprinkling - 1 cup = 8 fluid ounces - 1 tablespoon = 3 teaspoons - 1 packet of yeast = 2¼ teaspoons - ½ cup = 4 fluid ounces - If you lack active dry yeast, use instant yeast for a quicker rise. - You can swap all-purpose flour with bread flour for a chewier bite. - Melted coconut oil can replace unsalted butter for a dairy-free option. - If you prefer less sugar, reduce the amount used for coating. To start, grab a large mixing bowl. Add 1 ½ cups of warm water. Make sure it’s between 110°F and 115°F. Next, mix in 2 tablespoons of granulated sugar and 1 packet of active dry yeast. Let this sit for about 5 minutes until you see bubbles. This means the yeast is active. After that, stir in 4 cups of all-purpose flour and 1 teaspoon of salt. Mix until you form a soft dough. Now, turn the dough out onto a floured surface. Knead it for about 5-7 minutes. You want it to be smooth and elastic. Once done, put it in a lightly greased bowl. Cover it with a damp cloth. Let it rise in a warm spot for about 1 hour. It should double in size. Once your dough has risen, it’s time for some fun. Preheat your oven to 425°F (220°C). Line a baking sheet with parchment paper. Now, take a large pot and fill it with about 8 cups of water. Bring this to a gentle boil and add ½ cup of baking soda. Punch down the risen dough and divide it into small pieces. Each piece should be about the size of a golf ball. Roll each piece into a rope. Then shape the rope into bite-sized pretzel shapes. Carefully drop each pretzel bite into the boiling water for about 30 seconds. Use a slotted spoon to remove them. Place them on your prepared baking sheet. Before baking, brush each pretzel bite with melted butter. In a bowl, mix 1 cup of granulated sugar with 2 tablespoons of ground cinnamon. Generously sprinkle this mixture over the pretzel bites. Then, add a sprinkle of coarse sea salt for extra flavor. Bake your pretzel bites in the preheated oven for 12-15 minutes. They should turn golden brown. Once baked, let them cool slightly on a wire rack. Enjoy them warm for the best taste! To get soft pretzel bites, it's all about the dough. Use warm water, about 110°F to 115°F, to activate the yeast. This warmth helps the dough rise. Knead the dough for about 5-7 minutes. This builds gluten, making the pretzels chewy. Let the dough rise in a warm area. Cover it with a damp cloth for an hour. This will double its size. When you boil the pretzel bites, add baking soda to the water. This step gives them that classic pretzel texture. The sweet cinnamon sugar coating is a classic choice. However, you can mix things up! Try adding a pinch of nutmeg to the cinnamon sugar. This adds warmth and depth. For a chocolate twist, drizzle melted chocolate over the bites after baking. If you love savory flavors, try grated Parmesan or garlic powder instead of cinnamon. You can even sprinkle some herbs for a unique taste. These bites are great as a snack on their own. Serve them warm with a side of creamy dip. A simple cream cheese dip works well. For a fun twist, try a chocolate or caramel dip. You can also serve them at parties. Arrange them on a platter with different dips. This makes a fun snack for everyone. Pair with a cold drink for a perfect treat. {{image_2}} You can change things up with savory pretzel bites. Instead of cinnamon sugar, try garlic and herb seasoning. Mix garlic powder, Italian herbs, and a pinch of salt. Brush the pretzel bites with olive oil instead of butter. You can also add cheese. Just sprinkle shredded cheddar or parmesan on top before baking. These savory bites are great for parties or movie nights. Want a gluten-free option? Use a gluten-free all-purpose flour blend. Make sure it has xanthan gum for texture. Follow the same steps in the recipe. You might need to adjust the water slightly. Start with less and add more if needed. The pretzel bites will still taste amazing. You won't miss the gluten at all! Let’s get creative with flavors! For a sweet twist, think chocolate. After baking, dip each pretzel bite in melted chocolate. You can use dark, milk, or white chocolate. For a caramel flavor, drizzle warm caramel sauce over the bites. You can even sprinkle some sea salt on top. These fun additions make great snacks for kids and adults alike! To keep your leftover pretzel bites fresh, store them in an airtight container. This helps them stay soft. Place a paper towel in the container to absorb moisture. You can keep them at room temperature for up to two days. For longer storage, use the fridge. When you want to enjoy your pretzel bites again, preheat your oven to 350°F. Place the bites on a baking sheet. Cover them with foil to keep them soft. Heat for about 10 minutes. If you prefer a crunchy texture, remove the foil for the last few minutes. If you want to freeze the pretzel bites, let them cool first. Place them in a freezer bag or container. They can be stored for up to three months. When you're ready to eat them, take out the amount you want. Let them thaw in the fridge overnight. Reheat as mentioned before. The water should be warm, around 110°F to 115°F. This range helps the yeast activate. If it's too cold, the yeast won't rise. If too hot, it can kill the yeast. Always use a thermometer for the best results. Your pretzel bites are done when they turn a golden brown color. They should look crisp on the outside and feel firm to the touch. You can also tap the bottom; it should sound hollow. Trust your senses to check for doneness. Yes, you can make the dough ahead of time. After kneading, cover it and store it in the fridge. It will stay fresh for up to 24 hours. Just let it come to room temperature before shaping and baking. This saves time and still tastes great! Making pretzel bites is fun and easy. We covered the essential ingredients, from measurements to substitutions. I shared tips for dough prep, boiling, and baking for the best taste. We explored ways to enhance texture and flavor, including savory and sweet variations. Lastly, we discussed proper storage and reheating methods to enjoy pretzel bites later. With these tips, you can create standout pretzel bites at home. Happy baking!

Cinnamon Sugar Pretzel Bites Irresistible Snack Idea

Looking for a snack that will make your taste buds dance? Look no further! These Cinnamon Sugar Pretzel Bites are

To make Slow Cooker Tortilla Chicken Stew, you need a few key ingredients. Here’s the list: - 1.5 lbs boneless, skinless chicken thighs - 1 medium onion, chopped - 2 cloves garlic, minced - 1 red bell pepper, diced - 1 can (15 oz) black beans, rinsed and drained - 1 can (15 oz) corn, drained - 1 can (14.5 oz) diced tomatoes with green chilies - 4 cups chicken broth - 2 teaspoons ground cumin - 1 teaspoon chili powder - Salt and pepper to taste - 4 small corn tortillas, cut into strips - Fresh cilantro, for garnish - Avocado slices, for serving - Lime wedges, for serving Start with the chicken thighs. They give the stew a rich flavor. Next, add chopped onion, garlic, and red bell pepper. These add depth and sweetness. The canned black beans and corn provide protein and sweetness. The diced tomatoes bring a nice acidity to balance the stew. For spices, ground cumin and chili powder are key. They pack a flavorful punch. Don’t forget salt and pepper to taste. The corn tortillas are a fun addition. They soften in the stew and add texture. Finally, the fresh cilantro, avocado, and lime wedges are the perfect finishing touches. They brighten up the dish and add freshness. These ingredients create a warm, comforting meal you will love. First, you want to layer the chicken and veggies in the slow cooker. Start with 1.5 lbs of boneless, skinless chicken thighs. Place them at the bottom of the pot. Next, add the chopped onion, minced garlic, and diced red bell pepper on top. Then, toss in a can of black beans and a can of corn. Finally, pour in a can of diced tomatoes with green chilies. Now, it's time to add spices and broth. Pour 4 cups of chicken broth over the mixture. Add 2 teaspoons of ground cumin, 1 teaspoon of chili powder, and salt and pepper to taste. Stir it gently to mix everything. Make sure the chicken is mostly under the broth. You can choose between low heat or high heat options. For low heat, set the slow cooker for 6-7 hours. If you’re in a hurry, use high heat for 3-4 hours. Either way, check if the chicken is tender. It should shred easily with a fork when done. Once the chicken is tender, use two forks to shred it. Mix it back into the stew. In the last 30 minutes of cooking, add the tortilla strips. This will let them soften a bit. Stir gently to incorporate them. Serve it hot and garnish with fresh cilantro, avocado slices, and lime wedges. These toppings add a nice burst of flavor! To make this stew your own, start by adjusting the spices. Taste the stew as it cooks. If you like more heat, add extra chili powder. For a deeper flavor, try more cumin. Remember, seasoning really enhances this dish. For tender chicken, use boneless, skinless thighs. They stay juicy and shred easily. If you use chicken breasts, watch them closely. They can dry out faster. You can switch up the tortilla strips. Try using crushed tortilla chips for crunch. If you want a softer touch, add corn tortillas earlier in the cooking. To thicken the stew, mash some black beans with a fork. This adds body and creaminess. You can also add a cornstarch slurry near the end. Just mix cornstarch with water, then stir it in. Garnish your stew with fresh cilantro for a bright taste. Avocado slices add creaminess and texture. A squeeze of lime juice brightens the dish even more. For sides, serve with rice or a fresh salad. Pair it with a light drink, like lemonade or iced tea. These choices balance the rich flavors in the stew. {{image_2}} You can switch proteins in this dish. Try turkey or beef for a different taste. Each meat adds its unique flavor and texture. You can also mix in vegetables. Consider adding zucchini, carrots, or even sweet potatoes. These can make your stew even heartier and more colorful. If you need a gluten-free option, skip the corn tortillas. Instead, you can use gluten-free tortilla chips or rice. You can also make it dairy-free. Just skip any cheese or cream toppings and use fresh avocado for creaminess. You can adjust the heat level easily. For mild stew, use less chili powder. For medium heat, stick to the recipe's amount. Want it hot? Add more chili powder or some fresh jalapeños. Just remember to balance flavors. A squeeze of lime can help cut through the heat and brighten the stew. After enjoying your Slow Cooker Tortilla Chicken Stew, store any leftovers properly. First, let the stew cool to room temperature. Then, transfer it to an airtight container. Make sure to seal it well to avoid leaks. You can store it in the fridge for up to three days. This will keep the stew fresh and tasty. Remember, safety first! Always check for any signs of spoilage before eating leftovers. When you're ready to eat your leftovers, reheating them is key. The best way to do this is on the stove. Pour the stew into a pot and heat over low to medium heat. Stir often to prevent sticking. If you prefer, you can also use a microwave. Place the stew in a microwave-safe bowl. Heat it in short bursts, stirring in between. This helps avoid mushiness. You want to keep those tortilla strips from becoming too soft. If you want to save some stew for later, freezing is a great option. Ladle the cooled stew into freezer-safe bags or containers. Make sure to leave some space for expansion. Label the bags with a date and type of stew. This way, you know exactly what you have. When you're ready to eat it, thaw it in the fridge overnight. For a quick thaw, you can use the microwave, but ensure it’s evenly heated when reheating. Yes, you can use frozen chicken in this stew. It is safe to cook frozen chicken in a slow cooker. Just remember, it may take longer to cook. I recommend adding an extra hour to your cooking time on low heat. Be sure to check the chicken with a meat thermometer. It should reach 165°F to be safe to eat. This method keeps your stew juicy and flavorful. Absolutely! You can make this a plant-based dish. Swap the chicken with firm tofu or tempeh. Use vegetable broth instead of chicken broth. You can also add more beans or lentils for protein. This way, you keep the heartiness of the stew while making it meat-free. It still tastes great and is filling! If your stew turns out watery, don’t worry! You can thicken it easily. Try mashing some of the black beans with a fork and stirring them back in. You can also add a cornstarch slurry. Mix one tablespoon of cornstarch with two tablespoons of water. Stir it in and let it cook for about 10 minutes. This will help give your stew a nice, thick texture. This blog post covered a simple slow cooker stew. We discussed ingredients like chicken, veggies, and spices. I shared step-by-step instructions for cooking and flavoring. Tips were provided for texture and serving. Variations included ingredient swaps and spice adjustments. Finally, we reviewed storage and reheating methods. In conclusion, this stew is easy to customize. It suits many tastes and diets. Enjoy your cooking adventure!

Slow Cooker Tortilla Chicken Stew Flavorful Delight

Are you ready to warm your soul with a bowl of Slow Cooker Tortilla Chicken Stew? This simple, hearty dish

To make Sheet Pan Parmesan Crusted Tilapia, gather these ingredients: - 4 tilapia fillets - 1 cup panko breadcrumbs - ½ cup grated Parmesan cheese - 2 tablespoons fresh parsley, chopped - 1 teaspoon garlic powder - 1 teaspoon onion powder - ½ teaspoon paprika - ½ teaspoon salt - ¼ teaspoon black pepper - ¼ cup mayonnaise - 1 tablespoon lemon juice - 1 cup cherry tomatoes, halved - 1 lemon, sliced - Olive oil for drizzling Each ingredient plays a key role. The tilapia fillets are soft and mild, making them perfect for this dish. The panko breadcrumbs create a crunchy topping. Parmesan cheese adds a rich flavor. Fresh parsley brightens the dish. The spices, like garlic powder and paprika, bring warmth and depth. Mayonnaise and lemon juice keep the fish moist and flavorful. Cherry tomatoes add a burst of sweetness. Lemon slices add zest and visual appeal. Drizzling olive oil enhances everything. This mix of flavors and textures makes a simple and tasty meal. It's easy to find all these items in your local store. Let's get cooking! - Preheat the oven: Start by setting your oven to 400°F (200°C). This step is key for a nice crust. - Prepare the sheet pan: Line a large sheet pan with parchment paper. This makes cleanup easy and keeps the fish from sticking. - Mix the dry ingredients: In a bowl, combine the panko breadcrumbs, grated Parmesan cheese, chopped parsley, garlic powder, onion powder, paprika, salt, and black pepper. Stir well until everything is mixed. - Apply the mayonnaise mixture: In a separate bowl, mix mayonnaise and lemon juice. Spread this mixture over each tilapia fillet on the pan. - Coat with breadcrumb mixture: Press the breadcrumb mix firmly onto the mayonnaise-covered fillets. Make sure each piece is well-coated for a crunchy crust. - Arrange tomatoes and lemon: Place halved cherry tomatoes and lemon slices around the tilapia. This adds color and flavor. Drizzle everything lightly with olive oil. - Bake time and temperature: Place the pan in the oven and bake for 12-15 minutes. The fish should be opaque, and the crust should be golden brown. - Checking for doneness: Use a fork to check if the tilapia flakes easily. This means it’s ready to eat. - Letting it rest: Once cooked, remove the pan from the oven. Let the tilapia rest for a couple of minutes. This helps the flavors settle. To get that golden crust, ensure even coverage. After spreading the mayonnaise, use a spoon or a spatula. Make sure the breadcrumbs stick well. Press down gently so they stay in place while baking. You can adjust flavors by adding your favorite herbs. For a twist, try dill or basil. A pinch of cayenne pepper adds heat without overpowering the dish. Experiment until you find what you love. Plating is key for a great meal. Serve the tilapia on a large platter. Garnish with fresh parsley for color. Add lemon wedges on the side for a zesty touch. For accompaniments, think simple. A side salad with mixed greens works well. Roasted veggies are another great option. They add color and flavor to your meal. If you're watching calories, swap mayonnaise for Greek yogurt. It adds creaminess without the extra fat. You can also reduce the cheese by half for fewer calories. Serving sizes matter too. This recipe serves four, making it perfect for a family. If you have leftovers, store them properly to enjoy later. {{image_2}} You can change up the herbs in this recipe. Try using basil or dill for a fresh twist. You can also mix in some oregano for a Mediterranean flavor. Each green herb adds its own taste and scent. For cheese, if you want a different taste, you can swap Parmesan. Try mozzarella for a milder flavor or feta for a tangy kick. Each cheese brings its own fun to the dish. You can make this dish in an air fryer too. Preheat your air fryer to 375°F (190°C). Place the coated tilapia in the basket. Cook for about 10-12 minutes, or until the fish is flaky. The air fryer gives a nice crisp crust quickly. Grilling is another great option. Heat your grill to medium. Place the tilapia in a grill basket to avoid sticking. Cook for about 5-6 minutes per side. This adds a smoky flavor that is fantastic. If you can't find tilapia, you can use other fish. Cod or haddock work well and have a mild taste. Both fish cook nicely and take on flavors well. For a gluten-free version, choose gluten-free breadcrumbs. Many brands offer good options now. They will still give you that crunchy texture you want. This way, everyone can enjoy this tasty meal. To keep your tilapia fresh, cool it down quickly. Place it on a plate and let it sit at room temperature for no more than two hours. After cooling, wrap each fillet in plastic wrap. You can also use a shallow, airtight container. This keeps the fish moist and prevents odors from other foods. When it comes to reheating, you have two main options: the microwave or the oven. The microwave is fast but may make the crust soggy. For a crispy crust, use the oven. Preheat it to 350°F (175°C). Place the tilapia on a baking sheet and heat for about 10 minutes. This will help keep that crunchy topping intact. If you want to freeze tilapia, wrap each fillet tightly in plastic wrap. Then, place them in a freezer bag. Remove as much air as possible. For best results, eat it within three months. When you're ready to cook, thaw the fish in the fridge overnight. This keeps the texture nice and firm. Never thaw at room temperature, as it can lead to bacteria growth. Can I use frozen tilapia? Yes, you can use frozen tilapia. Just thaw it first. Place the fillets in the fridge overnight or run them under cold water. This helps them cook evenly. How can I adjust the spice level? To spice things up, add more paprika or a pinch of cayenne pepper. For less heat, skip the paprika. You can also add herbs like basil or oregano for flavor without heat. Can I make this recipe ahead of time? You can prep the dish ahead. Mix the breadcrumbs and mayo, then coat the tilapia. Cover it and store in the fridge for a few hours. Bake it when you're ready. What sides pair well with this dish? Serve it with a fresh salad or steamed veggies. Rice or quinoa also make great sides. For a light touch, try a lemon or garlic butter sauce. How do I know when tilapia is fully cooked? Tilapia is done when it turns opaque and flakes easily with a fork. It should reach an internal temperature of 145°F (63°C). Use a food thermometer for best results. What to do if the crust isn't crispy? If the crust isn't crispy, try broiling it for the last few minutes. Keep an eye on it to avoid burning. You can also add a bit more olive oil before baking. How to fix dry tilapia? If your tilapia turns out dry, use a sauce to add moisture. A lemon butter sauce or tartar sauce works well. Next time, be sure not to overbake it. This blog post detailed a delicious baked tilapia recipe. You learned about the needed ingredients, like panko and Parmesan cheese. The step-by-step instructions help you prepare, assemble, and bake the dish right. Key tips ensure a perfect crust and great serving ideas. Don't forget variations to keep it interesting. Finally, I covered how to store leftovers and answer common questions. Now, you can enjoy this meal any time and impress others with your cooking skills!

Sheet Pan Parmesan Crusted Tilapia Easy Dinner Recipe

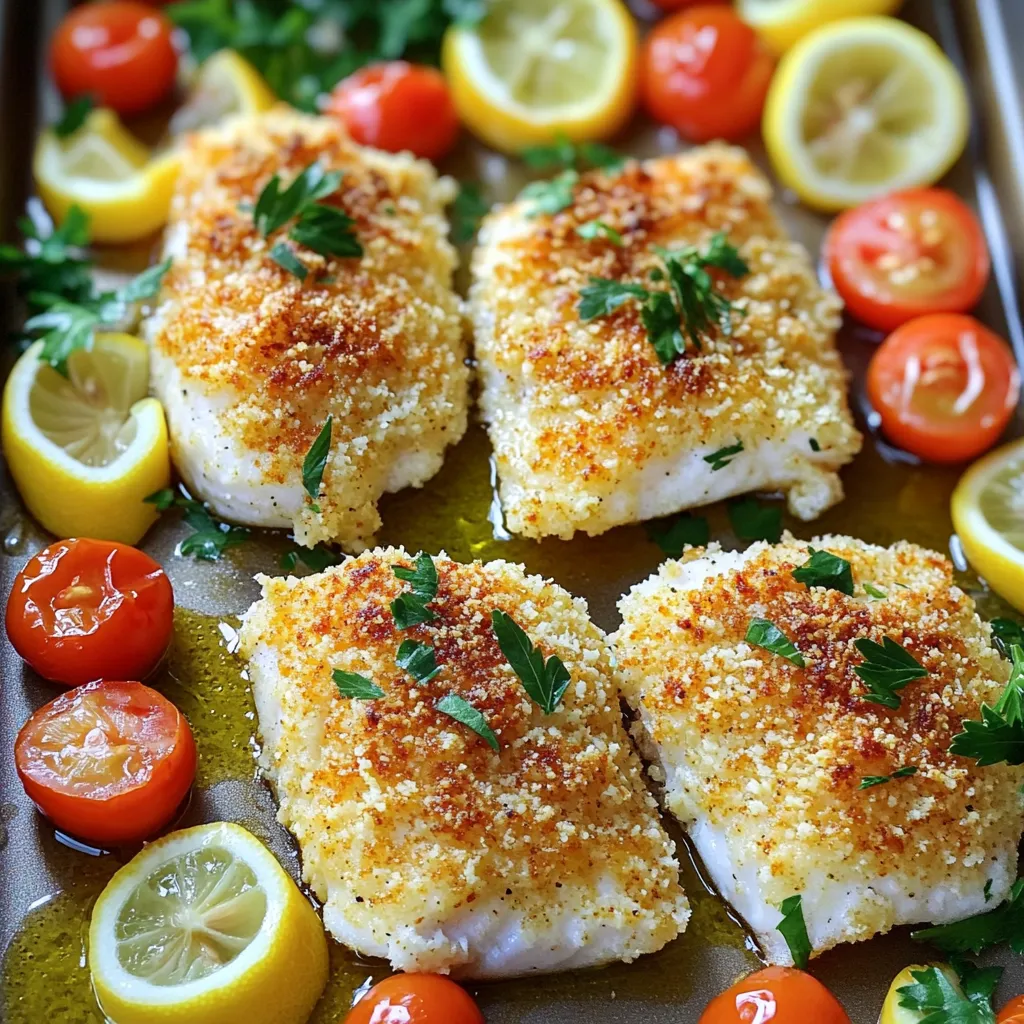
Looking for a quick and tasty dinner? This Sheet Pan Parmesan Crusted Tilapia recipe is for you! You’ll love how

- 1 pound gnocchi (store-bought or homemade) - 1 cup pumpkin puree (canned or fresh) - 1 cup heavy cream - 1 cup grated Parmesan cheese - 2 tablespoons butter - 2 garlic cloves, minced - 1/2 teaspoon nutmeg - Salt and pepper to taste - Fresh sage leaves, for garnish For this creamy pumpkin Alfredo gnocchi, I choose gnocchi as the base. You can buy it pre-made or make it yourself. Store-bought is easy and saves time. Next, I use pumpkin puree, which gives a rich taste and a lovely color. You can use canned or fresh pumpkin. Heavy cream adds a velvety texture. I love adding grated Parmesan cheese for a savory kick. Butter and minced garlic create a warm flavor base for the sauce. Nutmeg adds a hint of warmth that pairs perfectly with pumpkin. Salt and pepper are simple but key to bringing out all the flavors. Finally, fresh sage leaves not only look beautiful but also add a fresh aroma. This mix of ingredients makes a cozy dish that warms your heart. Start by bringing a large pot of salted water to a rolling boil. This is key for cooking the gnocchi. Once the water is boiling, add your gnocchi. If using store-bought gnocchi, follow the package instructions. Cook until the gnocchi float to the surface. This usually takes about 2 to 3 minutes. When they float, they are done! Drain them and set them aside for later. In a large skillet, melt 2 tablespoons of butter over medium heat. Once melted, add 2 minced garlic cloves. Sauté the garlic for about 1 minute. You want it fragrant but not brown. Next, stir in 1 cup of pumpkin puree and 1 cup of heavy cream. Mix well to combine the flavors. Cook this mixture for about 2 to 3 minutes until it is heated through. Gradually add 1 cup of grated Parmesan cheese to the sauce. Stir it in until it melts and forms a smooth, creamy texture. For added flavor, season the sauce with 1/2 teaspoon of nutmeg, and salt and pepper to taste. If your sauce seems too thick, you can thin it out with a little pasta water. Gently fold the cooked gnocchi into the sauce. Ensure each piece is fully coated with the creamy sauce. To serve, plate the gnocchi in shallow bowls. For a nice touch, garnish each plate with fresh sage leaves. This adds flavor and color to your dish. Enjoy your cozy comfort meal! To add depth to the sauce, use fresh herbs. Sage pairs well with pumpkin. You can also try thyme or rosemary. A pinch of cayenne gives a nice kick. For a touch of sweetness, add a little maple syrup. This balances the pumpkin's flavor and makes it richer. For a creamy sauce, keep the heat low. This prevents the cream from curdling. Stir often to keep everything smooth. If the sauce feels too thick, add pasta water. Start with a tablespoon and mix well. This will help you get the perfect consistency. You can prepare some ingredients in advance. Chop garlic and store it in the fridge. You can also measure out your spices. Cooked gnocchi can sit for a bit, but don’t let them cool too long. For leftovers, reheat on low heat. Add a splash of cream or pasta water to keep it smooth. {{image_2}} You can switch up the cheese for fun flavors. Try using mozzarella or goat cheese. These options add unique tastes to the creamy sauce. For those needing gluten-free choices, look for gluten-free gnocchi options. Many stores now offer tasty gluten-free brands made from rice or potato flour. Want a vegan or dairy-free version? Use coconut cream instead of heavy cream. A dairy-free cheese can replace Parmesan. Adding protein can make this dish heartier. Try cooked chicken or shrimp for a boost. You can sauté them in the same pan after the garlic. To celebrate fall, add veggies like mushrooms or spinach. They pair well with pumpkin. If you want summer flavors, swap pumpkin for zucchini or yellow squash. These lighter veggies keep the dish fresh and bright. Don't be afraid to mix and match for your taste! After enjoying your creamy pumpkin Alfredo gnocchi, let it cool first. This helps keep the flavors fresh. Use airtight containers for storage. These keep moisture in and air out. Glass or plastic containers work well. You can store leftovers in the fridge for 3 to 4 days. To freeze gnocchi and sauce, portion them out. Place them in freezer-safe containers. You can also use freezer bags. Remove as much air as you can. This prevents freezer burn. The gnocchi and sauce can last up to 3 months in the freezer. To thaw, place them in the fridge overnight. You can also use the microwave for quick thawing if needed. When reheating, use a low heat on the stove. This helps keep the sauce creamy. Stir often to avoid sticking. If the sauce separates, add a splash of cream. This helps bring it back together. You can also use the microwave, but be careful. Heat in short bursts, stirring in between. This keeps the dish rich and smooth. Yes, you can use homemade gnocchi. Fresh gnocchi often has a lighter texture. Just make sure to cook it until it floats. This shows it's ready. The pumpkin puree is key for flavor and creaminess. It adds a nice autumn taste. If you skip it, the dish will lose its special touch. To thicken your Alfredo sauce, use more cheese. You can also let it simmer longer. If it’s still too thin, add a bit of pasta water. This helps create a perfect texture. You can serve it with a simple green salad. Garlic bread or roasted vegetables make great sides too. They complement the dish's rich taste well. Yes, you can use other squash. Butternut squash works nicely. It gives a similar sweet flavor. Just make sure to puree it well for a smooth sauce. In this blog post, I shared a simple recipe for creamy pumpkin Alfredo gnocchi. We covered the main and additional ingredients, step-by-step cooking instructions, helpful tips, and ways to make variations. You can enhance the flavor and adjust it for dietary needs. Remember to store leftovers properly and reheat them well. This dish is both delicious and versatile, perfect for various occasions. Enjoy making this comforting meal and impress your friends and family with your culinary skills.

Creamy Pumpkin Alfredo Gnocchi Cozy Comfort Dish

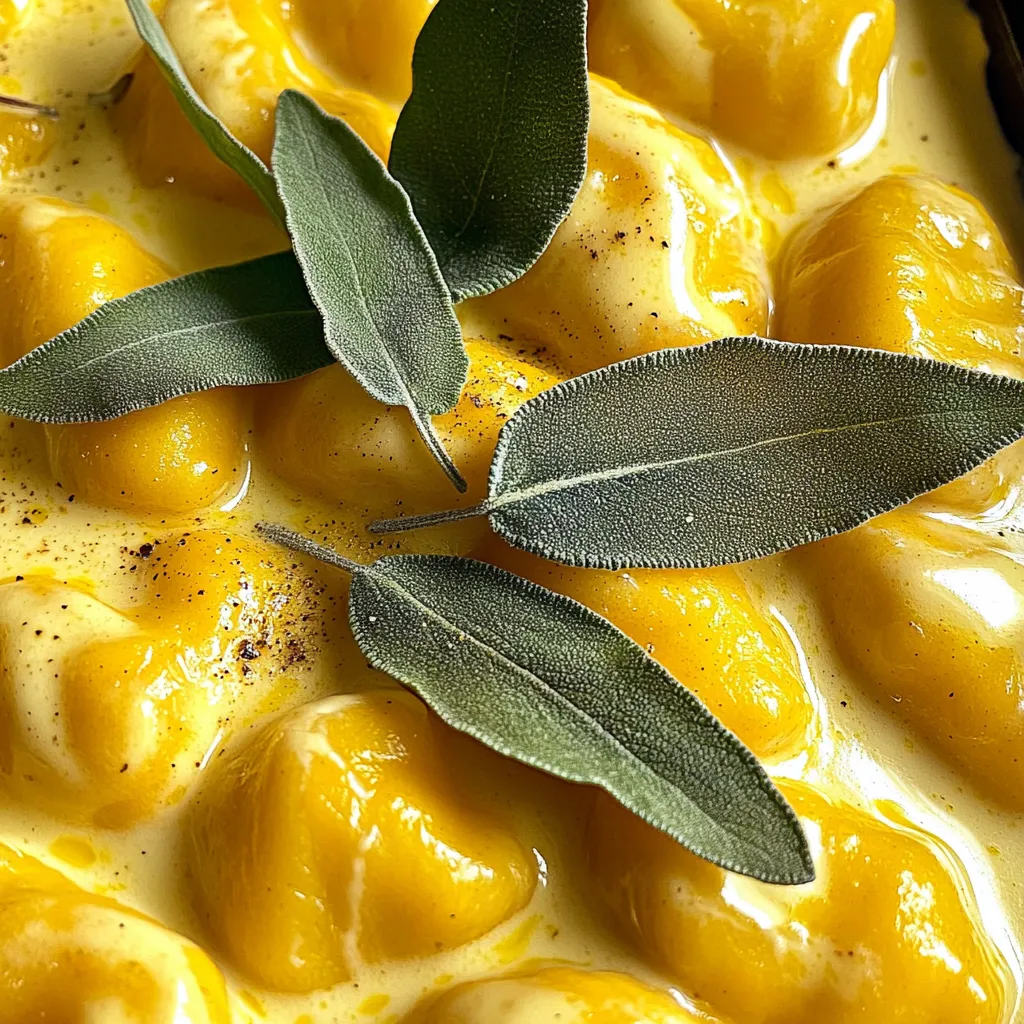
Get ready for a dish that brings warmth and comfort to your table! My Creamy Pumpkin Alfredo Gnocchi combines rich

Older posts
Newer posts
← Previous Page1 … Page12 Page13 Page14 … Page86 Next →

dsad

© 2026 Cooking Wells • Built with GeneratePress

Our Policies

  • Copyright Policy
  • Cookie Policy
  • GDPR Policy
  • Privacy Policy
  • Disclaimer
  • Terms Of Use

More Information

  • Home
  • About
  • Contact
  • Appetizers
  • Dessert
  • Dinner
  • Drinks
©2026, Cooking Wells About Back To Top