Skip to content
DisclaimerTerms Of UseGDPR PolicyCookie Policy

Cooking Wells

  • Home
  • Drinks
  • Appetizers
  • Dinner
  • Dessert
  • About
  • Contact
  • Privacy Policy
DisclaimerTerms Of UseGDPR PolicyCookie Policy

NO-ING-IMG

To make these tasty no bake matcha cheesecake cups, you will need: - 1 cup graham cracker crumbs - 1/2 cup unsalted butter, melted - 1 cup cream cheese, softened - 1/2 cup powdered sugar - 1/2 cup heavy whipping cream - 2 tablespoons matcha powder - 1 teaspoon vanilla extract These ingredients blend together for a smooth and creamy treat. The graham cracker crumbs form a delightful crust. The matcha adds a unique flavor and bright color. To make your cheesecake cups even more appealing, consider these garnishes: - Fresh berries (strawberries, blueberries, or raspberries) - Mint leaves - Extra matcha powder for dusting Adding berries gives a pop of color. Mint leaves add a fresh touch. These garnishes not only look great but also add flavor. Here's what you'll need to make these cheesecake cups: - Mixing bowls - Electric mixer - Small glasses or cups - Spoon or spatula for layering - Refrigerator for chilling Having the right tools makes the process easier. Mixing bowls help combine the ingredients well. Glasses or cups show off the layers, making your dessert look nice. First, gather your ingredients. You need graham cracker crumbs and melted butter. In a bowl, mix 1 cup of graham cracker crumbs with 1/2 cup of melted butter. Stir until all crumbs are coated. This mixture gives your cheesecake cups a crunchy base. Next, take small glasses or cups. Evenly divide the graham cracker mix between them. Press it down gently to form a nice crust. This step is key for the perfect texture. Now, let’s make the filling. Start with 1 cup of softened cream cheese in a bowl. Use an electric mixer to beat it until it is smooth. This helps create a creamy texture. Gradually add in 1/2 cup of powdered sugar, 2 tablespoons of matcha powder, and 1 teaspoon of vanilla extract. Mix until everything is well combined. The matcha gives it a lovely green color and unique flavor. In another bowl, whip 1/2 cup of heavy cream until stiff peaks form. This adds lightness to the filling. Gently fold the whipped cream into the matcha mixture. Be careful here; you want to keep it fluffy. Now it’s time to assemble the cups. Spoon the matcha cheesecake filling over the crust in each cup. Smooth out the tops for a nice finish. Once you fill all the cups, place them in the fridge. Chill for at least 4 hours, or until they are set. This step helps the flavors meld and the texture firm up. Before serving, you can add fresh berries on top. They make the cups look beautiful and add a burst of flavor. Enjoy your delightful no bake matcha cheesecake cups! To get a smooth and creamy cheesecake, start with room temperature cream cheese. Cold cream cheese can make lumps. Mix the cream cheese until it is soft. When you add sugar and matcha, keep mixing until smooth. This step is key for a perfect texture. When whipping cream, use a cold bowl and beaters. This helps the cream whip faster. Pour heavy cream into the bowl and start at a low speed. Increase the speed as it thickens. Stop when you see stiff peaks. Be careful not to overwhip; this can turn it into butter. Add matcha powder while mixing the cream cheese and sugar. This helps blend the matcha well. Use a whisk or spatula to mix gently. Avoid clumps for a smooth flavor. If you see lumps, sift the matcha before adding it. This step ensures a lovely, even green color and taste. {{image_2}} You can play with flavors in your no bake matcha cheesecake cups. Try swapping matcha with other fun flavors. Here are a few ideas: - Chocolate: Use cocoa powder instead of matcha for a rich treat. - Berry: Blend in pureed strawberries or raspberries for a fruity twist. - Coffee: Mix in espresso powder for a coffee-inspired dessert. These variations keep your dessert fresh and exciting! You can easily make these cheesecake cups dairy-free or vegan. Here’s how: - Cream Cheese: Use vegan cream cheese instead of regular cream cheese. - Whipping Cream: Choose coconut whipped cream or another plant-based option. - Butter: Replace unsalted butter with coconut oil or vegan butter. These swaps allow everyone to enjoy a tasty treat! If you need a gluten-free version, you can adjust a few ingredients. Here are some ideas to ensure your dessert remains gluten-free: - Graham Cracker Crumbs: Use gluten-free graham cracker crumbs or almond flour. - Check Labels: Always check labels on other ingredients to ensure they are gluten-free. These changes keep your dessert safe for those with gluten sensitivities! To keep your No Bake Matcha Cheesecake Cups fresh, store them in the fridge. Use an airtight container to prevent them from drying out. If you have leftovers, cover them tightly with plastic wrap. This method helps keep the flavors intact. These cheesecake cups can last in the fridge for up to five days. They taste best when chilled. Serve them cold for a refreshing treat. If you plan to serve them later, garnish with berries just before serving. This keeps the berries fresh and vibrant. You can freeze the cheesecake cups if you want to save them for later. Place them in a freezer-safe container. They will last for up to two months in the freezer. To thaw, move them to the fridge overnight. Avoid thawing at room temperature to keep the texture nice. No, you cannot use regular green tea. Matcha has a unique flavor and color. It comes from powdered green tea leaves, giving your cheesecake cups a vibrant green. Regular green tea lacks this rich taste and color. It won't give you the same creamy and earthy flavor you want in this dessert. You can keep these cheesecake cups in the fridge for up to five days. Make sure to cover them well. This will keep them fresh and tasty. The longer they sit, the more the flavors meld. However, for the best taste and texture, enjoy them within the first three days. If you want a different crust, you can use crushed cookies. Try vanilla wafers or even Oreos. For a gluten-free option, use almond flour or gluten-free cookies. Just make sure to mix them with melted butter for the right texture. This will keep the crust firm and delicious. You learned the key steps to make no bake matcha cheesecake cups. Remember the essential ingredients and the equipment needed. Use tips to perfect your texture and incorporate matcha well. Consider fun variations and storage tips for long-lasting enjoyment. Overall, this treat is simple and versatile. Enjoy creating something delicious and sharing it with others. Your time in the kitchen can be fun and rewarding!

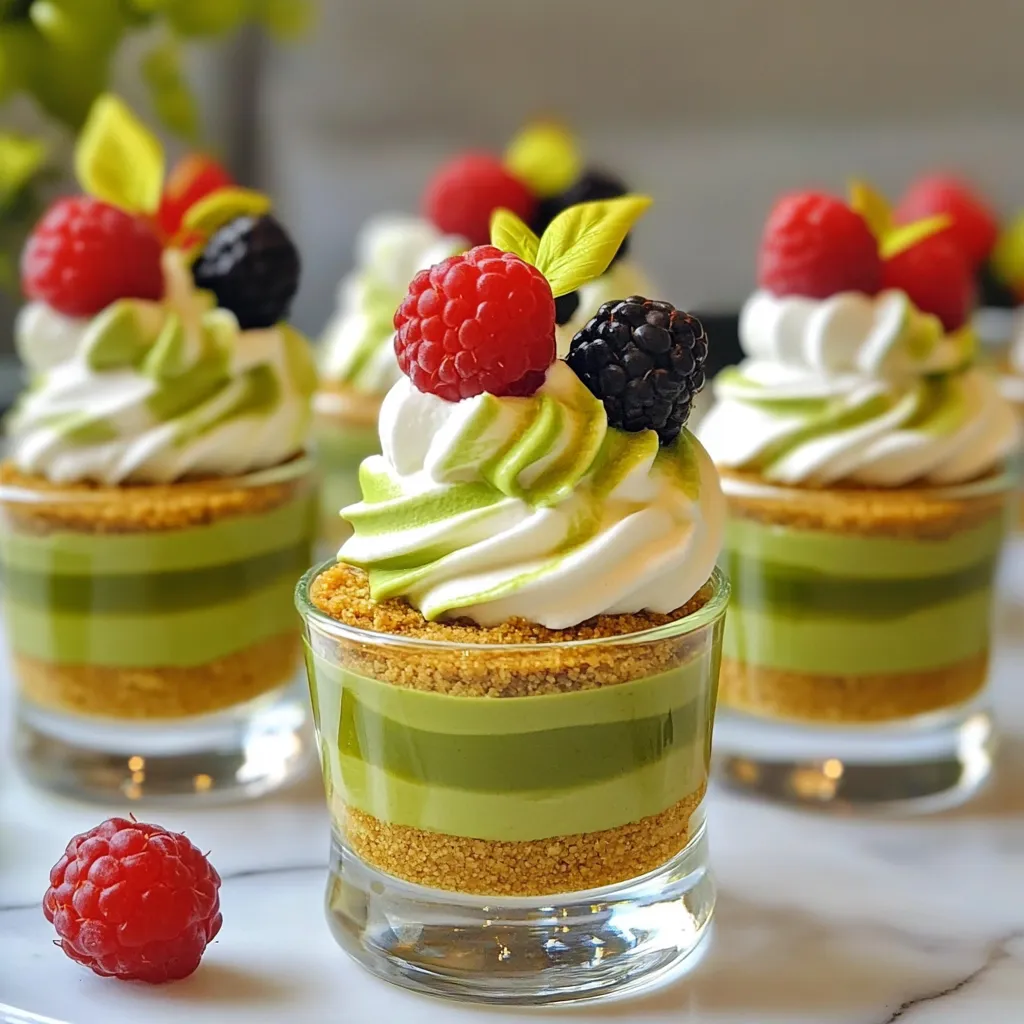
No Bake Matcha Cheesecake Cups Delightful and Easy

If you crave a sweet treat without the fuss of baking, you’re in for a treat! These No Bake Matcha

To make a spiced apple cider float, you need fresh and flavorful ingredients. Here’s a detailed list to get you started: - 4 cups apple cider: Use a high-quality brand for the best taste. Look for cider that is not from concentrate. - 1 cinnamon stick: This adds warm spice notes. Try using Ceylon cinnamon for a subtle flavor. - 4 whole cloves: Cloves provide a deep, aromatic kick. Make sure they are fresh for the best flavor. - 2 star anise pods: These add a unique licorice-like taste. They are great for balance in the cider. - 1 tablespoon brown sugar: This helps to enhance the sweetness. Dark brown sugar works well for a richer flavor. - 1 cup vanilla ice cream: Use a creamy brand to complement the spices. You can also try homemade ice cream for a special touch. - Whipped cream for topping: This adds a light, fluffy texture to the drink. - Optional: caramel sauce for drizzling: This adds sweetness and richness. Look for a natural brand without additives. These ingredients come together to create a warm, cozy drink that feels festive and delicious. To make the spiced apple cider, start with your apple cider in a saucepan. Pour in 4 cups of apple cider. Add one cinnamon stick, four whole cloves, and two star anise pods. Don’t forget the one tablespoon of brown sugar. Next, heat the mixture over medium heat. Stir it gently until it starts to simmer. This will take just a few minutes. Once it simmers, reduce the heat to low. Let it steep for about 10 to 15 minutes. This step helps the spices infuse their flavors into the cider. After steeping, remove the pan from the heat. You will need to strain the cider to remove the spices. This leaves you with a smooth, spiced cider. Now, we move on to assembling your float. Grab a tall glass and scoop in a generous amount of vanilla ice cream. You want enough to create a nice layer at the bottom. Next, slowly pour the warm spiced apple cider over the ice cream. The warm cider will float on top. Watch the magic happen as the ice cream starts to melt into the cider! The last step is adding the finishing touches. Top your float with a dollop of whipped cream. This adds a creamy texture and a bit of sweetness. If you like, drizzle some caramel sauce on top. This adds a nice sweet kick and makes your float look extra special. Enjoy your cozy treat! To make your spiced apple cider float shine, focus on the flavors. Here are some easy ways to infuse flavors in the cider: - Use fresh spices: Fresh spices give a stronger taste. Whole spices work best for this recipe. - Simmer for longer: Let the cider simmer for 15 minutes. This brings out the spice flavors well. - Mix in brown sugar: This adds a sweet touch that balances the spices. The ideal temperature for serving is warm but not hot. Serve it right after making. This keeps the ice cream from melting too fast. Avoid letting spices overpower your cider. Here’s how to keep the balance: - Use the right amount: Stick to the recipe. Too many spices can make the drink bitter. - Strain well: After steeping, strain out the spices. This leaves a smooth drink. It’s important to serve the float immediately. If you wait too long, the ice cream will melt. This can make your drink watery and less fun. Enjoy it fresh for the best taste! {{image_2}} You can easily switch up the flavor of your Spiced Apple Cider Float. Try using different kinds of ice cream. Caramel ice cream adds a rich, sweet taste. Pumpkin ice cream brings in a fall vibe that pairs well with the spices. You can also play with the spices. Nutmeg gives a warm, nutty flavor. Ginger adds a nice zing. You can mix and match spices based on what you like. This way, each float can taste unique and fun! If you want a non-dairy or vegan float, you can use dairy-free ice cream. Coconut or almond milk ice creams work great. They give a creamy texture while keeping it vegan-friendly. For the cider, you can still make it spiced and tasty. Just follow the same steps. Make sure to check the labels on your ice cream to ensure they are dairy-free. Enjoying a Spiced Apple Cider Float can be delicious for everyone! To store leftover spiced cider, place it in an airtight container. Make sure to cool it to room temperature first. Once cooled, put it in the fridge. This cider will taste best when used within three days. After that, the flavors may fade a bit. Always check for any off smells before use. When you want to enjoy your cider again, you can reheat it easily. Pour the cider into a saucepan and warm it over low heat. Stir it gently to avoid burning. You can also microwave it in a safe bowl for about one to two minutes, stirring halfway through. To keep the flavor strong, avoid boiling the cider. Just warm it until it is hot but not bubbling. This way, you can enjoy that cozy taste all over again! You can prep parts ahead for this treat. Make the spiced apple cider first. Store it in the fridge after it cools. You can keep it for up to three days. When you want to serve, just heat it again. For the ice cream, scoop it into cups and freeze. This way, it stays firm. When ready to enjoy, combine the warm cider and ice cream. This keeps the ice cream from melting too fast. Yes, you can use store-bought apple cider. Look for brands with no added sugars or artificial flavors. A natural apple flavor makes the best taste. Local apple cider is often fresh and tasty. Brands like Martinelli's or Simply Apple are good choices. They provide a great base for your float. If you run out of spices, don’t worry! Here are some easy swaps: - Cinnamon stick: Use 1/2 teaspoon of ground cinnamon. - Cloves: Replace with allspice or nutmeg, using less than 1/4 teaspoon. - Star anise: You can skip it or use a pinch of anise extract. These substitutes will still give you a warm and cozy flavor! You've learned how to make a delightful spiced apple cider float. We covered the ingredients, steps, storage tips, and even variations for your float. Remember, infusing the cider with spices is key for great flavor. Customize it with your favorite toppings and ice cream. Avoid common mistakes to ensure the best taste. Whether you go for a classic or a vegan option, this drink is fun to make. Enjoy every sip and share it with friends for a cozy treat.

Spiced Apple Cider Float Cozy and Festive Treat

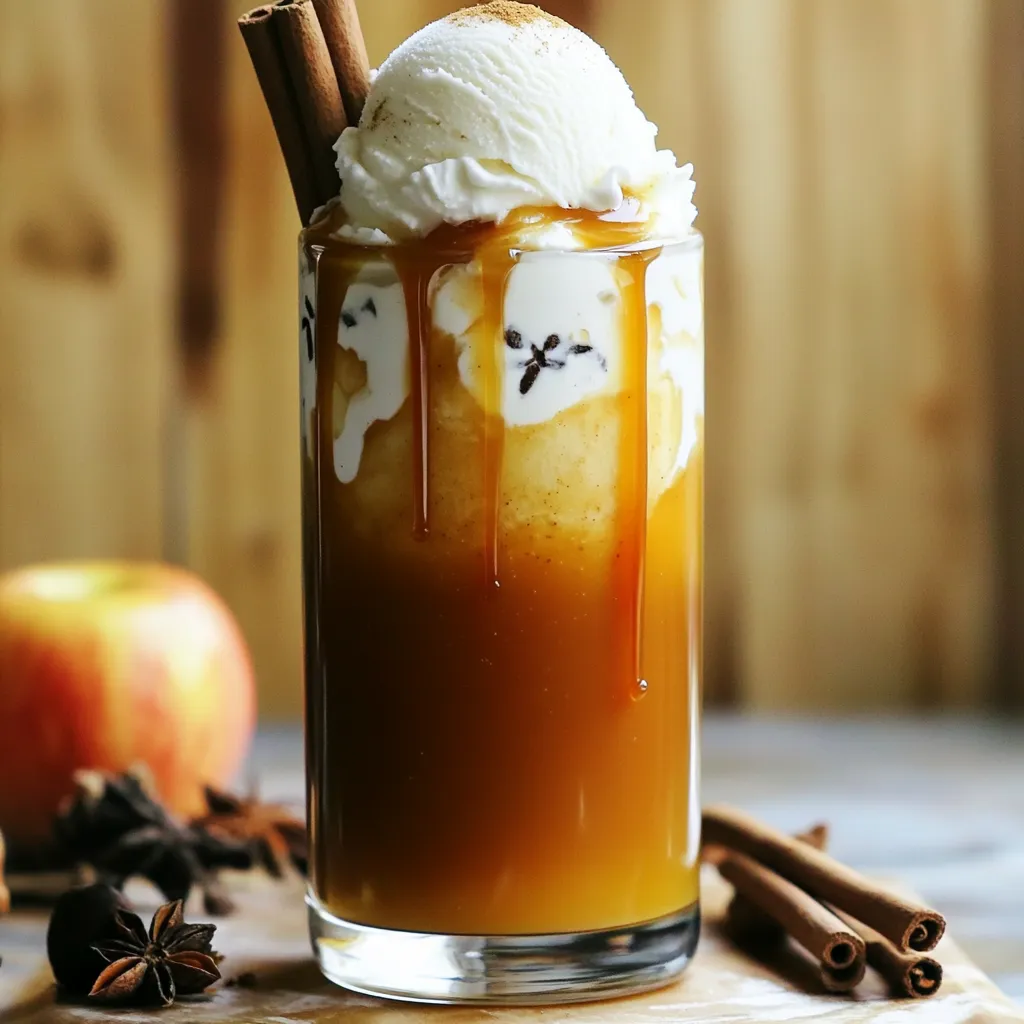
Warm up your chilly evenings with a Spiced Apple Cider Float! This cozy treat blends rich apple cider with creamy

For this dish, you will need: - 500g mushrooms (button or cremini), cleaned and halved - 4 tablespoons unsalted butter, melted - 4 cloves garlic, minced - 1 tablespoon fresh parsley, chopped - 1 teaspoon dried thyme - ½ teaspoon smoked paprika - Salt and pepper to taste - Lemon wedges for serving (optional) These ingredients create a rich and flavorful base. The garlic and butter add a tasty punch to the mushrooms. You can customize this recipe in many ways. Try adding: - 1 tablespoon of grated Parmesan cheese for a cheesy touch. - A pinch of red pepper flakes for some heat. - Different herbs like basil or oregano for a fresh twist. Feel free to experiment with these options based on your taste. If you have allergies, here are some swaps: - Use olive oil instead of butter for a dairy-free option. - Replace mushrooms with zucchini or eggplant for a different flavor. - Use gluten-free seasoning if you need to avoid gluten. These substitutions help you enjoy the dish while keeping your dietary needs in mind. Start by grabbing a mixing bowl. Add 4 tablespoons of melted butter to the bowl. Then, add 4 cloves of minced garlic. Next, toss in 1 tablespoon of chopped parsley and 1 teaspoon of dried thyme. Add ½ teaspoon of smoked paprika. Finally, season with salt and pepper to taste. Mix all these ingredients well until they blend together. This garlic butter marinade will give the mushrooms a rich flavor. Now, take 500 grams of cleaned and halved mushrooms. Place them in the bowl with the garlic butter marinade. Gently toss the mushrooms. Make sure each piece gets coated evenly. This step enhances the taste of the mushrooms. It also helps them cook well in the air fryer. Next, preheat your air fryer to 180°C (350°F). This should take about 5 minutes. After preheating, place the coated mushrooms in the basket. Arrange them in a single layer. This allows them to cook evenly. You may need to work in batches if your air fryer is small. Air fry the mushrooms for 10 to 12 minutes. Shake the basket halfway through to ensure they cook evenly. When done, the mushrooms should be golden and tender. Remove them and drizzle any extra garlic butter on top. Enjoy your flavorful mushrooms! To make your mushrooms tasty, use fresh ingredients. Fresh garlic gives a strong taste. Fresh parsley adds a bright touch. Smoked paprika brings warmth and depth. Mix these well with melted butter. This garlic butter marinade is where the magic happens. Let the mushrooms soak in it for a few minutes. This helps them absorb all the flavors. For even cooking, spread the mushrooms in a single layer. Avoid stacking them. If your air fryer is small, cook in batches. Shake the basket halfway through. This helps the mushrooms cook evenly. You want them to be golden brown and tender. Overcrowding the basket can lead to soggy mushrooms. Serve the mushrooms hot, right from the air fryer. Drizzle any leftover garlic butter on top. It adds a rich flavor. Garnish with more chopped parsley for color. Lemon wedges are a great addition. A squeeze of lemon brightens the dish. You can pair these mushrooms with steak or pasta. They also work well as a side dish for grilled chicken. Enjoy your delicious creation! {{image_2}} You can make your Air Fryer Garlic Butter Mushrooms unique. Try adding fresh herbs like basil or rosemary. A pinch of oregano can also bring a nice flavor. For a kick, add some red pepper flakes. Experiment with spices like cumin or coriander to change the taste. Each new herb or spice can create a different dish. Mushrooms are great, but you can add more veggies. Bell peppers or zucchini work well. Cut them into similar sizes as the mushrooms. Toss them in the garlic butter mix. You can even add halved cherry tomatoes for freshness. More veggies can give you a colorful and tasty meal. You can easily make this dish vegan. Swap the butter for plant-based butter or coconut oil. Use nutritional yeast instead of cheese for a cheesy flavor. Always check the labels to ensure your ingredients are dairy-free. This way, everyone can enjoy these tasty mushrooms! To store leftover mushrooms, let them cool first. Place them in an airtight container. Use parchment paper between layers to keep them fresh. Store the container in the fridge. They will last for about 3-4 days. Always check for any signs of spoilage before using them again. To reheat your mushrooms, use the air fryer again for the best taste. Set the air fryer to 160°C (320°F). Heat them for about 5-6 minutes. This will keep them crispy and tasty. You can also use a microwave, but they may turn soft. If using a microwave, heat them in short bursts of 30 seconds. You can freeze mushrooms for later use, but they need some prep. Clean and slice them first. Then, blanch them in boiling water for 2-3 minutes. Quickly cool them in ice water to stop the cooking. Drain and dry them well. Place them in a freezer bag, removing air. They can last up to 3 months in the freezer. When ready to use, no need to thaw; just cook straight from frozen! Yes, you can use dried mushrooms. However, they need soaking. Soak them in warm water for 20-30 minutes. This helps them soften. After soaking, drain and pat them dry. Then, toss them in the garlic butter marinade. The flavor will be rich and tasty. The best temperature for mushrooms is 180°C (350°F). This heat cooks them evenly without burning. It allows them to become tender and juicy. Preheating the air fryer for about 5 minutes helps, too. This ensures perfect cooking from the start. Cook mushrooms for 10-12 minutes in the air fryer. They should become golden and tender. Shake the basket halfway through cooking. This helps them cook evenly and prevents sticking. Keep an eye on them to avoid overcooking. You can serve these mushrooms with many dishes. They pair well with steak, chicken, or fish. They also taste great on pasta or rice. For a light meal, serve them over a salad. Add lemon wedges on the side for a fresh touch. In this article, we explored how to make Air Fryer Garlic Butter Mushrooms. We covered the key ingredients, step-by-step instructions, and helpful tips for the best flavor. You learned how to try new variations and store leftovers safely. Remember, the air fryer makes cooking simple and fun. With a few basic steps and ingredients, you can enjoy this tasty dish. I hope you feel ready to create your own version soon!

Air Fryer Garlic Butter Mushrooms Tasty and Simple Recipe

If you’re craving a dish that’s both tasty and simple, you need to try Air Fryer Garlic Butter Mushrooms. These

- Brussels Sprouts - Olive Oil - Maple Syrup - Dijon Mustard - Apple Cider Vinegar Brussels sprouts are the star of this salad. Choose fresh, bright sprouts for the best flavor. I recommend trimming and halving them to help them roast evenly. Olive oil adds richness and helps the sprouts brown nicely. Maple syrup gives a sweet touch that balances the mustard's tang. Dijon mustard adds a zesty flavor, while apple cider vinegar brings a hint of acidity. - Dried Cranberries - Pecans - Feta Cheese - Fresh Parsley You can add dried cranberries for a chewy, sweet burst. Pecans add a crunchy texture that pairs well with the sprouts. If you like cheese, feta brings a creamy and salty note. Fresh parsley adds a pop of color and brightness to the salad. - Salt - Pepper Seasoning is key. A good pinch of salt enhances the flavors. Freshly cracked pepper adds warmth and depth. Adjust these to suit your taste. This mix of ingredients creates a fresh and tasty salad. Each bite offers a lovely blend of sweet, savory, and tangy flavors. 1. First, preheat your oven to 400°F (200°C). This step warms up the oven for roasting. 2. Next, trim the Brussels sprouts by cutting off the tough ends. Halve them to help them cook evenly. 1. In a large bowl, toss the halved Brussels sprouts with 1/4 cup of olive oil, salt, and pepper. This gives them flavor. 2. Spread the Brussels sprouts on a baking sheet. Make sure they are in a single layer. 3. Roast them in the oven for about 20-25 minutes. Flip them halfway through to cook evenly. They should be tender and golden brown. 1. While the Brussels sprouts roast, grab a small bowl. 2. Combine 3 tablespoons of pure maple syrup, 1 tablespoon of Dijon mustard, and 1 tablespoon of apple cider vinegar. 3. Whisk these ingredients together. Add a pinch of salt and pepper to taste. This dressing is both sweet and tangy. 1. Once the Brussels sprouts are out of the oven, let them cool for about 5 minutes. 2. In a large salad bowl, add the warm Brussels sprouts. 3. Pour the maple Dijon dressing over the sprouts. Toss everything to combine well. 4. Add in 1/2 cup of dried cranberries and 1/2 cup of chopped pecans. Toss again gently. 5. If you like, sprinkle 1/4 cup of crumbled feta cheese on top. Garnish with fresh parsley. Enjoy your fresh and tasty salad! To get that sweet, caramelized flavor in your Brussels sprouts, roasting is key. Start by preheating your oven to 400°F (200°C). This temperature helps the sprouts brown nicely. Spread the halved sprouts on a baking sheet. Make sure they have space. Crowding them can lead to steaming, not roasting. Roast for 20-25 minutes. Flip them halfway through for even cooking. You'll know they are done when they are tender and golden brown. While the maple Dijon dressing is a star, you can play with it! Try adding fresh herbs like thyme or rosemary for a new twist. You could also sprinkle in some garlic powder for a kick. If you want a different sweetener, honey works well too. Just remember to adjust the amount. Each sweetener can change the flavor profile slightly but adds its own charm. This salad shines on its own but pairs well with many dishes. Serve it alongside grilled chicken or salmon for a hearty meal. It also fits great in a potluck spread or a holiday feast. The bright flavors make it a hit at gatherings. You can also enjoy it as a light lunch. Just add a slice of crusty bread for a complete meal. {{image_2}} You can change this salad based on the seasons. In spring, add fresh peas or radishes for a crisp bite. In fall, swap in roasted sweet potatoes for extra sweetness. Some great toppings to try are: - Sliced apples - Pomegranate seeds - Grated carrots These changes keep the salad fresh and fun all year round! If you need a vegan salad, skip the feta cheese. Use a plant-based dressing or add some avocado for creaminess. For gluten-free options, check that your Dijon mustard is gluten-free. To lower calories, cut down on the maple syrup or use less oil. You can also replace pecans with sunflower seeds for a lighter touch. Want to spice things up? Add some chili flakes or a dash of hot sauce to the dressing. You can also mix in different nuts like walnuts or almonds for a unique crunch. For a fruity twist, toss in some chopped apples or pears to balance the flavors. These tweaks make your Maple Dijon Brussels Sprout Salad even more exciting! To store leftovers, place the salad in an airtight container. This keeps it fresh and prevents any strong odors from mixing. The salad lasts in the fridge for about 3 days. Keep in mind that the longer it sits, the softer the Brussels sprouts become. I do not recommend freezing this salad. The texture of the Brussels sprouts and the crunchiness of the pecans will not hold up well. If you want to save some for later, store the dressing separately. This way, you can add it fresh before serving. Reheating isn’t needed for this salad, but if you prefer warm Brussels sprouts, use the oven or a skillet. Heat them gently to keep the taste and texture intact. Avoid microwaving, as it can make them soggy. For best results, serve the salad right after mixing it! Brussels sprouts are packed with nutrients. They are rich in vitamins C and K. They also contain fiber, which helps digestion. Eating Brussels sprouts may lower the risk of heart disease. They have antioxidants that fight free radicals in the body. These veggies are low in calories, making them great for weight control. You get a lot of nutrition with few calories. Yes, you can make this salad ahead of time. Roasting the Brussels sprouts is best done fresh. You can prepare the dressing a day early and store it in the fridge. Just remember to add the dressing right before serving. This keeps the salad crisp and tasty. You can also pre-chop the nuts and cranberries for quick assembly. If you need to skip feta cheese, there are good options. Try goat cheese for a creamy touch. You can also use vegan cheese if you're avoiding dairy. For a nutty flavor, consider nutritional yeast. Crumbled tofu works well for a vegan option too. Just choose what fits your taste! Customizing the dressing is easy and fun. You can add minced garlic for extra flavor. A squeeze of lemon juice gives a fresh twist. If you like spice, a dash of hot sauce adds heat. Fresh herbs like thyme or basil can also enhance the taste. Get creative and make it your own! This blog shared how to make a tasty Brussels sprouts salad. We discussed essential and optional ingredients, like olive oil and dried cranberries. I guided you through clear steps, from preparation to roasting. We explored tips for perfecting your dish and suggested variations for different diets. I hope you feel inspired to try this salad. It's simple, healthy, and full of flavor. Enjoy making it your own!

Maple Dijon Brussels Sprout Salad Fresh and Tasty Mix

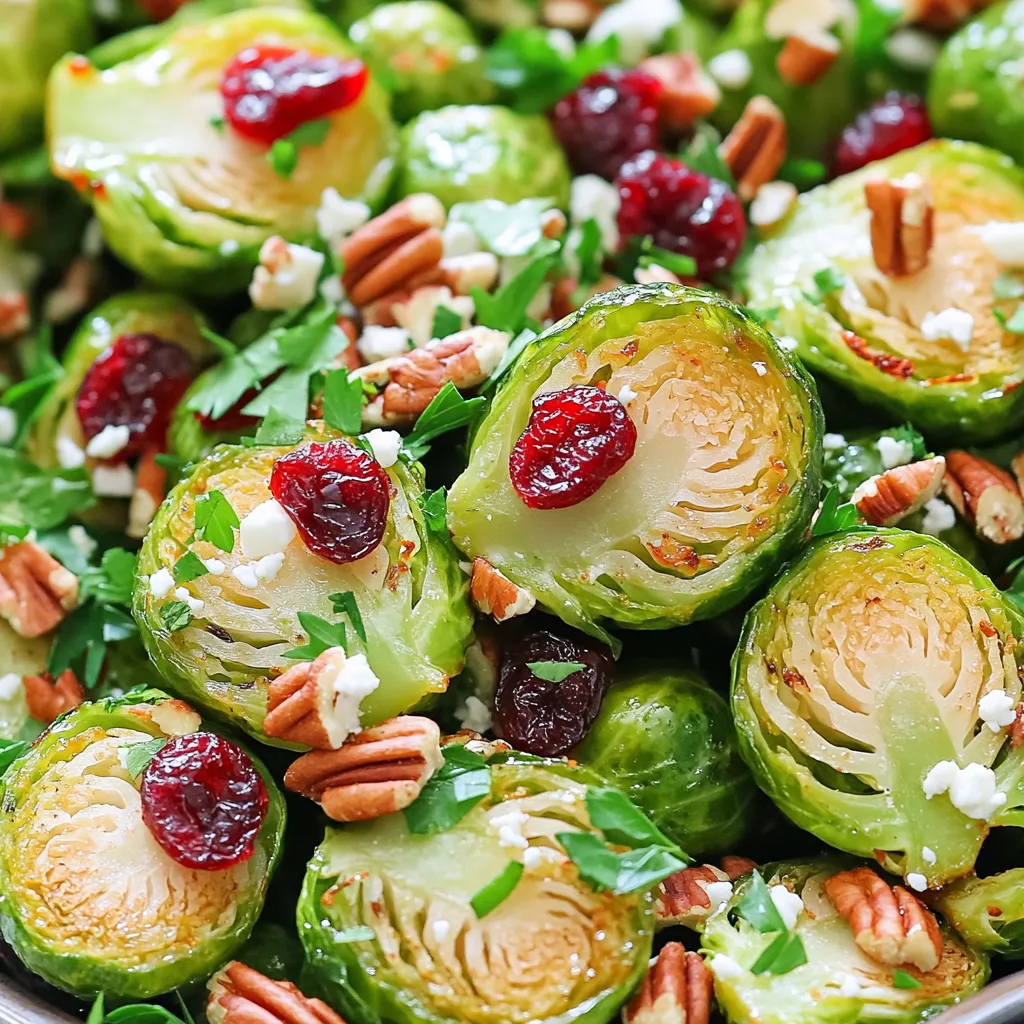
Looking for a vibrant salad that sings with flavor? My Maple Dijon Brussels Sprout Salad is just what you need!

- 1 block (14 oz) firm tofu, drained and pressed - 2 cups Brussels sprouts, halved - 1 red bell pepper, chopped - 1 cup cherry tomatoes, halved - 1 medium zucchini, sliced - 4 tablespoons olive oil - 4 tablespoons grated Parmesan cheese - 4 cloves garlic, minced - 1 teaspoon dried oregano - 1 teaspoon paprika - Salt and pepper to taste - Fresh parsley, chopped When I prepare this dish, I love using firm tofu. It absorbs flavors well and gives a great texture. Brussels sprouts add a nice crunch, while red bell pepper brings sweetness. Cherry tomatoes burst with juice, and zucchini adds a tender bite. For seasoning, I lean on olive oil, garlic, and dried oregano for depth. Paprika gives a bit of warmth, while salt and pepper tie everything together. The grated Parmesan cheese melts beautifully, creating a savory layer. To finish, I sprinkle fresh parsley on top. It adds color and a fresh taste. This combination of ingredients creates a delightful harmony that you will love. First, preheat your oven to 400°F (200°C). Line a large sheet pan with parchment paper. This helps keep the food from sticking and makes cleanup easy. Next, take your block of firm tofu. Drain the water and press it to remove excess moisture. This step is key for crispy tofu. Cut the pressed tofu into 1-inch cubes and place them in a large mixing bowl. Now, it's time to add flavor. Pour 2 tablespoons of olive oil over the tofu. Add minced garlic, dried oregano, paprika, salt, and pepper. Toss everything well so the tofu gets coated. In the same bowl, add halved Brussels sprouts, chopped red bell pepper, halved cherry tomatoes, and sliced zucchini. Drizzle the remaining 2 tablespoons of olive oil over these veggies. Season them with salt and pepper too. Toss again to coat all the veggies in oil and seasonings. Spread the tofu and veggie mix evenly on the prepared sheet pan. Make sure they are in a single layer. This helps them roast evenly. Now, sprinkle grated Parmesan cheese over the top of everything. Place the sheet pan in the preheated oven and roast for 25 to 30 minutes. Toss the mix halfway through for even cooking. Once done, the tofu should be golden and crispy, while the veggies are tender and caramelized. Remove the pan from the oven and let it cool for a few minutes. Garnish with chopped parsley before serving. How to achieve crispy tofu To get that perfect crispy tofu, start with firm tofu. Drain and press it well to remove excess moisture. I often place a heavy object on top for about 30 minutes. This step is key. After pressing, cut the tofu into 1-inch cubes. Toss them in olive oil, garlic, and spices. Spread the cubes on the sheet pan in a single layer. Roast them at 400°F (200°C) until golden brown. This ensures even cooking and crispiness. Best methods for pressing tofu Pressing tofu is simple but vital. Wrap the tofu block in a clean kitchen towel. Place it on a plate and add weight on top. A cast-iron skillet or a few cans work great. Let it sit for at least 30 minutes. This process helps squeeze out water, making the tofu firmer. Drier tofu absorbs flavors better and cooks crispier. Recommendations for seasonal vegetables Using seasonal veggies can elevate your dish. Try Brussels sprouts, bell peppers, and zucchini in spring. In summer, add eggplant or corn for a fresh twist. Fall brings butternut squash and kale, while winter offers hearty root vegetables like carrots and sweet potatoes. These choices not only taste great but also support local farmers. Substituting ingredients based on availability Don’t stress if you can’t find a veggie. You can easily swap out ingredients. If you lack Brussels sprouts, try broccoli or green beans. If you can’t find zucchini, use yellow squash instead. The key is to keep the flavors balanced. Just remember to adjust cooking times for different veggies. Adding spices or herbs for extra flavor Enhance your dish by mixing in spices or herbs. Try adding crushed red pepper for heat. Fresh herbs like basil or thyme can brighten the flavor. You can also experiment with smoked paprika for a deeper taste. Just a pinch can change the whole dish. Techniques for achieving a caramelized finish To get that nice caramelized finish, make sure the veggies are not crowded on the pan. Spacing allows the heat to circulate, which helps with browning. Another trick is to toss the veggies halfway through roasting. This ensures even cooking and promotes that lovely caramelization. {{image_2}} You can switch tofu for tempeh or chickpeas. Tempeh adds a nutty taste and is rich in protein. It absorbs flavors well and cooks nicely. Chickpeas offer a great crunch and are also high in protein. Both options make the dish hearty and delicious. If you want a vegan option, try using vegan cheese. Look for brands that melt well. They can give you a creamy texture without dairy. You can also experiment with different cheeses. Feta or goat cheese can add a tangy flavor. Cheddar or mozzarella can provide a nice richness. To spice things up, add chili flakes for heat. This will give your dish a nice kick. For a Mediterranean twist, try adding Italian herbs like basil or thyme. If you prefer Asian flavors, add soy sauce or sesame oil. These options allow you to customize the dish to your taste. Store your leftovers in an airtight container. This keeps the dish fresh. Place it in the fridge within two hours of cooking. If stored properly, the leftovers will last for about 3 to 5 days. Yes, you can freeze the cooked dish. Make sure it cools down before freezing. Use a freezer-safe container to keep it airtight. When ready to eat, thaw it in the fridge overnight. Reheat in an oven or microwave until hot. For quick assembly, pre-chop all veggies ahead of time. Store them in separate containers in the fridge. Cut the tofu into cubes and keep it in a separate container. For meal prep convenience, pack individual servings in airtight containers. This makes it easy to grab and go! Yes, you can easily make this dish vegan. Just replace the Parmesan cheese with a vegan cheese option. Nutritional yeast is a great substitute for a cheesy flavor. It adds a nice umami touch without dairy. You can also add more spices or herbs to enhance the taste. This dish pairs well with many sides. Here are some fun ideas: - Quinoa or brown rice for a filling meal - A fresh green salad for crunch - Garlic bread for a tasty side - A creamy avocado dip to add richness Cooking times can vary between ovens. If you use a convection oven, check your dish around 20 minutes. Convection ovens cook faster. For conventional ovens, stick to the full 25-30 minutes. Always check for that golden color on the tofu and tender veggies. Tossing halfway through helps ensure even cooking. This blog post covered a tasty roasted vegetable and tofu dish. We explored key ingredients, important seasoning, and methods for preparation. You learned how to achieve crispy tofu and add extra flavor. I shared variations with different proteins and cheeses, as well as storage tips for leftovers. Incorporating these ideas makes cooking fun and easy. You can create your own tasty meals at home. Enjoy trying out new flavors and techniques! Happy cooking!

Sheet Pan Garlic Parmesan Tofu Veggies Delight

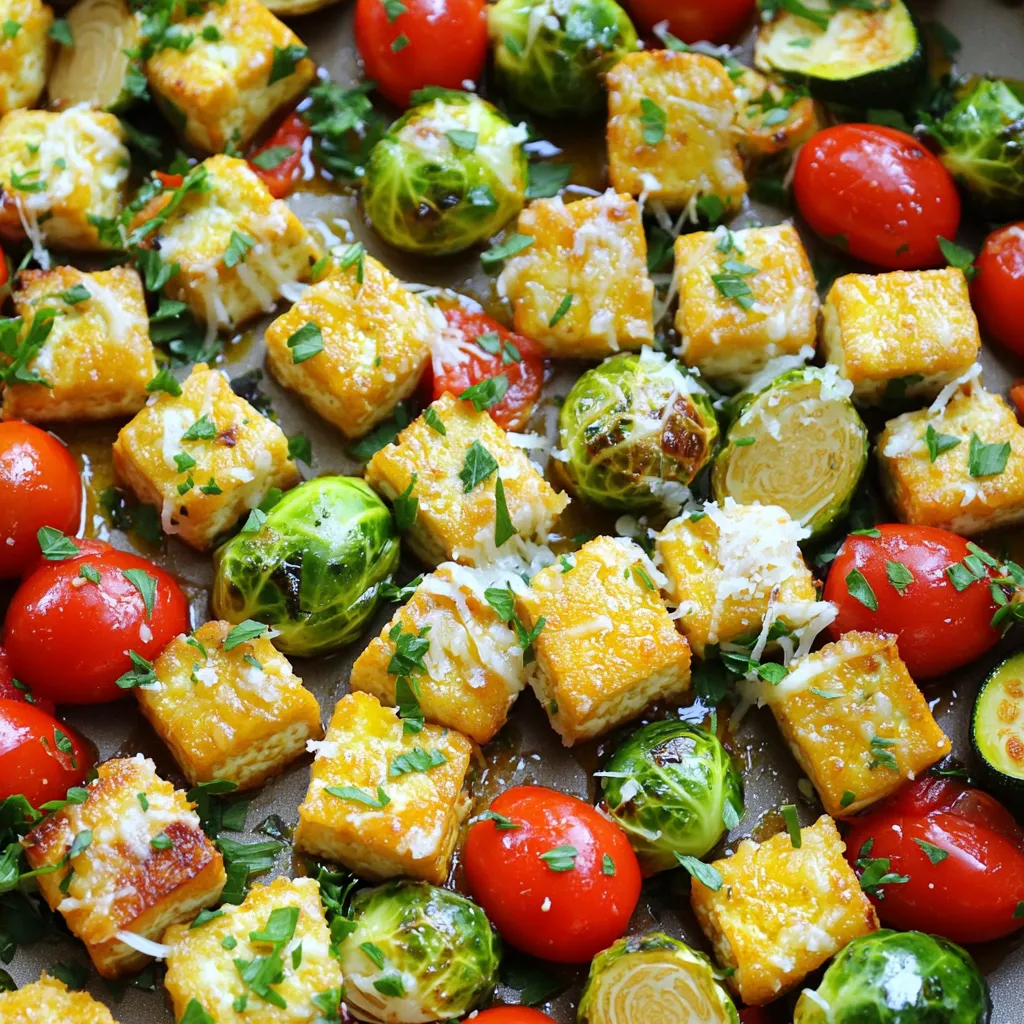
Welcome to Sheet Pan Garlic Parmesan Tofu Veggies Delight! If you’re looking for a tasty, quick meal, you’re in the

- Cauliflower florets - Olive oil - Taco seasoning - Shredded cheddar cheese - Optional toppings: sour cream, guacamole, jalapeños, chopped cilantro - Garlic powder - Salt and pepper Air Fryer Nacho Cauliflower Bites start with fresh cauliflower florets. Using a medium head of cauliflower, cut it into bite-sized pieces. This size helps them cook evenly and become crispy. Next, you need olive oil. This oil adds flavor and helps the seasoning stick to the cauliflower. Use about two tablespoons for the best result. Now, let’s talk about taco seasoning. This spice mix adds a bold flavor. You can buy it or make your own at home. Either way, you’ll want one tablespoon for this recipe. After that, we add some fun! The cheesy toppings are what make these bites so tasty. Shredded cheddar cheese is a must. It melts beautifully and gives a rich flavor. You can also add optional toppings like sour cream, guacamole, jalapeños, or chopped cilantro. These add extra flavor and fun to your bites. Don’t forget about seasonings! Garlic powder, salt, and pepper can really elevate the taste. Use half a teaspoon of garlic powder, plus salt and pepper to your liking. With these ingredients ready, you’re set to make a fun, crunchy snack! Set your air fryer to 400°F (200°C). This temperature is key for a perfect crunch. Preheating helps the cauliflower cook evenly. First, cut your cauliflower into bite-sized florets. In a large bowl, mix the florets with: - 2 tablespoons olive oil - 1 tablespoon taco seasoning - 1/2 teaspoon garlic powder - Salt and black pepper to taste Toss well to coat each piece. Next, add 1 cup of crushed tortilla chips. Mix gently so the chips stick but do not break the florets. Place the cauliflower bites in a single layer in the air fryer basket. You may need to cook them in batches. Air fry for 12-15 minutes. Shake the basket halfway through cooking. This ensures they cook evenly and get crispy. When the bites are golden brown, sprinkle 1 cup of shredded cheddar cheese on top. Return them to the air fryer for another 2-3 minutes. This melts the cheese and adds a delicious finish. Once done, let them cool slightly before serving. Enjoy these bites with optional toppings like sour cream or guacamole! To get your cauliflower bites nice and crispy, shake the basket during cooking. This helps them cook evenly. If you have a lot of cauliflower, cook in batches. This keeps everything crispy and tasty. You can customize spice levels to match your taste. Add more taco seasoning for heat or use less for a milder flavor. For extra fun, try different toppings. Jalapeños add heat while sour cream cools things down. Guacamole adds creaminess, and chopped cilantro gives freshness. These bites pair well with many dips. Try salsa for a fresh kick or cheese dip for extra creaminess. For a fun way to present, arrange the bites on a large platter. Add bowls of dips around for easy access. Your guests will love the look and taste! {{image_2}} You can easily change the flavor of your Air Fryer Nacho Cauliflower Bites. Try using a homemade taco seasoning for a fresh twist. Mix these spices for a simple blend: - 1 tablespoon chili powder - 1 teaspoon cumin - 1 teaspoon onion powder - 1/2 teaspoon paprika You can also explore other flavors. Buffalo sauce gives a spicy kick, while BBQ sauce adds a sweet touch. Just adjust the sauce amounts to fit your taste. If you want to skip dairy, use vegan cheese. Brands like Daiya or Violife melt well and taste great. For a spicy punch, try pepper jack cheese instead of cheddar. It adds a nice heat and flavor to your bites. You can mix other veggies with cauliflower for added crunch. Bell peppers and zucchini work well and add color. You can also combine the bites with black beans or chickpeas for extra protein. This makes the snack heartier and more filling. To keep your nacho cauliflower bites fresh, place them in an airtight container. Make sure they cool before sealing. Store them in the fridge. They stay fresh for about 3 days. If you want them to last longer, consider freezing. You can reheat the bites in the air fryer or the oven. For the air fryer, set it to 350°F (175°C) and cook for 5-7 minutes. This keeps them crispy. If using the oven, preheat to 350°F (175°C) and heat for about 10 minutes. Keep an eye on them to avoid sogginess. To freeze the cauliflower bites, let them cool completely. Then, place them in a single layer on a baking sheet and freeze until firm. Once frozen, transfer them to a freezer bag. They can stay frozen for up to 2 months. When ready to eat, reheat directly from frozen in the air fryer for about 10-12 minutes at 400°F (200°C). Enjoy them crispy and delicious! You can pair Air Fryer Nacho Cauliflower Bites with many fun sides and dips. Here are some ideas: - Sour cream: A cool and creamy dip. - Guacamole: Smooth and rich avocado spread. - Salsa: Fresh and zesty, it adds a nice kick. - Jalapeños: For those who love extra heat. - Chopped cilantro: Adds a fresh touch. These sides make your bites even tastier and more enjoyable! Yes, you can use frozen cauliflower. Here are some tips for cooking frozen florets: - Thaw the florets first to help them cook evenly. - Pat them dry with a paper towel to remove excess moisture. - Follow the same steps for coating and seasoning as fresh cauliflower. Frozen cauliflower can still be crispy and delicious! The best air fryer for this recipe should fit your needs. Here are some recommendations: - Size: A medium or large air fryer is ideal. It allows for more cauliflower bites at once. - Features: Look for an air fryer with adjustable temperature settings and a timer. - Brand: Popular brands like Ninja or Cosori offer great options. A good air fryer ensures you get crispy bites every time! Air fryer nacho cauliflower bites are simple and fun to make. Start with fresh cauliflower, olive oil, and taco seasoning. Coat the florets, air fry, and add cheese for a delicious topping. Use tips to shape the perfect crunch and customize flavors. Store leftover bites properly and reheat them easily for later. These bites are a tasty option for any gathering and pair well with various dips. Enjoy the flavor and have fun experimenting with new toppings and seasonings. Happy cooking!

Air Fryer Nacho Cauliflower Bites Crunchy Snack Idea

Craving a crunchy snack that’s packed with flavor? Try my Air Fryer Nacho Cauliflower Bites! Easy to make and bursting

To make this One Pot Moroccan Chickpea Stew, gather these ingredients: - 2 tablespoons olive oil - 1 large onion, diced - 3 garlic cloves, minced - 1 teaspoon ground cumin - 1 teaspoon ground coriander - 1 teaspoon smoked paprika - 1/2 teaspoon ground cinnamon - 1 can (15 oz) chickpeas, drained and rinsed - 1 can (14 oz) diced tomatoes - 2 medium carrots, sliced - 1 red bell pepper, chopped - 2 cups vegetable broth - 1 cup spinach, roughly chopped - Salt and pepper to taste - Fresh cilantro or parsley, for garnish - Lemon wedges, for serving If you need to convert measurements, here are some quick tips: - 1 tablespoon = 3 teaspoons - 1 cup = 8 ounces - 1 pound = 16 ounces You can customize your stew with these options: - Add sweet potatoes for extra sweetness. - Use vegetable stock instead of broth for more flavor. - Swap spinach for kale or Swiss chard. - Try adding chickpeas with spices for a more robust taste. These ingredients create a warm, hearty dish that's both full of flavor and easy to make. To start, gather all your ingredients. You will need: - 2 tablespoons olive oil - 1 large onion, diced - 3 garlic cloves, minced - 1 teaspoon ground cumin - 1 teaspoon ground coriander - 1 teaspoon smoked paprika - 1/2 teaspoon ground cinnamon - 1 can (15 oz) chickpeas, drained and rinsed - 1 can (14 oz) diced tomatoes - 2 medium carrots, sliced - 1 red bell pepper, chopped - 2 cups vegetable broth - 1 cup spinach, roughly chopped - Salt and pepper to taste - Fresh cilantro or parsley, for garnish - Lemon wedges, for serving Once you have everything, it is easy to move on. Heat the olive oil in a large pot over medium heat. Add the diced onion. Cook for about 5 minutes until the onion is soft. Next, add the minced garlic and cook for 1 more minute. The garlic should smell great. Now, sprinkle in the spices: cumin, coriander, smoked paprika, and cinnamon. Stir and cook for about 1 minute. This helps the spices taste better. Then, add the chickpeas, diced tomatoes (including their juice), sliced carrots, and chopped red bell pepper. Pour in the vegetable broth and mix everything well. Bring the mixture to a boil. Once boiling, lower the heat and cover the pot. Let it simmer for 25-30 minutes. Check that the carrots are tender before moving on. After the stew simmers, stir in the chopped spinach. Add salt and pepper to taste. Let the spinach wilt for about 2-3 minutes. Serve the stew warm. Garnish with fresh cilantro or parsley. Don’t forget the lemon wedges! They add a nice zing. Enjoy your meal! To boost the taste of your stew, use fresh herbs. Fresh cilantro or parsley adds brightness. A squeeze of lemon juice gives a zing that pairs well. You can also add a dash of hot sauce for heat. If you want a richer flavor, consider using vegetable broth instead of water. Toasting spices in oil for a minute brings out their best flavor. Start by sautéing the onion well. This builds a strong base for your stew. Wait until it softens before adding garlic. This way, you avoid burning the garlic. Stir in spices and let them cook for a moment. This helps release their oils and flavors. Keep the pot covered while simmering to lock in moisture. Stir occasionally to prevent sticking. One common mistake is not seasoning enough. Taste your stew and add salt and pepper as needed. Another pitfall is overcooking the spinach. Add it in the last few minutes so it stays bright and fresh. Don't skip the lemon wedges; they make a big difference. Lastly, avoid using canned chickpeas without rinsing. Rinsing removes extra salt and improves taste. {{image_2}} You can easily make this stew fit your needs. If you're vegan, it’s already perfect! For gluten-free folks, check your broth. Use vegetable broth without gluten. If you want a creamier stew, add coconut milk. For a lower-carb option, swap chickpeas for cauliflower. You can even try lentils for a different texture. Want more protein? Chickpeas are great, but there are other choices. Add cooked quinoa for a nutty flavor. Tofu cubes can also work well. If you eat meat, add chicken or lamb for a heartier meal. Just cook the meat first, then add it to the stew. Spices make this stew special. If you want a kick, add cayenne pepper. For a fresh twist, try adding fresh herbs like thyme or basil. You can even switch out the smoked paprika for regular paprika for a milder taste. Each change can bring a new flavor to your bowl. Play around with spices to find your favorite mix! To store your One Pot Moroccan Chickpea Stew, let it cool first. Use a clean, airtight container. Place it in the fridge. It will last for up to five days. Make sure to label the container with the date. This helps you keep track of freshness. You can freeze this stew for later. Use freezer-safe containers or bags. Make sure to leave some space for expansion. This stew will stay good for up to three months in the freezer. When you are ready to eat, thaw it overnight in the fridge. Reheat the stew gently. Use the stove or microwave. If using the stove, heat it on low, stirring often. You can add a splash of broth or water if it seems thick. In the microwave, heat in short bursts. Stir in between to ensure even heating. Enjoy your delicious stew! You can serve One Pot Moroccan Chickpea Stew with warm bread. I love using pita or crusty baguette. They soak up the stew nicely. You can also pair it with fluffy couscous. The light texture of couscous complements the stew's richness. A simple green salad adds freshness too. Toss some greens with lemon juice for a bright touch. Yes, you can make this stew in advance. It tastes even better the next day. Store it in the fridge for up to three days. Just let it cool before putting it in a container. When you’re ready to eat, reheat it gently on the stove. Add a splash of broth if needed to loosen it up. One Pot Moroccan Chickpea Stew has mild spice. The spices add warmth without heat. If you want more heat, add a pinch of cayenne or red pepper flakes. Start with a little and taste as you go. You can also serve it with hot sauce on the side. This way, everyone can adjust the spice to their liking. This blog post covered every step to make a great One Pot Moroccan Chickpea Stew. We explored the key ingredients, measurement tips, and optional add-ins for flavor. You learned the cooking steps, final touches, and some tricks to avoid common mistakes. We also discussed variations for dietary needs and how to store leftovers effectively. Now you’re ready to enjoy this dish or make it your own. Cooking should be fun and tasty!

One Pot Moroccan Chickpea Stew Flavorful and Simple

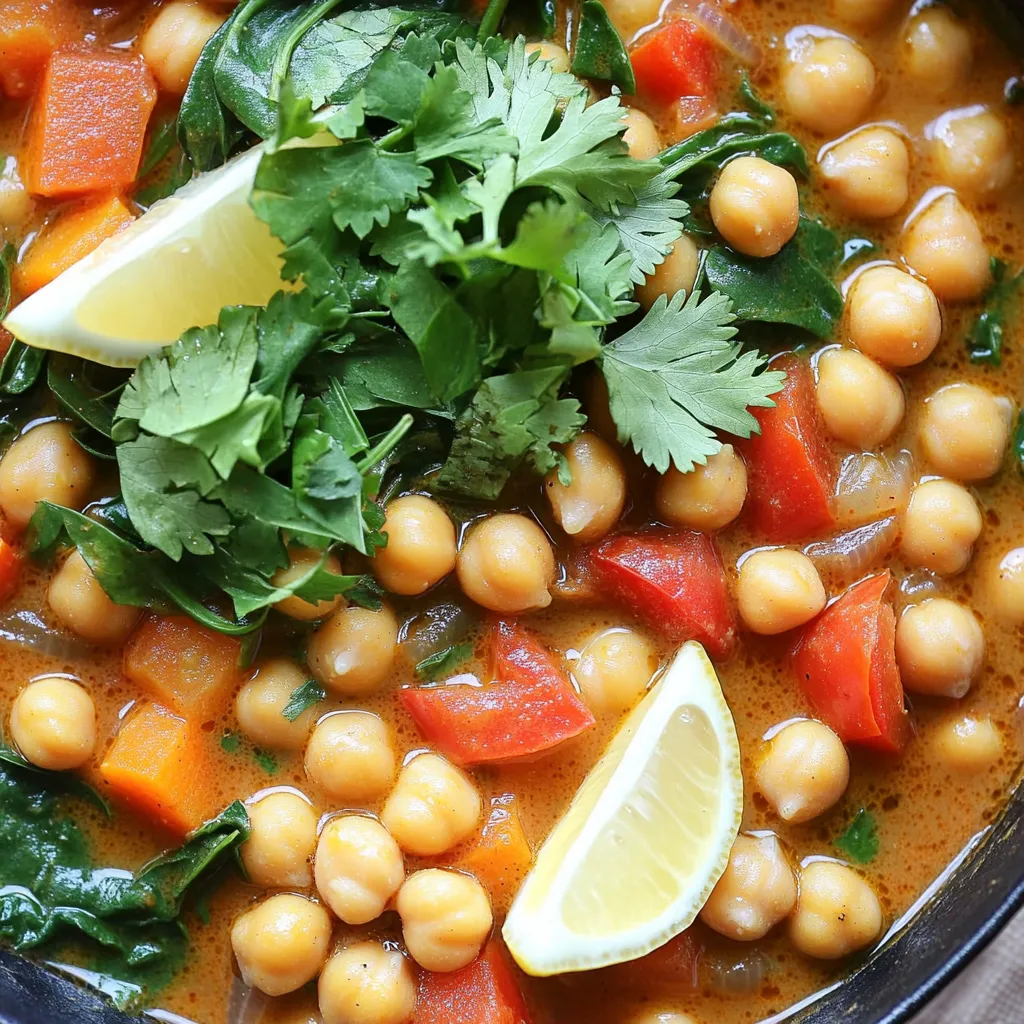
Looking for a quick, tasty meal? This One Pot Moroccan Chickpea Stew is your answer! Packed with flavor and super

- Grated Zucchini Use about 1 medium zucchini to get 1 cup. Grating it adds moisture. - All-Purpose Flour One cup of this flour gives a nice texture to the bread. - Whole Wheat Flour Half a cup adds fiber and a nutty flavor. - Sugars (Granulated & Brown) Combine 3/4 cup of granulated sugar and 1/2 cup of brown sugar. This mix sweetens the bread and gives it depth. - Oils (Vegetable or Coconut) Use 1/2 cup of vegetable oil or melted coconut oil. This keeps the bread moist. - Eggs and Vanilla Extract Two large eggs and 1 teaspoon of vanilla extract bind the mix and add flavor. - Baking Agents (Baking Soda & Baking Powder) One teaspoon of baking soda and half a teaspoon of baking powder help the bread rise well. - Seasoning (Salt & Cinnamon) A half teaspoon of salt and 1 teaspoon of ground cinnamon enhance the flavors nicely. - Chocolate Chips and Optional Walnuts Stir in 1/2 cup of semi-sweet chocolate chips. You can add 1/4 cup of chopped walnuts for extra crunch. These ingredients blend together to create a moist and flavorful treat. Each one plays a key role in making the chocolate chip zucchini bread a hit! - Preheating the Oven Start by preheating your oven to 350°F (175°C). This ensures an even bake for your bread. - Preparing the Loaf Pan Grease a 9x5 inch loaf pan with non-stick spray. You can also line it with parchment paper. This makes removing the bread easy. - Mixing Wet Ingredients In a large bowl, combine 1 cup of grated zucchini, 1/2 cup of vegetable oil, 3/4 cup of granulated sugar, and 1/2 cup of brown sugar. Add 2 large eggs and 1 teaspoon of vanilla extract. Whisk until smooth. - Mixing Flour and Baking Agents In another bowl, mix 1 cup of all-purpose flour, 1/2 cup of whole wheat flour, 1 teaspoon of baking soda, 1/2 teaspoon of baking powder, 1/2 teaspoon of salt, and 1 teaspoon of ground cinnamon. Ensure all dry ingredients are well blended. - Incorporating Dry Into Wet Gradually add the dry mix into the wet mixture. Fold gently until just combined. Be careful not to over mix, as this can make the bread tough. - Pouring the Batter Pour the batter into the prepared loaf pan. Smooth the top with a spatula for an even bake. - Baking Time and Doneness Check Bake for 50-60 minutes. To check doneness, insert a toothpick into the center. It should come out clean or with a few moist crumbs. If you see wet batter, it needs more time. Once done, let it cool for 15 minutes in the pan before transferring it to a wire rack. - Avoiding Overmixing: When you mix the wet and dry ingredients, do it gently. Overmixing can make your bread tough. You want to keep a light and airy texture. Fold the ingredients just until combined. It’s okay if there are a few lumps. - Achieving the Perfect Texture: The key to moist bread is the zucchini. Grate it finely, but do not press out all the moisture. This keeps your bread soft. If your batter seems too thick, add a splash of milk to loosen it. - Serving Suggestions: Serve your chocolate chip zucchini bread warm. A dusting of powdered sugar adds a nice touch. For a treat, top with a scoop of vanilla ice cream. This makes it a dessert everyone will love. - Storing & Gift-Wrapping Ideas: To store, wrap the bread in plastic wrap. Keep it at room temperature for a few days. For gifts, slice the bread and wrap it in parchment paper. Tie it with twine for a rustic look. - Why Use Zucchini?: Zucchini adds moisture without extra fat. It’s low in calories and high in fiber. This makes your bread healthier. You get great taste without guilt. - Nutritional Information: Each slice of chocolate chip zucchini bread is packed with nutrients. It contains vitamins A and C, plus potassium. The zucchini helps keep your digestion smooth, too. Enjoy this treat knowing it's good for you! {{image_2}} Additional Chocolate Variants You can boost the chocolate flavor by adding different types of chocolate. Use dark chocolate chips or even white chocolate chips for a fun twist. You could also melt chocolate and mix it into the batter for extra richness. This enhances the sweet taste and makes each slice even more delightful. Other Nut Options While walnuts add a nice crunch, you can try other nuts too. Pecans or hazelnuts work well and give a unique flavor. Chop them finely and fold them into the batter. This adds texture and a different taste to your zucchini bread. Gluten-Free Options If you need a gluten-free version, swap the all-purpose flour with a gluten-free blend. Make sure it contains xanthan gum for a good texture. This allows everyone to enjoy the bread without worry. Sugar Substitutes For a healthier option, use natural sweeteners like honey or maple syrup. You can also try coconut sugar as a substitute for brown sugar. These swaps can lower the overall sugar content while keeping the bread sweet and tasty. Adding Spices or Flavorings In the fall, add spices like nutmeg or pumpkin spice for a festive touch. You can also mix in some orange zest for a bright flavor. This keeps your zucchini bread fun and fresh, no matter the season. Holiday Versions For the holidays, consider adding dried fruits like cranberries or raisins. This gives a festive look and taste. You can also drizzle a simple icing on top for a special treat that looks great on any holiday table. Room Temperature You can store chocolate chip zucchini bread at room temperature for up to three days. Keep it in an airtight container or wrap it tightly in plastic wrap. This keeps it moist and tasty. Refrigeration If you want it to last longer, place the bread in the fridge. It will stay fresh for about a week. Use a container or wrap it well to prevent drying out. How to Freeze Properly Freezing is a great option if you have extra bread. First, slice the bread or leave it whole. Wrap it in plastic wrap, then place it in a freezer bag. Remove as much air as you can before sealing. This keeps the bread fresh. Thawing Instructions When you are ready to enjoy it, take it out of the freezer. Leave it in the fridge overnight to thaw. You can also leave it at room temperature for a few hours. It will taste just as good! Best Before Dates Chocolate chip zucchini bread is best eaten within a week. If properly stored, it can last up to three months in the freezer. Always check for the best taste. Signs of Spoilage Look for signs like mold, an off smell, or a dry texture. If you see any of these, it’s time to toss the bread. Eating spoiled food is never a good idea! Can I substitute zucchini for other vegetables? Yes, you can use carrots or squash. Both add moisture and flavor. How long can I store Chocolate Chip Zucchini Bread? You can store it at room temperature for about three days. For longer storage, refrigerate it for up to a week. Can this recipe be made as muffins? Absolutely! Just fill muffin tins with the batter. Bake for 20-25 minutes. What can I use instead of eggs for a vegan version? Try using flaxseed meal or unsweetened applesauce. Both work well in this recipe. How do I know when the zucchini bread is done baking? Insert a toothpick into the center. If it comes out clean or with a few crumbs, it's done. In this article, we explored how to make delicious Chocolate Chip Zucchini Bread. We covered the key ingredients, step-by-step instructions, useful baking tips, and creative variations. You learned about storage tips to keep your bread fresh and answers to common questions. Zucchini bread is easy, tasty, and versatile. Enjoy your baking journey and experiment with flavors! It’s a fun way to use zucchini while creating a treat everyone loves.

Chocolate Chip Zucchini Bread Moist and Flavorful Treat

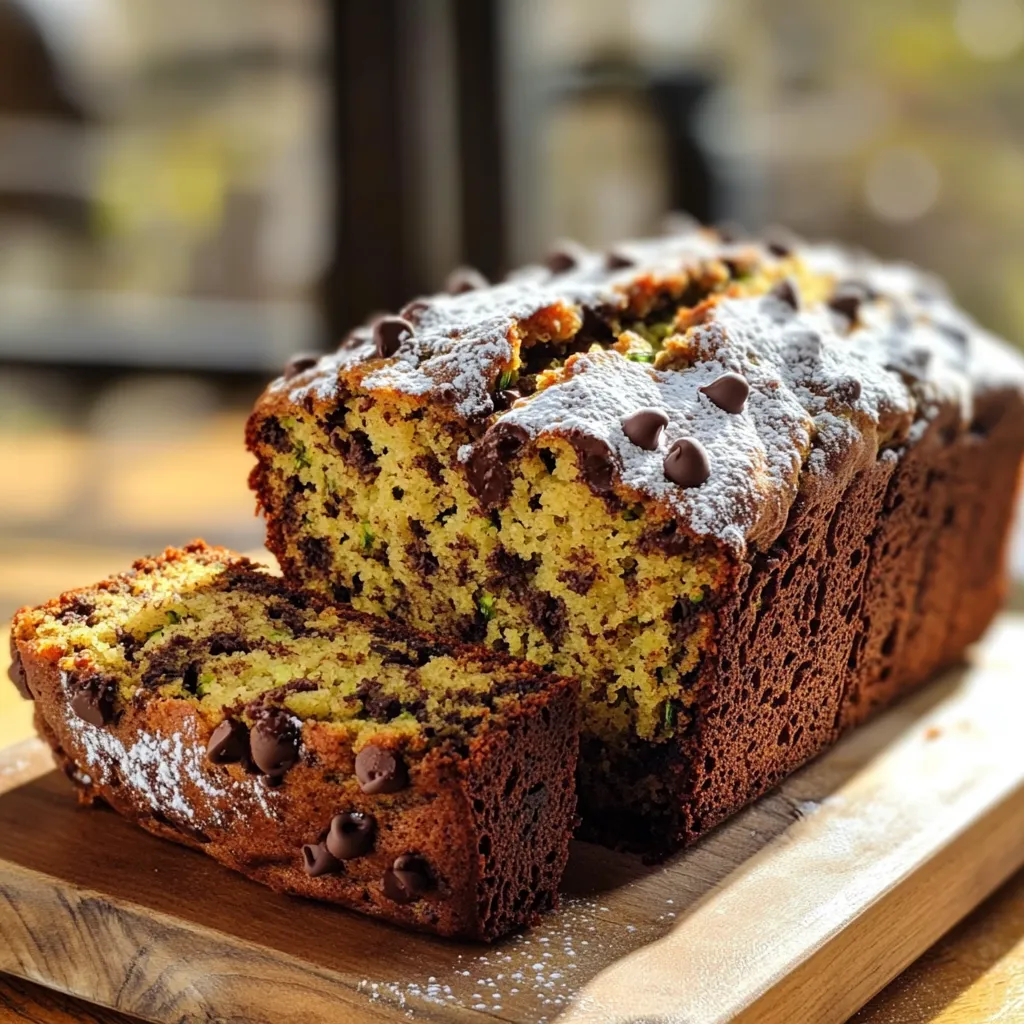
Are you ready to whip up a delicious treat? Chocolate chip zucchini bread is the perfect mix of moist, sweet,

- 1 cup canned pumpkin puree - 1 frozen banana - 1/2 cup Greek yogurt (plain or vanilla) - 1 scoop vanilla protein powder - 1/2 cup almond milk (or any milk of choice) These main ingredients create a base for your smoothie bowl. Canned pumpkin puree gives it a rich, creamy texture. The frozen banana adds natural sweetness and a thick feel. Greek yogurt boosts the protein content and adds creaminess. Vanilla protein powder enhances flavor and nutrition. Almond milk makes it smooth and easy to blend. - 1 teaspoon pumpkin pie spice - 1 tablespoon maple syrup (optional) Pumpkin pie spice adds warmth and depth to your bowl. It gives a comforting fall flavor. Maple syrup is a sweet choice if you like it sweeter. You can leave it out for less sugar. - Granola - Sliced bananas - Chia seeds - Coconut flakes - Pecans Toppings make your smoothie bowl fun and tasty. Granola adds crunch. Sliced bananas give extra flavor and texture. Chia seeds are healthy and look great on top. Coconut flakes add a tropical twist. Pecans provide a nutty flavor and healthy fats. To start, gather your ingredients. You need canned pumpkin puree, a frozen banana, Greek yogurt, vanilla protein powder, almond milk, and pumpkin pie spice. If you like, you can add maple syrup for some sweetness. Now, combine all these ingredients in your blender. Make sure to include the almond milk last. This helps the blender mix everything well. Blend on high speed until you see a smooth consistency. If you need to, stop and scrape down the sides with a spatula. This ensures all the ingredients get mixed evenly. After blending, check the thickness of your smoothie. If it feels too thick, add a little more almond milk. Blend again until you reach your desired consistency. You want it smooth but thick enough to hold your toppings later. Once your smoothie is ready, it’s time to serve. Pour the mixture into a bowl. Don’t just dump it all in; take your time to make it look nice. Next, it’s time to arrange your toppings. Use granola, sliced bananas, chia seeds, coconut flakes, and pecans. Place them artfully on top of your smoothie. This makes it look pretty and inviting. For that extra touch, sprinkle a bit more pumpkin pie spice over the top. Enjoy making your bowl look as great as it tastes! To make a great smoothie bowl, start with the right protein powder. Look for one with no added sugars. A clean protein source helps keep your smoothie healthy. I like vanilla flavor since it blends well with pumpkin. Greek yogurt is another key ingredient. It adds creaminess and protein. Plus, it has probiotics, which are good for your gut. Using plain yogurt keeps the flavor neutral, letting the pumpkin shine. The way you present your smoothie bowl matters. Swirl some yogurt or pumpkin puree on top for a fun design. This adds visual appeal and makes your bowl look gourmet. Choose colorful bowls and spoons. Bright colors make your meal pop and feel more inviting. A cheerful dish can lift your mood. If you want your smoothie bowl sweeter, maple syrup is a great choice. Add a tablespoon to taste. It adds a rich flavor that pairs well with pumpkin spice. You can adjust the sweetness based on your preference. Start with less and add more if needed. This way, you control the flavor and make it just right for you. {{image_2}} You can change up your Pumpkin Spice Protein Smoothie Bowl with seasonal spices. Adding nutmeg or cinnamon gives it a warm, cozy flavor. These spices boost the taste and bring a festive feel. Try one or both to find your favorite mix. Make your smoothie bowl even healthier with some simple swaps. For toppings, choose dairy-free options like almond yogurt or coconut yogurt. They add creaminess without dairy. You can also use low-calorie sweeteners like stevia or monk fruit instead of maple syrup. These swaps keep the sweetness while cutting calories. If you want more protein in your smoothie bowl, add seeds or nuts. Chia seeds or hemp seeds mix well and add crunch. You can also sprinkle on some sliced almonds or walnuts for extra flavor and texture. These protein boosts keep you full and satisfied longer. You can store your pumpkin spice protein smoothie bowl in the fridge for up to two days. To keep it fresh, use an airtight container. This helps prevent air from getting in and keeps your smoothie tasty. Before serving, stir it well. If it’s too thick, add a splash of almond milk to loosen it up. If you want to save some smoothie bowl for later, freezing is a great choice. Pour it into freezer-safe containers, leaving space for expansion. It can last up to a month in the freezer. To thaw, move it to the fridge for a few hours or overnight. You can also leave it at room temperature for about 30 minutes. Blend it again to restore its smooth texture. For the best crunch and flavor, store your toppings separately. Keep granola, sliced bananas, chia seeds, coconut flakes, and pecans in small containers. This keeps them fresh until you’re ready to serve. Add the toppings just before eating to keep everything crispy and delightful. To make this smoothie bowl, follow these steps: 1. In your blender, add the canned pumpkin puree, frozen banana, Greek yogurt, and vanilla protein powder. 2. Pour in the almond milk and add the pumpkin pie spice. If you like it sweet, add maple syrup. 3. Blend everything on high speed until it is smooth and creamy. You may need to scrape down the sides to mix well. 4. If it is too thick, add more almond milk to reach the consistency you want. 5. Once blended, pour the smoothie into a bowl. 6. Top with granola, sliced bananas, chia seeds, coconut flakes, and pecans. 7. For a nice touch, sprinkle more pumpkin pie spice on top. Yes, you can easily make this smoothie bowl vegan. Here are some swaps: - Use plant-based yogurt instead of Greek yogurt. - Replace vanilla protein powder with a vegan protein powder. - Choose almond milk or any other plant milk for a dairy-free option. - Skip the maple syrup if you prefer no added sugar. This smoothie bowl offers many health benefits: - Canned pumpkin puree is high in fiber and rich in vitamins A and C. - Frozen banana adds potassium and natural sweetness. - Greek yogurt provides protein and probiotics for gut health. - Vanilla protein powder boosts your protein intake, helping with muscle repair. - Almond milk is low in calories and often fortified with vitamins. - Pumpkin pie spice contains cinnamon, which can help regulate blood sugar. Enjoy this bowl as a nutritious breakfast or snack! This blog post covers how to make a delicious pumpkin spice protein smoothie bowl. We looked at the main and optional ingredients, step-by-step instructions, and tips for the best results. You can customize this bowl with various toppings and seasonal flavors. My final thoughts: enjoy experimenting with flavors and textures. This smoothie bowl is not just tasty; it also offers great health benefits. Get creative and make it your own!

Pumpkin Spice Protein Smoothie Bowl Healthy Delight

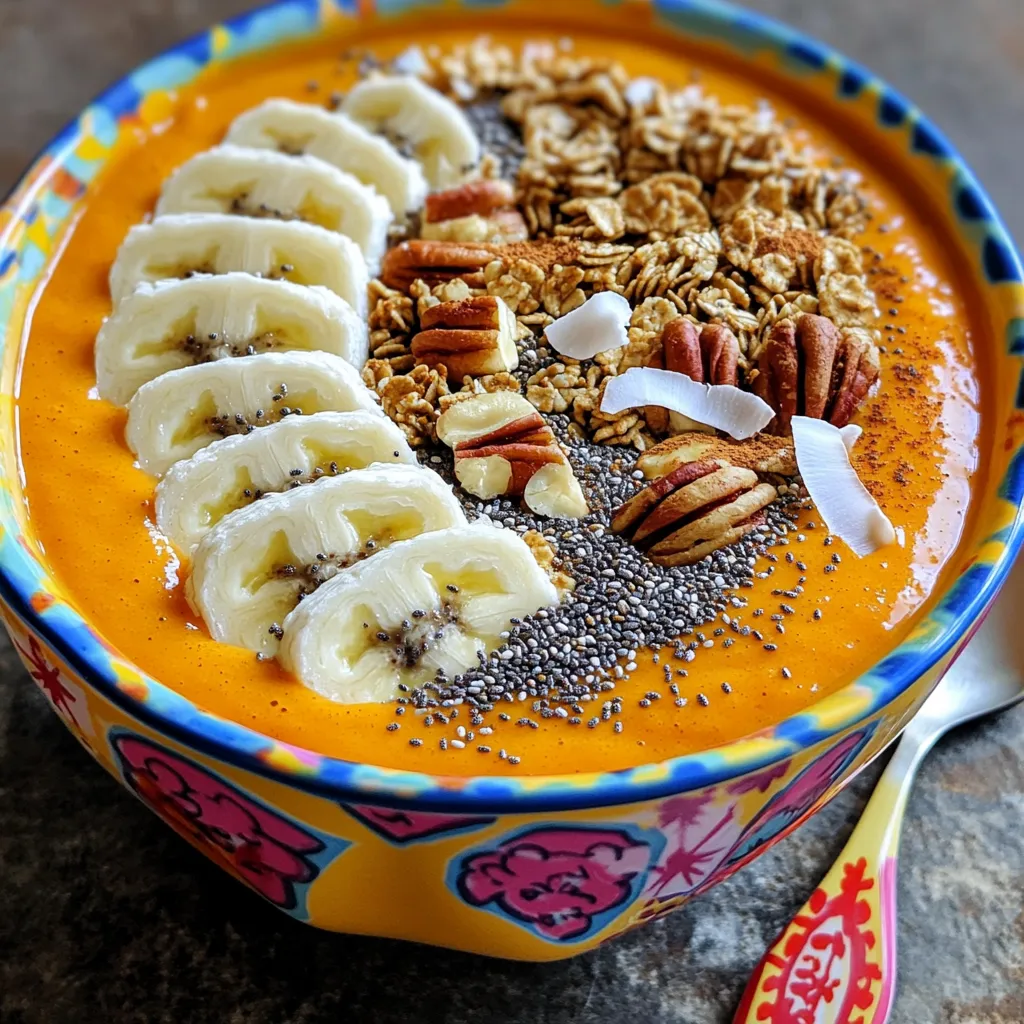
Ready to dive into fall flavors? This Pumpkin Spice Protein Smoothie Bowl is a healthy delight bursting with taste and

- Chicken and Base Components You need 1 pound of boneless, skinless chicken breasts. This chicken forms the heart of the soup. It soaks up all the flavors as it cooks. You also need 4 cups of chicken broth. This adds depth and richness to the soup. - Vegetables and Beans For a hearty texture, use 1 can of black beans, drained and rinsed. This gives protein and fiber. Add 1 can of corn for sweetness. You will also need 1 medium onion, chopped, and 3 cloves of minced garlic. These aromatics enhance the soup's flavor. Lastly, include 1 can of diced tomatoes with green chilies for a spicy kick. - Spices and Dairy To spice things up, add 1 teaspoon each of ground cumin and chili powder. These spices bring warmth and complexity. Don’t forget salt and pepper to taste for seasoning. For creaminess, you’ll need 1 cup of softened cream cheese. Mix in 1 cup of shredded cheddar cheese for a cheesy finish. This blend of ingredients creates a creamy, flavorful enchilada soup you will love. - Placing Ingredients in Slow Cooker Start by placing the chicken breasts at the bottom of your slow cooker. Then, pour in the enchilada sauce. Next, add the black beans, corn, and diced tomatoes. Sprinkle in the chopped onion and minced garlic. Finally, add the chicken broth, cumin, chili powder, salt, and pepper. - Cooking Time and Temperature Cover the slow cooker and cook on low for 6-8 hours or on high for 3-4 hours. The chicken should be fully cooked and tender when done. This slow cooking brings out the rich flavors in the soup. - Shredding Chicken After cooking, remove the chicken from the slow cooker. Use two forks to shred the chicken into bite-sized pieces. Return the shredded chicken back to the soup. This adds a nice texture to each bite. - Incorporating Cream Cheese Stir in the softened cream cheese. Mix it until it fully melts and blends into the soup. This adds a creamy texture and rich flavor that enhances the dish. - Adding Cheddar Cheese Next, add the shredded cheddar cheese. Mix well until the soup is creamy and smooth. The cheese will melt and contribute to the overall richness of the soup. - Adjusting Seasoning Taste the soup and adjust the seasoning as needed. You can add more salt and pepper to suit your taste. Let the soup cook for an extra 10-15 minutes on low. This allows all the flavors to meld together beautifully. Recommended Seasonings To boost flavor, use ground cumin and chili powder. They add warmth and depth. You can also sprinkle some smoked paprika for a smoky taste. Adjust the salt and pepper to suit your taste. Using Fresh Herbs Fresh cilantro brightens up the soup. Chop it finely and add it just before serving. For a zesty kick, a squeeze of lime juice pairs well too. These fresh touches lift the overall taste. Slow Cooker Best Practices To get the best results, layer your ingredients correctly. Put chicken at the bottom. This helps it cook evenly and stay juicy. Avoid opening the lid too often; it lets heat escape and can extend cooking time. Achieving Optimal Creaminess For a creamy soup, use softened cream cheese. Stir it in until it melts. Adding shredded cheddar cheese at the end makes it rich and tasty. This two-step process ensures a smooth texture. Finding Quality Ingredients Look for fresh produce and quality chicken. Local farmers' markets often have better options. Choose organic canned goods to reduce preservatives and enhance flavor. Substituting for Dietary Needs If you're dairy-free, use a vegan cream cheese. For a lighter version, opt for low-fat cream cheese. You can also swap chicken for beans or lentils for a vegetarian option. {{image_2}} You can make this soup lighter with low-fat cream cheese. This swap keeps the soup creamy while cutting down on fat. Use a brand that melts well for the best texture. For a vegetarian or vegan option, replace the chicken with extra beans or tofu. Use vegetable broth instead of chicken broth. This keeps the soup hearty and satisfying. To change up the protein, try using ground turkey or beef. Just brown it first before adding to the slow cooker. Shredded pork also works well for a different taste. If you want more heat, add diced jalapeños or red pepper flakes. You can adjust the spice level to fit your taste. Start small and add more until it’s just right. - How to Store Leftovers After serving, let the soup cool. Transfer it to an airtight container. Store it in the fridge for up to three days. Make sure to keep it tightly sealed to lock in flavor. - Best Practices for Reheating To reheat, pour the soup into a pot. Heat it on medium until warm, stirring often. You can also microwave it in a bowl. Heat in short bursts, stirring in between to avoid hot spots. Add a splash of broth if it thickens too much. - Freezing the Soup If you want to save it for later, freeze the soup. Let it cool completely, then pour it into a freezer-safe container. Leave some space at the top for expansion. It can stay fresh for up to three months. - Thawing and Reheating Tips To thaw, move the soup from the freezer to the fridge overnight. If you're short on time, use the microwave to defrost. After thawing, reheat it in a pot or microwave as before. Add a little chicken broth for a creamy texture. Can I make this soup in a regular pot? Yes, you can. Just use a large pot. Cook on medium heat. Add all the same ingredients. Stir often. Let it simmer for about 30-40 minutes. Ensure the chicken is cooked through before shredding. How can I make it spicier? To boost heat, add more chili powder. You can also use diced jalapeños. For extra kick, try adding hot sauce. Adjust to your taste. Remember, you can always add more, but you can't take it out! Is it possible to use frozen chicken? Absolutely! You can use frozen chicken breasts. Just add them directly to the slow cooker. Cook on high for 4-5 hours. Ensure they reach an internal temperature of 165°F before shredding. Caloric Content Per Serving This creamy enchilada soup has about 350 calories per serving. It includes protein from chicken and fiber from beans. The cheese adds richness and flavor. Dietary Restrictions and Considerations This soup contains dairy, so it's not suitable for those who are lactose intolerant. You can use dairy-free cream cheese for a dairy-free option. It is also gluten-free, making it a great choice for those with gluten sensitivities. In this blog post, I covered how to make a delicious soup with chicken, veggies, and spices. You learned about prep steps, cooking methods, and flavor tricks that enhance your dish. I also shared options for health-conscious eaters and tips for storing leftovers. As you experiment with this recipe, remember to use fresh ingredients and adjust flavors to suit your taste. Dive into your kitchen and enjoy creating your perfect bowl of soup!

Slow Cooker Creamy Enchilada Soup Flavorful Delight

If you’re craving a warm and hearty meal, this Slow Cooker Creamy Enchilada Soup is for you! Packed with tender

Older posts
Newer posts
← Previous Page1 … Page13 Page14 Page15 … Page86 Next →

dsad

© 2026 Cooking Wells • Built with GeneratePress

Our Policies

  • Copyright Policy
  • Cookie Policy
  • GDPR Policy
  • Privacy Policy
  • Disclaimer
  • Terms Of Use

More Information

  • Home
  • About
  • Contact
  • Appetizers
  • Dessert
  • Dinner
  • Drinks
©2026, Cooking Wells About Back To Top