Skip to content
DisclaimerTerms Of UseGDPR PolicyCookie Policy

Cooking Wells

  • Home
  • Drinks
  • Appetizers
  • Dinner
  • Dessert
  • About
  • Contact
  • Privacy Policy
DisclaimerTerms Of UseGDPR PolicyCookie Policy

NO-ING-IMG

To make spicy garlic edamame, gather these ingredients: - 2 cups edamame (in pods) - 3 tablespoons olive oil - 4 cloves garlic, minced - 1 tablespoon red chili flakes - 1 tablespoon soy sauce - 1 teaspoon sesame oil - 1 teaspoon sea salt - 1 tablespoon fresh lime juice - 1 tablespoon chopped fresh cilantro (for garnish) You can tweak the recipe with these options: - Add a squeeze of lemon for extra zest. - Use fresh ginger for a spicy kick. - Try different oils like avocado for a twist. - Add a dash of hot sauce for more heat. For great results, use: - Organic edamame for the best taste. - Extra virgin olive oil for rich flavor. - Low-sodium soy sauce to cut salt. - Fresh herbs, if possible, to boost freshness. Start by boiling a large pot of salted water. Once the water bubbles, add 2 cups of edamame pods. Cook them for 4 to 5 minutes until they are tender. Drain the pods and set them aside. This step softens the beans and makes them easier to eat. In a large skillet, heat 3 tablespoons of olive oil over medium heat. When the oil shimmers, add 4 cloves of minced garlic. Sauté for 1 to 2 minutes until the garlic smells great but does not turn brown. Then, stir in 1 tablespoon of red chili flakes. Cook for another 30 seconds to let the spices blend well. Add the cooked edamame to the skillet. Toss the pods in the garlic and chili oil mixture until they are well coated. Drizzle with 1 tablespoon of soy sauce and 1 teaspoon of sesame oil. Toss again to mix everything evenly. Take the skillet off the heat, then sprinkle with 1 teaspoon of sea salt and 1 tablespoon of fresh lime juice. Mix gently to combine. Finally, serve the edamame in a bowl and top with 1 tablespoon of chopped fresh cilantro for a bright finish. Enjoy your spicy garlic edamame! To make the best edamame, always start with fresh pods. Use large pots for boiling. Add enough salt to the water. This step gives flavor to the pods. Boil the edamame for 4-5 minutes. You want them tender but not mushy. Drain them well and set aside. This keeps them from getting soggy. Spice is key in this recipe. Start with 1 tablespoon of red chili flakes. If you like more heat, add extra flakes. You can also adjust the spice while cooking. Taste the mixture before adding the edamame. This way, you can find your perfect balance. Pairing with lime juice helps tone down the heat too. For a fun twist, serve edamame in small bowls. Add a sprinkle of lime juice right before serving. This brightens the flavors and adds freshness. You can also pair it with cold drinks. Try it with ice-cold sake or a crisp beer. Garnishing with cilantro makes it look fancy. Enjoy this dish as a snack or appetizer! {{image_2}} You can easily make Spicy Garlic Edamame vegan. The main ingredients are already plant-based. Just ensure the soy sauce is vegan. If you want more protein, add tofu or chickpeas. Both options work great with the spicy garlic flavor. You can switch up the spices to change the taste. Instead of red chili flakes, try cayenne or smoked paprika. This will give a different kick to your edamame. You can also add ginger for a fresh twist. Experimenting with spices makes cooking fun! Mix in other veggies to elevate your dish. Bell peppers or snap peas add color and crunch. You can also toss in cooked quinoa for a hearty meal. If you like a creamy texture, try adding a scoop of avocado. These combinations keep the recipe exciting every time you make it! To keep your spicy garlic edamame fresh, store leftovers in an airtight container. Make sure to let them cool completely before sealing. Place the container in the fridge. Proper storage helps maintain flavor and texture for up to three days. When it's time to enjoy your leftovers, reheat them gently. You can use a skillet over medium heat. Add a splash of olive oil if needed. Stir often until they are warm. This method keeps the edamame tasty and prevents them from becoming soggy. If you want to keep your spicy garlic edamame longer, freezing is a great option. First, let them cool completely. Spread them in a single layer on a baking sheet. Freeze for about an hour. Once frozen, transfer them to a freezer bag. They can last up to three months in the freezer. When ready to eat, thaw in the fridge and reheat as mentioned before. Edamame are young soybeans picked before they fully ripen. They are bright green and often served in their pods. This snack is nutritious, packed with protein, fiber, and vitamins. You can find them in many Asian dishes. Edamame is great for a healthy snack or appetizer. Yes, you can prepare spicy garlic edamame ahead of time. Cook the edamame and garlic mixture as directed, then cool it down. Store it in an airtight container in the fridge. When ready to serve, just reheat in a skillet. This keeps the flavors fresh and delicious. Many Asian restaurants serve great spicy garlic edamame. Look for places that focus on Japanese or Asian fusion cuisine. I recommend trying local sushi bars or izakayas. They often have unique twists on this popular dish. Don’t hesitate to ask the staff for their recommendations. To adjust serving sizes, simply scale the ingredients up or down. For example, if you want to serve six people, increase the edamame to 3 cups. You can also adjust spices to taste. Just remember to keep the same ratios for the oil and garlic. This way, you maintain the flavor balance. This blog covers making spicy garlic edamame from scratch. We explored essential ingredients, step-by-step cooking methods, and tips for a perfect dish. I shared variations for different diets, plus storage tips to keep leftovers fresh. Now, you have the tools to make a tasty snack that impresses. Remember, cooking is about experimenting. Try new flavors and enjoy your edamame just how you like it.

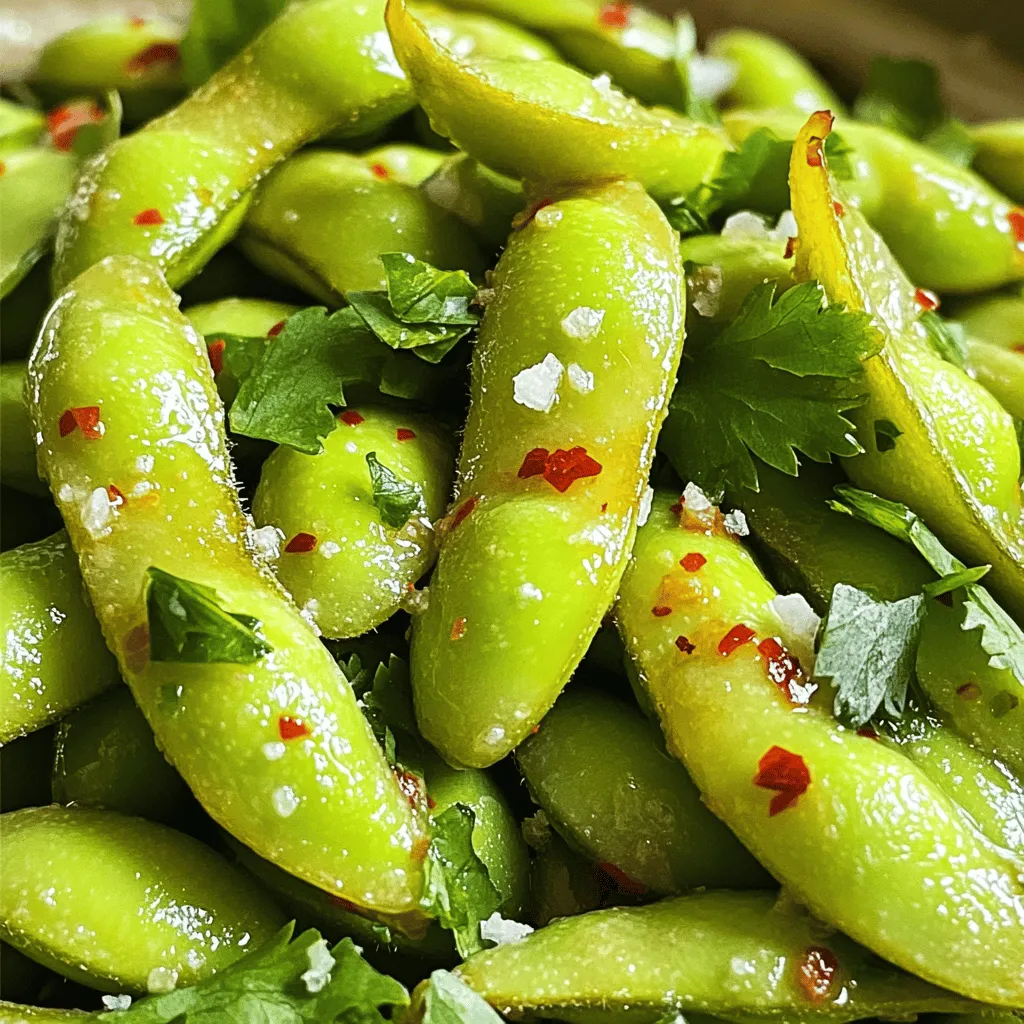
Spicy Garlic Edamame Flavorful and Easy Recipe

Craving a quick, flavorful snack? Look no further than this Spicy Garlic Edamame recipe! In just a few simple steps,

To make Lemon Herb Quinoa Stuffed Peppers, gather these fresh ingredients. They blend well for a tasty dish. - 4 medium bell peppers (any color) - 1 cup quinoa, rinsed - 2 cups vegetable broth - 1 cup cherry tomatoes, halved - 1 cup spinach, chopped - ½ cup red onion, finely chopped - 2 cloves garlic, minced - 1 lemon (zest and juice) - 1 teaspoon dried oregano - 1 teaspoon dried thyme - Salt and pepper to taste - ¼ cup feta cheese (optional, for topping) - Fresh parsley for garnish Each of these ingredients plays a key role. Bell peppers are the perfect vessel for the stuffing. Quinoa serves as a hearty base, while the broth adds flavor. Fresh vegetables like cherry tomatoes and spinach bring bright colors and nutrients. Aromatic herbs and spices lift the dish. You can top with feta cheese for a salty kick and sprinkle parsley for a fresh finish. When you choose your ingredients, go for the best quality. Fresh produce makes a big difference in taste. Enjoy the vibrant flavors of this dish! First, preheat your oven to 375°F (190°C). This step is key for even cooking. Next, take your bell peppers and cut off the tops. Remove the seeds and membranes inside. Place the peppers in a baking dish, cut side up. This way, they will hold the filling nicely. In a medium saucepan, bring 2 cups of vegetable broth to a boil. Once boiling, add 1 cup of rinsed quinoa. Cover the pan and lower the heat. Let it simmer for about 15 minutes. When the time is up, turn off the heat and keep it covered for 5 more minutes. This helps the quinoa fluff up. In a large skillet, heat a drizzle of olive oil over medium heat. Start by adding the finely chopped red onion and minced garlic. Cook them until the onion turns soft, about 3-4 minutes. Next, add the chopped spinach and stir until it wilts. Then, toss in the halved cherry tomatoes. Mix in the cooked quinoa, lemon zest, lemon juice, oregano, thyme, salt, and pepper. Stir everything well for about 2 minutes. This mix is full of flavor! Now, it’s time to fill the peppers. Spoon the quinoa mixture into each bell pepper. Press down gently to pack the filling. If you like, sprinkle feta cheese on top. Cover the baking dish with foil and bake for 25 minutes. After that, remove the foil and bake for another 10 minutes. The peppers should be tender and slightly charred. Once done, let them cool for a few minutes before serving. Enjoy your delicious lemon herb quinoa stuffed peppers! When picking bell peppers, look for ones that feel firm. They should have smooth skin and vibrant colors. A bright color often means more flavor. Avoid peppers with soft spots or wrinkles. These signs show age and less taste. You can change the taste of your stuffed peppers with herbs. Try adding fresh basil or cilantro for a fresh twist. If you want more heat, consider adding a pinch of red pepper flakes. Lemon zest brings brightness, while oregano and thyme add depth. You can cook these stuffed peppers in different ways. The oven gives a nice char. If you use a stovetop, cook them in a skillet with a lid. For slow cooker fans, place the stuffed peppers inside with a bit of broth. Cook on low for 4-6 hours. Each method offers a unique flavor and texture. {{image_2}} You can boost the protein in your stuffed peppers. Adding cooked chicken is a great option. Simply shred or dice the chicken and mix it into the quinoa filling. If you prefer plant-based protein, tofu works well. Press and cube the tofu, then sauté it with the onion and garlic. Beans are another easy protein choice. Black beans or chickpeas add flavor and texture. Just rinse and stir them into your quinoa mix. While quinoa is a star ingredient, you can switch it up with other grains. Brown rice adds a nutty flavor and chewy texture. Cook it just like quinoa, using broth for added taste. Couscous cooks quickly and absorbs flavors well. It gives a light and fluffy filling. Farro is another hearty grain. It has a chewy bite and a rich, earthy taste. Use whatever grain you prefer for a fun twist. Making this dish vegan is simple and tasty. Omit the feta cheese or use a plant-based cheese option. Instead of chicken broth, stick with vegetable broth for cooking. You can also add more veggies, like corn or zucchini, for flavor and color. Use a squeeze of lime instead of lemon for a zesty change. These swaps keep the dish delicious while meeting vegan needs. Store leftover stuffed peppers in an airtight container. Place them in the fridge. They stay fresh for up to three days. Make sure to let them cool before sealing. This helps keep the flavors intact. To reheat in the microwave, place one stuffed pepper on a microwave-safe plate. Cover it with a damp paper towel. Heat for about 1-2 minutes or until hot. For the oven, preheat to 350°F (175°C). Place the peppers in a baking dish. Cover with foil and heat for 15-20 minutes. This keeps the peppers moist and tasty. You can freeze stuffed peppers for longer storage. Wrap each pepper in plastic wrap. Then, place them in a freezer-safe bag. Label the bag with the date. They last up to three months in the freezer. To enjoy, thaw them overnight in the fridge. Reheat as mentioned above. Yes, you can make these stuffed peppers ahead. Prepare them up to the baking step. Store the stuffed peppers in the fridge for up to two days. When ready to eat, bake them as directed. This keeps the flavors fresh and tasty. These stuffed peppers pair well with a simple salad. A green salad with lemon vinaigrette adds a nice touch. You could also serve them with crusty bread or a light soup. For a fun twist, add a side of guacamole or salsa. Yes, stuffed peppers are healthy. They are low in calories and packed with nutrients. The quinoa adds protein and fiber. The veggies add vitamins and minerals, making them a great choice for any meal. Absolutely! You can use any cheese you like. Cheddar, mozzarella, or goat cheese work well. Just remember, cheese adds flavor and creaminess. Adjust the amount to suit your taste. In this article, we covered tasty quinoa stuffed peppers. We explored ingredients, step-by-step instructions, and helpful tips. You can enjoy various filling options and learn how to store leftovers. Stuffed peppers are easy, healthy, and fun to make. Try these recipes with family or friends. You’ll find new favorites with each bite. Embrace the flavors and make them your own! Happy cooking!

Lemon Herb Quinoa Stuffed Peppers Easy and Tasty Meal

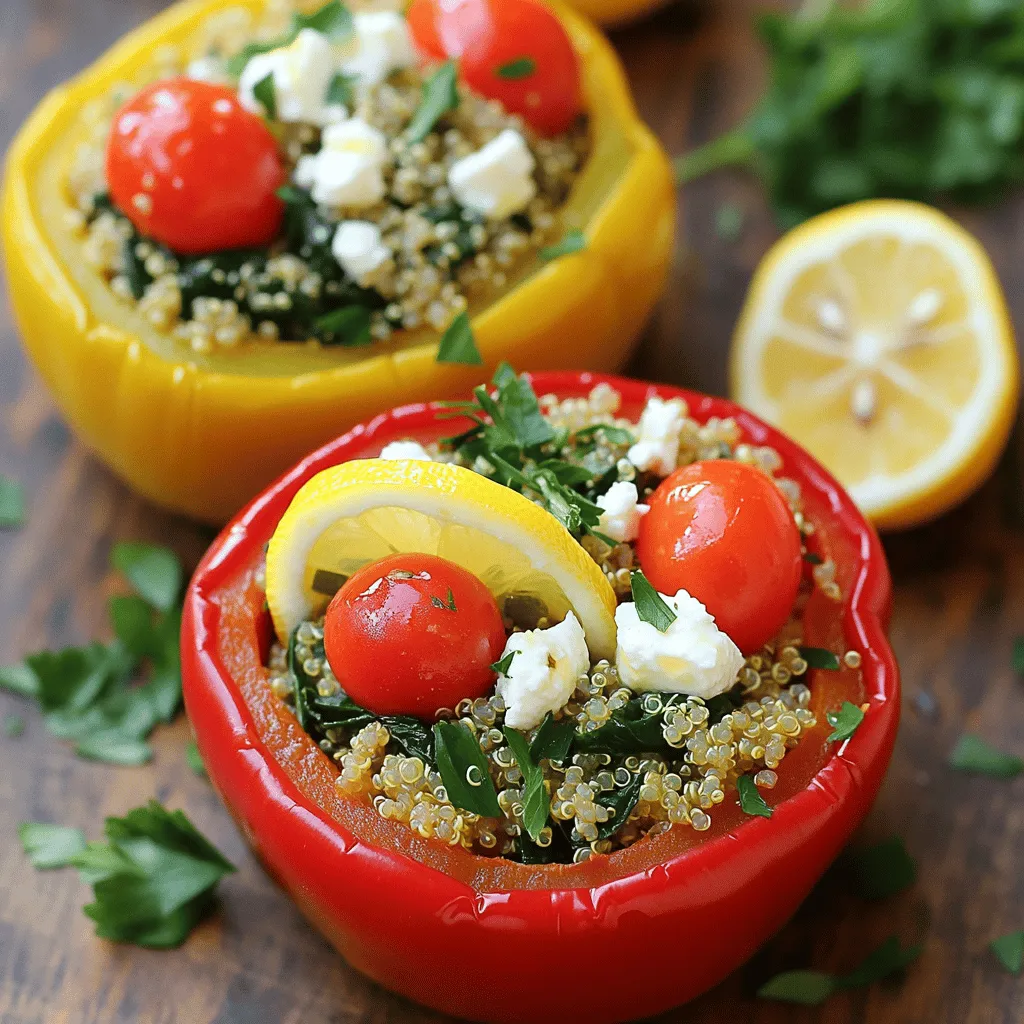
Looking for a tasty and easy meal that packs a punch of flavor? My Lemon Herb Quinoa Stuffed Peppers are

To make this soup, you need a few key ingredients. They work together to create a rich and tasty dish. Here’s what you will need: - 1 can (15 oz) chickpeas, drained and rinsed - 1 can (14 oz) coconut milk - 1 tablespoon olive oil - 1 medium onion, diced - 3 cloves garlic, minced - 1-inch piece ginger, grated - 1 can (14 oz) diced tomatoes - 2 cups vegetable broth - 1 teaspoon ground cumin - 1 teaspoon turmeric powder - ½ teaspoon chili powder (adjust for heat preference) - Salt and pepper to taste - Fresh cilantro, for garnish - Juice of 1 lime These ingredients bring warmth and flavor to the soup. The coconut milk adds creaminess, while the spices give it a lovely kick. You might already have some of these staples in your pantry. Here are the common ones you'll need: - Olive oil - Ground cumin - Turmeric powder - Chili powder - Salt and pepper These items are great to keep on hand. They can enhance many dishes beyond this soup. To make your soup even better, you can add some garnishes or variations. Here are some ideas: - Fresh cilantro - Lime wedges - Avocado slices - Crushed red pepper for extra heat You can also try adding different proteins, like chicken or shrimp, for a heartier meal. Feel free to mix and match to find your favorite version! Start by heating olive oil in a large pot over medium heat. Once hot, add the diced onion. Cook it for about five minutes until it turns soft and clear. This step builds a nice base for your soup. Next, toss in the minced garlic and grated ginger. Stir them for two minutes. You want to release their lovely smells. Now it's time to add the spices. Add ground cumin, turmeric powder, and chili powder. Mix well to coat the onions. This helps the spices bloom and fills your kitchen with wonderful aromas. After the spices are well mixed, pour in the diced tomatoes along with their juice. Then add the drained chickpeas and vegetable broth. Stir everything together and bring the mix to a gentle simmer. Let it cook for about ten minutes. This allows the flavors to blend nicely. Once the soup simmers, it’s time for the coconut milk. Stir it in, and season with salt and pepper to taste. Let it cook for an additional five minutes. This adds a rich, creamy texture to your soup. Now, it’s blending time. Use an immersion blender to puree the soup to your desired smoothness. If you prefer a chunkier texture, blend just a portion in a standard blender. After blending, squeeze the juice of one lime into the soup. This adds a bright flavor that balances the creaminess. Stir well and taste. Adjust the seasoning if needed. Serve your soup hot and garnish with fresh cilantro for a pop of color and flavor. Enjoy! To boost the taste of your soup, use fresh spices. Ground spices lose flavor over time. Always check the freshness of your spices before adding them. Adding lime juice at the end brightens the dish. Fresh cilantro adds a nice touch too. If you like heat, adjust the chili powder. Start with less, then taste and add more if needed. This way, you control the spice level. For a creamy texture, use full-fat coconut milk. It adds richness and depth. If you want a chunkier soup, blend only part of the soup. This keeps some chickpeas whole for texture. Using an immersion blender lets you control the smoothness easily. If you like a thinner soup, add more vegetable broth. Keep adjusting until you find your perfect consistency. When cooking with coconut milk, stir well to avoid separation. Heat it gently; high heat can cause it to break. Add coconut milk toward the end of cooking. This keeps its flavor bright and fresh. If your soup looks too oily, stir in some broth to balance it. Coconut milk can solidify in the fridge, so warm it up before using. Always taste as you go to ensure balanced flavors. {{image_2}} This soup is already vegan and gluten-free! The chickpeas and coconut milk make it rich and creamy without any animal products or gluten. If you want to change things up, use vegetable broth made from scratch. This can boost the flavor even more. You can also add more veggies like spinach or sweet potatoes for extra nutrients. If you like spice, add more chili powder or fresh chili peppers. You can also use crushed red pepper flakes. Start with a small amount, then taste. You can always add more heat! Another fun idea is to use jalapeños. Just sauté them with the onions at the start. They give a nice kick to the soup. Want to mix in some protein? You can add tofu, tempeh, or even cooked lentils. Just cube the tofu and sauté it with the onions. If you want to add meat, shredded chicken or shrimp works well. Make sure to cook the meat separately, then stir it in at the end. This keeps the flavors fresh and tasty. Each of these variations can make your creamy coconut chickpea soup unique and delicious. Enjoy trying different twists! After you make this creamy coconut chickpea soup, let it cool first. Once cool, pour it into an airtight container. Make sure to seal it well. Store it in the fridge for up to four days. This way, you can enjoy your soup later without losing any flavor. If you want to keep your soup for longer, freezing is a great option. Use freezer-safe containers or bags. Fill them, but leave some space at the top. This allows the soup to expand as it freezes. You can store it in the freezer for up to three months. Just remember to label your containers with the date. When you're ready to eat the soup, pull it from the fridge or freezer. If frozen, let it thaw in the fridge overnight. For reheating, pour the soup into a pot. Heat it over medium-low heat, stirring often. This keeps the soup smooth and prevents sticking. Add a splash of water or broth if it seems too thick. Enjoy it warm, and feel free to add fresh cilantro or lime juice before serving! Yes, you can use fresh chickpeas. Start by soaking them overnight. After soaking, boil them until tender. This will take about an hour. Canned chickpeas save time, but fresh ones add a nice texture. If you use fresh chickpeas, adjust the cooking time in the recipe. If you don’t have coconut milk, use almond milk or cashew cream. These will change the flavor but keep the soup creamy. You can also try soy milk, but it may not be as rich. For a thicker option, blend soaked cashews with water. To make the soup spicier, add more chili powder or fresh chili peppers. You can also include cayenne pepper for extra heat. If you want a milder soup, reduce the chili powder. You can add a bit of sugar to help balance the heat. In this blog post, we explored how to make creamy coconut chickpea soup. We discussed key ingredients, step-by-step instructions, helpful tips, variations, storage info, and answered common questions. Each part helps you craft this tasty soup with ease. Now, you can enjoy its rich flavors and creamy texture while making it your own. Try experimenting with spices and add-ins to discover your favorite twist. Enjoy your cooking adventure!

Creamy Coconut Chickpea Soup Flavorful and Easy Recipe

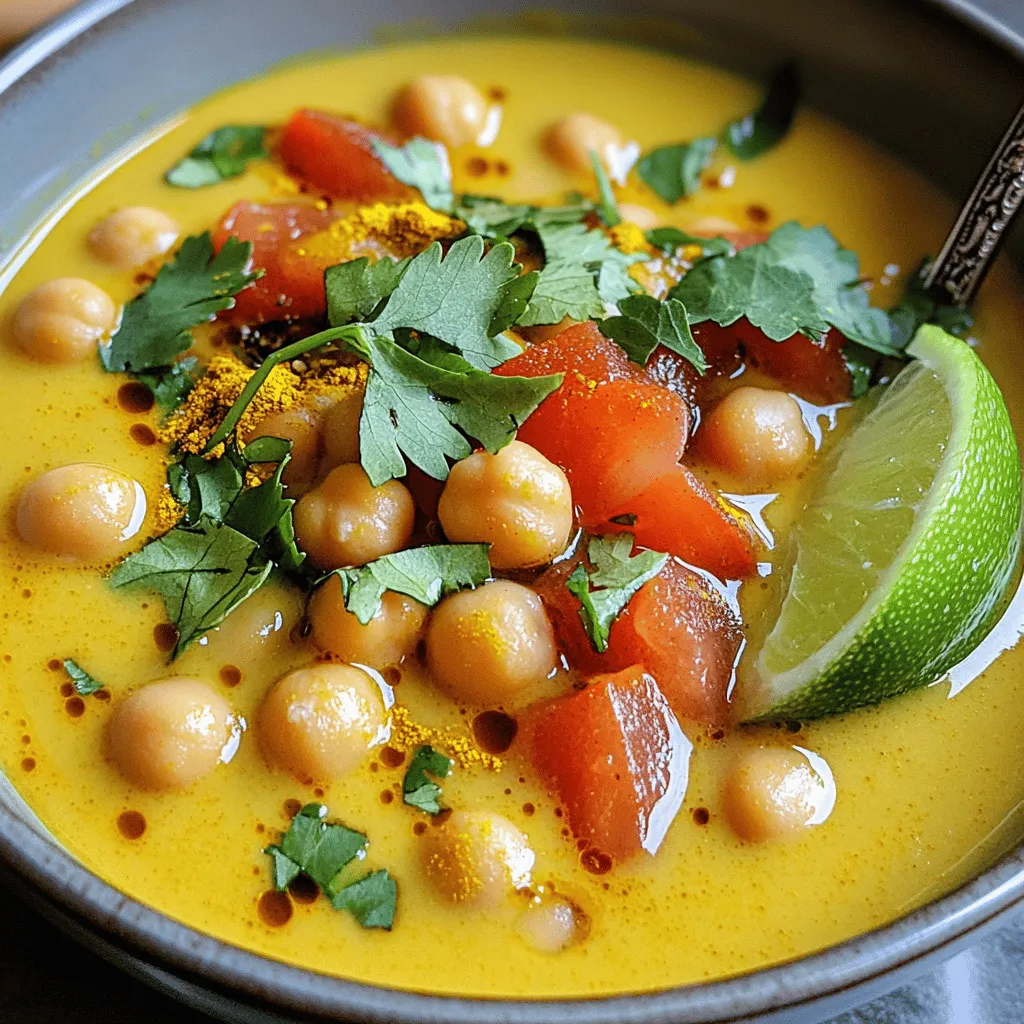
Looking for a warm, hearty meal that’s both tasty and easy to make? You’re in the right place! This Creamy

To make Raspberry Almond Thumbprint Cookies, gather these ingredients: - 1 cup unsalted butter, softened - 1/2 cup granulated sugar - 1/2 cup brown sugar, packed - 1 teaspoon vanilla extract - 1 teaspoon almond extract - 2 1/4 cups all-purpose flour - 1 teaspoon baking powder - 1/4 teaspoon salt - 1/2 cup finely chopped almonds (plus extra for garnish) - 1/2 cup raspberry jam (or your favorite fruit jam) You can easily swap ingredients if needed: - Instead of unsalted butter, use coconut oil for a dairy-free option. - If you lack brown sugar, use an equal amount of granulated sugar mixed with molasses. - No almond extract? Vanilla extract works just fine. - For a gluten-free version, use a 1:1 gluten-free flour blend. These ingredients not only make the cookies tasty but also add some benefits: - Butter adds richness and moisture, making the cookies soft. - Sugar provides sweetness and helps create that nice, chewy texture. - Almonds offer healthy fats and protein, plus a lovely crunch. - Raspberry jam gives a burst of fruity flavor and natural sweetness. Using fresh or high-quality ingredients makes a big difference. They enhance the taste and texture of your cookies. Enjoy experimenting with these simple yet delightful ingredients! Start by preheating your oven to 350°F (175°C). This step warms your oven for even baking. Line a baking sheet with parchment paper. This keeps the cookies from sticking. In a large bowl, cream together 1 cup of softened butter, 1/2 cup granulated sugar, and 1/2 cup brown sugar. Mix until the blend is smooth and fluffy. Then, add 1 teaspoon of vanilla extract and 1 teaspoon of almond extract. Beat this until combined. In a separate bowl, whisk together 2 1/4 cups of all-purpose flour, 1 teaspoon of baking powder, and 1/4 teaspoon of salt. Gradually add this dry mix to the wet ingredients. Stir until just combined. Now, fold in 1/2 cup of finely chopped almonds. This adds great texture and flavor. Next, scoop about 1 tablespoon of dough. Roll it into a ball and place it on the prepared baking sheet. Space each ball about 2 inches apart. Bake in the preheated oven for 12-15 minutes. Look for lightly golden edges to know when they are done. To make the thumbprint, use your thumb or the back of a spoon. Press it gently into the center of each cookie ball. This creates a small well for the jam. Spoon about 1 teaspoon of raspberry jam into each indentation. The jam gives sweetness and lovely flavor. Once the cookies are done baking, remove them from the oven. Let them cool on the baking sheet for a couple of minutes. This helps them set before moving. After that, transfer the cookies to a wire rack. Let them cool completely. For a pretty finish, sprinkle some finely chopped almonds on top. You can also add a light dusting of powdered sugar for a sweet touch. Enjoy your delicious raspberry almond thumbprint cookies! To get the perfect texture, use softened butter. Cold butter makes dough hard. Cream the butter and sugars well. This adds air and makes cookies fluffy. Avoid over-mixing after adding flour. Mix just until combined to keep them tender. Also, let the cookies cool on a wire rack. This helps them set perfectly. One common mistake is not measuring ingredients correctly. Too much flour can make cookies dry. Always spoon flour into a cup and level it off. Another mistake is skipping the resting time. Letting the dough sit helps flavors blend. Lastly, don’t rush the baking. Keep an eye on the cookies, and take them out when edges are golden. To make your cookies look great, use a nice platter. Dust them lightly with powdered sugar for a sweet touch. You can add fresh raspberries next to the cookies. This adds color and flavor. For an extra crunch, sprinkle more finely chopped almonds on top. These simple ideas make your cookies stand out! {{image_2}} You can change the jam for different flavors. Try using strawberry or apricot jam. You can even use lemon curd for a zesty twist. Each filling adds its own taste. This way, you can enjoy new flavors each time you bake. If you need to make these cookies nut-free, skip the almonds. You can use sunflower seeds instead. They give a nice crunch without nuts. This option works well for kids with nut allergies. Just make sure to check all your ingredients for hidden nuts. To make these cookies gluten-free, swap the all-purpose flour with a gluten-free blend. Look for mixes that contain xanthan gum for better texture. The cookies will still taste great. They will be soft and chewy, just like the original. Enjoy these cookies with friends who are gluten-sensitive! To keep your Raspberry Almond Thumbprint Cookies fresh, store them in an airtight container. Line the bottom with parchment paper. This helps absorb moisture and keeps the cookies crisp. Place a piece of wax paper between layers if stacking. Avoid direct sunlight and heat, as these can make cookies stale. Freezing these cookies is easy. First, let them cool completely. Then, place them on a baking sheet in a single layer. Freeze for about an hour until firm. Next, transfer them to a freezer-safe bag or container. Label with the date. You can freeze them for up to three months. To enjoy, thaw at room temperature or warm them in the oven. When stored properly, these cookies last about one week at room temperature. In the fridge, they can last up to two weeks. Remember, the fresher, the better. Enjoy them soon for the best taste and texture! Yes, you can use other nuts! Walnuts, pecans, or hazelnuts work well. Each nut adds its unique flavor and crunch. Just chop them finely for best results. If you have nut allergies, you can skip the nuts altogether. The cookies will still taste great without them. You have many options for jam! Any fruit jam will work. Try strawberry, apricot, or blueberry for a fun twist. You can also use fruit preserves for a chunkier texture. If you want a healthier option, try using fresh fruit puree mixed with a little honey. Look for the edges of the cookies. They should be lightly golden. The centers may seem soft, but that's okay. They will firm up as they cool. If the edges are dark brown, they may be overbaked. Trust your senses; the smell will also guide you! This post covered key ingredients, baking steps, and tips for success. I shared ideas for variations and storage methods. Remember, you can adjust ingredients to match your taste. Pay attention to baking time for perfect cookies. With these tips, you’ll bake cookies everyone loves. Enjoy each step of your baking journey!

Raspberry Almond Thumbprint Cookies Easy and Delicious

Ready to bake something special? These Raspberry Almond Thumbprint Cookies are both easy and delicious! I’ll guide you through each

- 1 cup unsalted butter, softened - 1 cup granulated sugar - 1/2 cup brown sugar, packed - 1 cup pumpkin puree - 2 large eggs - 3 1/2 cups all-purpose flour - 2 teaspoons cream of tartar - 1 teaspoon baking soda - 1 teaspoon ground cinnamon - 1 teaspoon pumpkin pie spice - 1/2 teaspoon salt - 1/2 cup granulated sugar (for rolling) - 2 tablespoons ground cinnamon (for rolling) To make these cookies, gather the ingredients listed above. Start with the butter. It should be soft but not melted. Use a mixer to blend the butter with both sugars until it becomes light and fluffy. This step is key for a good texture. Next, add the pumpkin puree and eggs. Mix well until everything is smooth. This mixture gives the cookies their rich flavor and moisture. In a different bowl, combine the flour, cream of tartar, baking soda, cinnamon, pumpkin pie spice, and salt. This mix adds depth to the cookie's taste. Slowly add this dry mix to the wet mixture. Stir gently. Overmixing can make your cookies tough. For rolling, mix the extra sugar and cinnamon in a small bowl. This will coat the cookie balls before baking. You’ll love the extra sweetness and spice it adds. Each ingredient plays an important role in creating those soft, flavorful cookies you’ll want to share. 1. Preheat the oven and prepare the baking sheet: Set your oven to 350°F (175°C). Line your baking sheet with parchment paper. This step helps the cookies bake evenly and prevents sticking. 2. Creaming butter and sugars: In a large bowl, add 1 cup of softened unsalted butter, 1 cup of granulated sugar, and 1/2 cup of packed brown sugar. Mix them together until the mixture is light and fluffy. This process adds air to the dough, making your cookies soft and chewy. 3. Adding pumpkin puree and eggs: Next, add 1 cup of pumpkin puree and 2 large eggs to the bowl. Beat the mixture until it is well combined. The pumpkin adds moisture and flavor, making these cookies truly special. 1. Combining flour, cream of tartar, and spices: In a separate bowl, whisk together 3 1/2 cups of all-purpose flour, 2 teaspoons of cream of tartar, 1 teaspoon of baking soda, 1 teaspoon of ground cinnamon, 1 teaspoon of pumpkin pie spice, and 1/2 teaspoon of salt. This mixture gives the cookies their structure and enhances the pumpkin flavor. 2. Gradually folding in dry ingredients: Slowly add the dry mix to the wet ingredients. Stir gently until just combined. Be careful not to overmix, as this can make your cookies tough. 1. Rolling dough into balls and coating: In a small bowl, mix 1/2 cup of granulated sugar and 2 tablespoons of ground cinnamon. Scoop out tablespoon-sized portions of dough and roll them into balls. Then, roll each ball in the cinnamon-sugar mixture to coat them well. 2. Baking times and tips for perfect cookies: Place the coated dough balls on the prepared baking sheet, spaced about 2 inches apart. Bake them in the preheated oven for 10 to 12 minutes. The edges should look lightly golden. The centers may seem soft, but that's okay! Let them cool on the baking sheet for 5 minutes. Then transfer them to wire racks to cool completely. Enjoy the warm, cozy flavors of fall in every bite! To get the best cookies, do not overmix the dough. Mix just until you see no dry flour. This keeps your cookies soft and chewy. When placing the cookie balls on the baking sheet, space them about 2 inches apart. This space allows them room to spread while baking. If they are too close, they may stick together. You can add nuts or chocolate chips to the dough. Chopped pecans or walnuts give a nice crunch. Chocolate chips add sweetness and richness. Try swapping spices for a twist. Instead of pumpkin pie spice, use nutmeg or cardamom. Each spice brings a different flavor to your cookies. For a fun serving idea, place cookies on a festive platter. A sprinkle of powdered sugar on top makes them look extra special. Pair these cookies with warm apple cider or a cup of hot cocoa. The flavors blend well and enhance your treat experience. {{image_2}} You can easily make these cookies vegan by swapping the eggs. Use 1/4 cup of unsweetened applesauce for each egg. For a gluten-free version, substitute all-purpose flour with a gluten-free blend. Check that your pumpkin puree is also gluten-free. Feel free to play with spices for fun flavors. Instead of pumpkin pie spice, try nutmeg or allspice. A hint of ginger can add warmth. You can also mix in some cocoa powder for a chocolatey twist. To make these cookies festive, add chopped nuts like pecans or walnuts. Dried cranberries offer a pop of color and tartness. For a holiday touch, sprinkle some edible glitter on top. You can even use cookie cutters to shape the dough for special occasions. Incorporate seasonal ingredients like maple syrup or butterscotch chips. These add a sweet depth to the flavor. Fresh grated orange zest can bring a bright note, perfect for winter baking. For smaller treats, scoop out tablespoon-sized dough and roll them into mini cookies. This way, you can enjoy one without feeling guilty. You can also bake the dough in a pan to make cookie bars. Cut them into squares for easy sharing. These ideas let you enjoy pumpkin spice snickerdoodle cookies in your own way. Each variation keeps the same great taste while adding a unique twist. To keep your Pumpkin Spice Snickerdoodle Cookies fresh, use an airtight container. A glass or plastic container works best. Line it with parchment paper to absorb moisture. Store the cookies at room temperature for up to a week. Refrigeration can dry them out. If you must refrigerate, wrap each cookie tightly. This helps retain moisture. When ready to eat, let them sit at room temperature for a few minutes. You can freeze both dough and baked cookies. For dough, scoop it into balls and place them on a baking sheet. Freeze until firm, then transfer to a freezer bag. This way, you can bake fresh cookies anytime. For baked cookies, allow them to cool completely. Place them in an airtight container with parchment paper between layers. They will stay fresh for up to three months. When you're ready to enjoy, thaw baked cookies at room temperature. For dough, bake straight from the freezer, adding a minute or two to the baking time. Can I use canned pumpkin puree? Yes, you can use canned pumpkin puree. It saves time and works well. Just make sure to choose 100% pure pumpkin. Avoid pumpkin pie filling, as it has added sugars and spices. How can I make these cookies softer or chewier? To make these cookies softer or chewier, you can slightly reduce the baking time. Also, add an extra egg yolk or increase the butter. These tips will help keep moisture in the cookies. What can I do if I don’t have cream of tartar? If you don’t have cream of tartar, you can use lemon juice or white vinegar. Use one teaspoon of either for every two teaspoons of cream of tartar. This will help stabilize the cookies. What should I do if my dough is too sticky? If your dough is too sticky, add a bit more flour. Start with one tablespoon at a time until the dough is manageable. Be careful not to add too much flour, as it can change the texture. How do I know when the cookies are done baking? You will know the cookies are done when the edges are lightly golden. The centers may still look soft. They will firm up as they cool on the baking sheet. Can I reduce the sugar content? Yes, you can reduce the sugar content. Cut the sugar by about 25% for less sweetness. The cookies will still be tasty and have great texture. How can I adjust the recipe for high altitude? For high altitude, you may need to increase flour and decrease sugar slightly. Start by adding two tablespoons of flour. Reduce the sugar by one to two tablespoons. These changes help the cookies rise properly. In this blog post, we explored how to make pumpkin spice snickerdoodle cookies. We covered every step, from getting your ingredients to baking tips. You learned how to achieve the perfect texture and even customize the recipe to fit your needs. Baking these cookies can fill your home with great scents and warm feelings. So gather your ingredients and enjoy creating this treat! Whether for a holiday or a cozy night in, these cookies are sure to please. Happy baking!

Pumpkin Spice Snickerdoodle Cookies Irresistible Treat

Get ready for a treat that blends two seasonal favorites! Pumpkin Spice Snickerdoodle Cookies offer warm, cozy flavors in every

- 1 can (5 oz) tuna, drained - 1 ripe avocado, diced - 1/2 cup cherry tomatoes, halved - 1/4 cup red onion, finely chopped - 1/2 cup cucumber, diced - 1/4 cup Kalamata olives, pitted and sliced - 2 tablespoons fresh parsley, chopped The main ingredients give this salad a fresh and bright taste. Tuna adds protein, while avocado gives healthy fats. The vegetables like cherry tomatoes, red onion, and cucumber add crunch and color. Kalamata olives bring a salty kick, and parsley freshens it all up. - 2 tablespoons lemon juice - 1 tablespoon extra virgin olive oil - Salt and pepper to taste The dressing is simple but powerful. Lemon juice adds zing, while olive oil gives richness. Salt and pepper enhance all the flavors. This salad is not just tasty; it is good for you too. - Caloric content: About 300 calories per serving. - Macronutrient breakdown: Roughly 20g protein, 15g fat, and 20g carbs. - Health benefits of ingredients: Tuna is high in protein. Avocado is full of healthy fats. The fresh vegetables offer vitamins and fiber. This Mediterranean Avocado Tuna Salad is a feast for your taste buds and a boost for your body. 1. Start by opening the can of tuna. Drain all the liquid out. 2. In a medium bowl, combine the drained tuna and diced avocado. 3. Gently mash the avocado with a fork. Mix until it blends with the tuna but stays chunky. 4. Next, add the halved cherry tomatoes, chopped red onion, diced cucumber, and sliced Kalamata olives to the bowl. 5. Toss in the chopped parsley for a fresh touch. 6. In a small bowl, whisk together lemon juice and extra virgin olive oil. 7. Pour this mixture over the tuna and vegetable blend. 8. Season with salt and pepper to taste. 1. Gently fold all the ingredients together. Make sure you don’t mush the avocado too much. 2. For best flavor, let the salad sit for about 10 minutes. This helps the flavors mix well. 3. Serve the salad in a bowl or on a bed of mixed greens. 4. Garnish with a lemon wedge and a sprinkle of parsley for a fresh look. 1. Use ripe avocados for the best texture and flavor. 2. Adjust the lemon juice to your taste. If you like tang, add more. 3. Ensure all ingredients are evenly mixed. This makes every bite tasty and flavorful. - You can add proteins like chicken or chickpeas for extra nutrients. - Try different herbs like basil or dill for a fresh taste. - Use yogurt or mustard instead of olive oil for a different dressing. - A medium mixing bowl helps combine all the ingredients well. - A sturdy spoon or spatula works best for folding the salad. - Look for low-sodium or organic tuna for a healthier choice. - You can switch fresh vegetables with frozen ones if necessary. {{image_2}} You can change the taste of your Mediterranean Avocado Tuna Salad in fun ways. For a Mediterranean twist, add feta cheese. The salty feta pairs well with the creamy avocado and tuna. It adds a nice tang. If you like heat, try adding jalapeños or a dash of hot sauce. This will give your salad a spicy kick, making it even more exciting. Using seasonal vegetables can make this salad fresh and vibrant. In summer, add bell peppers or zucchini. In fall, consider diced apples or roasted squash. These changes keep the salad interesting. You can also adjust ingredients based on what's in your fridge. If you have extra cucumbers or tomatoes, throw them in. This makes the salad flexible and fun to create. This salad is great in many forms. You can serve it as a sandwich filling. Just spread it between two slices of whole grain bread. It’s a quick lunch! You can also pair it with whole grain crackers or pita bread. This adds a nice crunch and makes a filling snack. Enjoy experimenting with these serving ideas! To keep your Mediterranean avocado tuna salad fresh, use an airtight container. Glass or plastic containers work well. This helps prevent air from getting in. Store it in the fridge right away. Make sure to cover it tightly to keep moisture locked in. You can safely eat the salad for up to two days after making it. Check for signs of spoilage. If the salad smells off or looks brown, it’s time to toss it. Always trust your senses when it comes to food safety. I do not recommend freezing this salad. Freezing can make the avocado mushy. However, if you must freeze it, do so without the avocado. When you want to eat it, thaw it in the fridge and then mix in fresh avocado before serving. This keeps the salad tasting fresh and delicious. This salad lasts about 1 to 2 days in the fridge. Store it in an airtight container. After a day, the avocado may brown, so enjoy it fresh if you can. Yes, you can make it ahead! If you prepare it a few hours before serving, the flavors blend beautifully. Just mix the ingredients and chill them. Add the avocado right before serving to keep it fresh. This salad pairs well with whole grain crackers or pita bread. You can also serve it on a bed of mixed greens. For a heartier meal, try it with roasted veggies or a light soup. This blog post covers how to create a Mediterranean Avocado Tuna Salad. We discussed key ingredients, like tuna, avocado, and fresh veggies, that make this dish healthy and tasty. I described step-by-step instructions to help you mix and serve it perfectly. Remember to customize based on your taste and use seasonal ingredients. In the end, this salad is not just a meal but a delightful experience. Enjoy making it your own!

Mediterranean Avocado Tuna Salad Fresh and Flavorful

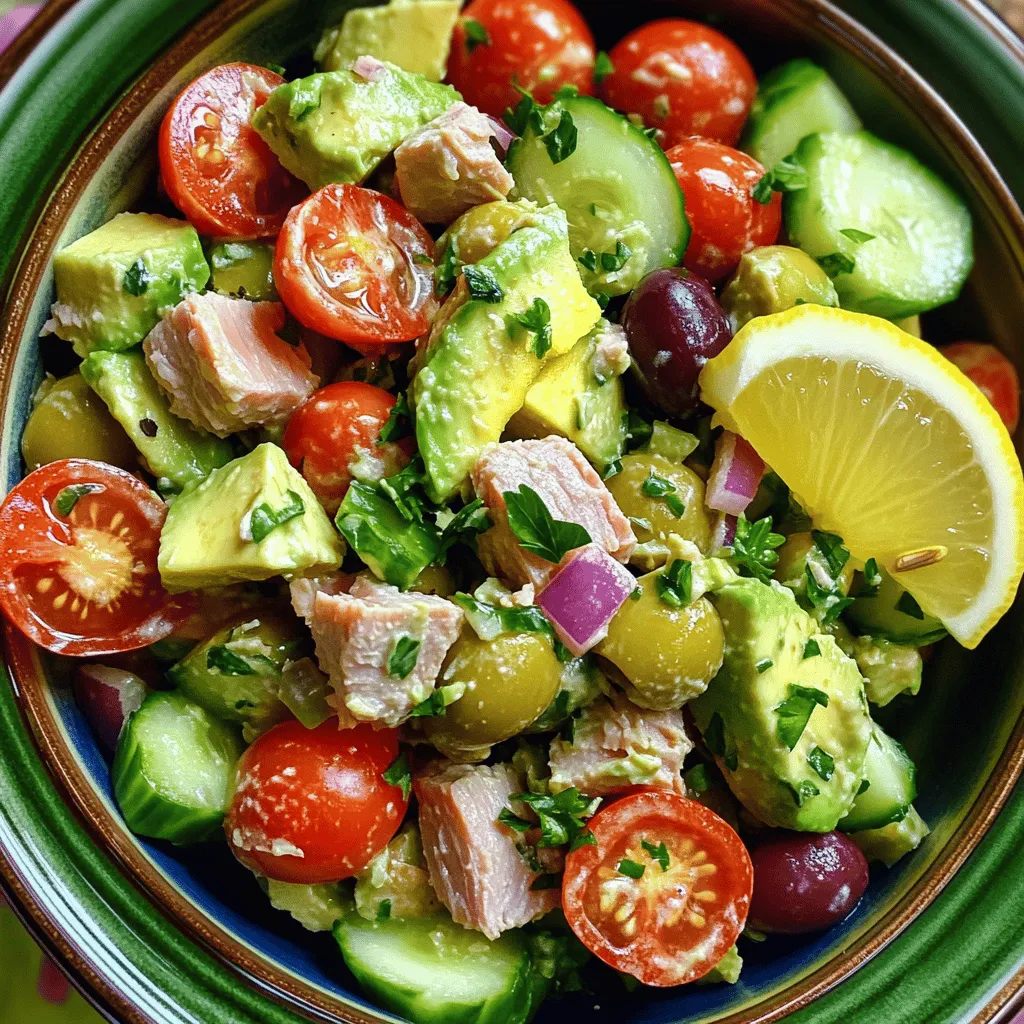
Are you ready to elevate your salad game? This Mediterranean Avocado Tuna Salad is fresh, bold, and bursting with flavor!

- 2 cups fresh strawberries, sliced - 8 ounces cream cheese, softened - 1 cup powdered sugar - 1 teaspoon vanilla extract - 1 cup heavy whipping cream - 1 package (14 ounces) graham crackers - 1/4 cup strawberry jam - Fresh mint leaves for garnish (optional) To make a delicious Strawberry Cheesecake Icebox Cake, gather these ingredients. Fresh strawberries give a burst of flavor. Cream cheese adds richness. Powdered sugar sweetens the mix. Vanilla extract brings a warm note. Heavy whipping cream makes it light and airy. Graham crackers form the base layers. Strawberry jam adds sweetness on top. If you like, use mint leaves for a pretty garnish. Having everything ready makes the process easy. Let's get cooking! To start, take 8 ounces of softened cream cheese. Place it in a mixing bowl. Use an electric mixer to beat it until smooth and creamy. This step is key to a great texture. Next, add 1 cup of powdered sugar. Then, add 1 teaspoon of vanilla extract. Mix these ingredients together until they are well combined. The mixture should be sweet and smooth, with a rich flavor. Now, grab a separate bowl. Pour in 1 cup of heavy whipping cream. Use a mixer to whip it until stiff peaks form. This means the cream should hold its shape well. It should not be runny at all. This step helps the cake stay fluffy. Take a 9x13 inch baking dish. Start with a layer of graham crackers at the bottom. Next, spread a layer of the cream cheese mixture over the crackers. Then, add a layer of sliced strawberries. Repeat this layering process. Go for another round of graham crackers, cream cheese mixture, and strawberries. Keep going until you use all your ingredients. Make sure to finish with a layer of the cream cheese mixture on top. Drizzle 1/4 cup of strawberry jam over the top layer. Use a spatula to spread it evenly. Cover your dish with plastic wrap. Place it in the fridge for at least 4 hours, or overnight if you can wait. This chilling time helps all the flavors blend well. To make your cheesecake smooth, use cream cheese that is at room temperature. Cold cream cheese will be lumpy and hard to mix. When you beat it, it should blend easily. When you whip the cream, aim for stiff peaks. This means the cream should stand tall when you lift the whisk. Gently fold the whipped cream into the cream cheese mix. Use a spatula and go slowly. This keeps the air in the whipped cream, making your cake light and fluffy. For the best results, chill your cake for at least four hours. Overnight is even better! This time lets the flavors mix well. The layers will also set, making it easier to slice. If you rush this step, the cake may fall apart when you cut it. To make your cake look extra special, consider garnishing it. Fresh mint leaves add a nice touch and a pop of color. You can also add more sliced strawberries on top. This makes your dessert look fresh and inviting. A well-presented cake is sure to impress your family and friends! {{image_2}} You can change the fruit in your icebox cake. Try using blueberries or raspberries instead of strawberries. These fruits add new flavors and colors. Blueberries give a sweet, juicy burst. Raspberries add a tangy kick. You can mix different fruits too. This way, every bite feels fresh and fun. If you want a lighter version, reduce the sugar. You can swap regular cream cheese for low-fat cream cheese. This keeps the taste rich while cutting calories. You can also use a sugar substitute for the powdered sugar. This makes it even better for those watching their sugar intake. For a gluten-free option, use gluten-free graham crackers. Many brands offer these today. Make sure to check the label for safety. The rest of the recipe stays the same. This way, everyone can enjoy this tasty treat without worry. To store your icebox cake, cover it tightly with plastic wrap. This helps keep it fresh. You can also use a lid if your dish has one. Keep it in the fridge. Avoid placing it near strong-smelling foods to prevent flavor changes. Your strawberry cheesecake icebox cake stays fresh in the refrigerator for about 3 to 5 days. After that, the texture may change. The layers could become soggy, and it might lose its yummy taste. Yes, you can freeze this dessert! To do it safely, first, cut it into squares. Wrap each piece in plastic wrap. Then, place them in a freezer bag. Make sure to remove all the air. This will help keep them fresh for about 2 months. When you want to enjoy a piece, let it thaw in the fridge overnight. Yes, you can use frozen strawberries. Just thaw and drain them first. This helps avoid excess water in your cake. Keep in mind that fresh strawberries offer a better taste and texture. The icebox cake needs at least 4 hours to set. I recommend chilling it overnight. This gives the flavors time to blend and the texture to firm up nicely. If you want a lighter option, try Greek yogurt. You can also use mascarpone cheese for a rich flavor. Both will change the taste but will still work well. Yes! This cake is perfect for making ahead. You can prepare it a day or two before serving. Just keep it covered in the fridge until you're ready to enjoy. Whipped cream is ready when it forms stiff peaks. This means it should hold its shape when you lift the beaters. Be careful not to over-whip it, or it may turn grainy. Absolutely! You can use digestive biscuits or even chocolate cookies for a twist. They add a nice flavor and change the cake's overall taste. Store any leftover cake in an airtight container. It will stay fresh in the fridge for about 3 days. It’s best enjoyed cold, so keep it chilled. Yes, you can freeze it! Just wrap it well in plastic wrap and foil. It can last for up to a month in the freezer. Thaw it in the fridge before serving for the best texture. You learned how to make a tasty icebox cake using fresh strawberries and cream cheese. We covered ingredients, step-by-step instructions, tips for a creamy texture, and variations to suit different needs. Remember to chill your cake to get the best taste and texture. With these easy steps, your dessert will impress everyone. Enjoy making this treat, and have fun experimenting with flavors. Your icebox cake will be a hit at any gathering.

Strawberry Cheesecake Icebox Cake Delightful Treat

Are you ready to impress at your next gathering? This Strawberry Cheesecake Icebox Cake is a showstopper. With layers of

- 1 pound baby carrots, washed and trimmed - 4 tablespoons unsalted butter, melted - 4 cloves garlic, minced - 2 tablespoons fresh parsley, finely chopped - 1 tablespoon fresh thyme leaves To create garlic butter herb roasted carrots, you need a few simple ingredients. Baby carrots provide a sweet, tender base. Unsalted butter adds richness, while garlic gives it a strong, savory punch. Fresh parsley and thyme bring color and aroma. These herbs add a fresh touch to the dish. - 1 teaspoon honey - Salt and freshly ground black pepper to taste Honey adds a hint of sweetness. Salt and black pepper enhance all the flavors. These seasonings help the carrots shine. With just a few more steps, you will have a dish full of flavor. - Alternative butters (vegan options, flavored butters) - Different herbs (rosemary, dill) If you want to switch things up, use vegan butter for a plant-based option. Flavored butters can also add a unique twist. You can swap parsley and thyme for herbs like rosemary or dill. Each choice will change the taste, making it your own. 1. Preheat the oven: Start by setting your oven to 400°F (200°C). This high heat helps the carrots roast well. 2. Prepare the baking sheet: Line a baking sheet with parchment paper. This makes cleanup a breeze and prevents sticking. 3. Mix the garlic herb butter: In a bowl, combine 4 tablespoons of melted unsalted butter, 4 minced garlic cloves, 2 tablespoons of chopped parsley, and 1 tablespoon of fresh thyme. Add 1 teaspoon of honey, salt, and black pepper to taste. Stir everything until it blends nicely. 1. Toss the carrots: Add 1 pound of washed and trimmed baby carrots to your bowl. Toss them in the garlic herb butter mixture. Make sure each carrot is well coated. This adds tons of flavor. 2. Arrange on the baking sheet: Spread the coated carrots in a single layer on the lined baking sheet. This helps them roast evenly. 1. Cooking time and temperature: Roast the carrots in the preheated oven for about 25-30 minutes. The high temperature helps them caramelize and become tender. 2. Turning for even cooking: Halfway through cooking, turn the carrots. This ensures they brown evenly and get that perfect fork-tender texture. When they look golden brown and are soft, they are ready. To get the best carrots, look for baby carrots. They should feel firm and have a bright color. Freshness matters. If you can, buy them from a local market. Always wash and trim the carrots before cooking. This step keeps them clean and ready to go. Coating the carrots evenly is key. When you toss them in the garlic butter mix, make sure every carrot gets some. This helps them roast well and taste great. Use a large bowl for mixing. This way, you can easily toss them without making a mess. For a rich taste, you can add parmesan cheese. Sprinkle it on right before serving. The cheese melts slightly and gives a nice salty flavor. Another great tip is to use lemon zest. It adds a bright, fresh taste. Just a little goes a long way. Mix it into the butter before tossing the carrots. Your dish will taste even better! Be careful not to overcrowd the baking sheet. If you pile the carrots too close, they will steam instead of roast. This can make them soggy. Also, adjust cooking time if your oven runs hot or cold. Check the carrots at the 20-minute mark. They should be fork-tender and golden brown when done. If they need more time, give them a few extra minutes. {{image_2}} You can add spices for fun. Try cumin for warmth or paprika for a kick. Both spices bring new flavors. You can also swap honey for maple syrup. Maple syrup adds a sweet, rich taste. This twist makes the dish unique. If you want a vegan version, use plant-based butter. This keeps the dish tasty and dairy-free. For gluten-free options, check the butter label. Most brands are gluten-free, so you can enjoy this dish without worry. Get creative by using other root veggies. Parsnips add a sweet, nutty flavor. Beets bring a beautiful color and earthiness. Mix and match to find your favorite combo. Each swap can turn this dish into something new. To keep your garlic butter herb roasted carrots fresh, place them in an airtight container. This helps prevent moisture loss. Store the container in the fridge. Leftovers last about 3 to 5 days. Make sure they cool down before sealing the container. This keeps the carrots crispy and tasty. When it's time to enjoy your leftovers, you can reheat them in two ways: in the oven or microwave. For the oven, preheat to 350°F (175°C). Spread the carrots on a baking sheet and heat for about 10-15 minutes. This method keeps them crisp. If you use the microwave, place them in a dish, cover with a damp paper towel, and heat in 30-second bursts. If your carrots turn soggy, you can crisp them up by quickly roasting them in a hot pan. Yes, you can freeze roasted carrots! Allow them to cool completely before freezing. Place them in a freezer-safe bag or container. They can last up to 3 months in the freezer. To reheat, it's best to thaw them in the fridge overnight. Then, roast them in the oven at 350°F (175°C) for about 10-15 minutes until warmed through. This helps maintain their flavor and texture. Garlic butter herb roasted carrots take about 40 minutes. You spend 10 minutes on prep and 25-30 minutes cooking. Preheat your oven to 400°F (200°C). This heat cooks the carrots evenly and gives them a nice brown color. Make sure to check them halfway through. Turning the carrots helps them cook well all over. Yes, you can use regular carrots. Just peel and cut them into sticks. Aim for pieces about the same size as baby carrots. This helps them cook evenly. Regular carrots may take a bit longer, so check for doneness often. You want them to be fork-tender and golden brown. Roasted carrots pair well with many dishes. They go nicely with grilled chicken or fish. You can also serve them alongside rice or quinoa. For a fresh touch, sprinkle some extra parsley on top before serving. This adds color and flavor. Try serving them with a squeeze of lemon juice for brightness. Roasting garlic butter herb carrots is simple and rewarding. We covered essential ingredients, like baby carrots and fresh herbs. I shared tips for perfect roasting and tasty variations to spark your creativity. You can even try different herbs or sweeteners. Remember, correct storage and reheating keep leftovers delicious. With these steps, you can make a great side dish for any meal. Now, gather your ingredients, and enjoy roasting these tasty carrots!

Garlic Butter Herb Roasted Carrots Delightfully Simple

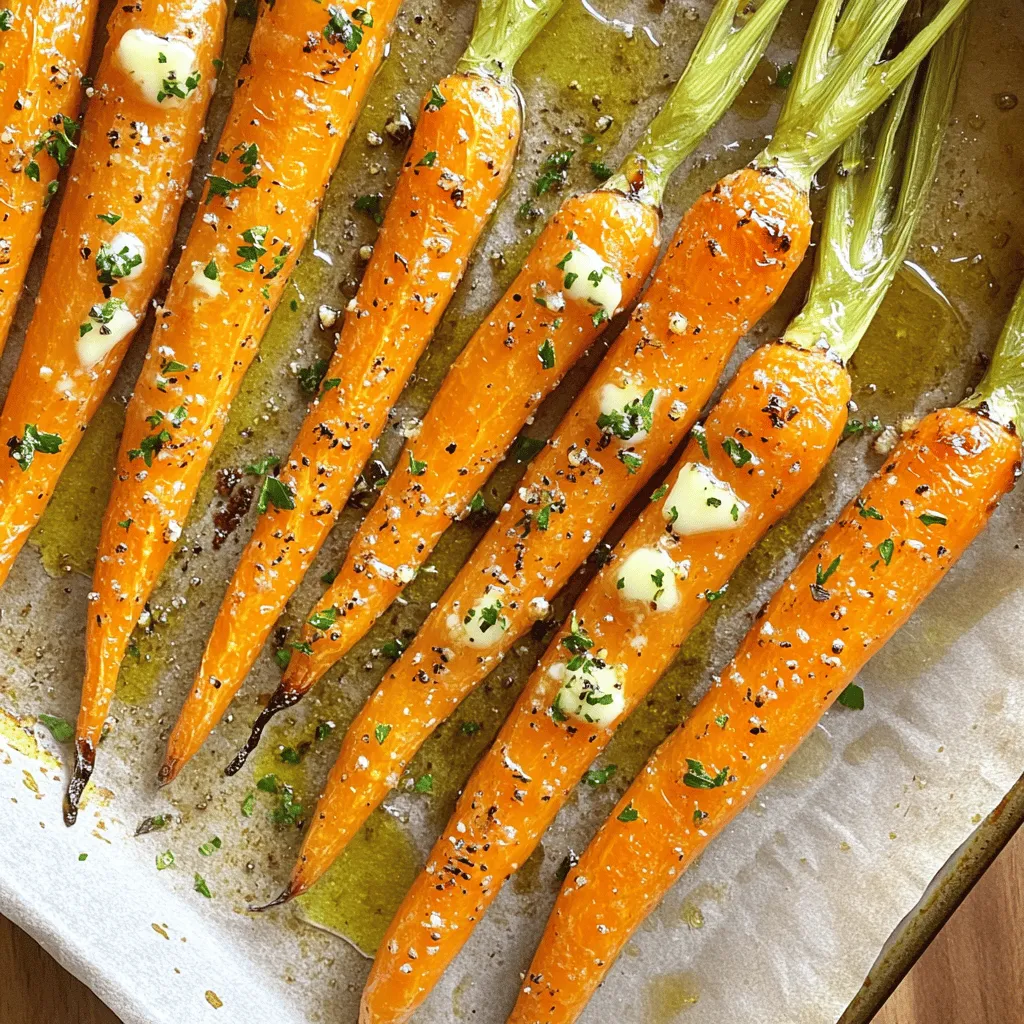
Are you ready to elevate your carrot game? Garlic Butter Herb Roasted Carrots are simple yet bursting with flavor. With

- 2 ripe bananas, frozen - 2 tablespoons unsweetened cocoa powder - 2 tablespoons peanut butter (or almond butter) - 1 cup almond milk (or any milk of your choice) - 1 tablespoon honey or maple syrup (optional) - 1/4 teaspoon vanilla extract I love using simple, fresh ingredients for my smoothie bowl. The frozen bananas give it a nice, thick texture. They should be ripe for the best flavor. Unsweetened cocoa powder adds a rich chocolate taste. I use peanut butter for its creamy texture and healthy fats. You can swap it for almond butter if you like. Almond milk is my go-to for a lighter feel, but feel free to choose any milk you enjoy. Honey or maple syrup can sweeten the bowl if you prefer it sweeter. A splash of vanilla extract brightens all the flavors. - Sliced banana - Chopped nuts - Granola - Coconut flakes - Dark chocolate shavings Toppings make the smoothie bowl fun and pretty. I love adding sliced banana for extra fruitiness. Chopped nuts add a nice crunch and protein. Granola gives it a delightful texture. Coconut flakes bring a tropical twist. Finally, dark chocolate shavings are a treat that makes it even more special. Try mixing and matching these toppings to find your favorite combo! You can also add more fruits or seeds based on what you have. First, take your frozen bananas and put them in a blender. Add two tablespoons of cocoa powder. This gives your smoothie a rich, chocolatey flavor. Next, add two tablespoons of peanut butter. You can also use almond butter if you prefer. Pour in one cup of almond milk. This makes the smoothie creamy and smooth. If you want it sweeter, add one tablespoon of honey or maple syrup. Finally, include a splash of vanilla extract for extra taste. Now it’s time to blend! Turn on your blender to high speed. Blend until the mixture is smooth and creamy. If the mix sticks to the sides, stop and scrape it down. Once blended, taste your smoothie. If you want it sweeter, add more honey or maple syrup. Blend again to mix it all in. Pour your smooth mix into a bowl. Use a spatula to smooth the surface. Now comes the fun part—adding toppings! Start with sliced bananas on top. Then sprinkle on chopped nuts and granola for a crunch. Add some coconut flakes for a tropical twist. Finish it off with dark chocolate shavings. This makes your smoothie bowl look beautiful and tasty. Enjoy your delicious creation right away! Frozen bananas are key to a creamy smoothie bowl. They give the bowl a thick, rich feel. Use ripe bananas for the best taste. When you blend, start on low speed. Gradually increase to high speed. This helps break down the frozen fruit smoothly. Stop to scrape the sides if needed. Blending takes about 30 seconds for a perfect mix. If you want to adjust sweetness, try honey or maple syrup. These natural sweeteners work well. You can also skip them if you like a less sweet taste. Taste the smoothie before adding more. This lets you find the right balance of flavors. Remember, the cocoa powder adds a bit of bitterness, so sweetening is essential. Make your smoothie bowl look great with toppings. Arrange sliced bananas in a fan shape. Sprinkle chopped nuts in little piles. Add granola for crunch. Use colorful coconut flakes and dark chocolate shavings for flair. The more colors, the more fun it looks! A well-presented bowl makes eating even more enjoyable. {{image_2}} To make a vegan Chocolate Peanut Butter Banana Smoothie Bowl, swap honey for maple syrup. Maple syrup adds sweetness and keeps it plant-based. Use any non-dairy milk you like, such as oat milk or soy milk. This keeps the bowl creamy and delicious. You can boost nutrition by adding spinach or avocado. They add creaminess and nutrients without changing the taste much. Try using flavored nut butters, like chocolate or cinnamon. These can give your smoothie bowl a fun twist. Use seasonal fruits to change up the flavor. In spring, add strawberries. In fall, toss in some pumpkin. Adjust your toppings based on the season too. For summer, try fresh berries or nuts, and in winter, use cozy spices like cinnamon or nutmeg. You can prepare the smoothie base in advance. Just blend all your ingredients, then store it in the fridge. To freeze ingredients, chop ripe bananas and place them in a bag. Lay the bag flat in the freezer. This makes it easy to use later. The smoothie bowl can last in the fridge for about one day. For optimal freshness, keep it in an airtight container. This will help it stay creamy and tasty. To reheat, pour the smoothie into a pot and warm it gently over low heat. Stir often to avoid burning. You can refreeze the smoothie if it hasn’t been blended yet. But after blending, I don’t recommend refreezing. It can change the texture. To make this smoothie bowl, follow these steps: 1. Gather your ingredients. You need frozen bananas, cocoa powder, peanut butter, almond milk, honey, and vanilla extract. 2. Blend the base. In a blender, mix the frozen bananas, cocoa powder, peanut butter, almond milk, honey (if you want), and vanilla extract. 3. Blend until smooth. Keep blending on high speed until it is creamy. Stop to scrape down the sides if needed. 4. Taste and adjust. Try your smoothie. If you want it sweeter, add more honey or maple syrup and blend again. 5. Pour and smooth. Pour the smoothie into a bowl and use a spatula to make the surface level. 6. Add toppings. Top it with sliced bananas, chopped nuts, granola, coconut flakes, and dark chocolate shavings. 7. Serve and enjoy! Grab a spoon and dig in! Each ingredient brings great health benefits: - Bananas: They are rich in potassium, which helps heart health. They also provide energy and fiber. - Cocoa powder: It is a source of antioxidants. These help protect your body from damage. Plus, it can boost your mood. - Peanut butter: It adds healthy fats and protein. This keeps you full and satisfied. - Almond milk: It is low in calories and has no dairy. This is good for those who are lactose intolerant. - Honey: It can be a natural sweetener. It also has some vitamins and minerals. Yes, you can add protein powder! Here are some tips: - Choose your powder: Pick a flavor that matches chocolate or banana. Chocolate protein powder works well. - Add a scoop: Blend one scoop with your other ingredients for a protein boost. - Adjust liquid: If your smoothie is too thick, add a little more almond milk. - Try plant-based options: Look for pea or hemp protein if you prefer vegan options. Adding protein powder makes this bowl even more filling and helps with muscle recovery! This blog post showed you how to make a tasty chocolate peanut butter banana smoothie bowl. We covered all the key ingredients, step-by-step instructions, tips for the perfect texture, fun variations, and how to store it. Enjoy a nutritious treat that is easy to customize. Try different toppings and flavors. You can make this smoothie bowl fit your taste and health goals. Simple changes can turn it into a perfect snack any time.

Chocolate Peanut Butter Banana Smoothie Bowl Delight

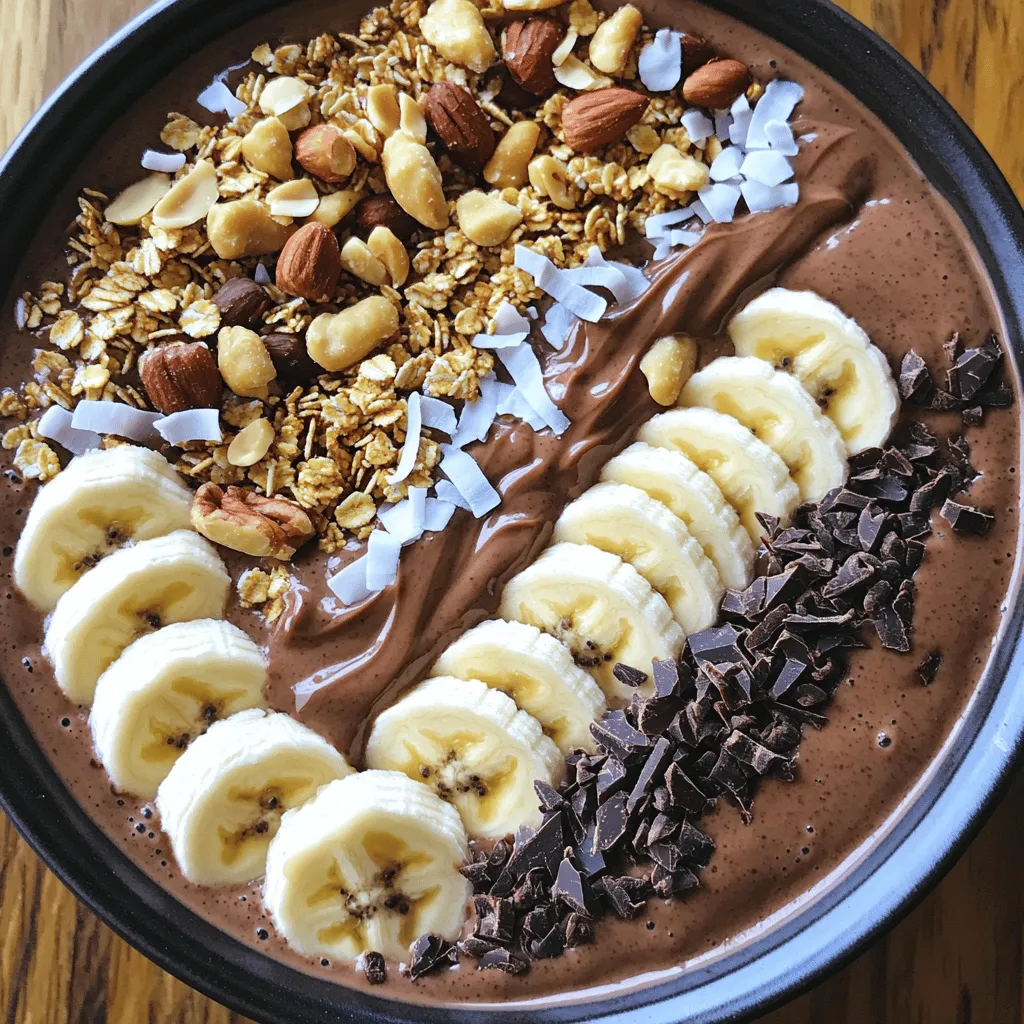
Are you ready to indulge in a delicious and healthy treat? The Chocolate Peanut Butter Banana Smoothie Bowl Delight is

To make a great Thai red curry noodle soup, you need these key items: - 200g rice noodles - 1 tablespoon coconut oil - 1/2 onion, finely chopped - 2 cloves garlic, minced - 1 tablespoon ginger, grated - 2 tablespoons red curry paste - 400ml coconut milk - 600ml vegetable broth - 1 red bell pepper, thinly sliced - 1 cup snap peas - 2 tablespoons soy sauce - 1 tablespoon lime juice - Fresh cilantro leaves for garnish - Lime wedges for serving These ingredients create a rich, creamy, and flavorful soup. The rice noodles serve as the base, soaking up all the delicious flavors. Coconut oil adds a nice depth to the dish. The red curry paste gives it a spicy kick. If you want to elevate your soup, consider these fun extras: - Sliced jalapeños for heat - Chopped green onions for crunch - Chopped peanuts for texture - Bean sprouts for freshness These garnishes not only add flavor but also create a beautiful presentation. Sometimes, you may not have everything on hand. Here are some easy swaps: - Use any noodles if you can't find rice noodles. - Olive oil can replace coconut oil. - Any broth works if you lack vegetable broth. - Use red bell pepper or any other colorful veggies. These options keep the spirit of the soup while making it easier to prepare. To start, cook the rice noodles. Follow the package instructions closely. This step usually takes around 4 to 6 minutes. Once they are ready, drain the noodles. Set them aside for later use. Next, grab a large pot. Heat one tablespoon of coconut oil over medium heat. Add half a finely chopped onion, two minced garlic cloves, and one tablespoon of grated ginger. Sauté this mix for about 3 to 4 minutes. You want the onion to turn soft and clear. Then, stir in two tablespoons of red curry paste. Cook this for one more minute. This helps the flavors combine and become rich. Now, pour in 400ml of coconut milk and 600ml of vegetable broth. Stir it well to blend everything together. Bring the soup to a gentle simmer. Add in one thinly sliced red bell pepper and one cup of snap peas. Let these cook for about 3 to 5 minutes until they are tender. Season the soup with two tablespoons of soy sauce and one tablespoon of lime juice. This adds a nice zing to your dish. Finally, to serve, place the cooked rice noodles in bowls. Ladle the hot curry soup over the noodles. Top with fresh cilantro leaves and add lime wedges on the side for squeezing. Enjoy! To cook rice noodles, follow the package directions carefully. Start by boiling water in a pot. Once the water boils, add the noodles and stir gently. Cook them until they are al dente, which means they are firm but not hard. Drain the noodles and rinse them with cold water. This stops the cooking process and keeps them from sticking together. Set them aside for later. Seasoning is key to making your soup tasty. When you add red curry paste, let it cook for a minute. This helps the flavors bloom. After adding coconut milk and broth, season with soy sauce and lime juice. This adds depth to the soup. Taste it as you go. You can always adjust the seasoning to your liking. Presentation makes your dish more appealing. Serve the soup in deep bowls to show off the colors. Add the vibrant veggies on top for a pop of color. A sprinkle of fresh cilantro adds freshness and looks great. Don’t forget lime wedges on the side. They let everyone add a splash of tangy flavor right at the table. Enjoy your beautiful creation! {{image_2}} You can make this soup vegetarian or vegan easily. Just swap the vegetable broth for a veggie base. Use the same coconut milk for creaminess. For protein, add tofu. Firm tofu works best. Cut it into cubes and pan-fry until golden. Toss it in during the last few minutes of cooking. The flavors blend well, and the texture is delightful. If you love protein, there are many choices. Tofu is great for a plant-based meal. Shrimp adds a sweet and briny taste. Just add it to the soup when you add the vegetables. Cook until pink and tender. If you prefer chicken, use cooked, shredded chicken. Add it in the same way as shrimp. Each protein option makes the soup more filling. Rice noodles are classic for this dish, but you can try other noodles too. Udon noodles give a thick and chewy texture. Soba noodles add a nutty flavor. For a gluten-free option, use rice noodles or buckwheat noodles. Each type changes the soup's feel. Experiment to find your favorite noodle! To keep your Thai Red Curry Noodle Soup fresh, store it in an airtight container. Let the soup cool to room temperature first. This helps avoid condensation, which can make the soup watery. Place the container in the fridge and use it within three days for the best taste. When it’s time to enjoy your leftovers, heat the soup on the stove over medium heat. Stir it often to prevent sticking. If the soup seems thick, you can add a splash of vegetable broth or water to thin it out. Warm it until it reaches your desired temperature. You can freeze the soup to enjoy later, but remember to leave out the noodles. They can become mushy when thawed. Store the soup in a freezer-safe container and make sure to label it with the date. It will keep well for up to three months. To thaw, move it to the fridge overnight before reheating. Thai Red Curry Noodle Soup comes from Thailand. This dish blends rich curry flavors with noodles. Thai cooks use local herbs and spices. The soup is a warm comfort food. It reflects Thailand's vibrant culinary culture. You can find it in street food stalls and restaurants across the country. To add spice, use more red curry paste. You can also add fresh chili peppers. Thai bird's eye chilies work well for heat. Another option is to sprinkle chili flakes on top. Taste as you go to find the right level for you. This will keep the flavors balanced while boosting the heat. Yes, you can prepare this soup ahead of time. Store the broth and noodles separately. This helps keep the noodles from getting mushy. You can keep the soup in the fridge for up to three days. Reheat it gently on the stove before serving. Add fresh herbs just before serving for the best taste. If you need a substitute, use almond milk or soy milk. These alternatives will change the flavor slightly. You can also use cashew cream for a rich texture. Adding a bit of peanut butter can mimic the creaminess of coconut milk. Just be sure to adjust the seasonings to maintain the soup's balance. Thai Red Curry Noodle Soup is a rich dish filled with flavor. We covered key ingredients, cooking steps, and helpful tips. You can adjust flavors and add your favorite proteins. Remember to store leftovers properly for another meal. This soup is versatile, so feel free to experiment with it. Enjoy making this warming dish that can fit any taste!

Thai Red Curry Noodle Soup Tasty and Simple Recipe

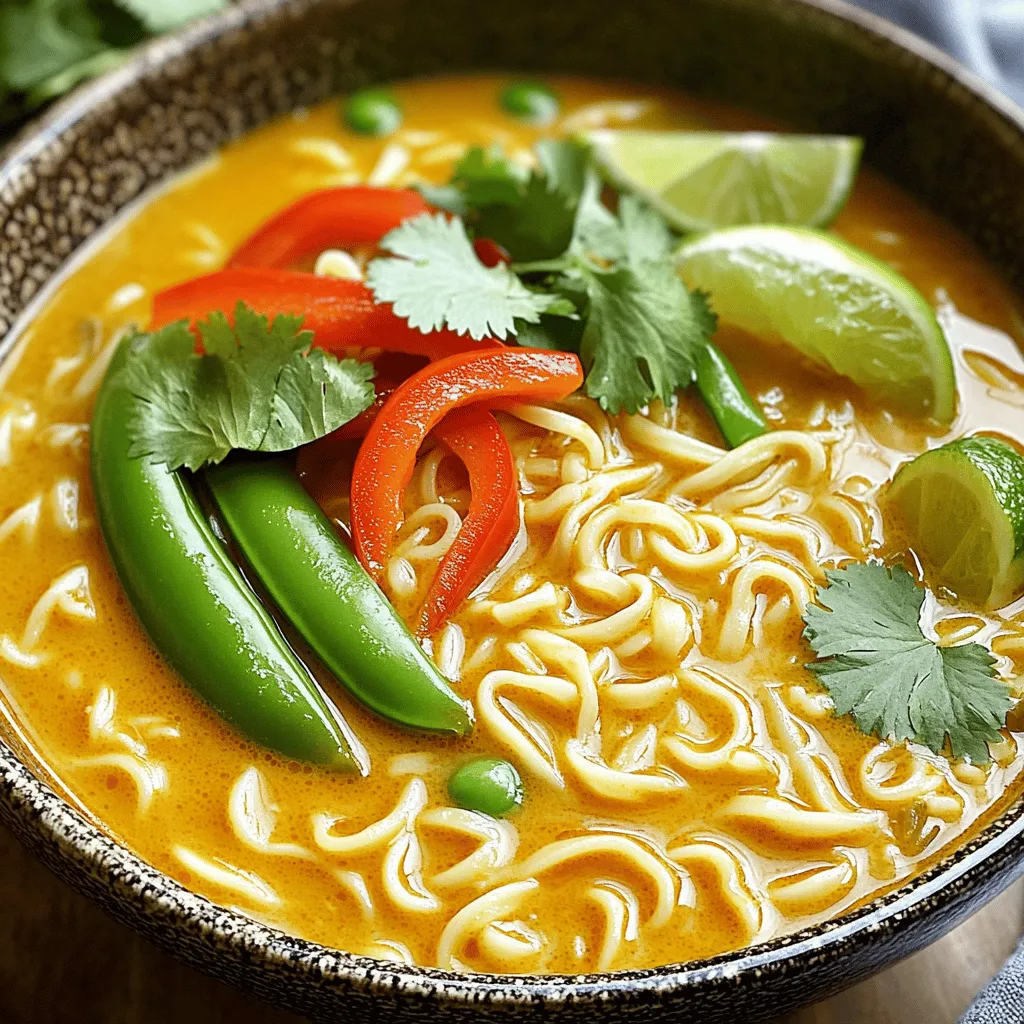
Craving something warm and flavorful? Thai Red Curry Noodle Soup is your answer! This dish combines rich spices with smooth,

Older posts
Newer posts
← Previous Page1 … Page24 Page25 Page26 … Page86 Next →

dsad

© 2026 Cooking Wells • Built with GeneratePress

Our Policies

  • Copyright Policy
  • Cookie Policy
  • GDPR Policy
  • Privacy Policy
  • Disclaimer
  • Terms Of Use

More Information

  • Home
  • About
  • Contact
  • Appetizers
  • Dessert
  • Dinner
  • Drinks
©2026, Cooking Wells About Back To Top