Skip to content
DisclaimerTerms Of UseGDPR PolicyCookie Policy

Cooking Wells

  • Home
  • Drinks
  • Appetizers
  • Dinner
  • Dessert
  • About
  • Contact
  • Privacy Policy
DisclaimerTerms Of UseGDPR PolicyCookie Policy

NO-ING-IMG

To make your Sheet-Pan Sesame Ginger Tofu Bowls, gather these key ingredients: - 1 block (14 oz) firm tofu, pressed and cubed - 3 tablespoons sesame oil - 2 tablespoons soy sauce - 1 tablespoon fresh ginger, grated - 3 cloves garlic, minced - 1 tablespoon maple syrup - 1 teaspoon rice vinegar - 2 cups broccoli florets - 1 red bell pepper, sliced - 2 carrots, thinly sliced - 1 cup cooked brown rice or quinoa - 2 green onions, chopped - Toasted sesame seeds for garnish Each ingredient brings a unique flavor to the dish. Tofu acts as the protein base. Sesame oil adds a rich, nutty taste. Soy sauce gives it a savory kick. Ginger and garlic add warmth and depth. The veggies provide crunch and color. You can elevate your bowls with these optional garnishes: - Chopped cilantro - Sliced avocado - Lime wedges These add freshness and a burst of flavor. Feel free to mix and match based on what you like! If you need substitutions, here are some ideas: - Use tempeh instead of tofu for a different texture. - Swap soy sauce with tamari for a gluten-free option. - Choose seasonal veggies like zucchini or snap peas for variety. These swaps make the dish your own. Enjoy experimenting with flavors that suit your taste! Start by gathering all your ingredients. You will need: - 1 block (14 oz) firm tofu, pressed and cubed - 3 tablespoons sesame oil - 2 tablespoons soy sauce - 1 tablespoon fresh ginger, grated - 3 cloves garlic, minced - 1 tablespoon maple syrup - 1 teaspoon rice vinegar - 2 cups broccoli florets - 1 red bell pepper, sliced - 2 carrots, thinly sliced - 1 cup cooked brown rice or quinoa - 2 green onions, chopped - Toasted sesame seeds for garnish Wash and chop the vegetables. Press the tofu to remove extra water. This helps it soak up the flavors later. In a medium bowl, whisk together sesame oil, soy sauce, ginger, garlic, maple syrup, and rice vinegar. This mix gives the dish its tasty kick. Toss the cubed tofu in half of this marinade. Spread the tofu on one half of a lined baking sheet. Next, add the broccoli, bell pepper, and carrots to the same bowl. Pour in the rest of the marinade, mixing well. Spread the veggies on the other half of the baking sheet. This way, they all cook together and share flavors. Preheat your oven to 400°F (200°C). Once preheated, place the baking sheet inside. Bake for 25-30 minutes. The tofu should turn golden, and the veggies should be tender. Stir halfway through cooking for even browning. While the tofu and veggies bake, cook your brown rice or quinoa according to the package instructions. This part can be done at the same time as baking. When everything is done, assemble your bowls. Layer the rice or quinoa first, then add the roasted tofu and veggies. Finish with green onions and sesame seeds for a pretty touch. Tofu can be tricky, but I have you covered. Start with firm tofu. Press it well to remove extra water. This step helps it soak up all the marinade. Cut the tofu into cubes, so they cook evenly. When you spread the tofu on the baking sheet, give each piece space. This helps it get crispy. Bake it until it turns golden brown for the best flavor. Choose vegetables that roast well together. I love using broccoli, red bell pepper, and carrots in this dish. They add color and crunch. You can also try zucchini or snap peas. Just make sure to cut them into even sizes. This way, they cook at the same time. Toss all the veggies in the same marinade for a burst of flavor. How you present your food makes a big difference. Use colorful bowls to show off the bright veggies. Start with a layer of brown rice or quinoa at the bottom. Then, add the roasted tofu and veggies on top. For a final touch, sprinkle chopped green onions and toasted sesame seeds. Drizzle a bit of sesame oil over the top for extra flavor. This makes your dish look as good as it tastes! {{image_2}} You can boost the flavor of your Sheet-Pan Sesame Ginger Tofu Bowls with simple tweaks. Try adding a splash of sriracha for heat. A sprinkle of lime juice can brighten the dish. You could also mix in some chopped cilantro or fresh mint for a fresh taste. Adding crushed peanuts or cashews on top gives a nice crunch and adds protein. These small changes can make a big impact on taste. If you want to change up the protein in your bowls, consider using chickpeas or edamame. Both options are great for adding protein and fiber. You can roast them in the oven just like the tofu. If you prefer meat, chicken or shrimp works well too. Simply marinate them in the same sauce as the tofu. They will soak up the flavors nicely. Using seasonal vegetables keeps your bowls fresh and exciting. For spring, try asparagus or snap peas. In summer, zucchini or corn adds a sweet touch. Fall brings butternut squash or Brussels sprouts, which pair well with the sesame flavor. In winter, root veggies like sweet potatoes or beets can add warmth. Feel free to mix and match according to what's available. This way, your dish stays colorful and nutritious all year long. To store leftovers, let the tofu bowls cool down first. Use airtight containers for the best results. You can keep them in the fridge for up to four days. Make sure to separate the rice or quinoa from the veggies and tofu. This helps keep everything fresh. For reheating, use the oven or a skillet. Preheat the oven to 350°F (175°C). Place the tofu and veggies on a baking sheet. Heat for about 10 to 15 minutes. If using a skillet, add a splash of water to avoid sticking. Cook on medium heat until warm. Avoid using a microwave as it can make the tofu soggy. This recipe is perfect for meal prep. You can double the ingredients so you have more servings. Prepare the tofu and veggies ahead of time. Store them in separate containers. When you’re ready to eat, just reheat and serve over fresh rice or quinoa. This saves time and keeps meals exciting throughout the week. Yes, you can easily make this recipe gluten-free. Just use gluten-free soy sauce or tamari instead of regular soy sauce. This swap keeps the flavor while making it safe for gluten-free diets. Tofu is done when it turns golden brown and has a crispy edge. It should feel firm to the touch. You can also taste a piece to check if it has a nice texture. These tofu bowls shine on their own but pair well with simple sides. Try a light cucumber salad or steamed edamame. You can also serve it with a side of kimchi for a spicy kick. Tofu bowls are simple, tasty, and full of nutrition. We explored key ingredients, from fresh vegetables to optional garnishes, and how to personalize your dish. You learned to prep, marinate, and bake your ingredients for great flavor. We offered tips on getting the perfect tofu and ideas for fun variations. Remember to store leftovers properly and try reheating for meals later. These bowls are easy to adapt and enjoy all week. Dive into your kitchen and create your own delicious tofu bowl today!

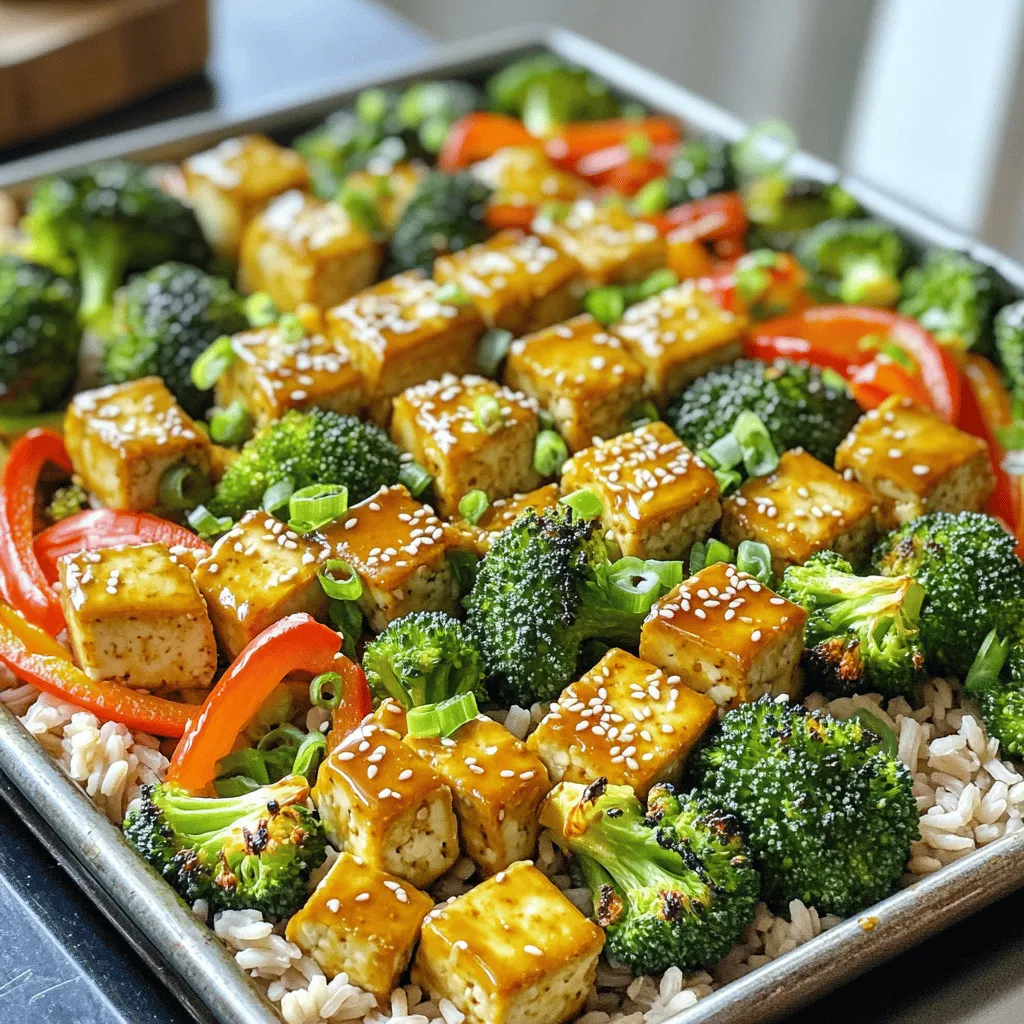
Sheet-Pan Sesame Ginger Tofu Bowls Healthy Delight

Looking for a quick, healthy meal? My Sheet-Pan Sesame Ginger Tofu Bowls are the answer. Packed with flavor and easy

- 1 cup chocolate cookie crumbs - 3 tablespoons unsalted butter, melted - 8 oz cream cheese, softened - 1/2 cup powdered sugar - 1/2 cup heavy whipping cream - 1 teaspoon vanilla extract - 1 cup fresh raspberries - 1/4 cup dark chocolate chips, melted - Extra raspberries and chocolate shavings for garnish When you pick ingredients, quality matters. Use fresh raspberries for the best taste. Look for ripe, firm berries with no spots. Choose unsalted butter for better control of salt in the recipe. Cream cheese should be soft, not cold, for easy mixing. When you buy chocolate chips, go for dark chocolate for rich flavor. The higher the cocoa content, the better. You can swap some ingredients to fit dietary needs. If you want a gluten-free option, use gluten-free chocolate cookie crumbs. For a dairy-free version, look for vegan cream cheese and coconut cream instead of heavy cream. If someone is allergic to nuts, check labels on cookie crumbs. Always read the package for hidden ingredients. To start, grab a medium bowl. Mix together 1 cup of chocolate cookie crumbs with 3 tablespoons of melted unsalted butter. Stir until it looks like wet sand. Press this mixture firmly into the bottom of your serving cups. This forms the crust layer. Chill the cups in the fridge for about 10 minutes to help it set. Next, take a large mixing bowl. Beat 8 ounces of softened cream cheese with an electric mixer. Keep mixing until it’s smooth and creamy. Then, add in 1/2 cup of powdered sugar and 1 teaspoon of vanilla extract. Mix until everything is well blended. In a separate bowl, whip 1/2 cup of heavy cream. Beat until stiff peaks form. Now, gently fold this whipped cream into your cream cheese mixture. Once combined, swirl in 1/4 cup of melted dark chocolate. This creates a nice marbled effect. Now, it’s time to assemble. Spoon the cheesecake mixture over the chilled cookie crusts in each cup. Fill them nearly to the top, leaving space for the raspberries. Next, place fresh raspberries on top. Press them gently into the cheesecake. Finally, chill the cups in the fridge for at least 2 hours. This cooling time helps the cheesecake firm up. Before serving, drizzle some melted chocolate on top and add extra raspberries and chocolate shavings for garnish. Enjoy your delightful treat! To get a smooth, creamy cheesecake, soften the cream cheese first. Use an electric mixer to blend it until it’s soft. Mix in the powdered sugar and vanilla well. This step helps avoid lumps. When you whip the heavy cream, whisk until you see stiff peaks. Gently fold this whipped cream into the cream cheese mix. This keeps the cheesecake light and airy. Garnishing makes your cheesecake cups look nice. After chilling, add fresh raspberries on top. Press them gently into the cheesecake. This makes them stick better. Drizzle melted chocolate over the cups for a tasty touch. Use a grater to add chocolate shavings too. This adds a nice look and taste. One common mistake is not chilling the crust long enough. Always chill for at least 10 minutes. This helps it set properly. Another mistake is overmixing the cream cheese. Mix just until smooth; lumps are okay. Remember not to skip the whipping of the cream. It keeps your cheesecake light and fluffy. Lastly, let the cheesecake chill for at least 2 hours before serving. This helps it firm up nicely. {{image_2}} You can change up the flavors in your cheesecake cups. Try using strawberries instead of raspberries. You can also mix in lemon zest for a bright twist. Another great option is to add some peanut butter to the cream cheese mix. This gives a rich, nutty taste. You can even swap chocolate for white chocolate. Each option offers a new taste adventure. While chocolate cookie crumbs shine, other crusts can be just as tasty. Use graham crackers for a classic flavor. You can also try crushed Oreos for a fun twist. If you want something healthier, blend nuts and dates to form a base. Each crust change can add a unique touch to your cheesecake cups. You can make these cheesecake cups vegan or gluten-free with a few swaps. For a vegan version, use coconut cream instead of cream cheese. You can sweeten it with maple syrup. Use gluten-free cookies for your crust. This way, everyone can enjoy these treats without worry. Each adaptation keeps the great taste while meeting dietary needs. To keep your no-bake raspberry chocolate cheesecake cups fresh, store them in the fridge. Use an airtight container to prevent moisture loss. If you stack the cups, place parchment paper between them. This avoids a messy situation. You want to keep the toppings intact. These cheesecake cups last about 3 to 4 days in the fridge. If you want to extend their life, you can freeze them. Wrap each cup in plastic wrap, then place them in a freezer-safe bag. They will stay good for about 2 months. Thaw them in the fridge before serving. You don’t need to reheat cheesecake cups. They taste best cold. If you have leftover crust or filling, store them separately. You can use the crust for other desserts or as a topping. Keep the filling in a sealed container in the fridge for up to 3 days. Yes, you can make these cheesecake cups ahead of time. It is a great way to save time. Prepare the cups and chill them in the fridge. You can make them one day before serving. This will enhance the flavors and texture. Just be sure to cover them well to prevent drying out. These cheesecake cups can last up to three days in the fridge. After that, they may start to lose their freshness. Keep them in an airtight container for best results. If you see any changes in color or smell, it’s best to discard them. Absolutely! You can use many fruits in place of raspberries. Strawberries, blueberries, or blackberries work well. Each fruit will add a unique flavor. Just make sure to adjust the sweetness if needed. Fresh fruits will give your cheesecake cups a lovely touch. In this blog post, we explored how to make No-Bake Raspberry Chocolate Cheesecake Cups. We covered the ingredients needed, measured details, and substitutions for your diet. You learned step-by-step instructions, tips for texture, and common mistakes to avoid. I also shared variations for flavors and crusts, along with storage info for keeping them fresh. Remember, these cups are easy to adapt and delicious. Try different flavors or crusts to find your favorite! Enjoy making this treat and impressing your friends with your skills.

No-Bake Raspberry Chocolate Cheesecake Cups Delight

Are you ready to indulge in a dessert that’s both easy and delicious? My No-Bake Raspberry Chocolate Cheesecake Cups will

- 1 lb boneless, skinless chicken breasts - 2 cups chicken broth - 1 cup heavy cream - 1 cup grated Parmesan cheese - 9 oz cheese tortellini (fresh or frozen) - 2 cups spinach (fresh or frozen) The chicken breasts form the heart of this dish. They soak up all the flavors. The chicken broth keeps it juicy and tender. Creamy elements like heavy cream and Parmesan cheese add richness. Tortellini gives you that comforting bite. Spinach adds color and nutrition. - 1 teaspoon Italian seasoning - 1/2 teaspoon black pepper - Fresh parsley, chopped Italian seasoning brings warmth and depth. Black pepper adds a slight kick. Fresh parsley brightens the dish and makes it inviting. These simple seasonings enhance the overall flavor without overpowering. - Slow cooker (at least 4-quart capacity) - Measuring cups and spoons - Forks for shredding Your slow cooker should be large enough for all the ingredients. It ensures even cooking and great taste. Measuring cups help you get the right amounts. Shredding the chicken requires two forks, which makes it easy and quick. Start by placing the chicken breasts in your slow cooker. Pour in 2 cups of chicken broth to keep it moist. Add 2 cloves of minced garlic, 2 tablespoons of butter, 1 teaspoon of Italian seasoning, and 1/2 teaspoon of black pepper. Stir everything together to mix the flavors well. Cover the slow cooker and set it to cook. You can choose to cook on low for 6 hours or on high for 3 hours. This allows the chicken to become tender and fully cooked. Once the time is up, take the chicken out and shred it using two forks. Return the shredded chicken back into the slow cooker for more flavor. Now, it's time to make it creamy! Stir in 1 cup of heavy cream and 1 cup of grated Parmesan cheese until you see it blend nicely. Next, add 9 ounces of cheese tortellini and mix it into the sauce. Let it cook for another 30 minutes on low. If you use frozen spinach, add it in the last 10 minutes. For fresh spinach, stir it in right before serving. This will help it wilt and keep its bright color. Taste the dish and adjust the seasoning if needed. Serve hot, garnished with chopped fresh parsley for a touch of freshness. To get the best taste, adjust the seasoning to your liking. You can add more black pepper or Italian seasoning for a stronger flavor. Taste your dish as it cooks. This way, you can add just what it needs. Choosing the right tortellini also matters. Fresh tortellini gives a soft texture, while frozen is quick and easy. Both work well in this dish. Just pick the one you prefer. Slow cooking chicken is a great way to keep it juicy. The chicken absorbs all the flavors from the broth and spices. This makes it tender and tasty. To avoid overcooking tortellini, add it later in the cooking process. Let it cook for just 30 minutes on low. This way, it stays firm and doesn't get mushy. Garnishing can make your dish look even better. Use fresh parsley on top for color and a fresh taste. You can also sprinkle more Parmesan cheese for a cheesy finish. When serving, use a large bowl or plate. This helps show off the creamy sauce and colorful spinach. A good presentation makes the meal more inviting. {{image_2}} You can easily swap out chicken for turkey. This change gives a leaner option. Turkey adds a nice twist to the dish. If you want a gluten-free meal, use gluten-free tortellini. This way, everyone can enjoy the meal. You can also try different cheeses like goat cheese or mozzarella. Just remember to adjust the flavors as you go. Adding veggies can boost flavor and nutrition. Bell peppers and mushrooms work well here. They add color and taste. You can also try different sauces. A pesto sauce or a marinara sauce could give a unique twist. Mixing in herbs like basil or oregano can elevate the dish, too. Experiment with what you love most. If you need to speed things up, try an Instant Pot. It cooks the dish much faster. You can make this meal in about 30 minutes. Just follow the same steps but adjust the cooking time. You can also use a stove-top method if you prefer. Just cook the chicken in a pan, and then add everything else. This method provides more control over cooking. To keep your Slow Cooker Chicken Alfredo Tortellini fresh, store it in an airtight container. Make sure it cools down to room temperature first. This dish lasts about 3 to 4 days in the fridge. Always check for any signs of spoilage before eating. You can freeze this dish for later enjoyment. Portion it into freezer-safe containers. It is best to freeze it without the spinach. The dish can last up to 3 months in the freezer. When you are ready to eat, thaw it in the fridge overnight. Reheat it on the stovetop or in the microwave until it is hot throughout. For easy meal prep, divide the dish into individual servings. Store each serving in a separate container. Pair it with a side salad or some garlic bread for a balanced meal. This way, you can enjoy a quick and satisfying lunch or dinner throughout the week. You can make Alfredo sauce at home easily. Start with butter, garlic, and cream. Here’s a simple way: - Melt 2 tablespoons of butter in a pan. - Add 2 cloves of minced garlic and cook for 1 minute. - Pour in 1 cup of heavy cream and stir. - Add 1 cup of grated Parmesan cheese and mix until smooth. This method gives you a fresh and rich sauce. You can also add fresh herbs for extra flavor. Homemade sauce tastes great and is simple to prepare. Yes, you can use frozen chicken in this recipe. It is safe to cook frozen chicken in a slow cooker. However, ensure the chicken cooks thoroughly. Here are some tips: - Increase cooking time by 1 to 2 hours. - Check the chicken’s internal temperature. It should reach 165°F (75°C). - Thawing before cooking is better for even cooking. Frozen chicken can still taste great, but fresh chicken offers better texture. You have many tasty options to serve with this dish. Here are some side dish ideas: - Garlic bread: Perfect for dipping in the creamy sauce. - Salad: A fresh green salad adds a nice crunch. - Steamed vegetables: Broccoli or green beans work well. - Roasted vegetables: Carrots and zucchini make great pairings. These sides complement the rich flavors of the tortellini and make your meal more balanced. Enjoy experimenting with different pairings! This blog post covered how to make Slow Cooker Chicken Alfredo Tortellini. You learned about the main ingredients, seasonings, and cooking essentials. I shared step-by-step instructions for preparing, cooking, and finalizing the dish. You found tips to perfect the flavor and how to store leftovers. I also suggested ingredient swaps and cooking methods. I hope you feel ready to try this tasty recipe. Enjoy experimenting and making it your own!

Slow Cooker Chicken Alfredo Tortellini Comfort Dish

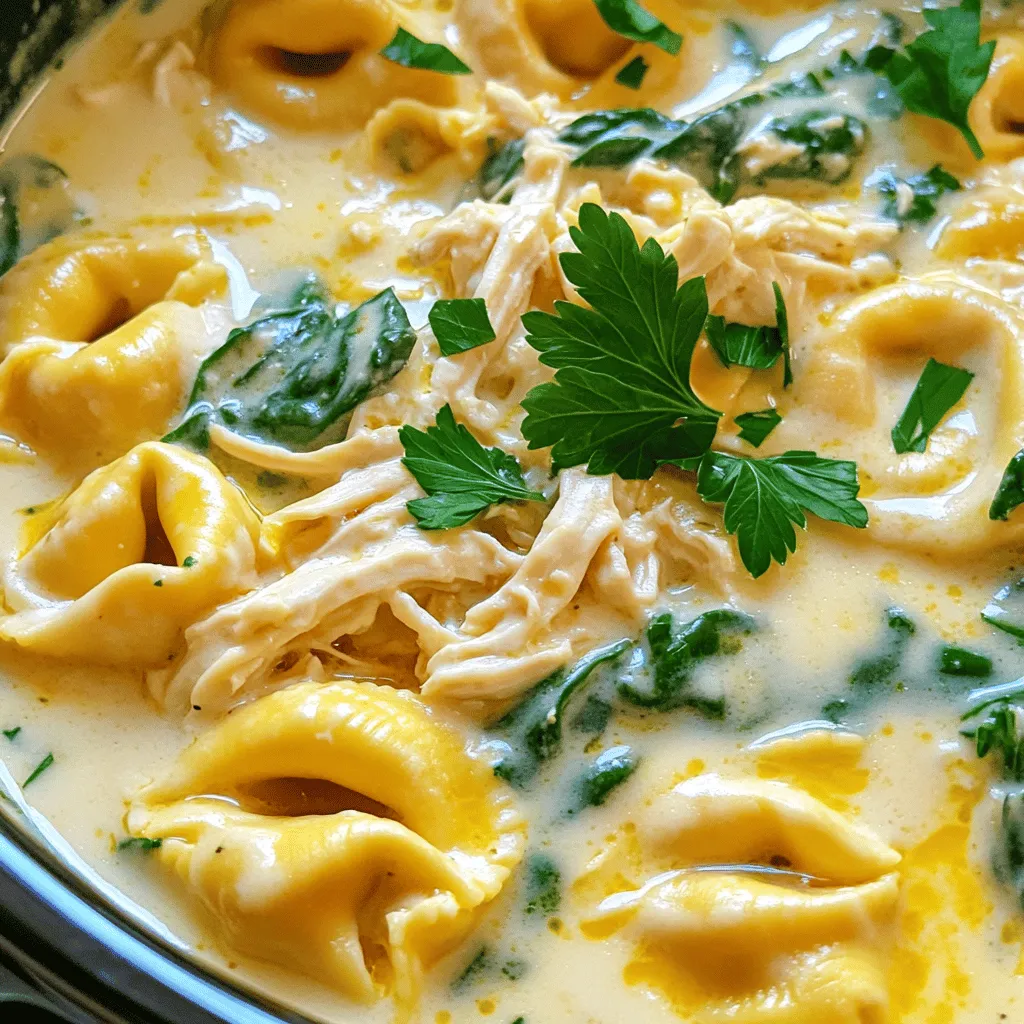
Are you ready to indulge in a dish that’s both comforting and easy to make? In Slow Cooker Chicken Alfredo

- 2 salmon fillets (about 6 oz each) - 2 tablespoons Cajun seasoning - 1 tablespoon olive oil - 4 large whole wheat or spinach tortillas - 2 cups romaine lettuce, chopped - ½ cup Caesar dressing (store-bought or homemade) - ¼ cup grated Parmesan cheese - ½ cup cherry tomatoes, halved - Fresh lemon wedges, for serving You need fresh ingredients for the best taste. I love using whole wheat or spinach tortillas. They add nutrition and flavor. The Cajun seasoning gives the salmon a spicy kick. - Avocado slices for creaminess - Capers for a briny touch - Red onion slices for crunch - Cilantro or parsley for freshness Feel free to add your favorite ingredients. Avocado adds a nice creamy texture. Capers and red onions give a great crunch. You can mix and match to fit your taste. This recipe serves four wraps. Each wrap has a healthy mix of protein and greens. Salmon is rich in omega-3s, good for heart health. The romaine lettuce gives fiber and vitamins. The Parmesan adds calcium. If you want to keep it light, use less dressing. These wraps are not just tasty; they are good for you too. Enjoy these wraps as a quick lunch or a light dinner option! First, you need to dry the salmon fillets. Use paper towels to remove excess moisture. This helps the seasoning stick well. Next, take the Cajun seasoning. Rub it generously on both sides of the fillets. You want every bite to burst with flavor. Let the salmon sit for a few minutes. This gives the seasoning time to soak in. Now it’s time to cook the salmon. Heat olive oil in a non-stick skillet over medium-high heat. Once the oil shimmers, place the seasoned salmon in the pan. Cook for about 3 to 4 minutes on each side. You want a nice blackened crust. The salmon should be opaque and flake easily. After cooking, remove it from the heat. Let it rest for one minute before flaking it into large pieces. Grab your tortillas and lay them flat on a clean surface. Start by spreading Caesar dressing evenly over each tortilla. This adds creaminess and flavor. Next, add a handful of chopped romaine lettuce on top. Then, layer on the blackened salmon pieces. Toss in some halved cherry tomatoes and a sprinkle of Parmesan cheese. Now it's time to roll! Fold in the ends of each tortilla and roll it tightly. Slice the wraps in half diagonally. Serve with fresh lemon wedges for a zesty kick. To flake salmon easily, let it cool for a minute after cooking. Use a fork to pull apart the fish gently. Start from the thickest part and work your way out. This keeps the pieces nice and big. Flaking right after cooking can make it mushy, so be patient. You want it to stay tender and juicy for your wraps. If you have leftover wraps, store them in an airtight container. Keep them in the fridge for up to two days. To maintain freshness, wrap each one in plastic wrap first. This helps prevent the tortillas from getting soggy. If you want to save the salmon and salad separately, do that too. This keeps everything fresh and crisp. For this recipe, you need a non-stick skillet. It helps cook the salmon evenly without sticking. A fork is essential for flaking the salmon later. Use a sharp knife to slice your wraps easily. Don't forget a cutting board for assembly. A spatula will help you flip the salmon without breaking it apart. These tools make cooking smooth and fun! {{image_2}} You can swap salmon for other proteins. Chicken works well in this recipe. Just season it like the salmon. Shrimp is another tasty option. Cook shrimp until pink, then add it to your wrap. For a plant-based choice, use chickpeas. Roast them with Cajun spice for added flavor. These swaps keep the wraps fun and fresh. While Caesar dressing is classic, you can try others. Ranch dressing adds a creamy twist. You might enjoy tahini sauce for a nutty flavor. A yogurt-based dressing is lighter and zesty. Mix in some lemon juice for a bright taste. Each dressing change offers a new taste adventure. Tortillas come in many types. Whole wheat and spinach are great choices. You can also use corn tortillas for a gluten-free option. Lettuce leaves make a low-carb wrap. Use large romaine leaves for a crunchy bite. These options let you create the wrap that suits your mood. Store any leftover wraps in an airtight container. Keep them in the fridge for up to two days. This helps keep the salmon and veggies fresh. If you notice any wilted lettuce, remove it before eating. Always check for strong smells or changes in color. I recommend freezing the salmon separately from the wraps. To freeze the salmon, wrap it tightly in plastic wrap. Place it in a freezer-safe bag. It will last for about three months. The wraps do not freeze well, as the tortillas can become soggy. To reheat the salmon, place it in a skillet over low heat. This keeps it moist and tender. For the wraps, unwrap them and heat them in the oven at 350°F for about 10 minutes. This method brings back the crunchiness of the tortilla. Enjoy your meal! Yes, you can use frozen salmon. Just make sure to thaw it first. Place it in the fridge overnight or run it under cold water. After thawing, pat the salmon dry. This helps the Cajun seasoning stick well. The cooking time may be slightly longer, so check for doneness. If you want a different flavor, you can use ranch dressing or yogurt-based dressing. You can also make a simple lemon vinaigrette. Mix olive oil, lemon juice, and a pinch of salt. This will give your wraps a fresh twist without losing taste. Yes, these wraps are great for meal prep. You can make them ahead and store them in the fridge. Just wrap them tightly in foil or plastic wrap. They stay fresh for up to three days. Just add the lemon wedges when you’re ready to eat! This blog post covered everything about making delicious salmon wraps. We explored key ingredients and optional add-ons to boost flavor. I shared step-by-step instructions for preparing and cooking salmon perfectly, plus tips for easy flaking and storage. You can even try different proteins or dressings to customize your meal. Remember, proper storage helps keep leftovers fresh. With these insights, you can create tasty wraps that fit your needs. Enjoy your cooking adventure, and don’t hesitate to experiment!

Minute Blackened Salmon Caesar Wraps Quick Delight

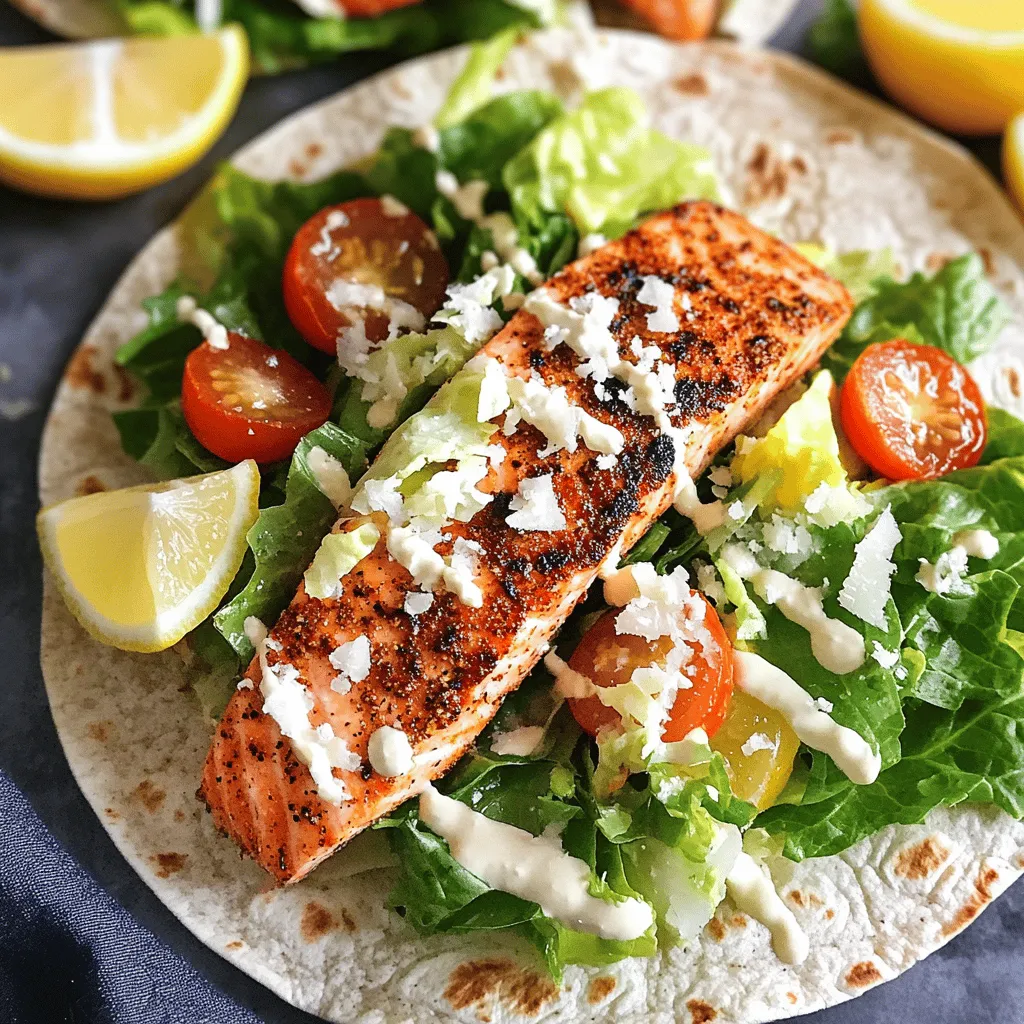
If you crave something quick yet delicious, you’ve come to the right place! My Minute Blackened Salmon Caesar Wraps are

To make Air Fryer Mozzarella Stuffed Chicken Meatballs, gather the following ingredients: - 1 lb ground chicken - 1 cup breadcrumbs - 1/2 cup grated Parmesan cheese - 1 teaspoon garlic powder - 1 teaspoon Italian seasoning - 1/2 teaspoon salt - 1/2 teaspoon black pepper - 1 cup shredded mozzarella cheese - 1 egg, beaten - 1 tablespoon olive oil - Fresh basil leaves for garnish (optional) You can swap some ingredients if you need to. Here are a few ideas: - Use turkey instead of ground chicken for a leaner option. - Replace breadcrumbs with crushed cornflakes or gluten-free bread for a gluten-free choice. - Try different cheeses like cheddar or provolone for a unique flavor twist. - If you lack Parmesan, grated Pecorino Romano works well too. Garnishes can make your dish look great. Consider adding: - Fresh basil leaves for a pop of color and flavor. - Extra grated Parmesan on top for added richness. - A drizzle of marinara sauce for a tasty dip. - Crushed red pepper flakes for a hint of heat. These simple additions can elevate your meal! To start, grab a large mixing bowl. Add 1 pound of ground chicken, 1 cup of breadcrumbs, and ½ cup of grated Parmesan cheese. Next, sprinkle in 1 teaspoon of garlic powder, 1 teaspoon of Italian seasoning, ½ teaspoon of salt, and ½ teaspoon of black pepper. Finally, crack an egg and beat it before adding it to the bowl. Mix everything together with your hands or a spoon until it forms a smooth mixture. Now, let’s form the meatballs. First, preheat your air fryer to 380°F (190°C). Prepare a small bowl of water. Wet your hands to avoid stickiness. Take about 2 tablespoons of the chicken mixture and flatten it in your palm. Place 1 tablespoon of shredded mozzarella cheese in the center of the flattened chicken. Carefully mold the chicken around the cheese to form a ball. Repeat this process until you’ve used all the mixture. Once your meatballs are ready, lightly brush or spray them with olive oil. This helps them get crispy. Place the meatballs in the air fryer basket in a single layer. Make sure they do not touch each other. Air fry the meatballs for 12 to 15 minutes. They should turn golden brown and reach an internal temperature of 165°F (74°C). After cooking, carefully remove them from the fryer. Let them rest for a few minutes. They will be very hot! If you like, garnish with fresh basil leaves for a nice touch before serving. To keep the cheese inside the meatball, make sure to seal it well. After you flatten the chicken mixture, place the cheese in the center. Gently fold the edges over the cheese. Pinch the seams tightly to prevent any leaks. A little extra effort here pays off with gooey, melted cheese inside. Use a meat thermometer to check the meatballs. They should reach an internal temperature of 165°F (74°C). This ensures they are fully cooked and safe to eat. If you want a crispier outside, spray a little olive oil before cooking. This will help achieve that golden-brown finish we all love. Preheat your air fryer to 380°F (190°C). This helps the meatballs cook evenly. Do not overcrowd the basket; give them space to cook well. Cook in batches if needed. Turn the meatballs halfway through cooking for even browning. Let them rest for a few minutes after cooking. This helps the cheese settle and keeps it melty inside. {{image_2}} You can change the cheese in your meatballs for new flavors. Try using cheddar, gouda, or provolone. Each cheese brings a different taste. You can mix cheeses too! For a spicy kick, add pepper jack cheese. This adds a fun twist to your dish. The seasoning in this recipe is key. But feel free to get creative! Instead of Italian seasoning, try taco seasoning for a bold taste. You can also use smoked paprika for a smoky flavor. If you love heat, add red pepper flakes. Adjust the salt and pepper based on the seasoning you use. Adding veggies or herbs can boost nutrition and flavor. Finely chop spinach or zucchini and mix them in. This adds moisture and makes the meatballs healthier. You can also add fresh herbs like parsley or cilantro for a fresh taste. These small changes can make a big impact on your meatballs! After making your air fryer mozzarella stuffed chicken meatballs, you'll likely have some leftovers. To store them, let the meatballs cool down first. Place them in an airtight container. They can last in the fridge for up to three days. Make sure to separate layers with parchment paper to keep them from sticking together. When you’re ready to enjoy your leftovers, reheating is easy. Preheat your air fryer to 350°F (175°C). Place the meatballs in the air fryer basket in a single layer. Heat them for about 5 to 7 minutes. This keeps them crispy and warm. You can also use a microwave if you're in a hurry, but the air fryer gives better results. If you want to save some meatballs for later, freezing is a great option. First, let the cooked meatballs cool completely. Then, arrange them in a single layer on a baking sheet. Freeze them for about an hour. Once frozen, transfer them to a freezer bag or container. They can stay frozen for up to three months. To reheat, cook them straight from the freezer in your air fryer. Yes, you can! Ground turkey or pork works well too. Each type brings its own flavor. Ground beef is another option, but it may be fattier. Choose what you like best. Just keep the cooking time similar, so they cook evenly. I recommend a basket-style air fryer for this recipe. They are easy to use and clean. Look for one with adjustable temperature settings and good capacity. A model with at least 3.5 quarts can cook these meatballs well. Brands like Ninja and Philips are popular choices. To make gluten-free meatballs, swap regular breadcrumbs for gluten-free ones. You can also use crushed rice crackers or almond flour. Just ensure that all other ingredients are gluten-free. Double-check labels on seasonings and cheese to avoid hidden gluten. Enjoy without worry! You learned about making tasty meatballs in this article. We covered key ingredients, step-by-step directions, and tips for success. You can swap ingredients and try fun variations. Follow storage tips to keep your leftovers fresh. For any questions, I provided helpful answers. Now you can cook delicious meatballs with ease. Enjoy your meals, share them with friends, and experiment with flavors. Happy cooking!

Air Fryer Mozzarella Stuffed Chicken Meatballs Recipe

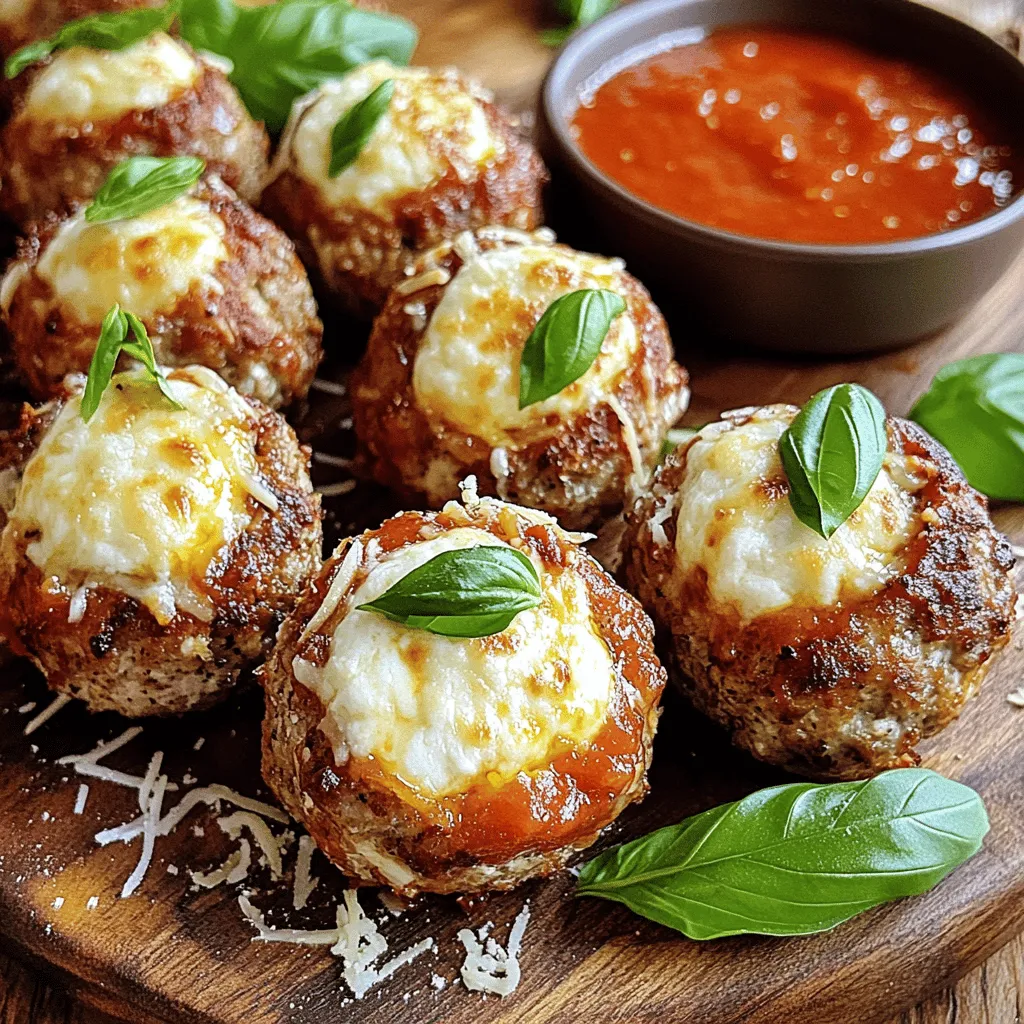
Ready to impress your family with a delicious twist on meatballs? My Air Fryer Mozzarella Stuffed Chicken Meatballs are packed

To make One Pan Jalapeño Lime Shrimp Fajitas, you will need: - 1 lb large shrimp, peeled and deveined - 2 tablespoons olive oil - 1 large red bell pepper, sliced - 1 large green bell pepper, sliced - 1 medium onion, sliced - 2 jalapeños, sliced (remove seeds for less heat) - 4 cloves garlic, minced - Juice of 2 limes - Zest of 1 lime - 1 teaspoon ground cumin - 1 teaspoon smoked paprika - Salt and pepper to taste To enhance your dish, consider adding: - Fresh cilantro, chopped - Corn or flour tortillas You can mix things up with different ingredients. Here are some ideas: - Swap the bell peppers for zucchini or mushrooms for a different taste. - Use shrimp alternatives like chicken or tofu for a different protein. - If you lack smoked paprika, regular paprika or chili powder works as a substitute. These options keep the dish fresh and exciting while catering to your taste or what you have on hand. Start by heating your skillet over medium-high heat. Add 1 tablespoon of olive oil. Let the oil get hot. This helps cook the shrimp and veggies well. Next, add sliced onions, red and green bell peppers, and jalapeños to the pan. Sprinkle some salt over them. Sauté for about 5 to 7 minutes. You want the veggies to soften and get a bit charred. Once done, take them out of the pan and set them aside. In the same pan, pour in the last tablespoon of olive oil. Then, add minced garlic. Cook for about 30 seconds. The garlic should smell great! Then, toss in the shrimp. Add cumin, smoked paprika, salt, and pepper. Cook the shrimp for about 3 to 4 minutes. They should turn pink and opaque. Once the shrimp are ready, put the cooked veggies back in the pan. Squeeze the juice of 2 limes over the mix. Don’t forget the lime zest! Toss everything together for another 1 to 2 minutes. This step is key to blending the flavors. Take the pan off the heat. Garnish with chopped cilantro. Serve warm with corn or flour tortillas on the side. Enjoy your One Pan Jalapeño Lime Shrimp Fajitas! To make great fajitas, use fresh ingredients. Fresh shrimp adds a nice taste. Choose ripe bell peppers for color and crunch. Slice them thinly for even cooking. Cook the veggies first until soft, then remove them. This keeps them from overcooking when you add the shrimp. Sauté the shrimp quickly. They cook fast, about 3-4 minutes. They should turn pink and opaque. Avoid crowding the pan. This helps them sear nicely. To enhance your fajitas, serve them with warm tortillas. You can use corn or flour. Top with fresh cilantro for brightness. Add a squeeze of lime to boost flavor. For extra heat, offer sliced jalapeños on the side. You can also serve with avocado slices or a dollop of sour cream. A side of rice or beans pairs well too. These sides add heartiness to your meal. To save time, prep your veggies ahead. Slice the onions and bell peppers the night before. Store them in the fridge for quick access. You can also peel and devein shrimp ahead of time. Store them in a sealed bag. For extra flavor, marinate the shrimp with lime juice and spices for 30 minutes. This makes cooking faster and adds taste. Having everything ready cuts down on cooking time. {{image_2}} You can control the heat in this dish. To make it spicy, keep the seeds in the jalapeños. If you prefer mild, remove the seeds and use fewer jalapeños. You can also adjust the seasoning. Use less cumin and smoked paprika for a gentler taste. This way, you can enjoy the flavors without too much spice. Shrimp is great, but you can change it up. Try chicken or beef instead. Just cut the meat into thin strips and cook it the same way. If you want a plant-based option, use firm tofu or tempeh. They soak up flavors well and add a nice texture. Each protein gives a new twist to the dish. Add extra veggies for more color and flavor. You can use zucchini, mushrooms, or corn. Just slice them thin and toss them in with the other veggies. They will cook quickly and add great taste. This makes your fajitas more colorful and fun. Plus, it boosts nutrition and keeps things interesting. To keep your One Pan Jalapeño Lime Shrimp Fajitas fresh, store leftovers in an airtight container. Let the dish cool down before sealing it. Place it in the fridge within two hours of cooking. This helps avoid bacteria growth and keeps the flavors intact. If you want to save some for later, freezing works well. First, let the fajitas cool completely. Then, pack them tightly in a freezer-safe bag or container. Remove as much air as possible before sealing. When you want to eat them, thaw in the fridge overnight. Reheat gently in a pan over medium heat until warmed through. In the fridge, your fajitas will stay fresh for about 3 days. For the freezer, they can last up to 3 months. After this time, they may lose flavor and texture. Always check for any signs of spoilage before eating. Yes, you can prepare One Pan Jalapeño Lime Shrimp Fajitas ahead of time. To meal prep, cook the shrimp and veggies, then store them in airtight containers. Keep the tortillas separate. When you’re ready to eat, warm the shrimp and veggies in a pan. This keeps the flavors fresh. You can also microwave them if you’re in a hurry. Just be careful not to overcook the shrimp during reheating. You have many options for sides. Here are some ideas: - Mexican rice - Black beans - Avocado slices - Fresh salsa - Grilled corn - A light salad with lime dressing These sides pair well and add more flavor to your meal. You can mix and match based on your taste. To check if shrimp is cooked, look for a few signs: - The shrimp should turn pink. - It should be opaque, not clear. - The texture should feel firm, not mushy. Cooking shrimp takes just a few minutes. Remove it from heat as soon as it’s done. This keeps it tender and juicy. This post covered everything you need to make One Pan Jalapeño Lime Shrimp Fajitas. We looked at key ingredients, tips for perfect cooking, and ways to add variety. Preparing this dish can be quick and easy, with options for different proteins and spice levels. Remember to store leftovers properly to enjoy them later. Get ready to impress friends and family with your tasty fajitas! Cooking should be fun, and with this guide, you’ll make it a breeze. Enjoy your flavorful journey!

One Pan Jalapeño Lime Shrimp Fajitas Delight

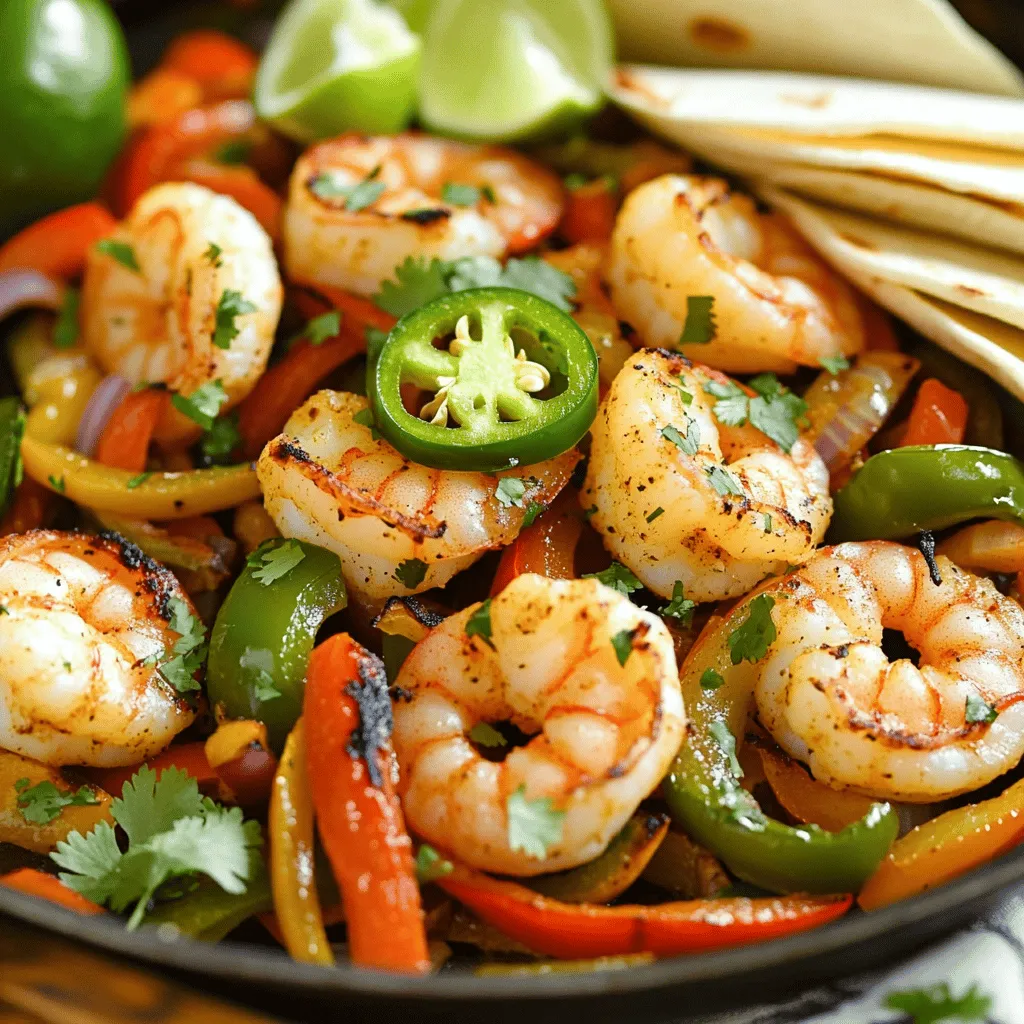
Are you ready to spice up dinner with a simple yet delicious dish? One Pan Jalapeño Lime Shrimp Fajitas will

To make these delightful Cinnamon Sugar Sweet Potato Donuts, you will need the following ingredients: - 1 cup cooked and mashed sweet potatoes - 1/4 cup granulated sugar - 1/4 cup brown sugar - 2 large eggs - 1/4 cup milk (or plant-based milk) - 1 teaspoon vanilla extract - 1 1/2 cups all-purpose flour - 1 teaspoon baking powder - 1/2 teaspoon baking soda - 1 teaspoon ground cinnamon - 1/4 teaspoon nutmeg - 1/4 teaspoon salt - 1/4 cup melted butter (or coconut oil) - 1/4 cup granulated sugar (for rolling) - 1 tablespoon ground cinnamon (for rolling) Using sweet potatoes gives these donuts a unique flavor and texture. The mix of sugars adds a sweet touch, while spices like cinnamon and nutmeg tie everything together. The eggs and milk help create a light and fluffy donut. Feel free to swap butter with coconut oil if you prefer a vegan option. Each ingredient plays an important role in making these donuts both tasty and satisfying. Preheat your oven to 375°F (190°C). This step is key to making the donuts rise well. Grease a donut pan or use non-stick spray. This will help the donuts come out easily after baking. In a large mixing bowl, combine the mashed sweet potatoes, granulated sugar, brown sugar, eggs, milk, and vanilla extract. Mix these ingredients until smooth. The sweet potatoes add moisture and flavor, making the donuts soft and tasty. In another bowl, whisk together the flour, baking powder, baking soda, cinnamon, nutmeg, and salt. This mix gives the donuts their structure and flavor. Make sure there are no lumps in the flour for the best results. Now, gradually fold the dry ingredients into the wet ingredients. Mix gently until just combined. Avoid overmixing; this keeps your donuts light and fluffy. The batter should be thick but well-blended. Transfer the batter into a piping bag or a zip-top bag with the corner cut off. Pipe the batter into the prepared donut pan, filling each cavity about two-thirds full. Bake in the preheated oven for 15-18 minutes. You'll know they’re ready when they spring back slightly when touched. After baking, let the donuts cool for about five minutes in the pan. Then transfer them to a wire rack. In a small bowl, mix together granulated sugar and cinnamon for the topping. Dip each warm donut into the cinnamon sugar mixture, ensuring an even coating on all sides. This step adds a sweet crunch that you won't want to miss! To get light and fluffy donuts, avoid overmixing your batter. When you combine the wet and dry ingredients, mix just until you see no dry flour. This helps keep the donuts soft and airy. Overmixing can lead to dense donuts, which we want to avoid. If you want a vegan-friendly treat, swap out the butter with coconut oil. This simple change keeps the donuts moist while making them plant-based. Just melt the coconut oil and mix it in with the other wet ingredients. You won’t lose any flavor! For a beautiful presentation, serve your donuts on a rustic wooden board or a colorful plate. Drizzle warm maple syrup or melted chocolate on top for an extra touch. This adds flavor and makes them look even more tempting. Enjoy with your favorite hot drink for a cozy treat! {{image_2}} You can add chocolate chips or nuts to the batter for extra flavor. I love using dark chocolate chips. They melt and create a rich taste. Chopped walnuts or pecans add a nice crunch. Just fold them in gently to keep the donuts light. Explore different glazes like maple or chocolate for a unique twist. A maple glaze is sweet and pairs well with sweet potatoes. For a chocolate glaze, melt some chocolate and mix in a bit of milk. Drizzle it over the warm donuts for a decadent treat. Try adding ginger or cloves for an alternative spice profile. Ginger gives a warm, zesty kick. Cloves add depth with their strong flavor. Adjust the amounts to find your perfect balance. Spice up your donuts and surprise your taste buds! You can store your cinnamon sugar sweet potato donuts in an airtight container. Keep them at room temperature. This way, they stay fresh and tasty for a few days. Don't worry, they won't dry out quickly if stored right! For a longer shelf life, freeze the donuts before coating them in sugar. This keeps them fresh for up to two months. When you're ready to enjoy, just thaw them at room temperature. They will taste great, just like fresh! To bring back the warmth and softness of the donuts, reheat them in the oven or air fryer. This method helps maintain their freshness. Just heat them at a low temperature until warm. Enjoy them as if they were just baked! Yes, you can use canned sweet potatoes. Just make sure they’re well-drained. This helps prevent your donuts from getting too wet. Canned sweet potatoes save you time and effort. They are a great option when you want to whip up these tasty donuts fast. To make these donuts gluten-free, simply swap out the all-purpose flour. Use a gluten-free flour mix instead. Many brands offer good blends that work well in baking. Just check the package for the right measurements and follow the rest of the recipe as is. You’ll still get soft and fluffy donuts! These donuts last up to three days at room temperature. Keep them in an airtight container to stay fresh. If you want to save some for later, freeze them. They can last up to two months in the freezer. Just thaw them before serving for a tasty treat anytime! You learned how to make delicious sweet potato donuts from scratch. We covered the ingredients, step-by-step baking, and tips for great texture. You also found ideas for variations and storage. Now, you can enjoy these treats any day. Don’t be afraid to add your own twist, like nuts or glazes. Keep this recipe handy for fun baking moments. Enjoy your sweet potato donuts whenever you want a delightful snack!

Cinnamon Sugar Sweet Potato Donuts Irresistible Treat

If you crave something sweet and delightful, these Cinnamon Sugar Sweet Potato Donuts are for you! With their fluffy texture

- 2 chicken breasts, boneless and skinless - 2 tablespoons olive oil - 3 cloves garlic, minced - 1 cup cooked quinoa or brown rice - 1 cucumber, diced - 1 cup cherry tomatoes, halved - 1 red onion, thinly sliced - 1 cup romaine lettuce, chopped - 1/2 cup crumbled feta cheese - 1/4 cup Kalamata olives, pitted and sliced - Tzatziki sauce (store-bought or homemade) For a filling meal, I like to use chicken breasts. They are easy to cook and very tasty. I prefer cooked quinoa for its nutty flavor and great texture. You can also use brown rice if you like. Adding fresh veggies like cucumber, tomatoes, and lettuce makes the bowl bright and colorful. - 1 tablespoon dried oregano - 1 teaspoon paprika - 1 teaspoon cumin - Salt and pepper to taste The spices are key to creating flavor. I use dried oregano for that classic Greek taste. Paprika adds a nice color and a bit of warmth. Cumin brings an earthy note. Salt and pepper enhance the overall taste. Mix these with olive oil and minced garlic to create a tasty marinade for the chicken. - Crumbled feta cheese - Sliced Kalamata olives - Tzatziki sauce For a true Greek experience, I love topping my bowls with crumbled feta. Its tangy flavor pairs well with the chicken and veggies. Kalamata olives add a nice briny touch. Lastly, tzatziki sauce gives a creamy, cool finish that ties everything together. Don’t forget to serve your bowl in a vibrant dish for that extra pop! To start, gather your ingredients. In a bowl, mix olive oil, minced garlic, dried oregano, paprika, cumin, salt, and pepper. Stir well to create a tasty marinade. Next, add the chicken breasts to this mix. Make sure every piece is coated well. Cover the bowl and let it sit in the fridge for at least 30 minutes. For the best flavor, you can marinate it for up to 2 hours. When you finish marinating, preheat your grill or grill pan over medium-high heat. Take the chicken out of the marinade and place it on the grill. Cook each piece for about 6 to 7 minutes on each side. You want the chicken to reach a safe internal temperature of 165°F (75°C). After cooking, let the chicken rest for a few minutes. Then, slice it into strips. Now, it’s time to build your bowls. Start with a base of cooked quinoa or brown rice. This gives your meal a great texture. Next, add the sliced chicken. You can pile on diced cucumber, halved cherry tomatoes, thinly sliced red onion, and chopped romaine lettuce. To finish, sprinkle crumbled feta cheese and sliced Kalamata olives on top. These add a nice salty flavor. Drizzle tzatziki sauce over everything or serve it on the side. Serve your bowls in bright, colorful dishes to show off the fresh ingredients. For an extra touch, add a lemon wedge on the side. This not only looks nice but gives a fresh burst of flavor too. To grill chicken well, use a good marinade. The mix of olive oil, garlic, and spices adds great taste. I recommend marinating the chicken for at least 30 minutes. For deeper flavor, let it sit for up to 2 hours. Always preheat your grill before adding the chicken. Cook each side for about 6 to 7 minutes. Check the internal temperature; it should reach 165°F (75°C). Let the chicken rest before slicing. This keeps it juicy. Meal prep makes cooking easier during the week. Start by marinating your chicken ahead of time. You can cook the chicken and store it in the fridge for up to four days. Prepare your grains, like quinoa or brown rice, in advance. Keep fresh veggies like cucumber and tomatoes chopped and ready to go. Store everything in separate containers to keep flavors fresh. This way, you can quickly assemble your bowls when hunger hits. Fresh ingredients make a big difference in taste. Use ripe cherry tomatoes and crisp cucumbers for crunch. Fresh romaine lettuce adds a nice texture to your bowl. For the best flavor, buy feta cheese that is freshly crumbled. Kalamata olives give a salty kick that complements the dish. Don’t forget the tzatziki sauce; it ties all the flavors together. Adding a squeeze of lemon at the end brightens everything up. {{image_2}} You can switch the chicken with beef or tofu. For beef, use thin slices of flank steak. Marinate it like the chicken. Grill it until it’s juicy. Tofu is a great option too. Use firm tofu and press it first. Cut it into cubes and marinate. Grill or sauté until golden brown. If you want a vegetarian meal, consider using chickpeas or lentils. Chickpeas add protein and texture. Roast them with spices for a crunchy treat. You can also use lentils for a softer bite. Cook them until tender and mix them with herbs for extra flavor. Try different grains for a unique twist. Couscous cooks quickly and is light. It adds a fluffy base to your bowl. Farro, on the other hand, is chewy and hearty. It gives a nutty flavor. Both options work well with the Greek flavors. Choose what you like best for your gyro bowl! Store your Greek Chicken Gyro Bowls in airtight containers. This keeps the flavors fresh. Let the bowls cool to room temperature before sealing. Place them in the fridge right away. Consume within 3 to 5 days for the best taste. Keep toppings, like cucumbers and lettuce, separate for crunch. To freeze, use freezer-safe containers. Separate the chicken from the grains and veggies. This helps keep the texture nice. When you are ready to eat, thaw the bowls overnight in the fridge. Reheat in the microwave or on the stovetop. Aim for a heat of 165°F (75°C) before serving. - Chicken: 1-2 days in the fridge, up to 6 months in the freezer. - Quinoa or brown rice: 4-6 days in the fridge, up to 1 year in the freezer. - Fresh veggies (cucumbers, tomatoes, lettuce): 3-5 days in the fridge. - Feta cheese: 5-7 days once opened. - Tzatziki sauce: 1-2 weeks in the fridge, depending on the recipe. Understanding how to store your ingredients helps keep your meals tasty and safe. Greek Chicken Gyro Bowls come from Greece. They are inspired by gyros, a popular street food. Gyros typically feature meat cooked on a vertical rotisserie. In this bowl, we use grilled chicken instead. This dish mixes flavors from Greece, like oregano and tzatziki sauce. It offers a balance of protein, grains, and vegetables. You can enjoy the same taste in a healthy, easy-to-make bowl. Yes, you can easily make tzatziki sauce at home! To do this, use fresh yogurt, cucumber, garlic, and dill. Combine one cup of yogurt with one diced cucumber. Add two minced garlic cloves and one tablespoon of chopped dill. Mix all the ingredients well and season with salt. Let it chill in the fridge for a bit. This sauce adds a fresh, tangy flavor that pairs well with the chicken. If you don’t have quinoa or brown rice, several great options exist. You can use couscous for a quick and fluffy base. Farro is another tasty choice with a chewy texture. If you're looking for a gluten-free option, try cauliflower rice. It’s low in carbs and adds a nice crunch. Each of these substitutes will still give you a great meal. You learned about the key ingredients for Greek Chicken Gyro Bowls, from spices to toppings. I shared steps for marinating chicken, cooking it, and assembling delicious bowls. You now have tips to grill chicken perfectly and best practices for meal prep. With these variations, you can explore different proteins and grain bases while enjoying fresh flavors. Lastly, I covered how to store and reheat leftovers to keep meals fresh. Enjoy making these bowls your own!

Greek Chicken Gyro Bowls Flavorful Meal Idea

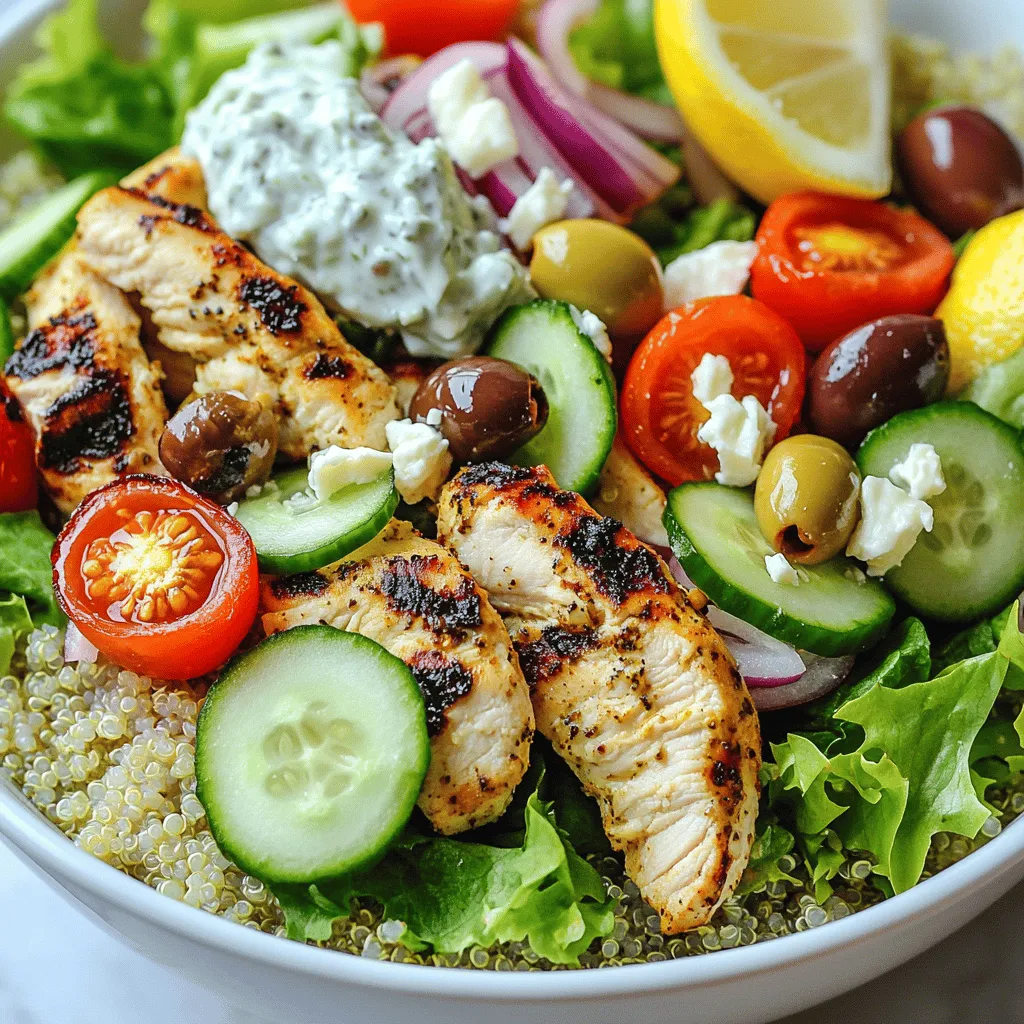
Looking for a tasty, healthy meal idea? Greek Chicken Gyro Bowls are perfect for you! With marinated chicken, fresh veggies,

- 1 cup canned pumpkin puree - 1 banana, frozen - 1 cup almond milk (or any milk of choice) - 2 tablespoons almond butter - 1 tablespoon honey or maple syrup (to taste) - 1 teaspoon pumpkin pie spice - 1/2 teaspoon vanilla extract - 1/4 cup rolled oats (optional for extra energy) - A pinch of salt - Ice cubes (optional, for a colder smoothie) The ingredients for the Pumpkin Spice Energy Smoothie are simple and wholesome. First, you need canned pumpkin puree. This is the star of the smoothie. It gives a rich flavor and vibrant color. Canned pumpkin is cooked and pureed, making it easy to use. Next, grab a frozen banana. A frozen banana adds a creamy texture. It also sweetens the smoothie naturally. For the liquid, use almond milk or any milk you prefer. Almond milk is light and works well with the pumpkin flavor. Almond butter adds healthy fats and protein. It enhances the richness of the smoothie. You can sweeten it with honey or maple syrup. Add it to your taste. Pumpkin pie spice brings warmth and autumn flavors. It has cinnamon, nutmeg, and ginger. Vanilla extract adds depth to the taste. It blends beautifully with the other flavors. If you want extra energy, add rolled oats. They make the smoothie more filling. A pinch of salt helps to balance the flavors. Lastly, ice cubes are optional. They make the smoothie colder and refreshing. With these ingredients, you can create a tasty and nutritious blend. - Start by blending the base ingredients. Add 1 cup of canned pumpkin puree, 1 frozen banana, and 1 cup of almond milk into a high-speed blender. - Next, add flavor and nutrition boosters. Include 2 tablespoons of almond butter, 1 tablespoon of honey or maple syrup, 1 teaspoon of pumpkin pie spice, and 1/2 teaspoon of vanilla extract. If you want an energy boost, add 1/4 cup of rolled oats and a pinch of salt. - Blend until smooth and creamy. Blend on high for about 30 seconds. If you prefer a colder smoothie, toss in a handful of ice cubes and blend again until well mixed. - Adjust sweetness if needed. Taste the smoothie and add more honey or maple syrup if you like it sweeter. - Pour the smoothie into a glass or bowl. - For garnish ideas, sprinkle some pumpkin pie spice on top or add a few pumpkin seeds for texture. Serve it in clear glasses to show off that vibrant orange color. You can also top it with whipped coconut cream or a sprinkle of cinnamon for an appealing finish. To make your Pumpkin Spice Energy Smoothie creamy, frozen bananas are key. They add a thick, rich texture without extra cream. When you blend a frozen banana, it turns silky smooth. This helps create a delightful drink that feels like a treat. Almond butter also plays a big role. It adds creaminess and a nutty flavor. Plus, it gives you healthy fats that help keep you full. Just two tablespoons add so much goodness. You can also swap almond butter for peanut or sun butter if you prefer. You can adjust the sweetness of your smoothie based on your taste. Start with one tablespoon of honey or maple syrup. After blending, taste it. If you want it sweeter, add a little more. Natural sweeteners let you control the flavor without being too sugary. You can also try different types of milk. Almond milk gives a nice, light flavor. If you want something creamier, try coconut or oat milk. Each type of milk changes the taste. Feel free to experiment and find your favorite! {{image_2}} You can boost your pumpkin spice energy smoothie with some healthy add-ins. - Adding protein powder: Mix in a scoop of protein powder. This makes your smoothie more filling and adds extra protein for your day. Look for options like whey or plant-based protein. - Incorporating spinach or kale: Try tossing in a handful of spinach or kale. These greens add vitamins without changing the taste. You won't even notice they're there! If you follow a specific diet, you can still enjoy this smoothie. - Vegan options: Use maple syrup instead of honey. Swap almond milk for any plant-based milk like oat or soy. These simple changes keep your smoothie vegan-friendly. - Nut-free alternatives: Replace almond butter with sunflower seed butter. This makes the smoothie nut-free. You can also skip any nut milk and use rice or oat milk instead. These variations keep your drink tasty while meeting your dietary needs! To keep your Pumpkin Spice Energy Smoothie fresh, store it in the fridge. Use a glass jar or any airtight container. This way, it can last for up to 24 hours. If you want to save it longer, you can freeze the smoothie. Pour it into ice cube trays or freezer bags. This will help you use it later in a quick smoothie. If you have leftover smoothie, give it a quick re-blend. This helps mix any separation that may happen. For the best taste and texture, always use airtight containers. This keeps air out and helps preserve flavor. What is pumpkin spice? Pumpkin spice is a mix of warm spices. It usually has cinnamon, nutmeg, and ginger. This blend gives a cozy taste to dishes and drinks. It is popular in fall, especially in lattes and desserts. Can I use fresh pumpkin instead of canned? Yes, you can use fresh pumpkin! Just roast it and blend it until smooth. Make sure it is soft. Canned pumpkin is easy and saves time, but fresh can add a nice, bright flavor. How can I make this smoothie more filling? To make this smoothie more filling, add rolled oats or a scoop of protein powder. These ingredients boost fiber and protein. You can also add nut butter for creaminess and healthy fats. Caloric breakdown and health benefits This smoothie has about 350 calories per serving. It is rich in vitamins and minerals. Pumpkin is high in vitamin A and fiber. Almond milk adds calcium without extra calories. Honey or maple syrup adds natural sweetness. Protein content and fiber sources This smoothie has around 10 grams of protein. The almond butter and rolled oats are great protein sources. Fiber comes from pumpkin, banana, and oats. This blend keeps you full and satisfied for longer. This blog post outlined a delicious pumpkin smoothie packed with nutrition. You learned about essential ingredients, preparation steps, and tips to enhance texture. I also covered ways to customize your smoothie for every taste and diet. Enjoy making this smoothie your own. With so many variations, it’s hard to go wrong. Your kitchen can be a space for healthy fun! Now, grab those ingredients and start blending!

Pumpkin Spice Energy Smoothie Tasty and Nutritious Blend

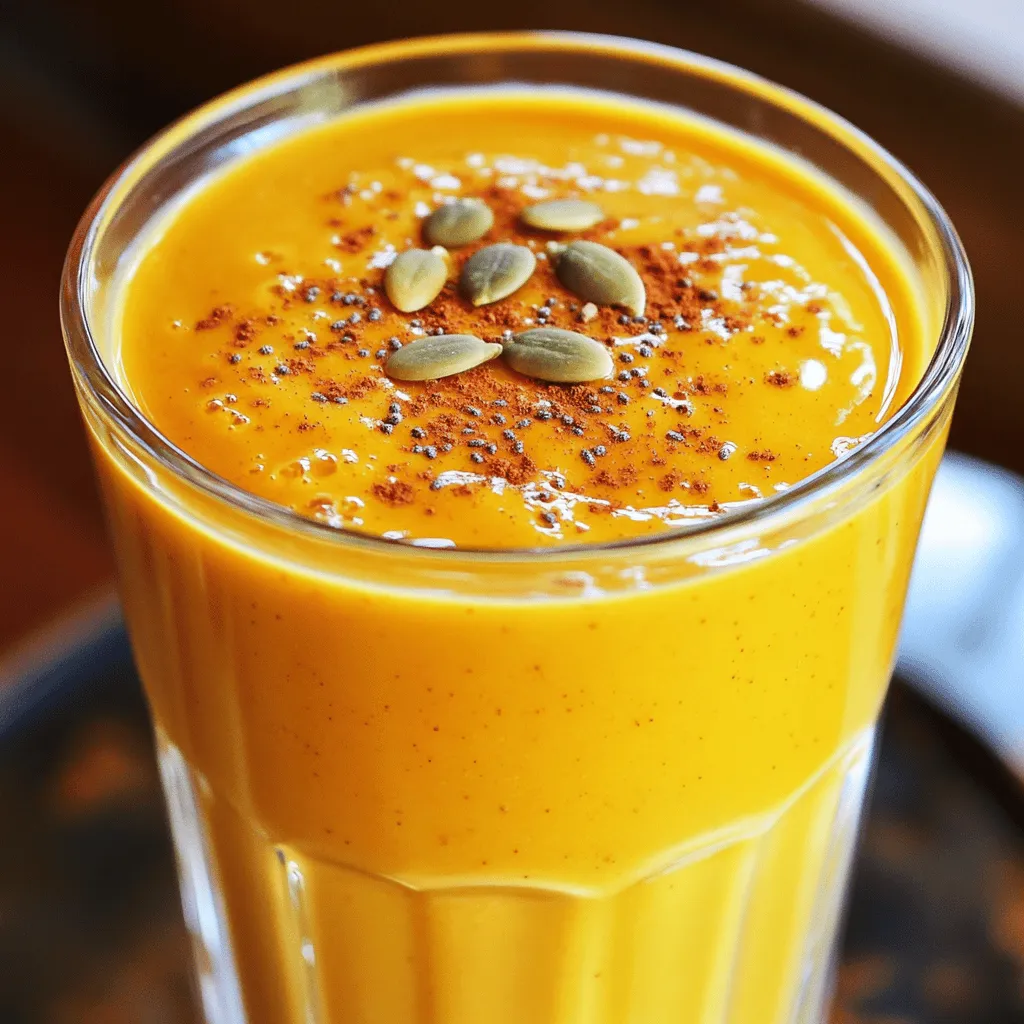
Craving a delicious boost of energy that’s both healthy and festive? Look no further! This Pumpkin Spice Energy Smoothie is

- 1 cup unsalted butter (2 sticks): Use high-quality butter for rich flavor. - 2 cups granulated sugar: This sweetens the brownies and gives them a nice crust. - 4 large eggs: Eggs bind the ingredients together and add moisture. - 1 teaspoon vanilla extract: This adds depth and sweetness to the batter. - 1 cup all-purpose flour: This gives structure to the brownies. - 1 cup cocoa powder: Choose unsweetened cocoa for deep chocolate flavor. - 1/2 teaspoon baking powder: This helps the brownies rise slightly. - 1/2 teaspoon salt: Salt balances the sweetness and enhances flavor. - 1 cup pretzel pieces, roughly crushed: These add crunch and a salty bite. - 1 cup caramel sauce: Go for store-bought or homemade, depending on your time. - 1/2 teaspoon sea salt (for topping): This adds a salty finish to each bite. When choosing butter, pick unsalted for best control of flavor. Use fresh eggs for the best rise. The quality of cocoa powder matters, as it impacts the chocolate taste. - Egg substitutions: Use applesauce or mashed bananas if you want a vegan option. - Flour alternatives: Almond flour or gluten-free blends work well for gluten-free diets. - Caramel options: Use a quick microwave caramel if you want a homemade touch without the fuss. For extra flavor, consider adding: - Chocolate chips: These can enhance the chocolate flavor. - Nuts: Chopped walnuts or pecans add a nice crunch and flavor contrast. Tailoring these ingredients can make your brownies fit your needs while keeping them delicious. Start by melting 1 cup of unsalted butter in a medium saucepan over low heat. This helps the butter blend smoothly. Once melted, remove the pan from heat. Stir in 2 cups of granulated sugar until the mixture is smooth and shiny. Next, add 4 large eggs, one at a time. Mix well after each egg to keep the batter light. Then, add 1 teaspoon of vanilla extract for flavor. In a separate bowl, whisk together 1 cup of all-purpose flour, 1 cup of cocoa powder, 1/2 teaspoon of baking powder, and 1/2 teaspoon of salt. Mixing these dry ingredients separately helps to avoid clumps. Gradually add the dry mix to the wet ingredients. Stir until just combined. Overmixing can make your brownies tough. Finally, fold in 1 cup of roughly crushed pretzel pieces, ensuring they spread evenly. Pour half of the brownie batter into a greased 9x13 inch baking pan. Spread it evenly. Then, drizzle half of the 1 cup of caramel sauce over the batter. This adds a sweet layer. Next, add the rest of the brownie batter on top, spreading it gently. Drizzle the remaining caramel sauce over the top. To create a beautiful marbled effect, use a knife to gently swirl the caramel into the brownie batter. This technique adds a nice touch and enhances flavor. Bake the brownies in a preheated oven at 350°F (175°C) for about 25-30 minutes. To check for doneness, insert a toothpick into the center. It should come out mostly clean. If it has wet batter, give it a few more minutes. Once baked, allow the brownies to cool in the pan for at least 20 minutes. This cooling time helps them set. After cooling, cut them into squares for serving. Enjoy your delicious salted caramel pretzel brownies! To get the sweet and salty mix just right, sprinkle a little sea salt on top before baking. Use about 1/4 teaspoon before the brownies go in the oven. After baking, add a bit more salt to bring out the flavors. This makes each bite pop with taste! While mixing, taste a small bit of the batter. You can adjust the salt if needed. This helps you find the perfect flavor for your taste buds. Just remember, the salt should enhance the sweetness, not overwhelm it. The texture of your brownies is key. To avoid overmixing, mix the batter just until you see no flour. Overmixing can lead to tough brownies. You want them soft and chewy. Use the toothpick test to check if they’re done. Insert a toothpick into the center. If it comes out with a few moist crumbs, they’re ready. If it’s wet with batter, bake them a little longer. This simple test ensures you get that perfect brownie texture every time. {{image_2}} If you want to make these brownies gluten-free, swap the all-purpose flour for a gluten-free blend. This keeps the texture light and chewy. For those who prefer vegan options, you can replace the eggs with flaxseed meal or applesauce. Use vegan butter and a plant-based caramel for a tasty treat. To lower the sugar, try using a sugar substitute like stevia or monk fruit. You can also reduce the granulated sugar by one-third without harming the flavor. The caramel sauce can be made with less sugar too, using natural sweeteners. Adding flavors can make these brownies even more exciting. For a nutty twist, mix in some peanut butter. Swirl a few tablespoons into the batter before baking. This gives a rich taste that pairs well with the caramel. You can also add espresso powder for a coffee flavor. Just one teaspoon can enhance the chocolate notes without making it taste like coffee. For a layered brownie, try mixing in different ingredients. You can add chocolate chips or nuts between the brownie layers for a fun surprise. This creates a blend of textures and flavors that everyone will love. To keep your salted caramel pretzel brownies fresh, store them right. For short-term storage, place brownies in an airtight container at room temperature. They will stay good for about three days. If you want them to last longer, use the fridge. The cool air helps keep them fresh for a week. Just remember, the colder they get, the firmer they become. If you want to freeze brownies, follow these steps: 1. Allow the brownies to cool completely after baking. 2. Cut them into squares for easy serving. 3. Wrap each piece tightly in plastic wrap. This keeps them from drying out. 4. Place all wrapped pieces in a freezer-safe bag or container. 5. Label the bag with the date. Brownies will last for about three months in the freezer. When you're ready to enjoy them, just take out the desired amount. No need to thaw overnight; you can eat them frozen or let them sit at room temperature for about 30 minutes. To reheat brownies, use the oven for best results. Preheat your oven to 350°F (175°C). Place the brownies on a baking sheet. Heat for about 10 minutes. This warms them without making them dry. If you want a quick way, use the microwave. Heat in 10-second bursts until warm. Just be careful not to overheat them, as that can make them tough. You can tell your brownies are done by looking for a few signs. First, the edges should look set and slightly pull away from the pan. The top should have a shiny finish. You can also gently press the center; it should feel firm but not jiggly. Besides the toothpick test, which should come out mostly clean, watch for these visual cues to judge doneness. Yes, you can use homemade caramel sauce! Making it at home can give a fresher taste and allow you to control the sweetness. However, it can be tricky to get just right. Store-bought caramel is quick and reliable, saving you time. If you're short on time, go for store-bought. If you have some extra minutes, homemade can add a personal touch. Store your brownies in an airtight container at room temperature. They can last about 3-4 days. For longer storage, place them in the fridge for up to a week. If you want to keep them even longer, you can freeze them. Wrap each brownie individually in plastic wrap and place them in a freezer bag. They can last up to 3 months this way. When ready, just thaw them at room temperature before enjoying! In this blog post, we explored how to make delicious salted caramel pretzel brownies. We covered key ingredients, helpful tips for perfect texture, and popular variations to suit different diets. Understanding the balance of sweet and salty is crucial. Remember to check for doneness and store your brownies properly. Baking is a rewarding journey. With these insights, you can enjoy tasty brownies every time. Try the recipe, and let your creativity shine!

Salted Caramel Pretzel Brownies Irresistible Treat

Are you ready to indulge in a treat that combines sweet, salty, and crunchy? These Salted Caramel Pretzel Brownies are

Older posts
Newer posts
← Previous Page1 … Page26 Page27 Page28 … Page86 Next →

dsad

© 2026 Cooking Wells • Built with GeneratePress

Our Policies

  • Copyright Policy
  • Cookie Policy
  • GDPR Policy
  • Privacy Policy
  • Disclaimer
  • Terms Of Use

More Information

  • Home
  • About
  • Contact
  • Appetizers
  • Dessert
  • Dinner
  • Drinks
©2026, Cooking Wells About Back To Top