Skip to content
DisclaimerTerms Of UseGDPR PolicyCookie Policy

Cooking Wells

  • Home
  • Drinks
  • Appetizers
  • Dinner
  • Dessert
  • About
  • Contact
  • Privacy Policy
DisclaimerTerms Of UseGDPR PolicyCookie Policy

NO-ING-IMG

- 1 cup shredded iceberg lettuce - 1/2 cup shredded carrots - 1/4 cup red onion, finely chopped - 1/4 cup roasted red bell peppers, diced - 1/2 cup cherry tomatoes, halved - 1/2 cup deli meats (turkey, salami, or your choice), sliced - 1/2 cup provolone cheese, sliced - 1/4 cup mayonnaise - 1 tablespoon red wine vinegar (or apple cider vinegar) - 1 tablespoon Italian seasoning - Salt and pepper to taste - 2 hoagie buns or sub rolls - Optional: sliced jalapeños for a spicy kick The TikTok Viral Grinder Salad Sandwich shines with fresh and colorful ingredients. You start with 1 cup of shredded iceberg lettuce. It gives a nice crunch to your bite. Next, add 1/2 cup of shredded carrots. They bring a sweet touch and vibrant color. Chop 1/4 cup of red onion finely. It adds a punchy flavor that blends well. Then, grab 1/4 cup of roasted red bell peppers, diced. They offer a smoky sweetness that elevates the taste. Don’t forget 1/2 cup of halved cherry tomatoes. They add juiciness and freshness. For protein, choose 1/2 cup of deli meats like turkey or salami. This choice makes the sandwich hearty. Then, layer in 1/2 cup of provolone cheese, sliced. It melts beautifully and ties the flavors together. To create a creamy dressing, mix 1/4 cup of mayonnaise with 1 tablespoon of red wine vinegar. You can use apple cider vinegar too. Add 1 tablespoon of Italian seasoning. Season with salt and pepper to taste. Finally, get 2 hoagie buns or sub rolls. These are the perfect vessels for all your fillings. If you like heat, add sliced jalapeños for a spicy kick. With this list, you have all you need for a tasty sandwich. 1. In a large bowl, combine: - 1 cup shredded iceberg lettuce - 1/2 cup shredded carrots - 1/4 cup diced red bell peppers - 1/4 cup finely chopped red onion - 1/2 cup halved cherry tomatoes Toss these ingredients well until mixed. 2. In a small bowl, whisk together: - 1/4 cup mayonnaise - 1 tablespoon red wine vinegar (or apple cider vinegar) - 1 tablespoon Italian seasoning - Salt and pepper to taste This makes a creamy dressing. 3. Pour the dressing over the mixed veggies. Toss gently until all ingredients are coated. 4. Cut 2 hoagie buns in half lengthwise. Be careful not to slice all the way through. 5. Layer the deli meats on the bottom half of each bun. You can use 1/2 cup of turkey, salami, or your choice. 6. Add a generous scoop of the salad mixture on top of the meats. 7. Top the salad with 1/2 cup sliced provolone cheese. If you like heat, add sliced jalapeños. 8. Press the sandwich down gently to combine all the layers. 1. Place the filled hoagies in a skillet set to medium heat. 2. Press down with a spatula and cook for about 2-3 minutes on each side. Cook until golden brown. 3. Remove from heat and let them cool for one minute. 4. Slice the sandwiches in half diagonally to serve. Now you have a delicious TikTok viral grinder salad sandwich ready to enjoy! To make your TikTok viral grinder salad sandwich look great, try these tips: - Garnish: Add extra cherry tomatoes and a sprinkle of chopped parsley. It brings color and freshness. - Serving Style: Place the sandwiches on a wooden board. Cut them in half to showcase the layers. This makes it more appealing. You can swap ingredients to fit your taste: - Deli Meats: Use turkey, salami, or any other favorite. If you want a lighter touch, try cooked chicken or ham. - Cheese Alternatives: Provolone is popular, but you can use mozzarella or pepper jack for a kick. - Vegetarian Options: Replace deli meats with grilled veggies or tofu. For a vegan twist, use vegan cheese and mayo. This keeps the flavor while catering to different diets. {{image_2}} You can mix up the meats in the grinder salad sandwich. Start with turkey or salami. Both add great taste! You can also try ham, roast beef, or even a mix. Each meat brings its own flavor. Want a spicy kick? Use pepperoni or spicy turkey! Feel free to get creative. The more you experiment, the more fun your sandwiches will be! The salad part is very flexible. You can add or swap veggies based on what you like. Try cucumbers for crunch or avocados for creaminess. Bell peppers add sweetness, while spinach gives a nice green boost. You can also change things with the seasons. In summer, add fresh basil or corn. In fall, think about roasted squash or apples. Each season offers its own tastes. This way, your grinder salad sandwich stays fresh and exciting all year long! To keep your grinder salad sandwich fresh, follow these tips: - Wrap it up: Use plastic wrap or foil to seal the sandwich tightly. This helps keep moisture in and prevents it from drying out. - Use an airtight container: If you want to save more than one sandwich, place them in an airtight container. Make sure to layer parchment paper between sandwiches to avoid sticking. - Refrigerate promptly: Place the sandwich in the fridge within two hours of making it. This keeps it safe to eat and maintains its taste. If you want to enjoy your grinder salad sandwich warm, reheating is easy: - Skillet method: Heat a skillet over medium heat. Place the sandwich in the skillet and press down gently. Heat for about 2-3 minutes on each side until golden brown. - Microwave option: For a quick reheat, place the sandwich on a microwave-safe plate. Cover it with a damp paper towel and microwave for 20-30 seconds. Check if it’s warm enough, and repeat if needed. - Avoid sogginess: If you microwaved it, let it sit for a minute before eating. This helps the bread stay firm. The TikTok Viral Grinder Salad Sandwich stands out for its fresh flavors and colorful ingredients. It combines crunchy veggies, savory meats, and creamy dressing. This mix creates a fun and tasty bite in every mouthful. Its rise to fame on TikTok shows how much people enjoy quick, vibrant meals. The sandwich is easy to make and looks great in photos. Many love to share their versions online, making it a trending dish. Yes, you can make this sandwich ahead of time! Prepare the salad mixture and dressing a day before. Keep them in separate containers in the fridge. This keeps the veggies fresh and crunchy. When you're ready to eat, layer the meats and cheese on the hoagie buns. Just add the salad mix and enjoy! This method saves time and makes lunch or dinner a breeze. Pairing sides with the TikTok Viral Grinder Salad Sandwich can enhance your meal. Here are some great options: - Chips for crunch - Pickles for tang - Potato salad for creaminess - Fresh fruit for sweetness - Coleslaw for extra crunch These sides offer different textures and flavors, making your meal more enjoyable! We covered the essential ingredients and steps to make the TikTok Viral Grinder Salad Sandwich. We also shared tips for serving, storing, and customizing your sandwich to fit your style. Remember, whether you pick deli meats, veggies, or cheese, you can make it your own. This sandwich not only tastes great but also brings joy to any meal. Try it today, and enjoy the fun of creating your perfect sandwich!

TikTok Viral Grinder Salad Sandwich Delightful Recipe

If you’ve scrolled through TikTok lately, you’ve likely seen the buzz around the viral Grinder Salad Sandwich. This delightful treat

- 2 cups plain Greek yogurt - 1 cup cream cheese, softened - 1/2 cup honey or maple syrup - 1/2 cup lemon juice (freshly squeezed) - Zest of 2 lemons - 1 teaspoon vanilla extract - 3 eggs - 1 cup almond flour - 1/4 cup melted coconut oil - 2 tablespoons honey or maple syrup (for crust) - A pinch of salt - Fresh berries - Additional lemon zest - Additional Greek yogurt for serving I love using Greek yogurt in desserts. It adds protein and a creamy texture. The lemon juice makes this cheesecake bright and fresh. You can use honey or maple syrup for sweetness. Both options taste great! For the crust, I prefer almond flour. It gives a nice nutty flavor. The coconut oil keeps it moist and adds richness. A pinch of salt balances the sweetness of the crust. When serving, fresh berries make a lovely topping. They add color and extra flavor. You can also sprinkle more lemon zest for a zestier bite. A dollop of Greek yogurt on top makes it extra special. It’s fun to mix and match toppings! This cheesecake is a delight for any occasion. It’s easy to make and sure to impress! - Combine almond flour, melted coconut oil, honey (or maple syrup), and a pinch of salt. - Mix until the dough is crumbly yet holds together. - Preheat the oven to 350°F (175°C). - Press the crust mixture into a 9-inch springform pan. - Bake for 10 minutes until lightly golden. - In a large bowl, blend Greek yogurt, cream cheese, honey (or maple syrup), lemon juice, lemon zest, vanilla extract, and eggs until smooth. - Pour the filling over the cooled crust and smooth the top with a spatula. - Bake in the preheated oven for 30-35 minutes. - Check that the edges are set and the center is slightly jiggly. - Allow the cheesecake to cool to room temperature. - Refrigerate for at least 4 hours or overnight. - Remove from the springform pan and slice into wedges. To get a smooth filling, make sure the cream cheese is softened. Cold cream cheese can create lumps. Mix the filling just enough so it is smooth. Avoid overmixing after adding eggs. Too much mixing can create air bubbles, which change the texture. Use fresh lemon juice for a bright, bold flavor. Fresh juice gives the cheesecake a lively taste. You can also add natural extracts, like almond or vanilla, to deepen the flavor. These small additions can change your cheesecake from good to great! Serve each slice with a dollop of Greek yogurt on top. Add a drizzle of honey for sweetness. Garnish with fresh berries for color and brightness. A sprinkle of lemon zest also adds a nice touch. These simple details make your cheesecake look stunning! {{image_2}} You can switch up the flavors easily. To make a berry cheesecake, replace lemon juice and zest with berry puree. Strawberries, raspberries, or blueberries work well. This change brings a sweet and tart taste to your dessert. You can also try other citrus fruits. Orange, lime, or grapefruit can give new flavor profiles. Each option will create a fresh twist on the classic lemon cheesecake. If you want to cut calories, there are great sweetener options. Use agave nectar or stevia instead of honey. These choices will keep your cheesecake sweet without extra calories. You can also try different types of honey or syrup. Maple syrup adds a rich flavor. Just remember to adjust the amount based on sweetness. Making this cheesecake gluten-free is easy. Substitute almond flour with other nut flours, like hazelnut or pecan. You can also use gluten-free flour blends. Just be sure all ingredients are labeled gluten-free. This way, everyone can enjoy a slice without worry. Store your cheesecake in an airtight container for up to 5 days. This keeps it fresh and tasty. If you have leftover slices, tightly wrap them for even longer freshness. You can freeze your cheesecake for up to 2 months. Just wrap it tightly in plastic wrap. When you're ready to enjoy it, thaw it in the refrigerator before serving. This keeps the texture nice. To spice up chilled slices, try new toppings. A drizzle of caramel or chocolate can add a fun twist. You might also want to make mini-slices for better portion control. These bite-sized treats are perfect for sharing or snacking! Yes, low-fat Greek yogurt can be used for fewer calories, but it may affect texture. If you choose this option, the cheesecake may be a bit less creamy. Full-fat yogurt gives a richer taste and smoothness. You can use a regular cake pan, but lining it with parchment paper is recommended for easy removal. This helps keep the cheesecake intact when you take it out. Just make sure the paper hangs over the edges for easy lifting. It should be slightly jiggly in the center and set around the edges. A little jiggle means it will firm up as it cools. Don’t let it bake too long, or it might crack. Yes, substitute eggs with a flaxseed mixture or unsweetened applesauce for a vegan option. Use 1 tablespoon of ground flaxseed mixed with 2.5 tablespoons of water for each egg. This will help bind the cheesecake without using eggs. This blog post covered how to create a tasty cheesecake with simple ingredients. We explored the main ingredients, how to prepare and bake the crust, and how to make the filling. Tips for perfecting the texture and flavor enhance your cheesecake experience. We also discussed variations and storage options for leftovers. Try making this cheesecake at home and enjoy a sweet treat with your favorite toppings!

High-Protein Greek Yogurt Lemon Cheesecake Delight

Are you ready to indulge in a dessert that packs a protein punch? This High-Protein Greek Yogurt Lemon Cheesecake Delight

To make Biscoff stuffed chocolate chip cookies, you need these simple ingredients: - 1 cup all-purpose flour - 1/2 teaspoon baking soda - 1/4 teaspoon salt - 1/2 cup unsalted butter, softened - 1/2 cup brown sugar, packed - 1/4 cup granulated sugar - 1 teaspoon vanilla extract - 1 large egg - 1 cup chocolate chips (semi-sweet or milk chocolate) - 1/2 cup Biscoff spread - Sea salt, for sprinkling Each ingredient plays a key role in making these cookies delicious. The flour gives the cookies structure. Baking soda helps them rise, making them fluffy. Salt brings out the sweet flavors. Butter adds a rich taste and a soft texture. Brown sugar adds moisture and a hint of caramel flavor. Granulated sugar gives the cookies a nice crunch. Vanilla extract adds warmth and depth. The egg binds the dough and keeps it moist. Chocolate chips provide bursts of sweetness in every bite. Biscoff spread brings a unique flavor that makes these cookies special. Finally, a sprinkle of sea salt enhances all the flavors. With these ingredients, you are ready to create a delightful treat that everyone will love. First, set your oven to 350°F (175°C). This is the perfect temperature for baking. While the oven heats, grab two baking sheets. Line them with parchment paper. This helps prevent sticking and makes cleanup easy. In a medium bowl, whisk together 1 cup of all-purpose flour, 1/2 teaspoon of baking soda, and 1/4 teaspoon of salt. Mixing these dry ingredients is key for even flavor. Set this bowl aside for now. In a large bowl, cream together 1/2 cup of softened unsalted butter, 1/2 cup of packed brown sugar, and 1/4 cup of granulated sugar. Use a hand mixer or a wooden spoon. Mix until the mixture looks light and fluffy. This should take about 2-3 minutes. This step adds air and makes cookies soft. Next, beat in 1 large egg and 1 teaspoon of vanilla extract. Make sure to mix until everything is well combined. This helps to add richness and flavor to your cookies. Now it’s time to combine the dry and wet ingredients. Gradually mix the dry ingredients into the wet ingredients. Stir gently until just combined. Be careful not to overmix. Overmixing can make your cookies tough. Gently fold in 1 cup of chocolate chips. Use a spatula or a wooden spoon for this step. Then, take about 2 tablespoons of cookie dough. Flatten it slightly in your hand. Place a small ball of Biscoff spread (about 1/2 teaspoon) in the center. Encase the Biscoff with the dough and roll it back into a ball. Place these dough balls on the prepared baking sheets, leaving about 2 inches between each one. Bake the cookies in your preheated oven for 10-12 minutes. Look for lightly golden edges. The centers may seem a bit underbaked, but they will set as they cool. Once baked, let the cookies cool on the baking sheets for about 5 minutes. This helps them firm up. After that, transfer them to wire racks to cool completely. Enjoy the warm, gooey center when you take a bite! To get that perfect Biscoff center, use chilled Biscoff spread. This makes it easier to form small balls. Roll about half a teaspoon of the spread into a ball, like making a marble. This size allows the filling to stay inside the cookie. When you wrap the dough around the Biscoff ball, make sure it’s fully covered. Pinch the edges tightly. This helps the filling stay inside as it bakes. For soft cookies, use room temperature butter. This helps mix better with sugars. Cream the butter and sugars until fluffy. This adds air, making cookies light. Keep an eye on the baking time. Bake for about 10-12 minutes. The edges should be golden, but the centers can look soft. They will firm up as they cool, so don’t overbake them. Warm cookies taste the best. Serve them on a rustic wooden board. Add a small bowl of extra Biscoff spread for dipping. Consider a drizzle of melted chocolate on top for a special touch. This will enhance the flavor and look great on your table. {{image_2}} You can change up your Biscoff stuffed chocolate chip cookies by adding nuts. Chopped walnuts or pecans work great. They add a nice crunch. You can also try using different spreads. Nut butters or caramel can be fun options. Each choice gives your cookies a new twist. If you want to make these cookies vegan, swap the egg for a flax egg. Mix one tablespoon of flaxseed meal with three tablespoons of water. Let it sit for five minutes. For gluten-free cookies, use a gluten-free flour blend instead of all-purpose flour. Both options keep the cookies tasty and satisfying. Try using dark chocolate chips for a richer taste. White chocolate adds a sweet touch that pairs well with Biscoff. You can mix different types of chocolate too. This makes each bite exciting. Experiment with what you have on hand, and discover your favorite combo! You can store your Biscoff stuffed cookies easily. Keep them in an airtight container at room temperature. This helps keep them soft. If you want to keep them longer, refrigerate them. Make sure to wrap them well to avoid drying out. These cookies last about a week at room temperature. In the fridge, they can last up to two weeks. Always check for any signs of spoilage before eating. Freezing is a great option for these cookies. First, let them cool completely. Then, wrap each cookie in plastic wrap. Place them in a freezer bag or container. They can stay frozen for up to three months. To enjoy, thaw them in the fridge or at room temperature. You can even reheat them in the oven for that fresh-baked taste. Yes, you can use other spreads. Nutella, peanut butter, or cookie butter work well. Just keep in mind that each spread has its unique taste. This can change the flavor of your cookies. Test a small batch first if you want to be sure. Look for golden edges and slightly soft centers. The cookies will continue to cook after you take them out. If they feel firm when cooled, they are perfect. You want a balance between soft and chewy. If your dough is sticky, add a little more flour. Start with one tablespoon at a time. Mix well before adding more. You can also chill the dough for about 30 minutes. This helps firm it up and makes it easier to handle. Yes, you can prepare the dough in advance. Shape the cookie balls and freeze them. When you're ready, bake straight from the freezer. Just add a minute or two to the baking time. This makes fresh cookies easy anytime! These Biscoff stuffed cookies are a treat you can make with simple steps. We covered the ingredients, mixing methods, and tips to bake soft cookies. Enjoy creative variations to fit your taste like nuts or gluten-free options. Store them well for lasting flavor. With this guide, you can create delicious cookies to share or savor. Happy baking!

Biscoff Stuffed Chocolate Chip Cookies Delightful Treat

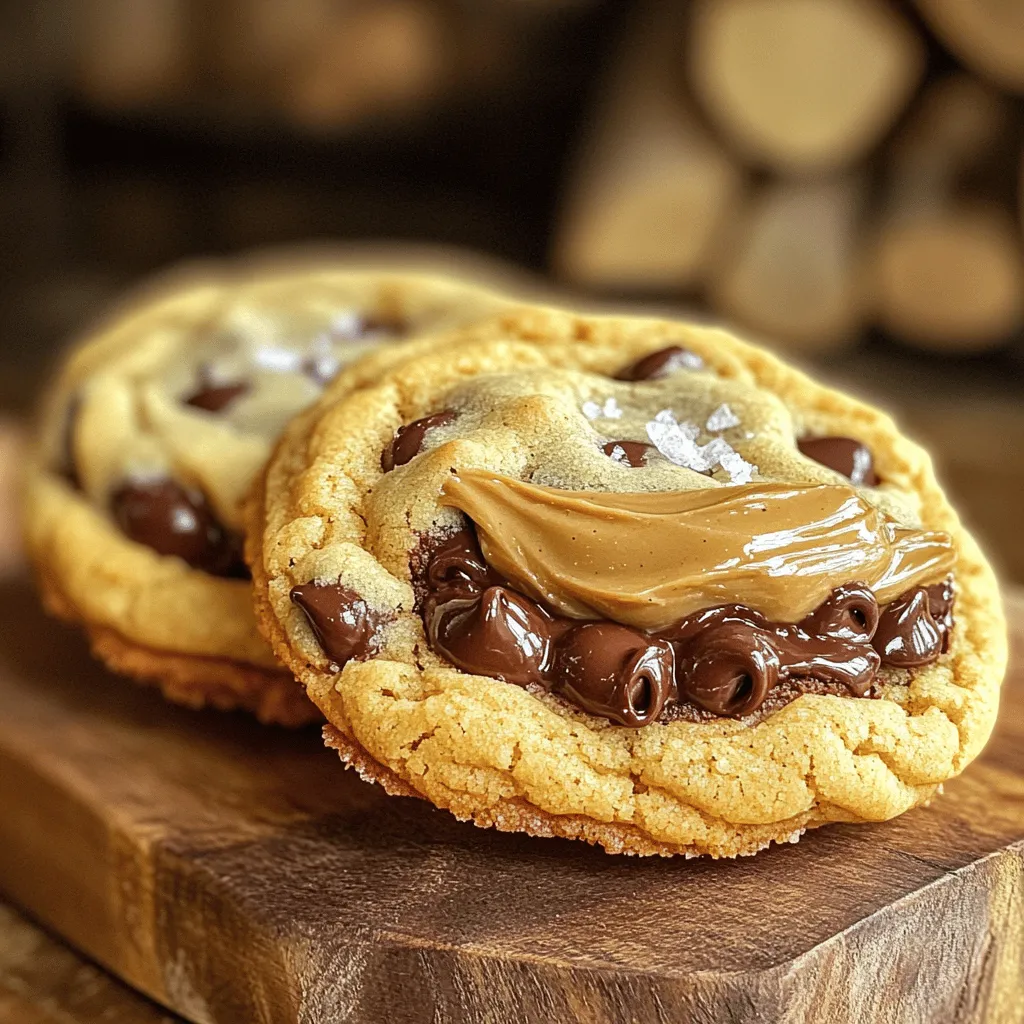
Who doesn’t love the warm, gooey goodness of chocolate chip cookies? Now, imagine taking that classic treat and stuffing it

- 200g ramen noodles - 250g raw shrimp, peeled and deveined - 2 tablespoons honey - 3 cloves garlic, minced Ramen noodles are the heart of this dish. They cook fast and soak up flavor well. The raw shrimp adds protein and a lovely texture. Honey gives a sweet touch, while garlic brings depth. - 2 tablespoons soy sauce - 1 tablespoon sesame oil - 1 teaspoon ginger, grated - 2 green onions, sliced - 1 tablespoon sesame seeds (optional) - 4 cups vegetable broth - Fresh vegetables (such as bok choy, carrots, or snap peas) for garnish Soy sauce and sesame oil add umami and richness. Fresh ginger gives a spicy kick. The green onions and sesame seeds are perfect for garnish, adding color and crunch. Use fresh veggies to brighten the bowl and boost the nutrition. To start, cook the ramen noodles. Follow the package instructions for the best result. This usually takes about 3 to 4 minutes. Once they are soft, drain the noodles in a colander. Set them aside for later. Next, grab a small bowl. In this bowl, whisk together two tablespoons of honey, three minced garlic cloves, two tablespoons of soy sauce, one tablespoon of sesame oil, and one teaspoon of grated ginger. This mix will create a delicious sauce. Set it aside for later use. Now, let’s cook the shrimp. Heat a little oil in a large skillet over medium heat. Once hot, add the peeled and deveined shrimp. Cook them for about two minutes on each side. They are done when they turn pink and opaque. This step is quick, so keep an eye on them! Once the shrimp are cooked, pour the honey garlic sauce over them in the skillet. Stir well to coat each shrimp evenly. Let the sauce cook for about one to two minutes. This helps the flavors blend and thicken slightly. For the final steps, prepare the vegetable broth. In a separate pot, bring four cups of vegetable broth to a gentle simmer. Add the cooked ramen noodles and your choice of fresh vegetables, like bok choy or carrots. Heat this mixture for about two to three minutes. Now, divide the ramen and broth into bowls. Top each bowl with the honey garlic shrimp. For a nice touch, garnish with sliced green onions and a sprinkle of sesame seeds if you like. Enjoy! To make sure your shrimp are cooked just right, check their color. When they turn pink and opaque, they are done. Overcooking shrimp can make them tough. Cook them for about two minutes on each side. This timing helps keep them juicy and tender. You can add extra aromatics for more flavor. Try adding crushed red pepper for heat or fresh herbs like cilantro. Balancing sweetness and saltiness is key. If you find it too sweet, add a bit more soy sauce. This will create a nice harmony in your dish. Plating can make your meal look stunning. Use a deep bowl to show off the noodles and shrimp. Arrange the shrimp neatly on top. For garnishing, sprinkle sliced green onions and sesame seeds. You can also add fresh veggies like bok choy or snap peas for color and crunch. This adds a fun twist to your dish! {{image_2}} You can switch the shrimp for chicken or tofu. For chicken, cut it into small pieces. Cook it for about 5-7 minutes until it's no longer pink. If you choose tofu, press it to remove water, then cube it. Cook the tofu until golden, about 4-5 minutes. Adjust the cooking time based on your protein choice. For a different flavor, try chicken or beef broth. These options add a rich taste. If you want a lighter dish, use low-sodium broth. It allows you to control the saltiness while keeping the broth tasty. Add seasonal veggies to boost nutrition and flavor. Bok choy, carrots, and snap peas work well. You can mix these for a colorful bowl. Fresh greens not only taste great but also add vitamins. Combine veggies to keep the dish vibrant and healthy. To keep your Minute Honey Garlic Shrimp Ramen fresh, store it right. Place leftovers in an airtight container. This helps avoid drying out. Refrigerate the container within two hours of cooking. The dish stays good in the fridge for up to three days. If you want to freeze it, follow these tips: - Let the ramen cool completely before freezing. - Use freezer-safe bags or containers for best results. - Label the bag with the date to track freshness. Frozen ramen can last for about three months. When you're ready to enjoy leftovers, reheat them safely. You can use a microwave or a stovetop. If using the microwave, place the ramen in a bowl. Add a splash of water to keep it moist. Heat in 30-second intervals until warm. For the stovetop, pour the ramen into a pan. Add a little broth or water to help it heat evenly. Stir often to maintain texture and flavor. This method helps keep the shrimp and veggies tender. Enjoy your tasty ramen just like the first time! This dish is quick to make. It takes about 10 minutes to prep and 10 minutes to cook. So, in just 20 minutes, you can have a tasty meal ready! Yes, you can use frozen shrimp. Just remember to thaw them first. Place the shrimp in a bowl of cold water. This will take about 15-20 minutes. Pat them dry before cooking. If you want a change, try other noodles. You can use soba noodles, udon noodles, or even rice noodles. Each type gives a different taste and texture. To add heat, you can mix in red pepper flakes or sriracha. Start with a small amount and taste it. You can always add more if you like it hot! You can easily make this dish vegetarian. Swap the shrimp for tofu or tempeh. Use vegetable broth to keep the flavors bold. Add extra veggies like bell peppers or mushrooms for more texture. This blog post detailed how to create a tasty Minute Honey Garlic Shrimp Ramen. You learned about the main and additional ingredients, from ramen noodles to fresh veggies and sauces. I shared step-by-step instructions for cooking and assembling your dish, plus tips for perfect shrimp and flavor enhancement. You can also modify this recipe with different proteins and vegetables. Remember to store leftovers properly for the best taste later. Enjoy trying this recipe and make it your own with fun variations!

Minute Honey Garlic Shrimp Ramen Flavorful Delight

Are you ready to whip up a tasty and quick meal? My Minute Honey Garlic Shrimp Ramen is the answer!

- 1 lb boneless, skinless chicken breasts - 1 cup sun-dried tomatoes, chopped (in oil) - 1 medium onion, diced - 3 cloves garlic, minced - 4 cups chicken broth - 1 cup heavy cream or coconut cream - 1 teaspoon oregano - 1 teaspoon thyme - Salt and pepper to taste - 2 cups baby spinach - 1/2 cup grated Parmesan cheese (optional) - Fresh basil for garnish This soup relies on a few key ingredients. The chicken gives it a hearty base. Sun-dried tomatoes add a rich flavor. Onions and garlic bring out the depth. Chicken broth ties everything together. Using heavy cream makes the soup rich and creamy. If you prefer a lighter option, use coconut cream. For herbs, oregano and thyme enhance the taste. Don’t forget salt and pepper to make it pop. You can add baby spinach for color and nutrition. Parmesan cheese adds a savory touch if you like. Fresh basil makes a great garnish. Each ingredient plays an important role in creating a warm, comforting dish. Enjoy the process of gathering these ingredients. The result will be a delicious soup that warms your heart and home. - First, season the chicken breasts with salt and pepper. This step adds flavor. - Next, chop the sun-dried tomatoes into small pieces. - Then, dice the onion finely. - Finally, mince the garlic cloves. These ingredients will create a rich taste. - Now, layer the seasoned chicken at the bottom of the slow cooker. - Add the chopped sun-dried tomatoes on top of the chicken. - Next, sprinkle the diced onion and minced garlic over the tomatoes. This mix will bring out great flavors. - Pour the chicken broth over all the ingredients. Make sure the chicken is fully submerged. - Then, sprinkle oregano and thyme on top. These herbs add warmth and depth to the soup. - Cover the slow cooker and set it to cook. You can choose low for 6-7 hours or high for 4 hours. The chicken will become tender and juicy. - When the chicken is cooked, remove it from the slow cooker. Shred it using two forks. - Return the shredded chicken to the slow cooker. - Stir in the heavy cream or coconut cream. Let it heat for another 15-20 minutes on low. This step makes the soup creamy and rich. - Just before serving, add the baby spinach. Stir until the spinach wilts. - If you like, stir in grated Parmesan cheese until it melts. This adds a nice, cheesy flavor. To make this soup shine, use fresh herbs. Fresh basil or thyme adds a bright touch. You can also adjust the seasoning before serving. Taste it first, and add salt or pepper as needed. This step helps bring out all the flavors. If you need a dairy-free option, try coconut cream instead of heavy cream. It adds a nice richness without the dairy. You can also swap out baby spinach for other greens. Kale or Swiss chard works great and adds a different texture. Garnish your soup with fresh basil and extra cheese for a special touch. It makes the dish look nice and adds flavor. Pair it with crusty bread or a fresh salad for a full meal. These sides complement the soup well and make it more filling. {{image_2}} You can spice up your Slow Cooker Creamy Sun-Dried Tomato Chicken Soup in fun ways. - Adding red pepper flakes for heat: If you like a kick, try red pepper flakes. Just a pinch adds warmth and flavor. Adjust the amount to your spice level. - Incorporating different vegetables: Think about adding carrots or celery. These veggies bring crunch and sweetness. Just chop them and toss them in with the other ingredients. You can also change this soup to fit your needs. - Gluten-free modifications: This soup is naturally gluten-free. Just make sure your chicken broth is gluten-free. - Making it dairy-free: Use coconut cream instead of heavy cream. It keeps the soup rich and creamy without dairy. Try adding local flavors for a new twist. - Italian-inspired variations: Add fresh basil or Italian sausage for an Italian flair. These ingredients complement the sun-dried tomatoes well. - Adding local spices or flavors: Feel free to explore your local spices. A pinch of cumin or paprika might work wonders. Just experiment to find what you love! - Store the soup in airtight containers. - It stays fresh for up to 4 days in the fridge. You want to keep it sealed well. This helps keep the flavors strong and safe to eat. If you plan to eat it later, place it in the fridge right away. - You can freeze the soup, but avoid adding cream before freezing. - To freeze, let it cool first. Then, pour it into freezer bags or containers. When you freeze it this way, it keeps its taste and texture. To thaw, put it in the fridge overnight. This makes it easy to reheat without losing its rich flavor. - The best way to reheat is on the stove over low heat. - You may need to add a splash of broth or water. Stir it often to warm it evenly. If it seems too thick, adding liquid helps bring back its creamy texture. Enjoy it hot, and feel free to adjust the seasoning if needed. This soup lasts about 3 to 4 days in the fridge. Keep it in an airtight container to lock in freshness. Make sure to cool the soup before storing. If you want it to last longer, freeze it. It keeps well for about 2 to 3 months in the freezer. When you want to eat it, just thaw it in the fridge overnight. Yes, you can use frozen chicken! Place the frozen chicken breasts directly in the slow cooker. Just remember, it may need extra cooking time. Cook on low for about 8 hours or on high for about 5 hours. Always check that the chicken is fully cooked before serving. The internal temperature should reach 165°F (75°C). This soup pairs well with crusty bread. You can also serve it with a fresh salad for a light meal. Garlic bread adds a nice touch too. Try a side of roasted vegetables to add some color and nutrition. For a fun twist, serve it with a grilled cheese sandwich! This blog post covered how to make a delicious Slow Cooker Creamy Sun-Dried Tomato Chicken Soup. I shared the main ingredients, step-by-step cooking instructions, and helpful tips. You can customize the soup with variations for taste or dietary needs. Always store leftovers properly for later enjoyment. With this guide, you can create a cozy meal that everyone will love. Enjoy the process and savor each delicious bowl. This soup is sure to be a hit in your home!

Slow Cooker Creamy Sun-Dried Tomato Chicken Soup Delight

If you’re looking for a cozy meal that cooks itself, you’ve found it! This Slow Cooker Creamy Sun-Dried Tomato Chicken

To make delicious blueberry lemon scones with glaze, you need simple ingredients. Here’s the list: - 2 cups all-purpose flour - 1/2 cup granulated sugar - 1 tablespoon baking powder - 1/2 teaspoon salt - 1/2 cup unsalted butter, cold and cubed - 1 cup fresh blueberries - Zest of 1 lemon - 1/2 cup heavy cream - 1 large egg - 1 teaspoon vanilla extract - 1 cup powdered sugar - 2-3 tablespoons lemon juice (for glaze) Each ingredient plays a key role in the flavor and texture of the scones. The flour gives structure, while sugar adds sweetness. Baking powder helps them rise, and salt enhances flavor. Cold butter creates a flaky texture, and blueberries bring juicy bursts. Lemon zest brightens the taste, while heavy cream and egg bind everything. Finally, powdered sugar and lemon juice make the sweet glaze that tops the scones. Gather these items, and you are ready to bake! Start by preheating your oven to 400°F (200°C). This helps the scones bake evenly. Line a baking sheet with parchment paper. This step keeps your scones from sticking. In a large bowl, whisk together the dry ingredients. Combine 2 cups of all-purpose flour, 1/2 cup of granulated sugar, 1 tablespoon of baking powder, and 1/2 teaspoon of salt. Whisking helps mix everything well. Next, add 1/2 cup of cold, cubed unsalted butter to the dry mix. Use a pastry cutter or your fingers to mix. You want the mixture to look like coarse crumbs. This step adds richness to the scones. Gently fold in 1 cup of fresh blueberries and the zest from 1 lemon. Be careful not to break the berries. This adds flavor and color to your scones. In another bowl, whisk together 1/2 cup of heavy cream, 1 large egg, and 1 teaspoon of vanilla extract. Mix well until everything is combined. This step binds your ingredients together. Pour the wet mix into the dry mix. Stir gently until just combined. The dough should come together but not be over-mixed. Turn the dough onto a floured surface. Pat it into a circle about 1 inch thick. Cut the scones into wedges or use a round cutter for shapes. Transfer your scone shapes to the prepared baking sheet. Bake for 15-20 minutes. They should turn a light golden color on top. This means they are done. While the scones bake, mix 1 cup of powdered sugar with 2-3 tablespoons of lemon juice in a bowl. Stir until smooth. Adjust the lemon juice to get the right thickness for your glaze. Once the scones cool on a wire rack for about 10 minutes, drizzle the lemon glaze over them. This sweet touch adds a nice finish. Enjoy your warm blueberry lemon scones! To make great scones, keep a few tips in mind: - Use cold butter. It helps create flaky layers. - Use fresh blueberries. They add burst and flavor. - Measure your flour correctly. Too much can make them dry. - Add lemon zest for a bright flavor. It lifts the scone. Mixing too much can ruin your scones. When you combine the wet and dry ingredients, stir gently. The goal is to just combine them. Look for a dough that holds together but is not smooth. This helps keep your scones light and fluffy. Preheat your oven to 400°F (200°C). A hot oven helps scones rise well. Place them on the middle rack. This allows even heat. If your scones are not browning, check your oven's temperature with a thermometer. Let the scones cool on a wire rack for about 10 minutes after baking. This keeps them from getting soggy. For the glaze, mix powdered sugar with lemon juice until smooth. Drizzle it on the scones while they are still warm. This helps the glaze stick better. Enjoy the sweet and tangy flavor! {{image_2}} You can switch out blueberries for other berries. Raspberries, blackberries, or strawberries work great. Each berry brings a unique taste. For instance, strawberries add sweetness, while raspberries give a tart flavor. Just remember to adjust the amount based on berry size. If using larger berries, cut them into smaller pieces. If you want a twist, try other citrus zests. Lime zest adds a bright, fresh taste. Orange zest offers sweetness and depth. You can even mix zests for a more complex flavor. Just use the same amount as you would for lemon. This keeps the balance of flavors in your scones. Incorporating nuts or spices can elevate your scones. Chopped walnuts or pecans add crunch and richness. For a warm flavor, consider adding cinnamon or nutmeg. Use about 1/4 cup of nuts or 1 teaspoon of spices. This way, you can create a scone that suits your taste. Enjoy experimenting with different combinations! To keep your blueberry lemon scones fresh, store them in an airtight container. This helps keep moisture in and prevents them from getting hard. Place wax paper between layers to avoid sticking. They stay fresh for about 2-3 days at room temperature. If you want to keep them longer, consider freezing. To enjoy warm scones again, preheat your oven to 350°F (175°C). Place the scones on a baking sheet. Heat for about 5-10 minutes. This warms them and helps restore some of their original texture. You can also microwave them for 15-20 seconds, but they won't be as crispy. To freeze scones, cool them completely first. Wrap each scone in plastic wrap or aluminum foil. Place wrapped scones in a freezer bag. They can last up to 3 months in the freezer. When ready to eat, let them thaw in the fridge overnight. Then, reheat as mentioned above. Enjoy your delicious scones anytime! Yes, you can use frozen blueberries. They work well in scones. Just add them straight from the freezer. Avoid thawing to keep them from bleeding. This keeps your scones bright and beautiful. To make gluten-free scones, replace regular flour with a gluten-free blend. Use a mix that has xanthan gum. This helps mimic the texture of all-purpose flour. Follow the same steps in the recipe for best results. If you need a substitute for heavy cream, use whole milk mixed with butter. Combine 1/2 cup of milk with 2 tablespoons of melted butter. This mixture will give you a similar fat content. The scones stay fresh for about 2-3 days at room temperature. Keep them in an airtight container. For longer storage, freeze them for up to 3 months. Just thaw and warm them before serving. Yes, you can make the dough ahead of time. Wrap it tightly in plastic wrap and refrigerate it for up to 24 hours. Just remember to let it sit at room temperature for a bit before shaping. The best way to glaze scones is to drizzle the glaze over them after they cool. Use a spoon for a light drizzle or a piping bag for more control. This adds a lovely finish to your scones. This blog post covered how to make delicious blueberry lemon scones. We discussed the ingredients, the step-by-step instructions, and useful tips for perfect results. Remember, mixing too much can ruin your scones. Explore variations by trying other fruits or adding nuts. Store your scones properly for freshness. Enjoy baking these treats. They will impress everyone and bring joy to your kitchen. Now grab your ingredients and start creating your own batch!

Blueberry Lemon Scones with Glaze Simple and Sweet

Are you ready to bake the perfect sweet and tangy treat? My Blueberry Lemon Scones with Glaze are simple to

- 1 lb ground chicken - 1 cup red bell pepper, finely diced - 1 cup carrots, grated - 1/4 cup green onions, finely sliced - 1 tablespoon fresh ginger, minced - 2 cloves garlic, minced - 1/4 cup creamy peanut butter - 2 tablespoons soy sauce (low sodium) - 1 tablespoon lime juice - 1 tablespoon honey or maple syrup - 1 teaspoon sriracha (adjust to taste) - 1 head of butter or iceberg lettuce, leaves separated The main ingredients create a hearty and flavorful filling. Ground chicken gives a rich taste and protein. Red bell peppers add color and crunch. Grated carrots bring sweetness and texture. Green onions give a subtle bite. Fresh ginger and garlic add depth. The creamy peanut butter is the star, binding all flavors. Soy sauce and lime juice balance the richness. Honey or maple syrup adds sweetness. Sriracha gives a kick, but you can adjust it to your liking. - Chopped cilantro - Crushed peanuts - Butter or iceberg lettuce leaves Garnishes elevate the dish. Chopped cilantro offers freshness and brightness. Crushed peanuts add crunch and nutty flavor. The lettuce leaves serve as a crunchy cup, holding all the delicious filling. You can use butter or iceberg lettuce based on your preference. These simple touches make the dish look inviting and appetizing. 1. Sauté garlic and ginger: In a large skillet, heat some oil over medium heat. Add minced garlic and ginger. Cook for about one minute until it smells great. 2. Brown the ground chicken: Add 1 pound of ground chicken to the skillet. Use a spatula to break it apart. Cook for 5 to 7 minutes until it turns brown and is fully cooked. - Add red bell pepper and carrots: Stir in 1 cup of finely diced red bell pepper and 1 cup of grated carrots. Cook for 2 to 3 minutes. The vegetables should be soft but still bright. - Whisk peanut butter, soy sauce, lime juice, honey/maple syrup, and sriracha: In a bowl, mix 1/4 cup of creamy peanut butter, 2 tablespoons of low-sodium soy sauce, 1 tablespoon of lime juice, 1 tablespoon of honey or maple syrup, and 1 teaspoon of sriracha. Whisk until smooth and creamy. - Mix peanut sauce with chicken and veggies: Pour the peanut sauce over the chicken and vegetable mix. Stir well to coat everything evenly. Let it simmer for about 2 minutes. This helps the flavors mix nicely. - Stir in green onions: Remove the skillet from heat. Add 1/4 cup of finely sliced green onions. Mix well to combine. - Assemble in lettuce cups and garnish: Take the leaves from a head of butter or iceberg lettuce. Spoon the spicy chicken mixture into each leaf. Top with chopped cilantro and crushed peanuts for extra crunch. Enjoy! To brown the chicken evenly, start by heating your skillet over medium heat. Add a drizzle of oil to the hot pan. When the oil is hot, add minced garlic and ginger. Cook them for about a minute until they smell good. Then, add the ground chicken. Break it apart as it cooks. Stir often to ensure all pieces get that nice brown color. For sautéing vegetables, keep the heat at medium-high. Add the diced red bell pepper and grated carrots after the chicken is browned. Stir them in for about 2-3 minutes. This helps them soften but still keeps some crunch. To modify the sriracha for your taste, start with one teaspoon. Add more if you want it spicier. Mix it into the sauce well. Taste it before adding more. This way, you control the heat level. If you like it milder, try using less sriracha or substituting it with sweet chili sauce. You can prep ingredients in advance to save time. Chop the veggies a day ahead and store them in the fridge. This keeps them fresh and ready to use. You can also mix the peanut sauce ahead of time. Just keep it in a sealed container. When you’re ready to cook, just combine everything. This makes weeknight dinners super easy and quick! {{image_2}} You can easily switch out ground chicken for turkey or tofu. Turkey has a similar taste and texture. It cooks just as quickly and absorbs flavors well. Tofu is a great choice for a plant-based meal. Use firm tofu for the best results. Just crumble it before cooking. This gives you a tasty and healthy option for everyone. To make this dish vegan, swap the ground chicken for crumbled tofu. Use the same amount as the chicken. For the peanut sauce, make sure your peanut butter is vegan. You can also use maple syrup instead of honey. This keeps the sweet flavor while staying plant-based. With these changes, you still get a delicious meal. Feel free to mix up the sauce to find your favorite taste. You can try using almond butter instead of peanut butter. This gives a different flavor that many enjoy. Adding hoisin sauce can also add a nice sweetness. If you love heat, try adding more sriracha or chili paste. You can even mix in some lime zest for extra freshness. Experimenting will help you discover fun new flavors! After you enjoy your Spicy Thai Peanut Chicken Lettuce Cups, store any leftovers right away. Place them in an airtight container. By doing this, you keep the flavors fresh. Leftovers will last for 3 to 4 days in the fridge. Make sure to separate the chicken mixture from the lettuce leaves. This will help the lettuce stay crisp. If you want to save some for later, freezing is a great option. First, cool the chicken mixture completely. Then, transfer it to a freezer-safe container. Label it with the date. You can freeze it for up to 2 months. Just remember, the lettuce does not freeze well. Store it fresh when you're ready to eat. When you're ready to enjoy your frozen chicken, take it out of the freezer. Let it thaw in the fridge overnight. To reheat, use a skillet over medium heat. Stir the chicken mixture until it is hot. This keeps the flavors intact. You can also use a microwave. Heat it in short bursts, stirring in between. Enjoy it in fresh lettuce cups, topped with cilantro and peanuts. Yes, you can use different types of lettuce. Butter lettuce is great, but you can also try iceberg or romaine. Each type adds a unique crunch. If you want something sturdier, use romaine. If you like a softer bite, butter lettuce works well. Iceberg is crisp and refreshing, perfect for holding your spicy filling. To make this dish gluten-free, swap regular soy sauce for tamari. Tamari tastes similar but has no wheat. You can also use coconut aminos as a tasty alternative. Both options keep the flavor strong while ensuring the dish is safe for gluten-sensitive eaters. If you don't have peanut butter, try using sunbutter or almond butter. Sunbutter works well for nut allergies. Almond butter adds a different nutty flavor but still pairs nicely with the other ingredients. You can also use tahini, which gives a creamy texture and a unique taste. Yes, you can double this recipe easily. Just make sure you have a larger skillet for cooking. Keep the cooking time the same, but watch the chicken to ensure it's cooked through. You can also prepare extra lettuce cups to serve everyone. Enjoy sharing these delicious cups with friends and family! In this blog post, we explored how to create tasty ground chicken lettuce cups. We covered key ingredients, including colorful vegetables and rich peanut sauce. I shared step-by-step instructions to ensure your cooking success. You learned helpful tips, ways to customize the dish, and proper storage methods. This recipe is versatile, allowing for many variations. Remember, cooking is all about trying new things. Enjoy your delicious cups and share them with friends!

Spicy Thai Peanut Chicken Lettuce Cups Simple Recipe

If you’re craving a tasty, easy meal, you’re in the right spot! This simple recipe for Spicy Thai Peanut Chicken

- Medium eggplant - Breadcrumbs (preferably panko) - Grated Parmesan cheese - Garlic powder - Italian seasoning - Salt and black pepper - Eggs for binding - Cooking spray or olive oil When we talk about the main ingredients, the medium eggplant is our star. I love to slice it into 1/4-inch rounds for the best balance of crunch and tenderness. Panko breadcrumbs are key. They add that extra crunch we crave! The grated Parmesan cheese gives a rich, nutty flavor that really shines through. Next, we have our seasonings. Garlic powder is a must for that warm, savory kick. Italian seasoning brings in herbs that make our dish feel even more special. Salt and black pepper are basics but essential for enhancing all the flavors. For binding, we use large eggs. They help the coating stick well to our eggplant. Finally, a light spray of cooking spray or olive oil keeps everything crispy and delicious. If you want to make it even more flavorful, consider adding some herbs or spices to the breadcrumbs. This way, your eggplant becomes a true delight! First, slice the eggplant into 1/4-inch rounds. Lay the slices on paper towels. Sprinkle salt on both sides. This step helps draw out moisture and bitterness. Let them sit for about 30 minutes. After that, pat the slices dry with more paper towels. This makes sure they are not soggy when cooked. Next, you need a breading station. In a bowl, mix breadcrumbs, grated Parmesan cheese, garlic powder, Italian seasoning, salt, and black pepper. Stir until well combined. In another bowl, whisk the eggs until smooth and mixed. This will help the breading stick to the eggplant. Now, it’s time to coat the eggplant. Dip each slice into the beaten eggs first. Let any extra egg drip off. Then, dredge the slice in the breadcrumb mix. Press down gently to help the coating stick. Repeat this process with all the eggplant slices. Enjoy the fun of getting your hands a little messy! Set your air fryer to 375°F (190°C). This step is key for crispy eggplant. Preheat it for about 5 minutes. Arrange the eggplant slices in the air fryer basket. Make sure they are in a single layer. They should not overlap. This helps them cook evenly. Lightly spray the tops with olive oil for extra crispiness. Cook the eggplant for 10-12 minutes. Halfway through, flip the slices for even cooking. Check for a golden brown color. You want them crispy and delicious! Let the crispy eggplant cool for a few minutes. This helps keep them crunchy. For a nice touch, drizzle some balsamic glaze over them. You can also serve them with marinara sauce for dipping. Enjoy your tasty treat! {{image_2}} To get that perfect crunch, use panko breadcrumbs. They add a light and airy texture. When you coat the eggplant, spray the tops with olive oil. This helps the crumbs crisp up while cooking. A light mist works wonders for achieving that golden color. Salting the eggplant is key. It draws out moisture and bitterness. Slice the eggplant, then sprinkle salt on both sides. Let it sit for about 30 minutes. Afterward, pat each slice dry. This prevents sogginess and keeps your eggplant crispy. You can boost flavor with more spices. Consider adding smoked paprika or oregano. These work well with the Parmesan. For a tasty dip, pair your crispy eggplant with marinara sauce or a creamy garlic dip. This adds a fun twist and enhances the eating experience. You can switch up the cheese in this dish. Mozzarella adds a gooey texture, while cheddar gives a sharp taste. Both melt well and make the eggplant even more delicious. If you want a dairy-free option, try vegan cheese. Look for brands that melt nicely. They can bring great flavor without the dairy. Want to add some heat? A dash of cayenne pepper will do the trick. It gives a nice kick without overpowering the dish. You can also try other seasoning blends. Garlic powder or smoked paprika can change the flavor profile. Experiment with your favorite spices to find what you love. While the air fryer makes this dish crispy, you have other options. Baking in the oven is one. Preheat your oven to 400°F (200°C) and bake for 20-25 minutes. Flip halfway for even crispiness. Pan-frying is another choice. Heat oil in a skillet and cook until golden brown on both sides. Each method offers a different taste and texture. Salt the eggplant for about 30 minutes. This process helps draw out moisture and bitterness. The salt pulls water from the eggplant, making it less soggy when cooked. After 30 minutes, pat the slices dry with paper towels. This step is crucial for crispy results. Yes, you can prepare the eggplant ahead of time. Slice and salt the eggplant, then pat it dry. Store the slices in an airtight container in the fridge for up to 24 hours. When you're ready to cook, you can bread and air fry them. This saves time and makes cooking easier. For leftovers, store the crispy eggplant in an airtight container. Keep it in the fridge for up to 3 days. To reheat, use the air fryer at 350°F (175°C) for about 5-7 minutes. This method keeps the crispiness intact. Avoid microwaving, as this can make them soggy. This blog post covered how to make delicious Air Fryer Parmesan Crusted Eggplant. We discussed the key ingredients, such as eggplant, breadcrumbs, and Parmesan cheese. I guided you through the preparation, coating, and cooking processes. Remember to salt the eggplant to reduce moisture for the best texture. You can also experiment with flavors and different cheeses. Enjoy your tasty dish, and don’t hesitate to try variations to make it uniquely yours!

Air Fryer Parmesan Crusted Eggplant Crispy Delight

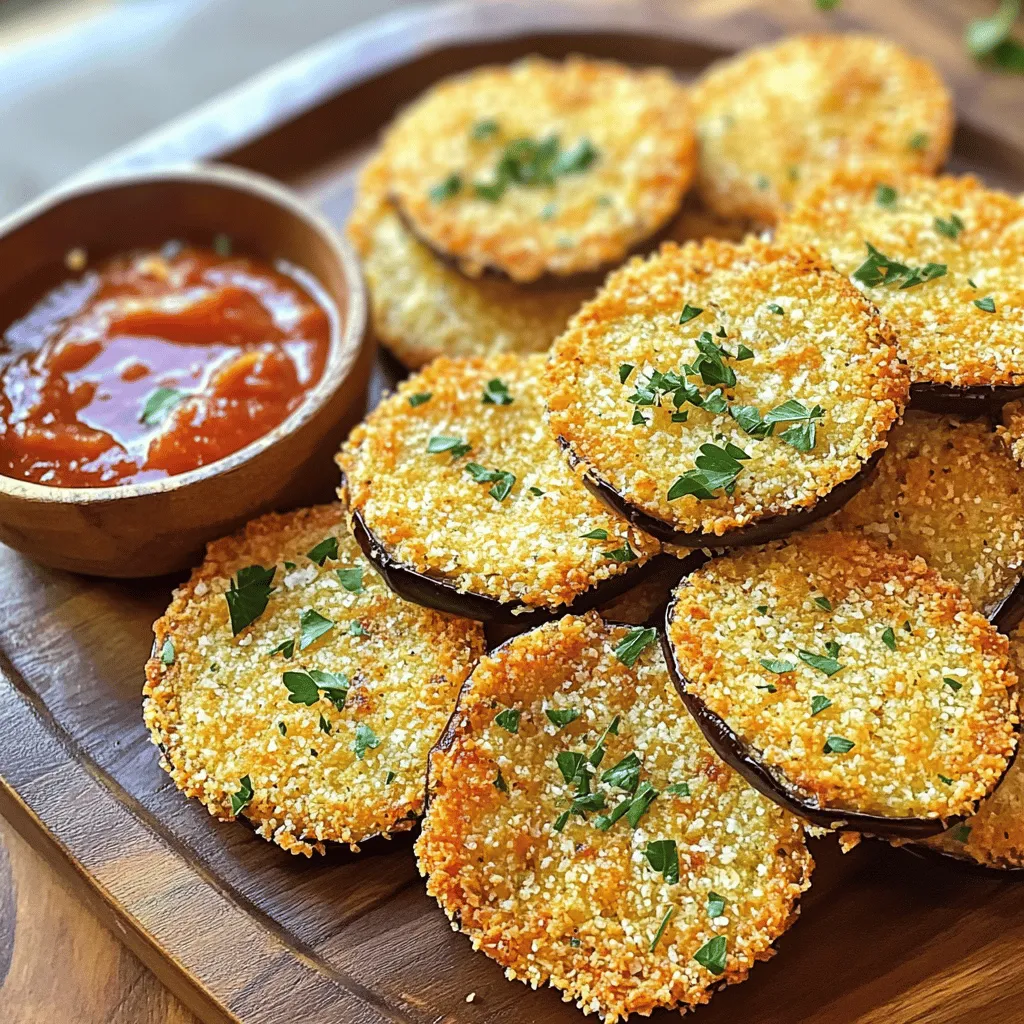
Are you ready for a tasty twist on a classic dish? Air Fryer Parmesan Crusted Eggplant is your new go-to

- Ripe bananas: You need 3 ripe bananas. They should be frozen and sliced. Bananas create a creamy base. They also add natural sweetness. - Coconut milk options: Use 1 cup of coconut milk. You can choose full-fat or light coconut milk. Both options work well. They add creaminess and a hint of coconut flavor. - Matcha powder explanation: Add 1 tablespoon of matcha powder. Matcha brings a vibrant green color. It also has a unique, earthy taste. Matcha is rich in antioxidants, making this nice cream healthy. - Peppermint extract significance: Use 1 teaspoon of peppermint extract. This gives the nice cream a refreshing taste. Peppermint pairs well with chocolate and matcha flavors. - Dark chocolate chips choice: Add 1/4 cup of dark chocolate chips. You can use dairy-free chips if you like. These add a nice crunch and rich chocolate flavor. - Optional sweetness with maple syrup: You may add 1 tablespoon of maple syrup. This is for extra sweetness, if you want. Taste the mix first to see if you need it. - Importance of sea salt: A pinch of sea salt is essential. It enhances all the flavors in the nice cream. Salt balances the sweetness and makes every bite better. Now that you know the ingredients, you can gather them all together. This nice cream is easy and fun to make! To start, freeze your banana slices. Peel and slice three ripe bananas. Place them in a single layer on a baking sheet. Then, freeze for about two hours or until solid. Next, measure one cup of coconut milk. You can use any milk you like, but coconut milk gives a creamy texture. Gather the rest of your ingredients. You will need matcha powder, peppermint extract, dark chocolate chips, a pinch of sea salt, and maple syrup if you want extra sweetness. Now, it’s time to blend. Start with the frozen banana slices in your blender. Add the coconut milk, one tablespoon of matcha powder, and one teaspoon of peppermint extract. If you’re using maple syrup, add it too along with a pinch of sea salt. When blending, use a high setting. Stop and scrape down the sides as needed. Blend until the mixture is smooth and creamy. It should look like soft serve ice cream. Once blended, gently fold in the dark chocolate chips. Use a spatula for this so you don’t break the chips. Transfer your nice cream into a container. Smooth the top with a spatula. Freeze the nice cream for about two to three hours until it’s firm. If you prefer a softer texture, you can serve it right away. Scoop into bowls or cones and enjoy! To get a creamy nice cream, start with frozen bananas. Use ripe bananas for the best flavor. When you blend, add the coconut milk slowly. This helps create a smooth, soft texture. If it’s too thick, you can add a bit more milk. Blend until it looks like soft serve ice cream. Adding maple syrup is a great way to add sweetness. Start with one tablespoon. You can always add more if you like it sweeter. If you want a different flavor, try vanilla extract instead of peppermint. This change will give your nice cream a new twist. You can serve your nice cream in bowls or cones. Bowls are great for sharing, while cones are fun for individual servings. To make it look pretty, top with extra chocolate chips or mint leaves. A sprinkle of nuts can add some crunch, too. Enjoy your delicious creation! {{image_2}} You can easily change the flavor of your nice cream. To do this, add coconut or almond extract. These extracts give a fun twist and add a nice depth to the taste. You can also try different types of chocolate. Use white chocolate or even carob chips for a unique profile. Nuts like walnuts or pecans can add crunch and richness. Just remember to chop them small so they mix well. If you want to make this nice cream nut-free, simply skip any nuts. Use oat milk or soy milk instead of coconut milk if you prefer. For sweetness, you can swap maple syrup with agave or honey. This nice cream stays sweet while fitting different diets. Make sure to check labels if you need it to be truly nut-free. Seasonal fruits can kick your nice cream up a notch. In summer, add fresh strawberries or blueberries. In fall, try pumpkin puree or cinnamon. These fruits not only add flavor but also beautiful colors. For holidays, think about flavors like gingerbread or eggnog. Adding these will make your nice cream festive and fun! To keep your Matcha Mint Chocolate Chip Nice Cream fresh, use an airtight container. Glass or plastic containers work well. Make sure the lid fits tightly. This keeps air out and prevents freezer burn. If you do not have a lid, use plastic wrap over the top. Wrap it tight to seal in moisture. Your nice cream will last in the freezer for about two weeks. After that, it may lose its flavor and texture. Watch for signs of spoilage. If it develops ice crystals or a strange smell, it’s best to toss it. These signs mean it’s not fresh anymore. If your nice cream is too hard, you can revive it. Let it sit at room temperature for a few minutes. Then, use a spoon or spatula to mix it. This helps restore a creamy texture. For serving leftovers, scoop out what you need. Return the rest to the freezer right away. This way, it stays fresh and tasty. No, fresh bananas will not work well. Frozen bananas create a creamy, soft texture. They also chill the nice cream, making it feel like real ice cream. You can use any milk you like. Almond milk or oat milk are great options. Just remember, different milks will change the flavor a bit. To cut calories, skip the maple syrup. You can also use less chocolate. Using a low-calorie milk helps too. Yes, this recipe is great for meal prep. You can make it ahead of time and freeze it. Just scoop out what you need when you want a treat. Absolutely! You can use honey or agave syrup. You can even use a sugar substitute if you prefer. Just adjust the amount to suit your taste. We explored how to make delicious, healthy nice cream using simple ingredients. Ripe bananas and coconut milk create a base that's easy to adapt. You can customize flavors with matcha or peppermint, and adjust sweetness with maple syrup. Follow the step-by-step instructions for the best texture. Don’t forget tips for serving and storage! Using this guide, you can enjoy a creamy treat that suits any taste. Try different flavors or storage methods to keep it fresh. I hope you have fun creating your unique nice cream!

Matcha Mint Chocolate Chip Nice Cream Delight

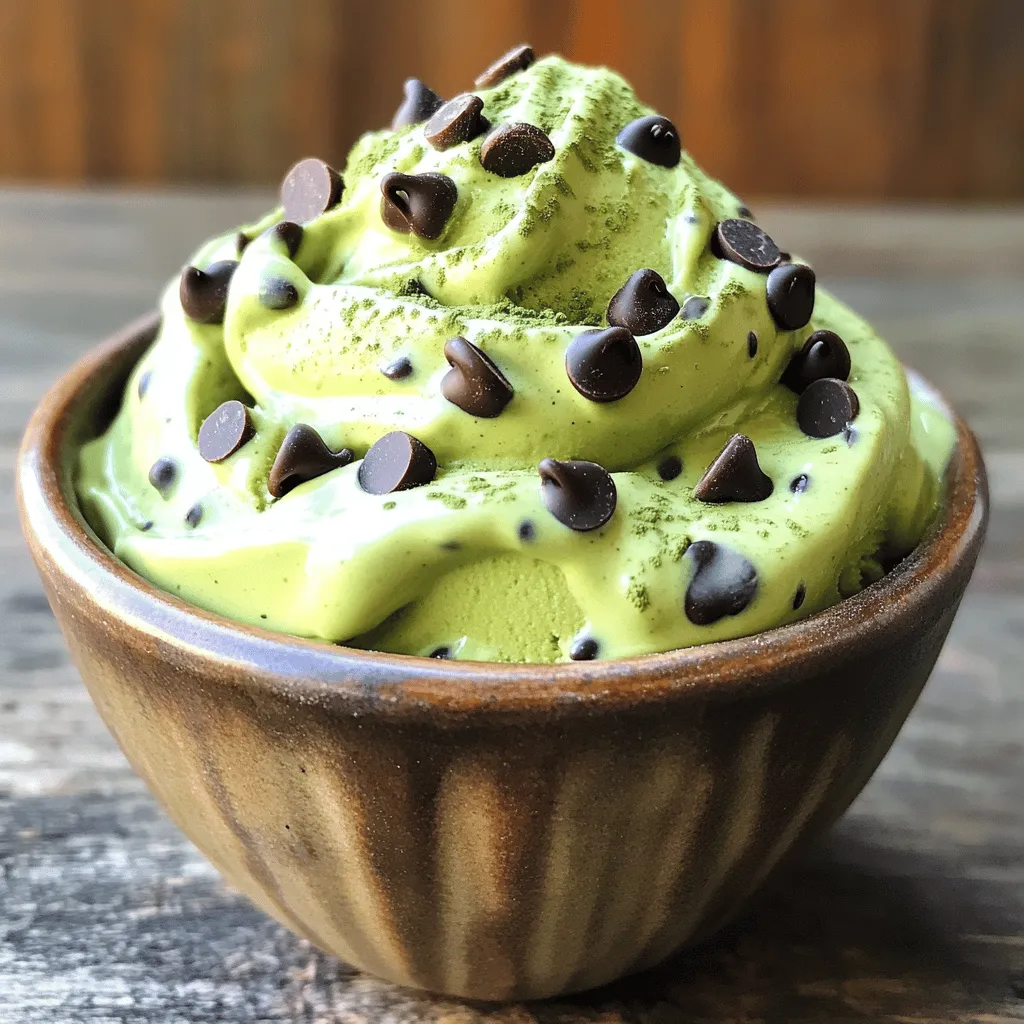
Are you ready to indulge in a guilt-free treat? Imagine creamy, dreamy Matcha Mint Chocolate Chip Nice Cream, perfect for

- 1 lb sirloin steak, cut into bite-sized cubes - 4 medium potatoes, diced - 4 tablespoons unsalted butter, melted - 4 cloves garlic, minced The heart of this dish lies in the main ingredients. The sirloin steak gives the packs a rich and hearty flavor. Cut it into bite-sized cubes for quick cooking and easy eating. Next, we have the potatoes. Diced medium, they cook evenly and soak up all the tasty juices. Then, unsalted butter adds a creamy richness. Melting it enhances the flavor of each ingredient. Finally, garlic is a must. Minced fresh, it adds a punch of flavor that shines through. - 1 teaspoon dried rosemary - 1 teaspoon dried thyme - Salt and pepper to taste - Fresh parsley, chopped (for garnish) Seasonings elevate the dish. Dried rosemary gives a woodsy note, while thyme adds a subtle warmth. Don't forget salt and pepper. They enhance all the flavors and make each bite pop. Chopping fresh parsley for garnish adds a bright touch. It makes your packs look and taste fresh. With these ingredients, you set the stage for a delicious meal that impresses everyone. - Preheat your grill or oven to 400°F (200°C). This step helps cook everything evenly. - In a large bowl, mix the cubed steak, diced potatoes, melted butter, minced garlic, dried rosemary, dried thyme, salt, and pepper. Toss until all the pieces are coated well. - Tear off four pieces of aluminum foil, each about 12x12 inches. This size works great for packing. - Divide the steak and potato mixture evenly among the four pieces of foil. Make sure each pack has enough for a good meal. - Fold the edges of the foil over the mixture. Seal the packets tightly to keep the steam inside. No openings should be left! - Place the foil packs on the grill or in the oven. Cook for about 25-30 minutes. Flip them halfway through cooking. Check that the potatoes are tender and the steak is just right. - Carefully take the foil packs from the heat. They will be hot, so use oven mitts! - Open the packets slowly to avoid steam burns. A burst of flavor will greet you! - Garnish each pack with freshly chopped parsley. This adds a nice touch and bright flavor. To ensure even cooking, cut the steak and potatoes into similar sizes. This helps them cook at the same rate. Flip the foil packs halfway through cooking. This action allows heat to reach all sides. Adjust the cooking time based on your taste for steak doneness. If you like it rare, check it at 20 minutes. Feel free to switch up the herbs. Try oregano or basil for a different twist. You can also add spices like paprika or cumin for a kick. Adding veggies like bell peppers or zucchini boosts flavor and nutrients. Mix in chopped onions for added sweetness and depth. Always use caution when handling hot foil packs. The steam inside can be very hot. Open the packs slowly to let steam escape safely. Ensure the packets are sealed tightly. This keeps the steam inside for perfect cooking. {{image_2}} If you want a twist, try using chicken or shrimp instead of steak. Chicken thighs work well because they stay juicy. Shrimp cooks fast, so check it often. For a vegetarian option, swap the steak with hearty veggies like mushrooms or tofu. Both choices keep the foil pack fun and tasty. Adding different sauces can change the dish's taste. A splash of soy sauce gives a savory kick. You can also try barbecue sauce for a sweet touch. Experimenting with spices adds depth. Use smoked paprika for warmth or chili powder for heat. This way, you can make each pack special. Don’t hesitate to add more veggies! Onions bring sweetness, while bell peppers add color. Carrots add crunch and sweetness too. Seasonal veggies like zucchini or asparagus can brighten the pack. Mixing various vegetables not only boosts flavor but also makes your meal colorful and healthy. To store your Garlic Butter Steak & Potato Foil Packs, first let them cool. This helps keep them fresh. Avoid putting hot food directly into the fridge. Use shallow containers for quick cooling. Then, place the leftovers in airtight containers. This keeps flavors locked in. Label the containers with the date to track freshness. You can reheat these foil packs in two ways: the oven or the microwave. For the oven, preheat to 350°F (175°C). Place the foil pack on a baking sheet. Heat for about 15-20 minutes. This method keeps the flavor strong. If using a microwave, place the pack on a microwave-safe plate. Heat for 3-5 minutes. Be careful, as the steam can be hot. Reheating in the oven usually maintains the best texture. If you want to freeze the cooked foil packs, let them cool first. Wrap each pack tightly in plastic wrap. Then, place them in a freezer-safe bag. This helps prevent freezer burn and keeps them fresh. For thawing, move the foil packs to the fridge the night before. You can also let them sit at room temp for about an hour. This helps them thaw evenly. Yes, you can make these foil packs ahead. Prepare the steak and potato mixture. Place the mixture in the foil and seal it. Store the sealed packs in the fridge for up to 24 hours. This saves time for busy days. When ready to cook, just place them on the grill or in the oven. If you are using a campfire, cook the foil packs for about 15-20 minutes. Place them on hot coals or a grill grate. Make sure to flip the packs halfway through. This helps cook the steak and potatoes evenly. Always check that the steak is cooked to your liking and the potatoes are tender. These foil packs pair well with many sides. You can serve them with a fresh salad. A simple green salad adds crunch and freshness. Grilled veggies are also a great choice. Consider corn on the cob or asparagus for extra flavor. Don’t forget a nice crusty bread to soak up the garlic butter! Garlic Butter Steak & Potato Foil Packs are easy and tasty. This meal combines sirloin steak, potatoes, and garlic butter with simple seasonings. You can customize it with different proteins and veggies. Follow my step-by-step guide to perfect your cooking. Remember to store leftovers properly and reheat for the best taste. These foil packs are not just delicious; they are fun to make. Try them out, and share your results with friends! Enjoy experimenting with flavors, and make this dish your own!

Savory Garlic Butter Steak & Potato Foil Packs

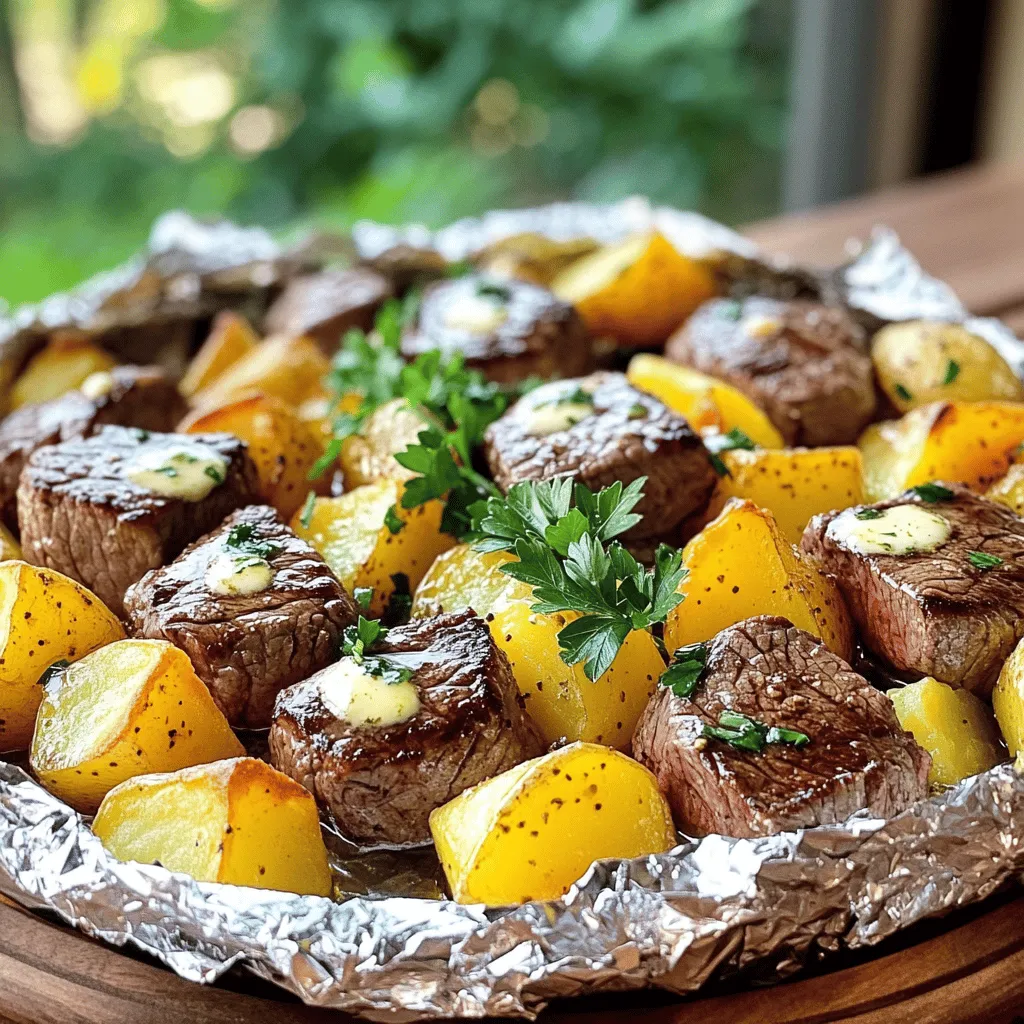
Get ready to elevate your dinner game with these Savory Garlic Butter Steak & Potato Foil Packs! I promise you’ll

Older posts
Newer posts
← Previous Page1 … Page33 Page34 Page35 … Page86 Next →

dsad

© 2026 Cooking Wells • Built with GeneratePress

Our Policies

  • Copyright Policy
  • Cookie Policy
  • GDPR Policy
  • Privacy Policy
  • Disclaimer
  • Terms Of Use

More Information

  • Home
  • About
  • Contact
  • Appetizers
  • Dessert
  • Dinner
  • Drinks
©2026, Cooking Wells About Back To Top