Skip to content
DisclaimerTerms Of UseGDPR PolicyCookie Policy

Cooking Wells

  • Home
  • Drinks
  • Appetizers
  • Dinner
  • Dessert
  • About
  • Contact
  • Privacy Policy
DisclaimerTerms Of UseGDPR PolicyCookie Policy

NO-ING-IMG

- 1 pound baby carrots (or regular carrots, peeled and cut into sticks) - 2 tablespoons honey - 1 tablespoon soy sauce (or tamari for gluten-free) - 2 tablespoons sesame oil - 2 teaspoons sesame seeds (toasted) - 1 teaspoon fresh ginger, grated - Salt and pepper to taste - Fresh parsley or cilantro, for garnish For this recipe, I use one pound of baby carrots. If you use regular carrots, peel them and cut them into sticks about 2-3 inches long. Measure honey and soy sauce using tablespoons. You need two tablespoons of sesame oil. For the sesame seeds, two teaspoons will do. Lastly, grate one teaspoon of fresh ginger for flavor. If you're looking for alternatives, here are some options: - Use maple syrup instead of honey for a vegan option. - Tamari works well for a gluten-free version of soy sauce. - Swap sesame oil with olive oil if you need a lighter flavor. - Fresh ginger can be replaced with ground ginger, but use less as it is stronger. - If you want a fresh touch, replace parsley or cilantro with green onions. Start by getting your carrots ready. If you have baby carrots, leave them whole. If you use regular carrots, peel them first. Cut the carrots into sticks about 2-3 inches long. This size helps them cook evenly. Now it's time to blanch the carrots. Fill a pot with water and bring it to a boil. Add the carrots to the boiling water. Cook them for about 3-5 minutes. You want them slightly tender but still a bit crisp. After that, drain the carrots and set them aside. This step helps keep their bright color and fresh taste. Next, make the tasty glaze. In a large skillet, add 2 tablespoons of sesame oil and heat it over medium heat. When the oil is hot, add 1 teaspoon of grated fresh ginger. Sauté it for 1 minute until it smells great. Then, pour in 2 tablespoons of honey and 1 tablespoon of soy sauce. Stir everything to mix well. Let it simmer for about 2 minutes. This lets the flavors blend nicely. Now, add the blanched carrots to the skillet. Toss them in the glaze until they are well coated. Cook for another 2-3 minutes. This helps the carrots soak up all that yummy flavor. Finally, sprinkle 2 teaspoons of toasted sesame seeds on top. Season with salt and pepper to taste. Toss gently to combine everything. Your sesame honey glazed carrots are now ready to serve! To get the best glaze, you need to blanch the carrots first. This step softens them but keeps them crisp. Blanching makes sure they absorb the glaze well. Aim for 3-5 minutes in boiling water. After blanching, quickly drain the carrots. This keeps them from overcooking and losing their crunch. One common mistake is skipping the blanching step. This can lead to carrots that are too hard. Another mistake is not stirring enough while cooking. Stir frequently to coat every carrot with the glaze. Lastly, don’t rush the simmering time. Letting the glaze simmer for 2 minutes lets the flavors deepen. You can add more flavor to your carrots. Try mixing in a dash of chili flakes for heat. A squeeze of fresh lime juice can add brightness. For a nutty twist, add chopped nuts like walnuts or almonds. Don’t forget fresh herbs! Parsley or cilantro enhances the dish's freshness and looks great on the plate. {{image_2}} You can swap honey with maple syrup for a vegan option. Agave nectar also works well. These sweeteners add a unique flavor. You might enjoy the change! Just keep the same amount for best results. You can roast the carrots instead of cooking them on the stove. Roasting gives a nice caramelized flavor. Preheat your oven to 400°F (200°C). Toss the blanched carrots in the glaze and spread them on a baking sheet. Bake for about 20 minutes, flipping halfway through. Another method is steaming. It keeps the carrots crisp and bright. Use a steamer basket over boiling water for about 5-7 minutes. Then, add them to the glaze for the last few minutes of cooking. Feel free to add other veggies for more color and taste. Broccoli, bell peppers, or snap peas blend nicely. Cut them into similar sizes to ensure even cooking. Add them to the skillet with the carrots to soak up the glaze. This adds variety and makes the dish even more nutritious. After enjoying your sesame honey glazed carrots, store any leftovers in an airtight container. They will stay fresh for about 3 to 5 days in the fridge. Make sure to let them cool down before sealing the container. This helps keep the texture crisp. You can freeze the glazed carrots for later use. First, let them cool completely. Then, place them in a freezer-safe bag or container. Be sure to remove as much air as possible. They will last up to 3 months in the freezer. When ready to eat, just thaw them in the fridge overnight. To reheat the carrots, you have a few options. You can use the microwave for quick reheating. Just place them in a bowl, cover, and heat for 1-2 minutes. For a crispier texture, use a skillet. Heat a little sesame oil over medium heat, then add the carrots. Stir them for about 3-5 minutes until heated through. Yes, you can use regular carrots. Just peel them and cut them into sticks. Aim for pieces about 2-3 inches long. This way, they cook evenly, and you still get that sweet glaze. To make this recipe vegan, swap honey for maple syrup or agave nectar. Both options will give a nice sweetness. Ensure your soy sauce is vegan-friendly, too. Tamari works great if you need it gluten-free. These carrots pair nicely with many dishes. Serve them with grilled chicken or fish. They also work well with rice or quinoa. For a vegetarian option, try them with tofu or chickpeas. They add color and flavor to any meal! In this article, we explored the recipe for Sesame Honey Glazed Carrots. We covered key ingredients, detailed measurements, and helpful substitutions. You learned step-by-step instructions for preparing and glazing the carrots, along with tips to avoid mistakes. We also discussed variations and storage options for leftovers. Perfecting this dish adds flavor to any meal. Enjoy experimenting with different sweeteners and vegetables to suit your taste. Happy cooking!

Savory Sesame Honey Glazed Carrots Easy Recipe

Are you ready to transform your carrots into a delightful dish? My Savory Sesame Honey Glazed Carrots recipe offers a

You need 2 cups of fresh strawberries for this recipe. Make sure they are ripe and sweet. Remove the green tops and cut them in half. This makes it easier to blend them into a smooth puree. Fresh strawberries give the popsicles a bright flavor and a lovely pink color. You can use a few pieces later for added texture. For this recipe, you can use 1 cup of Greek yogurt. Choose either plain or vanilla-flavored yogurt. Plain yogurt gives a tangy taste, while vanilla adds sweetness. Greek yogurt makes the popsicles creamy and rich. It is a great source of protein, too, which makes these treats a little healthier. You will need 1/4 cup of honey or maple syrup to sweeten the popsicles. You can adjust this amount based on your taste. Honey adds a floral note, while maple syrup offers a warm flavor. Both options are natural sweeteners and work well with the yogurt and strawberries. A pinch of salt enhances the flavors, too. Start by washing your strawberries. Remove the green tops and slice them in half. Place the hulled strawberries in a blender. Blend them until you have a smooth puree. If you like some chunks, set aside a few pieces to add later. This gives your popsicles a nice texture. In a large bowl, mix the Greek yogurt with honey or maple syrup. You can choose plain or vanilla yogurt based on your taste. Add the lemon juice and vanilla extract if you’re using plain yogurt. Don’t forget a pinch of salt to enhance the flavors. Stir until the mixture is creamy and smooth. Now it's time to combine everything. Gently fold the strawberry puree into the yogurt mixture. Mix until you see some pretty swirls. If you saved pieces of strawberries, add them now for extra flavor. Pour the mixture into popsicle molds. Leave a little space at the top because the popsicles will expand when they freeze. Insert the popsicle sticks and place them in the freezer. Let them freeze for at least 4 to 6 hours until they're solid. To get the popsicles out, run warm water over the molds for a few seconds. Then, gently pull them out and enjoy! To get the best texture, use ripe strawberries. They blend smoothly and taste great. Blend the strawberries until they are almost liquid. If you want chunks, save a few pieces to mix in later. When you stir in the yogurt, mix slowly. This keeps some strawberry swirls in your popsicles. Mixing too fast will make everything one color. Getting popsicles out of the molds can be tricky. To release them easily, run warm water over the outside of the molds. Just a few seconds of warm water works well. Then gently pull on the sticks. If they resist, try running the water again. This method helps keep your popsicles from breaking. Presentation matters when sharing your treats. Serve the popsicles on a wooden platter for a rustic look. Add fresh mint leaves or sliced strawberries on top. This adds color and makes the popsicles look even more tasty. You can also place them in clear cups. This way, everyone can see the pretty layers. {{image_2}} You can add many fruits to your Greek yogurt strawberry popsicles. Try blueberries, raspberries, or peaches. Each fruit brings its own flavor and color. You can blend them in or mix them in whole for texture. This makes each bite exciting! Just keep the fruit fresh and ripe for the best taste. There are many ways to boost the flavor of your popsicles. A splash of orange juice gives a bright taste. You can also add a bit of ginger for a spicy kick. If you love chocolate, mix in some cocoa powder. For a tropical twist, add coconut milk. Each option adds a new layer of flavor. You can enjoy these popsicles without dairy. Use coconut yogurt or almond yogurt instead of Greek yogurt. They provide a creamy texture with a nice taste. For sweetening, use agave syrup or maple syrup. This way, everyone can enjoy a cool treat, no matter their diet! To keep your Greek yogurt strawberry popsicles fresh, use good molds. Choose BPA-free plastic molds for safety. Make sure to leave a small gap at the top of each mold. This space helps the popsicles expand as they freeze. Cover the molds with plastic wrap if your freezer has strong smells. This keeps your popsicles tasting fresh. These popsicles can last up to two months in the freezer. After two months, they still taste good, but they may lose some texture. For best taste and quality, eat them within the first month. Label your molds with the date. This helps you track how long they’ve been in the freezer. Thawing is easy! Simply run warm water over the outside of the molds for a few seconds. This warms the outside without melting the popsicle. If you're in a hurry, you can let them sit at room temperature for about five minutes. Avoid using a microwave, as it may melt them unevenly. Enjoy your popsicles when they are just right! Greek yogurt popsicles take about 4 to 6 hours to freeze solid. To make sure they are ready, check them after 4 hours. If they are still soft, give them more time. The longer you freeze them, the firmer they will be. Yes, you can use frozen strawberries. However, thaw them first to get a smooth blend. This can change the texture a bit, but they will still taste great. Just remember to adjust the sweetness, as frozen fruit can be less sweet. Each popsicle has about 60-80 calories, depending on your sweetener choice. They provide protein from the yogurt and vitamins from the strawberries. These popsicles are a healthy treat that keeps you cool in warm weather. Enjoy them without guilt! This blog post covered how to make Greek yogurt popsicles using fresh strawberries, yogurt, and sweeteners. We explored step-by-step instructions, tips for the best texture, and presentation ideas. You can also try fun variations like adding other fruits or making dairy-free versions. Lastly, we discussed storing and thawing your treats to keep them tasting great. Enjoy making these easy, tasty popsicles at home. They are not just delicious; they’re a healthy treat for everyone!

Greek Yogurt Strawberry Popsicles Refreshing and Easy Treat

If you’re looking for a tasty and healthy treat, Greek Yogurt Strawberry Popsicles are perfect! They are easy to make

To make cheesy cauliflower rice, gather these items: - 1 medium head of cauliflower, riced (about 4 cups) - 1 cup shredded sharp cheddar cheese - 1/2 cup cream cheese, softened - 1/4 cup grated Parmesan cheese - 1 tablespoon olive oil - 1/2 cup onion, finely chopped - 2 cloves garlic, minced - 1/4 teaspoon paprika - Salt and pepper to taste - Fresh parsley, chopped for garnish This dish is both tasty and nutritious. Each serving contains: - Calories: 230 - Protein: 10g - Carbs: 7g - Fiber: 3g - Fat: 20g - Calcium: 20% of your daily value You can swap some ingredients to fit your needs: - Use low-fat cream cheese for fewer calories. - Try different cheeses like mozzarella or gouda for unique flavors. - If you dislike onions, leave them out. - Garlic powder works if you don’t have fresh garlic. - Fresh herbs can replace parsley for extra flavor. These swaps help you enjoy the dish while meeting your dietary goals. To start, cut the cauliflower into florets. This helps it blend well. Next, pulse the florets in a food processor until they look like rice. You want about four cups of riced cauliflower. Once done, set it aside. This simple step makes your dish light and fluffy. Heat a large skillet over medium heat and add one tablespoon of olive oil. Once hot, toss in half a cup of finely chopped onion. Sauté it for about five minutes until the onion is soft and clear. Then, add two minced garlic cloves and cook for one more minute. The smell will be amazing! Now, add the riced cauliflower to your skillet. Season it with a quarter teaspoon of paprika, along with salt and pepper to taste. Cook everything for five to seven minutes. Stir occasionally, making sure the cauliflower gets tender. Next, lower the heat. Mix in half a cup of softened cream cheese. Stir until it melts into the cauliflower. Gradually add one cup of shredded sharp cheddar cheese and a quarter cup of grated Parmesan cheese. Let each cheese melt before adding more. Keep stirring until everything is creamy. Once your cheese is melted and mixed in, taste it. Adjust the salt and pepper if needed. When it’s just right, remove the skillet from the heat. For a fresh touch, sprinkle chopped parsley on top. This adds color and flavor. Your cheesy cauliflower rice is now ready to serve! Enjoy this warm, delicious dish. To make great cauliflower rice, start with a fresh head of cauliflower. Cut it into small florets. This helps the food processor chop it evenly. Pulse the florets in a food processor until they look like rice. Do not over-process, or it will turn mushy. If you don't have a food processor, you can use a box grater. Just be careful with your fingers! To get that creamy texture, use both cream cheese and sharp cheddar cheese. Start by adding the cream cheese first. Stir it in on low heat until it melts. Then, add the cheddar cheese a little at a time. This helps it melt better. If you want even more creaminess, consider stirring in a splash of milk or cream. You can also mix in a bit of sour cream for extra richness. Serve cheesy cauliflower rice as a side dish or a base for your meals. It pairs well with grilled chicken or fish. You can also top it with sautéed veggies or beans for a hearty meal. For a fun twist, add some cooked bacon bits or crispy shallots on top for crunch. Don't forget to sprinkle fresh parsley for color and flavor! {{image_2}} You can switch up the cheese for more flavor. Try using gouda, fontina, or mozzarella. Each cheese brings its own taste. For a sharper flavor, use aged cheddar. Mix and match cheeses for a fun twist. You can even add a bit of blue cheese for a unique kick. Just remember to adjust the amount based on your taste. Adding veggies and proteins makes your dish more filling. You can toss in spinach, peas, or bell peppers for color and nutrition. Sauté them with the onions and garlic for best results. If you want protein, cooked chicken or ground turkey works well. You can also use beans or lentils for a vegetarian option. This way, your cheesy cauliflower rice becomes a complete meal. If you like spice, try adding some heat! A dash of cayenne pepper or red pepper flakes gives a nice kick. You can also mix in diced jalapeños or hot sauce to spice it up. Adjust the heat to your liking, but start small. You can always add more later. This spicy version pairs well with creamy cheese. To store your cheesy cauliflower rice, let it cool first. Transfer it to an airtight container. It will keep in the fridge for up to three days. Make sure to seal the container tightly to keep it fresh. Reheat your cheesy cauliflower rice on the stove for the best taste. Place it in a skillet over low heat. Add a splash of milk or broth to help it warm evenly. Stir gently until heated through. You can also use the microwave. Heat in short bursts, stirring in between, until warm. You can freeze cheesy cauliflower rice for later use. Cool it completely before packing. Use a freezer-safe container or bag. It can last up to three months in the freezer. When ready to eat, thaw it overnight in the fridge. Reheat it as mentioned above for the best flavor. Yes, Cheesy Cauliflower Rice is keto-friendly. Cauliflower has low carbs and high fiber. It makes a great substitute for traditional rice. You can enjoy this dish without breaking your diet. Plus, the cheese adds flavor and fat, perfect for keto meals. To make Cheesy Cauliflower Rice dairy-free, use plant-based cheese. Look for brands that melt well. You can replace cream cheese with cashew cream or coconut cream. Nutritional yeast can add a cheesy flavor without dairy. This way, you still get a creamy texture and good taste. Cheesy Cauliflower Rice pairs well with many foods. You can serve it with grilled chicken or roasted veggies. It also goes well with shrimp or beef stir-fry. Try it as a side for tacos or a main dish with salad. The options are endless! In this article, we explored how to make cheesy cauliflower rice. We covered the essential ingredients, including substitutes, and detailed step-by-step instructions for preparation and cooking. I shared tips for achieving the best texture and flavor. We also looked at fun variations to customize your dish and provided storage advice. Cheesy cauliflower rice is easy, tasty, and versatile. Enjoy it again and again in different ways!

Cheesy Cauliflower Rice Flavorful and Easy Recipe

If you’re craving a delicious side dish that’s both cheesy and healthy, you’re in the right place! This Cheesy Cauliflower

To make these tasty energy bites, gather these key ingredients: - 1 cup pumpkin puree - 1 cup rolled oats - 1/2 cup chocolate chips (dark or semi-sweet) - 1/2 cup almond butter (or any nut butter) - 1/4 cup honey or maple syrup - 1 tsp vanilla extract - 1 tsp ground cinnamon - 1/2 tsp pumpkin pie spice - Pinch of salt These ingredients work together to create a sweet, chewy, and satisfying snack. The pumpkin puree adds moisture and flavor. The rolled oats give chewiness and fiber. Chocolate chips bring sweetness. Almond butter adds creaminess and healthy fats. You can easily swap some ingredients if you need to. Here are some options: - Pumpkin puree: Use sweet potato puree or applesauce for a different flavor. - Almond butter: Peanut butter, cashew butter, or sunflower seed butter work well too. - Honey or maple syrup: You can replace these with agave syrup or brown rice syrup. - Rolled oats: Quick oats can be used, but the texture will change slightly. These substitutions keep the recipe flexible and fun. Each ingredient offers health benefits: - Pumpkin puree: High in vitamins A and C, it supports eye health and boosts immunity. - Rolled oats: Great for heart health, they provide fiber that aids digestion. - Chocolate chips: Dark chocolate has antioxidants and can improve mood. - Almond butter: Packed with protein and healthy fats, it helps keep you full. - Honey or maple syrup: Natural sweeteners that provide quick energy and minerals. These bites are not just tasty; they are also nourishing. You get a sweet treat with health benefits, making them perfect for a snack or pre-workout boost. First, gather all your ingredients. You need pumpkin puree, rolled oats, chocolate chips, almond butter, honey or maple syrup, vanilla extract, ground cinnamon, pumpkin pie spice, and a pinch of salt. Make sure everything is measured out and ready to go. This makes the process smooth and fun. In a large bowl, combine the pumpkin puree, almond butter, honey, and vanilla extract. Mix these well until they blend smoothly. Next, add the rolled oats, ground cinnamon, pumpkin pie spice, and a pinch of salt. Stir this mixture until everything is fully combined. It's important to get a nice uniform mix. Finally, fold in the chocolate chips gently. You want to make sure they are spread evenly throughout the mixture. After mixing, cover the bowl with plastic wrap or a lid. Place it in the fridge for about 30 minutes. This chill time helps the mixture firm up, making it easier to shape. Once chilled, scoop about 1 tablespoon of the mixture. Roll it into a ball using your hands. Repeat this until all the mixture is shaped into bites. Place the bites on a baking sheet lined with parchment paper. Return them to the fridge for another 15 to 30 minutes. This extra chill helps them set well. Store your energy bites in an airtight container in the fridge for up to a week. You can also freeze them for longer storage. Enjoy these tasty snacks anytime you need a boost! To get the right texture, start with cold ingredients. Keep your almond butter and pumpkin puree in the fridge before mixing. After mixing, chill the mixture for 30 minutes. This helps it firm up. If your mix feels too wet, add more oats. You want a dough that holds its shape when rolled. Not too sticky, not too dry—just right! One common mistake is not measuring ingredients. Accurate measurements lead to better bites. Also, skip the chilling time at your own risk. If you don’t chill the mix, your bites may fall apart. Lastly, don’t overmix when adding the chocolate chips. You want them evenly spread, not crushed. For a richer flavor, try adding a dash of nutmeg or ginger. These spices pair well with pumpkin. You can also swap honey for maple syrup for a different sweetness. To add crunch, toss in some chopped nuts or seeds. This will give your bites a nice texture contrast. {{image_2}} You can easily make these energy bites gluten-free. Just swap the rolled oats for certified gluten-free oats. This way, you still enjoy the same great taste without the gluten. Be sure to check ingredient labels. Some products may contain gluten even if they look safe. Get creative with your energy bites! You can add nuts, seeds, or dried fruit. Chopped walnuts or pecans give a nice crunch. For a fruity twist, add raisins or cranberries. Try using different types of chocolate chips too. Milk chocolate, white chocolate, or even butterscotch can change the flavor. During fall, add nutmeg or ginger for extra spice. For a winter treat, mix in peppermint extract. You can also shape the bites into festive shapes using cookie cutters! During holidays, roll them in shredded coconut or crushed candy canes for a fun touch. To keep your Pumpkin Chocolate Chip Energy Bites fresh, store them in an airtight container. Place them in the fridge right after you make them. This helps maintain their texture and flavor. Avoid leaving them out at room temperature for too long, as they can become too soft or dry. These energy bites can last in the fridge for about a week. If you want them to stay fresh longer, consider freezing them. Just remember to keep them in a sealed container to prevent freezer burn. This way, you can enjoy them anytime! Freezing is a great way to store energy bites for longer. To freeze, place the bites on a baking sheet in a single layer. Freeze them for about an hour until firm. Then, transfer them to a freezer-safe bag or container. They can last for up to three months in the freezer. When you're ready to eat, let them thaw in the fridge for a few hours or enjoy them straight from the freezer! Yes, you can make these bites vegan. Just replace honey with maple syrup. Use a plant-based nut butter, like peanut or sunflower seed butter. This way, you keep it tasty and vegan-friendly. You can choose any nut butter you like. Peanut butter works great here. Sunflower seed butter is a good choice too. Each option adds its own flavor, so try what you enjoy. You can eat them after they chill for 30 minutes. They should feel firm to the touch. If they hold their shape when rolled, they are ready. Enjoy them cold or at room temperature! Pumpkin chocolate chip energy bites are a nutritious and tasty snack. We covered key ingredients, how to prepare them, and tips for the best results. I shared ways to adapt recipes to meet dietary needs and enhance flavors. Storing them properly keeps them fresh longer, and I answered common questions. Try these bites for a quick energy boost! Enjoy experimenting with different flavors and ingredients. Your snack game will reach new heights.

Pumpkin Chocolate Chip Energy Bites Quick and Easy Snack

Looking for a quick and healthy snack? You’re in the right place! These Pumpkin Chocolate Chip Energy Bites are simple

- 2 cups Greek yogurt (plain or vanilla) - 1 cup mixed berries (strawberries, blueberries, raspberries, blackberries) - 1/4 cup honey or maple syrup - 1 cup granola (your favorite type) - 1 teaspoon vanilla extract (optional) - Fresh mint leaves for garnish (optional) Greek yogurt is the star of this parfait. It gives a creamy texture and a tangy taste. You can choose plain or vanilla yogurt based on your preference. Next, we have mixed berries. Fresh strawberries, blueberries, raspberries, and blackberries add color and flavor. They are juicy and sweet, making the parfait exciting. To sweeten the mix, you can use honey or maple syrup. This adds a lovely touch of sweetness. If you want some crunch, add granola. It gives the parfait a nice texture. For a hint of extra flavor, you can use vanilla extract. Fresh mint leaves serve as a fancy garnish. They also add a fresh taste to your parfait. This simple list of ingredients makes for a quick and tasty treat. To start, you need to prep your berries. If you choose strawberries, hull them by removing the green tops. Then slice them into small pieces. For mixed berries like blueberries, raspberries, and blackberries, rinse them under cold water. This washes off any dirt. After rinsing, set all the berries aside to drain. Next, let’s sweeten the yogurt. In a medium bowl, add 2 cups of Greek yogurt. You can use plain or vanilla yogurt. Then add 1/4 cup of honey or maple syrup for sweetness. If you want, add 1 teaspoon of vanilla extract to boost the flavor. Mix everything well until the yogurt is smooth and creamy. Now it’s time to layer your parfaits. Grab serving glasses or bowls. Start with about 1/4 cup of the yogurt mixture at the bottom. Then, add a layer of berries, about 1/4 cup. After that, sprinkle 2 tablespoons of granola over the berries. Repeat these layers until the glasses are full. Finish with a layer of berries and a sprinkle of granola on top for a pretty look. To make your parfaits look great, use even layers. Start with about 1/4 cup of yogurt. Then, add 1/4 cup of berries on top. Follow this with 2 tablespoons of granola. Repeat these layers until your glass is full. This keeps each bite tasty and balanced. To keep your granola crunchy, add it last. If you mix granola with yogurt too soon, it will get soggy. You want the texture to be just right. Using flavored Greek yogurt can add extra taste. You can find options like honey or vanilla. These flavors mix well with berries. If you want to switch up your sweetener, try mashed banana or agave syrup. These give a different twist to your parfait. For serving, use clear glasses. This lets the colors of your layers shine through. You can also use small cups for a fun touch. To make it pop, add fresh mint leaves on top. They add color and a fresh taste. You can also sprinkle a few whole berries on top as a garnish. It makes your parfait look special and inviting. {{image_2}} You can easily modify this parfait to fit your needs. If you want a dairy-free option, try using plant-based yogurt. Almond or coconut yogurt works well. These alternatives keep your parfait tasty and creamy. For a gluten-free option, choose gluten-free granola. There are many brands available. Check the label to ensure it fits your diet. Feel free to get creative with fruits. Bananas and peaches add a sweet twist. You can also mix in other berries for variety. The choice is yours! Spices can elevate the flavor too. A sprinkle of cinnamon or nutmeg adds warmth. Just a little bit goes a long way. Experiment and find your favorite blend. Greek yogurt berry parfaits make a great breakfast or dessert. They are light and refreshing. Serve them for brunch with friends or as a sweet treat after dinner. Portion sizes can vary. For breakfast, aim for a larger serving. For dessert, smaller portions work best. Enjoy them in pretty glasses or bowls for added fun! To keep your Greek yogurt berry parfaits fresh, use airtight containers. Glass jars or plastic containers work well. Store your parfaits in the fridge. They stay good for about 2-3 days. If you see any liquid on top, just stir it back in before eating. You can freeze the yogurt, berries, and granola separately. Use freezer-safe bags or containers for each item. For yogurt, portion it into single servings. Berries can be frozen whole. Granola can stay crunchy when frozen if stored in an airtight bag. When you're ready to eat, thaw the yogurt and berries in the fridge overnight. For granola, you can use it straight from the freezer. To layer your parfaits again, start with yogurt. Add a layer of thawed berries next. Top with granola. If the yogurt is too thick, stir in a bit of milk. This helps it spread better. To keep the granola crunchy, do not add it until just before serving. Enjoy your fresh-tasting parfait again! Yes, you can make Greek Yogurt Berry Parfaits ahead of time. I suggest preparing the yogurt mixture and washing the berries a few hours in advance. You can layer the parfaits in the morning for a quick breakfast. Just keep the granola separate until you serve. This keeps it crunchy and fresh. If you want to switch things up, try using nuts, seeds, or coconut flakes. Chopped almonds or walnuts add a nice crunch. For a sweet touch, you can use crushed cookies or cereal. These options give different textures and flavors to your parfait. Greek Yogurt Berry Parfaits are quite healthy! Greek yogurt gives you protein and calcium. Mixed berries are full of vitamins and antioxidants. Honey or maple syrup adds natural sweetness without refined sugar. Overall, this treat is nutritious and satisfying. Enjoy it for breakfast or a snack! Greek Yogurt Berry Parfaits are easy and fun to make. You learned how to prepare fresh berries, sweeten yogurt, and layer your parfaits. I shared tips on flavoring and presentation. Variations fit any diet and occasion. Do not forget how to store and freeze leftovers for later enjoyment. These parfaits are not just a tasty treat; they're also a nutritious choice. Enjoy them as breakfast or dessert. Now, grab your ingredients and start creating your delicious parfaits!

Greek Yogurt Berry Parfaits Quick and Tasty Treat

Looking for a quick and tasty treat? Greek Yogurt Berry Parfaits are easy to whip up and packed with flavor!

- 2 cups raw almonds - 1/4 cup pure maple syrup - 1 teaspoon ground cinnamon - 1/4 teaspoon sea salt - 1/4 teaspoon vanilla extract - 1/4 teaspoon cayenne pepper (optional for heat) - 1 tablespoon coconut oil (or melted butter) These maple cinnamon roasted almonds are not just tasty; they pack a healthy punch. A serving size of about 1 ounce (28 grams) contains roughly: - Calories: 170 - Protein: 6 grams - Fat: 15 grams - Carbohydrates: 6 grams - Fiber: 3 grams - Sugars: 3 grams They offer healthy fats, protein, and fiber, making them a great snack. You can easily swap some ingredients if you need to. Here are a few ideas: - Almonds: Use walnuts or pecans for a different nutty flavor. - Maple Syrup: Honey or agave nectar work well as sweeteners. - Coconut Oil: Substitute with olive oil or melted butter for a rich taste. - Cayenne Pepper: Skip it if you prefer no heat, or use paprika for a milder spice. These changes allow you to customize the recipe based on your taste or what you have at home. Start by preheating your oven to 350°F (175°C). This temperature helps the almonds roast evenly. Next, take a baking sheet and line it with parchment paper. This step makes cleanup easy later. It also helps the almonds not stick. In a mixing bowl, combine the following ingredients: - 1/4 cup pure maple syrup - 1 teaspoon ground cinnamon - 1/4 teaspoon sea salt - 1/4 teaspoon vanilla extract - 1/4 teaspoon cayenne pepper (optional for heat) Stir the mix until it blends well. The maple syrup adds sweetness, while the cinnamon gives warmth. If you like a bit of spice, add cayenne. Now, add 2 cups of raw almonds to the bowl. Drizzle 1 tablespoon of melted coconut oil or butter over them. Toss the almonds in the coating until they are fully covered. Spread the coated almonds in a single layer on your baking sheet. This helps them roast well. Place the sheet in the oven. Roast for 15 to 20 minutes. Stir them halfway through to ensure even browning. Watch closely to avoid burning. They should turn golden brown and smell amazing. Once done, remove the baking sheet from the oven. Let the almonds cool completely. They will harden as they cool. Finally, store them in an airtight container. Enjoy your tasty snack! To make your maple cinnamon roasted almonds shine, focus on fresh ingredients. Use pure maple syrup for real sweetness. It tastes better than the fake stuff. Ground cinnamon adds warmth and depth. Make sure it's fresh for the best flavor. You can add cayenne pepper for a spicy kick. This balances the sweetness and makes it unique. Tossing the almonds well ensures every bit gets coated. Spread them out evenly on the baking sheet. This helps them roast evenly for that perfect crunch. One common mistake is overcooking the almonds. Keep an eye on them as they roast. Set a timer for 10 minutes and stir them. This helps prevent burning. Another mistake is using too much syrup. Just coat them lightly, or they will be sticky. Lastly, don’t skip the cooling step. Allow them to cool completely before storing. This hardens the coating and makes them crunchier. Store your roasted almonds in an airtight container. This keeps them fresh and crunchy. A cool, dry place is best for storage. Avoid direct sunlight, as heat can spoil them. If you want them to last longer, consider freezing. They can stay fresh for months in the freezer. Just let them thaw before serving. This way, you can enjoy your tasty snack whenever you want! {{image_2}} You can change the taste of your almonds by adding different spices. Try nutmeg for a warm flavor. Or use cardamom for a floral note. If you like heat, add more cayenne pepper. Just a pinch can make a big difference. Experiment with what you like best! Maple syrup is great, but it’s not the only option. You can try honey for a floral sweetness. Agave nectar works too, and it has a light taste. For a sugar-free choice, use monk fruit sweetener. Each sweetener gives a unique taste to the almonds. Mix flavors to create your special twist. How about adding cocoa powder for a chocolatey treat? You could also mix in dried fruits like cranberries for a sweet burst. For a savory option, try garlic powder and rosemary. The choices are endless. Don’t be afraid to get creative! After making your maple cinnamon roasted almonds, let them cool completely. This step is key. Once they are cool, transfer the almonds to an airtight container. I recommend glass or plastic containers with tight lids. This will keep them fresh and tasty. You can also use resealable bags. Just make sure to squeeze out all the air before sealing. When stored properly, your roasted almonds can last a long time. They stay fresh for about 1 to 2 weeks at room temperature. If you put them in the fridge, they can last up to a month. For the best taste, eat them within the first week. You might find they lose some crunchiness after a while. If you want to keep your almonds even longer, freezing is a great choice. Place the cooled almonds in a freezer-safe bag. Make sure to remove as much air as possible. They can last for about 3 months in the freezer. When you're ready to eat them, just take out what you need. Let them sit at room temperature for a bit to regain their crunch. Yes, you can use other nuts. Walnuts, pecans, or cashews work well. Each nut will give a unique taste. Just keep an eye on roasting times. Some nuts cook faster than almonds. You will know the almonds are done when they turn golden brown. They should also smell fragrant. Stir them halfway through roasting to help them cook evenly. Be careful not to burn them. Yes, these roasted almonds are a healthy snack. Almonds are packed with good fats and protein. Maple syrup adds sweetness but is still natural. Just remember to enjoy them in moderation. In this article, we explored the key steps to make roasted almonds. We covered ingredients, tips for the best flavor, and common mistakes. You learned how to store your almonds for freshness and even tried new variations. Roasting almonds is simple and rewarding. You can enjoy a healthy snack or use them in recipes. I hope this inspires you to create your tasty treats. Happy roasting!

Maple Cinnamon Roasted Almonds Easy Flavor Boost

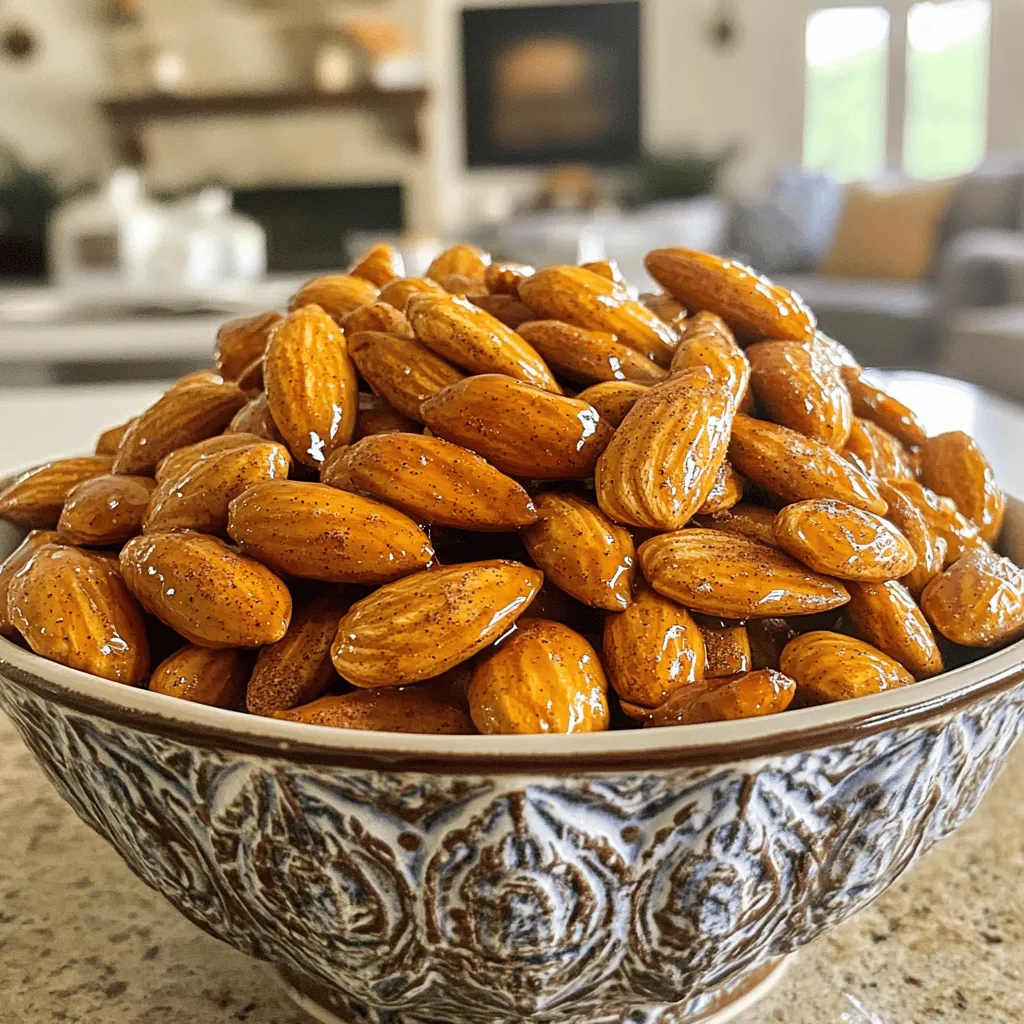
Are you ready to elevate your snack game? Maple Cinnamon Roasted Almonds are your answer! They blend sweet maple and

Gathering the right ingredients is key to making a veggie-loaded minestrone soup. Each veggie adds flavor and texture. Here’s what you will need: - 1 tablespoon olive oil - 1 onion, diced - 3 cloves garlic, minced - 2 carrots, diced - 2 celery stalks, diced - 1 zucchini, diced - 1 cup green beans, trimmed and cut into 1-inch pieces - 1 can (14 oz) diced tomatoes, with juices - 1 can (15 oz) cannellini beans, drained and rinsed - 4 cups vegetable broth - 1 teaspoon dried oregano - 1 teaspoon dried basil - Salt and pepper to taste - 1 cup pasta (small shapes like ditalini or elbow) - 2 cups fresh spinach or kale, roughly chopped - Grated Parmesan cheese (for serving, optional) These ingredients come together to create a hearty soup. The olive oil starts the base. The onion and garlic add a strong aroma. Carrots and celery give a sweet crunch. Zucchini and green beans bring freshness. Diced tomatoes add richness. Cannellini beans offer protein. The broth ties it all together, while herbs boost the flavor. Pasta gives it a comforting texture, and greens add a nutritious touch. This soup is not just filling; it’s also packed with vitamins. Fresh spinach or kale makes it vibrant. You can also adjust the herbs and spices to match your taste. This flexibility makes the soup a favorite in many homes. Plus, it’s simple to prepare, making it perfect for any cook! To make this veggie loaded minestrone soup, follow these steps. 1. Heat olive oil and sauté onions In a large pot, pour in one tablespoon of olive oil. Heat it over medium heat. Add the diced onion. Sauté until the onions are soft and clear, which takes about five minutes. 2. Add garlic, carrots, and celery Next, stir in three minced garlic cloves, two diced carrots, and two diced celery stalks. Cook for another five minutes. This will make the kitchen smell amazing! 3. Stir in zucchini and green beans Now, add one diced zucchini and one cup of trimmed green beans. Stir everything well to mix the flavors. 4. Incorporate tomatoes, beans, and broth Open a can of diced tomatoes and add it to the pot, juices included. Then, add one can of drained cannellini beans and four cups of vegetable broth. Stir in one teaspoon each of dried oregano and dried basil. Add salt and pepper to taste. 5. Season with herbs and spices As the soup heats, the herbs will release their flavors. This is a key step for a tasty soup! 6. Bring to a boil and then simmer Bring the soup to a gentle boil. Once it boils, lower the heat. Let it simmer for about 15 minutes. This waiting time allows the soup to get flavorful. 7. Add pasta and cook until al dente After simmering, add one cup of pasta. Cook it according to the package instructions, which usually takes about 8 to 10 minutes. 8. Stir in spinach or kale before serving In the last two minutes, add two cups of fresh chopped spinach or kale. Stir it in until just wilted. Now you have a warm bowl of veggie-loaded minestrone soup ready to enjoy! - How to enhance flavors with herbs Fresh herbs add a bright touch. I love using basil and oregano. They bring out the best in the soup. You can add them at the start for depth. Fresh herbs at the end give a nice finish. - Best practices for vegetable prep Cut veggies into small, even pieces. This helps them cook evenly. Start with the harder ones first, like carrots and celery. Add softer veggies, like zucchini and spinach, later. This keeps them from getting mushy. - Timing for adding pasta and greens Add pasta when the soup simmers. This way, it cooks just right. If you add greens too early, they can lose color. Stir them in during the last two minutes of cooking. They will stay bright and fresh. - Recommended garnishes like Parmesan cheese Grated Parmesan cheese is a perfect topping. It adds a salty richness. You can also drizzle a bit of olive oil on top for added flavor. - Best side dishes to serve with the soup A slice of crusty bread works great with this soup. You can dip it in and enjoy. A light salad also pairs well. It adds a fresh crunch to your meal. {{image_2}} You can easily switch up the veggies in this soup. Use what's fresh or in season. For example, try adding bell peppers in the summer or squash in the fall. You can mix in peas, corn, or even sweet potatoes. Each choice brings a new flavor and texture. If you want protein, consider adding meat or tofu. Diced chicken or turkey works great. For a plant-based option, add cubed tofu. Just toss it in when you add the broth. This way, it will absorb all the soup's flavors. If you need a gluten-free soup, swap regular pasta for gluten-free pasta. There are many great options available now. Look for rice, quinoa, or chickpea pasta. They add a nice twist to the dish. For a vegan soup, skip the Parmesan cheese. You can use nutritional yeast instead for a cheesy flavor. This soup is very flexible, so it suits many diets. Enjoy making it your own! To keep your veggie loaded minestrone soup fresh, use airtight containers. Glass jars or plastic containers work well. Make sure to cool the soup before storing. If you plan to freeze it, leave some space in the container. This allows room for the soup to expand. - Refrigeration: Store in the fridge for 3 to 4 days. - Freezing: Freeze for up to 3 months. When you are ready to eat, reheat the soup gently. You can use a pot on the stove or a microwave. - Stovetop: Pour the soup into a pot. Heat on medium until warm. Stir often to keep it from sticking. - Microwave: Place in a microwave-safe bowl. Heat for 2-3 minutes, stirring halfway through. Keep leftovers in mind. Store them right after your meal to keep the soup safe. It tastes best when eaten fresh, but reheating brings back that cozy flavor! Can I use fresh tomatoes instead of canned? Yes, you can use fresh tomatoes. Just chop about 4-5 medium-sized tomatoes. Add them to the pot with the other veggies. Fresh tomatoes will add a nice texture and flavor. How long does homemade minestrone soup last? Homemade minestrone soup lasts about 3-4 days in the fridge. Store it in a sealed container. You can also freeze it for up to 3 months. Can I make this soup in a slow cooker? Absolutely! Just add all the ingredients to the slow cooker. Cook on low for 6-8 hours or high for 3-4 hours. This method allows the flavors to blend well. What is the best way to make this soup ahead of time? Make the soup a day in advance. Let it cool, then store it in the fridge. Reheat it on the stove or in the microwave before serving. This helps the flavors develop even more. This blog covered a simple and tasty minestrone soup recipe. We covered the ingredients, steps, tips, and variations. Now, you can make this soup to warm your days and please your taste buds. Remember to mix and match the veggies based on what you have. Enjoy it fresh or save leftovers for later. You have all the tools to create a hearty dish everyone will love. Start cooking and make your kitchen smell wonderful!

Veggie Loaded Minestrone Soup Comforting and Healthy

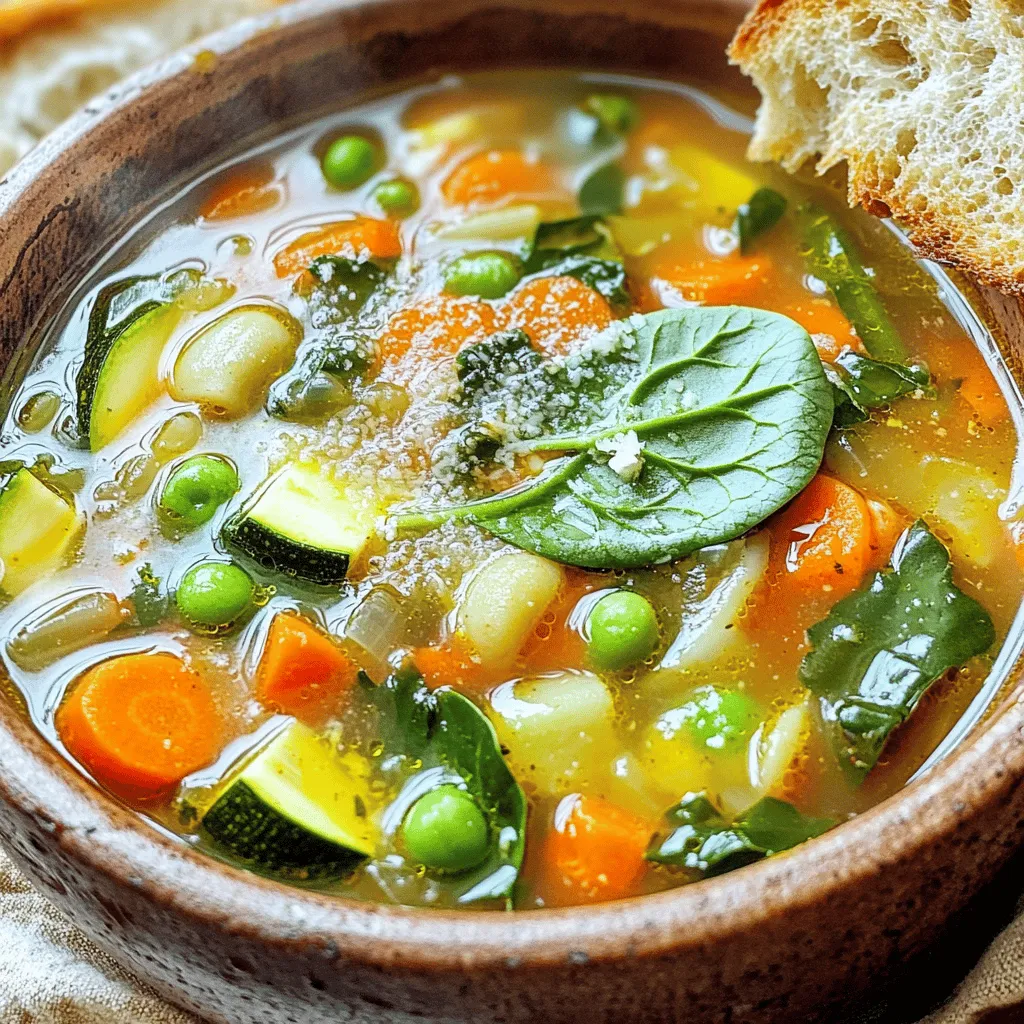
If you seek a warm, hearty dish that packs a veggie punch, you’re in the right place! My Veggie Loaded

To make honey garlic roasted sweet potatoes, you need to gather a few simple ingredients. Here’s the list: - 4 medium sweet potatoes, peeled and cubed - 3 tablespoons olive oil - 1/4 cup honey - 4 cloves garlic, minced - 1 teaspoon ground cinnamon - 1/2 teaspoon smoked paprika - Salt and pepper to taste - Fresh parsley, chopped (for garnish) Each ingredient plays a key role in building flavor. Sweet potatoes add a creamy texture and natural sweetness. Olive oil helps them roast perfectly, giving that nice golden color. Honey adds a sweet note, and garlic brings a lovely savory flavor. Cinnamon adds warmth, while smoked paprika gives a hint of depth. Salt and pepper balance everything out. Fresh parsley not only looks nice but adds a fresh touch. This blend makes the perfect dish for any meal. - Preheat the oven to 425°F (220°C). - Prepare a baking sheet with parchment paper. This makes cleanup easy. - In a large bowl, combine the cubed sweet potatoes with olive oil and seasonings. - Add honey, minced garlic, ground cinnamon, smoked paprika, salt, and pepper. - Toss the sweet potatoes to ensure even coating. This step is key for flavor. - Spread the sweet potato mixture in a single layer on the baking sheet. - Roast in the preheated oven for 25-30 minutes. - Stir halfway through cooking for even browning. The sweet potatoes should be golden and tender when done. To get the best roast, cut sweet potatoes into uniform cubes. This helps them cook evenly. If some pieces are bigger, they will take longer to cook. Try to aim for cubes that are about one inch. When you season, make sure every piece gets coated. This way, each bite is tasty. Toss the sweet potatoes well in the bowl before spreading them on the baking sheet. You can boost the flavor by adding spices. Try a pinch of nutmeg or some black pepper. These will add a nice kick. Fresh herbs like rosemary or thyme can also work well. Using different types of honey can change the taste. Try clover honey for a mild sweetness. Or use wildflower honey for a bolder flavor. These small changes can make a big difference. Honey garlic roasted sweet potatoes pair well with many proteins. Serve them with grilled chicken or fish for a balanced meal. They also go great with a fresh salad. For presentation, sprinkle freshly chopped parsley on top. It adds color and freshness. You can also use a drizzle of honey on top for extra sweetness. This makes the dish look even more inviting. {{image_2}} You can use many types of sweet potatoes. Try the orange, purple, or even white ones. Each type has a unique taste and texture. If you want a twist, use an air fryer. It cooks them faster and gives a nice crisp. You can also cook them on the stovetop. This method is great for a quick side dish. To spice things up, add chili flakes for a sweet and spicy kick. This turns the dish into a fun treat. For a savory version, try fresh herbs like thyme. Thyme adds depth and makes the flavors pop. Mixing flavors can change the whole dish into something new and exciting. If you want a vegan option, swap the honey for agave nectar. This keeps the sweet flavor while being plant-based. For those needing gluten-free meals, feel safe to enjoy this dish. All ingredients are naturally gluten-free, so you can dig in without worry. To keep your honey garlic roasted sweet potatoes fresh, store them in an airtight container. This helps lock in flavor and moisture. Place the container in the fridge as soon as they cool. They will last for up to 4 days in the fridge. If you want them to last longer, freezing is a great option. When reheating, I recommend using an oven. Preheat it to 350°F (175°C). Place the sweet potatoes on a baking sheet. Heat for about 10 to 15 minutes. This method helps keep them crispy. If you use a microwave, they may become soggy. To avoid this, cover them with a paper towel. This absorbs some moisture. To freeze roasted sweet potatoes, let them cool first. Spread them on a baking sheet in a single layer. Freeze for 1 to 2 hours until solid. Then, transfer them to a freezer-safe bag. Remove as much air as possible. They can stay in the freezer for up to 3 months. To thaw, place them in the fridge overnight. You can also reheat them directly from frozen, but they may take longer to warm through. Yes, you can make Honey Garlic Roasted Sweet Potatoes ahead. Prepare them up to a day in advance. Store them in an airtight container in the fridge. When ready to serve, reheat them in the oven until warm. They taste great even after a day. These sweet potatoes pair well with many dishes. Try serving them with roasted chicken or grilled fish. They also go great with a fresh salad or steamed veggies. The sweet and savory flavors complement many meals. Yes, you can use other potatoes. Regular potatoes or Yukon Golds work well too. Just keep in mind that the taste and texture will change. Sweet potatoes bring a unique sweetness that makes this dish special. Absolutely! This recipe is perfect for meal prep. You can cook a big batch and portion it out. Store in the fridge for easy meals throughout the week. It keeps well and tastes delicious reheated. To adjust the sweetness, change the amount of honey. Add less honey for a less sweet flavor. You can also add a touch of lemon juice to balance the sweetness. Experiment until you find the perfect taste for you. This blog post covered how to make Honey Garlic Roasted Sweet Potatoes. We discussed ingredients, step-by-step instructions, tips for roasting, and variations. I shared storage tips to keep leftovers fresh. Roasting sweet potatoes is an easy task that anyone can master. Feel free to experiment with flavors and serve them in unique ways. Enjoy making this tasty dish!

Honey Garlic Roasted Sweet Potatoes Flavorful Delight

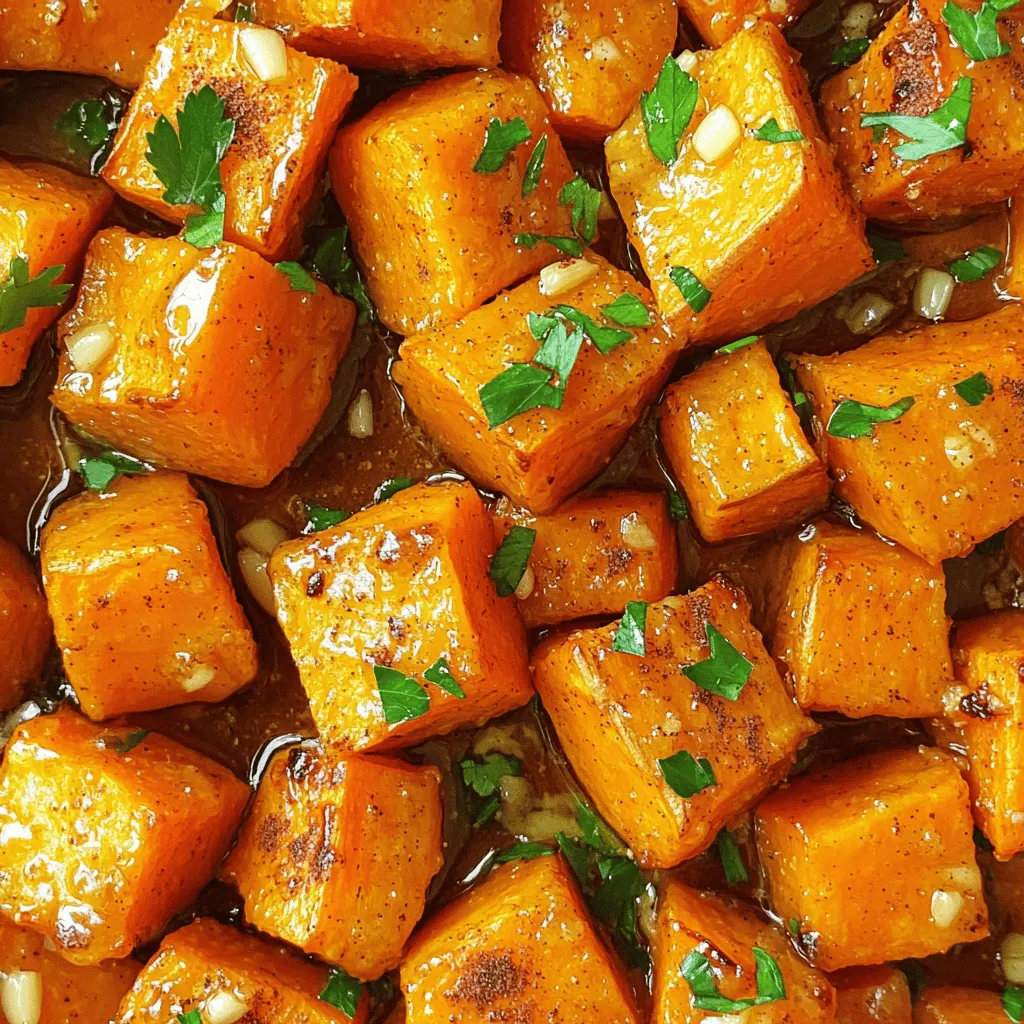
Are you ready to enjoy a delicious side dish that’s both sweet and savory? Honey Garlic Roasted Sweet Potatoes are

- 1 lb potato gnocchi - 2 tablespoons olive oil - 3 cloves garlic, minced - 1 cup cherry tomatoes, halved - 1 cup fresh mozzarella balls, halved - 2 cups fresh spinach - 1 cup heavy cream - 1/2 teaspoon Italian seasoning - Salt and pepper to taste - Fresh basil leaves for garnish - Balsamic glaze for drizzling To make this dish, you will need: - A large skillet - A wooden spoon or spatula - A measuring cup and spoons - A knife and cutting board These tools help you cook and serve the dish easily. A good skillet gives even heat. A sharp knife makes cutting veggies quick. If you don’t have gnocchi, use pasta like fusilli or penne. For a lighter option, try cauliflower gnocchi. You can swap cherry tomatoes with diced tomatoes or sun-dried tomatoes. If you need a dairy-free option, use coconut cream or almond milk instead of heavy cream. For a fresh twist, add arugula instead of spinach. 1. Start by heating 2 tablespoons of olive oil in a large skillet over medium heat. 2. Mince 3 cloves of garlic and add them to the hot oil. Sauté for about 1 minute, until you smell the garlic. 3. Cut 1 cup of cherry tomatoes in half. Add the tomatoes to the skillet and cook them for 5-7 minutes. Stir them now and then until they get soft and blister. 4. Now, add 1 pound of potato gnocchi to the skillet. Cook them as the package says, usually about 3-5 minutes. They are done when they float to the top. 5. Add 2 cups of fresh spinach. Stir it in until it wilts, which takes about 2-3 minutes. 6. Pour in 1 cup of heavy cream. Mix it well with the other ingredients. Add 1/2 teaspoon of Italian seasoning, and season it with salt and pepper. Cook for another 2-3 minutes. This will help the sauce thicken a bit. 7. Gently fold in 1 cup of halved fresh mozzarella balls. Remove the skillet from heat as soon as the cheese starts to melt. 8. Plate the creamy gnocchi and garnish it with fresh basil leaves. Drizzle some balsamic glaze on top for a nice finish. I recommend taking pictures at each step. This way, you can see how the dish changes as you cook. You can also find videos online that show similar recipes. Watching someone else can help you feel more confident. - Prep Time: 10 minutes - Cooking Time: 15 minutes - Total Time: 25 minutes - Servings: 4 By breaking down the time, you can plan your meal better. Each step flows into the next, making this dish fun and quick to prepare. To cook gnocchi well, start with a large pot of salted water. Boil the water before adding the gnocchi. This step helps the gnocchi float when they are ready. Cook them until they float to the top, usually about 3-5 minutes. Don’t overcrowd the pot, as it can make the gnocchi stick together. After cooking, drain them gently. You can also sauté them in olive oil for a nice texture. To boost flavor, use fresh ingredients. Fresh basil and ripe cherry tomatoes make a big difference. Adding garlic at the start gives a great base flavor. Don't skip the balsamic glaze; it adds a sweet touch. You can also sprinkle some grated Parmesan cheese on top for extra taste. A pinch of red pepper flakes can give a spicy kick. One common mistake is overcooking the gnocchi. This can make them mushy. Always keep an eye on them once they float. Another mistake is not seasoning enough. Taste your dish while cooking and adjust salt and pepper as needed. Lastly, avoid adding too much cream at once. Gradually stir it in to achieve the perfect creamy texture. {{image_2}} You can make this dish even better with some fresh vegetables. Try adding zucchini or bell peppers. These add color and crunch. You might also like to toss in some artichoke hearts for a fun twist. These additions keep it light and tasty while staying vegetarian. If you want some extra protein, consider adding chicken or shrimp. Cook the chicken in the skillet before the garlic. Use bite-sized pieces for quick cooking. For shrimp, add them after the tomatoes. They only need a few minutes until they turn pink. Both options elevate the dish and make it more filling. Switching the sauce can change the whole meal. Pesto adds a fresh, herby flavor that brightens the dish. For a richer taste, use Alfredo sauce instead of heavy cream. You can even mix both for a creamy and zesty blend. Each sauce brings out unique flavors, so feel free to experiment! To store leftovers, let the dish cool down first. Place the creamy caprese gnocchi in an airtight container. This keeps the flavors fresh. Store it in the refrigerator for up to three days. If you want to keep it longer, freezing is a good option. When you're ready to eat, it’s time to reheat. You can use a skillet or microwave. For a skillet, warm it over low heat. Stir occasionally until it's hot. In the microwave, use a microwave-safe bowl. Heat in short bursts, stirring in between, until warm. Adding a splash of cream can help keep it creamy. Freezing gnocchi can be easy. If you have extra uncooked gnocchi, you can freeze them. Place them on a baking sheet in one layer. Freeze until solid, then transfer to a bag. For cooked gnocchi, freeze them in a single layer first. Then, put them in a bag. Use them within three months for the best taste. Gnocchi is a small pasta made from potatoes. It can also include flour and eggs. This soft pasta is light and fluffy. The best gnocchi has a tender bite. You can find it in many stores. Yes, you can prepare parts of this dish ahead of time. Cook the gnocchi and store it in the fridge. You can also mix the sauce without adding the cheese. Just reheat it when you are ready to eat. Gnocchi cooks quickly. It usually takes about 3-5 minutes. They are done when they float to the top. If they sink, give them a bit more time. Test one to be sure! This dish pairs well with a fresh salad. A simple green salad with vinaigrette is great. You can also serve it with garlic bread. For a special touch, add a glass of white wine. You now have a complete guide to making gnocchi. We covered the ingredients and tools you need, along with step-by-step cooking instructions. I included tips to improve your dish and variations to try. Plus, I shared smart ways to store or reheat leftovers. Remember, cooking is fun! Don't be afraid to make this dish your own. Enjoy your delicious homemade gnocchi!

Creamy Caprese Gnocchi Skillet Simple and Tasty Dish

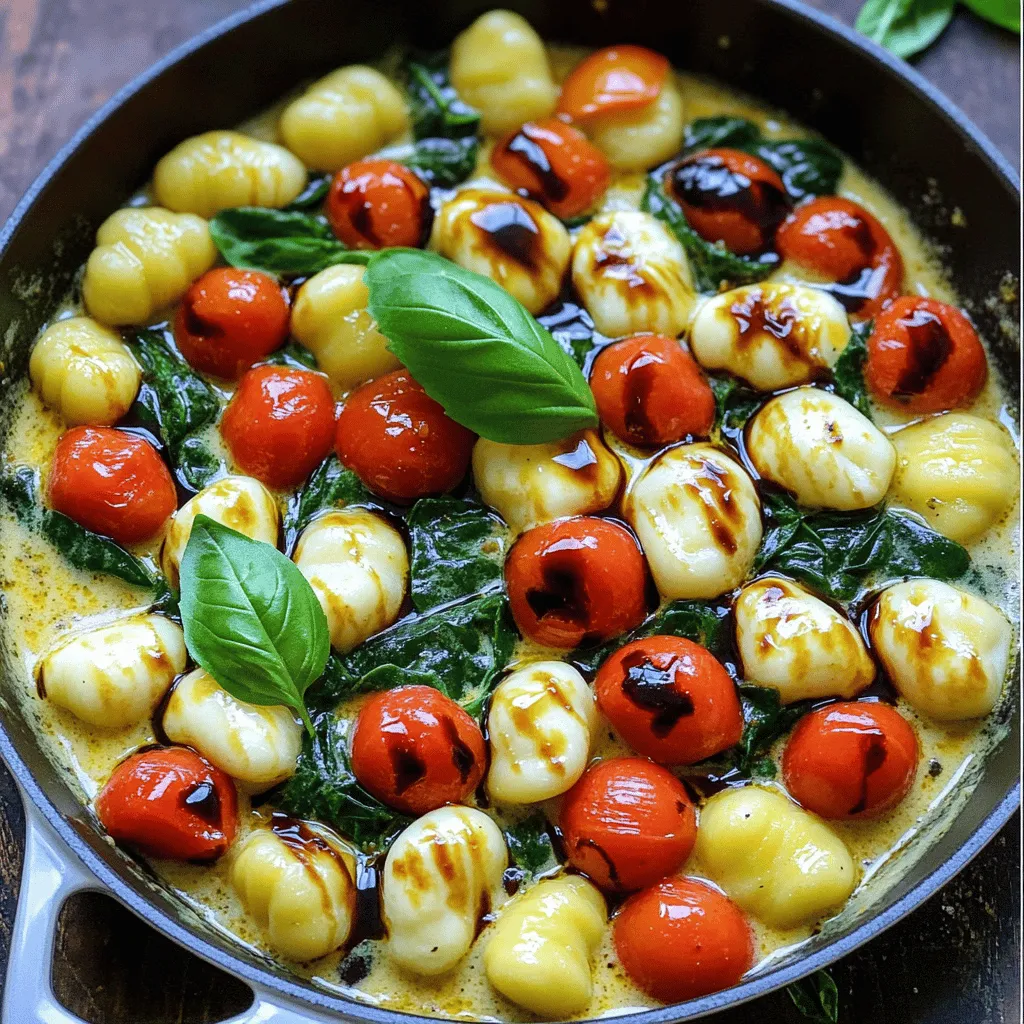
Are you ready to make a dish that is both easy and delicious? The Creamy Caprese Gnocchi Skillet is packed

- 2 cups edamame in pods - 3 tablespoons sesame oil - 4 cloves garlic, minced - 1-2 teaspoons red pepper flakes - 1 tablespoon soy sauce - 1 tablespoon rice vinegar - Salt to taste - 2 green onions, thinly sliced - Sesame seeds for garnish To make this tasty snack, start with fresh or frozen edamame. Both work well, but fresh pods give a nice crunch. I love using sesame oil for its rich flavor. Minced garlic adds a strong taste that pairs great with the heat from red pepper flakes. Adjust the flakes based on how spicy you want it. Soy sauce and rice vinegar bring a savory tang. Don’t forget salt to enhance all the flavors! Top it with green onions and sesame seeds for a pop of color and taste. For a gluten-free version, swap soy sauce with tamari. You can also use coconut aminos for a sweeter touch. If you want a vegan option, all the ingredients listed are already vegan-friendly. Edamame are young soybeans. They are packed with protein and fiber, which help you feel full. They also provide vitamins like K and C. Garlic is great for your heart and helps boost your immune system. Sesame oil is full of healthy fats, which are good for your skin and hair. Together, these ingredients create a tasty snack that’s also good for you! To start, you need to decide if you want to use frozen or fresh edamame. If you choose frozen, cook them as the package says until they are tender. This usually takes about 5-7 minutes. Make sure to drain them well after cooking. Draining is key because it helps avoid a soggy dish. If you pick fresh edamame, steam them for about the same time until they are bright green and tender. Next, let’s get cooking. Heat 3 tablespoons of sesame oil in a large skillet over medium heat. This oil gives a rich flavor. Now, add 4 cloves of minced garlic to the skillet. Sauté the garlic for about 1-2 minutes until it smells good but does not brown. Burning garlic can ruin the dish. Then, toss in 1-2 teaspoons of red pepper flakes. Sauté for another 30 seconds. This helps release the heat and flavor of the spices. Now, add the cooked edamame to the skillet. Toss them well to coat in the garlic and oil. Drizzle 1 tablespoon of soy sauce and 1 tablespoon of rice vinegar over the edamame. Stir everything to mix well and ensure the edamame is seasoned right. Cook for another 2-3 minutes to let the flavors blend. Taste and add salt if you need it. Time for the final touches! Remove the skillet from heat. For a pop of color and flavor, garnish your dish with sliced green onions and a sprinkle of sesame seeds. These add a nice crunch and visual appeal. Serve your Spicy Garlic Edamame warm. It makes a great snack or side dish! Enjoy the bold flavors and the vibrant look of your creation. - Best oil for sautéing: I love using sesame oil for this dish. It gives a nice nutty flavor. It also has a high smoke point, which makes it great for sautéing. You can use other oils, but sesame oil truly shines here. - Preventing overcooking edamame: To avoid mushy edamame, keep a close eye on the cooking time. If using frozen edamame, follow the package instructions. For fresh, steam them for just 5-7 minutes. Bright green and tender is what you want! - Adjusting heat and seasoning: The red pepper flakes add spice, but you control the heat. Start with one teaspoon and taste. You can always add more if you like it spicier. - Adding additional toppings: Try adding a squeeze of lime juice or a splash of soy sauce. You can also sprinkle some chopped cilantro or peanuts for a fun twist. - Ideal accompaniments: Spicy garlic edamame pairs well with rice dishes or as a side to grilled meats. It also works great as a snack with drinks or while watching a movie. - Pairing with drinks: For drinks, consider pairing with iced tea or a light beer. The flavors in the edamame match well with these drinks. {{image_2}} You can mix up the flavors of Spicy Garlic Edamame in many ways. For a sweet and spicy twist, add a touch of honey or maple syrup. This blend gives a nice balance to the heat. You can also try adding a splash of lime juice for a zesty kick. For an Asian-inspired twist, sprinkle in some five-spice powder or soy sauce. This gives your edamame a deeper flavor that is rich and satisfying. This recipe is easy to adapt for different diets. To make it vegan, ensure you use tamari instead of regular soy sauce. It is gluten-free and safe for those with gluten sensitivities. If you want a low-sodium version, use low-sodium soy sauce and skip the extra salt. These adjustments keep your snack tasty while fitting your dietary needs. Spicy Garlic Edamame is a great side dish. You can pair it with rice, noodles, or grilled meats. It also works well in salads. Toss edamame into a fresh green salad for added protein. You can even add it to grain bowls with quinoa or farro. The bright green color and crunch make any dish pop. To keep your spicy garlic edamame fresh, store it in an airtight container. Place it in the fridge. This way, it will stay tasty for up to three days. If you want to keep it longer, you can freeze it. Make sure to cool it first, then pack it in a freezer bag. It will last for about two months in the freezer. Reheating is simple. For the best flavor and texture, use a skillet. Heat it on medium-low. Add the edamame and cook for about five minutes. Stir often to warm it evenly. If you're in a hurry, you can microwave it. Place the edamame in a microwave-safe bowl and cover it. Heat for one to two minutes, stirring halfway through. In the fridge, spicy garlic edamame lasts up to three days. Look for signs of spoilage. If it smells off or has a slimy texture, it’s time to toss it. If you freeze it, it can last for two months. Just remember to label the bag with the date. Yes, you can use frozen edamame. Just cook it according to the package instructions. Frozen edamame is a great time saver. It still tastes fresh and delicious when cooked properly. The spice level depends on how many red pepper flakes you add. Start with one teaspoon if you prefer less heat. You can always add more if you want it spicier. Adjust it to suit your taste. Edamame is packed with protein, fiber, and vitamins. It is low in calories and high in antioxidants. Eating edamame can help you feel full and satisfied. It also supports heart health and aids digestion. You can prep the edamame and garlic in advance. Cook them and store them in the fridge for up to two days. Just reheat them in a skillet before serving. This makes it easy for quick snacks or meals. Spicy Garlic Edamame pairs well with rice or noodles. You can also serve it as a side dish with grilled meats. It makes a great appetizer for parties too. Enjoy it with a cold drink for a fun snack! This article covered how to make Spicy Garlic Edamame. We explored the main ingredients and their benefits. I shared step-by-step instructions for preparation and cooking. You also learned tips for enhancing flavors and serving ideas. Remember, edamame is not only tasty but also packed with nutrition. Enjoy making this dish and customize it to fit your taste. With practice, you’ll perfect this simple, healthy snack.

Spicy Garlic Edamame Flavorful and Easy Snack Recipe

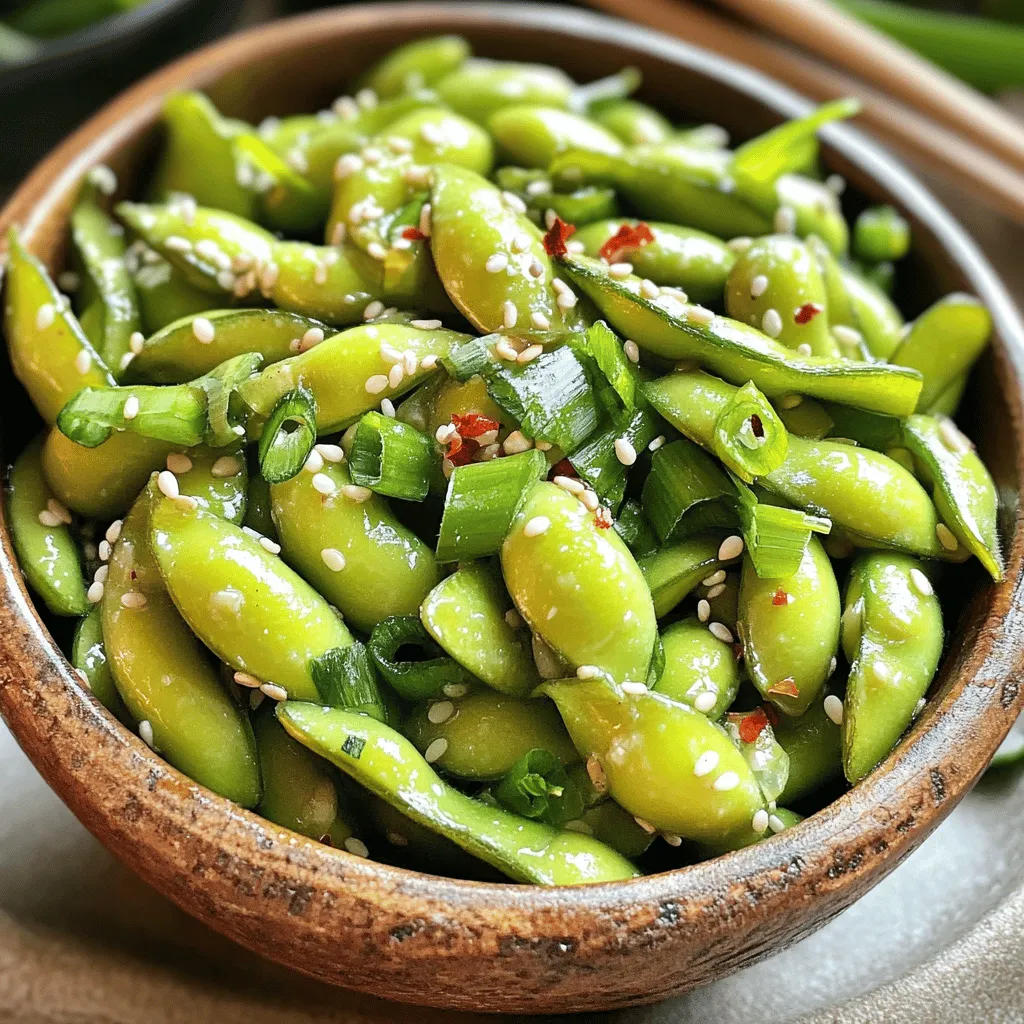
Looking for a quick, tasty snack that packs a punch? Try my Spicy Garlic Edamame recipe! This flavorful treat is

Older posts
Newer posts
← Previous Page1 … Page34 Page35 Page36 … Page86 Next →

dsad

© 2026 Cooking Wells • Built with GeneratePress

Our Policies

  • Copyright Policy
  • Cookie Policy
  • GDPR Policy
  • Privacy Policy
  • Disclaimer
  • Terms Of Use

More Information

  • Home
  • About
  • Contact
  • Appetizers
  • Dessert
  • Dinner
  • Drinks
©2026, Cooking Wells About Back To Top