Skip to content
DisclaimerTerms Of UseGDPR PolicyCookie Policy

Cooking Wells

  • Home
  • Drinks
  • Appetizers
  • Dinner
  • Dessert
  • About
  • Contact
  • Privacy Policy
DisclaimerTerms Of UseGDPR PolicyCookie Policy

NO-ING-IMG

- 1 ½ cups all-purpose flour - 1 teaspoon baking soda - ½ teaspoon baking powder - ¼ teaspoon salt - ½ cup granulated sugar - 1 cup plain yogurt (Greek or regular) - 2 large eggs - ¼ cup vegetable oil - Zest of 1 lemon - 2 tablespoons fresh lemon juice - 1 cup fresh blueberries (or frozen) Gather these ingredients before you start. Each plays a key role in flavor and texture. The all-purpose flour gives the loaf structure. Baking soda and baking powder help it rise. Salt enhances the taste. Granulated sugar adds sweetness. Yogurt makes the loaf moist and soft. Eggs bind the mix together. Vegetable oil keeps it light and fluffy. Lemon zest and juice bring a bright, fresh flavor. Blueberries add sweetness and juicy bursts. You can use fresh or frozen blueberries, depending on what's available. With these ingredients ready, you're all set to bake a delicious blueberry lemon yogurt loaf! - Preheat the oven to 350°F (175°C). - Grease or line a 9x5 inch loaf pan. This step is important. Preheating the oven helps the loaf bake evenly. Greasing the pan or using parchment paper will make removing the loaf easier. - Combine 1 ½ cups all-purpose flour, 1 teaspoon baking soda, ½ teaspoon baking powder, and ¼ teaspoon salt. In a medium bowl, whisk these dry ingredients well. This ensures your loaf will rise properly and have a nice texture. - Whisk together ½ cup granulated sugar, 1 cup plain yogurt, 2 large eggs, ¼ cup vegetable oil, the zest of 1 lemon, and 2 tablespoons fresh lemon juice. Use a large bowl for this mix. Make sure everything blends smoothly. The yogurt adds moisture and flavor, while lemon brightens the taste. - Gradually mix the dry ingredients into the wet ingredients. - Fold in 1 cup of blueberries. Add the dry mix slowly to the wet mix. Stir gently to combine. Be careful not to overmix. This can make your loaf dense. When adding blueberries, fold them in carefully to keep them whole. - Pour the batter into the prepared pan. - Bake for 50-60 minutes and check with a toothpick. Spread the batter evenly in the pan. The toothpick test is key. Insert it in the center; if it comes out clean, your loaf is ready. To make a great Blueberry Lemon Yogurt Loaf, do not overmix the batter. Overmixing can make the loaf dense and tough. Mix just until you no longer see dry flour. This helps create a light and fluffy texture. If using frozen blueberries, rinse them first. Then, toss them in a bit of flour. This keeps the berries from sinking to the bottom. It also helps them stay whole during baking. You can add more flavor with toppings. Try a sprinkle of chopped nuts or coconut. You can also add a drizzle of honey. This makes each slice more exciting. Serving with yogurt works well. A dollop of yogurt adds creaminess. A light dusting of powdered sugar on top gives it a nice touch, too. If your loaf is too dense, it may be from overmixing. Next time, mix gently and watch your time. If you bake it too long, it can also become dry. Baking times may change based on your oven. Check your loaf at 50 minutes. If it needs more time, bake in 5-minute increments. Each oven is different, so keep a close eye! {{image_2}} You can change the fruit in this loaf. Instead of blueberries, try raspberries or blackberries. These berries add a nice tartness and color. You might also want to add some chopped nuts, like walnuts or pecans. Nuts give a crunchy texture that is fun to eat. Using flavored yogurt can boost the taste. For example, lemon or vanilla yogurt works well. If you want a dairy-free option, choose almond or coconut yogurt. These swaps keep the loaf moist and tasty. If you want a healthier loaf, reduce the sugar by half. The lemon and blueberries still add sweetness. For a natural sweetener, use honey or maple syrup. Both options give a rich flavor and keep the loaf soft. To keep your Blueberry Lemon Yogurt Loaf fresh, wrap it tightly in plastic wrap. This helps keep moisture inside. You can also store it in an airtight container. Keep it at room temperature for up to three days. If you want to save it longer, place it in the fridge. The cold air will keep it fresh for about a week. For short-term storage, avoid cutting the loaf until you're ready to eat. This keeps the inner part moist. If you notice any dryness, spread a little yogurt on a slice to add moisture. Freezing is a great option if you want to save some slices for later. To freeze, first let the loaf cool completely. Then, slice it into pieces. Wrap each slice in plastic wrap, then place them in a freezer bag. This way, you can take out just what you need. To thaw, you have two simple methods. You can leave the slices in the fridge overnight. This keeps the texture nice. Or, if you're in a hurry, use the microwave on low for about 15 seconds. After storage, the best way to serve your loaf is simple. Just slice it and enjoy! A dollop of yogurt on the side adds creaminess. You can also sprinkle fresh blueberries on top for extra flavor. Pair your loaf with a warm cup of tea or coffee. The bright lemon flavor matches well with a variety of drinks. It's a perfect treat for breakfast or a snack! Yes, you can use frozen blueberries in this loaf. When using frozen berries, do not thaw them first. This keeps them from getting mushy. Just fold them in while frozen. They may turn the batter a bit blue, but the taste will still be great. You might also want to add a little extra flour to the mix. This helps absorb extra moisture from the frozen berries. To make this recipe gluten-free, swap all-purpose flour for a gluten-free blend. Look for a blend that includes xanthan gum. This will help bind the loaf. You can also use almond flour or coconut flour. Just be aware that these will change the texture slightly. Almond flour makes it denser, while coconut flour absorbs more moisture. Adjust the liquid in the recipe if needed. A perfectly baked loaf has a golden-brown top. You can also press gently on the top; it should spring back. Another sign is the sides pulling away from the pan. If you want to check doneness without a toothpick, use a knife. Insert it into the center; it should come out clean or with just a few crumbs. This loaf lasts about 2 to 3 days at room temperature. Store it in an airtight container to keep it fresh. If you see any mold or it feels dry, it's best to toss it. For longer storage, consider freezing it. Just wrap it well in plastic wrap and foil. This way, it can last up to 3 months! This blog post guides you through baking a delicious blueberry loaf. You learned about the simple ingredients and step-by-step instructions. I shared tips to make a perfect loaf and offered variations for different tastes. In the end, baking is fun and rewarding. Enjoy this easy recipe with family and friends. Happy baking!

Blueberry Lemon Yogurt Loaf Crunchy and Delicious Treat

Are you ready to bake a treat that’s both crunchy and delicious? This Blueberry Lemon Yogurt Loaf combines zesty lemon

To make Honey Sesame Chicken Stir Fry, you need: - 1 lb boneless, skinless chicken thighs, cut into bite-sized pieces - 1 cup broccoli florets - 1 bell pepper, sliced - 1 cup snap peas - 1 carrot, julienned - 4 cloves garlic, minced - 1 tablespoon ginger, grated - 2 tablespoons sesame oil - 1/4 cup honey - 3 tablespoons soy sauce - 1 tablespoon oyster sauce - 2 teaspoons cornstarch mixed with 2 tablespoons water - 1 tablespoon sesame seeds - Green onions, chopped for garnish Feel free to add extra flavor with: - Red pepper flakes for heat - Cashews or peanuts for crunch - Bok choy for a different green - Fresh herbs like cilantro for freshness I recommend using boneless, skinless chicken thighs. They stay juicy and tender during cooking. Chicken breasts can dry out, especially in a stir fry. Thighs add rich flavor and pair well with the sweet honey sauce. For a healthier option, skinless chicken breasts work too, but be careful not to overcook them. To start, you need to make the sauce. In a small bowl, mix together the honey, soy sauce, oyster sauce, and cornstarch mixed with water. Stir well until everything blends. This sauce makes the dish sweet and savory. Set it aside for later. Next, heat 1 tablespoon of sesame oil in a large skillet or wok. Use medium-high heat for the best results. When the oil is hot, add the chicken thighs. Cook for about 5-7 minutes. You want them golden brown. Once cooked, take the chicken out and set it aside. In the same skillet, add the rest of the sesame oil. Then, add minced garlic and ginger. Sauté for about 30 seconds until you smell their nice scent. After that, add the broccoli, bell pepper, snap peas, and carrot. Stir fry for 3-4 minutes. You want the veggies tender but still crunchy. Now it’s time to combine everything. Return the cooked chicken to the skillet with the vegetables. Pour the sauce over the mix and toss everything together. Cook for another 2-3 minutes. The sauce should thicken and coat the chicken and veggies nicely. When done, take the skillet off the heat. Sprinkle sesame seeds and chopped green onions on top for a nice touch. Serve the dish hot over cooked jasmine rice or noodles. This makes for a colorful and tasty meal! To cook chicken well, use boneless, skinless thighs. They stay juicy and tender. Cut the chicken into bite-sized pieces for even cooking. Heat your skillet or wok on medium-high. Add sesame oil before the chicken. Sear the chicken for 5-7 minutes until golden brown. Don’t crowd the pan; this helps it cook evenly. Always check the inside to ensure it’s fully cooked. When stir frying, keep your veggies colorful and fresh. Use broccoli, bell peppers, snap peas, and carrots. Cut them into uniform sizes for even cooking. Heat the skillet before adding the veggies. Add garlic and ginger first for flavor. Stir fry for about 3-4 minutes until they are tender-crisp. This keeps the nutrients and crunch intact. Avoid overcooking; you want bright colors. If you want more sweetness, add extra honey. Start with a teaspoon at a time to avoid overdoing it. For heat, include red pepper flakes or a dash of hot sauce. Mix them well into your sauce. Taste as you go, and adjust to your liking. This dish should balance sweet and spicy for the best flavor. {{image_2}} If you want a meat-free meal, tofu works great. Use firm or extra-firm tofu. Press it to remove water, then cut it into cubes. Cook the tofu in the same way you would cook chicken. Sear it until golden and crispy. This gives a nice texture and flavor. You can mix and match vegetables based on what you have. Try adding mushrooms, zucchini, or bok choy. Snow peas or green beans can also be great. The key is to use fresh veggies. This keeps the dish colorful and healthy. Each vegetable brings its own taste and crunch. If you love heat, add some chili flakes or sriracha. Mix these into the sauce for a spicy kick. You can also slice fresh jalapeños or Thai bird chilies. Just remember, a little goes a long way. Adjust the spice to suit your taste. This version adds a fun twist to the classic dish. After enjoying your Honey Sesame Chicken Stir Fry, store leftovers in an airtight container. Make sure to let the dish cool down first. You can keep it in the fridge for up to three days. For best taste, eat it within two days. Label your container with the date, so you know when you made it. To reheat your stir fry, use a skillet over medium heat. Add a splash of water or broth to keep it moist. Stir often for about five minutes or until it's hot. You can also microwave it in a bowl. Cover it with a lid or plastic wrap, leaving a small gap. Heat for one minute, then stir and check if it’s hot enough. If you want to save some for later, freezing is a great option. Place the cooled stir fry in a freezer-safe bag or container. Try to remove as much air as possible. Label it with the date and freeze for up to three months. To enjoy, thaw it in the fridge overnight and then reheat as mentioned above. If you need a honey substitute, try maple syrup or agave nectar. Both add sweetness. You can also use brown sugar mixed with a little water. This mix gives a similar flavor. Yes, frozen vegetables work well for this stir fry. They save time and are easy to use. Just make sure to thaw them before cooking. This helps them cook evenly. You can make Honey Sesame Chicken Stir Fry in advance. Cook it and let it cool. Store it in an airtight container in the fridge for up to three days. Reheat it in a pan or microwave before serving. Serve this dish with jasmine rice or noodles for a complete meal. You can also add a side salad or spring rolls for extra crunch and flavor. To make this dish gluten-free, use gluten-free soy sauce. You can find this at most grocery stores. Ensure all other ingredients are gluten-free as well, like the oyster sauce. You now have all the steps to create a tasty Honey Sesame Chicken Stir Fry. We covered the key ingredients, cooking methods, and ways to make it your own. Remember, cooking is about fun and creativity. Use these tips to adjust flavors or try new ingredients. With practice, you can make this dish perfect every time. Enjoy your cooking journey and share your delicious results with friends and family!

Honey Sesame Chicken Stir Fry Quick and Tasty Meal

Are you ready to whip up a quick and tasty meal? Honey Sesame Chicken Stir Fry is perfect for those

- Apples: You need 4 large apples. A mix of Granny Smith and Fuji works best. - Sweeteners: Use 1/2 cup brown sugar and 1/3 cup granulated sugar. - Spices: You will need 1 teaspoon ground cinnamon and 1/4 teaspoon nutmeg. - Dry Ingredients: Gather 1/2 cup rolled oats, 1/2 cup all-purpose flour, and 1/4 teaspoon salt. - Butter: Use 1/4 cup cold butter, cut into small cubes. - Optional toppings: Serve with vanilla ice cream or whipped cream for a treat. This list includes all the essentials to make your cinnamon apple crumble delightful. The combination of tart and sweet apples balances the flavors. The spices bring warmth and comfort to the dish. The oats and butter create a crunchy topping. You can make this dessert even more special with a scoop of ice cream or a dollop of whipped cream. Enjoy the sweet aroma of cinnamon as you prepare this dish! First, you need to prepare the apples. Get four large apples. I love using a mix of Granny Smith and Fuji apples for the best taste. Start by peeling, coring, and slicing each apple into thin pieces. This helps them cook evenly. Next, place the sliced apples in a large bowl. Add one tablespoon of lemon juice. This keeps the apples fresh and bright. Sprinkle in half a cup of brown sugar, one teaspoon of ground cinnamon, and a quarter teaspoon of nutmeg. Mix everything together until the apples are well coated. Set this bowl aside for now. Now, let’s make the crumble topping. In another bowl, combine half a cup of rolled oats, half a cup of all-purpose flour, one-third cup of granulated sugar, and a quarter teaspoon of salt. Mix these dry ingredients well. Next, take a quarter cup of cold butter and cut it into small cubes. Add the butter to the dry mixture. Use your fingers or a pastry cutter to work the butter into the mix. You want it to look like coarse crumbs. This will create a crunchy topping. It’s time to put everything together! Grease a 9x9 inch baking dish. Spread the apple mixture evenly across the bottom of the dish. Make sure the apples are in a nice, even layer. Now, sprinkle the oat crumble topping over the apples. Cover them generously so that every bite will be delicious. Preheat your oven to 350°F (175°C) and bake for 30 to 35 minutes. You will know it's done when the apples are bubbling and the topping is golden brown. Once baked, take it out and let it cool for a few minutes. This makes it easier to serve. Enjoy your warm cinnamon apple crumble! To get the best crumble, start with your butter. Use cold butter, as it helps create that flaky texture. Cut the butter into small cubes before mixing it with the dry ingredients. This way, you’ll get nice, crumbly bits rather than a paste. For apples, I like a mix of Granny Smith and Fuji. The tartness of Granny Smith balances well with the sweetness of Fuji. When it comes to serving, I prefer vanilla ice cream. The cold ice cream melts into the warm crumble, creating a great mix. Whipped cream is also a good choice if you want something lighter. For presentation, sprinkle a bit of cinnamon on top. You can also add a few thin apple slices for color and texture. If your topping turns out soggy, check your butter. Too much moisture can cause this problem. You can try baking it a bit longer to help it crisp up. For sweetness, taste the apple mixture before baking. If you find it too sweet, add a little lemon juice to balance it out. Adjusting sweetness keeps your flavors in check. {{image_2}} You can make this crumble gluten-free. Just swap the all-purpose flour with almond flour or gluten-free all-purpose flour. For oats, look for certified gluten-free oats. This way, everyone can enjoy this dessert! To make this crumble vegan, replace the butter with coconut oil or a plant-based butter. You can also add a scoop of dairy-free ice cream or coconut whipped cream on top. These swaps keep the dessert rich and tasty. Get creative with flavors! Add chopped nuts like walnuts or pecans for crunch. Dried fruits like raisins or cranberries also work well. For a twist, try adding a pinch of cardamom or ginger with the cinnamon. These options can give your crumble a unique taste every time! To store leftovers, let the crumble cool first. Cover it with plastic wrap or foil. Place it in the fridge. It will stay fresh for about 3 to 5 days. When you want to eat it, just warm it in the oven. This keeps the topping nice and crispy. For freezing, let the crumble cool completely. Then, slice it into portions. Wrap each piece tightly in plastic wrap. Place the wrapped pieces in a freezer bag. Squeeze out the air before sealing. The crumble can last in the freezer for about 3 months. To reheat, take a slice out and let it thaw in the fridge overnight. You can warm it in the oven at 350°F (175°C) for about 15 minutes. This way, you keep that perfect crumble texture. In the fridge, the crumble lasts about 3 to 5 days. If you freeze it, it stays fresh for about 3 months. Always check for any signs of spoilage. If it looks or smells off, it’s better to discard it. Enjoy your cinnamon apple crumble at its best! Yes, you can use frozen apples. However, you need to thaw them first. Thawing helps avoid excess moisture. This prevents a soggy crumble. Once thawed, drain any extra juice. This keeps the texture nice and firm. If you do not drain them, the filling may be too runny. Yes, you can prepare this dish ahead of time. You can slice the apples and mix them with the spices. Place them in the baking dish. Cover and store them in the fridge for one day. You can also make the crumble topping ahead. Just keep it in the fridge as well. When ready, layer the topping on the apples and bake. This saves time and makes it easy for busy days. I recommend using a mix of tart and sweet apples. Granny Smith apples add a nice tartness. Fuji apples bring sweetness to the mix. Other great options include Honeycrisp and Braeburn. Mixing different types gives the best flavors. The sweet-tart balance creates a delightful taste in every bite. This guide covers all you need to make a delicious apple crumble. We explored ingredients, from apple types to sweeteners and spices. We walked through easy prep steps for the perfect crumble topping. Tips helped ensure success, whether you want it gluten-free or vegan. Plus, we shared storage advice and answered common questions. Enjoy baking, tasting, and sharing your apple crumble. You now have the tools to create a tasty treat your family will love. Happy baking!

Cinnamon Apple Crumble Delight Easy and Delicious Recipe

Are you ready for a warm treat that’s easy to make and so delicious? This Cinnamon Apple Crumble is a

- 20 jumbo pasta shells - 1 lb ground beef or turkey - 1 packet taco seasoning - 1 cup refried beans - 1 cup corn (canned or frozen) - 1 cup salsa - 2 cups shredded Mexican cheese blend - 1/2 cup chopped green onions - 1/2 cup sour cream (for topping) - Fresh cilantro (for garnish) - Salt and pepper to taste To make cheesy taco stuffed shells, gather these tasty ingredients. Jumbo pasta shells hold everything inside. You can use ground beef or turkey for protein. Taco seasoning adds flavor. Refried beans give a creamy texture. Corn adds sweetness and crunch. Salsa brings spice and moisture. You need two cups of shredded Mexican cheese blend for a gooey touch. Don’t forget the green onions for a fresh kick. Sour cream on top makes it rich and cool. Fresh cilantro adds brightness. Lastly, season with salt and pepper to your liking. This mix of ingredients creates a fun and delicious dish. It’s perfect for dinner or a gathering. Enjoy these flavors together in each bite! First, preheat your oven to 375°F (190°C). This step is key. It ensures even cooking for your stuffed shells. While the oven heats, fill a large pot with water. Add some salt and bring it to a boil. Once the water is bubbling, add the jumbo pasta shells. Cook them according to the package, which is about 8-10 minutes. You want them al dente, so they hold up when stuffed. After cooking, drain the shells and set them aside to cool. Next, grab a large skillet and place it over medium heat. Add your ground beef or turkey to the pan. Cook this meat until it turns brown. This usually takes about 5-7 minutes. Drain any extra fat from the pan. Now, sprinkle in the taco seasoning. Pour in 3/4 cup of water, too. Stir it well and let it cook for another 5 minutes. This lets the flavors blend. After that, add in the refried beans, corn, and 1 cup of salsa. Mix everything until well combined. Taste it and add salt and pepper as needed. Now, it's time to stuff the shells! Take each cooked shell and carefully spoon in the taco filling. Place the filled shells open side up in a greased baking dish. Once all shells are filled, pour the remaining salsa over them. This adds flavor and moisture. Finally, sprinkle the shredded Mexican cheese blend on top evenly. Cover your baking dish with aluminum foil. This helps keep the shells moist while they cook. Place the dish in the preheated oven and bake for 20 minutes. After that, remove the foil and bake for an additional 10 minutes. This last step melts the cheese and makes it bubbly. Once baked, take the dish out and let it cool for a few minutes. This helps avoid burns when serving. Top each shell with a dollop of sour cream. Then, sprinkle on some sliced green onions and fresh cilantro. These toppings add freshness and flavor, making your dish look great! You can cook Cheesy Taco Stuffed Shells in different ways. You might use an air fryer or stovetop. Both methods can give you tasty results. For air frying, cook at 375°F for about 15 minutes. For stovetop, cover and simmer on low for 20 minutes. To get the best texture, make sure the pasta shells are al dente. If they cook too long, they can break. Drain them well and let them cool before stuffing. This helps keep them firm. If you want to skip the meat, use black beans or lentils. Both options give great flavor. You can also use tempeh or tofu for a protein boost. For a vegan option, replace sour cream with cashew cream or avocado. You can find plant-based cheese in stores too. Just check the labels to ensure they fit your diet. To serve, place the stuffed shells on a big platter. This looks nice and invites sharing. Drizzle some extra salsa on top for color. For plating, stack the shells in a pyramid shape. This adds height and looks fancy. Finish with green onions and cilantro for a pop of color. Each bite will be as beautiful as it is delicious! {{image_2}} You can switch out the ground beef for other meats. Chicken or turkey works well. These meats keep the dish light and tasty. If you use chicken, try shredded rotisserie chicken for a quick option. Turkey adds a nice lean touch without losing flavor. Both options pair perfectly with the taco seasoning, making them fun and easy swaps. Want to spice things up? Add some chili powder or cumin to the filling. You can also mix in diced jalapeños for heat. Toppings can also change the dish. Try adding sliced olives, diced tomatoes, or avocado. Fresh lime juice can brighten the flavor too. Experimenting with these extras keeps the recipe exciting and new. If you need gluten-free options, use gluten-free pasta shells. Make sure to check the labels. For those on a low-carb diet, replace pasta with zucchini noodles. You can also use cauliflower rice as a filling base. These swaps keep the taste while fitting your diet. To keep your cheesy taco stuffed shells fresh, follow these steps: - Storing in the fridge: Place any leftovers in an airtight container. Store them in the fridge for up to three days. Make sure to cool them down before sealing the container. - Freezing instructions: If you want to save them longer, freeze the stuffed shells. Wrap them tightly in plastic wrap, then place them in a freezer-safe bag. They can last up to three months in the freezer. When it’s time to enjoy your leftovers, reheating them correctly matters. Here are the best methods for reheating stuffed shells: - Oven method: Preheat your oven to 350°F (175°C). Place the stuffed shells in a baking dish. Add a splash of water or salsa to keep them moist. Cover with foil and bake for about 20 minutes. - Microwave method: Put the shells on a microwave-safe plate. Add a little salsa or water to keep them from drying out. Heat in the microwave for about 2-3 minutes, checking every minute. Using these methods will keep your cheesy taco stuffed shells tasty and enjoyable! You can make your own taco seasoning. Use these spices: - 1 tsp chili powder - 1 tsp cumin - 1 tsp garlic powder - 1 tsp paprika - 1/2 tsp onion powder - Salt and pepper to taste Mix these spices together. This blend gives great flavor and is easy to make. Yes, you can prep these shells in advance. Just follow these steps: 1. Cook and stuff the shells. 2. Cover them well and refrigerate. 3. Bake them when ready. Just add a few extra minutes to the baking time. This makes weeknight dinners a breeze! To add heat, try these options: - Add diced jalapeños to the filling. - Include a dash of hot sauce in the salsa. - Use pepper jack cheese instead of regular cheese. These small changes can really kick up the spice! Absolutely! Here are some great options: - Cheddar cheese for a sharper taste. - Monterey Jack for a creamy texture. - Queso fresco for a crumbled topping. Mix and match to find your favorite cheese combo! For the best results, use the oven. Follow these steps: 1. Preheat your oven to 350°F (175°C). 2. Place shells in a baking dish. Add a bit of salsa or water to keep them moist. 3. Cover with foil and heat for 15-20 minutes. This keeps the cheese melted and the pasta soft! You can create delicious Cheesy Taco Stuffed Shells using simple ingredients and steps. Remember to preheat your oven and prepare your pasta shells. Whether you choose beef or a meat alternative, the filling is key to flavor. Garnish with fresh toppings for a pleasing look and taste. Don’t forget about storage and reheating options for leftovers. Lastly, feel free to explore variations that suit your diet. Enjoy making this fun dish, and share it with family and friends. It’s sure to be a hit!

Cheesy Taco Stuffed Shells Tasty and Easy Recipe

Do you love tacos and pasta? Then you’ll adore my Cheesy Taco Stuffed Shells! This fun dish combines two favorites

To make a Tropical Pineapple Green Smoothie, gather these fresh ingredients: - 1 cup fresh pineapple chunks - 1 ripe banana - 1 cup fresh spinach leaves - 1/2 avocado - 1 cup coconut water or almond milk - 1 tablespoon chia seeds - 1 tablespoon honey or agave syrup (optional) - Ice cubes (optional) These ingredients blend together to create a tasty, healthy drink. The pineapple adds a sweet, tropical flavor. The banana gives it creaminess and natural sweetness. Fresh spinach provides a boost of nutrients without changing the taste. Half an avocado makes the smoothie rich and smooth. You can choose coconut water for a tropical twist or almond milk for a nutty flavor. Chia seeds pack in more protein and fiber. Honey or agave syrup is for extra sweetness, but it’s not needed if you prefer less sugar. Ice cubes cool it down, making it extra refreshing. 1. Start by adding the fresh pineapple chunks, ripe banana, fresh spinach leaves, and half an avocado to your blender. These base ingredients create a fruity and green mix that is both tasty and healthy. 2. Next, pour in your choice of coconut water or almond milk. This step helps the blender mix everything smoothly. The liquid makes the smoothie light and refreshing. 3. Now, add one tablespoon of chia seeds. These tiny seeds pack a big nutritional punch. If you prefer a sweeter drink, include one tablespoon of honey or agave syrup. 4. If you want an extra chill, toss in a handful of ice cubes. This makes your drink even more refreshing on a hot day. - Set your blender to high speed for a creamy texture. This ensures all your ingredients blend well together. - While blending, stop to scrape down the sides with a spatula. This helps mix everything evenly and prevents any chunks from sticking to the sides. - Serve your smoothie immediately for the best flavor. It tastes best when fresh and cold. - For a fun touch, you can garnish with a slice of pineapple or a sprinkle of chia seeds on top. This adds a nice look and extra texture to your drink. When making a tropical pineapple green smoothie, picking the right fruits is key. Choose a pineapple that feels firm but has a slight give when you squeeze it. Look for a sweet smell at the base; this means it is ripe and ready to eat. Avoid pineapples with brown spots or a hard shell. Your smoothie needs bright, fresh flavors! For spinach, select leaves that are vibrant and crisp. The leaves should look green without any yellow or brown spots. Fresh spinach adds a nice boost of vitamins. If you can, buy organic spinach. It often tastes better and is free from harmful pesticides. To avoid clumps in your smoothie, start by blending the soft ingredients first. Add your fresh pineapple, banana, and avocado to the blender. Blend these until they are smooth before adding the spinach and liquid. This helps everything mix well. For the perfect consistency, adjust your liquid. If your smoothie is too thick, add more coconut water or almond milk. You want it creamy but not too runny. Blend until you reach that light, fluffy texture that feels refreshing. Chia seeds are a fantastic addition. They pack a punch of fiber and protein. Adding just one tablespoon boosts the nutrition of your smoothie. They also help keep you full longer. You might also consider other nutrient-rich ingredients. Adding a scoop of almond butter gives healthy fats and protein. Flaxseeds are another good choice; they offer omega-3 fatty acids. With these extras, your smoothie becomes a powerhouse of nutrition! {{image_2}} You can switch up the fruits in your smoothie for new tastes. Try mango for a sweet twist. Or use kiwi for a tangy kick. Seasonal fruits also play a big role. In summer, use fresh berries for a bright flavor. In winter, opt for oranges or pears. Each fruit brings a unique taste and health benefits. If you want a different base, consider non-dairy options. Almond milk gives a nutty flavor. Coconut water adds sweetness and hydration. You can also use fruit juices, like orange or apple juice, for a fruity lift. Each liquid changes the smoothie’s taste and texture. Want to boost nutrition? Add protein powder for extra energy. It makes your smoothie more filling too. You can also mix in other greens, like kale or Swiss chard. This adds vitamins without changing the taste much. Superfoods help make your drink healthier and more satisfying. How long does the smoothie last in the fridge? This Tropical Pineapple Green Smoothie stays fresh for up to 24 hours. After that, the flavors and texture may change. What are the best container practices? Store your smoothie in a tight container. Glass jars or BPA-free plastic bottles work well. Make sure to leave some space at the top. This allows for any expansion if you freeze it later. Can you freeze a smoothie for later consumption? Yes! You can freeze this smoothie. It keeps well for about 1 month in the freezer. What about thawing and reheating? To thaw, move your smoothie to the fridge for several hours or overnight. If you need it fast, place it in warm water for a few minutes. Blend it again after thawing to restore its smooth texture. Enjoy your refreshing drink anytime! You can make your smoothie thicker by adding some natural ingredients. Here are a few tips: - Use more banana or avocado. - Add Greek yogurt for creaminess. - Include frozen fruit instead of fresh. - Mix in some oats for extra texture. These ingredients will help create that thick, velvety feel you want. Yes, you can make this smoothie ahead of time. It tastes best when fresh but can last in the fridge for up to 24 hours. Store it in a tightly sealed container to keep it fresh. If you notice any separation, just shake or stir before drinking. Yes, this smoothie can easily be vegan-friendly. Use almond milk or coconut water as your base. Choose agave syrup instead of honey for sweetness. All other ingredients are plant-based, making this a great option for vegan diets. This smoothie packs a lot of nutrients. Here’s a quick breakdown: - Pineapple: Rich in vitamin C and antioxidants. - Banana: Provides potassium and fiber. - Spinach: Full of iron and vitamins A and K. - Avocado: Offers healthy fats and vitamins E and C. - Chia seeds: High in omega-3 fatty acids and fiber. Together, these ingredients support digestion, boost energy, and keep your skin glowing. Enjoy this tasty drink while reaping its health benefits! This smoothie is a blend of tasty and healthy ingredients. We explored key components like pineapple, banana, spinach, and avocado. You learned step-by-step how to make a creamy drink. Choosing fresh ingredients and blending properly ensures great flavor and texture. Consider adding superfoods for extra nutrition. Proper storage keeps your smoothie fresh. Now, you’re ready to enjoy this refreshing treat anytime. Remember, a good smoothie can be both delicious and healthy. Have fun customizing it to fit your taste!

Tropical Pineapple Green Smoothie Refreshing Delight

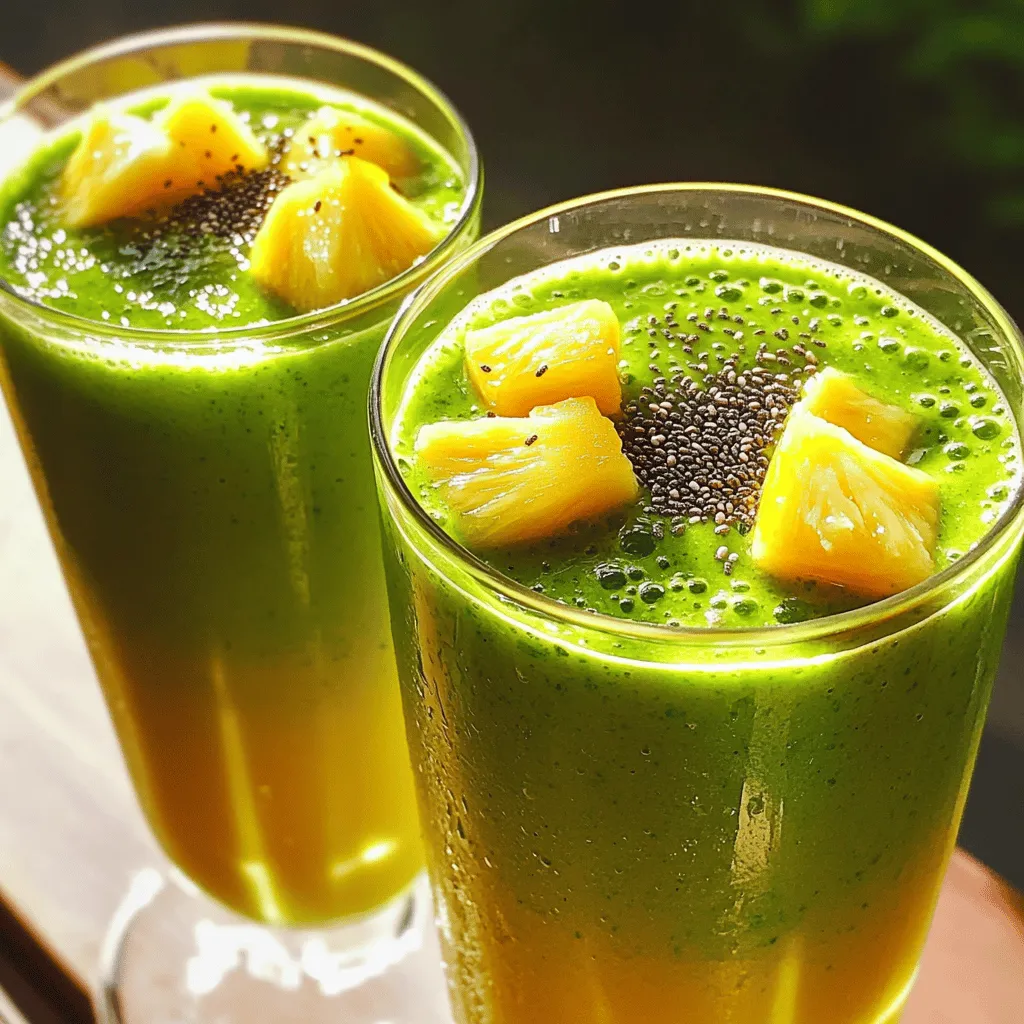
Craving a delicious and nutritious boost? Meet the Tropical Pineapple Green Smoothie! Packed with fresh pineapple, ripe banana, and creamy

To make this Garlic Butter Herb Salmon, you need: - 4 salmon fillets (6 ounces each) - 4 tablespoons unsalted butter - 4 cloves garlic, minced - 1 tablespoon fresh parsley, chopped - 1 tablespoon fresh dill, chopped - 1 tablespoon fresh lemon juice - Salt and pepper to taste - Lemon slices (for garnish) You can swap out some ingredients if needed. For instance, use olive oil instead of butter for a lighter dish. If you lack fresh herbs, dried ones work too. Just use less, about one-third of the amount. You can also use garlic powder in place of fresh garlic. Use about half a teaspoon for each clove. If you want a different flavor, try lime juice instead of lemon juice. Fresh herbs bring bright flavors and vibrant color. They are great for this dish. Use them if you can. Dried herbs are handy too. They have a more concentrated taste. If using dried herbs, remember they are stronger. Use about one-third of the fresh herb amount. For example, if a recipe calls for one tablespoon of fresh parsley, use one teaspoon of dried parsley. 1. Preheat your oven to 400°F (200°C). This step is key for even cooking. 2. Take a small saucepan and set it over medium heat. 3. Add 4 tablespoons of unsalted butter to the pan. Let it melt slowly. 4. Once the butter is melted, add 4 cloves of minced garlic. 5. Sauté the garlic for about 1 minute. It should smell great but not brown. 6. Stir in 1 tablespoon of chopped parsley and 1 tablespoon of chopped dill. 7. Add 1 tablespoon of fresh lemon juice for brightness. Mix well. 8. Remove the pan from heat and set your garlic butter aside. 1. Line a baking sheet with parchment paper. This helps with easy cleanup. 2. Place 4 salmon fillets, skin-side down, on the lined sheet. 3. Season each fillet with salt and pepper to taste. 4. Pour the garlic butter herb mixture over the salmon. Make sure each fillet is well-coated. 5. Bake the salmon in the preheated oven for 12-15 minutes. 6. Check for doneness by using a fork to see if it flakes easily. - The internal temperature should reach 145°F (63°C) to be safe to eat. - If you don’t have a thermometer, check the salmon with a fork. - It should flake easily and look opaque. If it’s still translucent, give it more time. - Let the salmon rest for a couple of minutes before serving. This helps the juices settle. I love baking salmon because it keeps the fish moist. The oven cooks evenly and lets the flavors shine. You can also grill salmon for a nice char and smoky taste. Pan-searing gives a crispy skin, which many enjoy. Each method works great for this garlic butter herb salmon. Salmon cooks fast, so keep an eye on it. Bake for 12-15 minutes at 400°F. Use a fork to check if it flakes easily. The internal temperature should be 145°F. If you go over, the fish can become dry. Setting a timer helps prevent mistakes. To make this dish even tastier, try adding other herbs. Thyme and basil pair well with garlic and butter. A splash of white wine in the butter mix adds depth. You can also use a bit of honey for a sweet touch. Experimenting with flavors makes cooking fun and unique! {{image_2}} You can switch up the herbs in this dish. Fresh basil or thyme adds great flavor. Try using oregano for a Mediterranean twist. If you like heat, a pinch of red pepper flakes works well too. Each herb brings its own taste, making your meal unique every time. Salmon is tasty, but you can use other fish too. Cod or trout works well with garlic butter. If you prefer seafood, shrimp is a great option. For a meat choice, chicken breasts can soak up those rich flavors. Just adjust cooking times for different proteins. Grilling salmon adds a smoky flavor. Preheat your grill and use a fish basket for easy handling. Cook each side for about 4-5 minutes. If you prefer pan-seared, heat a skillet with some oil. Sear each side for 3-4 minutes until golden. Both methods keep your fish juicy and full of flavor. To keep your Garlic Butter Herb Salmon fresh, store it in an airtight container. Place the salmon in the fridge right after it cools. If you have leftovers, try to eat them within three days for the best taste. Make sure to cover them well to avoid any odors from the fridge. When it’s time to enjoy your leftover salmon, reheat it gently. Preheat your oven to 300°F (150°C). Place the salmon on a baking sheet and cover it with foil. Heat for about 10-15 minutes, or until warm. You can also use a microwave. Just cover the salmon and heat for 30 seconds at a time, checking often. This keeps it moist and tasty. If you want to store your salmon for longer, freezing works great. Wrap each salmon fillet tightly in plastic wrap. Then, place them in a freezer-safe bag or container. You can freeze it for up to three months. When you’re ready to eat, thaw it in the fridge overnight before reheating. This keeps the flavors fresh and delicious. Garlic Butter Herb Salmon stays fresh in the fridge for 3 to 4 days. Store it in an airtight container. Make sure it cools down before sealing. This way, it keeps its flavor and texture. Yes, you can use frozen salmon. Just thaw it first before cooking. Thaw it in the fridge overnight for best results. This helps keep the fish juicy and tender. I love serving Garlic Butter Herb Salmon with simple sides. Here are some great options: - Steamed broccoli - Roasted asparagus - Rice or quinoa - A fresh green salad - Mashed potatoes These sides complement the salmon well and make a complete meal. To sum up, this post covered the ingredients for Garlic Butter Herb Salmon, along with tips and tricks for making it. I also shared variations and storage info to help you get the most from your meal. In my final thoughts, remember that cooking offers endless ways to enjoy salmon. Each method lets you explore new flavors. Keep experimenting and have fun in the kitchen. Enjoy your delicious creations!

Garlic Butter Herb Salmon Delightful and Easy Recipe

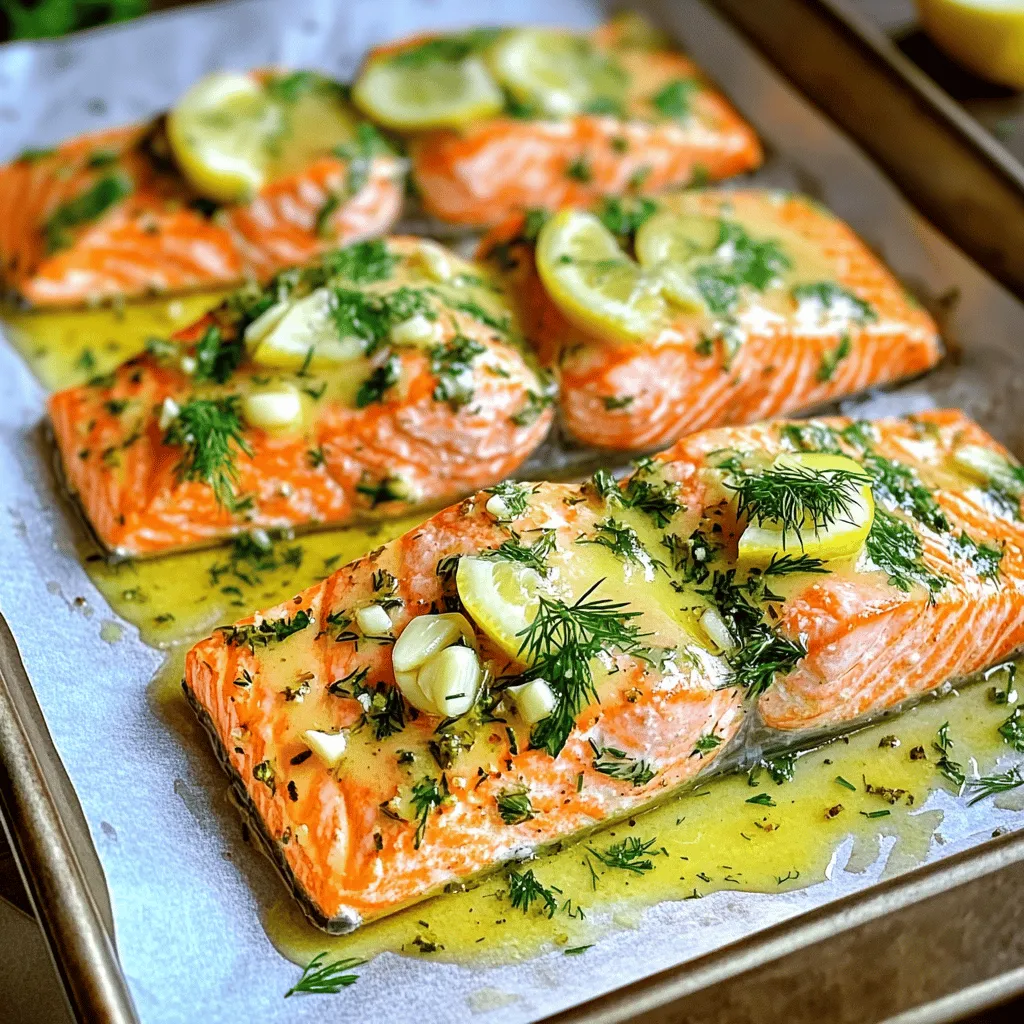
Are you ready to impress your taste buds? This Garlic Butter Herb Salmon recipe is easy and delicious! I will

- 8 slices of thick bread (such as challah or brioche) - 4 oz cream cheese, softened - 1 cup fresh strawberries, hulled and sliced - 2 tablespoons powdered sugar (plus more for dusting) - 4 large eggs - 1 cup whole milk - 1 teaspoon vanilla extract - 1 teaspoon ground cinnamon - 2 tablespoons butter (for cooking) - Maple syrup (for serving) When picking bread, choose thick slices. Challah or brioche work best for a rich taste. Look for bread that is soft yet sturdy enough to hold the filling. Select fresh strawberries. A bright red color and firm texture mean they are ripe and sweet. Avoid any that are mushy or dull. For cream cheese, ensure it is softened. This helps it mix smoothly with the powdered sugar. Choose large, fresh eggs for the egg mixture. They provide great flavor and help bind the French toast. Use whole milk for a creamy texture. You can also use a milk alternative if needed, but it may change the taste slightly. Pick quality vanilla extract for the best flavor. Avoid imitation vanilla as it lacks depth. Make sure your ground cinnamon is fresh for a warm spice flavor. Old spices can lose their punch. Lastly, grab real maple syrup. It adds a delightful sweetness that pairs perfectly with this dish. 1. Start by taking 4 oz of softened cream cheese. Place it in a mixing bowl. 2. Add 2 tablespoons of powdered sugar to the cream cheese. Mix until smooth. 3. Next, take 1 cup of fresh strawberries. Hull and slice them into small pieces. 4. Gently fold the sliced strawberries into the cream cheese mixture. Make sure they are evenly scattered. Set this aside. 1. In a separate bowl, crack 4 large eggs. 2. Pour in 1 cup of whole milk. 3. Add 1 teaspoon of vanilla extract and 1 teaspoon of ground cinnamon. 4. Whisk all these ingredients together until they are well combined. 1. Grab one slice of thick bread. Spread a generous amount of the strawberry cream cheese mixture on one side. 2. Place another slice of bread on top to make a sandwich. Repeat this for all slices. 3. Heat a large skillet or griddle over medium heat. Add 1 tablespoon of butter. Let it melt and coat the pan. 4. Dip each sandwich into the egg mixture, covering both sides lightly. Don’t soak them too much. 5. Place the soaked sandwiches onto the hot skillet. Cook until both sides are golden brown, about 3-4 minutes each. 6. If needed, add more butter for each batch. 7. Once cooked, remove from heat and dust with more powdered sugar. 8. Serve warm with maple syrup drizzled on top and extra sliced strawberries on the side. To make great French toast, you need the right skillet temperature. I recommend setting your skillet to medium heat. This ensures your bread cooks evenly. If it’s too hot, the outside burns before the inside cooks. To avoid soggy French toast, don’t soak the bread too long. Dip each sandwich quickly in the egg mixture. You want both sides coated, but not dripping. This helps keep the toast firm while cooking. Presentation makes your dish special. Stack the French toast neatly on a plate. Drizzle warm maple syrup on top for sweetness. Add fresh strawberries around the stack for color. A light dusting of powdered sugar adds a nice touch. This not only looks good but also makes it inviting. The bright red strawberries pop against the golden toast. You can prepare some parts in advance. Make the cream cheese mixture and store it in the fridge. This saves time on busy mornings. You can also slice the bread ahead of time. For storage before cooking, keep the sandwiches in the fridge. Use parchment paper between the layers to prevent sticking. This way, you can cook them fresh when you’re ready. {{image_2}} You can switch strawberries for other fruits. Blueberries, raspberries, or bananas work well. Each fruit adds a different flavor. Blueberries bring sweetness, while raspberries add a tart touch. Bananas give a creamy feel. When using other fruits, chop them small. This way, they mix well into the cream cheese. For a healthier take, choose lower-calorie options. You can use low-fat cream cheese. It cuts fat without losing flavor. Gluten-free bread is great for those with gluten issues. Whole grain bread can add fiber too. You can also reduce the powdered sugar for less sweetness. These changes keep your dish yummy and light. Want to enhance the taste? Try adding spices. A dash of nutmeg or cardamom can create warmth. You can also mix in almond extract for a nutty twist. Vanilla extract adds depth too. These small changes make a big difference in flavor. Experiment with what you like best. To store cooked French toast, let it cool down first. Place it in an airtight container. Layer pieces with parchment paper to prevent sticking. This method helps keep it fresh. You can store it in the fridge for up to three days. When ready to eat, simply reheat it in a skillet or microwave. To freeze your French toast, wrap each piece in plastic wrap. Then, place the wrapped pieces in a freezer bag. Make sure to squeeze out as much air as possible. You can freeze them for up to three months. To reheat, take out a piece and thaw it in the fridge overnight. Then, warm it in a skillet or toaster until heated through. This way, you can enjoy your treat anytime! Yes, you can prepare some parts ahead. Mix the cream cheese and powdered sugar a day before. Store it in the fridge. You can also slice the strawberries in advance. Keep them in an airtight container. When you are ready to cook, just assemble and dip the bread. This saves time and helps you enjoy a warm breakfast faster. Yes, you can use various breads. Challah and brioche are great choices. You can also try sourdough or whole wheat bread for a different taste. Each type will give a unique flavor and texture. Just make sure the bread is thick enough to hold the filling well. Serve this dish with fresh fruit like bananas or berries. A side of crispy bacon or sausage adds a nice salty touch. For drinks, consider orange juice or a warm cup of coffee. These pair well and create a balanced meal. Enjoy your breakfast delight! In this post, we covered how to make delicious Strawberry Cream Cheese French Toast. We looked at the key ingredients and how to select the best ones. Then, we went through simple steps to prepare, mix, and cook the dish to perfection. I also shared tips for cooking, presenting, and making this meal ahead of time. French toast can be a fun meal to customize. Try different fruits or spices to make it your own. With a few simple changes, you can create many tasty dishes. Enjoy your cooking!

Savory Strawberry Cream Cheese French Toast Delight

Looking for a breakfast that wows? Try my Savory Strawberry Cream Cheese French Toast Delight! This easy recipe mixes sweet

- 12 oz penne pasta - 1 tablespoon olive oil - 1 medium onion, diced - 1 bell pepper, diced - 2 cloves garlic, minced - 1 cup diced tomatoes (canned or fresh) - 1 cup chicken broth - 1 cup heavy cream - 1 ½ teaspoons Cajun seasoning - 1 teaspoon smoked paprika - 1 cup cooked shrimp, peeled and deveined - 1 cup andouille sausage, sliced - 1 cup okra, sliced (fresh or frozen) - 2 green onions, for garnish - 1 tablespoon fresh parsley, for garnish - Salt and pepper to taste In this dish, each ingredient plays a key role. The penne pasta gives a nice bite. The olive oil adds richness. Onions and bell peppers bring sweetness and color. Garlic adds a sharp flavor. The diced tomatoes keep the sauce fresh and lively. Chicken broth enhances the taste and makes the dish hearty. Heavy cream adds a creamy texture, making each bite smooth. Cajun seasoning and smoked paprika give the dish its signature taste. The shrimp and andouille sausage add protein and a savory kick. Okra not only adds texture but also helps thicken the dish. Finally, green onions and parsley brighten up the dish. They add color and freshness. Don't forget to season with salt and pepper to your liking. Each ingredient works together to create a vibrant, flavorful meal that you will love. - Heat olive oil in a large pot over medium heat. - Add diced onion and bell pepper. Cook until softened, about 3-4 minutes. - Stir in minced garlic and cook for 1 minute. Then add diced tomatoes, chicken broth, and heavy cream. - Mix in Cajun seasoning and smoked paprika. Bring to a gentle boil. Now, add the penne pasta, ensuring it is fully submerged. - Reduce heat to low. Cover the pot and simmer for 12-15 minutes. Stir occasionally until pasta is cooked and liquid thickens. - Remove the lid and stir in cooked shrimp, sliced sausage, and okra. Cook for 3-5 more minutes until heated through. - Taste and adjust seasoning with salt and pepper. Let it sit for a couple of minutes to thicken. - Serve hot, garnished with sliced green onions and fresh parsley. Stirring occasionally is key. It keeps the pasta from sticking. This also helps the flavors mix well. When the pasta is done, it should be tender but not mushy. Use a fork to taste it near the end of cooking. If it feels firm but cooked, it’s ready. Adjusting Cajun seasoning can change the dish. If you like it spicier, add more seasoning. For less heat, cut back on it. You can also add herbs like thyme or bay leaves for depth. A dash of hot sauce gives an extra kick if desired. Garnishing makes your dish pop. Use sliced green onions and fresh parsley for color. They add a fresh taste too. For serving size, a bowl works best. If you want to impress, use a shallow plate. This lets the colors shine and looks great for guests. {{image_2}} You can change the protein in this dish easily. If you do not like shrimp, try chicken or tofu. Chicken breast or thighs will work well, and they cook quickly. Tofu adds a nice texture and absorbs flavors well. Also, you can switch up the sausage. Andouille sausage gives great flavor, but other types work too. Look for spicy Italian sausage or smoked sausage for a different taste. If you need a gluten-free option, use gluten-free pasta. Brown rice pasta or chickpea pasta are great choices. They will still absorb the flavors well and create a tasty dish. You can also experiment with pasta shapes. While penne is great, other shapes like fusilli or farfalle fit nicely in the sauce. Choose what you have on hand or what you like best. Okra is traditional, but you can skip it if you want. Try zucchini, bell peppers, or even spinach instead. Each of these adds color and nutrition to the dish. You can also use seasonal vegetables. Fresh seasonal veggies can brighten up your meal. Consider asparagus in spring or butternut squash in fall. They will add a twist and keep things interesting. To keep your One-Pot Cajun Jambalaya Pasta fresh, use airtight containers. Glass or plastic containers work well. Make sure they are clean and dry before adding your pasta. Store the leftovers in the fridge. They will stay good for about three to four days. Always let the pasta cool to room temperature before sealing it. When reheating your Jambalaya Pasta, the best method is to use a stovetop. Place the pasta in a pan over low heat. Add a splash of chicken broth or water to help it heat evenly. Stir often to prevent sticking. Microwaving is quick, but it may make the pasta soggy. If you use a microwave, cover the dish loosely. This helps steam escape while keeping the pasta moist. To freeze your One-Pot Cajun Jambalaya Pasta, let it cool first. Portion it into freezer-safe bags or containers. Squeeze out as much air as possible before sealing. This helps prevent freezer burn. When ready to eat, thaw the pasta in the fridge overnight. Reheat it on the stovetop with a bit of broth. This keeps it flavorful and prevents drying out. Yes, you can. Prepare the dish but do not add shrimp or sausage until serving. Store it in the fridge for up to three days. When ready to eat, reheat it gently on the stove. Add shrimp and sausage during the last few minutes of cooking. This keeps them fresh and tasty. If you can't find andouille sausage, use these options: - Kielbasa for a smoky flavor - Chicken sausage for a lighter option - Vegan sausage for a meat-free meal Each choice gives a different taste and texture but still keeps the dish hearty. This recipe has a good kick due to Cajun seasoning. If you want less heat, use half the seasoning. For more spice, add hot sauce or cayenne pepper. Adjust the heat to fit your taste buds. Here are some great side options: - A crisp green salad for freshness - Garlic bread to soak up the sauce - Roasted vegetables for added flavor These sides complement the dish and make your meal complete. This blog post covers how to make a tasty Cajun Jambalaya Pasta. We discussed all the ingredients, including pasta, protein, and spices. I shared step-by-step instructions for cooking, plus tips on flavor and presentation. Also, I offered ideas for variations and storage methods. This dish is great for quick meals and feeding a crowd. It’s easy to customize based on what you love. Enjoy creating your own perfect version of this recipe!

One-Pot Cajun Jambalaya Pasta Flavorful Dinner Idea

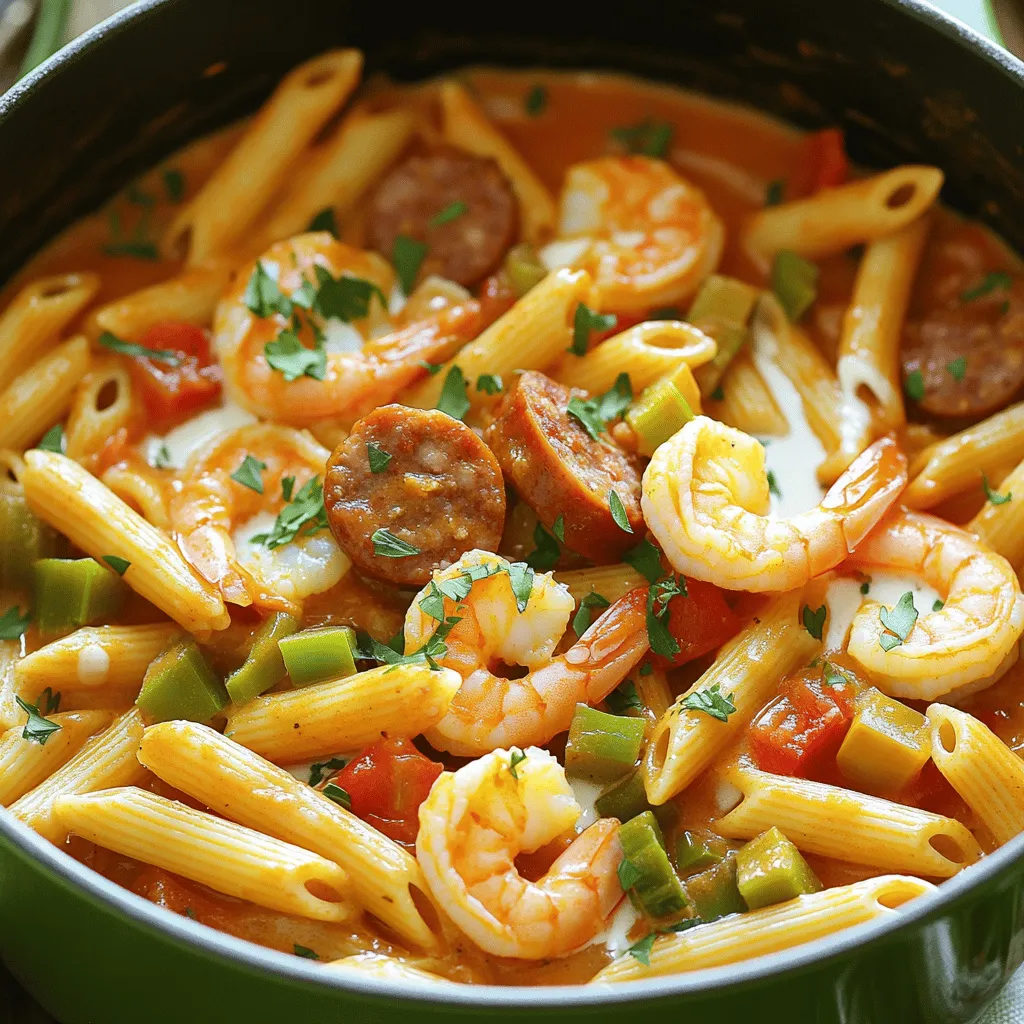
Looking for a quick and tasty dinner idea? This One-Pot Cajun Jambalaya Pasta combines bold flavors with easy preparation. You’ll

- 1 medium head of cauliflower - 3 tablespoons honey - 3 tablespoons olive oil - 4 cloves garlic, minced - 1 teaspoon soy sauce - 1 teaspoon paprika - 1/2 teaspoon salt - 1/4 teaspoon black pepper - Fresh parsley for garnish To make honey garlic roasted cauliflower, you need a few key ingredients. Start with one medium head of cauliflower. Cut it into bite-sized florets. These florets soak up the sauce well. Next, you need three tablespoons of honey. Honey gives the dish its sweet touch. Then, add three tablespoons of olive oil. This oil helps the cauliflower roast nicely. For flavor, use four cloves of garlic, minced. Garlic adds a great taste. Also, include one teaspoon of soy sauce. This gives a savory depth. One teaspoon of paprika adds warmth and color. Don’t forget the seasoning! Use half a teaspoon of salt and a quarter teaspoon of black pepper. These spices balance the sweetness and enhance the flavor. Lastly, fresh parsley makes a lovely garnish. It adds a pop of color and freshness. All these ingredients come together to create a delicious side dish. First, preheat your oven to 425°F (220°C). This helps the cauliflower cook evenly. Next, grab a baking sheet and line it with parchment paper. This will keep your florets from sticking. In a large bowl, whisk together the sauce ingredients. Combine 3 tablespoons of honey, 3 tablespoons of olive oil, and 4 minced cloves of garlic. Add 1 teaspoon of soy sauce, 1 teaspoon of paprika, 1/2 teaspoon of salt, and 1/4 teaspoon of black pepper. Mix until smooth. This sauce adds great flavor to the cauliflower. Now, take your medium head of cauliflower and cut it into bite-sized florets. Place the florets in the bowl with the honey garlic sauce. Toss them gently until all the pieces are coated. Make sure every floret gets some sauce. This step is key for even flavor. Spread the coated florets on the prepared baking sheet. Arrange them in a single layer so they roast well. Place the sheet in the oven and roast for 25-30 minutes. Stir the florets halfway to ensure they brown evenly. The cauliflower is ready when it turns golden brown and is tender. Enjoy the wonderful aroma as it cooks! To get the best roast, you need to control your oven temperature. Set it to 425°F (220°C). This heat helps the cauliflower get crispy on the outside and soft on the inside. Spacing is also key. Spread the florets on the baking sheet. Make sure they are in a single layer. This way, they cook evenly. If they are too close, they will steam instead of roast. You can enhance the flavor with extra spices. Consider adding a pinch of cayenne for heat. A bit of cumin can add a nice earthy taste. Adjust sweetness to your liking. If you want it sweeter, add a touch more honey. For a more balanced flavor, reduce the honey to suit your taste. Garnishing adds a pop of color. Fresh parsley works great for this dish. Just chop it fine and sprinkle on top. Think about how you serve it. This roasted cauliflower pairs well with grilled chicken or fish. You can also serve it with a dip like ranch or yogurt sauce. Enjoy it as a side or a main dish! {{image_2}} If you want a different sweet taste, try using maple syrup or agave nectar. Both options add a nice flavor. Maple syrup gives a rich, earthy taste. Agave nectar is milder and blends well. You can swap these for honey in the same amount. While cauliflower shines in this dish, other veggies work well too. Broccoli florets can add a nice crunch and color. Brussels sprouts also roast nicely with this marinade. Even carrots or bell peppers can absorb those sweet and savory flavors. You can easily make this dish vegan. Just replace honey with maple syrup or agave. This keeps the sweetness while staying plant-friendly. For gluten-free needs, use tamari instead of soy sauce. This way, everyone can enjoy this tasty side dish without worry. After making honey garlic roasted cauliflower, let it cool for about 10 minutes. This cooling helps keep the texture. Once cool, transfer the cauliflower to an airtight container. Use a container that fits the amount you have. This keeps it fresh for later. In the refrigerator, honey garlic roasted cauliflower lasts for about 3 to 5 days. Make sure your fridge is at the right temperature to help it stay good. Check for any signs of spoilage before eating. To reheat, use the oven for the best results. Preheat your oven to 350°F (175°C). Spread the cauliflower on a baking sheet and heat for about 10-15 minutes. This helps keep it crispy. You can also use a microwave, but it may make it softer. If you choose the microwave, heat in short bursts to avoid overcooking. Yes, you can use frozen cauliflower. However, fresh cauliflower gives a better texture. If you use frozen, thaw it first. Pat it dry to remove excess moisture. This helps the cauliflower roast well. The cauliflower is done when it is golden brown and tender. This usually takes about 25-30 minutes at 425°F. You can check by piercing a floret with a fork. It should be soft but not mushy. Honey garlic roasted cauliflower pairs well with many dishes. Try it with grilled chicken, fish, or tofu. It also complements rice or quinoa nicely. You can serve it as a side for any meal. Yes, you can prepare this dish ahead of time. Roast the cauliflower and store it in the fridge. Reheat it in the oven before serving. This keeps the flavors and texture great. This blog post covers a tasty honey garlic roasted cauliflower recipe. You learned about the main ingredients, easy steps for cooking, and tips for the best roast. I shared variations to suit different diets and how to store leftovers well. Try this dish for a simple, delicious side. Enjoy making it your own by adding flavors you love. With these tips, you'll impress anyone at your table. Happy cooking!

Honey Garlic Roasted Cauliflower Flavorful Side Dish

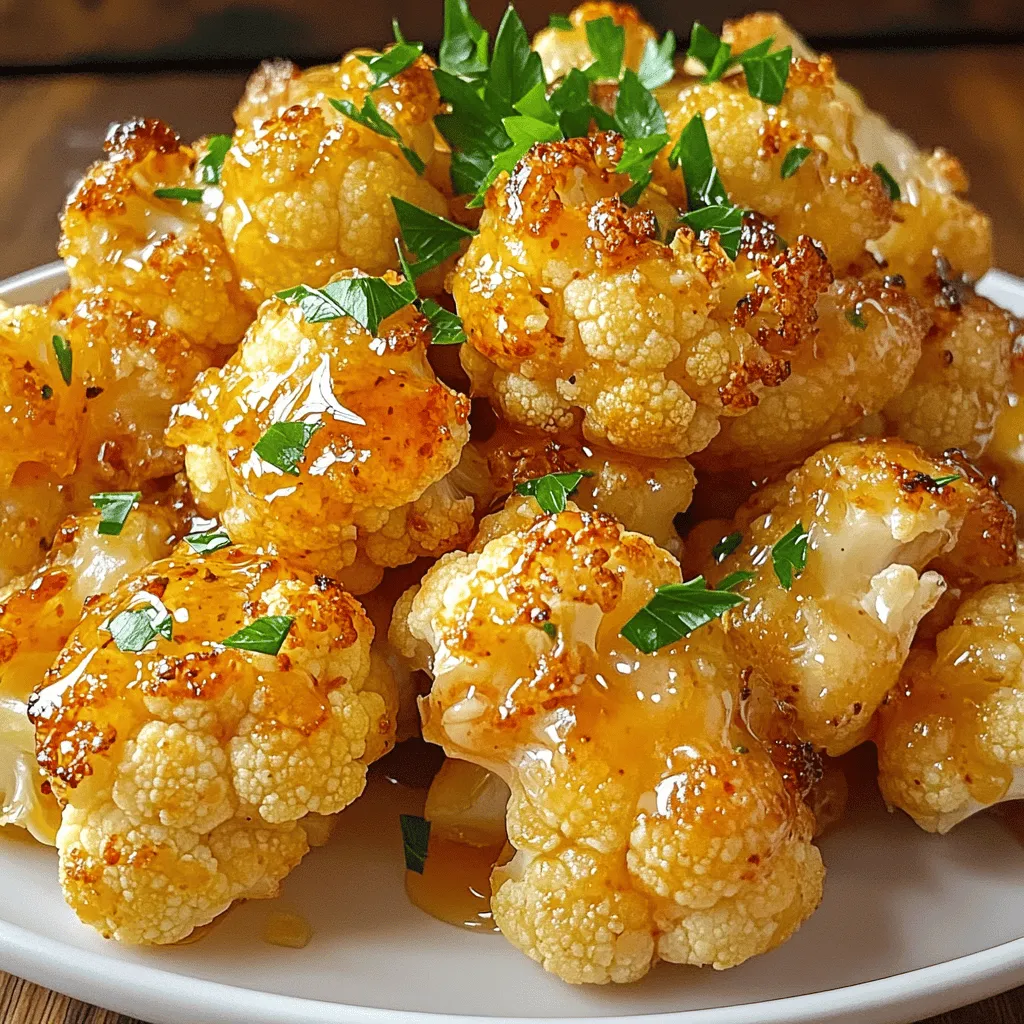
Looking for a tasty way to enjoy cauliflower? Honey Garlic Roasted Cauliflower is the perfect side dish that balances sweet

To make Spinach Ricotta Stuffed Shells, gather these key ingredients: - 12 jumbo pasta shells - 2 cups fresh spinach, chopped - 1 cup ricotta cheese - 1 cup mozzarella cheese, shredded - 1/2 cup grated Parmesan cheese - 1 egg, beaten - 1 teaspoon garlic powder - 1 teaspoon onion powder - 1/2 teaspoon nutmeg - Salt and pepper to taste - 2 cups marinara sauce - Fresh basil for garnish These ingredients create a tasty and creamy filling that pairs well with the pasta shells. You can add a few optional ingredients to boost the flavor: - Crushed red pepper flakes for spice - Fresh herbs like parsley or oregano - A splash of lemon juice for brightness These extras can take your dish to the next level. Each serving of Spinach Ricotta Stuffed Shells has about: - Calories: 400 - Protein: 18g - Carbohydrates: 45g - Fat: 18g - Fiber: 3g - Calcium: 25% of the daily value This meal is a good source of protein and calcium, making it both filling and nutritious. First, set your oven to 375°F (190°C). This step warms the oven so the shells bake evenly. It’s key for a perfect dish! Next, grab a large pot. Fill it with water and add salt. Bring the water to a boil. Cook the jumbo shells until they are just tender, about 8-10 minutes. Check the package for exact times. Drain the shells in a colander and let them cool. In a big bowl, mix the chopped spinach and ricotta cheese. Add half of the mozzarella and all the Parmesan cheese. Toss in the beaten egg, garlic powder, onion powder, nutmeg, salt, and pepper. Stir until it's all well mixed. This filling is creamy, tasty, and full of flavor. Now, take each cooled shell and fill it with the spinach mixture. Use a spoon to pack the filling in well. Make sure every shell is full. This will give you a hearty bite in every forkful. Grab a 9x13 inch baking dish. Pour a little marinara sauce on the bottom. Now, place the stuffed shells seam-side up in the dish. Cover them with the rest of the marinara sauce. Finally, sprinkle the remaining mozzarella on top. It will melt and create a cheesy crust. Cover your dish with foil and place it in the oven. Bake for 25 minutes. After that, remove the foil and bake for another 10-15 minutes. The cheese should be bubbly and golden. Once done, take the dish out and let it sit for a few minutes before serving. This helps the flavors settle. When cooking pasta shells, start with a large pot. Fill it with water and add salt. Bring the water to a boil. This step adds flavor to the pasta. Cook the shells until they are al dente. This means they should still have a slight bite. Overcooking can make them too soft, which leads to tearing. After draining, let the shells cool for a bit. This makes them easier to handle when you stuff them. If you want to switch up the flavors, you can use different cheeses. Try cottage cheese instead of ricotta for a lighter option. You can also add feta for a tangy twist. For the greens, kale makes a great substitute for spinach. It adds a different texture and flavor. If you don’t have nutmeg, a dash of cinnamon works too. It gives a warm, cozy taste. To get the filling just right, mix your ingredients well. Use a fork to mash the ricotta. This helps break it down. Add the spinach carefully, and ensure it’s chopped finely. A smooth filling works better for stuffing. Make sure the egg is fully blended in. It holds the filling together. Season well with salt and pepper. This step enhances the overall taste. {{image_2}} You can easily add protein to your stuffed shells. Cooked chicken or sausage both work well. For chicken, use shredded rotisserie chicken for ease. Mix the chicken into your spinach and ricotta filling. If you choose sausage, cook it first, then crumble it into the mix. This adds a hearty touch and makes each bite more filling. If you want a dairy-free option, try using tofu instead of ricotta. Blend firm tofu with a splash of lemon juice and seasonings. This gives a cheesy texture without the dairy. You can also use cashew cheese for a nutty flavor. Experimenting with different types of cheese can make the dish unique and satisfying. The sauce you choose can change the whole dish. While marinara is classic, pesto offers a fresh taste. Use store-bought or homemade pesto to mix things up. For a creamy texture, try an Alfredo sauce. Simply pour your sauce over the shells before baking. Each sauce adds its own flavor and makes the meal special. After you enjoy your Spinach Ricotta Stuffed Shells, you might have leftovers. Store them in an airtight container in the fridge. They stay fresh for up to three days. I like to cover the shells with a bit of extra marinara sauce. This keeps them moist and adds flavor. If you want to save some for later, freezing is a great choice. Place the stuffed shells in a single layer on a baking sheet. Freeze them for a few hours until firm. Then, transfer the shells to a freezer-safe container or bag. They can stay in the freezer for up to three months. When you’re ready to eat, just thaw them in the fridge overnight before reheating. Reheating is simple and quick. You can use the oven or microwave. For the oven, preheat it to 350°F (175°C). Place the shells in a baking dish. Add a splash of marinara sauce on top. Cover with foil and heat for about 20 minutes. If you use the microwave, heat for 2-3 minutes on high. Check to ensure they're hot throughout. Enjoy your delicious shells again! Yes, you can use regular pasta. However, you will need to adjust the cooking time. Jumbo shells hold the filling well. If using smaller pasta, select shapes like penne or farfalle. They won’t hold as much filling, but they work in a pinch. To prevent leaking, ensure the shells are cooked al dente. Overcooked shells can break easily. When stuffing, fill each shell generously but do not overfill. Press the filling gently to keep it secure. Also, a good layer of marinara sauce on the bottom helps hold everything together. These stuffed shells pair well with a simple green salad. A salad with arugula and cherry tomatoes adds freshness. Garlic bread or a side of roasted vegetables also complements the dish. For drinks, a light white wine or sparkling water works nicely. Yes, you can prepare the dish ahead of time. Assemble the shells and cover them tightly. Store in the fridge for up to one day before baking. When ready, just pop them in the oven. You may need to increase baking time if they are cold from the fridge. In this blog post, we explored how to make delicious Spinach Ricotta Stuffed Shells. You learned about the key ingredients, step-by-step instructions, and helpful tips. We discussed fun variations and how to store leftovers. For a tasty meal, follow these easy steps. Don't hesitate to customize the dish to fit your taste. Enjoy your cooking journey and the tasty results!

Spinach Ricotta Stuffed Shells Flavorful Dinner Option

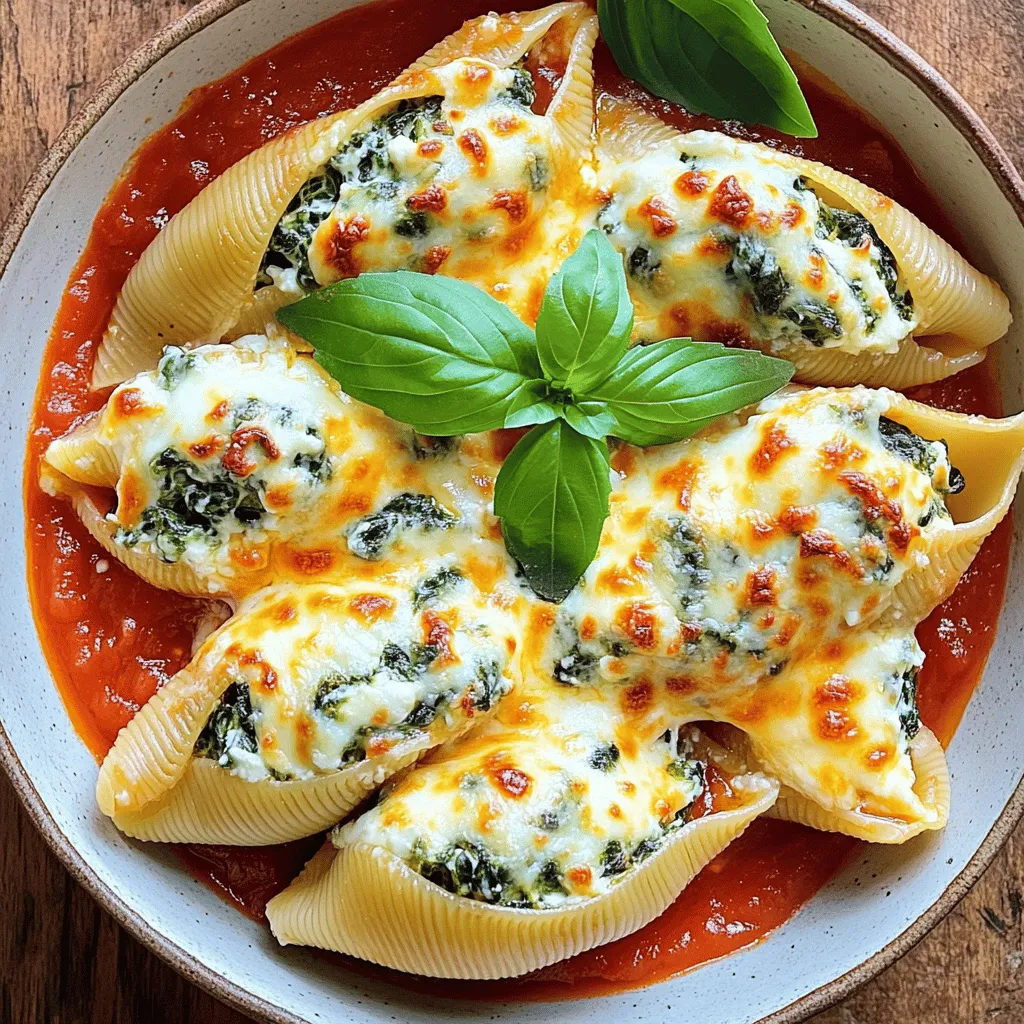
Looking for a tasty and wholesome dinner idea? You’ll love these Spinach Ricotta Stuffed Shells! They combine creamy ricotta and

Older posts
Newer posts
← Previous Page1 … Page36 Page37 Page38 … Page86 Next →

dsad

© 2026 Cooking Wells • Built with GeneratePress

Our Policies

  • Copyright Policy
  • Cookie Policy
  • GDPR Policy
  • Privacy Policy
  • Disclaimer
  • Terms Of Use

More Information

  • Home
  • About
  • Contact
  • Appetizers
  • Dessert
  • Dinner
  • Drinks
©2026, Cooking Wells About Back To Top