Skip to content
DisclaimerTerms Of UseGDPR PolicyCookie Policy

Cooking Wells

  • Home
  • Drinks
  • Appetizers
  • Dinner
  • Dessert
  • About
  • Contact
  • Privacy Policy
DisclaimerTerms Of UseGDPR PolicyCookie Policy

NO-ING-IMG

To make Vegan Cashew Alfredo Fettuccine, you need a few simple ingredients. Here’s a list: - 1 cup raw cashews, soaked for 2-4 hours - 1 cup unsweetened almond milk - 2 tablespoons nutritional yeast - 2 tablespoons lemon juice - 2 tablespoons olive oil - 2 garlic cloves, minced - Salt and pepper to taste - 8 oz fettuccine pasta (gluten-free if desired) - Fresh parsley, chopped (for garnish) - Optional: pinch of nutmeg Each ingredient plays a key role in creating that creamy, rich flavor we love. Raw cashews are the star of this recipe. When soaked, they soften and blend smoothly. This creates a rich base for the sauce. They add a subtle nutty flavor that complements the other ingredients. Plus, cashews are versatile and can be used in many vegan dishes. This dish is not just tasty; it’s also good for you. Here are some benefits of the main ingredients: - Raw Cashews: They are high in healthy fats, protein, and minerals. - Almond Milk: Lower in calories than dairy milk, it’s a great dairy-free option. - Nutritional Yeast: It is a great source of B vitamins, including B12 for energy. - Lemon Juice: This adds vitamin C and brightens the flavor of the sauce. - Garlic: Known for its health benefits, garlic supports heart health and boosts immunity. This dish is creamy and satisfying while providing important nutrients. Enjoy every bite knowing you are eating well! To start, drain and rinse the soaked cashews. This step helps remove any bitterness. Next, grab your blender. Add the cashews, almond milk, nutritional yeast, lemon juice, olive oil, and minced garlic. Sprinkle in some salt and pepper for taste. Blend on high until the mixture is smooth and creamy. If it feels too thick, add a little more almond milk. For a unique twist, consider adding a pinch of nutmeg. It brings a warm flavor that pairs well with the sauce. Now, let’s cook the fettuccine. Bring a large pot of salted water to a boil. Once boiling, add the fettuccine pasta. Cook it according to the package instructions until it is al dente. This usually takes about eight to ten minutes. When done, drain the pasta but save about half a cup of the pasta water. This water can help adjust the sauce later. In a large skillet, pour the cashew sauce and heat it over medium. Allow it to simmer gently. If the sauce seems too thick, add a bit of the reserved pasta water. This will help you reach the perfect consistency. Once the sauce is ready, add the drained fettuccine to the skillet. Toss gently to coat the pasta evenly with the creamy sauce. Cook it all together for about two to three minutes. This lets the flavors mingle and warms everything through. To get the sauce just right, start with soaked cashews. Soak them for 2-4 hours. This step makes them soft and easy to blend. When blending, combine the cashews with almond milk, nutritional yeast, lemon juice, olive oil, and garlic. Blend until smooth. If the sauce feels too thick, add more almond milk. This will help achieve a creamy texture. For a special touch, try adding a pinch of nutmeg. It adds warmth and depth. Cooking fettuccine perfectly is key. Bring a large pot of salted water to a boil. Add the pasta and stir to prevent sticking. Cook according to the package instructions. Aim for al dente, which means it should be firm yet tender. To check, taste a strand a minute or two before the timer goes off. When done, drain the pasta but save about half a cup of the cooking water. This water helps blend the pasta with the sauce later. Seasoning makes all the difference. After blending the sauce, taste it. Add salt and pepper to enhance the flavors. You can adjust these to fit your taste. Fresh herbs like parsley can add brightness. Try tossing in some chopped parsley right before serving. For a more complex flavor, consider adding a splash of lemon juice. This brightens the dish and makes it even more satisfying. {{image_2}} If you want a gluten-free meal, choose gluten-free fettuccine. Many brands offer tasty options made from rice or chickpeas. These pastas cook just like regular fettuccine. Follow the package instructions for the best results. Boost the nutrition of your vegan cashew alfredo by adding vegetables. Broccoli, spinach, or peas work well. Just steam or sauté them before adding to the pasta. This adds color and nutrients to your dish. You can also mix in some cherry tomatoes for a pop of flavor. You can change the flavor of your sauce easily. Add fresh herbs like basil or thyme for a fresh taste. If you like heat, sprinkle in some red pepper flakes. A pinch of nutmeg also adds warmth. Experiment with these options to find your favorite blend. To store your Vegan Cashew Alfredo Fettuccine, place it in an airtight container. Make sure it cools to room temperature before sealing. This way, the sauce will stay creamy. Keep it in the fridge for up to three days. You can easily enjoy it later. When you reheat your fettuccine, do it gently. Use a skillet over low heat. Add a splash of almond milk to keep the sauce creamy. Stir frequently until the dish is warm. This helps avoid a dry texture. You want it to taste just as good as fresh. If you want to save some for later, freezing works well. First, cool the fettuccine completely. Then, transfer it to a freezer-safe container. It can last up to three months in the freezer. When ready to eat, thaw it in the fridge overnight. Reheat with a little almond milk for the best texture. You can use sunflower seeds instead of cashews. They blend well for a creamy texture. Another option is silken tofu, which also gives a smooth result. Both substitutes keep the dish creamy. If you want a nutty flavor, try using hemp seeds. Yes, you can make this recipe nut-free! Use sunflower seeds or tofu instead of cashews. Also, choose almond milk alternatives like oat milk. These options keep the dish creamy and tasty without nuts. Check the pasta package for cooking time. Usually, fettuccine cooks in 8-10 minutes. Taste a piece to see if it's al dente. It should be firm but not hard. If it feels soft, it may be overcooked. This blog post shared how to make a delicious dish with raw cashews and fettuccine. We explored the key ingredients, highlighted cashews' benefits, and covered easy steps for cooking. I shared tips for perfect sauce and pasta, along with variations for gluten-free options and added veggies. Lastly, I provided storage advice and answered common questions. Cooking can be simple and fun. Enjoy creating your own tasty meals!

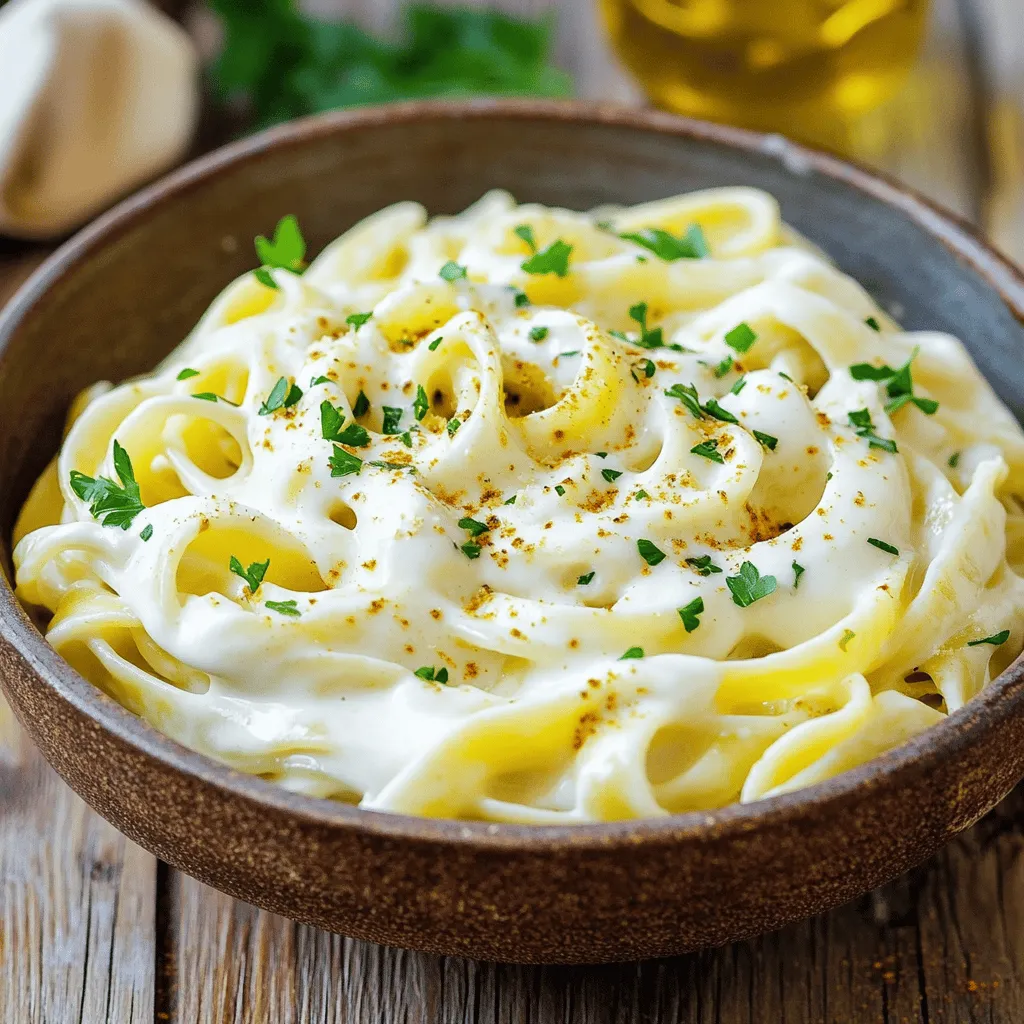
Vegan Cashew Alfredo Fettuccine Creamy and Satisfying

Craving a creamy, rich pasta dish without the dairy? Look no further! This Vegan Cashew Alfredo Fettuccine delivers all the

- 1 lb baby carrots, peeled - 3 tablespoons unsalted butter, melted - 2 tablespoons honey - 3 cloves garlic, minced - 1 teaspoon fresh thyme leaves (or ½ teaspoon dried thyme) - Salt and freshly ground black pepper to taste - Fresh parsley, chopped (for garnish) When it comes to making Honey Garlic Butter Roasted Carrots, the right ingredients make all the difference. I love using fresh baby carrots because they are sweet and tender. You will want to peel them for a clean look. Butter adds a rich flavor. It melts beautifully and helps the honey stick. Honey brings a natural sweetness that caramelizes in the oven. Garlic is key for depth. It gives the dish a nice savory edge. Thyme adds a fresh herbal note. You can use fresh or dried thyme, but fresh is always best if you can find it. Don't forget salt and pepper! They bring out the other flavors. Adjust them to your taste for the perfect balance. For a finishing touch, sprinkle with fresh parsley. It looks great and adds a pop of color. This blend of ingredients creates a side dish that is not just delicious but also visually appealing. - Preheat the oven to 400°F (200°C). - Prepare a large bowl for mixing ingredients. - Combine melted butter, honey, minced garlic, thyme, salt, and pepper. - Mix well until all ingredients are thoroughly combined. - Toss peeled baby carrots in the honey garlic mixture. - Spread carrots in a single layer on a parchment-lined baking sheet. - Roast in the oven for 25-30 minutes, stirring halfway through. These steps create a sweet and savory dish. As the carrots roast, they turn tender and caramelized. The honey garlic mixture coats the carrots well, bringing out their natural sweetness. Enjoy the aroma that fills your kitchen as they cook! - To get nice, even roasting, avoid overcrowding the baking sheet. - If you like softer carrots, adjust the roasting time. Cook a bit longer for extra tenderness. - Want some heat? Add a pinch of cayenne pepper to the mix. - If you're feeling adventurous, swap honey for maple syrup. This gives a sweet, unique twist. - Make your dish pop! Serve the carrots on a colorful platter, arranged in a fan shape. - For that extra touch, sprinkle some fresh thyme leaves on top. It looks great and adds flavor. {{image_2}} You can swap the baby carrots for parsnips. Parsnips have a sweet, nutty taste that offers a different flavor. If you want to get creative, combine baby carrots with baby potatoes. This mix gives you a colorful and tasty roast that everyone will love. If you want a vegan option, use agave syrup instead of honey. It will still give you that sweet touch. You can also try brown sugar. This will change the flavor and make it deeper and richer. For a different taste, use rosemary or oregano instead of thyme. This can change the whole vibe of the dish. You might also consider adding a squeeze of lemon juice. The lemon adds brightness that can really lift the flavors. Store leftovers in an airtight container in the fridge. This keeps them fresh. Consume within 3-4 days for optimal freshness. The flavors will stay strong, and the texture will remain nice. To reheat, use the oven for best results. It makes the carrots warm and crisp again. You can also use a microwave if you are in a hurry. Consider adding a pat of butter when reheating for extra flavor. This little touch can make a big difference in taste. You can freeze cooked carrots for up to 3 months. This is a great way to save extras. Thaw and reheat thoroughly to enjoy later. Just remember, the texture may change a bit after freezing, but the taste will still be sweet and delicious. Yes, you can use regular carrots; just slice them into uniform pieces. This helps them cook evenly. The size matters for the best taste and texture. Substitute butter with vegan margarine and honey with maple syrup. This keeps the dish tasty while meeting vegan needs. You still get that sweet and savory flavor. These carrots pair well with grilled meats, seafood, or as a side for vegetarian dishes. They add color and flavor to any meal. Try them with chicken or fish for a great match. Refer to our full recipe for detailed cooking instructions and ingredient quantities. Follow it closely for the best results. You’ll want to enjoy these carrots! To sum up, you can make delicious Honey Garlic Butter Roasted Carrots with just a few ingredients. Start with baby carrots, mix them with honey, garlic, and thyme, then roast to perfection. Remember to adjust cooking time for the right tenderness. You can also try variations with other veggies or sweeteners to suit your tastes. This dish is simple, versatile, and perfect for any meal. Enjoy this tasty side with your favorite main dish, and don't forget to share the recipe!

Honey Garlic Butter Roasted Carrots Delightful Side Dish

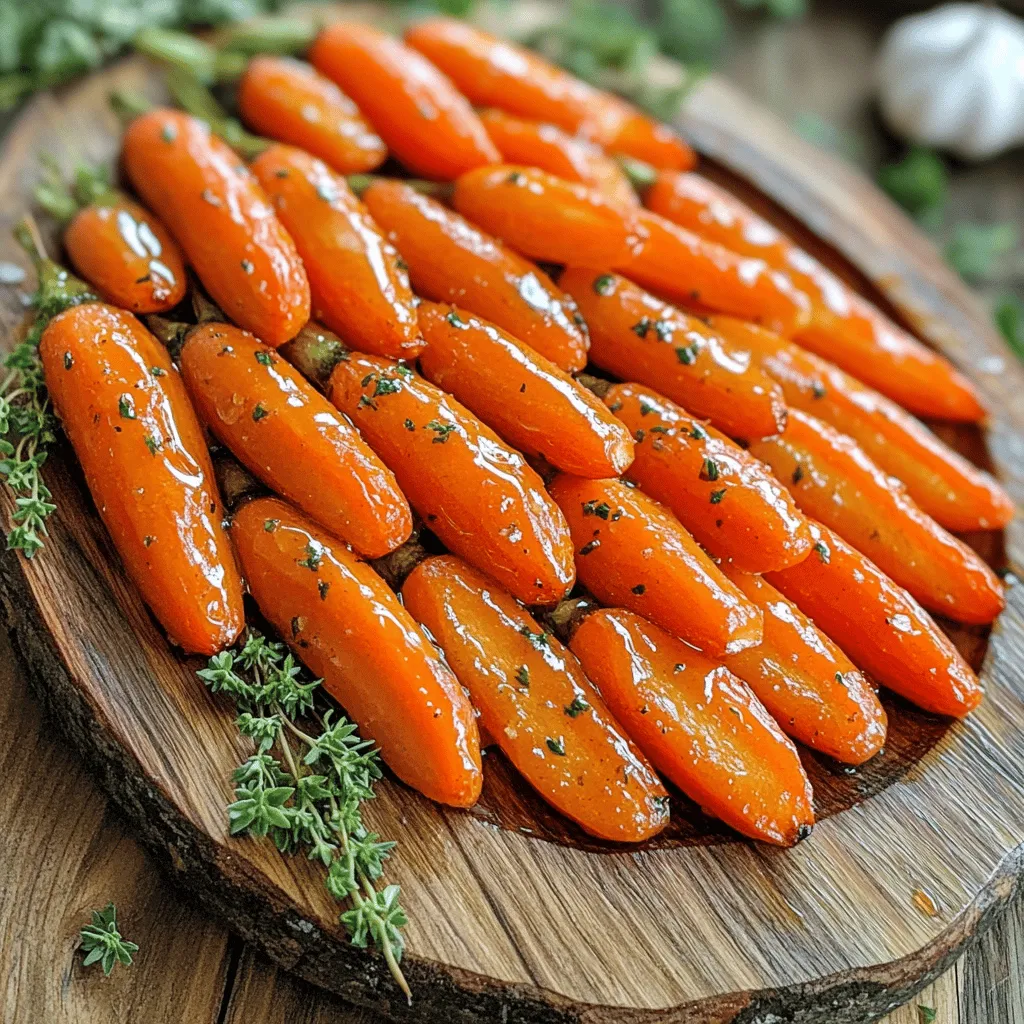
Looking for the perfect side dish? Honey Garlic Butter Roasted Carrots are a tasty choice! In this article, I’ll share

- 1 lb large shrimp, peeled and deveined - 1/4 cup olive oil - 4 cloves garlic, minced - Zest of 1 lemon - Juice of 1 lemon The main star here is the shrimp. You want large shrimp so they stay juicy. The olive oil adds richness and helps the flavors blend. Fresh garlic gives a bold taste that pairs well with lemon. Zest and juice from the lemon brighten the dish and add a fresh kick. - 1 teaspoon smoked paprika - 1/2 teaspoon red pepper flakes (optional) - Salt and pepper to taste For seasoning, smoked paprika brings a warm, smoky note. Red pepper flakes add heat, but you can skip them if you prefer mild flavors. A bit of salt and pepper rounds out the taste, making all the flavors pop. - Fresh parsley, chopped (for garnish) - Lemon wedges (for serving) To finish, I love adding fresh parsley. It gives a nice green color and fresh taste. Lemon wedges are perfect for squeezing on top, adding extra brightness with every bite. This dish not only tastes great but looks beautiful on the plate. - In a bowl, mix together 1/4 cup olive oil, 4 cloves minced garlic, the zest of 1 lemon, and the juice of 1 lemon. - Add 1 teaspoon smoked paprika, 1/2 teaspoon red pepper flakes, and salt and pepper to taste. - Stir the mixture well until it is smooth. - Now, add 1 lb large shrimp, which are peeled and deveined, into the bowl. - Toss the shrimp gently in the marinade to coat them evenly. - Cover the bowl and let the shrimp marinate in the fridge for 30 minutes to 2 hours. - If you are using wooden skewers, soak them in water for 15 minutes. This helps stop them from burning. - While the skewers soak, preheat your grill or grill pan to medium-high heat. - After marinating, take the shrimp and thread them onto the skewers. Leave a little space between each shrimp for even cooking. - Place the skewers onto the hot grill. Cook them for 2-3 minutes on each side. - The shrimp are done when they turn pink and opaque. Be careful not to overcook them; this keeps them tender. - Once cooked, remove the skewers from the grill and place them on a serving platter. - Garnish with fresh parsley and serve with lemon wedges on the side. To know when shrimp are done, look for a few signs. Perfectly cooked shrimp turn pink and opaque. They also curl into a C shape. If they curl into an O shape, they are overcooked. Avoid overcooking by timing your grill. Cook shrimp for 2-3 minutes on each side. For richer flavor, let shrimp marinate longer. I recommend marinating for 1-2 hours. This allows the shrimp to soak up all the tasty garlic and lemon. You can also try other seasonings. Consider using fresh herbs like cilantro or basil. A touch of cumin or lemon pepper adds a nice twist. When serving, arrange skewers on a large platter. This makes a colorful display. Scatter fresh parsley over the shrimp for a pop of color. Serve with lemon wedges on the side. This adds freshness and brightness to each bite. For a fun touch, you can also serve on wooden boards or slate tiles. {{image_2}} You can easily swap shrimp for other proteins. Chicken works well with this recipe. Use boneless, skinless chicken breasts. Cut them into bite-sized pieces. Marinate just like the shrimp. Fish is another great choice. Try salmon or swordfish for a richer flavor. Adjust cooking times since these proteins may take longer. Adding herbs and spices can change the dish. Try fresh basil or thyme for a new twist. You can also add a pinch of cumin for warmth. If you love heat, use cayenne pepper instead of red pepper flakes. This will give you a spicy kick. Experiment with your favorite seasonings for a unique taste. If you don’t have a grill, you can bake the shrimp. Preheat your oven to 400°F. Line a baking sheet with foil. Place the skewers on the sheet and bake for 10-12 minutes. Keep an eye on them to avoid overcooking. You can also cook shrimp skewers on the stovetop. Heat a grill pan over medium-high heat. Add the skewers and cook just like on a grill. This method gives you great grill marks and flavor. To keep your leftover shrimp skewers fresh, place them in an airtight container. Make sure to cool them down first. They can last in the fridge for up to two days. If you want to keep them longer, consider freezing. You can reheat shrimp skewers in the oven or microwave. For the oven, preheat it to 350°F (175°C). Place the skewers on a baking sheet and heat for about 10 minutes. This method keeps them crispy. If using a microwave, heat them on a plate for 1-2 minutes. This is faster, but may make them a bit soggy. To freeze shrimp skewers, wrap them tightly in plastic wrap or foil. Then, place them in a freezer bag. Make sure to remove as much air as possible. When you're ready to eat, thaw them in the fridge overnight. For quick thawing, you can run them under cold water for about 30 minutes. This keeps them safe and tasty. You should marinate the shrimp for at least 30 minutes. If you have time, let them sit for up to 2 hours. This longer time helps the shrimp soak up the lemon and garlic flavors. You want the shrimp to taste great, so don’t rush this step! Yes, you can use frozen shrimp. Just make sure to thaw them first. Place the shrimp in the fridge overnight or run them under cold water until thawed. After thawing, pat them dry before adding to the marinade. This step helps the marinade stick better. Lemon garlic shrimp skewers pair well with many sides. Here are some tasty options: - Garlic bread - Grilled vegetables - Rice pilaf - Fresh salad - Couscous These sides will complement the shrimp perfectly and make your meal more filling. Enjoy! In this guide, we covered the simple steps to make delicious shrimp skewers. We looked at key ingredients like shrimp and a zingy marinade. Marinating adds flavor, and grilling gives a nice char. I shared tips for perfect cooking and fun ways to serve. Remember, you can swap shrimp for other proteins or change up the spices. Keep leftovers fresh and reheat easily. With these insights, you’ll impress your family and friends with perfect skewers every time. Enjoy your cooking adventure!

Lemon Garlic Shrimp Skewers Easy Grilling Delight

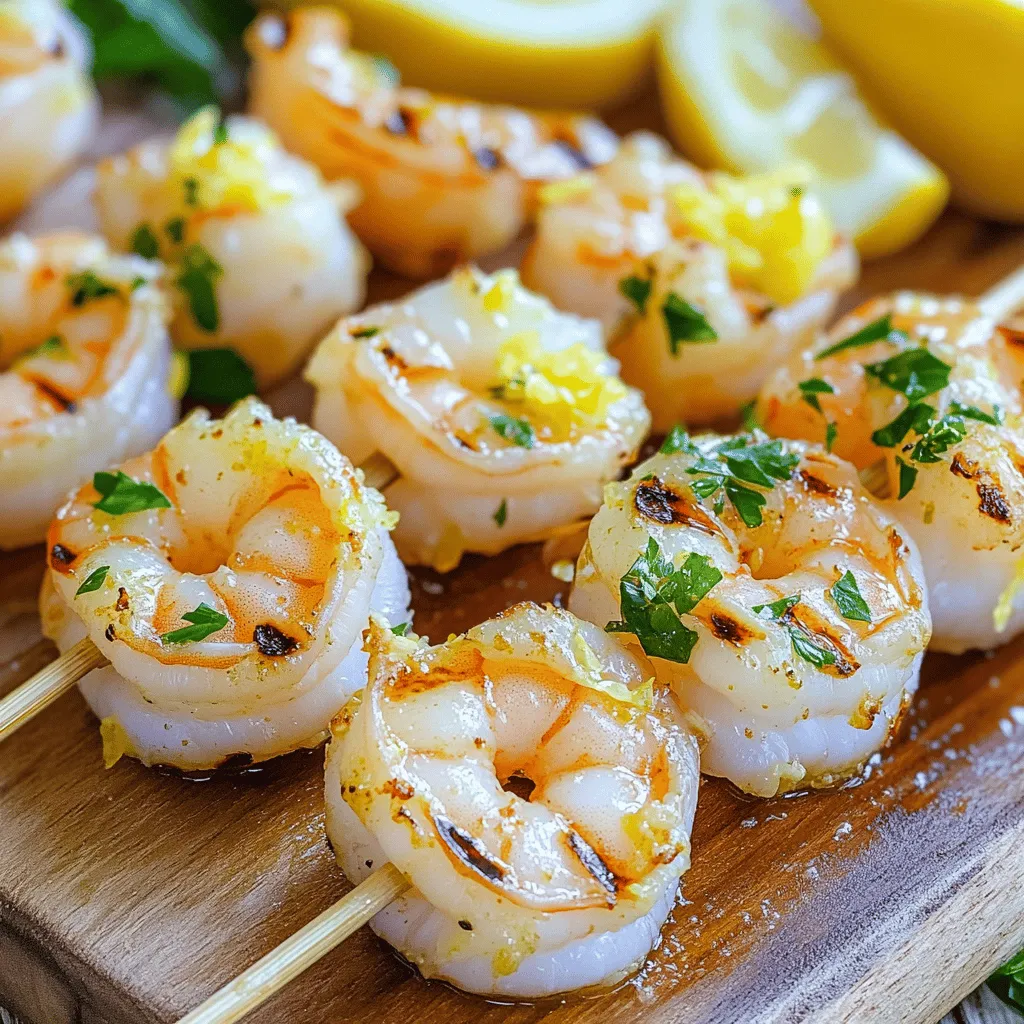
If you’re looking for a simple and tasty dish, you’ll love these Lemon Garlic Shrimp Skewers! Juicy shrimp soak in

- 1 cup all-purpose flour - 1/2 cup granulated sugar - 1/2 teaspoon baking powder - 1/2 teaspoon baking soda - 1/4 teaspoon salt - 1/2 teaspoon ground cinnamon - 1/4 teaspoon ground nutmeg - 1/2 cup buttermilk - 1/4 cup unsalted butter, melted - 1 large egg - 1 teaspoon vanilla extract - 1/2 cup powdered sugar (for glaze) - 2 tablespoons maple syrup If you lack buttermilk, you can use milk with a splash of vinegar. This mix mimics buttermilk's tang. For a lighter muffin, swap some all-purpose flour with whole wheat flour. If you want a sweet twist, try adding chocolate chips or chopped nuts to the batter. Can I use brown sugar instead of granulated sugar? Yes, you can. Brown sugar adds a deeper flavor and moisture to your muffins. What if I don't have ground nutmeg? You can skip nutmeg or add a bit more cinnamon for flavor. Is it okay to use margarine instead of butter? Yes, margarine works, but butter adds a richer taste to the muffins. First, set your oven to 350°F (175°C). This step is crucial for even baking. While it heats, grease a muffin tin with butter or oil. You can also use muffin liners for easy removal later. This helps prevent sticking and makes cleanup simple. In a large bowl, add these dry ingredients: - 1 cup all-purpose flour - 1/2 cup granulated sugar - 1/2 teaspoon baking powder - 1/2 teaspoon baking soda - 1/4 teaspoon salt - 1/2 teaspoon ground cinnamon - 1/4 teaspoon ground nutmeg Whisk them together until they blend well. This mix creates the base for your tasty muffins. In a separate bowl, mix the wet ingredients: - 1/2 cup buttermilk - 1/4 cup unsalted butter, melted - 1 large egg - 1 teaspoon vanilla extract Whisk these until smooth. This mix adds moisture and flavor to the muffins. Now, pour the wet mix into the dry ingredients. Gently fold them together until just combined. It’s alright if some lumps remain; overmixing makes muffins tough. Divide the batter evenly into the muffin cups, filling each about 3/4 full. Bake for 15-18 minutes. Check doneness with a toothpick; it should come out clean. While the muffins bake, prepare the glaze. In a small bowl, mix: - 1/2 cup powdered sugar - 2 tablespoons maple syrup Stir until smooth. If it’s too thick, add a bit of water. The glaze should be pourable but not runny. Once the muffins cool for about 5 minutes, remove them from the tin. Dip the tops of each muffin into the maple glaze. Let excess glaze drip off. Then, place them on a wire rack. Allow the glaze to set for a few minutes. Enjoy the sweet, rich flavor of your freshly baked maple glazed donut muffins! To make your muffins soft and fluffy, use fresh ingredients. Check the expiration date on your baking powder and soda. Mix dry and wet ingredients separately. This way, you avoid overmixing. When you combine them, fold gently. A few lumps are fine. This keeps air in the batter, giving you that perfect rise. If your muffins sink in the middle, it could be too much liquid. Ensure you measure your buttermilk and melted butter accurately. If they are too dry, you might have added too much flour. Spoon flour into your measuring cup and level it off for best results. Also, check your oven temperature with an oven thermometer. It helps avoid under or overbaking. For a twist, add chocolate chips or chopped nuts to the batter. You can also mix in citrus zest, like lemon or orange, for a fresh taste. To boost the maple flavor, use real maple extract in the glaze. This makes each bite even more delicious. Don’t forget to adjust the sweetness by adding a bit more or less powdered sugar in the glaze. Enjoy experimenting with flavors! {{image_2}} You can add fun flavors to your maple glazed donut muffins. Try mixing in some chocolate chips. They melt and make a sweet surprise. You can also add fresh fruit like blueberries or bananas. This gives your muffins a burst of flavor. Spices like ginger or allspice can add warmth too. Just remember to keep the balance of wet and dry ingredients in mind. If you want gluten-free muffins, use a gluten-free flour blend. Brands like Bob's Red Mill or King Arthur Flour work well. Just make sure the blend has xanthan gum. This helps the muffins rise and hold together. You can still add the same delicious flavors. The muffins will taste great and be safe for those who can't have gluten. Toppings can change the game for your donuts. Instead of a maple glaze, try a chocolate glaze. Melted dark chocolate is rich and delicious. You could also sprinkle cinnamon sugar on top for a crunchy texture. For a fruity twist, use a berry glaze made from pureed fruits. This adds color and taste. Experiment with what you like best! To keep your maple glazed donut muffins fresh, store them in an airtight container. This helps to keep them moist. You can place a piece of parchment paper inside to absorb extra moisture. If you like, you can also wrap them in plastic wrap before putting them in the container. For best results, store them at room temperature away from direct sunlight. When stored properly, these muffins can last for about 2 to 3 days. After that, they may start to dry out. If you want to keep them longer, freezing is a great option. Just remember, the glaze may lose some texture after freezing, but the taste will still be amazing. To enjoy your muffins warm, you can reheat them in the oven or microwave. For the oven, set it to 350°F (175°C) and heat for about 5 to 10 minutes. This will help them regain their softness. In the microwave, heat each muffin for about 10 to 15 seconds. This method is quick but watch closely to avoid overheating. Enjoy them warm for the best taste! Yes, you can make these muffins ahead of time. Bake them and let them cool completely. Store the muffins in an airtight container. They will stay fresh for up to three days at room temperature. You can also refrigerate them for about a week. Reheat them in the oven for a few minutes before serving. This warms them up and keeps them soft. If you don’t have buttermilk, you can make a substitute. Mix one cup of milk with one tablespoon of white vinegar or lemon juice. Let it sit for five minutes. This will create a tangy milk that works well in the recipe. You can also use yogurt or sour cream, mixed with a bit of milk to thin it out. To check if the muffins are done, insert a toothpick into the center of one muffin. If it comes out clean or with a few crumbs, they’re ready. If the toothpick has wet batter on it, bake for a few more minutes. Keep an eye on them to avoid overbaking. Yes, you can freeze these muffins. After they cool completely, wrap each muffin tightly in plastic wrap. Then place them in a freezer bag. They can last for up to three months in the freezer. When you’re ready to eat them, thaw at room temperature or warm them in the oven. In this blog post, we explored how to create delicious maple glazed donut muffins. We covered key ingredients, step-by-step baking instructions, and tips for perfect texture. You learned about tasty variations and how to store your muffins for freshness. Baking is fun, and these muffins are a great treat. Use the tips provided to make your muffins perfect every time. Enjoy your baking journey!

Maple Glazed Donut Muffins Irresistible Treat Recipe

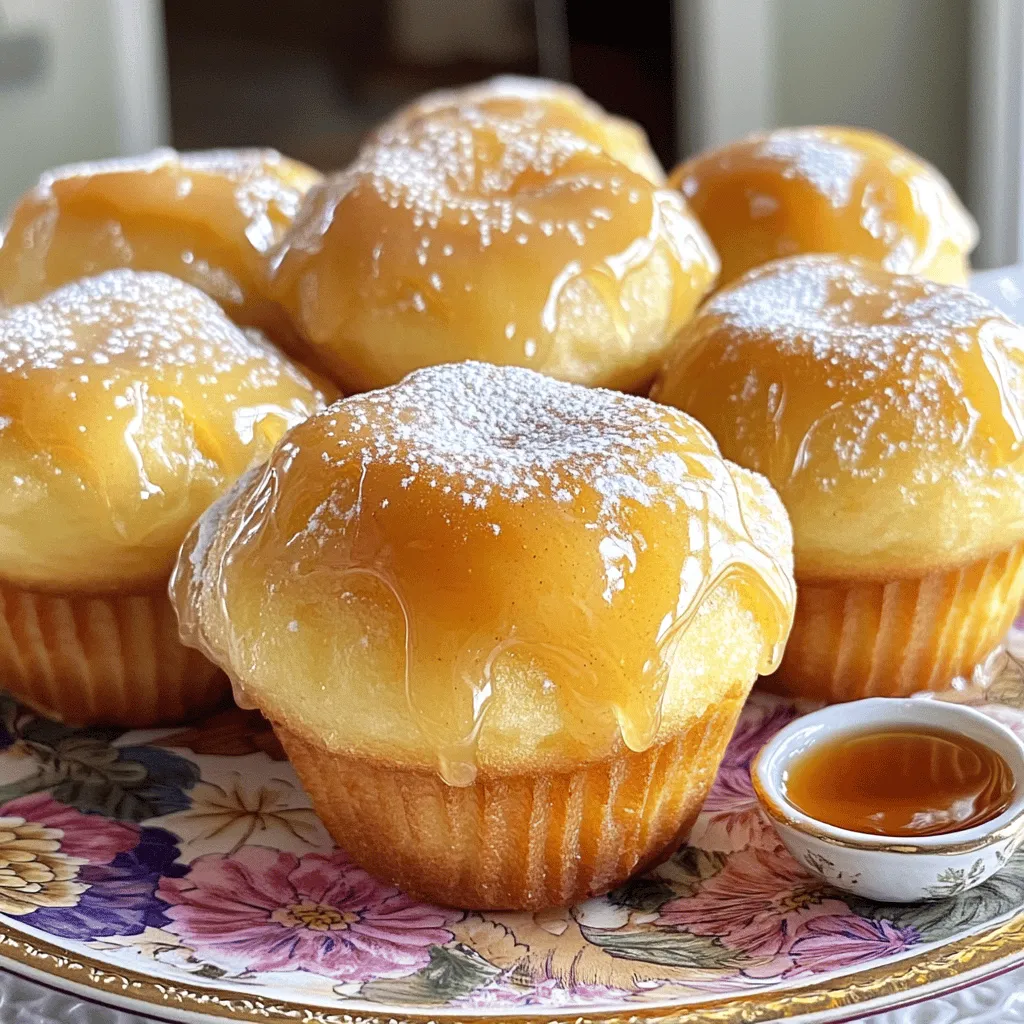
Get ready to delight your taste buds with my Maple Glazed Donut Muffins! This yummy treat combines the best of

- 1 large flatbread (store-bought or homemade) - 2 large yellow onions, thinly sliced - 2 tablespoons olive oil - 1 teaspoon sugar - 1 teaspoon balsamic vinegar - 1 teaspoon fresh thyme leaves (or ½ teaspoon dried thyme) - 1 ½ cups grated Gruyere cheese - Salt and pepper to taste - Fresh parsley for garnish (optional) This flatbread relies on a few key ingredients. The yellow onions bring sweetness. The Gruyere cheese adds a rich, nutty flavor. Olive oil helps to cook the onions perfectly. Balsamic vinegar gives a hint of tang, while thyme adds freshness. You can change things up by adding: - Cooked bacon for a smoky taste - Sliced mushrooms for earthiness - Spinach for extra greens - Red pepper flakes for some heat These optional ingredients can enhance your flatbread. Each adds a different layer of flavor. To make this flatbread, you will need: - A large skillet for cooking onions - A baking sheet lined with parchment paper - A knife for slicing onions - A cutting board for prep - A cheese grater for the Gruyere Using the right tools makes cooking easier. Each tool helps you achieve the best results for your flatbread. To start, gather your onions and slice them thinly. Heat the olive oil in a large skillet over medium heat. Add the sliced onions along with a pinch of salt. Cook for about 15 minutes, stirring often. The onions should soften and begin to caramelize. Next, sprinkle the sugar over the onions. This helps them turn a deep, rich brown. Lower the heat slightly and cook for another 10 minutes. Stir in the balsamic vinegar and thyme for extra flavor. Cook for 2 more minutes, then remove from heat. Set aside the caramelized onions. Now it’s time to build your flatbread. Preheat your oven to 425°F (220°C). Place the flatbread on a baking sheet lined with parchment paper. Spread the caramelized onions evenly over the flatbread. Leave a small border around the edges for a nice crust. Next, sprinkle the grated Gruyere cheese generously on top of the onions. This cheese adds a creamy and nutty flavor that pairs perfectly with the onions. Once your flatbread is assembled, it’s time to bake. Put the flatbread in the preheated oven. Bake for about 10 to 12 minutes. You want the cheese to be bubbling and slightly golden. When it’s done, remove the flatbread from the oven. Let it cool for a few minutes. You can season it with freshly ground black pepper and sprinkle chopped parsley on top. Slice the flatbread into pieces and serve warm for a delightful treat. To get sweet, rich flavors in your onions, you must caramelize them well. Start by using medium heat and add a pinch of salt to help them soften. Stir them often for about 15 minutes. Once they soften, sprinkle a teaspoon of sugar over them. This step boosts sweetness and enhances color. Lower the heat slightly and cook for another 10 minutes. Watch them turn a beautiful golden brown. Don’t rush this process; patience is key for that deep flavor. Gruyere cheese shines in this flatbread, but you can swap it if needed. Try using mozzarella for a milder taste. Cheddar adds a sharpness that works well too. For a creamier texture, cream cheese can be mixed in. Make sure to choose a cheese that melts nicely so you get that gooey goodness. Experiment with different cheeses to find your perfect match! This flatbread is perfect for any occasion. Serve it as a starter at a dinner party or as a snack for movie night. Pair it with a fresh salad to balance the richness. A glass of white wine, like Sauvignon Blanc, goes well with the flavors. You can also add a side of roasted veggies for a complete meal. Enjoy sharing this tasty treat with friends and family! {{image_2}} You can change the flavor of your caramelized onion Gruyere flatbread easily. Adding crispy bacon gives a nice crunch and smokiness. Fresh herbs like rosemary or basil can brighten the dish. Try mixing in some roasted garlic for depth. You can also add a bit of heat with red pepper flakes. Each addition brings a new taste that can change the whole dish. If you need a gluten-free option, you can use gluten-free flatbread. Many stores sell these now. You can also make your own using almond flour or chickpea flour. Just follow a simple recipe for gluten-free dough. This way, everyone can enjoy the flatbread without worry. Seasonal toppings can make this dish even more special. In spring, add fresh asparagus or peas for a bright touch. Summer can bring ripe tomatoes or zucchini. In autumn, consider adding roasted pumpkin or butternut squash. Winter is perfect for hearty toppings like sautéed mushrooms or kale. These variations keep your flatbread fresh and exciting all year long. To keep your flatbread fresh, let it cool first. Wrap it tightly in plastic wrap. You can also use an airtight container. Store it in the fridge for up to three days. This way, the flavors stay strong and the flatbread remains soft. When you’re ready to enjoy the flatbread again, preheat your oven to 350°F (175°C). Place the flatbread on a baking sheet. Bake for about 10 minutes. This warms it through and makes the cheese melty again. If you want it crispier, bake for a few extra minutes. If you want to save some flatbread for later, freezing is a great option. Wrap the cooled flatbread in plastic wrap and foil. This prevents freezer burn. Label it with the date. You can freeze it for up to three months. To thaw, place it in the fridge overnight before reheating. This method keeps your flatbread tasty and ready for a quick meal! Gruyere cheese comes from Switzerland. It has a firm texture and a rich taste. This cheese melts well, making it perfect for flatbreads. It has nutty and creamy notes, adding depth to dishes. Gruyere pairs nicely with onions and herbs, boosting the flavor of your flatbread. Yes, you can use other cheeses. Good choices include mozzarella, fontina, or gouda. Each cheese will give a unique taste and texture. If you like a stronger flavor, try aged cheddar. Just remember, the cheese should melt well to create that lovely topping. Perfectly caramelized onions are golden brown and soft. You should stir them often while cooking. Look for a sweet aroma and a rich color. After about 25 minutes, they should be deep brown and taste sweet. Don't rush this step; patience gives the best flavor. Yes, you can prepare parts of this recipe in advance. Caramelize the onions a day before. Store them in the fridge in an airtight container. You can also pre-grate the cheese. When ready, just assemble and bake the flatbread. This saves time and still tastes fresh. This guide covered all you need for delicious flatbread. We explored key ingredients, tools, and step-by-step instructions for easy cooking. Tips for caramelizing onions properly and cheese swaps helped enhance flavor. You learned how to store and reheat leftovers plus exciting variations you can try. Cooking can be fun and rewarding. Get creative and enjoy making your flatbread your own!

Caramelized Onion Gruyere Flatbread Flavorful Treat

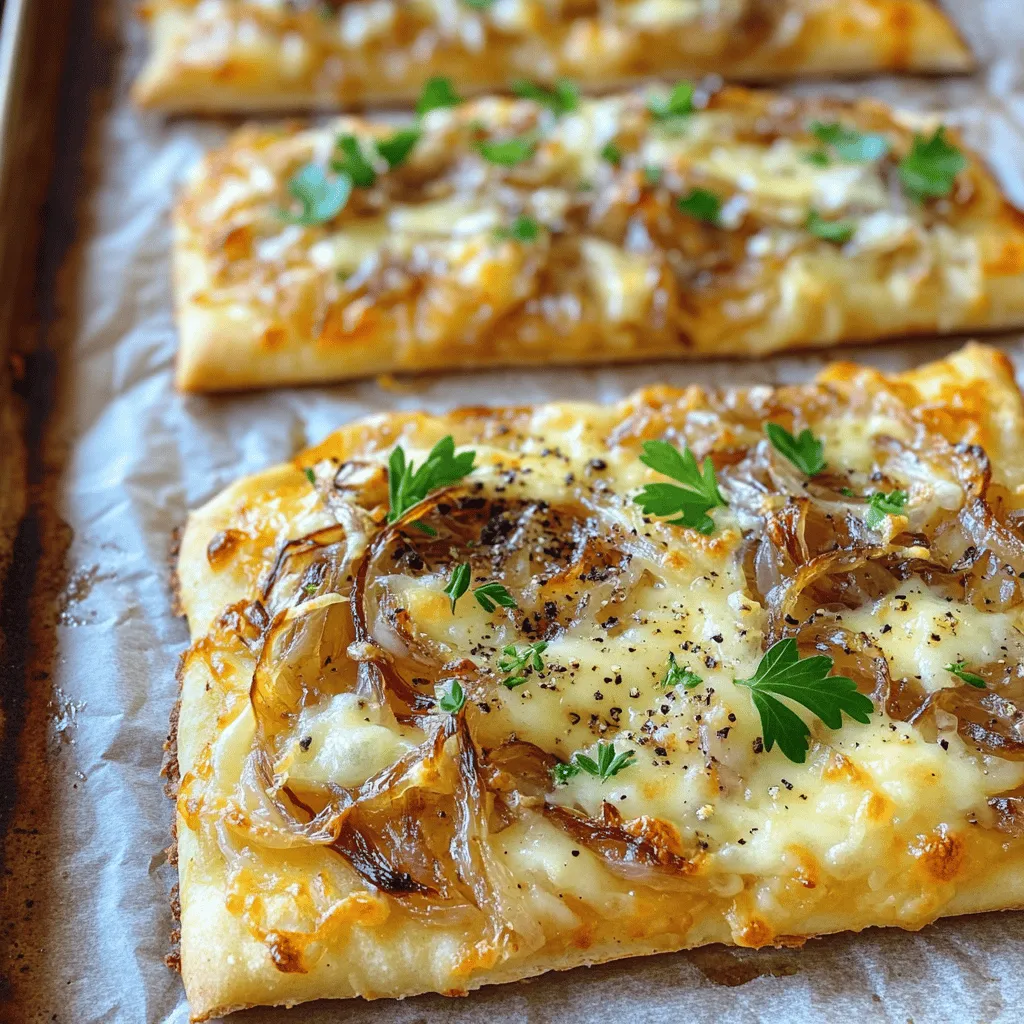
Are you ready to elevate your snack game? This Caramelized Onion Gruyere Flatbread is a flavorful treat that will thrill

- 2 ripe bananas, mashed - 1 cup natural peanut butter - 1 cup rolled oats - 1/4 cup honey or maple syrup - 1/2 teaspoon vanilla extract - 1/2 teaspoon cinnamon - 1/4 teaspoon salt - 1/3 cup dark chocolate chips (optional) These ingredients come together to create a tasty and healthy snack. Bananas give natural sweetness and moisture. Peanut butter adds protein and richness. Rolled oats bring fiber, which helps you feel full. Honey or maple syrup adds extra sweetness and flavor. The vanilla and cinnamon enhance the taste with warm notes. The salt balances the sweetness. If you want a treat, dark chocolate chips are a great option. They melt into the bars and create a delicious texture. Each ingredient plays a key role in the flavor and texture of these oat bars. Together, they make a great snack for any time of the day. First, we need to preheat your oven. Set it to 350°F (175°C). This heat helps our bars cook evenly. While the oven warms up, grab an 8x8 inch (20x20 cm) baking pan. Line it with parchment paper. Make sure to leave some paper hanging over the sides. This will help you lift the bars out easily later. Now, let’s mix our ingredients. In a large bowl, mash the two ripe bananas. Then, add one cup of natural peanut butter to the bowl. Stir these together until they are smooth and creamy. Next, pour in 1/4 cup of honey or maple syrup. Add 1/2 teaspoon of vanilla extract, 1/2 teaspoon of cinnamon, and 1/4 teaspoon of salt. Mix everything well until combined. After that, fold in one cup of rolled oats. If you like chocolate, add 1/3 cup of dark chocolate chips now. Pour the mixture into the lined baking pan. Spread it out evenly with a spatula. Now, it’s time to bake! Place the pan in the preheated oven for 20-25 minutes. Keep an eye on it as it bakes. You want the edges to turn golden brown. To check for doneness, insert a toothpick in the center. If it comes out clean, your bars are ready. Let them cool in the pan for about 10 minutes. Then, use the parchment paper to lift them out. Allow them to cool completely on a wire rack before cutting them into squares. - Options for nut butters: You can use almond butter or sunflower seed butter. Both options are tasty and add a unique flavor. - Alternative sweeteners: Instead of honey, try agave syrup or coconut sugar. These will give a different taste while keeping it sweet. - How to evenly spread the mixture: Use a spatula or the back of a spoon. Start in the middle and push outwards. This helps create a flat surface for even baking. - Tips for achieving the perfect texture: Mix until just combined, so the oats stay whole. If you want softer bars, add a little extra banana or peanut butter. - Decorative drizzling methods: Melt a bit of chocolate and drizzle it on top. You can also drizzle more peanut butter for a rich look. - Serving suggestions: Slice the bars into squares and serve on a colorful plate. Add banana slices or nuts around them for a nice touch. {{image_2}} You can easily make these bars vegan. Instead of honey or maple syrup, use agave nectar. It adds sweetness and keeps the bars moist. You can also choose dairy-free chocolate chips. Look for brands that offer dark chocolate without milk. These swaps keep the flavors rich and satisfying. If you need gluten-free bars, use gluten-free oats. Most rolled oats are naturally gluten-free, but check the label. You can also add almond flour or coconut flour for a different texture. These options are great for those with gluten sensitivity. Want to mix things up? Add nuts like walnuts or almonds. They give a nice crunch. Dried fruits like cranberries or raisins add sweetness too. You can also sprinkle spices like nutmeg or ginger for a warm kick. These little changes make each batch unique and fun to create. To keep your Peanut Butter Banana Oat Bars fresh, use airtight containers. This helps keep moisture out and flavors in. You can also wrap them tightly in plastic wrap. This method is great for short-term storage. Store these bars at room temperature for up to three days. If you want them to last longer, move them to the fridge. They can stay fresh in the fridge for about a week. Freezing is a smart way to save your bars. To freeze them, cut the bars into squares first. Place each square in a single layer on a baking sheet. Freeze them for about an hour until they are firm. Then, transfer them to a freezer-safe bag or container. Make sure to remove as much air as possible. When you want to enjoy a bar, take it out and let it thaw at room temperature. For the best texture, eat it within a month of freezing. Peanut Butter Banana Oat Bars last about one week in the pantry. Store them in an airtight container to keep them fresh. If you place them in the refrigerator, they can last up to two weeks. The cold helps to preserve their texture and flavor. Yes, you can easily make these bars nut-free. Use sunflower seed butter or soy nut butter instead of peanut butter. Both options work well and still give a nice taste and texture. Be sure to check for allergies if you're serving them to others. These bars are perfect for meal prep! Make a batch on the weekend and store them for the week. Cut them into squares and keep them in an airtight container. They are easy to grab for a quick snack or breakfast on the go. These peanut butter banana oat bars are a tasty and healthy snack. You learned about the ingredients and their benefits, from bananas to oats. The step-by-step guide helps you bake perfect bars easily. Remember the tips and tricks for storage, variations, and fun kitchen techniques. These bars are simple to make, nutritious, and great for meal prep. Enjoy experimenting with flavors and sharing your tasty results!

Peanut Butter Banana Oat Bars Simple and Healthy Snack

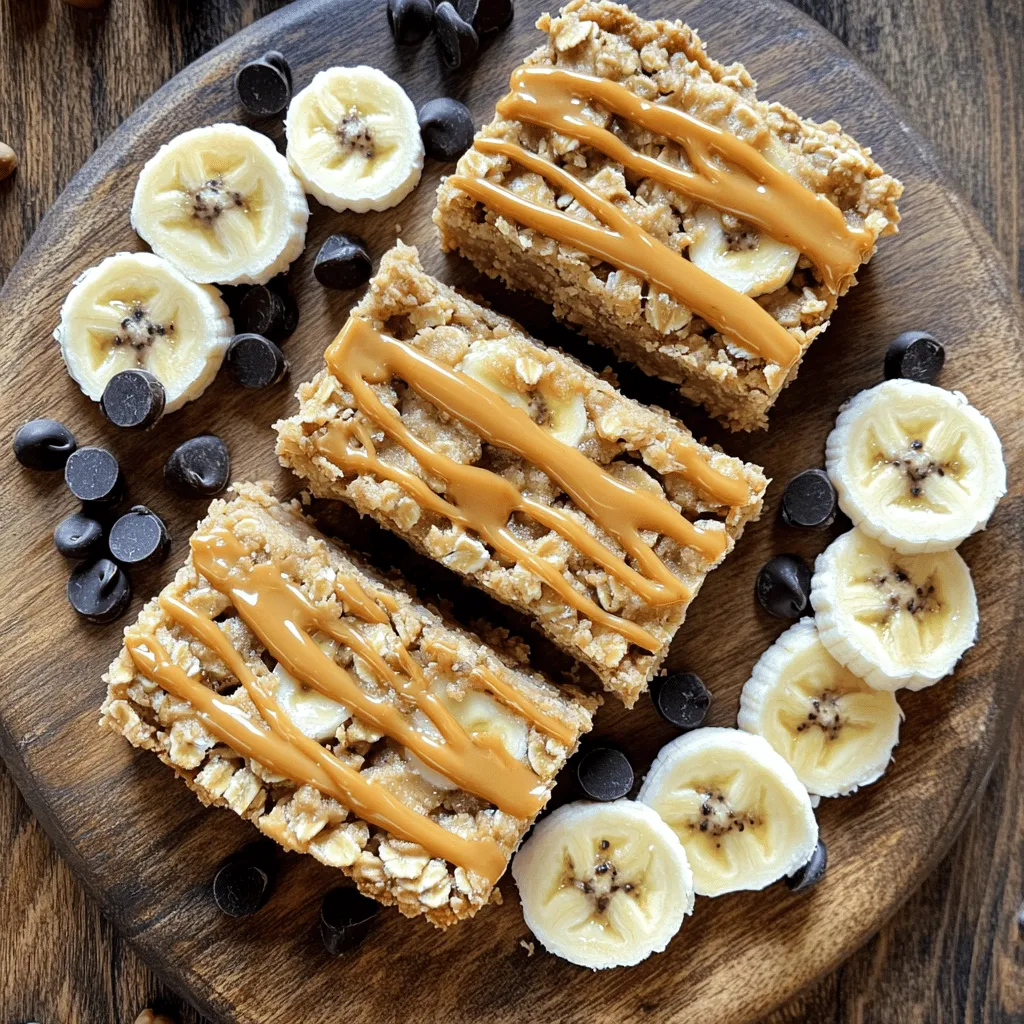
Looking for a tasty, healthy snack? Peanut Butter Banana Oat Bars are simple to make and packed with goodness. With

- 1 pound large shrimp, peeled and deveined - 1 red bell pepper, sliced - 1 yellow bell pepper, sliced - 1 red onion, sliced - 3 tablespoons olive oil - 2 tablespoons taco seasoning - 1 tablespoon lime juice For the main ingredients, shrimp is the star. Choose large, fresh shrimp for the best taste. The colorful bell peppers and onion add flavor and crunch. Olive oil helps the spices stick. Lime juice brings freshness to each bite. Taco seasoning adds a great blend of spices. - 1 teaspoon garlic powder - Salt and pepper to taste - Fresh cilantro for garnish For seasoning, garlic powder gives a warm, savory flavor. Salt and pepper balance the taste. Use fresh cilantro as a bright garnish. It adds a nice touch and taste. - Tortillas for wrapping - Optional side dishes Serve the fajita shrimp with warm tortillas. They make a perfect wrap for your meal. You can also add side dishes like rice or beans. These sides make the meal heartier and more filling. Enjoy the mix of flavors and textures! - Preheat your oven to 400°F (200°C). - Line a sheet pan with parchment paper. This makes cleanup easy. - In a large bowl, mix the shrimp, sliced bell peppers, and onion. - Drizzle olive oil and lime juice over the shrimp and veggies. - Add taco seasoning and garlic powder. - Season with salt and pepper, then toss everything together. - Make sure the shrimp and veggies are well coated. - Spread the mixture evenly on the sheet pan. - Bake in the oven for 10-12 minutes. - Check that the shrimp turn pink and are cooked through. - The veggies should be tender. - After baking, let it cool for a minute. - Garnish with fresh cilantro. - Serve with warm tortillas for wrapping. How to choose the right shrimp Pick large shrimp for this dish. They cook evenly and stay juicy. Look for shrimp that are firm and have a fresh smell. If you can, buy shrimp that are wild-caught. They have better flavor than farmed shrimp. Avoiding overcooked shrimp Keep an eye on the shrimp while they bake. They only need about 10-12 minutes in the oven. Remove them once they turn pink and opaque. Overcooked shrimp become tough and rubbery. Trust your eyes; they change color quickly. Alternative vegetables You can mix in different veggies if you want. Zucchini, corn, or even asparagus add great flavor. Just remember to cut them into similar sizes for even cooking. This way, every bite bursts with taste. Homemade taco seasoning If you want to skip store-bought taco seasoning, make your own. Mix chili powder, cumin, paprika, and a pinch of salt. This blend is easy and fresh. Adjust the spices to your liking. Serving directly from the sheet pan Serving from the sheet pan adds a casual vibe. It looks fun and colorful. Guests can grab their tortillas, fill them, and enjoy. This keeps cleanup simple, too! Enhancing with lime wedges and salsa Add lime wedges and a bowl of salsa on the side. The lime juice brightens the dish. Salsa adds a burst of flavor and color. This makes your meal look even more inviting. {{image_2}} Want to spice things up? Add jalapeños or hot sauce. Sliced jalapeños give a fresh crunch and heat. You can also drizzle hot sauce over the shrimp before serving. This adds a zesty kick that will please heat lovers. If you prefer a vegetarian meal, swap shrimp for tofu or other veggies. Firm tofu absorbs flavors well. Just cut it into cubes and mix it with the peppers and onion. You can also try mushrooms, zucchini, or corn for added texture and taste. You can explore different flavor profiles with this dish. For a Mexican twist, use traditional spices like cumin and chili powder. For a Tex-Mex vibe, try adding cheese or sour cream when serving. Both styles will deliver a delicious meal that satisfies your cravings. To keep your shrimp fajitas fresh, store them in an airtight container. Make sure to refrigerate them within two hours of cooking. This helps prevent bacteria growth. Your leftovers will stay good for up to three days. If you have extra tortillas, store them separately. This keeps them from getting soggy. Reheating shrimp fajitas can be quick and easy. You can use the microwave for fast results. Place the shrimp and veggies in a microwave-safe dish. Heat for about one to two minutes, or until warm. Stir halfway through to ensure even heating. If you prefer, you can also reheat them in a skillet over medium heat. Just add a little olive oil to avoid sticking. If you want to save some for later, freezing is a great option. First, let the shrimp mixture cool down completely. Then, transfer it to a freezer bag or container. Be sure to remove as much air as possible. This helps prevent freezer burn. Your fajita mix can last up to three months in the freezer. To thaw, place it in the fridge overnight or use the microwave on a low setting. Can I use frozen shrimp for this recipe? Yes, you can use frozen shrimp. Just make sure to thaw it first. Place the shrimp in a bowl of cold water for about 15-20 minutes. This method works well and saves time. How do I know when shrimp are cooked through? Shrimp are done cooking when they turn pink and curl into a C shape. They should also feel firm to the touch. Overcooked shrimp become tough and rubbery, so keep an eye on the time. What are the best tortillas to use? Corn tortillas add a nice flavor. They are gluten-free and hold the filling well. Flour tortillas are great for a softer bite. Choose what you enjoy most! Can I prepare this recipe ahead of time? Yes, you can prep the shrimp and veggies a few hours in advance. Just mix them and store in the fridge. When you're ready, bake them for a quick meal. How to enhance flavor without extra calories? Use fresh herbs like cilantro or parsley. You can also add lime juice for brightness. These options make your dish tasty without adding fat or calories. Is this recipe suitable for meal prep? Absolutely! The fajita shrimp keep well in the fridge. Store them in airtight containers. They can last for up to three days, making them perfect for lunch or dinner. This blog post covered how to make delicious shrimp fajitas. We discussed key ingredients, including shrimp, peppers, and spices. I shared step-by-step instructions for cooking and serving. You learned tips for perfecting the recipe and variations for different tastes. In conclusion, shrimp fajitas are fun and easy to make at home. With a few simple steps, you can enjoy a tasty meal. Don't hesitate to experiment and make this dish your own!

Sheet Pan Fajita Shrimp Quick and Flavorful Meal

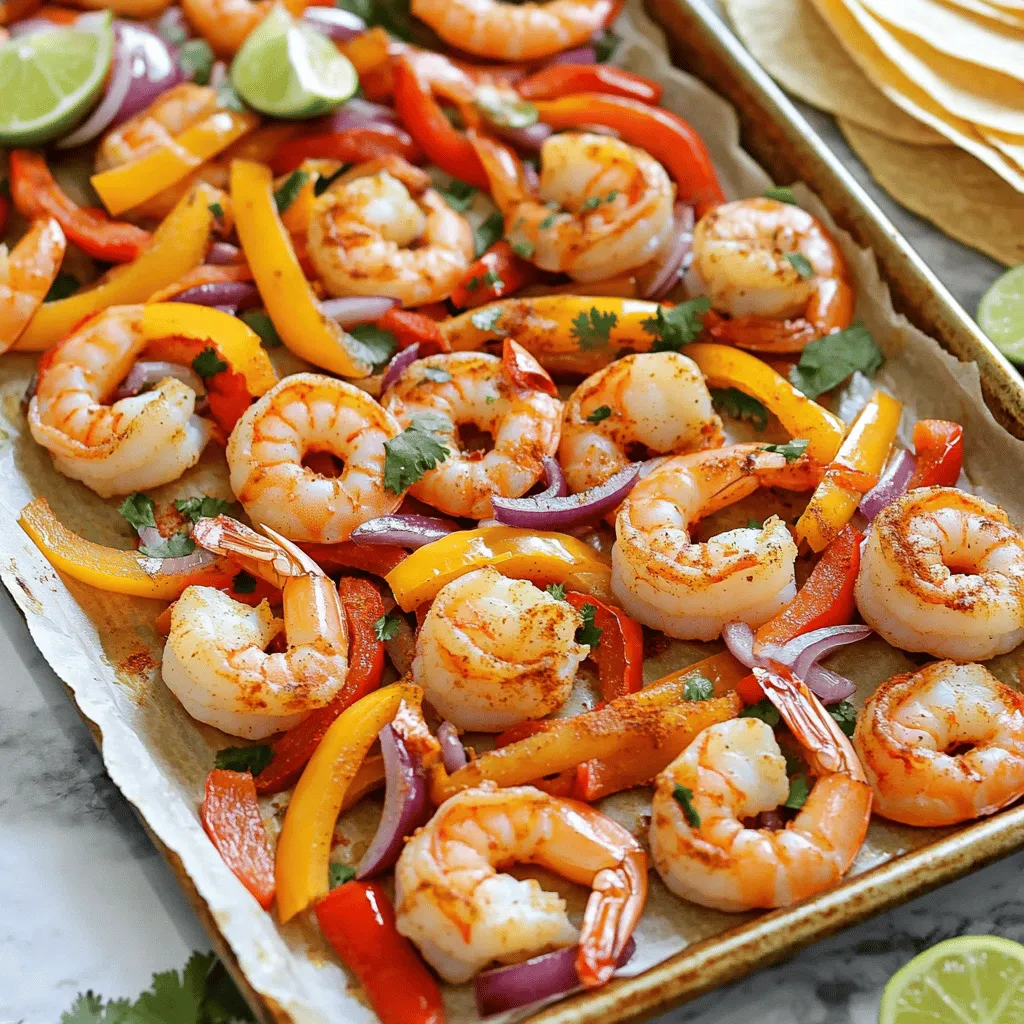
If you want a quick and tasty meal, try my Sheet Pan Fajita Shrimp! It’s packed with flavors from juicy

To make a delightful chocolate chip pumpkin bread, you need a few key ingredients: - 1 cup pumpkin puree (canned or fresh) - 1/2 cup granulated sugar - 1/2 cup brown sugar, packed - 1/2 cup vegetable oil - 2 large eggs - 1 teaspoon vanilla extract - 2 cups all-purpose flour - 1 teaspoon baking soda - 1/2 teaspoon baking powder - 1 teaspoon ground cinnamon - 1/2 teaspoon ground nutmeg - 1/4 teaspoon ground cloves - 1/2 teaspoon salt - 1 cup semi-sweet chocolate chips These ingredients blend to create a moist and flavorful bread. The pumpkin puree gives it a rich texture, while the chocolate chips add sweetness. You can enhance your chocolate chip pumpkin bread with some fun extras: - Chopped nuts (like walnuts or pecans) - Dried fruits (such as cranberries or raisins) - A sprinkle of powdered sugar on top - Cream cheese frosting for a sweet twist These add-ins make your bread unique and cater to different tastes. Feel free to mix and match! If you are missing an ingredient, don’t worry! Here are some easy swaps: - Use applesauce instead of vegetable oil for lower fat. - Swap granulated sugar for coconut sugar for a healthier option. - Try almond flour instead of all-purpose flour for a gluten-free version. - Replace semi-sweet chocolate chips with dark chocolate or white chocolate chips. These substitutions can change the flavor and texture, keeping your bread exciting every time! First, gather all your ingredients. You will need: - 1 cup pumpkin puree - 1/2 cup granulated sugar - 1/2 cup brown sugar - 1/2 cup vegetable oil - 2 large eggs - 1 teaspoon vanilla extract - 2 cups all-purpose flour - 1 teaspoon baking soda - 1/2 teaspoon baking powder - 1 teaspoon ground cinnamon - 1/2 teaspoon ground nutmeg - 1/4 teaspoon ground cloves - 1/2 teaspoon salt - 1 cup semi-sweet chocolate chips Next, preheat your oven to 350°F (175°C). Grease a 9x5 inch loaf pan. You can also line it with parchment paper for easy removal later. In a large bowl, mix the pumpkin puree, granulated sugar, brown sugar, vegetable oil, eggs, and vanilla extract. Whisk this mix until it's smooth and well combined. In another bowl, mix the flour, baking soda, baking powder, cinnamon, nutmeg, cloves, and salt. Combine these dry ingredients well. Now, add the dry mix to the wet mix gradually. Stir gently until just combined. Don't worry about lumps; they are okay. Finally, fold in the chocolate chips gently. Pour the batter into your prepared loaf pan. Smooth the top with a spatula to make it even. Place it in the oven and bake for 55 to 65 minutes. To check if it's done, insert a toothpick into the center. If it comes out clean, your bread is ready. A few chocolate chips on the toothpick are fine, too. Once baked, remove the bread from the oven. Let it cool in the pan for about 10 minutes. After that, transfer it to a wire rack to cool completely. When it is cool, slice the bread. Serve it warm or at room temperature. You can sprinkle powdered sugar on top or add whipped cream for a special touch. Enjoy each slice with a hot cup of coffee or tea! To keep your pumpkin bread moist, use fresh pumpkin puree. Canned pumpkin works too, but fresh gives a richer taste. Mix in vegetable oil; it adds moisture. Don’t overmix the batter; this makes the bread tough. Bake until a toothpick comes out clean, with only a few chocolate chips on it. Let it cool in the pan briefly; this helps keep it moist. One common mistake is not measuring ingredients correctly. Use dry measuring cups for flour and sugar. Level off the top with a knife for accuracy. Another mistake is opening the oven door too often. This can change the temperature and ruin your bread. Lastly, don’t skip the spices! They add flavor and warmth to your pumpkin bread. For best results, spoon flour into your measuring cup instead of scooping it. This prevents too much flour. Always pack brown sugar into the cup firmly to get the right amount. When measuring liquids, use a clear measuring cup with measurement lines. Check at eye level for accuracy. Following these tips ensures your bread turns out great every time! {{image_2}} To make a gluten-free version, swap the all-purpose flour with a gluten-free blend. Look for a mix that includes xanthan gum, as it helps the bread rise and stay moist. Follow the same steps in the recipe. Your bread will still taste delicious and soft! You can add nuts or dried fruit to boost flavor and texture. Walnuts or pecans add a nice crunch. Try 1/2 cup of chopped nuts for a great mix. Dried cranberries or raisins also work well. They add sweetness and chewiness. Mix any add-ins in when you fold in the chocolate chips. Spices can enhance the flavor of your pumpkin bread. Besides cinnamon and nutmeg, consider adding ginger or allspice. Just 1/2 teaspoon can make a big difference. Experiment with different spice mixes to find your favorite flavor. Enjoy the fun of creating your unique bread! To keep your pumpkin bread fresh, wrap it tightly in plastic wrap. This keeps moisture in and prevents drying. You can also use aluminum foil for added protection. Store it at room temperature for up to three days. For longer storage, place it in the fridge. It can last up to a week when chilled. Just make sure to wrap it well to avoid any fridge odors. If you want to save your pumpkin bread for later, freezing is a great option. First, let the bread cool completely. Then, wrap it in plastic wrap and then in aluminum foil. This double layer helps protect it from freezer burn. You can freeze the loaf for up to three months. When you are ready to eat it, just thaw it in the fridge overnight. To enjoy your pumpkin bread warm, preheat your oven to 350°F (175°C). Unwrap the bread and place it on a baking sheet. Heat it for about 10-15 minutes. You can also slice the bread and heat it in the toaster. This gives it a nice, crispy edge. Enjoy your warm slices with a bit of butter or cream cheese for extra flavor! Chocolate Chip Pumpkin Bread lasts about 3 to 5 days at room temperature. Keep it in an airtight container to keep it fresh. If you want it to last longer, you can refrigerate it for up to a week. Just be sure to wrap it well to prevent it from drying out. Yes, you can use fresh pumpkin instead of canned. Just cook the pumpkin until soft, then puree it. This will give your bread a fresh taste. Make sure to measure the puree accurately. One cup of fresh pumpkin puree works great in this recipe. You can serve Chocolate Chip Pumpkin Bread warm or at room temperature. It pairs well with a cup of coffee or tea. For a fun twist, add a dollop of whipped cream or a sprinkle of powdered sugar on top. You can also enjoy it with butter or cream cheese for extra flavor. Absolutely! You can turn this recipe into muffins. Just fill the muffin cups about two-thirds full with batter. Bake at the same temperature for about 20 to 25 minutes. Check with a toothpick to make sure they are done. This gives you tasty, portable treats! In this article, we covered all you need for making delicious chocolate chip pumpkin bread. We looked at key ingredients, step-by-step instructions, and helpful tips. I shared variations for diets and preferences, plus storage info to keep it fresh. Remember, your bread should be moist and full of flavor. Take these tips to bake the best pumpkin bread. Enjoy experimenting with your own touches! Happy baking!

Chocolate Chip Pumpkin Bread Easy and Tasty Recipe

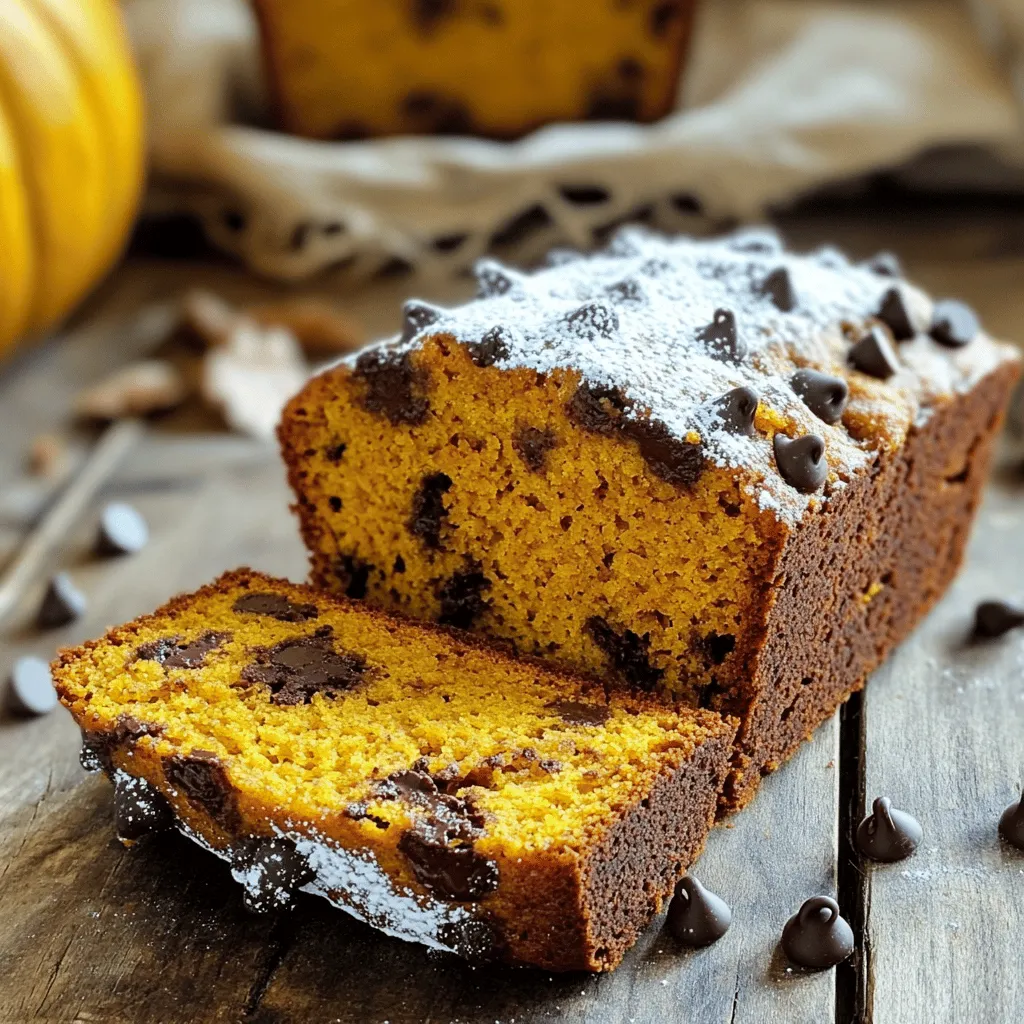
Are you ready to bake a delicious Chocolate Chip Pumpkin Bread? This easy recipe combines the warm flavors of fall

- 1 cup orzo pasta - 3 cups vegetable broth - 1 tablespoon olive oil - 4 cloves garlic, minced - 1 small onion, finely chopped - 1 cup heavy cream - 1 cup grated Parmesan cheese - 1 teaspoon garlic powder - 1/2 teaspoon black pepper - Salt to taste - Fresh parsley, chopped (for garnish) You can easily swap orzo with rice or quinoa. Use chicken broth instead of vegetable broth for more flavor. If you prefer a lighter dish, substitute heavy cream with half-and-half or whole milk. For a dairy-free option, try cashew cream or coconut cream. Nutritional yeast can replace Parmesan cheese for a vegan option. Each serving has about 400 calories. It includes 15 grams of fat, 50 grams of carbs, and 10 grams of protein. This dish is rich in calcium from the cheese and provides a good amount of fiber from the orzo. Adjust portions based on your dietary needs. - Bring vegetable broth to a simmer. - Cook orzo according to package instructions. To start, you want to bring three cups of vegetable broth to a gentle simmer in a medium pot. This step is key because it gives your orzo a nice flavor. Once it simmers, add one cup of orzo pasta. Cook it according to the package instructions, usually about 8 to 10 minutes. Stir it occasionally so it doesn’t stick to the bottom of the pot. - Sauté onion and garlic. - Combine orzo with cream and cheese. - Adjust consistency and seasoning. Now, while your orzo cooks, grab a large skillet. Heat one tablespoon of olive oil over medium heat. Add one small, finely chopped onion and sauté it for about 3 to 4 minutes. You want it to turn translucent. Next, add four cloves of minced garlic. Sauté this for another minute or two until it smells great but doesn’t brown. Next, lower the heat and pour in one cup of heavy cream. Stir it gently to mix with the onion and garlic. Gradually add the cooked orzo along with some broth from the pot. Stir well to blend everything together. Now it’s time for the cheese! Add one cup of grated Parmesan cheese, one teaspoon of garlic powder, half a teaspoon of black pepper, and salt to taste. Mix everything until it becomes creamy and the cheese melts, which should take about 3 to 4 minutes. If the dish seems too thick, add a splash more broth or water to reach the right consistency. - Best garnishes for the dish. - Ideal pairings with proteins or vegetables. Once your dish is ready, let it sit for a minute. Serve it warm, garnished with freshly chopped parsley for a pop of color and flavor. For a complete meal, pair it with grilled chicken, shrimp, or steamed vegetables. This creamy garlic Parmesan orzo is versatile and perfect for any weeknight dinner! To get that perfect creamy texture, you need to adjust the cream and cheese ratios. Use more heavy cream for a richer dish. If you want it lighter, add less cream and cheese. Stir gently while cooking to keep it smooth. To prevent sticking, stir the orzo every few minutes while it cooks. This keeps the pasta from clumping together. If it does stick, add a splash of broth or water while you stir. Overcooking the orzo can ruin the dish. Keep an eye on the time and test it for doneness. It should be firm but not hard. Not adjusting seasoning can lead to bland flavors. Taste as you cook. Add salt and pepper to enhance the taste. Don't forget the garlic powder for extra flavor! Adding herbs and spices can take your orzo to the next level. Try fresh parsley for a pop of color and taste. You can also add thyme or basil for more depth. Consider optional add-ins too. Veggies like spinach or peas boost nutrition and color. You can also add proteins like chicken or shrimp for a heartier meal. This makes your dish more filling and tasty! {{image_2}} For a vegan twist, you can swap out the dairy. Use coconut cream instead of heavy cream. Nutritional yeast makes a great substitute for Parmesan cheese. This gives a cheesy flavor without using dairy. You can also use almond milk or soy milk for a lighter taste. These swaps keep the dish creamy and flavorful. Want less cleanup? You can make this dish in one pot. Start by cooking the orzo in the vegetable broth. Once it’s done, add the sautéed onion and garlic right in. Then, pour in the cream and cheese. This method saves time and makes washing up easier. You will still enjoy that creamy goodness! You can change up the flavors easily. Adding sun-dried tomatoes gives a nice touch of sweetness. Spinach adds color and extra nutrients. If you want some heat, add red pepper flakes. You can also mix in cooked chicken or shrimp for protein. These options make this dish fun and exciting every time you cook it! To keep your Creamy Garlic Parmesan Orzo fresh, put it in an airtight container. Make sure it cools to room temperature before sealing. Place it in the fridge for up to three days. This helps keep the flavors intact. If you notice it thickening, add a splash of broth before serving. You can freeze Creamy Garlic Parmesan Orzo for longer storage. Use a freezer-safe container or bag. It’s best to freeze it in single servings. This way, you can thaw just what you need later. It can last up to three months in the freezer. Remember to label the container with the date. To reheat, you can use a microwave or a stovetop. If using a microwave, heat it in short bursts. Stir in between heats to warm evenly. On the stovetop, add a bit of broth to keep it creamy. Heat on low, stirring gently until warm. This prevents it from drying out and keeps the texture smooth. Yes, you can use whole wheat orzo. It adds a nutty flavor and more fiber. Just be aware that it may take a little longer to cook. Check the package for specific cooking times to ensure it's tender but firm. To make Creamy Garlic Parmesan Orzo gluten-free, use gluten-free orzo. Many brands offer this option now. You can also replace vegetable broth with gluten-free broth for extra flavor. This dish pairs well with roasted vegetables or grilled chicken. You can also serve it with a fresh salad for a complete meal. Add some crusty bread to soak up the creamy sauce! Creamy Garlic Parmesan Orzo lasts 3 to 5 days in the fridge. Store it in an airtight container to keep it fresh. Reheat it gently to avoid drying out the pasta. Yes, you can prepare this meal ahead of time. Cook the orzo and sauce, then store them separately. Combine them just before serving for the best flavor and texture. This blog post covered a creamy garlic Parmesan orzo recipe. You learned about the ingredients, how to cook, and tasty variations. I shared tips for creamy texture and common mistakes to avoid. You can explore storage options and reheating methods too. Remember, you can customize this dish to suit your taste. Enjoy experimenting with flavors and substitutions. Simple steps make cooking fun and rewarding. Now, go create a delicious meal that impresses!

Creamy Garlic Parmesan Orzo Flavorful Dinner Dish

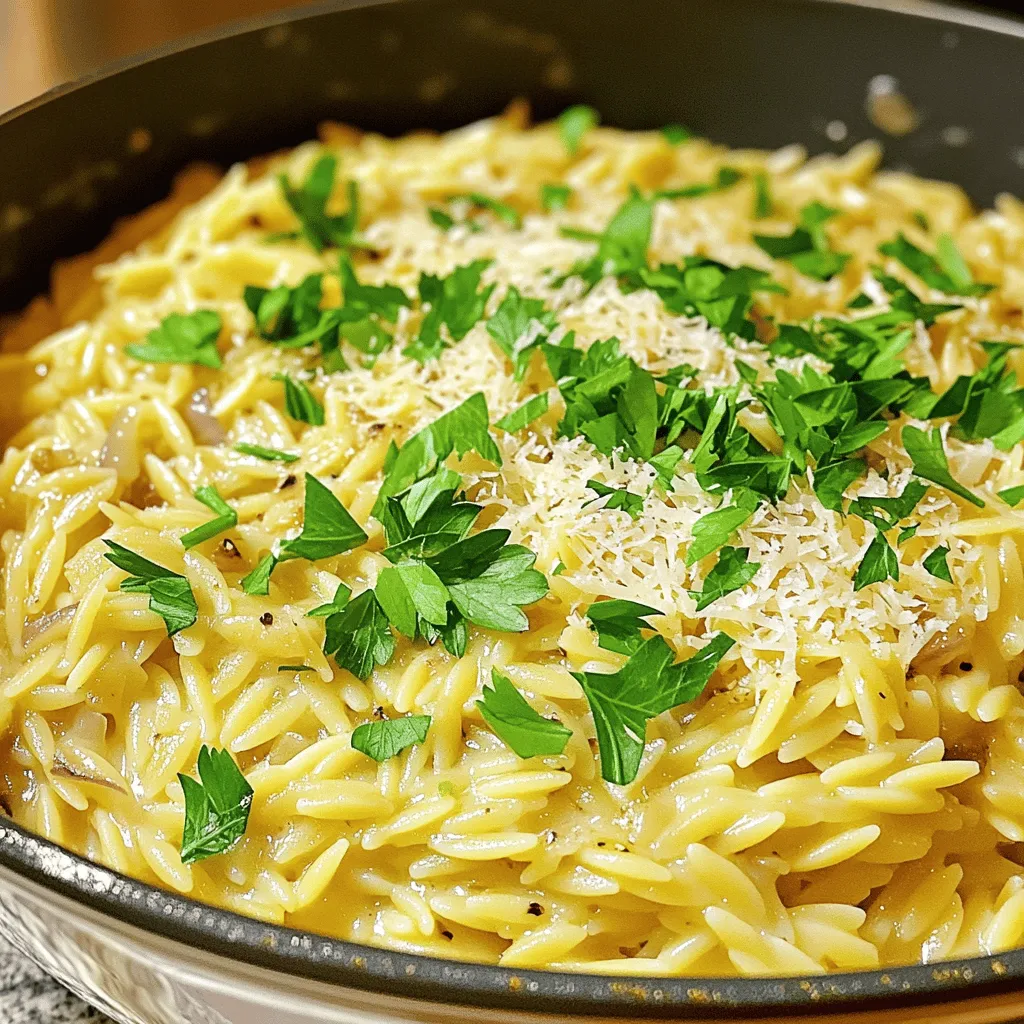
Looking for a dinner dish that’s quick, creamy, and packed with flavor? Look no further than Creamy Garlic Parmesan Orzo!

To make pesto mozzarella stuffed tomatoes, you need: - 4 large ripe tomatoes - 1 cup fresh mozzarella balls or diced mozzarella cheese - 1/2 cup fresh basil pesto - 1/4 cup grated Parmesan cheese - 1/4 teaspoon salt - 1/4 teaspoon black pepper - 1 tablespoon balsamic glaze (for drizzling, optional) - Fresh basil leaves for garnish You can swap ingredients based on what you have. If you can't find fresh mozzarella, use shredded mozzarella. For the pesto, any green pesto works well. If you want a dairy-free option, try nut-based cheese instead of Parmesan. You can also skip the balsamic glaze if you prefer a simpler look. Fresh ingredients bring the best taste, especially in summer. Fresh tomatoes are sweet and juicy, perfect for stuffing. Fresh mozzarella has a creamy texture that melts well. If you use dried basil instead of pesto, the taste will change. Dried herbs lack the same punch. Always choose fresh when you can for the best flavor. {{ingredient_image_1}} First, you need to prepare the tomatoes. Take four large, ripe tomatoes. Slice off the tops carefully. Use a spoon to scoop out the insides. Try not to break the outer wall. Set the flesh aside for later. This step is key to make room for the tasty filling. Next, grab a medium bowl for mixing. Add one cup of fresh mozzarella balls or diced mozzarella cheese. Then, pour in half a cup of fresh basil pesto. Add a quarter cup of grated Parmesan cheese, along with salt and pepper. Stir everything until it’s well blended. This mix will be creamy and full of flavor. Now it's time to stuff the tomatoes. Fill each hollowed tomato with your pesto-mozzarella mixture. Press it gently to pack it in. Place the filled tomatoes upright in a baking dish. If they wobble, trim the bottoms a bit. Preheat your oven to 375°F (190°C). Bake for 20 to 25 minutes. They are ready when the cheese melts and the tomatoes soften. Let them cool for a few minutes. If you like, drizzle with balsamic glaze and add fresh basil for garnish. Enjoy your tasty summer delight! To hollow the tomatoes well, start with ripe ones. Choose large, firm tomatoes for the best results. Cut the tops off and scoop out the insides gently. Use a spoon for this. Take care not to break the skin. You want a sturdy shell to hold the filling. If any seeds remain, remove them. This makes the filling blend better. You can chop the scooped-out flesh and add it to your filling for extra flavor. For a rich taste, use fresh mozzarella balls. They melt beautifully and give a creamy texture. If you want a sharper flavor, try aged mozzarella. You can also mix in some feta cheese for a tangy twist. Just remember, balance the flavors. Too much cheese can overpower the dish. Stick with one or two types to keep it simple. Presentation matters, so make it fun! Arrange the stuffed tomatoes neatly on a plate. Drizzle balsamic glaze over them for a beautiful look. Add fresh basil leaves as a garnish. This adds color and freshness. Serve them warm, right out of the oven. They look great and taste amazing! Enjoy them as a light meal or a side dish. Pro Tips Choose ripe tomatoes: Select tomatoes that are firm but slightly soft to the touch for the best flavor and texture. Customize your pesto: Feel free to add nuts or extra herbs to your pesto for a personalized flavor profile. Don’t overbake: Keep an eye on your tomatoes while baking; you want them tender but not mushy. Serving suggestion: Pair the stuffed tomatoes with a light salad for a complete meal. {{image_2}} You can add proteins to make this dish heartier. Cook some diced chicken or shrimp and mix them into the pesto-mozzarella filling. This adds great flavor and makes the dish more filling. Grilled chicken works well, as does sautéed shrimp. Just remember to season your protein with salt and pepper for extra taste. If you want a vegan version, swap the mozzarella for dairy-free cheese. You can also use tofu or chickpeas for protein. Instead of Parmesan, try nutritional yeast for a cheesy flavor. Finally, use a vegan pesto or make your own with nuts and herbs. These swaps let everyone enjoy this dish. Experiment with different flavors! Try adding sun-dried tomatoes for tanginess, or mix in olives for a briny taste. You can also add spices like red pepper flakes for heat. Fresh herbs like oregano or thyme can brighten the dish. The options are endless, so get creative and find your favorite combo! To keep your pesto mozzarella stuffed tomatoes fresh, store them in the fridge. Place the tomatoes in an airtight container. This helps prevent them from drying out. You can keep them for up to three days. If possible, eat them within one day for the best taste. Make sure not to cover the tomatoes too tightly. This helps maintain their shape. You can freeze these stuffed tomatoes, but they may change in texture. To freeze, wrap each tomato in plastic wrap. Then, place them in a freezer-safe bag. They can last up to three months in the freezer. When you are ready to eat them, thaw them in the fridge overnight. To reheat, you can bake the tomatoes again. Preheat your oven to 350°F (175°C). Place the tomatoes on a baking tray. Heat them for about 10-15 minutes, until warm. If you prefer using a microwave, place one tomato on a microwave-safe plate. Heat it for about 30 seconds to 1 minute, checking to avoid overheating. Enjoy your tasty summer delight warm! Yes, you can make these stuffed tomatoes ahead of time. Prepare the tomatoes and stuffing. Then, fill the tomatoes and place them in the fridge. Bake them just before serving. This keeps the tomatoes fresh and tasty. Pesto mozzarella stuffed tomatoes pair well with many dishes. You can serve them with a fresh green salad. Grilled chicken or fish works great too. A side of crusty bread is perfect for soaking up the flavors. Leftover pesto mozzarella stuffed tomatoes last about three days in the fridge. Store them in an airtight container. Reheat them in the oven to keep them warm and tasty. They may lose some crispness, but the flavor stays strong. This blog post covered all you need for making pesto mozzarella stuffed tomatoes. We explored ingredients, step-by-step prep, and useful tips. You learned about innovative variations to suit different diets. I shared how to store and reheat leftovers safely. With clear steps and options, you can create a tasty dish your friends will love. Enjoy making this easy, delicious meal that fits any occasion!

Pesto Mozzarella Stuffed Tomatoes Tasty Summer Delight

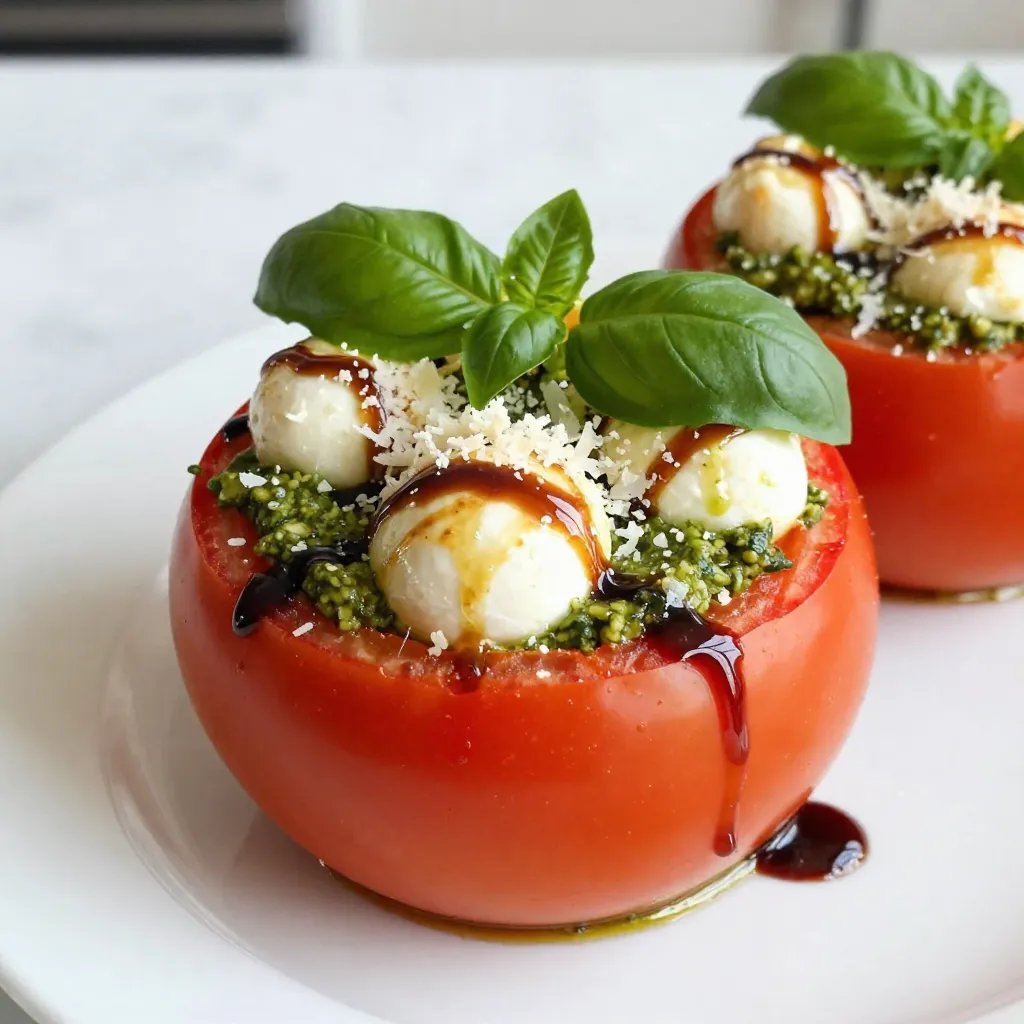
Summer is the perfect time for fresh, flavorful dishes, and my Pesto Mozzarella Stuffed Tomatoes are a must-try! These vibrant

Older posts
Newer posts
← Previous Page1 … Page39 Page40 Page41 … Page86 Next →

dsad

© 2026 Cooking Wells • Built with GeneratePress

Our Policies

  • Copyright Policy
  • Cookie Policy
  • GDPR Policy
  • Privacy Policy
  • Disclaimer
  • Terms Of Use

More Information

  • Home
  • About
  • Contact
  • Appetizers
  • Dessert
  • Dinner
  • Drinks
©2026, Cooking Wells About Back To Top