![- 1 ½ cups graham cracker crumbs - ½ cup unsalted butter, melted - 1 cup sweetened condensed milk - ½ cup freshly squeezed lemon juice - 1 tablespoon lemon zest - 1 cup heavy whipping cream - ¼ cup powdered sugar - Fresh mint leaves for garnish (optional) To make a no-bake lemon icebox pie, you need simple and fresh ingredients. The graham cracker crumbs form a crunchy base. Unsalted butter binds the crumbs and adds richness. The sweetened condensed milk gives the pie its creamy texture and sweetness. Freshness is key, so use freshly squeezed lemon juice for the best flavor. Lemon zest enhances the lemon taste with its bright, tangy notes. The heavy whipping cream creates a light and fluffy filling when whipped. Powdered sugar sweetens the cream and helps it hold shape. Lastly, you can add fresh mint leaves on top for a pop of color. This pie is all about bright flavors and easy preparation. You can find the full recipe to explore each step in detail. To start, gather your graham cracker crumbs and melted butter. In a medium bowl, mix them well. You want the crumbs to soak up the butter. The mixture should feel like wet sand. Next, press this crumb mixture into the bottom and up the sides of a 9-inch pie pan. Make sure it is tight and even. After that, place the crust in the refrigerator. Let it chill while you make the filling. Now, let’s prepare the filling. In a separate bowl, combine the sweetened condensed milk, freshly squeezed lemon juice, and lemon zest. Whisk these ingredients together until they blend well. This mixture will be sweet and zesty. Next, grab another large bowl. Whip the heavy cream until soft peaks form. Then, slowly add the powdered sugar. Keep beating until you see stiff peaks. This step is key for a light filling. Finally, gently fold the lemon mixture into the whipped cream. Be careful not to deflate the whipped cream. Once the filling is ready, it’s time to assemble the pie. Pour the lemon filling into the chilled graham cracker crust. Use a spatula to smooth the top. Make it look nice and even. Now, cover the pie with plastic wrap. Place it back in the refrigerator for at least 4 hours. This allows it to set up well. When you’re ready to serve, you can garnish with fresh mint leaves if you like. For the full recipe, check out the instructions above. To make great whipped cream, start with cold tools. Use a cold bowl and beaters. This helps the cream whip better. Pour the heavy cream in the bowl. Beat on medium speed. Watch for soft peaks to form. This takes about two minutes. When you see soft peaks, slowly add the powdered sugar. Keep beating until stiff peaks form. Stop as soon as you see stiff peaks. Overbeating can turn cream into butter, which is a big mistake! For a bright taste, use both lemon juice and zest. A good ratio is one tablespoon of zest for every half cup of juice. This gives a fresh, zesty flavor. If you want to change it up, try using lime or orange instead of lemon. You can also swap sweetened condensed milk for coconut cream. This will add a light coconut flavor, which pairs well with lemon. When serving, think about how to make it pretty! You can add fresh mint leaves on top for color. Slices of lemon on the side also look great. For an extra treat, serve with vanilla ice cream or whipped cream. This adds a creamy touch that many will love. You can even pair it with a fruit salad for a light dessert. {{image_2}} You can easily change the flavor of your No-Bake Lemon Icebox Pie. Here are some fun ideas: - Adding different fruit flavors: Try using lime, orange, or even berry juice. Each fruit gives a new taste. Mix it up and find your favorite. - Incorporating herbs like basil or mint: Adding fresh herbs can give a surprising twist. Mint adds a cool flavor, while basil gives a warm touch. Just chop them finely and mix them right into the filling. The crust can also change based on your taste or diet. Here are some tasty options: - Using chocolate or cookie crust: A chocolate crust can add a rich taste. You can use crushed Oreos or chocolate graham crackers for a fun twist. - Gluten-free options: Use gluten-free graham crackers or almond flour to make a crust. Your pie will still taste amazing, and everyone can enjoy it. If you want a dairy-free pie, you can make some simple swaps: - Substituting with coconut cream: Replace heavy cream with coconut cream for a rich, creamy texture. It adds a lovely tropical note too. - Using non-dairy condensed milk alternatives: There are plenty of non-dairy options available now. Look for coconut or almond-based condensed milk. This keeps your pie sweet and delicious without dairy. Feel free to explore these variations to make your No-Bake Lemon Icebox Pie uniquely yours! For the complete recipe, check out the [Full Recipe]. To store your no-bake lemon icebox pie in the refrigerator, first, cover it tightly with plastic wrap. This keeps it fresh and prevents any odors from other foods getting in. Make sure to place it in the back of the fridge where it’s coldest. Your pie can last up to five days this way. To keep it fresh for longer, try not to slice into the pie until you're ready to serve. Each slice exposes the filling to air, which can dry it out. If you notice the top getting a bit crusty, you can add a dollop of whipped cream on each slice to help keep it moist. If you want to freeze your lemon icebox pie, you can do so easily. First, make sure the pie is fully set. Then, cover it tightly with plastic wrap, and wrap it again with aluminum foil. This double layer helps prevent freezer burn. You can freeze it for up to two months. When you're ready to enjoy your pie, take it out of the freezer and place it in the fridge to thaw overnight. For the best texture, avoid thawing it at room temperature. This technique helps preserve the creamy filling and keeps it from becoming too soft. No-Bake Lemon Icebox Pie lasts about 3 to 5 days in the fridge. To keep it fresh, cover the pie with plastic wrap or foil. This helps prevent it from absorbing odors. If you want to enjoy it longer, you can freeze it. Just make sure to wrap it tightly. When you’re ready to eat it, thaw it in the fridge overnight. The texture remains nice and creamy. Yes, you can use bottled lemon juice. However, fresh lemon juice gives a brighter taste. Bottled juice may have a different flavor due to preservatives. If you use bottled juice, try to pick one labeled "100% pure." This choice can still make your pie tasty, but fresh lemons really shine in this recipe. If you need a substitute for heavy cream, try using coconut cream. It has a similar texture and works well. Another option is to blend milk with butter. Mix ¾ cup of milk with ¼ cup of melted unsalted butter. This mix can mimic the richness of heavy cream. For a lighter version, use half-and-half, though it won’t whip up as thick. This blog post shared how to make a no-bake lemon icebox pie. We covered the key ingredients, step-by-step instructions, and helpful tips. You learned about variations and storing your pie for freshness. Now, enjoy your tasty treat and amaze your friends with your skills! This pie is full of flavor and easy to make. Have fun exploring different flavors and share your creations!](https://cookingwells.com/wp-content/uploads/2025/07/abc185d9-c3c5-49de-a16c-254e2f76e547.webp)
No-Bake Lemon Icebox Pie Simple and Refreshing Treat
Looking for a simple dessert that impresses? Let’s dive into the world of No-Bake Lemon Icebox Pie! This refreshing treat
Looking for a simple dessert that impresses? Let’s dive into the world of No-Bake Lemon Icebox Pie! This refreshing treat
![Cooking a tasty Garlic Butter Steak & Potato Skillet is easy. Here are the main ingredients you will need: - 1 lb flank steak, trimmed and cut into bite-sized pieces - 2 large russet potatoes, diced into small cubes - 4 tablespoons unsalted butter These three ingredients form the heart of the dish. Flank steak gives you a rich, meaty flavor. Russet potatoes add a nice, creamy texture. Unsalted butter ties it all together, adding a luscious depth. The seasonings bring this dish to life. You will use: - 4 cloves garlic, minced - 1 teaspoon dried thyme - 1 teaspoon smoked paprika - Salt and pepper to taste Garlic is bold and aromatic. Thyme adds a hint of earthiness. Smoked paprika brings a touch of warmth. Salt and pepper enhance all the flavors, making each bite pop. Don't forget these extra items: - ½ cup beef broth - Fresh parsley, chopped (for garnish) Beef broth adds moisture and richness to the dish. Fresh parsley gives a bright, fresh finish that looks great and tastes great too. For the full recipe, check out the [Full Recipe]. Preheat and prepare the skillet Start by preheating your skillet. Set it to medium-high heat. Add 2 tablespoons of unsalted butter. Let the butter melt and get hot. This step is key for a good sear. Seasoning the steak While the skillet heats, take your flank steak. Cut it into bite-sized pieces. Season the steak with salt, pepper, and smoked paprika. Use enough to cover it well. This seasoning gives the steak a great flavor boost. Searing the steak Once the butter is hot, add the seasoned steak to the skillet. Lay it down in a single layer. Sear the steak for 2 to 3 minutes on each side. You want it to be browned but not cooked all the way through. When done, remove the steak and set it aside. Cooking the potatoes Next, add your diced russet potatoes to the same skillet. Season them with salt, pepper, and dried thyme. Cook the potatoes for about 10 to 12 minutes. Stir them often until they turn golden and soft. This will create a nice texture. Sautéing garlic Now, push the cooked potatoes to one side of the skillet. Add the remaining 2 tablespoons of butter to the empty space. Once the butter melts, add 4 cloves of minced garlic. Sauté for about 30 seconds until it smells amazing. Final mixing and simmering Return the seared steak to the skillet. Pour in ½ cup of beef broth. Stir everything together well. Allow it to simmer for 3 to 5 minutes. This step lets all the flavors mix together beautifully. For more details on this recipe, check the Full Recipe. To achieve the perfect steak sear, start with a hot skillet. Heat it on medium-high until it’s very hot. This helps create a nice crust on the steak. Avoid overcrowding the pan; cook in batches if needed. Let the steak sit for a minute or two before flipping. This helps develop a tasty brown color. For even-cooked potatoes, cut them into small, uniform cubes. This ensures they cook at the same rate. Stir them often while cooking, so they brown evenly. A little patience goes a long way here. If they get golden on one side, flip them over. Adding herbs and spices can elevate your dish. Fresh thyme or rosemary brings a lovely aroma. You can also try red pepper flakes for a kick. Mix and match based on your taste preferences. For alternative ingredients, consider adding mushrooms or bell peppers. These veggies can add depth and texture. You can also swap the beef broth for chicken broth for a lighter flavor. Experimenting with different ingredients makes this dish your own. For presentation, serve the dish directly from the skillet. This gives a homey, rustic feel. A large serving platter works too if you want a more formal look. Add lemon wedges for a pop of color and a fresh twist. Pair the dish with a simple green salad or crusty bread. This balances the richness of the steak and potatoes. A light sauce, like chimichurri, can also add a fresh touch. For a full experience, consider the [Full Recipe]. {{image_2}} You can change the cuts of steak for your Garlic Butter Steak & Potato Skillet. Try ribeye or sirloin for a richer taste. Each cut offers a unique flavor and texture. If you want a lean option, choose tenderloin. For the vegetables, switch out russet potatoes for sweet potatoes or even cauliflower. Sweet potatoes add a hint of sweetness. Cauliflower gives a lighter feel and works well in low-carb diets. You can prepare this dish in different ways. Oven-baking is a good option if you want a hands-off approach. Just season and roast everything together. Skillet-cooking gives you a nice sear and quick cooking time. It also keeps more flavors in the pan. Grilling the steak is another method. It gives a smoky flavor that pairs well with garlic butter. Just sear the steak on the grill first. Then combine it with potatoes cooked on the stovetop. To make this dish gluten-free, simply use gluten-free broth. All the other ingredients are already safe. This way, everyone can enjoy the meal. For a low-carb version, skip the potatoes. You can use zucchini noodles or riced cauliflower instead. These swaps keep the dish tasty while lowering carbs. Explore more ideas or variations on this recipe in the [Full Recipe]. To keep your Garlic Butter Steak & Potato Skillet fresh, follow these tips: - Cool the dish first: Let it sit at room temperature for about 30 minutes. - Use airtight containers: Store the leftovers in a container that seals tightly. - Label and date: Mark your container for easy tracking. This dish lasts in the fridge for 3 to 4 days. Enjoy it within this time for best taste. When it’s time to eat your leftovers, here are the best methods: - Stovetop reheating: Heat in a skillet over medium heat. Stir gently for even warming. - Microwave option: Use a microwave-safe dish. Cover it loosely to keep moisture. Heat for 1-2 minutes. To keep the flavor and texture, add a splash of beef broth while reheating. This helps maintain moisture and richness. Yes, you can freeze this dish! Here’s how: - Cool completely: Ensure the dish is fully cooled before freezing. - Use freezer-safe containers: Choose containers that are safe for the freezer. Leave space for expansion. To properly freeze the dish, it can last for up to 3 months. To reheat, thaw overnight in the fridge and follow the reheating instructions. For the full recipe and more tips, check out the [Full Recipe]. What is the best steak to use for this recipe? The best steak for this dish is flank steak. It cooks fast and stays tender. You can also use sirloin or ribeye for a richer taste. Just remember to slice it against the grain for better texture. Can I use sweet potatoes instead of russet potatoes? Yes, you can use sweet potatoes! They add a nice sweetness and color to the dish. Just dice them into small cubes to ensure even cooking. How do I know when the steak is done? You can check the steak's doneness by using a meat thermometer. For medium-rare, aim for 130°F. For medium, look for 140°F. You can also cut into the steak to see the inside color. What can I serve with Garlic Butter Steak & Potato Skillet? This skillet dish pairs well with a fresh salad or steamed veggies. You can also serve it with crusty bread to soak up the garlic butter. Can I make this a one-pan meal? Yes! This dish is already one-pan friendly. You cook the steak, then the potatoes, all in the same skillet. It saves time and makes cleanup easy. How to adapt for different portion sizes? To adjust for more or fewer servings, simply scale the ingredients. Double or halve the steak and potatoes as needed. Just keep the cooking times in mind. This blog discussed making a tasty Garlic Butter Steak and Potato Skillet. You learned about key ingredients like flank steak and russet potatoes. I shared cooking steps, tips for great flavor, and variations to try. Remember to store leftovers properly and explore alternatives to fit your diet. Experiment with the methods and ingredients to find what you love. Cooking can be fun and rewarding! Enjoy your meal and happy cooking!](https://cookingwells.com/wp-content/uploads/2025/07/bbf13d67-17f2-45be-a84e-b64ed65ba88a.webp)
Get ready for a flavor explosion with my Garlic Butter Steak & Potato Skillet! This one-pan meal is packed with
![Gather these essential ingredients for your Pineapple Teriyaki Chicken Bowls. Each item adds to the meal's bright flavors. - 1 lb boneless, skinless chicken thighs - 1 cup fresh pineapple, diced - ½ cup teriyaki sauce - 1 tablespoon olive oil - 2 cups cooked jasmine rice - 1 bell pepper (red or yellow) - 1 cup snow peas - 2 green onions - Sesame seeds for garnish - Salt and pepper to taste Using fresh ingredients makes all the difference. The chicken thighs provide a juicy base for the dish. Fresh pineapple brings sweetness that pairs well with the salty teriyaki sauce. Jasmine rice serves as a lovely, fluffy base. For crunch and color, the bell pepper and snow peas are perfect. Green onions add a fresh bite while sesame seeds give a nice finish. This recipe is simple yet satisfying. You can find the full recipe in the provided link. Enjoy creating your own Pineapple Teriyaki Chicken Bowls! Start by taking your chicken thighs and cutting them into bite-sized pieces. In a bowl, combine the chicken pieces with ½ cup of teriyaki sauce. Add a pinch of salt and pepper for flavor. It’s best to let the chicken marinate for at least 20 minutes. For even more flavor, marinate it for up to 2 hours in the fridge. Next, heat 1 tablespoon of olive oil in a large skillet or wok over medium-high heat. Once the oil is hot, add in the marinated chicken. Cook for about 5-7 minutes. You want the chicken to turn a lovely golden brown while cooking through. Stir occasionally to ensure it cooks evenly. After the chicken is cooked, it’s time to add the veggies. Toss in the sliced bell pepper and snow peas. Cook them for another 3-4 minutes until they are tender-crisp. Now, stir in the diced pineapple and the remaining ¼ cup of teriyaki sauce. Cook for an additional 2-3 minutes. This helps the flavors meld together and warms the pineapple. Now for the fun part! In serving bowls, layer the cooked jasmine rice first. Then, top it with the teriyaki chicken and vegetable mixture. For a touch of flair, sprinkle sliced green onions and sesame seeds on top. This adds a nice crunch and a pop of color to your dish. For the complete recipe, check out the [Full Recipe]. To make the best Pineapple Teriyaki Chicken Bowls, focus on flavor. I recommend marinating the chicken for at least 20 minutes. If you have more time, let it sit for up to 2 hours. This extra time helps the chicken soak up the teriyaki sauce. When it comes to teriyaki sauce, choose one that you love. You can use store-bought or homemade. A good sauce adds depth to the dish. Look for sauces with natural ingredients to keep it fresh and tasty. For the chicken to shine, cook it right. Start with a hot skillet or wok. Use medium-high heat to get that golden brown color. This takes about 5 to 7 minutes. Make sure to stir occasionally so the chicken cooks evenly. The goal is to achieve a juicy texture. Avoid overcooking, as this can dry out the chicken. Keep an eye on it. If your stove has different settings, set it to medium-high for the best results. When serving, think about what pairs well with these bowls. Jasmine rice is a great base, but feel free to explore other options like brown rice or quinoa. Add colorful veggies like bell peppers and snow peas for a vibrant look. Setting the table is just as important. Use bowls that showcase the colorful layers. Garnish with green onions and sesame seeds. This makes the meal inviting and fun. Don't forget to add some chopsticks for a playful touch! {{image_2}} To make this dish gluten-free, swap the teriyaki sauce for a gluten-free alternative. Many brands offer tasty options. You can also make your sauce at home. For a low-carb version, use cauliflower rice instead of jasmine rice. This keeps the meal light but still full of flavor. You can change the protein in this dish. Try using tofu for a vegetarian option. Turkey is also a lean choice that works well. For the veggies, feel free to mix it up! Broccoli, carrots, or snap peas can add color and crunch. To give your Pineapple Teriyaki Chicken Bowls an extra kick, add some spices like ginger or garlic. Fresh herbs like cilantro or basil can brighten the dish. For a fun twist, try using different fruits. Mango or kiwi can add sweetness and a tropical feel. For the full recipe, check out the [Full Recipe]. To keep your Pineapple Teriyaki Chicken Bowls fresh, store leftovers in an airtight container. Make sure they cool down first. You can safely eat them within three days. After that, the flavor and texture may fade. When reheating, avoid the microwave if possible. Instead, use a skillet over low heat. This helps maintain the dish's texture and keeps the pineapple juicy. Stir occasionally until everything is warmed through. Yes, you can freeze Pineapple Teriyaki Chicken Bowls. To do this, pack the chicken and rice in a freezer-safe container. Leave out any fresh toppings, like green onions. When you're ready to eat, thaw it overnight in the fridge. Reheat in a skillet for the best results. To make homemade teriyaki sauce, you need just a few simple ingredients. Combine: - ½ cup soy sauce - ¼ cup brown sugar - 1 tablespoon rice vinegar - 1 tablespoon sesame oil - 1 teaspoon garlic (minced) - 1 teaspoon ginger (minced) Mix these together in a saucepan over medium heat. Stir until the sugar dissolves. Let it simmer for about 5 minutes until it thickens slightly. This sauce adds a rich flavor to your Pineapple Teriyaki Chicken Bowls. Yes, you can use chicken breasts instead of thighs. Chicken breasts cook faster and are leaner. They may dry out if cooked too long. Adjust your cooking time to about 4-6 minutes for chicken breasts. Cut them into smaller pieces for even cooking. If you prefer a different grain, try these options: - Brown rice - Quinoa - Cauliflower rice Brown rice gives a nutty flavor. Quinoa adds protein. Cauliflower rice is a low-carb choice. Each adds a unique twist to your bowl. Yes, this recipe is very kid-friendly. The sweet pineapple and savory sauce appeal to young taste buds. To make it more fun, let kids help with the cooking. They can add toppings like sesame seeds or green onions. You can also cut the chicken into fun shapes for added excitement. Pineapple teriyaki chicken bowls offer a simple and tasty meal. You learned what ingredients to use, how to cook them, and how to serve the dish. Variations allow for dietary needs and personal tastes. Remember to store leftovers safely and enjoy them later. This recipe can be a hit for all ages, bringing flavor and fun to mealtime. Try these tips to make the dish even better. Happy cooking!](https://cookingwells.com/wp-content/uploads/2025/07/653ea411-3408-454e-8a68-c84039bd11fc.webp)
Looking for a tasty dinner that’s quick and easy? Pineapple Teriyaki Chicken Bowls are your answer! With juicy chicken thighs,
![- Quinoa and Liquid Requirements - 1 cup quinoa, rinsed - 2 cups water or vegetable broth - Fresh Vegetables - 1 cup cherry tomatoes, halved - 1 can (15 oz) black beans, rinsed and drained - 1 bell pepper (any color), diced - 1 small red onion, finely chopped - 1 cup corn (frozen or canned) - 1/2 cup fresh cilantro, chopped - Dressing Components - 1/4 cup lime juice (about 2-3 limes) - 2 tablespoons olive oil - 1 teaspoon cumin - Salt and pepper to taste When I make this salad, I always start with high-quality ingredients. The quinoa is the base. I rinse it well to remove any bitterness. This ensures a light and fluffy texture. You can use water or vegetable broth for extra flavor. Next, the fresh vegetables add color and crunch. Cherry tomatoes bring sweetness. Black beans add protein and fiber. Bell peppers give a nice crunch, while red onion adds a sharp bite. Corn rounds it all out with a bit of sweetness. Fresh cilantro is key for that vibrant flavor. For the dressing, I mix lime juice, olive oil, and cumin. This blend makes the salad bright and zesty. I always taste it and adjust with salt and pepper. The dressing ties everything together beautifully. For the full recipe, refer to the cooking instructions. Enjoy crafting this delightful dish! Proper Rinsing Techniques Rinsing quinoa is key. It removes a bitter coating called saponin. Place quinoa in a fine-mesh strainer. Rinse it under cool water for about 2 minutes. Swirl it around to ensure all grains get rinsed well. Cooking Time and Fluffing Details To cook quinoa, combine 1 cup of rinsed quinoa with 2 cups of water or vegetable broth in a medium saucepan. Bring it to a boil. Then, reduce the heat and cover. Let it simmer for about 15 minutes. Once the liquid is gone, remove the pot from heat. Let it sit covered for 5 minutes. Fluff the quinoa gently with a fork to separate the grains. Chopping Techniques for Freshness Chop your vegetables with care. Freshness matters. Use a sharp knife for clean cuts. Cut the cherry tomatoes in half for a sweet burst. Dice the bell pepper and chop the red onion finely. Aim for even sizes so they mix well. Flavor Combinations Mixing fresh veggies adds great flavor. Combine cherry tomatoes, black beans, diced bell pepper, finely chopped red onion, and corn. Each ingredient adds its special taste. This blend makes every bite exciting. Combining Ingredients for Best Flavor For the dressing, use a small bowl. Whisk together 1/4 cup of fresh lime juice, 2 tablespoons of olive oil, and 1 teaspoon of cumin. Add salt and pepper to taste. This dressing ties all the flavors together. It brings brightness to the salad. For the full recipe, check the details above and enjoy making this dish! Adjusting Seasonings Taste your salad before serving. If it needs more punch, add salt or lime juice. Each ingredient shines best when balanced. Cilantro brings a fresh note, while lime adds zest. Don't be shy to tweak until you find your favorite flavor blend. Enhancing Flavor Profiles Consider adding a pinch of cayenne for heat or honey for sweetness. You can also mix in avocado for creaminess. Each new layer of flavor makes your salad more exciting. A dash of smoked paprika can add depth. Always remember, flavor is key to a great salad. Alternative Veggies to Use If you're missing an ingredient, be creative! Replace black beans with chickpeas or kidney beans. Swap cherry tomatoes for diced cucumbers or radishes. You can even use spinach or kale for a leafy twist. The goal is to enjoy this fresh and colorful dish. Adding Protein Options Want to make it heartier? Add grilled chicken or shrimp. For a vegetarian option, toss in tofu or nuts. These protein choices boost flavor and nutrition. You can also include feta cheese for a salty kick. Customize your salad to fit your needs and taste. For a complete recipe, check out the [Full Recipe]. {{image_2}} You can easily change the flavors of your cilantro lime quinoa salad. For a Southwest-inspired twist, add some avocado, jalapeños, or diced mango. These ingredients bring a fresh, zesty taste. You could also sprinkle some queso fresco on top for creaminess. If you prefer a Mediterranean flair, swap out the corn for chopped cucumbers and olives. Feta cheese adds a salty bite that really lifts the dish. Toss in some artichoke hearts for a unique touch. This variation keeps the salad light and crisp. You can adapt this salad to match the seasons. In summer, use ripe tomatoes, fresh corn, and bell peppers. These veggies are bright and juicy, perfect for hot weather. You might also want to add some fresh basil or mint for a refreshing hint. In winter, think about using roasted vegetables. Butternut squash or Brussels sprouts can add warmth. They create a heartier dish, great for colder days. You can also toss in some dried cranberries for sweetness. Seasonal changes keep your salad exciting and fun! To keep your cilantro lime quinoa salad fresh, follow these tips: - Refrigeration: Place leftovers in an airtight container. Store in the fridge. This helps lock in flavors and moisture. Eat within 3 to 5 days for the best taste. - Freezing Options: You can freeze this salad, but it may change texture. Use a freezer-safe container. Make sure to leave some space for expansion. Thaw in the fridge before eating. Consume within 1 to 2 months for the best quality. - How Long it Lasts in the Fridge: The salad stays fresh for 3 to 5 days in the fridge. If you notice changes in smell or color, it’s best to discard it. - Signs of Spoilage: Look for a slimy texture or off smell. These are signs the salad has gone bad. If the veggies look wilted, it's time to toss it. Always trust your senses when judging freshness. Can I make this salad ahead of time? Yes, you can make this salad ahead of time. It stores well in the fridge. I suggest making it a few hours before serving. This gives the flavors time to mix and deepen. Just keep it in an airtight container. Can I use different grains instead of quinoa? Absolutely! You can use grains like brown rice, farro, or barley. Each grain brings its own taste and texture. Just adjust the cooking times based on your chosen grain. Is this salad gluten-free? Yes, this salad is gluten-free. Quinoa is a great choice for those avoiding gluten. It’s a complete protein, which means it has all nine essential amino acids. What are the health benefits of the ingredients in this salad? This salad is packed with health benefits. Quinoa is high in protein and fiber. Black beans provide more protein and are rich in iron. Bell peppers and tomatoes are full of vitamins A and C. Cilantro adds a fresh flavor and has antioxidants. Lime juice boosts your immune system too! You can find the full recipe [here](Full Recipe). This blog post covered how to make a delicious cilantro lime quinoa salad. We discussed key ingredients, step-by-step cooking, and tips for flavor. You can personalize the salad with different veggies and dressings. I shared storage tips to keep leftovers fresh. Enjoy experimenting with this dish, and let the flavors inspire you. Healthy eating can be fun and easy. Your taste buds and body will thank you!](https://cookingwells.com/wp-content/uploads/2025/07/718122cf-a115-460a-abaf-988029e5daab.webp)
Looking for a fresh and tasty dish that’s easy to make? You’ll love this Cilantro Lime Quinoa Salad! It’s packed

Get ready to savor the flavors of fall with my Pumpkin Cream Cheese Muffins! This delightful recipe combines soft pumpkin
![To make Sesame Garlic Noodles, gather these fresh and flavorful ingredients. Each one plays a key role in creating this tasty dish. - Noodles and Bases - 8 oz. egg noodles: These are soft and absorb flavors well. - Sauces and Seasonings - 3 tablespoons sesame oil: This adds a nutty taste. - 4 cloves garlic, minced: Fresh garlic gives a strong flavor. - 2 tablespoons soy sauce: It adds saltiness and umami. - 1 tablespoon rice vinegar: This brings a light tang. - 1 tablespoon honey or maple syrup: This balances the flavors with sweetness. - 1 teaspoon red pepper flakes: Use these to control the spice level. - Garnishes and Extras - 2 green onions, chopped: They add a fresh crunch. - 1 tablespoon sesame seeds (toasted): These provide texture and extra flavor. - Fresh cilantro for garnish: This adds a bright finish. With this Full Recipe, you're ready to create a delicious meal that is quick and easy! 1. Boiling Techniques: Fill a large pot with water. Add a pinch of salt. Bring it to a rolling boil. 2. Timing for Al Dente: Add the egg noodles to the pot. Cook them for about 6 to 8 minutes. Check the package for specific timing. You want them firm but not hard. 3. Draining and Setting Aside: Once cooked, drain the noodles in a colander. Rinse them briefly with cold water to stop cooking. Set them aside to cool. 1. Mixing Techniques: Grab a small bowl. Add sesame oil, minced garlic, soy sauce, rice vinegar, and honey. Mix it all well with a whisk or a fork. 2. Adjusting Sweetness and Spice: Taste the sauce. If you want it sweeter, add more honey. For more spice, toss in some red pepper flakes. 1. Cooking Methods: Heat a large skillet over medium heat. Add the cooked noodles to the skillet. 2. Achieving the Perfect Coat: Pour the sauce over the noodles. Use tongs to toss the noodles until they are evenly coated. 1. Recommended Garnishes: Once the noodles are heated through, stir in chopped green onions and sesame seeds. 2. Final Touches: Taste the noodles again. If needed, add a splash of soy sauce. Serve on plates and top with fresh cilantro for a bright finish. - Best Practices for Leftovers After enjoying your sesame garlic noodles, let them cool down. Store them in an airtight container. They last up to three days in the fridge. Avoid leaving them out for too long to keep them fresh. - Reheating Techniques When you want to enjoy leftovers, heat them on the stove. Add a splash of water or oil to help them steam. Stir often to avoid sticking. You can also use the microwave, but cover the dish to keep moisture in. - How to Cook Perfect Noodles Use a large pot with plenty of salted water. Bring it to a rolling boil before adding the noodles. Cook them until they are al dente. This means they should be firm but not hard. Drain the noodles right away to stop the cooking. - Enhancing Flavor Profiles To boost the taste, try adding fresh herbs like cilantro or basil. You can also sprinkle more sesame seeds on top. If you like spice, add more red pepper flakes. Taste your dish as you go. Adjust the soy sauce to suit your flavor. - Alternative Noodles If you want a different base, try rice noodles or whole wheat noodles. They cook slightly differently, so check the package instructions. You can also use zoodles (zucchini noodles) for a low-carb option. - Vegan Options To make this dish vegan, use maple syrup instead of honey. Ensure your soy sauce is labeled as vegan. You can also add tofu for protein. Cook the tofu until golden before mixing it in with the noodles. For the full recipe, refer to the earlier section. Enjoy your cooking! {{image_2}} You can easily add protein to your sesame garlic noodles. Options like chicken, tofu, or shrimp work well. For chicken, use thin strips and cook them in the skillet first. For tofu, opt for firm tofu and cube it. Sauté the tofu until golden for extra flavor. If you prefer shrimp, add them to the skillet until they turn pink. Each choice adds taste and makes the dish more filling. Incorporating seasonal vegetables can elevate your dish. Try bell peppers, broccoli, or snap peas for color and crunch. Chop the veggies into bite-sized pieces. Sauté them in the skillet for a few minutes before adding the noodles. This way, they cook evenly and stay crisp. Feel free to mix and match your favorite vegetables for variety. If you're a fan of heat, adjust the spice level easily. Start with more red pepper flakes for a kick. You can also add chili oil for another layer of heat. For a unique twist, try incorporating sliced jalapeños or sriracha. Adjust the spice until it fits your taste. It’s your dish, so make it as spicy as you like! When storing your sesame garlic noodles, follow these simple steps: - Refrigeration Tips: Place leftovers in an airtight container. Keep them in the fridge. They will stay fresh for a few days. Make sure to cool them before sealing the container to prevent moisture buildup. - Freezing Methods: If you want to save them longer, freezing is a great option. Place the cooled noodles in a freezer-safe bag. Remove as much air as possible to avoid freezer burn. They can last up to three months in the freezer. - How Long It Lasts in the Fridge: Sesame garlic noodles can last about 3 to 5 days in the fridge. Always check for freshness before eating. - Signs of Spoilage: Look for changes in color or smell. If the noodles smell sour or look slimy, it’s best to throw them away. Staying safe is key! By following these storage tips, you can enjoy your sesame garlic noodles later without worry. For the full recipe, check out the [Full Recipe]. Sesame garlic noodles are a simple yet tasty dish. They feature egg noodles tossed in a savory sauce. This sauce blends sesame oil, garlic, soy sauce, and a hint of sweetness. The result is a flavorful meal that is both satisfying and comforting. You can add veggies or protein to make it heartier. The dish is popular in many Asian cuisines and is loved for its rich taste and quick preparation. Yes, you can make sesame garlic noodles ahead of time. Cook and toss the noodles with the sauce, then store them in the fridge. To keep them fresh, place them in an airtight container. When you’re ready to eat, reheat them in a skillet. Add a splash of water or soy sauce to help the noodles warm up evenly. This makes meal prep easy and saves time on busy days. Sesame garlic noodles offer several health benefits. The ingredients provide essential nutrients. Garlic boosts your immune system and adds flavor without extra calories. Sesame oil contains healthy fats that can support heart health. Egg noodles give you energy from carbohydrates. You can also add vegetables for more vitamins and fiber. This dish can be a balanced meal when you include fresh ingredients. You can find sesame garlic noodles in many Asian restaurants. Look for spots that serve Chinese or Thai food. These places often have similar noodle dishes on their menu. You can also check local bistros or cafes that focus on fusion cuisine. If you want to try a new place, ask friends or search online for recommendations. Enjoy tasting different versions of this dish! In this article, we explored how to make Sesame Garlic Noodles. I covered the key ingredients, from noodles to sauces, garnishes, and extras. You learned step-by-step cooking techniques, including how to prepare, combine, and add garnishes for the best flavor. Remember to store leftovers properly and try out ingredient substitutions to suit your taste. Whether you add protein, seasonal veggies, or spice it up, these noodles can be made your own. Enjoy this versatile dish, packed with flavor and easy to make!](https://cookingwells.com/wp-content/uploads/2025/07/883c7019-ecbd-4968-a923-605183926f4f.webp)
Craving something quick, tasty, and loaded with flavor? Look no further! In this post, I’ll show you how to make

Are you ready to beat the summer heat with a delightful treat? These Berry Yogurt Popsicles are not only refreshing
![To make this dish, you will need some key items. Here’s what to gather: - 4 boneless, skinless chicken breasts - 1 tablespoon olive oil - Salt and pepper to taste - 1 cup fresh pineapple, diced - 1 medium red bell pepper, finely chopped - 1/2 red onion, finely diced - 1 jalapeño, seeded and minced - 1/4 cup fresh cilantro, chopped - Juice of 1 lime - 1 teaspoon honey (optional) These ingredients create a great balance of flavors. The juicy chicken pairs perfectly with the sweet and spicy salsa. You can add your own twist to the salsa. Here are some ideas: - Mango for extra sweetness - Avocado for creaminess - Corn for texture - Black beans for protein Feel free to mix and match these extras. It allows you to create a version that fits your taste. The right seasoning elevates this dish. Here are some essential tips: - Rub olive oil on the chicken. It keeps it moist. - Use salt and pepper generously. This enhances the chicken flavor. - Marinate the chicken for at least 30 minutes. This helps infuse the spices. You can even add garlic powder or smoked paprika for a deeper flavor. These steps bring out the best in your grilled chicken. For the complete recipe, check out the [Full Recipe]. Start by getting your grill ready. Preheat it to medium-high heat. Next, take your chicken breasts and rub them with olive oil. Add salt and pepper to both sides. This will bring out the flavor. While the grill heats up, you can make your salsa. Once your grill is hot, place the chicken breasts on it. Cook each side for about 6-7 minutes. You want them to reach an internal temperature of 165°F (75°C). This ensures they are safe to eat. After grilling, let them rest for a few minutes. This helps keep the chicken juicy. In a mixing bowl, combine the diced pineapple, red bell pepper, red onion, jalapeño, cilantro, and lime juice. If you like a touch of sweetness, add honey. Stir everything well to mix. This salsa brings a burst of flavor to the chicken. After the chicken rests, top it with your fresh pineapple salsa. For the full recipe, check the details above. To grill chicken well, start with a hot grill. This helps seal in juices. I suggest preheating it for about 10 minutes. Next, make sure to oil the grill grates. This prevents sticking. Cook the chicken for 6-7 minutes on each side. Use a meat thermometer to check the internal temperature. It should reach 165°F (75°C). Let the chicken rest for a few minutes after grilling. This step keeps it juicy. To boost the flavor, marinate the chicken before grilling. A simple mix of olive oil, salt, and pepper works great. You can add lime juice for a zesty touch. For the salsa, fresh ingredients make a big difference. Use ripe pineapple for sweetness. The red bell pepper adds crunch and color. Cilantro gives a fresh note, while jalapeño adds heat. Adjust these ingredients to match your taste. Presentation matters. Serve the chicken on a colorful plate. Spoon the pineapple salsa over the top. This adds a vibrant look. You can also garnish with extra cilantro leaves. Add lime wedges on the side for a pop of color. A sprinkle of salt can enhance the dish. This dish not only tastes good but also looks beautiful. For more details, check out the Full Recipe. {{image_2}} You can change the fruit in your salsa. Try mango for a sweet twist. It adds a bright, sunny flavor. You can also use kiwi for a tart kick. Papaya works well, too, and gives a smooth texture. Each fruit brings its own charm. Mix and match to find your favorite! Grilling is great, but you have options. You can bake the chicken in your oven. Set it to 375°F (190°C) and bake for 25-30 minutes. If you want more flavor, try searing the chicken in a skillet. This adds a nice crust. You can also use a slow cooker for juicy chicken. Cook on low for 4-6 hours. Each method makes the dish fun and easy. Summer calls for fresh and light meals. Serve the chicken with a side salad or on tacos. In the fall, pair it with roasted veggies. This warms you up and adds depth. Winter brings hearty grains like quinoa or rice. In spring, top it with fresh herbs for a bright look. Each season gives you a chance to play with flavors. Use the Full Recipe to explore these ideas! After enjoying your pineapple salsa grilled chicken, store any leftovers in an airtight container. Keep the chicken and salsa separate if you can. This keeps the chicken juicy and the salsa fresh. Place the container in the fridge. Leftovers will stay good for about three days. When it’s time to eat your leftovers, reheat the chicken gently. Use a microwave or an oven. For the microwave, place the chicken on a plate. Heat for one minute, check, and heat more if needed. If using an oven, set it to 350°F. Cover the chicken with foil to keep it moist. Heat for about 10 minutes. Serve the chicken with fresh salsa on top. You can freeze both the chicken and salsa. First, let the chicken cool completely. Wrap it tightly in plastic wrap. Then place it in a freezer bag. For the salsa, use a freezer-safe container. Leave some space at the top, as it will expand. You can freeze the chicken for up to three months. The salsa can stay good for about a month. Just remember to label everything with the date. When you are ready to eat, thaw in the fridge overnight before reheating. For full recipe details, check out the recipe section. If you want a different fruit, try mango or peach. Both fruits bring sweetness and brightness. You can also use diced tomatoes for a savory twist. Each choice adds a unique flavor to your salsa. You can marinate the chicken for about 30 minutes to 2 hours. This time allows the chicken to soak up the flavors. If you marinate too long, the chicken can become mushy. Keep an eye on it for the best results. Yes, you can prepare the salsa ahead of time. Just store it in the fridge for up to 2 days. The chicken can also be marinated early. Grill it fresh when you are ready to eat. For the full recipe, check out the details above. In this post, we explored how to make delicious pineapple salsa grilled chicken. We covered key ingredients and seasoning methods to enhance flavor. The step-by-step guide made grilling chicken easy and fun. You can customize the salsa with different fruits and cooking methods. Also, proper storage ensures your leftovers stay fresh. Enjoy experimenting with this recipe. Let your taste buds guide you to new flavors. This dish can be your go-to for many meals.](https://cookingwells.com/wp-content/uploads/2025/07/8519df45-44c5-44e0-aa70-bc1ccfd2ae24.webp)
If you’re looking for a dish that screams summer, you’ve found it! Pineapple Salsa Grilled Chicken combines juicy, grilled chicken
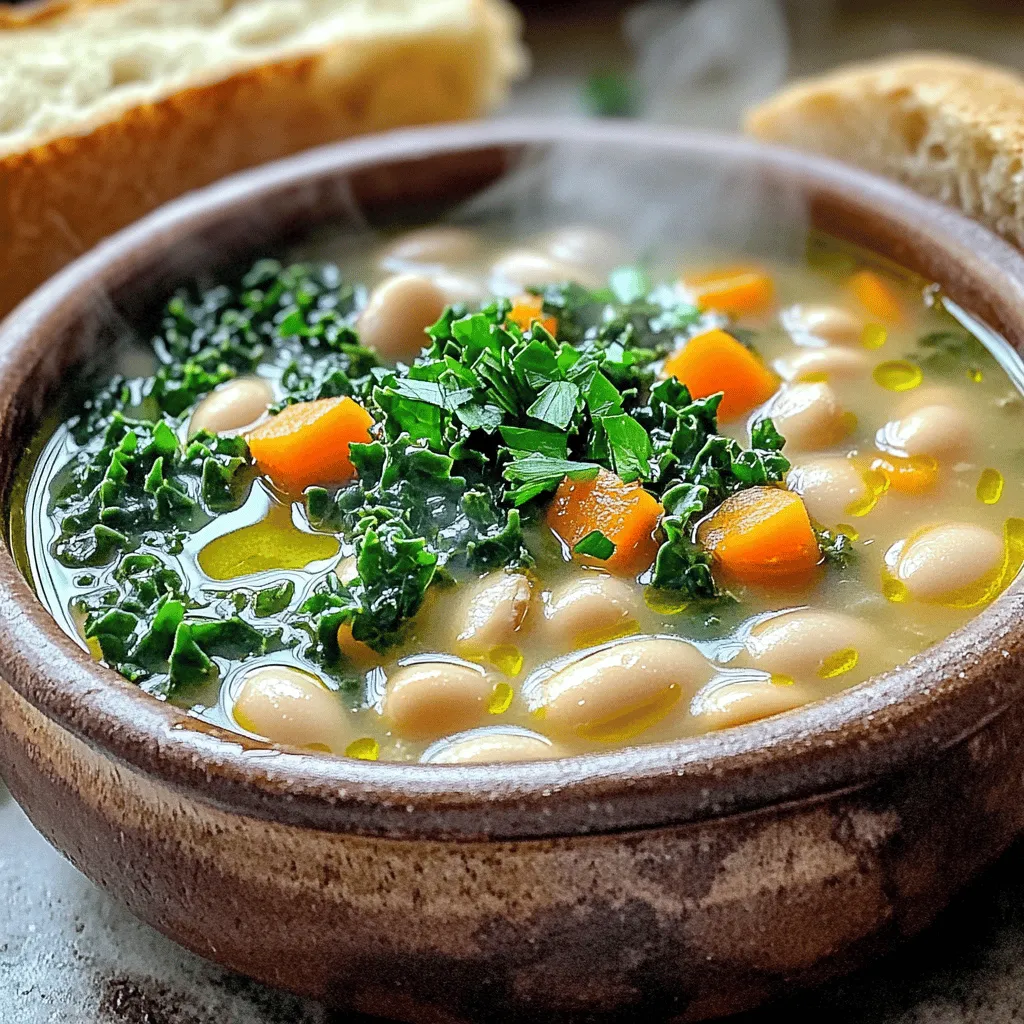
If you’re seeking a meal that warms your soul and fuels your body, look no further than Tuscan White Bean
![To make sweet chili glazed meatballs, you need these key ingredients: - 1 lb ground chicken or turkey - 1/2 cup breadcrumbs - 1/4 cup grated Parmesan cheese - 1/4 cup fresh parsley, chopped - 1 egg, beaten - 3 cloves garlic, minced - 1 teaspoon ginger, grated - Salt and pepper to taste - 1/2 cup sweet chili sauce - 2 tablespoons soy sauce - 1 tablespoon rice vinegar - 1 teaspoon sesame oil - Sesame seeds (for garnish) These ingredients create a nice mix of flavors and textures. The ground chicken or turkey keeps them light, while the breadcrumbs bind them well. The Parmesan cheese adds a savory touch. You can add some fun garnishes or extras to make your meatballs even better: - Chopped green onions - Crushed red pepper flakes for heat - Chopped cilantro for freshness - A squeeze of lime juice for a tangy kick These options let you customize the dish to your taste. You can mix and match based on what you have at home. Don’t worry if you can’t find an ingredient! Here are some easy swaps: - Use ground beef or pork instead of chicken or turkey. - Swap breadcrumbs for crushed crackers or oats. - Try mozzarella instead of Parmesan for a different cheese flavor. - Use coconut aminos instead of soy sauce for a gluten-free option. These substitutions can help you use what you have on hand. They still keep the spirit of the dish intact. For the full recipe, check out Sweet Chili Glazed Meatballs. Start by preheating your oven to 400°F (200°C). This step is vital for even cooking. While the oven heats, line a baking sheet with parchment paper. This will help the meatballs cook nicely without sticking. In a large bowl, combine the following ingredients: - 1 lb ground chicken or turkey - 1/2 cup breadcrumbs - 1/4 cup grated Parmesan cheese - 1/4 cup fresh parsley, chopped - 1 egg, beaten - 3 cloves garlic, minced - 1 teaspoon ginger, grated - Salt and pepper to taste Mix these items well but don’t overwork it. You want a good blend without making the meat tough. Now, use your hands to shape the mixture into 1-inch meatballs. Place them evenly on the prepared baking sheet. Make sure they are not too close together. Bake the meatballs for about 20 minutes. They should turn golden brown and be fully cooked. While the meatballs bake, grab a small bowl. Whisk together: - 1/2 cup sweet chili sauce - 2 tablespoons soy sauce - 1 tablespoon rice vinegar - 1 teaspoon sesame oil Mix until all the ingredients blend well. This glaze adds a wonderful flavor. Once the meatballs are done, take them out of the oven. Brush or toss the hot meatballs in the sweet chili glaze until they are well coated. For extra flavor, you can return them to the oven. Broil them for 2-3 minutes, but watch closely to avoid burning. Finally, sprinkle sesame seeds on top for a nice finish. Now, you’re ready to serve these delicious meatballs warm. For the full recipe with details, check out the [Full Recipe]. To get the best meatball texture, you want them to be tender but firm. Start with ground chicken or turkey. These meats keep the meatballs light and fluffy. Add breadcrumbs to help them hold together. Don’t overmix the meat; just combine the ingredients well. This keeps them from becoming tough. Make sure to shape them into even 1-inch balls for even cooking. Herbs and spices can really boost the flavor of your meatballs. Fresh parsley adds a nice touch. You can also try adding some chopped green onions or cilantro for a fresh kick. Grated ginger gives a subtle warmth. If you like a little heat, consider adding red pepper flakes. These small changes can make your meatballs truly stand out. One common mistake is overcooking the meatballs. Keep an eye on them in the oven. Remove them once they are golden brown. Another mistake is using too much moisture in the mix. If the mixture feels too wet, add more breadcrumbs. Lastly, don’t forget to let the meatballs rest for a few minutes after cooking. This helps keep them juicy. For the full recipe, check out the section above. {{image_2}} You can use many types of meat for these meatballs. Ground chicken or turkey works well. You can also use ground beef or pork for a richer flavor. If you want a lighter option, try ground lamb. For a vegetarian choice, mix cooked lentils or chickpeas with breadcrumbs and spices. Each meat brings its own taste and texture, so feel free to experiment. While sweet chili sauce is a star, you can switch it up. Try teriyaki sauce for a sweet and salty kick. A spicy sriracha sauce adds heat if you like a kick. You can also use barbecue sauce for a smoky flavor. Mix in some honey or lime juice for a fresh twist. Each sauce changes the dish, so explore what you love best. These meatballs fit many occasions. For a casual party, serve them on toothpicks as appetizers. Pair them with rice for a family dinner. You can also toss them in a salad for a light lunch. If you’re celebrating, make a big batch and serve with drinks. They are easy to share and always popular. Check out the Full Recipe for more tips on serving! To keep your sweet chili glazed meatballs fresh, place them in an airtight container. I like to layer parchment paper between the meatballs to avoid sticking. Make sure they cool down first. This will help keep their texture nice. Store the container in the fridge for up to three days. Freezing meatballs is a great option for later meals. First, place the cooled meatballs on a baking sheet in one layer. Freeze them for about an hour. Once frozen, transfer them to a freezer bag. Remove as much air as possible. They can last for up to three months in the freezer. When you're ready to eat them, thaw overnight in the fridge. Reheat them in the oven at 350°F (175°C) until hot. You can also use a microwave for a quick meal. When stored properly, sweet chili glazed meatballs have a good shelf life. In the fridge, they stay fresh for about three days. If frozen, they last much longer. Just remember that the quality may change over time. It's best to enjoy them within three months for the best taste. Following these tips will ensure you enjoy your sweet chili glazed meatballs at their best. For the full recipe, check out the details above. Yes, you can make Sweet Chili Glazed Meatballs ahead of time. Prepare the meatballs as directed in the Full Recipe. After baking, let them cool completely. Store them in an airtight container in the fridge. They will last for about three days. You can also freeze them for up to three months. Just remember to thaw them in the fridge before reheating. There are many tasty side dishes you can serve with meatballs. Here are a few ideas: - Steamed rice - Stir-fried vegetables - Noodles with soy sauce - Garlic bread - A fresh salad These sides balance the sweet and spicy flavors of the meatballs. To adjust the spiciness of the glaze, you have options. If you want it milder, use less sweet chili sauce. You can also add honey for sweetness without heat. If you like it spicier, add a splash of hot sauce or a pinch of red pepper flakes. This way, you can find the perfect level of heat for your taste. The best way to reheat cooked meatballs is in the oven. Preheat your oven to 350°F (175°C). Place the meatballs on a baking sheet and cover them with foil. Heat for about 15-20 minutes. You can also reheat them in the microwave, but they may lose some texture. Add a splash of water to keep them moist when using the microwave. In this article, we explored making sweet chili glazed meatballs. We covered key ingredients, easy steps, and helpful tips. You can mix and match flavors for your taste. Whether you use different meats or sauces, these meatballs are versatile. Remember, storing leftovers properly keeps them tasty. Making them ahead saves time for busy days. I hope these ideas inspire you to create delicious meals. Enjoy your cooking and happy eating!](https://cookingwells.com/wp-content/uploads/2025/07/8868861d-2dc4-4c91-a214-64805ab82972.webp)
Are you ready to elevate your dinner game? These Sweet Chili Glazed Meatballs are not only flavorful but also super
