Skip to content
DisclaimerTerms Of UseGDPR PolicyCookie Policy

Cooking Wells

  • Home
  • Drinks
  • Appetizers
  • Dinner
  • Dessert
  • About
  • Contact
  • Privacy Policy
DisclaimerTerms Of UseGDPR PolicyCookie Policy

NO-ING-IMG

- 2 cups all-purpose flour - 1/3 cup granulated sugar - 1 tablespoon baking powder - 1/2 teaspoon salt - 1/2 cup unsalted butter, cold and cubed - Zest of 1 large lemon - 1 cup fresh blueberries (or frozen if unavailable) - 1/2 cup heavy cream - 1 large egg - 1 teaspoon vanilla extract - 1 cup powdered sugar - 2 tablespoons fresh lemon juice - 1-2 teaspoons milk (as needed) I love the fresh taste of lemon blueberry scones. The bright lemon zest adds a punch. The blueberries burst in your mouth, giving a sweet contrast. To make the scones, start with the main ingredients. You need all-purpose flour for a good base. Granulated sugar adds sweetness. Baking powder helps the scones rise. Salt balances the flavor. The cold butter gives a nice flaky texture. Next, we need flavor enhancers. The lemon zest is key for that citrus zing. Fresh blueberries are juicy and sweet. If you can't find fresh, frozen blueberries work just fine. For the wet ingredients, heavy cream adds richness. One egg helps bind everything together. The vanilla extract brings a warm note to the scones. Finally, the glaze is what makes these scones special. It’s simple: powdered sugar mixed with fresh lemon juice. You may need a bit of milk to get the right drizzle. You can find the full recipe to make these delightful scones. Follow each step, and you’ll end up with a treat that everyone loves. - Preheat your oven to 400°F (200°C) and line a baking sheet with parchment paper. - Whisk together the flour, sugar, baking powder, and salt in a large mixing bowl. - Blend cold, cubed butter into the dry ingredients until a coarse crumb texture forms. - Gently fold in blueberries and lemon zest without crushing the berries. - Combine heavy cream, egg, and vanilla in a separate bowl and add to the dry mixture. - Shape the dough and cut it into wedges before placing on the prepared baking sheet. - Bake for 15-20 minutes until golden brown and cool briefly on a wire rack. - Drizzle prepared glaze over warm scones. To see the complete recipe, check out the [Full Recipe]. To get the best scones, start with cold butter. Cold butter gives your scones a flaky texture. Cut the butter into small cubes before mixing. It helps to keep the butter cold until you mix it in. Also, avoid over-mixing the dough. Just mix until you see no dry flour. This keeps the scones light and airy. I love serving these scones warm. A pat of clotted cream or butter makes them even better. For a pop of color, garnish with lemon zest and fresh blueberries. This simple touch makes your presentation shine. You can even serve them on a rustic wooden board for a cozy feel. If you have leftover scones, store them in an airtight container. They stay fresh for 1-2 days at room temperature. For longer storage, freeze the baked scones. Just place them in a freezer bag after they cool. When you want one, reheat it in the oven. This way, they taste like fresh-baked again! {{image_2}} You can play with flavors in your scones. Try adding lemon extract for a stronger lemon taste. This gives your scones a bright and bold flavor. You can also mix in other fruits. Raspberries and strawberries work well. They add a fun twist to the classic blueberry scone. Want a healthier scone? Use whole wheat flour instead of all-purpose flour. This change boosts fiber and nutrients. You can also swap half of the butter for Greek yogurt. This cuts down on fat while keeping your scones moist and tasty. For those needing gluten-free options, use a gluten-free flour blend. It works just like regular flour and keeps the scones light. If you prefer less sweetness, adjust the sugar content. This way, you can enjoy your scones without too much sugar. Exploring these variations makes your scones unique while still following the [Full Recipe]. Store your scones in an airtight container for 1-2 days. This keeps them fresh and tasty. If you leave them out too long, they may dry out. You can refrigerate scones for up to a week in a sealed container. This helps maintain moisture. Just remember to enjoy them before they lose their charm! To freeze baked scones, place them in a single layer on a baking sheet. Once they are frozen, transfer them to a freezer bag. This method keeps them fresh for up to 2 months. When you're ready to enjoy, just reheat them straight from the freezer. This way, you can have a warm treat anytime! For the full recipe, check the earlier section. - Yes, frozen blueberries work well; do not thaw before adding. Frozen blueberries keep their shape and add a nice burst of flavor. They also help your scones stay moist during baking. - They should be golden brown and a toothpick should come out clean. Check the scones around the 15-minute mark. If they look golden and the toothpick is clean, they’re ready to enjoy. - Reheat in the oven at 350°F for about 5-10 minutes for a freshly baked taste. This warms them up nicely and restores their flaky texture. Microwave reheating can make them soggy, so avoid that. - Whisk together powdered sugar, lemon juice, and milk until smooth and drizzle over cooled scones. Aim for a thick but pourable consistency. This glaze adds a sweet, tangy finish to your scones. - Yes, prepare the dough and freeze unbaked scones for easy baking later. This is a great time-saver for busy mornings. Just bake them straight from the freezer, adding a few extra minutes to the bake time. You now know how to make delicious lemon blueberry scones. Start with simple ingredients like flour, sugar, and butter. Mix in fresh blueberries and lemon zest for flavor. Follow the steps to create a tasty dough and bake until golden brown. Remember, using cold butter and not over-mixing gives the best texture. Enjoy your scones warm with clotted cream, or try different fruit and recipe variations. These tips ensure your baking will be a hit every time. Happy baking!

Lemon Blueberry Scones Fresh and Flavorful Delight

Craving a warm, buttery treat? Look no further than these Lemon Blueberry Scones! With zesty lemon and fresh blueberries, this

- 1 lb sirloin steak, cut into bite-sized pieces - 1 lb baby potatoes, halved - 4 tablespoons unsalted butter - 4 cloves garlic, minced - 1 teaspoon dried rosemary - 1 teaspoon dried thyme - Salt and pepper to taste - 2 tablespoons olive oil - Fresh parsley, chopped (for garnish) You can swap the sirloin for other cuts like ribeye or flank steak. If you want a different texture, try using Yukon gold or red potatoes. For a gluten-free option, ensure your garlic and herbs are certified gluten-free. When choosing steak, look for cuts with good marbling. This means fat lines within the meat. Fresh baby potatoes should feel firm and smooth, without any soft spots. For garlic, choose bulbs that are dry and firm. This ensures a strong flavor. Fresh ingredients make a big difference in taste. First, wash the baby potatoes under cold water. This helps remove dirt and debris. Next, cut the potatoes in half. This makes them cook faster and absorb flavor better. Set the potatoes aside for now. For the steak, take your sirloin and cut it into bite-sized pieces. Season them with salt, pepper, and dried rosemary. You want every piece to have some flavor. Heat a large skillet over medium-high heat. Add 2 tablespoons of olive oil to the skillet. Once hot, add the seasoned steak pieces. Sear them for about 2-3 minutes on each side. This gives them a nice brown crust. After the steak is done, remove it from the skillet and set it aside. In the same skillet, add the cooked baby potatoes. Cook them for about 5 minutes until they start to brown. This adds a great texture and taste. Now, reduce the heat to medium. Push the potatoes to one side of the skillet. Add 4 tablespoons of butter and 4 cloves of minced garlic to the empty space. Let the butter melt for about 30 seconds. Once melted, mix the garlic with the potatoes. Stir in 1 teaspoon of dried thyme. Then, return the cooked steak to the skillet. Toss everything gently until it is well coated in the garlic butter. Taste your dish and add more salt or pepper if needed. Remove from heat and garnish with fresh parsley before serving. For the full recipe, check out the detailed steps above. To make the best steak, use a meat thermometer. For rare steak, cook to 125°F. For medium-rare, aim for 135°F. If you like it medium, go for 145°F. For medium-well, cook until 150°F. Finally, well-done steak reaches 160°F. These numbers help you cook steak just right. You can boost the taste of your steak and potatoes by adding herbs. Try fresh or dried rosemary and thyme. These herbs pair well with garlic. You can also make a marinade. Mix olive oil, garlic, and herbs to soak the steak. Leave it for at least 30 minutes. This makes the steak more flavorful. Using a one-pan method makes cooking easy. Start with the steak, then cook the potatoes in the same pan. This adds flavor. To prevent sticking, use enough oil. Make sure the pan is hot before adding the steak. This seals in the juices. If the food sticks, let it cook a bit longer. {{image_2}} You can switch up the protein in this dish. Try using chicken instead of steak. Chicken thighs work well and stay juicy. If you like seafood, shrimp can be a great choice too. Just cook the shrimp for about 2-3 minutes until they turn pink. For a vegetarian option, use hearty mushrooms or tofu. Both soak up the garlic butter flavor nicely. Change the flavor by using different garlic infusions. You can roast garlic for a sweeter taste. If you want some heat, add chili flakes to the butter. This gives a nice kick without overpowering the dish. You can also mix in fresh herbs like basil or oregano for added taste. Add seasonal vegetables to keep it fresh. In spring, asparagus or peas add bright flavor. In summer, try zucchini or bell peppers for crunch. In fall, root veggies like carrots or butternut squash work great. Using local produce adds flavor and supports your community. Mix these veggies in with the potatoes for a colorful dish. For the full recipe, check the earlier section. After enjoying your Garlic Butter Steak and Potatoes Skillet, it’s wise to store leftovers right. Let the dish cool down for about 30 minutes. Then, place it in an airtight container. This helps keep the flavors fresh. - For refrigeration, the dish lasts up to 3 days. - If you plan to eat it later, freezing is a great option. Use freezer-safe bags or containers. When it’s time to enjoy leftovers, you want them warm and tasty. There are a few easy ways to reheat. - Use a skillet over medium heat. Add a splash of water or broth to keep it moist. - You can also microwave it. Place the dish in a microwave-safe bowl and cover it. Heat in short bursts, stirring in between. These methods help keep the steak tender and the potatoes soft. You can keep your Garlic Butter Steak and Potatoes Skillet in the fridge for up to 3 days. If you freeze it, it’s best to eat within 2 months for the best flavor. When you thaw, do so in the fridge overnight. This keeps the taste great and helps with texture. To check if your steak is done, look for a few signs. The meat should feel firm but springy to the touch. You can also cut into the steak to see the color inside. For precise results, use a meat thermometer. A medium-rare steak should read 130°F to 135°F. For medium, aim for 140°F to 145°F. Let your steak rest for a few minutes before cutting. This helps keep it juicy. Yes, you can make this dish ahead of time. Cook the steak and potatoes as usual. Store them in the fridge for up to three days. When you’re ready to eat, reheat them in a skillet over low heat. Add a bit of butter to keep it moist. You can also make the garlic butter ahead. Store it in the fridge and mix it in when you're ready. This dish pairs well with many sides. Consider a fresh salad with greens and a light dressing. Steamed vegetables like broccoli or green beans also work great. For a heartier option, serve with garlic bread. You can even try a light pasta dish for a twist. Each option adds something special to your meal. Absolutely! This recipe is great for meal prepping. The steak and potatoes store well and reheat nicely. Make sure to cool them completely before you store them. Use airtight containers for best results. This way, you can enjoy a delicious meal during the week with minimal effort. This blog post covered a delicious garlic butter steak and potatoes skillet. We explored the key ingredients and their substitutes. I shared steps for prep and cooking, along with tips for perfecting your steak. We also discussed variations and storage tips to enhance your meal. In final thoughts, follow these steps for a tasty dish. Experiment with flavors and enjoy your cooking journey. Simple adjustments make a big difference. Happy cooking!

Garlic Butter Steak and Potatoes Skillet Delight

Are you ready to elevate your dinner game? My Garlic Butter Steak and Potatoes Skillet Delight is a one-pan wonder

To make a fresh and tasty Caprese pasta salad, gather these ingredients: - 8 oz. fusilli pasta - 1 cup cherry tomatoes, halved - 1 cup fresh mozzarella balls, drained - 1/2 cup fresh basil leaves, torn - 1/4 cup extra virgin olive oil - 2 tablespoons balsamic glaze - 1 teaspoon garlic powder - Salt and pepper to taste These items create a simple yet delightful dish. Each ingredient adds a layer of flavor. You can switch some ingredients if you need to. Here are a few ideas: - Use penne or rotini instead of fusilli for pasta. - Swap in grape tomatoes if you can't find cherry tomatoes. - Try burrata cheese instead of mozzarella for a creamier taste. - Use dried basil if fresh basil is not available, but use less, as dried herbs are stronger. - Substitute lemon juice for balsamic glaze for a zesty kick. These swaps keep the dish fresh while making it easy to use what you have. Fusilli is perfect for this salad because its twists hold the dressing well. Here are other great pasta choices: - Penne, which has a smooth surface and pairs well with the sauce. - Rotini, with its spiral shape, also clings to the dressing nicely. - Farfalle, or bow-tie pasta, adds fun shapes and texture. Choosing the right pasta helps create a tasty and enjoyable dish. For the full recipe, check the details above. To start, boil a pot of salted water. Once it bubbles, add the fusilli pasta. Cook it according to the package. Usually, this takes about 8-10 minutes. Stir often to keep it from sticking. When the pasta is tender, drain it in a colander. Rinse the pasta under cold water. This stops the cooking and cools it down. Now, let’s get the salad ingredients ready. Take your cherry tomatoes and slice them in half. The bright red color adds a nice touch. Next, drain the fresh mozzarella balls. They should be soft and creamy. Then, tear the fresh basil leaves into smaller pieces. This brings out their flavor and aroma. In a large mixing bowl, add the cooled pasta. Toss in the halved cherry tomatoes and the mozzarella balls. Gently mix them together. Then, add the torn basil leaves but save a few for later. In a smaller bowl, whisk together the olive oil, balsamic glaze, garlic powder, salt, and pepper. Pour the dressing over the pasta salad. Toss everything gently to coat the ingredients evenly. Taste the salad and adjust the seasoning if needed. Let it sit for 10-15 minutes. This helps the flavors blend nicely. Serve the salad in a big bowl or on individual plates. Drizzle with extra balsamic glaze and garnish with reserved basil leaves. Enjoy this fresh and flavorful delight! For the full recipe, you can refer to the earlier section. To cook fusilli pasta, use a large pot. Fill it with water and add salt. Bring the water to a boil. Add the pasta and stir it well. Cook according to the package time, usually 8-10 minutes. It should be al dente, firm but not hard. Drain the pasta in a colander. Rinse it with cold water to stop the cooking. This keeps the pasta firm for your Caprese pasta salad. To kick up the flavor, consider adding some extras. A pinch of red pepper flakes gives a nice kick. You can also use fresh lemon juice for brightness. For a richer taste, try adding pesto to the dressing. If you want creaminess, mix in some crumbled feta cheese. These additions will make your salad pop and impress your guests. When serving, a colorful dish looks great! Use a large bowl for sharing or individual plates for each guest. Drizzle some extra balsamic glaze on top for flair. Garnish with sprigs of fresh basil to add green color. You can also sprinkle some pine nuts for a crunchy texture. A well-presented salad makes it even more enjoyable. {{image_2}} You can easily add protein to your Caprese pasta salad. Chicken or shrimp work great. For chicken, use cooked, diced pieces. Simply toss them in with the pasta and veggies. For shrimp, try cooked, peeled shrimp. They add a nice touch of flavor. You can also use grilled chicken for a smoky taste. This boost in protein makes the salad hearty and filling. While the olive oil and balsamic glaze are perfect, try new dressings too. A lemon vinaigrette can awaken fresh flavors. It adds a bright zing to the dish. You can also use pesto for a herbal twist. Mix it with some olive oil for a creamy texture. If you like spicy, add red pepper flakes to the dressing. This gives the salad a fun kick. Changing the ingredients with the seasons makes this dish exciting. In summer, add fresh corn or bell peppers for crunch. In fall, try roasted butternut squash for sweetness. In winter, use arugula or spinach for a nice green color. Fresh herbs also change the taste; try dill or mint for a new flavor. Using seasonal ingredients keeps your salad fresh and vibrant. For the full recipe, check out the Caprese Pasta Salad Delight! To keep your Caprese pasta salad fresh, store it in an airtight container. Make sure the salad is cool before sealing it. This helps keep the flavors intact. You can also use a glass jar for easy storage. It’s best to refrigerate the salad right after serving. When ready to eat, check the salad. If it looks dry, add a splash of olive oil. Toss gently to mix in the oil. If you prefer it warm, heat it on low in a pan. Avoid high heat to keep the cheese from melting. The salad lasts about 3 days in the fridge. Cherry tomatoes and mozzarella stay fresh for this time. Basil may wilt sooner, so add it fresh if possible. Always check for off smells or changes in texture before eating. For the best taste, enjoy it within two days. For the full recipe, check the Caprese Pasta Salad Delight section above. Yes, you can prepare Caprese Pasta Salad ahead of time. I often do this for parties. Make the salad and let it chill in the fridge. The flavors blend better after a few hours. Just don’t add the dressing until you’re ready to serve. This keeps the pasta from getting soggy. You can easily customize Caprese Pasta Salad. Here are some ideas: - Add Protein: Try adding grilled chicken or shrimp for extra flavor. - Change the Cheese: Use feta or goat cheese if you prefer. - Add Veggies: Toss in bell peppers, cucumbers, or red onion for a crunch. - Switch Herbs: Try parsley or arugula instead of basil. - Spice It Up: Add a pinch of red pepper flakes for heat. These changes keep the salad fresh and fun! Caprese Pasta Salad is not gluten-free if you use regular fusilli pasta. However, you can use gluten-free pasta instead. Many options are available now, like chickpea or brown rice pasta. Check the label to ensure it is gluten-free. This way, everyone can enjoy the salad! Caprese pasta salad is easy and fun to make. We covered the key ingredients, cooking steps, and tasty tips. You can mix it up with proteins or dressings. Storing leftovers is simple, and the salad stays fresh. Remember, you can customize this dish for any occasion. Enjoy making this salad your way, and serve it with pride. Your friends and family will love it!

Caprese Pasta Salad Fresh and Flavorful Delight

Looking for a fresh and flavorful dish that’s easy to make? You’ve come to the right place! In this post,

- Oreo cookies: Regular or double-stuffed - Softened cream cheese - Semi-sweet chocolate chips - Coconut oil: Optional for smoother melting When I make these chocolate covered Oreo truffles, I start with the main ingredients. I choose either regular or double-stuffed Oreo cookies. The cream cheese must be softened to blend well. I also grab semi-sweet chocolate chips for the coating. If I want a smooth finish, I add coconut oil. This oil helps the chocolate melt better and coat the truffles evenly. - Crushed Oreos: For topping For garnishing, I use crushed Oreos. They add a nice crunch to the truffles. I sprinkle them on top while the chocolate is still wet. This way, the crumbs stick well. It makes each truffle look fancy and tasty. I love how these simple garnishes make the treat pop! To start, take your package of Oreo cookies and place them in a food processor. Pulse them until they turn into fine crumbs. You want them to look like sandy dirt. If you don’t have a food processor, you can also put them in a zip-top bag and crush them with a rolling pin. Next, grab a mixing bowl and add your crushed Oreos. Now, take 8 ounces of softened cream cheese and add it to the bowl. Use a spatula or your hands to mix them together. Keep mixing until the mixture is smooth and well blended. This step makes your truffles rich and creamy. Now it's time to shape your truffles. Scoop out small portions of the Oreo mixture, about 1 tablespoon each. Roll them into balls with your hands. Place these balls on a parchment-lined baking sheet. Once all the balls are formed, put them in the fridge for about 30 minutes. This chilling time helps them hold their shape. While the truffles chill, let’s melt the chocolate. In a microwave-safe bowl, combine 12 ounces of semi-sweet chocolate chips and 1 tablespoon of coconut oil, if you want a smoother finish. Microwave the mixture in 30-second intervals. Stir between each interval until the chocolate is fully melted and smooth. Once your truffles are chilled, it's time to coat them in chocolate. Dip each truffle ball into the melted chocolate. Use a fork or toothpick to help you with this. Make sure to let any excess chocolate drip off before placing them back on the parchment paper. This will keep them from being too messy. After coating, sprinkle the tops of the wet chocolate with crushed Oreos for garnish. This adds a nice touch. Now, return the truffles to the refrigerator for about 15 minutes. This final chill will help set the chocolate perfectly. For the full recipe, you can refer back to the instructions mentioned earlier. Enjoy your delicious creations! To get the best texture, use the right amount of cream cheese. Start with 8 oz, as in the Full Recipe. If your mixture feels too dry, add a little more cream cheese. If it feels too wet, add more crushed Oreos. The key is to make a smooth and creamy mixture, easy to roll. Melting chocolate can be tricky. If you find the microwave method hard, try a double boiler. Fill a pot with water and bring it to a gentle simmer. Place a heat-proof bowl on top, adding chocolate chips and coconut oil. Stir until melted and smooth. This method helps avoid burning the chocolate and keeps it silky. Serving your truffles well makes them even more special. Use a decorative plate or a pretty gift box. Line the box with colorful tissue paper for a nice touch. You can also drizzle some melted chocolate on top for style. Add a few extra crushed Oreos on the plate for a fun finish. These ideas will impress your guests or anyone you gift them to! {{image_2}} You can make these treats even better by adding flavor extracts. Try vanilla, almond, or peppermint. Just a few drops will enhance the taste. You can also switch chocolate types. Use milk chocolate for a sweeter truffle or dark chocolate for a rich flavor. Each option gives a unique twist to the classic taste. If you want a vegan version, swap cream cheese for a plant-based cream cheese. Use dairy-free chocolate chips instead of semi-sweet ones. For a gluten-free option, choose gluten-free Oreos. These swaps keep the fun while meeting different dietary needs. Think beyond crushed Oreos for fun toppings. Try sprinkles for a pop of color or chopped nuts for added crunch. Shredded coconut brings a tropical flair, while a drizzle of white chocolate adds elegance. Experiment with different toppings to make each truffle unique and exciting. To keep your chocolate covered Oreo truffles fresh, store them in an airtight container. Use parchment paper between layers to prevent sticking. Place the container in the fridge. This helps maintain their texture and flavor. Avoid keeping them at room temperature for too long. The chocolate can melt or become soft. You can freeze your truffles for longer storage. Place them on a baking sheet in a single layer. Freeze them for about two hours until they are firm. Then, transfer them to an airtight container or a freezer bag. They can last up to three months in the freezer. To thaw, move them to the fridge for a few hours before serving. This keeps their taste fresh. These truffles are best enjoyed within a week when stored in the fridge. They stay fresh and tasty for about 1 to 2 weeks. If you freeze them, they can last up to three months. After thawing, consume them within a week for the best flavor. Enjoy every bite! Yes, you can use crushed Oreos. This method works great for the filling. Crushing the Oreos helps mix them well with cream cheese. You get a consistent flavor and texture in each bite. It’s a fun way to get kids involved too! Just make sure to crush them finely. This way, the mixture stays smooth. You can use other ingredients if you don’t want cream cheese. Try using mascarpone cheese or Greek yogurt for a lighter option. Both will keep the truffles creamy while adding a different taste. You can also use nut butters like peanut or almond butter. These alternatives can change the flavor profile completely. Dipping truffles can be messy, but it’s fun! Use a fork or a toothpick to dip the truffles in melted chocolate. Make sure the chocolate is smooth and not too hot. Let the excess chocolate drip off before placing them back on the parchment paper. This way, you get a nice even coat. Most Oreo cookies are not gluten-free. They contain wheat flour, which has gluten. If you want gluten-free truffles, look for gluten-free Oreo alternatives. Many brands offer gluten-free cookies that taste great. Just check the packaging before buying. You can find pre-made Oreo truffles at many stores. Look in the bakery section of your local grocery store. Some specialty shops also sell them. If you prefer online shopping, check websites like Amazon or Etsy. Many bakers offer their tasty truffles for delivery. Adding flavor is easy and fun! You can mix in extracts like vanilla or almond. Try adding a pinch of sea salt for a sweet and salty combo. If you like spice, a sprinkle of cinnamon works well too. You can also use different types of chocolate for dipping, like white or dark chocolate. These small changes make your truffles unique and even tastier. For the full recipe, check out the previous sections. These Oreo truffles are simple and fun to make. We covered the main ingredients, easy steps, and tips for success. You can add flavors or modify the recipe to fit your needs. With these variations, you can impress everyone with your treats. Remember to store them properly for the best taste. Enjoy creating and sharing these delicious truffles. They are perfect for any occasion!

Chocolate Covered Oreo Truffles Delightful and Easy

Get ready to treat yourself to a sweet delight! Chocolate Covered Oreo Truffles are easy to make and taste amazing.

Cranberry Walnut Chicken Salad combines chicken, cranberries, and walnuts. This dish is fresh and tasty. You can serve it as a meal or a side. The balance of flavors makes it a favorite. Here’s what you need for this recipe: - 2 cups cooked chicken breast, shredded - 1/2 cup dried cranberries - 1/2 cup walnuts, chopped - 1/2 cup celery, finely chopped - 1/4 cup red onion, finely diced - 1/2 cup Greek yogurt - 2 tablespoons honey mustard - 1 tablespoon lemon juice - Salt and pepper to taste - Fresh arugula or mixed greens for serving You can swap ingredients if needed. For chicken, use canned or rotisserie chicken. If you avoid nuts, try sunflower seeds. For Greek yogurt, plain yogurt works well too. Use Dijon mustard instead of honey mustard for a different taste. If you want less sweetness, skip the honey mustard entirely. These changes keep the dish tasty. Start by gathering all your ingredients. Use 2 cups of cooked chicken breast, shredded. Chop 1/2 cup of walnuts and 1/2 cup of celery. Dice 1/4 cup of red onion. Measure out 1/2 cup of dried cranberries. This makes your prep easy and quick. In a large bowl, mix the shredded chicken, dried cranberries, chopped walnuts, celery, and red onion. This blend gives a nice texture and taste. In another bowl, whisk together the Greek yogurt, honey mustard, lemon juice, salt, and pepper until smooth. Pour this dressing over the chicken mix. Gently fold it in to coat everything well. It's important to be gentle to keep the chicken pieces intact. To boost the flavor, taste the salad after mixing. Adjust with more salt or pepper as needed. Chill the salad in the fridge for at least 30 minutes. This lets the flavors mix and improves the taste. Serve on a bed of fresh arugula or mixed greens for a delightful crunch. For a great look, use a clear bowl to show off the colorful ingredients. For a finishing touch, sprinkle extra walnuts and fresh cranberries on top. You can find the full recipe above for precise measurements and steps. When making cranberry walnut chicken salad, it’s easy to make some mistakes. First, don’t overcook your chicken. Overcooked chicken can become dry and tough. Use leftover roasted chicken for better flavor. Also, be careful with the salt. Too much salt can overpower the taste. Remember, you can always add more, but it’s hard to take away. Make sure to chop your celery and walnuts finely. Big chunks can make the salad hard to mix. Chilling your salad is very important. It allows the flavors to blend well. After you mix everything, cover your bowl with plastic wrap. Place it in the fridge for at least 30 minutes. For best results, chill for an hour. This waiting time makes each bite refreshing and tasty. If you have time, chill the chicken before mixing. It helps keep the salad cool and crisp. Presentation matters when serving your salad. Use a clear glass bowl to show off the colors. Bright red cranberries and green celery look great together. After serving, add extra walnuts and cranberries on top. This small touch makes the dish look special. Serve on a bed of fresh greens like arugula. It adds color and a nice crunch. For the full recipe, check the section above. {{image_2}} You can swap chicken for other proteins. Turkey works well and has a similar taste. For a vegetarian option, try chickpeas. They add a nice texture and protein. Tofu is another choice if you want something plant-based. Just make sure to press and cube it before mixing it in. In winter, add diced apples for crunch and flavor. In summer, fresh berries brighten the salad. You can also use nuts like pecans instead of walnuts. They give a different taste but work just as well. Experiment with different greens like spinach or kale for variety. If you want to change the dressing, try using mayo instead of Greek yogurt. This makes a creamier mix. You can also add a splash of apple cider vinegar for tang. For a spicy kick, mix in some sriracha. This gives the salad a fun twist. Check out the Full Recipe for more ideas! To keep your cranberry walnut chicken salad fresh, use an airtight container. This helps keep air out and flavors in. It’s best to store it in the fridge. If you plan to serve it later, don’t add greens until just before eating. This keeps them crisp and tasty. In the fridge, your salad will stay good for about three days. After that, it may lose flavor and texture. I do not recommend freezing this salad. Freezing can change the texture of the chicken and yogurt dressing. If you need to warm it, do so gently. Place the salad in a bowl and microwave it for short bursts. Heat in 15-second intervals, stirring in between. However, I suggest enjoying the salad cold. It tastes best that way! For more details, check the Full Recipe. You can serve this salad with many sides. Fresh bread pairs well. You might also enjoy it with a light soup. A fruit salad brings a nice contrast and sweetness. Try it alongside crunchy chips for a fun twist. If you want, serve it on a bed of mixed greens. This adds more texture and color to your meal. Cranberry walnut chicken salad stays fresh for about three days in the fridge. Make sure to keep it in an airtight container. After three days, the flavors may fade. If you notice any odd smells or colors, it's best to toss it. Always check before you eat leftovers. Yes, you can make this salad ahead of time. It tastes even better after a few hours in the fridge. The flavors meld and create a tasty dish. I recommend mixing the salad a day before serving. Just remember to keep it chilled. This way, it stays fresh and delicious for your meal. For the full recipe, check out the detailed instructions. We explored the main elements to make a delicious Cranberry Walnut Chicken Salad. You learned about the key ingredients, steps for preparation, and even helpful tips to avoid mistakes. I shared exciting variations to try and essential storage methods. Remember, cooking should be fun and creative. Feel free to experiment with flavors and ingredients. Enjoy making your salad and sharing it with loved ones!

Cranberry Walnut Chicken Salad Fresh and Tasty Meal

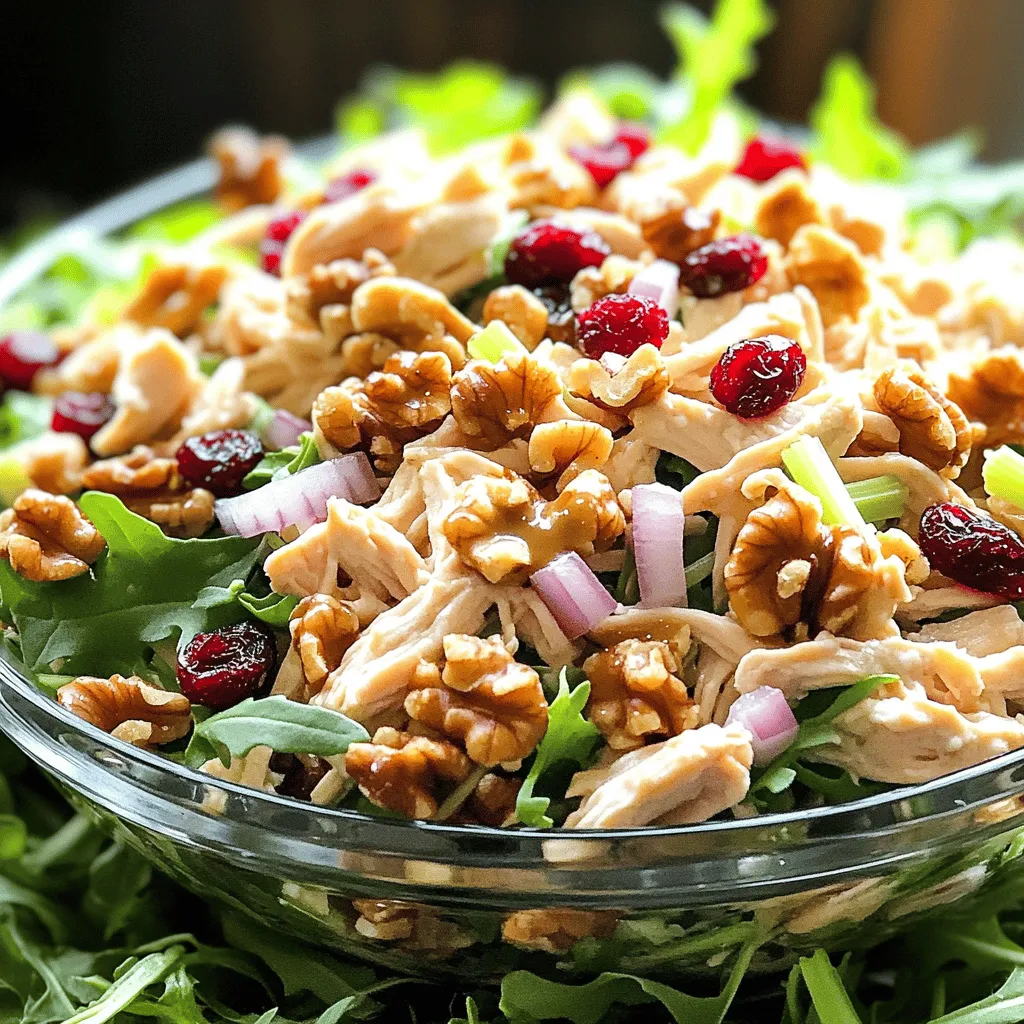
If you’re looking for a quick, tasty meal, this Cranberry Walnut Chicken Salad is for you. Packed with flavor and

For a tasty triple berry smoothie bowl, you will need: - 1 cup frozen strawberries - 1 cup frozen blueberries - 1 cup frozen raspberries - 1 banana, sliced - 1/2 cup Greek yogurt (or a dairy-free alternative) - 1/2 cup almond milk (or any milk of choice) - 1 tablespoon honey or maple syrup (optional) These main ingredients pack a punch of flavor and nutrients. The berries are rich in vitamins and antioxidants. They help boost your immune system and may improve heart health. The banana adds natural sweetness and creaminess. Greek yogurt brings protein and probiotics, which are great for digestion. You can add a few items to make your smoothie bowl even better: - Spinach or kale for extra greens - Protein powder for a protein boost - Nut butter for healthy fats and flavor These optional add-ins will enhance nutrition and flavor. Spinach and kale blend well without changing the taste much. Nut butter adds richness and makes it more filling. Toppings can turn your smoothie bowl into a feast for the eyes: - Sliced fresh fruits like kiwi or mango - Granola for crunch - Chia seeds for extra fiber - Coconut flakes for a tropical touch - Mint leaves for freshness These toppings not only look pretty but also add different textures. You can mix and match to suit your taste. A colorful bowl makes eating healthy fun! For the full recipe, check out the instructions above. To start, gather all your ingredients. You need frozen strawberries, blueberries, and raspberries. Don't forget a banana, Greek yogurt, and almond milk. If you want extra sweetness, grab honey or maple syrup. 1. In a blender, add the frozen strawberries, blueberries, and raspberries. 2. Then, slice the banana and add it to the mix. 3. Next, include Greek yogurt and almond milk. 4. Blend everything on high speed until it turns smooth and creamy. To get the right texture, adjust the almond milk. If you want it thicker, use less milk. For a thinner mix, add more milk. Taste the smoothie. If you want it sweeter, add honey or maple syrup. Blend it briefly again to combine. Pour your smoothie into a bowl. Use the back of a spoon to smooth the top. Now, it's time for fun! Arrange your toppings. Use fresh fruit slices, granola, chia seeds, coconut flakes, and mint leaves. Each topping adds flavor and looks great. Serve right away with a spoon. Enjoy your nutrient-packed delight! For the full recipe, check out the earlier section. To get the right thickness, use frozen fruit. This gives your smoothie bowl a creamy texture. Add almond milk slowly. Blend it until smooth. If it's too thick, add a little more milk. If it's too thin, add more frozen fruit. Aim for a spoonable texture that holds toppings well. Mix in a splash of vanilla extract for a warm taste. You can also add a pinch of cinnamon for extra depth. If you like it sweeter, try more honey or maple syrup. Fresh lemon juice can brighten the flavors too. Experiment to find your favorite blend! Don't skip the frozen fruit; it’s key for texture. Over-blending can make it too thin, so blend just until smooth. Also, avoid using too much liquid at once. This can lead to a watery bowl. Lastly, don’t forget the toppings! They add flavor and fun to your smoothie bowl. For more detailed steps, check the Full Recipe for the Triple Berry Smoothie Bowl. {{image_2}} You can switch up the berries with seasonal fruits. When strawberries are out of season, try peaches or mangoes. In fall, use apples or pears for a cozy twist. These fruits add flavor and nutrients, keeping your smoothie bowl fresh and fun. If you want a dairy-free bowl, use coconut yogurt instead of Greek yogurt. Almond milk works great, but you can also try oat milk or soy milk. These options keep your bowl creamy without dairy. You won’t lose any taste, just gain more choices! To make your smoothie bowl more filling, add protein. You can mix in a scoop of your favorite protein powder. Greek yogurt already adds protein, but nuts or seeds can help too. Try almond butter or hemp seeds for a tasty boost. This way, your smoothie bowl becomes a full meal! For the complete recipe, check the Full Recipe section. After making your triple berry smoothie bowl, store any leftovers in the fridge. Use an airtight container to keep it fresh. The smoothie bowl will taste best within 24 hours. If it sits longer, it may lose its creaminess. If you want to save some smoothie for later, freezing is a great option. Pour the leftover smoothie into an ice cube tray or a freezer-safe container. This way, you can use it for another bowl later. Just blend the frozen smoothie cubes with a bit of milk to revive the texture. In the fridge, your smoothie bowl lasts about one day. In the freezer, it can last up to three months. However, for the best taste and texture, use it within a month. For the full recipe and more delicious ideas, check out the complete guide to making this nutrient-packed delight. A Triple Berry Smoothie Bowl is packed with nutrients. Berries like strawberries, blueberries, and raspberries are rich in vitamins and antioxidants. They can help fight free radicals. This keeps your cells healthy and may lower the risk of chronic diseases. The Greek yogurt adds protein and calcium, which support strong bones and muscles. The banana provides potassium, which helps with heart health. Together, these ingredients make a tasty, healthy meal or snack. Yes, you can make this smoothie bowl ahead of time. Just blend the ingredients and store them in an airtight container. Keep it in the fridge for up to 24 hours. When you're ready to eat, give it a quick stir. If it’s too thick, add a splash of milk to thin it out. For best taste, add your toppings right before serving. This keeps them fresh and crunchy. You can easily customize your smoothie bowl to fit your taste. Want a sweeter bowl? Add more honey or maple syrup. You can swap out the berries for other fruits like mango or peaches. For extra nutrients, add spinach or kale to the blend. If you need more protein, toss in some protein powder or nut butter. The toppings are also fun to change. Try nuts, seeds, or different fruits to mix things up. The options are endless! For the Full Recipe, check out the details above. In this post, we explored how to make a Triple Berry Smoothie Bowl. We covered key ingredients and optional add-ins for flavor. You learned step-by-step instructions, blending tips, and how to serve it right. We provided helpful tips for consistency and common mistakes to dodge. You also saw ways to vary your bowl and how to store it. My final thought is that this smoothie bowl is fun and healthy. Experiment with it to find your favorite mix! Enjoy your creation!

Triple Berry Smoothie Bowl Nutrient-Packed Delight

Are you ready to fuel your day with a Triple Berry Smoothie Bowl? This nutrient-packed delight is not just delicious;

- 1 can (15 oz) chickpeas, drained and rinsed - 1 cup cherry tomatoes, halved - 1 cucumber, diced - 1/2 red onion, finely chopped - 1 bell pepper (any color), diced - 1/2 cup Kalamata olives, pitted and sliced - 1/2 cup feta cheese, crumbled - 3 tablespoons olive oil - 2 tablespoons lemon juice - 1 teaspoon dried oregano - Salt and pepper to taste - Fresh parsley for garnish This Greek chickpea salad shines due to its fresh ingredients. You can find chickpeas in any store. They provide protein and fiber. I love using canned chickpeas for quick prep. Rinse them well to remove any canning liquid. Next, I always choose bright cherry tomatoes. They add a sweet burst. Halve them so they mix well. Diced cucumber adds crunch and freshness. It makes every bite crisp. Red onion gives a sharp flavor. I chop it finely so it blends nicely. Bell peppers bring color and sweetness. Choose any color you like for fun! Kalamata olives add a briny taste. I slice them for easy eating. Crumbled feta cheese brings creaminess. It pairs well with all other flavors. For the dressing, I mix olive oil and lemon juice. This adds nice tang. Dried oregano gives an herbal kick. Don't forget salt and pepper to enhance all the flavors. Finally, fresh parsley makes a lovely garnish. It adds color and a hint of earthiness. You can find the full recipe at the end of this section. To make Greek Chickpea Salad, follow these clear steps. This salad is fresh, tasty, and easy to prepare. - Combine salad ingredients in a bowl: Start by adding the drained chickpeas, halved cherry tomatoes, diced cucumber, chopped red onion, diced bell pepper, and sliced Kalamata olives into a large bowl. Mix them gently with a spoon. - Prepare the dressing: In a separate small bowl, whisk together 3 tablespoons of olive oil, 2 tablespoons of lemon juice, 1 teaspoon of dried oregano, and a pinch of salt and pepper. This dressing adds great flavor. - Toss ingredients with dressing: Pour the dressing over the salad mixture. Toss everything together so that the dressing coats all the ingredients evenly. - Adjust seasoning to taste: Taste your salad. Add more salt, pepper, or lemon juice if you want more flavor. - Allow to marinate: Cover the bowl with plastic wrap or a lid and let it sit in the fridge for at least 30 minutes. This marinating time helps the flavors mix well. - Idea for garnishing with parsley: Before serving, chop some fresh parsley and sprinkle it on top. This adds color and a fresh taste. - Suggestions for serving temperature: Serve the salad chilled or at room temperature. Both ways taste great, so choose what you prefer. Make this Greek Chickpea Salad using the Full Recipe. It's a delightful dish that everyone will love! To make the dressing tangier, add more lemon juice. This brightens the salad. You can also add a splash of red wine vinegar. This will give it a nice kick. Marinating is key for flavor. Let the salad sit in the fridge for at least 30 minutes. This allows the ingredients to blend well. The more time it sits, the better it tastes. Greek Chickpea Salad pairs well with grilled meats or pita bread. It’s a great side dish for barbecues or picnics. For meal prep, this salad is perfect. You can pack it for lunch in jars. It stays fresh and tasty for a few days. Enjoy it at work or school. Check out the Full Recipe for all the details! {{image_2}} You can easily adapt Greek Chickpea Salad for different diets. To make it vegan, simply skip the feta cheese. You can replace it with vegan cheese or nutritional yeast for a cheesy flavor. For gluten-free options, this salad is a great choice as it contains no gluten ingredients. Always check labels to ensure any added items, like olives or dressings, are gluten-free. Feel free to switch up the beans! Black beans or kidney beans can work well too. If you want to try something different, lentils are a great choice. You can also add seasonal vegetables to make the salad more colorful. Try adding bell peppers in spring or roasted butternut squash in the fall. This keeps the dish fresh and exciting throughout the year. For the full recipe, refer to the earlier sections. To keep your Greek Chickpea Salad fresh, start by storing it in an airtight container. Make sure the lid seals well. This helps to keep air out and prevents wilting. If you have leftovers, place them in the fridge right away. - Separate dressing: Store the dressing apart from the salad. This keeps veggies crisp. - Use fresh herbs: Add herbs just before serving. They taste better fresh. Your salad stays good in the fridge for 3 to 5 days. After that, the veggies may start to lose their crunch. Check for any signs of spoilage before eating. - Freezing options: I do not recommend freezing this salad. The texture will change. However, you can freeze leftover chickpeas if needed. Just thaw them before using in a new dish. If you want to enjoy this salad later, stick to the fridge for best taste. For the full recipe, check out the Greek Chickpea Salad above! Can I make Greek Chickpea Salad ahead of time? Yes, you can make Greek Chickpea Salad ahead of time. It tastes even better after sitting for a few hours or overnight. This helps the flavors mix well. Just store it in the fridge in a covered bowl. Is this recipe suitable for meal prep? Greek Chickpea Salad is great for meal prep. It holds up well in the fridge. You can portion it into containers for easy grab-and-go meals. What are the health benefits of chickpeas? Chickpeas are very healthy. They are high in protein and fiber. This can help you feel full longer. They also have vitamins and minerals. Eating chickpeas can support heart health and digestion. Can I use dried chickpeas instead? Yes, you can use dried chickpeas. Just soak them overnight and cook until tender. This takes more time but can enhance flavor. How do I make this salad less salty? To make the salad less salty, reduce olives and feta cheese. You can also rinse the chickpeas well. Adding extra veggies can help balance the saltiness too. What's the best way to serve Greek Chickpea Salad? Serve Greek Chickpea Salad chilled or at room temperature. It looks great in a nice bowl. You can garnish it with fresh parsley for a pop of color. Enjoy it as a side dish or main meal! For the complete recipe, check out the [Full Recipe]. This Greek Chickpea Salad is easy to make and packed with flavor. You learned about the key ingredients, simple steps, and useful tips. Building on this recipe lets you create variations to match your diet. Remember to store leftovers properly to keep them fresh. Enjoy this salad chilled or at room temperature for the best taste. Overall, this dish is perfect for a healthy meal or snack.

Greek Chickpea Salad Fresh and Flavorful Delight

Are you ready to savor a fresh and tasty dish? My Greek Chickpea Salad is packed with vibrant flavors and

To make a tasty Harvest Quinoa Salad, gather these items: - 1 cup quinoa, rinsed - 2 cups vegetable broth - 1 medium sweet potato, peeled and diced - 1 cup Brussels sprouts, trimmed and halved - 1/2 cup dried cranberries - 1/2 cup pecans, roughly chopped - 1/4 cup feta cheese, crumbled (optional) - 1/4 cup olive oil - 2 tablespoons apple cider vinegar - 1 teaspoon maple syrup - Salt and pepper to taste - Fresh parsley for garnish I love using seasonal ingredients for this salad. In fall, sweet potatoes and Brussels sprouts shine. They add warmth and flavor. You can also swap in seasonal greens, like kale or spinach, in winter. Fresh herbs like basil or dill can liven up the salad in spring and summer. Always choose vibrant, local produce when you can. It’s fresher and tastes better! Feel free to personalize your Harvest Quinoa Salad! Here are some fun ideas: - Add grilled chicken or chickpeas for protein. - Toss in diced apples or pears for sweetness. - Use walnuts instead of pecans for a different crunch. - Try different cheeses like goat cheese for a tangy twist. - Add chopped bell peppers or cucumbers for extra freshness. With these ingredients and ideas, you can make a salad that fits your taste and the season perfectly. For the full recipe, check the details above! First, gather your ingredients. You will need quinoa, sweet potatoes, Brussels sprouts, cranberries, and pecans. Rinse the quinoa under cold water. This step helps remove any bitter taste. Preheat your oven to 400°F (200°C). This ensures your veggies roast well. In a medium saucepan, add the rinsed quinoa and vegetable broth. Bring this mix to a boil. Once boiling, reduce the heat to low. Cover the pan and let it simmer for 15 minutes. After this time, check if the quinoa absorbed all the broth. If it did, fluff it with a fork and set it aside. This method gives you light and fluffy quinoa. Now, let’s prepare the sweet potatoes and Brussels sprouts. Peel and dice one medium sweet potato. Trim and halve one cup of Brussels sprouts. Toss them on a baking sheet with one tablespoon of olive oil, salt, and pepper. Spread them out evenly. Place the sheet in the oven for 25-30 minutes. Stir them halfway through to ensure even roasting. When done, they should be tender and slightly caramelized. This roasting brings out their natural sweetness. For the full method, check the Full Recipe. To fluff quinoa well, first rinse it under cold water. This removes any bitter taste. After cooking, let it sit covered for a few minutes. Then, use a fork to gently fluff the grains. This method helps keep quinoa light and airy. A well-fluffed quinoa adds texture to your Harvest Quinoa Salad. You can change the dressing to suit your taste. Try adding lemon juice for brightness or tahini for creaminess. A bit of Dijon mustard can give it a nice kick. For a sweet twist, use honey instead of maple syrup. These dressing variations can make your salad unique each time. Serve your Harvest Quinoa Salad in a large bowl. Arrange the ingredients neatly for a lovely look. Top with fresh herbs or extra feta for color. You can also add sliced avocado for creaminess. This not only enhances taste but also makes the dish more filling. Enjoy it chilled or at room temperature for the best flavor. {{image_2}} If you want a vegan Harvest Quinoa Salad, skip the feta cheese. You can add nutritional yeast for a cheesy taste without dairy. Another great option is to use avocado for creaminess. It adds healthy fats too. You might try a tahini dressing made from tahini, lemon juice, and garlic. This dressing will give your salad a rich flavor. This salad is naturally gluten-free since quinoa is a safe grain. If you want to add more texture, try using cooked lentils or chickpeas. They boost protein and fiber. You can also include roasted butternut squash instead of sweet potatoes for a different taste. Just remember to check labels for any packaged ingredients to ensure they are gluten-free. Herbs and spices can make your quinoa salad shine. Fresh herbs like basil, cilantro, or mint add brightness. You can also sprinkle in cumin or smoked paprika for a warm touch. If you like heat, add a pinch of cayenne or red pepper flakes. For an earthy flavor, try mixing in some ground turmeric. Using these enhancements will lift your salad's taste and make it even more enjoyable. To keep your Harvest Quinoa Salad fresh, store it in an airtight container. This helps keep moisture locked in while preventing any odors from other foods in the fridge. Make sure to chill the salad within two hours after making it. It can stay fresh for about 3 to 5 days. If you see any signs of spoilage, it’s best to throw it out. If you want to save some salad for later, freezing is a great option. However, quinoa can change texture when frozen. I recommend freezing the salad without the dressing. Place the salad in a freezer-safe container. It can last up to three months in the freezer. When you’re ready to eat, just thaw it in the fridge overnight. When it’s time to enjoy your leftovers, avoid the microwave if you can. It may dry out the salad. Instead, take out the salad and let it sit at room temperature for 15 to 30 minutes. If you prefer it warm, heat the quinoa in a pan on low heat. Stir gently until warmed through. Add fresh dressing afterward for the best flavor. For the full recipe, check out the Harvest Quinoa Salad section above. Quinoa is a superfood packed with nutrition. It is high in protein, making it great for muscle health. Quinoa also has fiber, which aids digestion and keeps you full longer. It contains vitamins like B and E, plus essential minerals such as magnesium and iron. This grain is also gluten-free, making it safe for those with gluten intolerance. Eating quinoa can help support heart health and reduce the risk of chronic diseases. Yes, you can prepare this salad ahead of time. Making it a day in advance can enhance the flavors. Just store it in the fridge in an airtight container. If you do this, wait to add the dressing until right before serving. This keeps the ingredients fresh and crunchy. Harvest Quinoa Salad lasts about 3 to 5 days in the fridge. Store it in a tightly sealed container to keep it fresh. If you notice any changes in smell or texture, it's best to toss it. Always check for signs of spoilage before enjoying leftovers. In this article, we covered the key ingredients for a delicious Harvest Quinoa Salad. You learned about seasonal options and fun add-ins for flavor. I provided step-by-step directions that help in preparing and cooking the quinoa and veggies just right. You also explored tips for serving and storing your salad. Final thoughts: Customize your dish with variations that suit your taste. Enjoy creating your unique salad!

Harvest Quinoa Salad Nourishing and Flavorful Meal

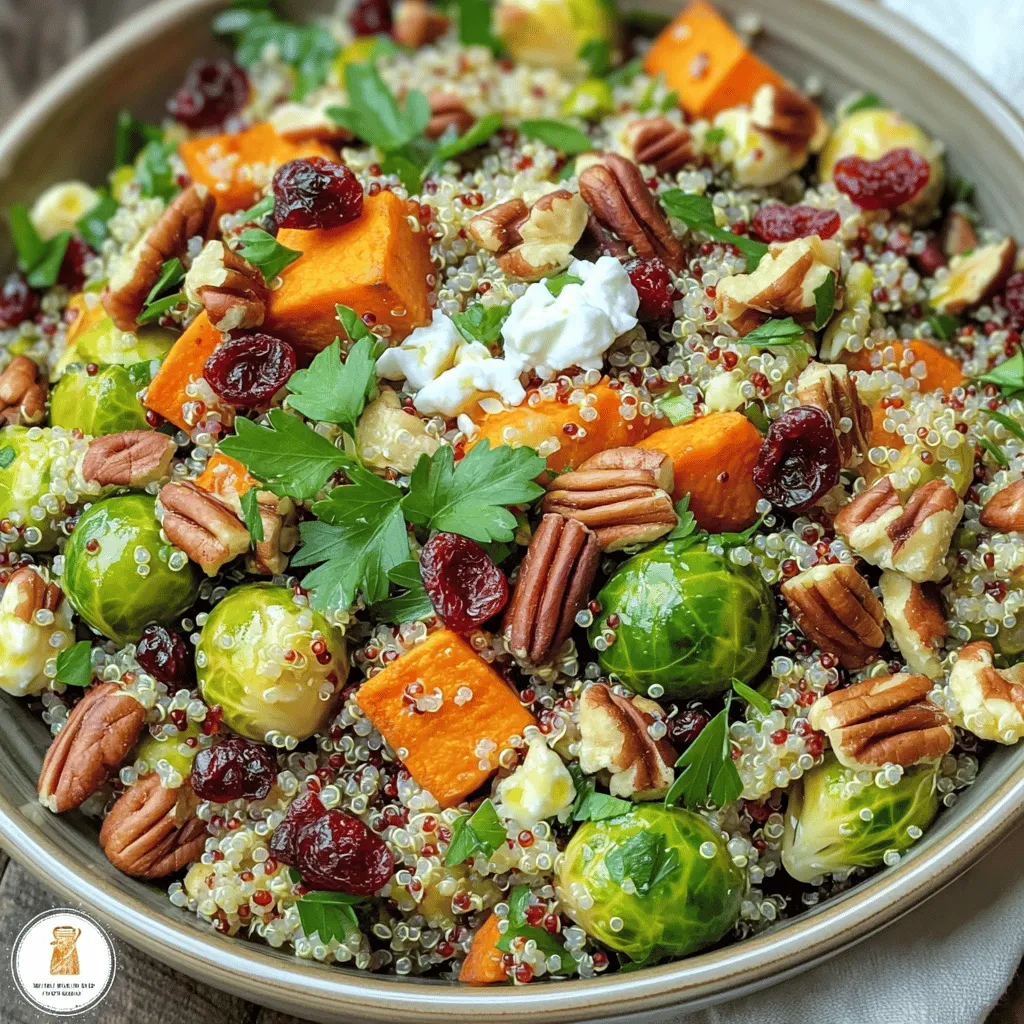
Looking for a nourishing meal that bursts with flavor? My Harvest Quinoa Salad checks all the boxes! Packed with vibrant,

For this vibrant salad, you need a few key ingredients. First, use fresh kale. It adds crunch and nutrition. Next, choose a crisp apple like Honeycrisp for sweetness. Finally, walnuts bring a nice crunch and healthy fats. If you want to add more flavor, consider using feta cheese or dried cranberries. These extras can enhance the taste and texture of your salad. The dressing ties everything together. You will need olive oil and apple cider vinegar for a tangy base. Sweeten it up with honey or maple syrup. Season with salt and pepper for balance. A hint of cinnamon can add warmth and depth to the dressing. Together, these ingredients create a delightful blend that complements the salad. This salad is not just tasty; it’s packed with nutrition. Kale is a superfood, rich in vitamins A, C, and K. It helps your body fight off illness. Apples provide fiber and keep your heart healthy. Walnuts are full of omega-3 fatty acids, which are good for your brain. Together, these ingredients create a balanced meal that nourishes your body. Enjoying apple walnut kale salad supports your health in a delicious way. You can find the full recipe [here](#). Start by prepping the kale. Remove the stiff stems and chop the leaves. Place the kale in a large bowl. Add a pinch of salt and massage the leaves for 2-3 minutes. This makes the kale softer and brighter. Massaging also enhances the flavor. Seasoning is key during this step. The salt helps break down the tough fibers in kale. It makes the leaves tender and ready to absorb the dressing. Now it’s time to mix in the fruits and nuts. Add the diced apple to the kale. The sweet crunch of the apple pairs well with the greens. Next, toss in the toasted walnuts. Their nutty flavor adds a nice contrast. If you like, sprinkle in some crumbled feta cheese for creaminess. It’s optional but adds a great taste. You can also mix in dried cranberries or cherries. They bring a burst of sweetness to the salad. For the dressing, whisk together olive oil, apple cider vinegar, honey or maple syrup, cinnamon, salt, and pepper in a small bowl. Whisking helps blend all the ingredients smoothly. To ensure an even coat, pour the dressing over the salad. Gently toss the salad until everything is covered. Let the salad sit for about 5-10 minutes. This allows the flavors to meld nicely before serving. For the full recipe, refer to the previous sections. To make your Apple Walnut Kale Salad pop, try adding fresh herbs like parsley or mint. You can also sprinkle some black pepper or a pinch of cayenne for a kick. Letting the salad sit for a bit is key. This resting time helps the flavors mix and the kale to soften more. Aim for about 5 to 10 minutes before serving. When it comes to presentation, use a large, colorful bowl. The bright greens of kale and the reds of apples make a lovely mix. Garnish with extra walnuts and apple slices on top. This adds a nice look and texture. Pair the salad with grilled chicken, fish, or a warm loaf of bread. These options make it a full meal. If you have leftovers, store the salad and dressing separately. This keeps the kale fresh and crunchy. Use an airtight container for the salad and a small jar for the dressing. You can keep the salad in the fridge for up to two days. For longer freshness, try to store ingredients like walnuts and apples in cool, dry places. This way, they stay crisp and tasty. For the complete recipe, check out the Full Recipe section. {{image_2}} If you want to switch things up, consider using different fruits and nuts. For apples, pears or peaches work well. They bring a nice sweetness and crunch. Instead of walnuts, try pecans or almonds; each adds a unique flavor. For those avoiding dairy, you can skip the feta cheese. Try using avocado for creaminess or a sprinkle of nutritional yeast for a cheesy flavor. Both options keep the salad tasty and fresh. To make your salad more filling, add grains like quinoa or farro. They boost protein and fiber. You can also toss in other fruits, like sliced strawberries or mandarin oranges. These fruits add color and flavor, making the salad even more appealing. Nuts can also vary; try pumpkin seeds or sunflower seeds for a different crunch. Each add-in can change the taste and texture of your dish. Vinaigrettes can bring new life to your salad. Instead of the basic dressing, try a balsamic vinaigrette for a tangy kick. A lemon vinaigrette adds brightness and zest, perfect for summer days. For a sweet and savory twist, mix maple syrup with your dressing. It pairs well with the apples and walnuts. You can also add spices like ginger or garlic for extra depth. Experiment with these ideas to find your favorite flavor combination. For the complete recipe, check out the Full Recipe section. To make kale less bitter, massage it. Take your chopped kale and sprinkle a pinch of salt on it. Use your hands to massage the kale for about 2-3 minutes. This softens the leaves and brightens their color. It also helps reduce bitterness. You can soak the kale in cold water for 10-15 minutes. After soaking, drain and dry the kale well. This helps make it taste milder. Yes, you can make this salad ahead of time. Prepare the salad without the dressing first. Store the salad in an airtight container in the fridge. This keeps it fresh for about 1-2 days. You can mix the dressing and keep it separate. Add the dressing just before serving. This way, the salad stays crisp and tasty. Apple Walnut Kale Salad pairs well with many dishes. It complements grilled chicken or salmon nicely. You can also serve it with roasted vegetables or a hearty soup. If you want a vegetarian option, try it with quinoa or lentils. This salad adds freshness and crunch to any meal. You can find the full recipe for this salad to explore more. Prep time is just 15 minutes. Total time is also 15 minutes. This recipe serves four. To start, prepare the kale. In a large bowl, massage the chopped kale with a pinch of salt. Do this for about 2-3 minutes. It should soften and turn bright green. This step makes the kale taste better. Next, add the diced apple, toasted walnuts, and dried cranberries or cherries. If you want, you can also add crumbled feta cheese. In a small bowl, whisk together the olive oil, apple cider vinegar, honey or maple syrup, cinnamon, salt, and pepper. Mix until everything is combined. Now pour the dressing over the salad. Gently toss everything together until it is evenly coated. Let the salad sit for about 5-10 minutes. This allows the flavors to blend together. When serving, present the salad in a colorful bowl. Garnish with extra walnuts and apple slices for a nice touch. Drizzle some extra dressing just before serving for added appeal. [Insert image of the finished Apple Walnut Kale Salad here] This Apple Walnut Kale Salad combines fresh flavors and great nutrition. You learned how to prepare the kale, mix in fruits and nuts, and create a tasty dressing. I shared tips for enhancing flavors and storage ideas. The salad is also versatile, allowing for ingredient swaps to suit your taste. Enjoy this healthy dish as a side or main meal. You can make it your own with simple changes. Eating well should be fun and easy, and this salad proves just that.

Savory Apple Walnut Kale Salad for Fresh Flavor

Are you ready to dive into a salad that bursts with fresh flavor? This Savory Apple Walnut Kale Salad combines

To make a tasty Blueberry Feta Delight Salad, you need: - 2 cups fresh baby spinach - 1 cup blueberries, fresh or frozen (thawed) - 1/2 cup feta cheese, crumbled - 1/4 cup walnuts, roughly chopped - 1/4 cup red onion, thinly sliced - 3 tablespoons olive oil - 1 tablespoon balsamic vinegar - 1 tablespoon honey - Salt and pepper to taste This salad is not only delicious but also healthy. Each serving has about: - Calories: 210 - Protein: 5g - Carbohydrates: 15g - Fats: 17g - Fiber: 3g Blueberries give you vitamins, while feta adds protein and flavor. Choosing fresh ingredients makes your salad shine. Here’s how: - Spinach: Look for bright green leaves. Avoid any that are wilted. - Blueberries: Pick plump, firm berries with a deep blue color. - Feta Cheese: Fresh feta should smell milky and taste creamy. Check the date on the package. - Walnuts: Choose whole nuts with a light tan color. Avoid dark spots. - Red Onion: Pick firm onions with tight skin. They should feel heavy for their size. These tips help you create the best Blueberry Feta Delight Salad. For the full recipe, check out the recipe section above. To start, gather all your ingredients. You need fresh baby spinach, blueberries, feta cheese, walnuts, and red onion. Rinse the spinach and blueberries under cold water. If your blueberries are frozen, let them thaw. Next, crumble the feta cheese and chop the walnuts roughly. Slice the red onion thinly. Now, you have everything ready to go! For the dressing, take a small bowl. In it, whisk together olive oil, balsamic vinegar, honey, salt, and pepper. Mix these until you see a smooth blend. This dressing adds a nice tangy flavor to the salad. Grab a large salad bowl. Combine the spinach, blueberries, feta, and walnuts. Pour the dressing over the salad mix. Now, gently toss everything together. Make sure all the ingredients are covered in the dressing. Finally, add the sliced red onion and give it a light toss again. You can serve it right away or let it sit for about 10 minutes. This waiting time helps the flavors mix well. For a nice touch, serve it on a large platter or in individual bowls. You might want to sprinkle some extra feta and walnuts on top. This Blueberry Feta Delight Salad is ready to impress! Check out the Full Recipe for more details. To keep your Blueberry Feta Salad fresh, choose the best ingredients. Look for bright green spinach with no wilting. When picking blueberries, select plump ones with a deep hue. If you use frozen blueberries, make sure they are thawed and drained. Store your salad components separately until you're ready to serve. This way, the spinach stays crisp. To boost flavors, add a dash of lemon juice or zest. This brightens the dish and complements the blueberries. You can also toast the walnuts for a nutty crunch. Just heat them in a pan for a few minutes. For extra sweetness, mix in a few slices of ripe strawberries or peaches. This adds layers of taste to your salad. Presentation matters! Serve your salad on a large platter for a family-style meal. For an elegant touch, use individual bowls. Sprinkle extra feta and walnuts on top for a beautiful finish. You can also add edible flowers for a pop of color. Serve immediately for the best flavor and freshness. For a fun twist, try using a mason jar for each serving. This makes it easy to transport and looks great! {{image_2}} You can swap ingredients to change the flavor. Try using kale instead of spinach for a heartier base. You can also replace feta with goat cheese for a tangy twist. If you want a crunch, use pecans instead of walnuts. For a touch of sweetness, add sliced strawberries or raspberries. This salad shines in every season. In summer, include fresh herbs like basil or mint for extra freshness. In fall, add roasted butternut squash for warmth and depth. Winter calls for citrus like orange or grapefruit, brightening the dish. You can use pomegranate seeds in winter for a festive look and taste. To make this salad vegan, skip the cheese and use avocado for creaminess. If you're gluten-free, check that your balsamic vinegar is gluten-free. For a protein boost, add grilled chicken or chickpeas. This salad is easily adaptable to fit many diets, ensuring everyone can enjoy it. For the full recipe, explore how these variations can elevate your meal. To store leftover Blueberry Feta Salad, place it in an airtight container. Make sure to seal it tight to keep air out. This method helps maintain the salad's crispness and flavor. Store it in the fridge for up to three days. If you see any wilting, it’s best to toss those leaves. For the best taste, keep the dressing separate. If you mix everything before storing, the salad can get soggy. You can also store the nuts and cheese in separate bags. This keeps them crunchy and fresh. When you're ready to eat, just combine everything again! This salad is best served cold. If you want to eat it warm, you can give the nuts a quick toast. Just heat them in a dry pan for a few minutes. But remember, don't heat the salad itself. Heating can change the taste of the blueberries and the feta cheese. Enjoy it fresh for the best flavor! You can use goat cheese or ricotta for a different taste. Both add creaminess. If you want a vegan option, try tofu. Crumble it and season it for a similar texture. Yes, you can prepare the salad a few hours ahead. Just keep the dressing separate. This helps the greens stay crisp. Combine the salad and dressing right before serving. Fresh blueberries last about one week in the fridge. Keep them in their original container. Avoid washing until you’re ready to eat them. This keeps them fresh longer. Blueberries are full of vitamins and minerals. They are low in calories but high in fiber. They help support heart health and boost brain function. Eating them can improve your overall health. Yes, this salad works well for meal prep. You can pack it in containers. Just keep the dressing separate to maintain freshness. It’s a great way to enjoy healthy meals all week! For the full recipe, check out the Blueberry Feta Delight Salad. This blog post shared key steps for making a fresh salad. We covered ingredients, tips for freshness, and how to store leftovers. Try the advice for picking fresh items and enhancing flavor for the best results. We also explored fun variations to suit different tastes and diets. Remember to follow the storage tips to keep your salad fresh and tasty. Enjoy creating your perfect salad and sharing it with others!

Blueberry Feta Salad Fresh and Flavorful Delight

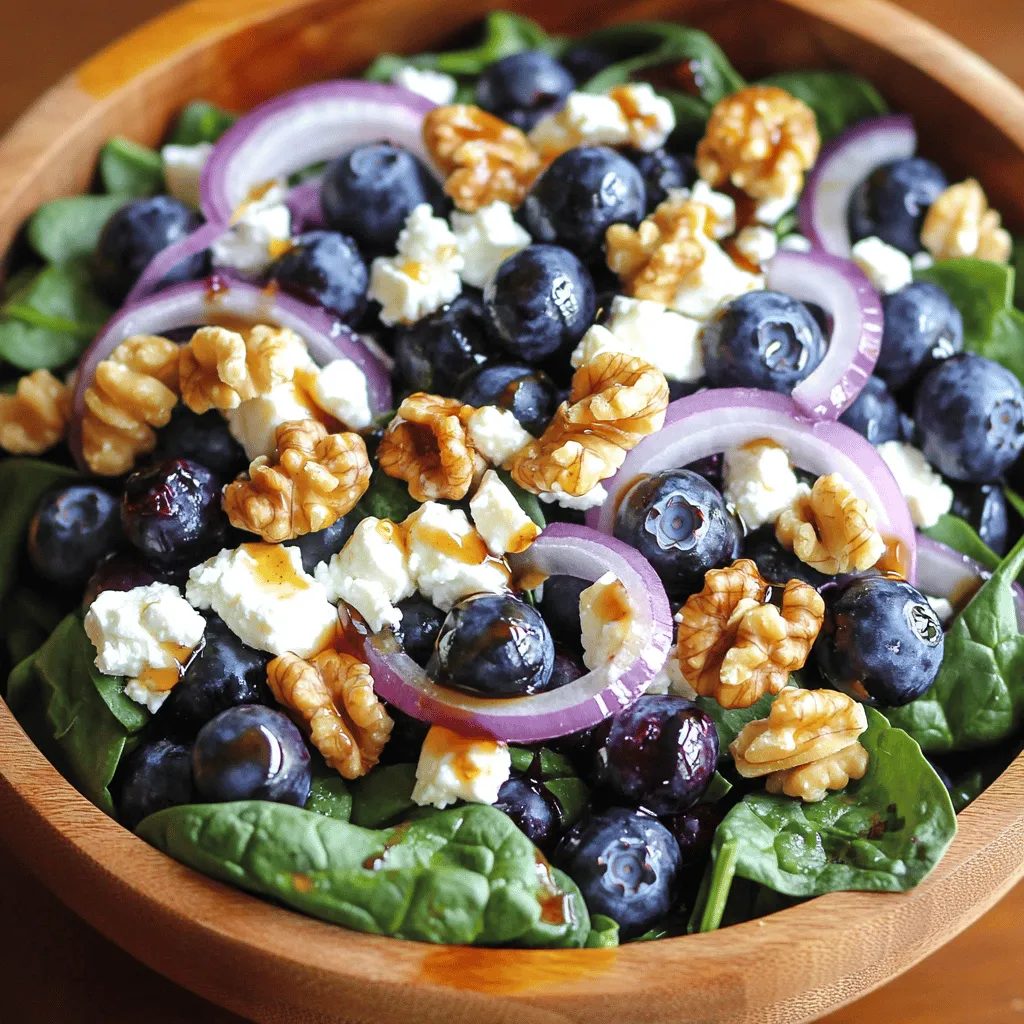
Looking for a fresh salad that bursts with flavor? You’re in the right place! The Blueberry Feta Salad is a

Older posts
Newer posts
← Previous Page1 … Page48 Page49 Page50 … Page86 Next →

dsad

© 2026 Cooking Wells • Built with GeneratePress

Our Policies

  • Copyright Policy
  • Cookie Policy
  • GDPR Policy
  • Privacy Policy
  • Disclaimer
  • Terms Of Use

More Information

  • Home
  • About
  • Contact
  • Appetizers
  • Dessert
  • Dinner
  • Drinks
©2026, Cooking Wells About Back To Top