Skip to content
DisclaimerTerms Of UseGDPR PolicyCookie Policy

Cooking Wells

  • Home
  • Drinks
  • Appetizers
  • Dinner
  • Dessert
  • About
  • Contact
  • Privacy Policy
DisclaimerTerms Of UseGDPR PolicyCookie Policy

NO-ING-IMG

- Baby potatoes - Olive oil - Grated Parmesan cheese - Minced garlic - Dried oregano - Paprika - Salt and pepper - Fresh parsley for garnish If you want to switch things up, you can use other cheeses. Cheddar or Gouda work great. For oil, avocado oil or canola oil are good choices. Both give a nice flavor and help with crispiness. For this recipe, you will need a few key items: - Baking sheet - Parchment paper - Mixing bowls These tools make cooking easy and clean up simple. Using parchment paper helps the potatoes crisp up nicely. Plus, it saves you from scrubbing your baking sheet later. Check out the Full Recipe for more details on how to make these tasty crispy Parmesan potatoes! First, preheat your oven to 425°F (220°C). This temperature is key for crispy results. Next, prepare a baking sheet by lining it with parchment paper. This makes cleanup easy and helps the potatoes crisp up. In a large bowl, add your halved baby potatoes. Pour in the olive oil, minced garlic, dried oregano, paprika, salt, and pepper. Mix everything together until the potatoes are well coated. This step adds flavor to every bite. Now, sprinkle the grated Parmesan cheese over the potatoes. Toss again to ensure each piece is covered in cheesy goodness. Spread the Parmesan-coated potatoes in a single layer on the baking sheet. Make sure the cut sides are down; this helps them get crispy. Bake in the oven for 25 to 30 minutes. Keep an eye on them until they turn golden brown and crispy on the outside. After baking, let them sit for 5 minutes to get even crispier. Finally, garnish with freshly chopped parsley before serving. For the full recipe, check out the detailed instructions. To get those perfectly crispy edges, adjust your cooking time. Bake the potatoes for 25-30 minutes. If you want them even crunchier, try a convection setting. This method circulates hot air, making your potatoes crispier. You can add extra spices or herbs to boost flavor. Consider garlic powder, cayenne pepper, or thyme for a twist. Marinating the potatoes before baking can deepen the taste. Just toss them in olive oil and spices and let them sit for 30 minutes. Serving styles can make your dish stand out. Try placing the crispy Parmesan potatoes in a rustic bowl. This adds a homey touch. Garnish with more Parmesan and fresh parsley to make it pop. A sprinkle of paprika can also add color and interest. For the full recipe, check out the link above! {{image_2}} You can spice up your crispy Parmesan potatoes easily. If you like heat, add chili flakes. This small change gives your dish a nice kick. You can also try herb-infused variations. Rosemary pairs well with the Parmesan and adds a fresh taste. Just mix in chopped rosemary when you combine the potatoes and seasonings. Feel free to swap out baby potatoes for other types. You can use red potatoes, Yukon gold, or even sweet potatoes. Each type offers a different flavor and texture. You can also incorporate vegetables for a colorful twist. Carrots, bell peppers, or zucchini work well. Just cut them into similar sizes as the potatoes for even cooking. If you need gluten-free options, you're in luck! This recipe is naturally gluten-free, thanks to the simple ingredients. For vegan alternatives, replace the Parmesan cheese. Nutritional yeast gives a cheesy flavor without dairy. You can also use a vegan cheese that melts well. To keep your Crispy Parmesan Potatoes fresh, store them in an airtight container. This helps prevent moisture from making them soggy. Let the potatoes cool down before sealing the container. You can keep them in the fridge for up to three days. If you want to enjoy them longer, consider freezing. To reheat and keep the crispiness, use the oven. Preheat it to 375°F (190°C). Spread the leftover potatoes on a baking sheet. Bake for about 10-15 minutes, or until they are hot. Check them to ensure they don’t burn. You can also use an air fryer for a quick reheat. Set it to 350°F (175°C) for about 5-7 minutes. Yes, you can freeze Crispy Parmesan Potatoes! First, let them cool completely. Then, spread them on a baking sheet in a single layer. Freeze until firm, then transfer them to a freezer bag. This method helps avoid clumping. To thaw, place them in the fridge overnight. Reheat them in the oven or air fryer, as mentioned above. Enjoy that crunch again! To make your Crispy Parmesan Potatoes extra crispy, adjust the cooking time. Bake them longer if needed. Use a convection oven if you have one. This helps circulate hot air and crisps them up. Don't overcrowd the baking sheet; give them space. This allows heat to reach all sides. You can also try parboiling the potatoes first. Boil them for about 5-7 minutes before baking. This helps create a fluffy inside and a crispy outside. Yes, you can prepare these potatoes ahead of time. You can cut and season them a few hours before baking. Store them in the fridge in an airtight container. If you want to make them even earlier, you can bake them halfway. Let them cool, then store. When ready, just bake them until crispy. This method saves time and gives you a tasty side dish. Crispy Parmesan Potatoes pair well with many dishes. They make a great side for grilled chicken or steak. You can also serve them with fish or roasted vegetables. A fresh salad on the side adds a nice balance. For a fun twist, serve them with a dipping sauce like garlic aioli or ranch dressing. These potatoes also shine at parties as a snack. To avoid mushy potatoes, choose the right type. I recommend using waxy potatoes like baby potatoes or Yukon Gold. These types hold their shape better. Avoid starchy potatoes like Russets, as they can turn mushy. When cooking, make sure to cut the potatoes evenly. This ensures they cook at the same rate. Also, don’t skip the preheating step. A hot oven helps seal the outside quickly, keeping the inside fluffy. This blog post walked you through making Crispy Parmesan Potatoes. We covered ingredients, their substitutes, and essential cooking gear. The step-by-step guide helped with preparation, mixing, and baking for perfect crispiness. We also shared valuable tips for flavor, presentation, and storage. In summary, these potatoes are easy to make and rewarding. Experiment with flavors to find your favorite. Enjoy these tasty bites on your table!

Crispy Parmesan Potatoes Easy and Delicious Recipe

Looking for a simple yet delicious side dish? Let me introduce you to crispy Parmesan potatoes! These golden bites are

- 3 ripe bananas, mashed - 1/3 cup melted butter - 1 teaspoon vanilla extract - 1 teaspoon baking soda - Pinch of salt - 1/2 cup sugar (preferably brown for a richer flavor) - 1 large egg, beaten - 1 cup all-purpose flour - 1/2 cup Nutella (plus extra for swirling) Use ripe bananas. Look for brown spots. They add great flavor. For melted butter, microwave it in short bursts. This prevents it from getting too hot. When measuring flour, don't pack it down. Use a spoon to scoop it lightly into the measuring cup. Level it off with a knife. This helps avoid dense bread. For bananas, choose organic if possible. They taste better and are often fresher. For Nutella, the classic version works best. If you prefer a healthier option, try a brand with less sugar. For butter, use unsalted butter for better control over salt levels. - Preheat the oven to 350°F (175°C). - Grease a 9x5 inch loaf pan. This helps the bread come out easily after baking. - In a bowl, mash the ripe bananas with melted butter until smooth. - Next, stir in the vanilla extract and beaten egg. Mix well. - Sprinkle the baking soda and salt over the mix, then stir to combine. - Add the sugar and mix again. Gradually fold in the flour. Be careful not to over-mix. - Pour half of the batter into the prepared loaf pan. - Drizzle half of the Nutella over the batter. Use a knife to gently swirl it. - Pour the rest of the batter on top and repeat the Nutella swirl. - Bake for about 60-65 minutes. A toothpick should come out clean when done. - Use the toothpick method to check if the bread is ready. - Look for a golden-brown crust and a firm top. This means it’s perfectly baked. - Avoiding over-mixing: Mix your batter gently. Stir until just combined. Over-mixing can make the bread dense and tough. - Ensuring even baking: Place your loaf pan in the center of the oven. This helps it bake evenly. Rotate the pan halfway through baking for best results. - What to do if the bread is too dense: If your banana bread turns out dense, check your flour measurement. Too much flour can weigh it down. Next time, spoon flour into your measuring cup and level it off. - Fixing dry or overcooked banana bread: If your bread is dry, it may have baked too long. Use a toothpick to check doneness next time. Remove it when the toothpick comes out slightly moist for a softer texture. - Serving suggestions: Slice your banana bread and serve it warm. It’s delicious on its own or with a cup of coffee. - Garnishing with Nutella and banana slices: Drizzle extra Nutella over each slice. Add fresh banana slices for a lovely touch. This makes your bread look even more inviting! {{image_2}} If you have nut allergies, don't worry! You can easily swap Nutella for chocolate spread. Just pick a spread that is safe for you. The taste will still be rich and sweet. If you want a nut-free swirl, try using fruit preserves. Strawberry or raspberry adds a fun twist! To make your banana bread even better, consider adding nuts or chocolate chips. Walnuts or pecans give a nice crunch. Chocolate chips add extra sweetness and gooeyness. You can also sprinkle in some spices. A little cinnamon or nutmeg can boost the flavor. Just a pinch goes a long way! You can serve this banana bread as a dessert. It's perfect for a cozy night in. Pair it with ice cream for something special. A scoop of vanilla or a dollop of whipped cream makes it feel fancy. For a morning treat, serve it warm with butter. Enjoy it your way! To keep your Nutella swirl banana bread fresh, store it in the pantry. Wrap it tightly in plastic wrap or place it in an airtight container. This helps keep moisture in. It will stay fresh for about 3 to 4 days. If you want, you can also keep it in the fridge. Just remember that it may dry out faster in the fridge. If you want to save some for later, you can freeze your banana bread. Slice it first, so you can grab a piece easily. Wrap each slice tightly in plastic wrap. Then, place the slices in a freezer-safe bag. This way, they won’t get freezer burn. Your banana bread can last up to 3 months in the freezer. When you’re ready to enjoy it, take out a slice and let it thaw. You can leave it on the counter for a few hours. If you want it warm, you can microwave it for about 15 to 20 seconds. Just be careful not to overheat it, or it may become dry. Nutella swirl banana bread lasts about 4 to 5 days at room temperature. If you keep it in the fridge, it may last up to a week. In the freezer, it can last for 3 months. So, you can enjoy this tasty treat whenever you want! For the full recipe, check the link. To ripen bananas fast, place them in a brown paper bag. This traps ethylene gas, speeding up the ripening. You can also add an apple to the bag for extra effect. Check them daily until they reach your desired ripeness. Yes, you can use frozen bananas! Just thaw them first. Drain any excess liquid before mashing. Frozen bananas work well as they become super soft, perfect for banana bread. This helps create a moist texture. You can tell banana bread is overbaked if it’s dark brown or hard on the outside. The toothpick test is key; if the toothpick comes out clean, it’s done. If it’s dry or crumbly, it may be overbaked. To boost Nutella flavor, add more Nutella swirls before baking. You can also mix in some Nutella into the batter. For a fun twist, sprinkle some Nutella chips on top before baking. This will enhance the rich chocolate taste. Yes, you can make this recipe healthier! Substitute whole wheat flour for all-purpose flour. You can also reduce the sugar or use a natural sweetener. Adding nuts or seeds can increase protein and healthy fats. For a tasty Nutella swirl banana bread, you need simple ingredients. Here they are: - 3 ripe bananas, mashed - 1/3 cup melted butter - 1 teaspoon vanilla extract - 1 teaspoon baking soda - Pinch of salt - 1/2 cup sugar (preferably brown for a richer flavor) - 1 large egg, beaten - 1 cup all-purpose flour - 1/2 cup Nutella (plus extra for swirling) This recipe is easy and fun. You start by preheating your oven to 350°F (175°C) and greasing a loaf pan. Next, mash your ripe bananas in a bowl. Mix in the melted butter until it’s smooth. Then, stir in the vanilla extract and beaten egg. Sprinkle the baking soda and salt over the mix and blend well. Add the sugar and stir again. Gradually fold in the flour until just mixed. This helps the bread stay fluffy. Now, pour half of the batter into the pan. Drizzle half of the Nutella over it. Use a knife to swirl it gently. Pour the rest of the batter on top and repeat the swirls with the remaining Nutella. Bake your bread for about 60-65 minutes. To check if it’s done, insert a toothpick in the center. If it comes out clean, your bread is ready. Let it cool for about 10 minutes in the pan before moving it to a wire rack. This Nutella swirl banana bread is great warm, with extra Nutella and banana slices on top. You can find the full recipe above for all the details needed to make this delicious treat! This blog covered how to make delicious Nutella Swirl Banana Bread. We explored ingredients, steps, and tips, ensuring the perfect loaf. Remember to mix well but avoid over-mixing for the best texture. Don’t hesitate to get creative with flavors and toppings. Store your bread properly to enjoy it longer. With a few simple steps, you can make this treat a favorite in your home. Happy baking! Enjoy every bite of your sweet creation.

Nutella Swirl Banana Bread Irresistible and Easy Recipe

Are you ready to elevate your baking game? This Nutella Swirl Banana Bread is not just a treat; it’s a

- 4 cups rice cereal - 3 cups mini marshmallows - 3 tablespoons unsalted butter - 1 teaspoon pumpkin pie spice - 1 teaspoon vanilla extract - 1/4 cup canned pumpkin puree - Pinch of salt - 1/2 cup white chocolate chips (optional) - 1/4 cup crushed graham crackers (for topping) To make my pumpkin spice marshmallow treats, you need a few simple ingredients. I love using rice cereal for its crunch. The mini marshmallows create a sweet base. Unsalted butter adds richness. Pumpkin pie spice gives that warm fall flavor. The vanilla extract enhances the taste. Canned pumpkin puree adds moisture and nutrition. A pinch of salt balances the sweetness. If you want, you can include white chocolate chips for extra creaminess. Finally, crushed graham crackers work great on top for a fun crunch. This list makes it easy to gather your items. I always check my pantry first to avoid extra trips to the store. You can find most ingredients in any grocery store. For the full recipe, follow the steps after gathering these tasty ingredients. 1. Melt butter and marshmallows Start by melting three tablespoons of unsalted butter in a large saucepan over low heat. Stir it gently until the butter is completely melted. Next, add in three cups of mini marshmallows. Keep stirring until the marshmallows melt and become smooth. This step is key for a gooey treat! 2. Mix in pumpkin and spices Once the marshmallows are melted, stir in one teaspoon of pumpkin pie spice, one teaspoon of vanilla extract, and a quarter cup of canned pumpkin puree. Add a pinch of salt for balance. This mix brings that classic pumpkin flavor to your treats! 3. Combine with rice cereal Remove the saucepan from the heat. Immediately add four cups of rice cereal to the melted mixture. Stir well to make sure all the cereal is coated. This will give your treats their delightful crunch. 1. Press into a baking dish Prepare a greased 9x13-inch baking dish. Pour the mixture into the dish and press it down evenly. Use a spatula or your hands (lightly greased) to flatten the top. This helps the treats hold their shape. 2. Garnish with graham crackers Sprinkle a quarter cup of crushed graham crackers over the top. This adds a nice texture and a hint of sweetness. It makes your treats look festive! 3. Cut into squares Let your treats cool completely for about 30 minutes. Once cooled, cut them into squares or bars. You can stack them in a pyramid on a plate for a fun presentation. Enjoy your delicious Pumpkin Spice Marshmallow Treats! For more details, check out the Full Recipe. To make the best pumpkin spice marshmallow treats, focus on texture. You want them soft yet firm. Use fresh mini marshmallows for better melting. Also, mix quickly once you add the rice cereal. This helps keep the treats light and fluffy. Avoid sticking when pressing the mixture into the dish. Lightly grease your hands or spatula with butter. This simple step helps you shape the treats without a mess. One big mistake is overheating the marshmallows. Heat them slowly and keep stirring. If they get too hot, they can turn into a gooey mess. Another common error is not letting the treats cool enough. Give them at least 30 minutes to set. If you cut them too early, they won't hold their shape. For tips on making these treats, check out the Full Recipe. {{image_2}} You can make your Pumpkin Spice Marshmallow Treats even better with some simple swaps. If you need a gluten-free option, use gluten-free rice cereal. If you want a nut-free version, skip any nuts you might add. You can also replace the white chocolate chips with carob chips for a twist. For a richer flavor, try adding a few tablespoons of caramel sauce. This adds a sweet touch that pairs well with pumpkin spice. Chopped nuts, like pecans or walnuts, give a nice crunch. Just remember to mix them in gently to keep the treats soft. Want to make your treats more festive? Add candy corn on top for color and fun. It gives a great fall look and a little added sweetness. You can also use seasonal spices. Instead of just pumpkin pie spice, try a dash of nutmeg or cinnamon for extra warmth. Using different extracts can also change the flavor. Almond extract can give a nice twist if you want something unique. These variations help you personalize your treats for any occasion. Plus, they keep your guests guessing and excited for more! To keep your pumpkin spice marshmallow treats fresh, store them in an airtight container. This helps to lock in moisture and flavor. Line the container with parchment paper to prevent sticking. Keep the treats at room temperature for up to a week. If you live in a humid area, place them in the fridge. This will help them stay firm. Avoid placing the treats near strong-smelling foods. Marshmallows can absorb odors, which can change their taste. For the best texture, enjoy the treats within a few days. If you want to save some treats for later, freezing is a great option. Wrap each treat in plastic wrap. Then, place them in a freezer-safe bag or container. Make sure to remove as much air as possible. This prevents freezer burn. To thaw, simply take out the treats and let them sit at room temperature for about 20 minutes. You can also pop them in the microwave for a few seconds to soften them up. They can last for up to three months in the freezer. Enjoy the sweet taste of fall even when it's not pumpkin season! Can I make these treats in advance? Yes, you can make these treats ahead of time. They taste great after a day or two. Just store them in an airtight container. This keeps them fresh and soft. What can I substitute for marshmallows? If you need a substitute, try using a vegan marshmallow or rice syrup. These options work well, but the texture may be slightly different. They won’t fluff up like regular marshmallows. How long do these treats last? These treats last about a week at room temperature. If you want to keep them longer, store them in the fridge. They may harden a bit in the fridge, so let them sit out for a few minutes before serving. Finding quality pumpkin puree and spices Look for pumpkin puree in cans. Always check the label for pure pumpkin with no added sugar. For spices, visit a store that sells fresh spices. Fresh spices enhance the flavor of your treats. Recommended brands for Rice Cereal and Marshmallows For rice cereal, I recommend brands like Kellogg's or Nature Valley. They have good crunch and flavor. For marshmallows, Jet-Puffed is a great choice. Their mini marshmallows melt nicely and taste sweet. You now have everything you need to make Pumpkin Spice Marshmallow Treats. We covered tasty ingredients, clear steps, and tips to avoid mistakes. Don't forget to keep your treats fresh with proper storage. Feel free to get creative with variations and share them with friends and family. Enjoy the flavors of fall in every bite!

Pumpkin Spice Marshmallow Treats Easy and Festive Recipe

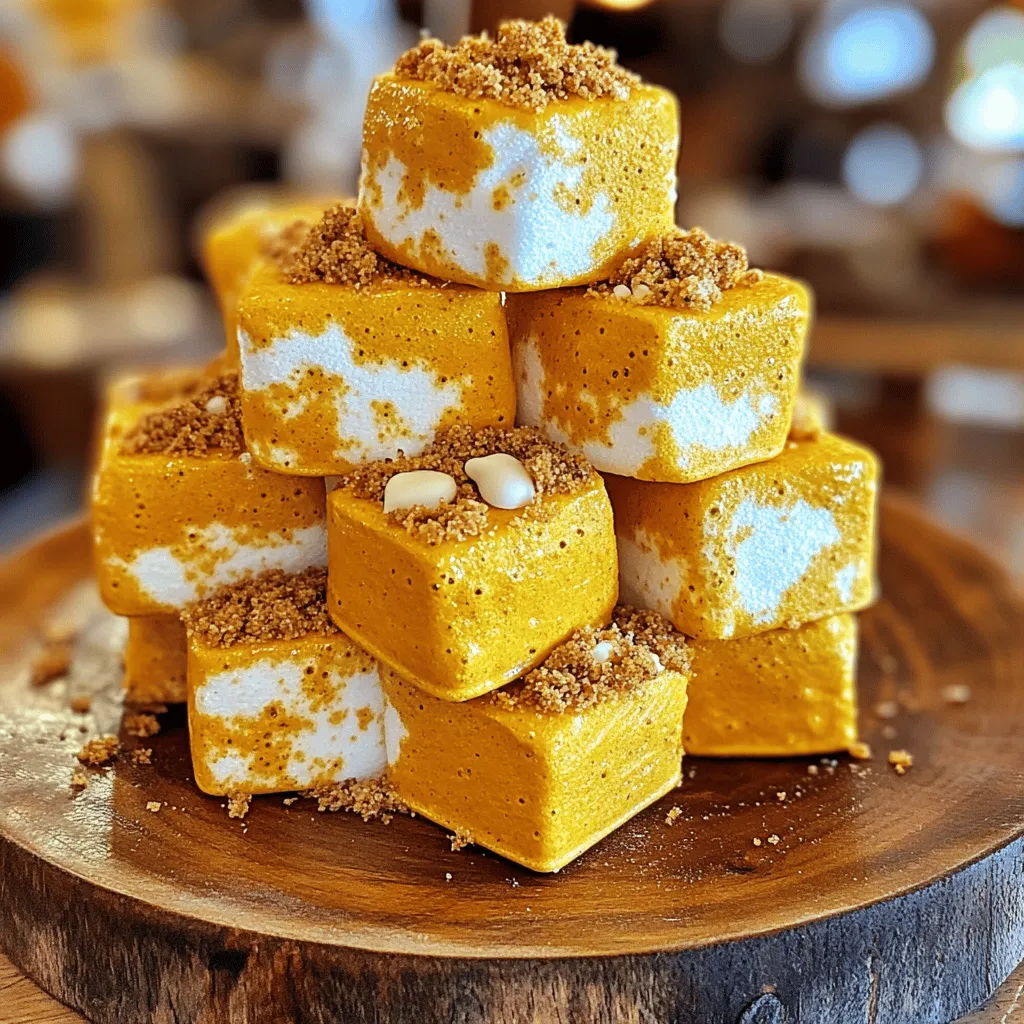
Get ready for a sweet fall delight! My Pumpkin Spice Marshmallow Treats are easy to make and perfect for autumn

To make Cheesy Buffalo Chicken Taquitos, you need simple and tasty ingredients. Here’s what you will need: - 2 cups cooked chicken, shredded - 1/2 cup buffalo sauce - 1 cup shredded cheddar cheese - 1/2 cup cream cheese, softened - 1/2 cup green onions, finely chopped - 8 small flour tortillas - 1 cup oil for frying - Salt and pepper to taste These ingredients blend to create a creamy and spicy filling. The chicken gives it protein, while the cheeses add creaminess. The buffalo sauce packs a punch, making each bite exciting. You can customize your taquitos with extra flavors or swaps. Try adding: - Cooked bacon bits for a smoky taste - Jalapeños for extra heat - Black beans for added fiber If you want a lighter option, you can use Greek yogurt instead of cream cheese. You can also swap flour tortillas for corn ones, if preferred. No taquito is complete without a great dip! Here are some tasty sauce ideas: - Sour cream: Cool and creamy. - Ranch dressing: A classic choice that pairs well. - Blue cheese dressing: For a bold flavor. These dips enhance the flavors and provide a nice contrast to the spice of the buffalo sauce. Serve your taquitos with one or more of these sauces for a fun meal. For the full recipe, check out the detailed instructions. Start by gathering your ingredients. In a large bowl, combine the cooked chicken, buffalo sauce, cheddar cheese, cream cheese, and green onions. Mix everything well until it’s creamy and smooth. Don't forget to season with salt and pepper to taste. This filling packs a flavorful punch and gets ready in no time. Next, warm the tortillas. This makes them soft and easy to roll. Place about 2-3 tablespoons of the chicken mixture at one end of each tortilla. Roll it tightly, tucking in the sides as you go. If needed, use a toothpick to hold them together. Make sure they are sealed well to keep the filling inside during cooking. Now it's time to fry! Heat oil in a large skillet over medium heat. Once hot, place the taquitos seam-side down. Fry them for about 3-4 minutes on each side until they turn golden brown and crispy. This step is crucial for that perfect crunch! After frying, transfer them to a paper towel-lined plate to drain any excess oil. Enjoy them hot with sour cream on the side. For the full recipe, check out the details provided earlier. To get the crispiest taquitos, start with hot oil. Heat the oil to 350°F. If it's too cool, the taquitos will soak up the oil and get soggy. Fry them in small batches. This keeps the temperature steady. Cook for 3-4 minutes on each side. Look for a golden brown color. Once done, place them on a paper towel to absorb extra oil. You can adjust the spice level of your taquitos. If you want more heat, add chopped jalapeños to the filling. A little cayenne pepper can also boost the spice. For a milder version, use less buffalo sauce or mix it with ranch dressing. You can also add garlic powder or onion powder for extra flavor. Don't forget to taste your filling before you roll the taquitos. Serving is key to making your taquitos look great. Arrange them on a colorful platter. Garnish with chopped green onions for a fresh look. You can drizzle some extra buffalo sauce on top for flair. Serve with a bowl of sour cream on the side. This adds a creamy contrast to the spicy taquitos. For a fun touch, use toothpicks for easy eating. Make sure to check out the Full Recipe for detailed steps on making these tasty treats! {{image_2}} You can switch up the filling for your taquitos. Try using pulled pork or beef instead of chicken. For a vegetarian option, use black beans or lentils. Adding corn or diced tomatoes can give your taquitos a fresh taste. Mix in some spinach or kale for extra nutrients. You can also change the cheese; pepper jack adds a nice kick. If you want a healthier taquito, bake them instead of frying. Preheat your oven to 425°F. Place the rolled taquitos on a baking sheet lined with parchment paper. Spray them lightly with cooking oil. Bake for about 15-20 minutes, or until they turn golden and crispy. This method cuts down on oil and adds crunch without frying. Want to turn up the heat? Add diced jalapeños or serrano peppers to the filling. You can also mix in extra buffalo sauce for a spicier kick. For those who love bold flavors, try using a spicy cheese blend. This will give your taquitos a fiery twist that spice lovers will enjoy. Store leftover taquitos in an airtight container. Make sure they cool completely before sealing. This helps keep them fresh. They can last in the fridge for up to three days. Just remember, the longer they sit, the less crispy they become. To freeze taquitos, let them cool fully first. Place them in a single layer on a baking sheet. After they freeze solid, transfer them to a freezer bag. Make sure to remove as much air as you can. These can last up to three months in the freezer. When you’re ready to eat, you can reheat them straight from frozen. For the best results when reheating, use an oven. Preheat it to 375°F (190°C). Place the taquitos on a baking sheet and bake for about 10-15 minutes. This helps restore their crispy texture. You can also use an air fryer for about 5-7 minutes at 350°F (175°C). Both methods work great for keeping that crunch. For more details, check out the Full Recipe. Yes, you can use rotisserie chicken. It saves time and adds great flavor. Just shred the chicken and mix it with the other ingredients. The buffalo sauce, cheese, and cream cheese blend well with the chicken. This will give your taquitos a tasty kick. Using rotisserie chicken makes this recipe quicker and easier. To make taquitos gluten-free, use gluten-free tortillas. Many brands offer these in stores. Just check the label to ensure they fit your needs. The rest of the ingredients are naturally gluten-free. Mix your filling as usual and roll it in the gluten-free tortillas. You’ll enjoy the same cheesy, spicy taste without gluten. I love serving these taquitos hot and fresh. Arrange them on a platter for a fun look. Add some chopped green onions on top for color. Provide a bowl of sour cream for dipping. You can also drizzle some extra buffalo sauce on the top for added flavor. This makes a great snack or appetizer for any gathering. For the full recipe, check out the cooking instructions above. In this post, we explored how to make Cheesy Buffalo Chicken Taquitos. We covered the main ingredients, tasty dips, and the steps to prepare them. You now know how to achieve perfect crunchiness and flavor. The variations let you get creative, while storage tips help preserve your taquitos. The FAQs answered your key questions. Enjoy making these taquitos your way and share them with others. They're sure to be a hit! Keep experimenting and have fun in the kitchen.

Cheesy Buffalo Chicken Taquitos Crispy and Tasty Treat

Are you ready to dive into a flavor explosion? Cheesy Buffalo Chicken Taquitos are your next go-to snack! Packed with

- Apples: Use Granny Smith or Honeycrisp for the best crunch and flavor. These apples offer a nice tartness that pairs well with sweet caramel. Their firm texture holds up well when dipped. - Caramel sauce: You can use store-bought for convenience or make your own for a richer taste. Homemade caramel adds a personal touch and lets you control the flavor. - Cream cheese: This is key for a smooth and creamy dip. It balances the sweetness of the caramel and adds depth to the dish. - Ground cinnamon: Adding this spice enhances the flavor with warmth. It gives a cozy, fall-inspired touch to your dip. Just half a teaspoon will do wonders. - Nuts: Chopped pecans or walnuts add a nice crunch. They also bring a bit of earthiness that contrasts well with the creamy dip. - Pairing with fruits and other dippables: Besides apples, try pears, strawberries, or pretzels. Each offers a unique twist on the flavor combination. - Best types of apples to complement the dip: Stick with Granny Smith or Honeycrisp. Their tartness cuts through the sweetness of the caramel, making each bite delightful. For the full recipe, check out the Salted Caramel Apple Dip section. Enjoy your delicious creation! To start, wash your apples well. I love using Granny Smith or Honeycrisp for their crispness. Slice them into wedges. This makes them easy to dip. Place the apple slices in a bowl with water and a bit of lemon juice. This keeps them fresh and bright. Next, mix your cream cheese and powdered sugar. In a medium bowl, use a hand mixer or whisk. Beat until it’s smooth and creamy. This gives a nice sweet base for your dip. Add vanilla extract and ground cinnamon if you’d like. Mix until everything is well blended. Now, it's time for the caramel! In a separate bowl, take your fresh caramel sauce. Mix in the sea salt and stir it well. This adds that perfect salty touch. Gently fold half of this caramel into the cream cheese mixture. Be careful not to over-mix; you want to keep that creamy texture. The dip will be multi-layered and fun! For the final assembly, grab a serving dish. Spread the cream cheese mixture evenly as a base. Then, drizzle the remaining salted caramel sauce over the top. Create swirls for a pretty effect. To finish, sprinkle a pinch of sea salt over the top. It adds a nice touch. Now, arrange your apple slices around the dip for dipping. For presentation, use a decorative bowl. It makes everything look inviting. You can add more drizzles of caramel and a sprinkle of sea salt on top. This makes it even more tempting! To make your salted caramel apple dip creamy, start with softened cream cheese. Blend it well with powdered sugar until smooth. This ensures a rich base that pairs nicely with the caramel. If you want to adjust the sweetness, taste the dip before serving. You can add more caramel if needed or a touch of powdered sugar. Just remember, a little goes a long way! You can prepare this dip ahead of time for parties or gatherings. Just follow the recipe and store the dip in an airtight container. Keep it in the fridge for up to three days. When it’s time to serve, give it a quick stir. This keeps the texture nice and fresh. If you have leftovers, store them in the fridge too. Just make sure to cover it well to keep it tasty. To boost the flavor, consider adding a sprinkle of ground cinnamon. It adds warmth and pairs well with apples. You can also try mixing in crushed nuts, like pecans or walnuts, for extra crunch. Balance sweetness by adding a touch more salt. A pinch of sea salt on top can enhance the flavors. This makes each bite a delightful mix of sweet and salty. For the full recipe, check out the details above. Enjoy your delicious dip! {{image_2}} You can easily change up the salted caramel apple dip. Adding chocolate chips or toffee bits gives it a fun twist. Chocolate melts beautifully and adds a rich flavor. Toffee bits add a sweet crunch. Try mixing in both for a treat! For a seasonal flair, consider adding fall spices. Cinnamon gives warmth and comfort. You can also add pumpkin spice for a cozy vibe. This makes the dip perfect for autumn gatherings. If you need gluten-free options, you’re in luck! This dip is naturally gluten-free. Just make sure the caramel sauce is also gluten-free. For a dairy-free version, swap cream cheese with a dairy-free alternative. Look for brands that are smooth and creamy. This way, everyone can enjoy the dip. Get creative with what you dip! Apples are classic, but many fruits work great too. Try pears or strawberries for a fresh taste. You can also serve the dip with pretzels or graham crackers. These snacks add a nice crunch and surprise element. The mix of flavors will delight your guests! For the complete recipe, check out the Full Recipe link. To keep your salted caramel apple dip fresh, store it in an airtight container. This helps prevent air and moisture from getting in. Place the container in the fridge right after serving. Always remember to cover it tightly. This will keep the dip creamy and tasty. You do not need to heat the dip. It tastes great cold with crisp apple slices. However, if you want a warm treat, gently warm it in the microwave. Heat it for 10-15 seconds at a time. Be careful not to overheat it. Serve it warm for a cozy twist, or enjoy it chilled. The dip lasts up to five days in the fridge if stored properly. Always check for signs of spoilage before eating. If you see any mold or if it smells off, it’s time to toss it. Freshness is key to enjoying this sweet delight! Can I use a different cheese instead of cream cheese? Yes, you can use mascarpone or Greek yogurt. These will change the flavor a bit. Mascarpone gives a rich taste, while Greek yogurt adds tang. Both options work well for a creamy dip. Is it possible to make this dip sugar-free? Absolutely! You can use sugar-free caramel sauce and a sugar substitute for the cream cheese mixture. Look for options like stevia or erythritol. This way, you still enjoy the dip without the added sugar. How do I prevent apples from browning before serving? To keep your apples fresh, soak them in a mix of water and lemon juice. Use one tablespoon of lemon juice in a cup of water. Soak the apple slices for about five minutes, then pat them dry before serving. Can I serve it at room temperature? Yes, this dip tastes great at room temperature. Just remember to let it sit out for about 15 minutes before serving. This helps bring out the flavors and makes it easier to dip. How to scale the recipe for larger gatherings? To scale the recipe, simply double or triple the ingredients. Use a larger bowl for mixing and a bigger serving dish. This way, everyone gets to enjoy the delicious dip without running out! Can I use pre-sliced apples? Is there a flavor difference? You can use pre-sliced apples for convenience. However, they may not taste as fresh as whole apples. If possible, slice apples just before serving for the best flavor and crunch. In this post, we explored how to make a delicious salted caramel apple dip. You learned about key ingredients like apples, caramel sauce, and cream cheese. Optional add-ins such as nuts and spices can boost flavor. We shared easy preparation steps and tips for serving and storing. Don't forget that variations exist for different diets or tastes. Now you're ready to impress with this tasty dip. Enjoy sharing it at your next gathering!

Salted Caramel Apple Dip Sweet and Simple Delight

Are you ready for a sweet treat that’s simple to make? My Salted Caramel Apple Dip is the perfect blend

To make Pumpkin Chocolate Chip Blondies, you need a few key ingredients. These ingredients create a moist and tasty treat. Here’s what you will use: - 1 cup pumpkin puree (canned or fresh) - 1 cup brown sugar, packed - 1/2 cup granulated sugar - 1/2 cup unsalted butter, melted - 2 large eggs - 1 teaspoon vanilla extract - 1 1/2 cups all-purpose flour - 1 teaspoon baking powder - 1 teaspoon baking soda - 1 teaspoon ground cinnamon - 1/2 teaspoon ground nutmeg - 1/4 teaspoon salt - 1 cup semi-sweet chocolate chips These ingredients combine to create a soft and chewy texture. The pumpkin adds moisture and flavor, while the chocolate chips offer a sweet contrast. You can add a few optional ingredients for even more taste. Here are some ideas: - Chopped nuts (like walnuts or pecans) - Dried cranberries or raisins - Sea salt for a sweet-salty touch - A splash of maple syrup for more sweetness These additions can enhance the flavor and make your blondies unique. If you need to swap out some ingredients, here are some easy substitutions: - Use coconut oil instead of unsalted butter for a dairy-free option. - Replace all-purpose flour with almond flour for a gluten-free version. - Use flax eggs (1 tablespoon ground flaxseed mixed with 2.5 tablespoons water) in place of eggs for a vegan option. These swaps still keep the blondies delicious and satisfying. For the full recipe, check out the details above. First, gather all your ingredients. You need pumpkin puree, brown sugar, granulated sugar, and melted butter. Don’t forget the eggs, vanilla extract, flour, baking powder, baking soda, and spices. Line your baking pan with parchment paper. This helps with easy removal later. Preheat your oven to 350°F (175°C). In a large bowl, mix the melted butter, brown sugar, and granulated sugar. Stir it well until everything blends together. Next, add the pumpkin puree, eggs, and vanilla extract. Mix until it is smooth and creamy. In another bowl, whisk together the flour, baking powder, baking soda, cinnamon, nutmeg, and salt. This step is key for even flavor. Gradually add the dry mix to the wet mix. Stir gently. You want it just mixed, not overdone. Finally, fold in the chocolate chips. Make sure they are evenly spread throughout the batter. Now, pour the batter into your prepared pan. Use a spatula to spread it out evenly. Bake in the preheated oven for 25-30 minutes. Check for doneness by inserting a toothpick in the center. If it comes out clean with a few moist crumbs, the blondies are ready. Once baked, remove the pan from the oven. Allow the blondies to cool for about 10 minutes. Then, transfer them to a wire rack. Let them cool completely before cutting them into squares. To get the best texture, do not overmix your batter. This keeps the blondies soft and chewy. Make sure your butter is melted but not hot when mixing. Hot butter can cook the eggs. Use fresh spices for the best flavor. They add a warm kick to the blondies. If you want a richer taste, try brown butter instead of regular melted butter. For a fun twist, add chopped nuts or a swirl of peanut butter. This adds texture and flavor. Enjoy experimenting with your Pumpkin Chocolate Chip Blondies! For the full recipe, check out the detailed steps above. To get the best flavor from your blondies, use fresh spices. Ground cinnamon and nutmeg are key. They add warmth and depth. I also love to use high-quality chocolate chips. The chocolate melts and creates gooey pockets in each bite. Mix the ingredients gently to keep the blondies soft and chewy. Overmixing can make them tough. A few mistakes can ruin your blondies. First, don't skip the step of melting the butter. It helps blend the sugars well. Second, be careful with the baking time. Every oven is different. Start checking at the 25-minute mark. A toothpick should come out clean or with a few moist crumbs. Lastly, don’t rush cooling. Let them cool in the pan before cutting. This helps them hold their shape. For the best experience, serve these blondies warm. A light dusting of powdered sugar adds a nice touch. You can also drizzle melted chocolate on top for extra sweetness. Try pairing them with a scoop of vanilla ice cream. It creates a wonderful contrast of flavors and textures. Enjoy them with a warm drink, like spiced cider or hot cocoa. They make the perfect treat for any gathering! {{image_2}} You can easily make these blondies gluten-free. Just swap the all-purpose flour with a gluten-free blend. Look for a blend that has xanthan gum. This will help give the blondies a nice texture. The taste remains just as delicious. You will still enjoy the pumpkin and chocolate flavors. To make a vegan version, replace eggs with flax eggs. Mix 1 tablespoon of ground flaxseed with 2.5 tablespoons of water. Let it sit for 5 minutes until it thickens. Use a plant-based butter instead of regular butter. You can also use a dairy-free chocolate chip. This way, everyone can enjoy these treats! You can mix up the flavors in your blondies. Try adding a pinch of ginger or cloves for extra warmth. You can also toss in some chopped nuts like walnuts or pecans. If you want a twist, add dried fruit like cranberries or raisins. These small changes can make a big difference in taste. Each bite becomes a new experience. For the full recipe, make sure to check the original instructions. To keep your Pumpkin Chocolate Chip Blondies fresh, store them in an airtight container. Place a piece of wax paper between layers to prevent sticking. Keep them at room temperature for up to four days. If you want to keep them longer, consider refrigerating them. They can last up to a week in the fridge. Freezing blondies is easy and great for long-term storage. First, let the blondies cool completely. Then, cut them into squares. Wrap each square tightly in plastic wrap. Place them in a freezer bag or airtight container. They can last in the freezer for up to three months. When you want to enjoy them, just thaw them in the fridge overnight. To reheat your blondies, preheat your oven to 350°F (175°C). Place the blondies on a baking sheet. Heat them for about 10 minutes or until warm. You can also use the microwave for a quick option. Heat each square for about 15-20 seconds. Enjoy them warm for the best taste! Yes, you can use fresh pumpkin. Just cook it until soft, then puree it. This method gives a nice flavor. However, canned pumpkin is more convenient and consistent. Either option works well in the recipe. To check if the blondies are done, insert a toothpick into the center. If it comes out clean or with a few moist crumbs, they are ready. Keep an eye on them while baking, as oven times can vary. If you want to replace butter, try using coconut oil or applesauce. Both options keep the blondies moist. You can also use margarine as a direct swap. Each substitute may change the taste slightly, but they work well. For the full recipe, refer to the earlier section. Enjoy your baking! This article covered how to make delicious pumpkin chocolate chip blondies. We explored key and optional ingredients and even substitutions. I shared easy step-by-step instructions and tips for the best baking results. Remember, you can swap ingredients and try different flavors to make it your own. Don’t forget storage tips to keep them fresh. Enjoy baking these blondies and sharing them with others. They’re sure to impress!

Pumpkin Chocolate Chip Blondies Irresistible Treats

Get ready to delight your taste buds with Pumpkin Chocolate Chip Blondies! These sweet treats blend rich pumpkin flavor with

For this crispy honey garlic tofu, I recommend using firm or extra-firm tofu. Firm tofu holds its shape well, while extra-firm gives you a heartier bite. Both options work great, but I usually prefer extra-firm for added texture. You can also adjust the sweetness and saltiness. If you want a vegan option, try maple syrup instead of honey. For soy sauce, low-sodium versions are better. If you need gluten-free, use tamari. Garnishes elevate your dish. I love using green onions and sesame seeds. They add color and flavor. The crunch of sesame seeds complements the crispy tofu nicely. Green onions provide a fresh taste that brightens every bite. Presentation matters too. A pretty plate makes food more appealing. Serve your crispy honey garlic tofu on jasmine rice. Top it off with green onions and sesame seeds. This makes it look delicious and inviting. You can find the full recipe with all the details to make this dish in no time. To start, you need to press your tofu. This step helps to remove extra moisture. Wrap the tofu in a clean kitchen towel. Place something heavy on top, like a cast iron pan. Let it sit for about 15-30 minutes. This will make your tofu firmer and crispier later. Next, cut the tofu into cubes. I like to slice it into bite-sized pieces. Aim for about 1-inch cubes. This size helps them cook evenly and get crispy all around. Pat the cubes dry with paper towels to remove any remaining moisture. Now, let’s focus on cooking the tofu for the best crispiness. The best method is pan-frying. Heat your vegetable oil in a large non-stick skillet over medium-high heat. Make sure the oil is hot enough before adding the tofu. When you add the cubes, place them in a single layer. Fry them for about 3-4 minutes on one side. Then, flip them over carefully to cook the other side. Repeat this until all sides are golden brown and crispy. This step is key to achieving that lovely crunch. After frying the tofu, it’s time to make the sauce. In the same skillet, lower the heat to medium. Add minced garlic and grated ginger. Sauté these for about 30 seconds. This brings out their flavors and makes the dish smell amazing. Next, stir in the honey and soy sauce. Mix everything well and let it simmer for 2-3 minutes. This helps the sauce thicken and blend the flavors. It should reach a nice sticky consistency that coats the tofu perfectly. Once the sauce is ready, return the crispy tofu to the skillet. Toss gently to coat each piece in that delicious honey garlic sauce. Add a drizzle of sesame oil for extra flavor. Cook everything together for one more minute to heat through. Remember, this process will make your meal prep easy and tasty! For the full recipe, check the details above. To get that perfect crispiness when making crispy honey garlic tofu, you need to focus on two main things: cornstarch and heat. - Importance of cornstarch coating: Cornstarch is your best friend. It creates a light crust that helps the tofu fry up nice and crispy. Make sure to coat the tofu cubes evenly. This way, every piece gets that delightful crunch. - Temperature control during frying: Heat your oil to medium-high before adding the tofu. If the oil is too cool, the tofu will soak up oil and get soggy. If it's too hot, it will burn. You want that sweet spot where the tofu turns golden brown. To make your crispy honey garlic tofu even better, consider adding a few flavor boosts. - Optional additions: You can sprinkle in some chili flakes if you like heat. A squeeze of lime juice adds a nice tang that brightens the dish. Both options can elevate your meal to new heights. - Pairing suggestions: Serve your tofu with steamed veggies like broccoli or bell peppers. You can also pair it with jasmine rice or a fresh salad. These sides not only taste great but also bring color and balance to your plate. If you're ready to make this tasty dish, check out the [Full Recipe] for all the details! {{image_2}} You can change up the flavor of your crispy honey garlic tofu by trying different sauces. For a sweet twist, use teriyaki sauce instead of honey. If you like heat, a spicy garlic sauce works great too. To adapt the base recipe for different cuisines, consider using a sesame ginger sauce for an Asian flair or a maple soy glaze for a sweet touch. These small changes can make a big difference in taste. Pairing veggies with your tofu can enhance the dish. Good options include bell peppers, broccoli, and snap peas. These not only add color but also provide crunch. To incorporate veggies, simply add them to the skillet after frying your tofu. Stir-fry them briefly before adding the sauce and tofu back in. This way, the flavors meld together nicely. You can also serve the tofu with a side of steamed vegetables for a complete meal. To keep your crispy honey garlic tofu fresh, store it in an airtight container. Make sure to cool it down to room temperature before sealing. This helps maintain its texture. Cooked tofu lasts about 3 to 5 days in the fridge. If you notice any off smell or change in color, it's best to toss it. When reheating, the oven is your best friend. Preheat it to 375°F (190°C). Place the tofu on a baking sheet for about 10 minutes. This keeps it crispy. The microwave can make it soft, so use it only in a pinch. If you do use the microwave, heat for short bursts of 30 seconds. To revive the sauce flavor, add a splash of soy sauce or a hint of honey while reheating. This brings back that tasty glaze. You can also sprinkle fresh green onions on top before serving. Enjoy your meal prep with this delicious dish! For the full recipe, check out Crispy Honey Garlic Tofu. Silken tofu has a soft and creamy texture. This makes it less firm than the tofu I usually use. If you choose silken tofu, your dish will not be as crispy. Silken tofu works best in soups or smoothies. For crispy honey garlic tofu, stick with firm or extra-firm tofu. These types hold their shape well when cooked and give a great crunch. To make my crispy honey garlic tofu vegan, swap honey for maple syrup or agave nectar. Both options give a nice sweetness without using animal products. Make sure your soy sauce is vegan, too. Some brands might use fish sauce in their recipes. Check the label to be sure! I love serving this dish over jasmine rice. The rice soaks up the sweet sauce. You could also pair it with a fresh salad or stir-fried veggies. Try serving it in a bowl with quinoa or farro for a hearty meal. Adding green onions and sesame seeds on top makes it look extra tasty. To keep your crispy tofu fresh, store it in an airtight container in the fridge. It will last up to three days. If you want to keep it longer, freeze the tofu. Just know it will lose some crispiness when thawed. When reheating, use an oven to help regain that crunch. You can also add a splash of soy sauce to boost the flavor. This blog covered how to make crispy honey garlic tofu. We discussed ingredient choices, like firm tofu and sweeteners. You learned tips for pressing and cooking tofu for a perfect texture. We explored flavor options and garnishes for visual appeal. I also shared storage tips and reheating methods to maintain crispiness. Cooking doesn’t have to be complicated. With these steps and tips, you can enjoy this dish many ways. Experiment with flavors and garnishes. Enjoy your tasty creations!

Crispy Honey Garlic Tofu Perfect for Meal Prep

If you’re looking to spice up your meal prep with an easy and delicious recipe, you’ve come to the right

To make Buffalo Chicken Pinwheels, gather these ingredients: - 2 cups shredded cooked chicken - 1/2 cup Buffalo sauce - 1/2 cup cream cheese, softened - 1/2 cup shredded cheddar cheese - 1/4 cup chopped green onions - 4 large flour tortillas - 1/2 cup ranch dressing (for dipping) - Fresh cilantro leaves for garnish (optional) Choose high-quality ingredients for the best taste. Use fresh chicken for a tender bite. If you can find it, go for organic chicken. This choice often has better flavor. Opt for a Buffalo sauce that you enjoy. Some sauces are mild, while others pack a punch. Cream cheese should be soft for easy mixing. Look for full-fat cream cheese. This will give a creamy texture. Fresh green onions add a nice crunch. Always buy them firm and bright green. If you don’t have shredded chicken, you can use canned chicken. Just drain and shred it. For a spicy kick, swap the regular Buffalo sauce for a hotter version. If you want to avoid dairy, use a vegan cream cheese. Flour tortillas work best, but you can use whole wheat or corn tortillas instead. If you're out of ranch dressing, try blue cheese dressing as a dip. It pairs well with the flavors. To start, gather your ingredients. You will need: - 2 cups shredded cooked chicken - 1/2 cup Buffalo sauce - 1/2 cup cream cheese, softened - 1/2 cup shredded cheddar cheese - 1/4 cup chopped green onions - 4 large flour tortillas - 1/2 cup ranch dressing (for dipping) - Fresh cilantro leaves for garnish (optional) In a large bowl, mix the shredded chicken with Buffalo sauce. Make sure the chicken is well coated. Next, add the softened cream cheese, cheddar cheese, and green onions. Stir until everything is mixed well. This part is key for flavor! Now, let’s roll our pinwheels. Take a tortilla and lay it flat on a clean surface. Spread a good amount of the chicken mixture evenly across the tortilla. Make sure to reach the edges for full flavor. Starting from one end, roll the tortilla tightly. Keep it snug but not too tight. Repeat this process with the other tortillas and remaining mixture. Once all pinwheels are rolled, place them seam-side down on a cutting board. Cover them with plastic wrap. This helps them chill in the fridge for about 30 minutes. Chilling firms up the pinwheels, making them easier to cut. After chilling, remove the wrap and slice each roll into bite-sized pieces. Arrange them on a platter for serving. You can serve with ranch dressing on the side, and add fresh cilantro for a touch of color. For the full recipe, refer to the earlier section. To make your Buffalo chicken pinwheels burst with flavor, use high-quality ingredients. Fresh chicken adds a great taste. You can cook chicken in advance for ease. Mix Buffalo sauce to your liking. If you like it spicy, add more sauce. Cream cheese gives a creamy balance to the heat. Consider using flavored cream cheese for a fun twist. Presentation is key when serving pinwheels. Slice them into even pieces for a neat look. Use a sharp knife to avoid squishing the filling. Arrange the pinwheels in a circle on a platter. You can also stack them vertically for a fun display. Add some fresh cilantro leaves around the plate for color. Serve with a bowl of ranch dressing in the middle for dipping. One common mistake is rolling the tortillas too loosely. This can cause the filling to spill out. Make sure to roll tightly, but not too tight. Overfilling can also lead to messiness. Stick to the right amount of filling for easy rolling. Lastly, don’t skip the chilling step! Chilling helps the pinwheels hold their shape. For the full recipe, check out the instructions carefully. {{image_2}} If you want more heat, add extra Buffalo sauce to your filling. You can also use spicy shredded chicken for a bigger kick. Try adding diced jalapeños for a fresh twist. These changes will give your pinwheels a fiery flavor that will excite your guests. For a meatless version, swap chicken with shredded vegetables. Use cooked carrots, zucchini, and bell peppers. Mix in some cream cheese and Buffalo sauce for flavor. You can even add beans for protein. This way, everyone can enjoy tasty pinwheels, no matter their diet. While ranch is a classic choice, you can try others too. Blue cheese dressing pairs well with the spicy flavor. You might also like a yogurt-based dip for a lighter option. For a fun twist, serve with guacamole or salsa. Each dip can change the whole experience of your pinwheels. Want to know how to make these delicious treats? Check out the Full Recipe for step-by-step instructions! To keep your Buffalo Chicken Pinwheels fresh, wrap them tightly. Use plastic wrap or foil. Place them in an airtight container. This helps keep them from drying out. Store them in the fridge. They last about three days. For best taste, I suggest you eat them cold. If you prefer warm, heat them gently. Use a microwave and cover them with a damp paper towel. Heat for about 20-30 seconds. Check often to avoid overcooking. You can also reheat them in an oven at 350°F for about 10 minutes. You can freeze these pinwheels for later. First, wrap each pinwheel in plastic wrap. Then place them in a freezer bag. Try to remove all the air before sealing. They can stay frozen for up to three months. When ready to eat, let them thaw in the fridge overnight before reheating. For more details, check the full recipe. You can easily prepare Buffalo Chicken Pinwheels in advance. Just follow the recipe steps up to rolling the tortillas. After spreading the chicken mixture, roll them tightly and wrap each roll in plastic wrap. Store them in the fridge for up to 24 hours before serving. This method keeps the flavors fresh and saves you time on party day. Just remember to slice them just before you serve. Absolutely! You can use various types of tortillas for this recipe. Flour tortillas work great, but you can also try whole wheat, spinach, or even gluten-free options. Each type adds a unique flavor and texture. Feel free to experiment with different sizes too. Smaller tortillas can make cute bite-sized pinwheels for kids or parties. Buffalo Chicken Pinwheels pair well with many sides. Try serving them with ranch or blue cheese dressing for dipping. Fresh veggies like carrots and celery sticks add a nice crunch. You could also serve chips or a light salad for balance. These options round out your snack table nicely and keep your guests happy. In this post, we covered key aspects of making pinwheels. You learned about ingredient quality, preparation methods, and best practices. I shared tips for enhancing flavor and avoiding mistakes. We also looked at fun variations and how to store leftovers. Pinwheels are easy and fun to make. With the right ingredients and techniques, you can impress anyone. Enjoy your pinwheels and experiment with flavors!

Buffalo Chicken Pinwheels Easy Party Appetizer Recipe

Looking for a simple and tasty party snack? You’ve found it! Buffalo Chicken Pinwheels are easy to make and packed

- 8 oz cream cheese - ½ cup powdered sugar - 1 tsp vanilla extract - 1 cup graham cracker crumbs - 1 cup semi-sweet chocolate chips - 2 tbsp coconut oil To start, you need cream cheese. It gives these bites their rich, buttery taste. Next, powdered sugar adds sweetness. Vanilla extract brings warmth and flavor depth. Graham cracker crumbs provide a nice crunch. For the chocolate coating, use semi-sweet chocolate chips. Lastly, coconut oil helps the chocolate melt smoothly and gives a nice shine. - Sea salt - Colorful sprinkles - Crushed nuts While the bites are tasty on their own, toppings can add a fun twist. A sprinkle of sea salt enhances the chocolate flavor. Colorful sprinkles make them festive. Crushed nuts add crunch and a different taste. You can mix and match these toppings to suit your style. Try the full recipe for the best results! Start by mixing the cream cheese, powdered sugar, and vanilla extract. Use an electric mixer for a smooth blend. You want the mix to be creamy and well combined. Next, fold in the graham cracker crumbs. This step adds texture and makes the filling hold together. The mixture should be thick enough to form into balls. Now, it's time to shape the mixture. Use a small cookie scoop or your hands to form bite-sized balls. Aim for about one inch in diameter. Place each ball on a baking sheet lined with parchment paper. Once you shape all the bites, freeze them for about 30 minutes. This helps them firm up, making the next steps easier. While the bites freeze, let's melt the chocolate. Combine the semi-sweet chocolate chips and coconut oil in a microwave-safe bowl. Microwave in 30-second intervals, stirring in between. Continue until the chocolate is fully melted and smooth. Remove the cheesecake bites from the freezer. Dip each bite into the melted chocolate using a fork. Make sure each bite is fully coated. Allow any extra chocolate to drip off before placing them back on the baking sheet. While the chocolate is still wet, feel free to sprinkle sea salt or add colorful sprinkles. Finally, refrigerate the bites for another 20-30 minutes to let the chocolate set. For the full recipe, check out the complete instructions to make these delicious treats. To get the right creaminess, use room-temperature cream cheese. Cold cream cheese makes it hard to mix. Blend the cream cheese, powdered sugar, and vanilla until smooth. For the best texture, chill the bites after shaping. This helps them hold their shape during dipping. Dipping can be messy, so I have some tips. First, use a fork to dip each bite. This lets excess chocolate drip off easily. You can also use a toothpick to help lift them. This keeps your hands clean. You might want to dip them twice for a thicker coat. For a fun presentation, place the bites on a colorful plate. You can also arrange them in a small tower. Pair these bites with coffee or milk for a tasty treat. If you want something extra, serve them with fresh fruit. They look great and taste amazing! {{image_2}} You can make your cheesecake bites even more fun. Try adding flavor extracts like: - Almond extract - Mint extract These flavors can change the taste of your bites. You can also use different types of chocolate. Dark chocolate gives a rich taste, while white chocolate adds sweetness. Each chocolate option offers a unique twist. If you need gluten-free options, use gluten-free graham crackers. They work just as well. You can also make vegan cheesecake bites. Replace cream cheese with a dairy-free option. Use coconut cream or cashew cream for a creamy texture. This way, everyone can enjoy these treats. You can make your cheesecake bites festive for any holiday. For Halloween, use orange sprinkles. For Christmas, add red and green toppings. You can also enhance the flavors with seasonal ingredients. Pumpkin spice can add a fall twist, while peppermint can give a winter vibe. These little changes can make your bites perfect for any occasion. For the full recipe, check out Decadent Chocolate Dipped Cheesecake Bites. To keep your chocolate dipped cheesecake bites fresh, store them in an airtight container in the fridge. This will help keep them from drying out. If you want to freeze them, place the bites in a single layer on a baking sheet. Once frozen, transfer them to a freezer-safe bag or container. This method prevents them from sticking together. These bites last about 3-5 days in the fridge. If you freeze them, they can last up to 2 months. Always check for signs of spoilage. If you see any discoloration or an off smell, it's best to toss them. For thawing, move the bites from the freezer to the fridge. Let them thaw overnight for the best results. Avoid using a microwave, as it can change the texture. Enjoy them chilled for a perfect treat! You can make these bites a day before your event. Store them in an airtight container in the fridge. To keep them extra fresh, place parchment paper between layers. If you want to freeze them, do so after coating in chocolate. They can last up to three months in the freezer. Just remember to let them sit at room temperature for a few minutes before serving. This helps regain their creamy texture. Yes, you can use white chocolate! It gives a sweeter taste. If you love vanilla flavors, white chocolate works well. However, it lacks the rich depth of semi-sweet chocolate. For a fun twist, mix in some crushed cookies or nuts with the white chocolate. Look for these bites at local bakeries, especially those that focus on desserts. Many bakeries offer them as seasonal items or special treats. If you prefer online, check popular dessert delivery services. They often have options for same-day delivery in your area. No-bake cheesecake is light and creamy. It relies on whipped cream and gelatin to set. Regular cheesecake, on the other hand, is baked. It has a denser texture, thanks to eggs and cream cheese. Both styles are delicious, but they offer different mouthfeels. In this post, we explored how to make delicious chocolate-dipped cheesecake bites. You learned about essential ingredients, like cream cheese and chocolate. We covered step-by-step instructions to create and freeze your treat. I shared tips for perfecting the texture and showing off your bites. In the end, you can customize your cheesecake with flavors and toppings. Whether for a party or a simple snack, these bites are sure to impress. Enjoy making and sharing this tasty treat with friends and family!

Chocolate Dipped Cheesecake Bites Irresistible Delight

Are you ready to indulge in a sweet treat that will wow your taste buds? Chocolate Dipped Cheesecake Bites are

To make these tasty rolls, you need a few key items. Here are the must-have ingredients: - 3 cups all-purpose flour - 2 teaspoons instant yeast - 1 tablespoon sugar - 1 teaspoon salt - 1 cup warm milk (about 110°F) - 1/4 cup unsalted butter, melted - 1/2 cup grated Parmesan cheese - 4 cloves garlic, minced - 2 tablespoons chopped fresh parsley - 2 tablespoons olive oil These items create a rich, buttery dough with a strong garlic flavor. The Parmesan cheese adds a nice touch, making each bite delicious. You can add more flavor with some optional ingredients. Try these to make your rolls unique: - Italian seasoning for extra herbs - Red pepper flakes for a kick - Different cheeses like mozzarella or cheddar - Chopped green onions for freshness Feel free to mix and match these options. They can help you create a roll that fits your taste. If you have dietary needs, there are good swaps. Here are some substitutes: - Use gluten-free flour for a gluten-free option. - Almond milk or oat milk can replace regular milk. - Vegan butter works well instead of unsalted butter. - Nutritional yeast can replace Parmesan cheese for a dairy-free version. These swaps help you enjoy the rolls while meeting your dietary needs. For the full recipe, check out the link above. To start, warm your milk until it's about 110°F. In a large bowl, mix the warm milk with sugar and instant yeast. Let this sit for five minutes until it gets foamy. This lets the yeast wake up and work its magic. Next, gradually add the flour and salt into the bowl. Pour in the melted butter as well. Mix until you form a soft dough. Now, it's time to knead! Place the dough on a floured surface and knead for five to seven minutes. You want the dough to feel smooth and elastic. After kneading, put the dough in a greased bowl. Cover it with a kitchen towel and let it rise in a warm spot for about one hour. The dough should double in size. While the dough rises, prepare the garlic Parmesan mixture. In a small bowl, combine minced garlic, grated Parmesan, chopped parsley, and olive oil. Stir it well and set it aside. This mixture will give the rolls their tasty flavor. Once the dough has risen, punch it down gently. Divide it into twelve equal pieces. Roll each piece into a ball, then dip it in your garlic Parmesan mixture. Make sure each ball is well-coated. Arrange the coated balls in a greased bundt pan or a round baking dish. Stack them together for a fun look. Cover the dough balls with a towel and let them rise for another thirty minutes. Preheat your oven to 350°F. When the rolls have risen, bake them for twenty-five to thirty minutes. They should turn golden brown on top. After baking, remove the rolls and brush them with any leftover garlic mixture. Let them cool for a few minutes. Serve warm on a rustic wooden board. Add a small bowl of olive oil and balsamic vinegar for dipping. Enjoy your Garlic Parmesan Pull Apart Rolls! For the complete process, check the Full Recipe. To get the best dough, start with warm milk. This helps the yeast grow. Mix the warm milk, sugar, and yeast first. Wait five minutes until it foams. This shows the yeast is active. When adding flour, do it slowly. Knead the dough for five to seven minutes. It should feel smooth and elastic. If it feels sticky, add a bit more flour. Let it rise in a warm spot. The dough should double in size. This step is key for soft rolls. You can add more flavors to your rolls. Try mixing in herbs like rosemary or thyme. These add a fresh taste. You can use different cheeses too. Mozzarella or cheddar can work well. For a kick, add some red pepper flakes. This gives a nice heat. If you want a hint of sweetness, drizzle in honey. This balances the garlic's strong flavor. Don’t forget to adjust the garlic amount. More garlic means a stronger taste! One big mistake is not letting the dough rise enough. If it does not double, the rolls will be dense. Another mistake is baking at the wrong temperature. Always preheat your oven to 350°F. If you skip this, your rolls may not cook properly. Also, be careful when mixing the garlic mixture. Make sure you coat each dough ball well. If they are not coated, some rolls will lack flavor. Lastly, don’t rush the cooling time. Let them cool for a few minutes before serving. This helps the flavors meld nicely. For the full recipe, check the detailed instructions above. {{image_2}} You can easily make cheesy garlic pull apart rolls. Just add cheese to the dough. I love using mozzarella for its melty goodness. Mix in 1 cup of shredded mozzarella when you mix the flour and salt. This makes the rolls ooey-gooey inside. You can also sprinkle extra cheese on top before baking. The result? A cheesy, savory treat that everyone will love! For a fresh twist, try herb-infused pull apart rolls. Mix in your favorite herbs into the dough. Rosemary and thyme work great. Use about 1 tablespoon of dried herbs or 2 tablespoons of fresh herbs. Add them when you mix in the flour. This adds depth to the flavor. The smell of herbs while baking fills your kitchen with warmth. If you want something sweet, you can create sweet pull apart rolls. Replace the garlic and cheese with cinnamon and sugar. Use 1/2 cup of sugar and 2 teaspoons of cinnamon. Mix this blend with melted butter and dip each dough ball in it. You can also add raisins or chopped nuts for texture. Bake as usual, and you will have a sweet treat perfect for breakfast or dessert. For the full recipe, get ready to impress your family and friends with these fun variations! To keep your leftover garlic Parmesan pull apart rolls fresh, store them in an airtight container. This method helps to keep them soft and tasty. You can also wrap them in plastic wrap or foil. If you choose to use foil, make sure it is tightly sealed. Keep the container at room temperature for up to two days. If you want them to last longer, consider refrigeration. When you are ready to enjoy your leftover rolls, reheating is key. Preheat your oven to 350°F (175°C). Place the rolls in an oven-safe dish and cover them with foil. This helps to retain moisture. Heat for about 10 to 15 minutes. If you prefer, you can microwave them. Just heat them for 15 to 20 seconds at a time until warm. Be careful not to overheat, as they can become tough. If you have extra rolls, freezing is a great option. Allow the rolls to cool completely before freezing. Place them in a freezer-safe bag or container. Make sure to remove as much air as possible. You can freeze them for up to three months. To thaw, simply take them out of the freezer and let them sit at room temperature. For a warm treat, reheat them in the oven as mentioned above. Enjoy your tasty garlic Parmesan pull apart rolls whenever you want! You know the rolls are done when they turn golden brown. Take a quick look at the tops. They should look nice and crispy. You can also tap the bottom of a roll. If it sounds hollow, it is ready. The rolls should feel light and airy when you pick them up. Yes, you can make the dough ahead of time. This can save you time on a busy day. After you knead the dough, place it in a bowl. Cover it well and store it in the fridge. It’s best to use the dough within 24 hours. When you’re ready to bake, let it warm up and rise again. This makes it easier to shape. These rolls are great on their own, but you can make them even better. Serve them warm with olive oil for dipping. You can also pair them with marinara sauce. They go well with soups or salads too. Try placing them on a wooden board for a nice look. Add fresh herbs or some extra Parmesan on top for flair. You can find the Full Recipe to make these rolls today. You learned the key ingredients for delicious Garlic Parmesan Pull Apart Rolls. You gained steps for preparing the dough and baking your rolls perfectly. We covered tips to enhance flavor and avoid common mistakes. You also explored fun variations and how to store leftovers. Now, try making these rolls yourself. Enjoy sharing them with friends and family. Happy baking!

Garlic Parmesan Pull Apart Rolls Easy and Flavorful Treat

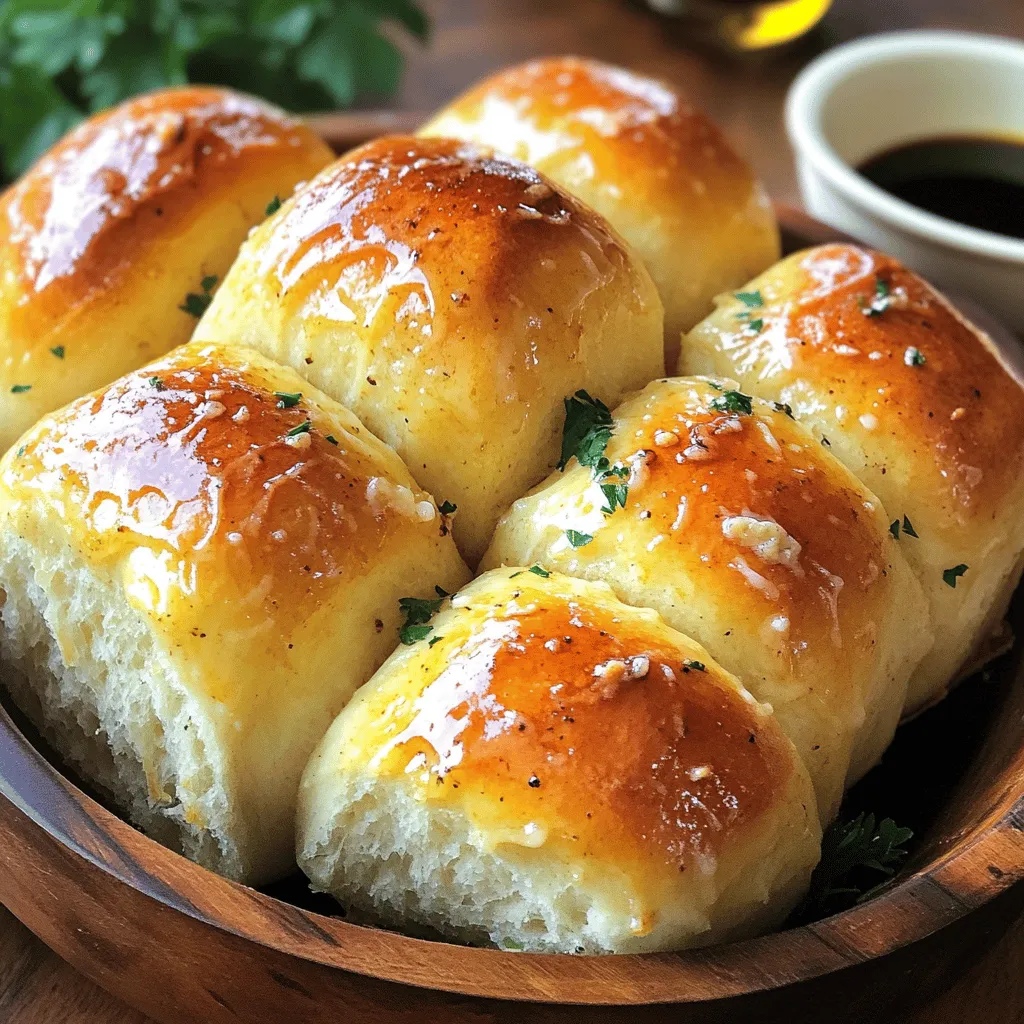
Garlic Parmesan Pull Apart Rolls are the perfect snack for any gathering! These rolls are easy to make and bursting

Older posts
Newer posts
← Previous Page1 … Page51 Page52 Page53 … Page86 Next →

dsad

© 2026 Cooking Wells • Built with GeneratePress

Our Policies

  • Copyright Policy
  • Cookie Policy
  • GDPR Policy
  • Privacy Policy
  • Disclaimer
  • Terms Of Use

More Information

  • Home
  • About
  • Contact
  • Appetizers
  • Dessert
  • Dinner
  • Drinks
©2026, Cooking Wells About Back To Top