![To make Crispy Garlic Herb Potato Wedges, you will need: - 4 large russet potatoes, scrubbed and cut into wedges - 4 tablespoons olive oil - 4 cloves garlic, minced - 2 teaspoons dried oregano - 2 teaspoons dried thyme - 1 teaspoon paprika - 1 teaspoon onion powder - Salt and pepper to taste - Fresh parsley, chopped (for garnish) - Grated Parmesan cheese (optional) If you prefer, you can swap russet potatoes for sweet potatoes. They add a nice sweetness. You can also use fresh herbs instead of dried ones if you have them on hand. To prepare these tasty potato wedges, you will need a few key tools: - A sharp knife for cutting the potatoes - A large mixing bowl for combining the oil and spices - A baking sheet lined with parchment paper for easy cleanup Using the right tools makes cooking easier and more fun. A sharp knife helps you cut the potatoes quickly and safely. Lining the baking sheet prevents sticking, and it keeps the wedges crispy. These small steps lead to great results. You can find the full recipe to follow along with each step. Happy cooking! Start by washing your russet potatoes well. Scrub them under cold water to remove dirt. Next, cut each potato into wedges. Aim for 8 wedges per potato for even cooking. Make sure they are similar in size. This helps them cook at the same time. Soaking the wedges in water for 30 minutes is a great tip. It removes extra starch, which helps make them crispier. In a big bowl, combine 4 tablespoons of olive oil with the spices. Use 4 cloves of minced garlic, 2 teaspoons of oregano, and 2 teaspoons of thyme. Add 1 teaspoon of paprika, 1 teaspoon of onion powder, salt, and pepper. Mix this well. This creates a tasty oil mixture. It’s vital to coat each wedge evenly. This ensures they all get crispy and flavorful. Preheat your oven to 425°F (220°C). Line a baking sheet with parchment paper to prevent sticking. Spread the potato wedges in a single layer on the sheet. Avoid crowding them; this helps them crisp up. Bake the wedges for 30 to 35 minutes. Flip them halfway to cook evenly. They are ready when they look golden brown and feel crispy. Enjoy them warm as a side or snack! For the full recipe, check out the section above. To make your potato wedges extra crispy, a few tricks can help. First, try parboiling the potato wedges before baking. Boil them for about 5-7 minutes, then drain and let them cool. This step helps to soften the inside while keeping the outside crunchy. Next, pay attention to the oil temperature. Make sure the oil is hot when you mix it with the spices. This helps create a golden crust. Spacing on the baking sheet is also key. Spread the wedges out in a single layer. If they touch, they can steam rather than crisp up. Give them room to breathe for the best results. Now, let’s talk about flavor! You can add more herbs or spices to suit your taste. Try adding rosemary or basil for a fresh twist. A pinch of cayenne pepper can spice things up if you like heat. Adjusting the seasoning is easy too. Taste the oil mixture before tossing the wedges. If you want more garlic, add another clove. Don’t hesitate to make it your own! If you follow these tips, your crispy garlic herb potato wedges will be a hit every time. For the complete recipe, check the [Full Recipe]. {{image_2}} You can change the flavor of your Crispy Garlic Herb Potato Wedges easily. For a spicy kick, add chili powder or cayenne pepper to the oil mixture. If you love cheese, sprinkle some grated cheese on top before baking. You can also use Italian seasoning for a classic taste. To explore different cuisines, think about using curry powder for an Indian twist or cumin and chili powder for a Mexican vibe. These blends add fun flavors that can match any meal. Using different types of potatoes can change your wedges' taste and feel. Russet potatoes are great for a crispy texture. They give a fluffy inside and a crunchy outside. If you try Yukon Gold potatoes, you’ll get a creamier texture. They have a buttery flavor, but they may not get as crispy. Sweet potatoes are another tasty choice. They add a nice sweetness and can be spiced up with cinnamon or paprika. When you pick your potato, think about the final dish. The right potato will make your wedges even better. For more details on the full recipe, check out the Full Recipe section. To keep your leftover potato wedges fresh, let them cool first. Then, place them in an airtight container. Store them in the fridge for up to three days. If you want to reheat them, use your oven. Preheat it to 400°F (200°C). Spread the wedges on a baking sheet. Heat for about 10-15 minutes. This method helps keep them crispy. If you want to save your potato wedges longer, freezing is a good option. First, let the wedges cool completely. Place them in a single layer on a baking sheet. Freeze them for about an hour. This helps them keep their shape. After that, transfer the frozen wedges to a freezer bag. They will last up to three months. To thaw, take the wedges out the night before and place them in the fridge. When you're ready to cook, bake them directly from frozen. Preheat your oven to 425°F (220°C). Bake for 25-30 minutes. This way, they will stay tasty and flavorful. For the full recipe, check out the recipe section. You can use several alternatives to olive oil. Some great options include: - Avocado oil - Coconut oil - Grapeseed oil - Sunflower oil These oils still provide flavor and help achieve that crispy texture. Each oil has its own taste, so choose one that you like. For a lighter option, you might use vegetable broth or a bit of apple cider vinegar, though it won’t give the same crispiness. Yes, you can make the wedges ahead of time. Here are some tips: - Cut the potatoes and soak them in water. This helps remove starch and keeps them from browning. - Toss the wedges in the seasoning mix but don’t bake them. Store them in an airtight container in the fridge for up to 24 hours. For reheating, you can place them back in the oven at 425°F (220°C) for about 15 minutes. This will crisp them up nicely. These potato wedges pair well with many dishes. Here are some ideas: - Serve with ranch or garlic aioli for dipping. - They go great with burgers, grilled chicken, or steak. - Add a fresh salad on the side for balance. For a complete meal, consider a creamy soup or a tangy slaw. These sides complement the crispy texture perfectly. For the full recipe, check out the details above. This guide covered everything you need for Crispy Garlic Herb Potato Wedges. You learned about ingredients, cooking tools, and step-by-step instructions for perfect wedges. We discussed tips for extra crispiness, flavor variations, storage methods, and answered common questions. Remember, customizing your recipe adds fun and flavor. Enjoy experimenting and sharing delicious wedges with friends and family. Your cooking can be simple, satisfying, and tasty. Happy cooking!](https://cookingwells.com/wp-content/uploads/2025/07/623efb22-9c3c-4ef1-bf79-c173a50dbb7b.webp)
Crispy Garlic Herb Potato Wedges Simple and Tasty Recipe
Craving a tasty side dish that’s crispy, herby, and packed with flavor? You’re in the right place! My Crispy Garlic
Craving a tasty side dish that’s crispy, herby, and packed with flavor? You’re in the right place! My Crispy Garlic
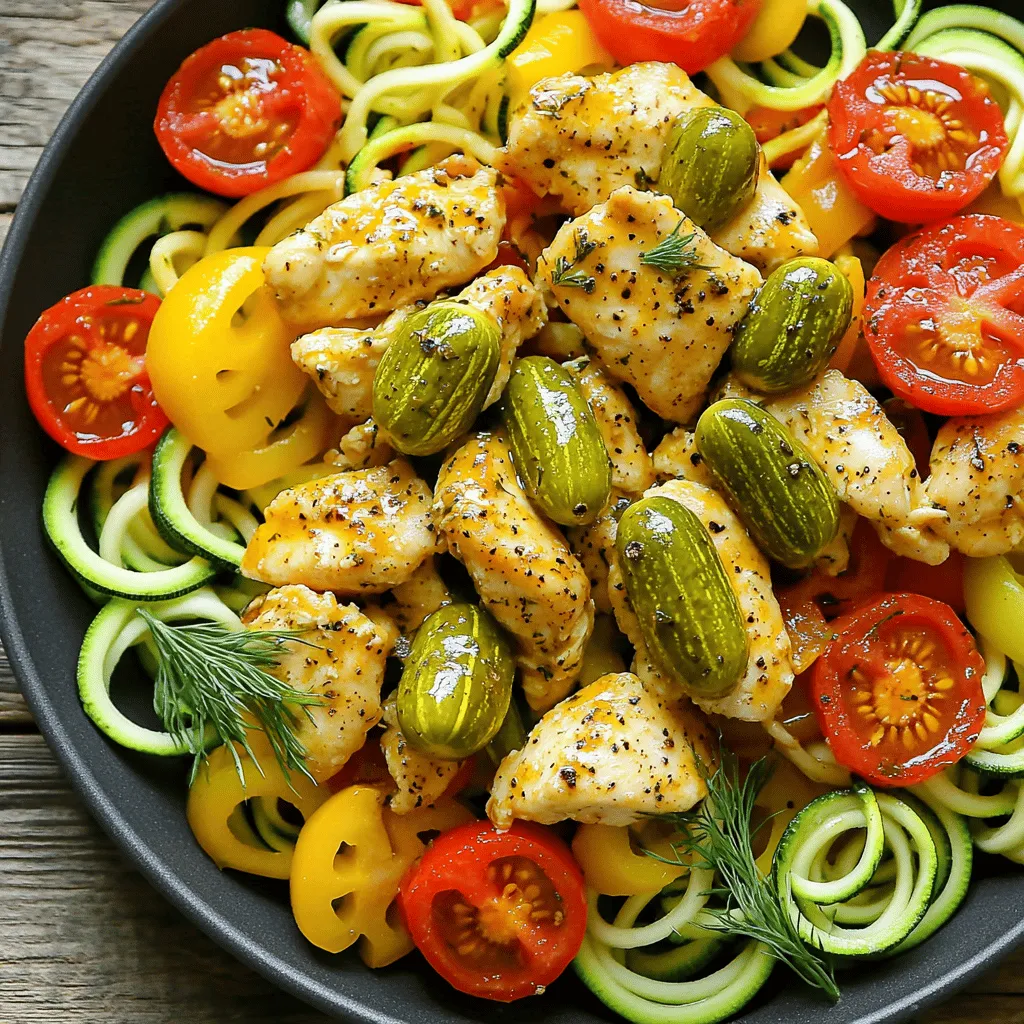
Get ready to take your dinner game to the next level with my Pickle Ranch Chicken and Zoodle Stir Fry
![To make the best Cherry Almond Breakfast Muffins, you'll need these simple ingredients: - 1 cup all-purpose flour - 1 cup almond flour - 1 teaspoon baking powder - 1/2 teaspoon baking soda - 1/4 teaspoon salt - 1/2 cup brown sugar - 2 large eggs - 1/2 cup Greek yogurt - 1/4 cup almond milk - 1 teaspoon almond extract - 1/2 cup fresh or frozen cherries, pitted and chopped - 1/4 cup sliced almonds, plus extra for topping These items create a lovely blend of flavors and textures. The cherries add a burst of sweetness, while the almonds give a nice crunch. If you need to change things up or have dietary needs, here are some swaps you can try: - Instead of almond flour, use oat flour for a gluten-free option. - You can swap Greek yogurt with sour cream or a dairy-free yogurt. - If you don't have almond milk, any milk will work fine. - For a nut-free option, skip the almonds or replace them with sunflower seeds. These alternatives keep your muffins tasty while meeting your needs. To make these muffins, gather the following tools: - A muffin tin and paper liners (or non-stick spray) - Two mixing bowls (one large, one medium) - A whisk for mixing wet ingredients - A spatula for folding in the cherries and almonds - An oven mitt for safe handling Having the right tools makes baking easier and more fun! With these ingredients and tools, you’re ready to create a delicious batch of Cherry Almond Breakfast Muffins. For the complete recipe, check out the Full Recipe section. First, gather your ingredients. This recipe uses basic items you may already have. Preheat your oven to 350°F (175°C). Line a muffin tin with liners or grease it with non-stick spray. In a medium bowl, mix together the all-purpose flour, almond flour, baking powder, baking soda, and salt. This mix gives the muffins a great texture. In another large bowl, whisk the brown sugar, eggs, Greek yogurt, almond milk, and almond extract until smooth. This step adds flavor and moisture. Now, slowly add the dry mix to the wet mix. Stir gently until you see no flour streaks. Be careful not to overmix. It can make your muffins tough. Next, fold in the chopped cherries and sliced almonds. This adds a nice crunch and fruity taste. Now you’re ready to fill the muffin cups. Pour the batter evenly into each cup, filling them about two-thirds full. This gives them room to rise. For a tasty finish, sprinkle some extra sliced almonds on top. Place the muffin tin in the oven and bake for 18-20 minutes. They should turn golden brown. To check if they are done, insert a toothpick in the center. If it comes out clean, they are ready! Once baked, let the muffins cool in the tin for about 5 minutes. This helps them firm up. After that, transfer them to a wire rack to cool completely. Serve them warm or at room temperature. Enjoy these Cherry Almond Breakfast Muffins with your favorite drink or on their own. For the full recipe, check out the detailed instructions provided above! To make the best cherry almond muffins, follow these simple tips: - Measure Ingredients: Use dry measuring cups for flour and almond flour. - Room Temperature Eggs: Bring your eggs to room temp for better mixing. - Mix Gently: Stir the batter just until combined. Overmixing can make muffins tough. - Chop Cherries Evenly: Cut the cherries into small pieces for better distribution. - Preheat Oven: Always preheat the oven. This helps muffins rise well. If your muffins aren't perfect, don't worry! Here are some common problems and easy fixes: - Muffins Are Too Dense: This usually means you overmixed the batter. Try mixing less next time. - Muffins Don't Rise: Check that your baking powder and baking soda are fresh. Old leavening agents can cause flat muffins. - Burnt Tops: If muffins brown too quickly, cover them with foil halfway through baking. - Dry Muffins: Make sure to measure flour correctly and not pack it in. Use a light touch! Cherry almond muffins are tasty on their own, but you can make them even better! Here are some fun ideas: - Spread with Butter: A little butter on a warm muffin adds richness. - Serve with Yogurt: Pair muffins with Greek yogurt and fresh fruit for a complete breakfast. - Coffee or Tea: Enjoy with your favorite coffee or tea. The flavors complement each other. - Garnish with Honey: Drizzle honey over the top for added sweetness and shine. These tips should help you create the best cherry almond muffins every time. For a detailed recipe, check the Full Recipe section. {{image_2}} You can make your Cherry Almond Breakfast Muffins healthier. Try using gluten-free flour instead of all-purpose flour. This option works great for those who are gluten-sensitive. For a low-sugar version, reduce the brown sugar. You can also use a sugar substitute, like stevia. These changes keep the muffins tasty while making them better for you. Want to mix things up? You can add chocolate chips for a sweet twist. Dark chocolate pairs well with almonds and cherries. You might also consider using different fruits. Fresh blueberries or diced peaches add a fun flavor. Each fruit brings its own taste, making each batch unique. Get creative with seasonal themes! In fall, add pumpkin spice for a cozy flavor. For winter, try adding dried cranberries and orange zest for a festive touch. In spring, mix in fresh raspberries and lemon zest. Each season offers new tastes and ideas for your muffins. These fun twists make your Cherry Almond Breakfast Muffins perfect for any holiday! For the complete recipe, check out the [Full Recipe]. To keep your Cherry Almond Breakfast Muffins fresh, store them in an airtight container. This will help maintain their soft texture. Place a paper towel at the bottom of the container to absorb excess moisture. You can keep them at room temperature for up to three days. If you want to keep them longer, refrigeration is an option, but it may change their texture. When you are ready to enjoy your muffins again, reheating them is easy. Preheat your oven to 350°F (175°C). Place the muffins on a baking sheet and heat for about 5 to 10 minutes. If you are in a hurry, you can use the microwave. Heat each muffin for about 15 to 20 seconds. Just be careful not to overheat them, or they may turn tough. Freezing your muffins is a great way to save them for later. Start by letting them cool completely. Wrap each muffin tightly in plastic wrap. Place the wrapped muffins in a freezer-safe bag or container. You can freeze them for up to three months. When you're ready to eat them, take them out and let them thaw overnight in the fridge. Then, reheat them as mentioned above for a cozy breakfast treat. Cherry Almond Breakfast Muffins stay fresh for about 3 to 5 days when stored properly. Keep them in an airtight container at room temperature. If you want to keep them longer, try freezing them. They freeze well for up to 3 months. Yes, you can make these muffins ahead of time! I often bake a batch on the weekend. You can enjoy them for breakfast all week. Just store them in an airtight container after they cool. If you need a substitute for Greek yogurt, try using sour cream. You can also use regular yogurt, but the texture will be thinner. Another option is to use applesauce for a dairy-free choice. It adds moisture and a hint of sweetness. For the full recipe, check out the details above! You learned how to make Cherry Almond Breakfast Muffins. We covered ingredients, steps, and tips for baking. You also saw ways to change the recipe or store your muffins. Remember, making muffins can be fun and easy. Use fresh ingredients for the best taste. Don't hesitate to get creative with flavors or make bigger batches. Enjoy your muffins and share with friends and family!](https://cookingwells.com/wp-content/uploads/2025/07/5df8376c-ed4b-4f8a-b59b-e7d8ba180f10.webp)
Start your day right with my Cherry Almond Breakfast Muffins! These cozy, tasty treats blend sweet cherries and nutty almonds

Looking for a fun and tasty meal? Try my Pickle Ranch Chicken and Spinach Wraps! These wraps combine crispy pickles,
![For the Cherry Coconut Muffins, you’ll need the following: - 1 cup all-purpose flour - 1 cup shredded coconut (sweetened or unsweetened) - 1/2 cup sugar - 2 teaspoons baking powder - 1/2 teaspoon baking soda - 1/4 teaspoon salt - 1/2 cup unsweetened coconut milk (or regular milk) - 1/4 cup vegetable oil (or melted coconut oil) - 1 large egg - 1 teaspoon vanilla extract - 1 cup fresh or frozen cherries, pitted and halved - Optional: Additional shredded coconut for topping These ingredients work together to create a tasty treat. The cherries add a bright burst of flavor, while coconut gives a lovely texture. You can easily swap some ingredients if needed. Here are my suggestions: - Flour: Use whole wheat flour for added nutrition. - Sugar: Try brown sugar for a richer flavor. - Milk: Almond or soy milk work well if you need a dairy-free option. - Oil: Use melted butter for a richer taste. - Cherries: Swap cherries with blueberries or raspberries for a different twist. These substitutions can change the flavor slightly but will still yield great muffins. When choosing cherries, look for these signs of freshness: - Color: Pick cherries that are deep red and shiny. - Firmness: They should feel firm, not soft or mushy. - Stem: A fresh stem indicates the cherry is still good. For coconut, choose either sweetened or unsweetened shredded coconut. Check the packaging for freshness dates. Fresh coconut adds great flavor and texture to your muffins. Make sure to check out the Full Recipe for detailed instructions and tips! Start by gathering your ingredients. You will need all-purpose flour, coconut, sugar, baking powder, baking soda, salt, coconut milk, vegetable oil, an egg, vanilla extract, and cherries. 1. Preheat your oven to 350°F (175°C). Line a muffin tin with paper liners or spray it with non-stick spray. 2. In a large bowl, whisk the flour, shredded coconut, sugar, baking powder, baking soda, and salt. Mix until everything is well combined. 3. In a separate bowl, mix the coconut milk, vegetable oil, egg, and vanilla extract. Stir this until it’s smooth. 4. Pour the wet mix into the dry mix. Stir gently until you see no dry flour. Don’t worry about lumps; they are okay! 5. Fold in the cherries carefully. Make sure they are evenly spread throughout the batter. 1. Use a spoon to fill each muffin cup about two-thirds full. This will help them rise nicely. 2. If you want, sprinkle some extra shredded coconut on top of each muffin for added flavor and crunch. 3. Place the muffin tin in the oven and bake for 18 to 22 minutes. Check if they are done by inserting a toothpick into the center. If it comes out clean, they are ready! 1. Let the muffins cool in the pan for about 5 minutes. This makes them easier to remove. 2. After that, transfer them to a wire rack to cool completely. This step helps keep them fluffy. 3. Serve your muffins warm. A light dusting of powdered sugar makes them look pretty! You can also enjoy them with whipped cream for a special treat. For the full recipe, check the section above. Enjoy your delicious Cherry Coconut Muffins! To get that perfect muffin texture, you need to mix gently. After you add the wet ingredients to the dry ones, stir just until combined. Over-mixing can make the muffins tough. A few small lumps in the batter are okay. The goal is a light and fluffy muffin, so handle the batter with care. If you have leftover muffins, let them cool completely. Then, place them in an airtight container. They stay fresh at room temperature for up to three days. For longer storage, you can freeze them. Wrap each muffin in plastic wrap and then in foil. They will last up to three months in the freezer. When you want to enjoy one, just thaw it at room temperature. One common mistake is using old baking powder. Always check the expiration date. If your muffins don’t rise, this could be the reason. Another mistake is not prepping your muffin tin. Grease it well or use liners. This helps the muffins come out easily. Lastly, don’t skip the cooling step. Letting them cool for a bit helps them firm up and taste even better. For the full recipe, check out the details above! {{image_2}} To make vegan cherry coconut muffins, swap the egg for a flax egg. Mix 1 tablespoon of ground flaxseed with 2.5 tablespoons of water. Let it sit for 5 minutes until it thickens. Use coconut milk, just like in the original recipe. Choose a vegan oil, like coconut oil or vegetable oil. Ensure your sugar is vegan-friendly. These changes keep your muffins tasty and plant-based. You can make these muffins gluten-free. Use a gluten-free flour blend instead of all-purpose flour. Look for blends that contain xanthan gum; this helps with texture. The rest of the recipe stays the same. You still get that delicious cherry and coconut flavor! Just make sure all your other ingredients are also gluten-free. Feel free to customize your muffins! You can add chocolate chips for a sweet twist. Fold in about half a cup of dark or white chocolate chips into the batter. You can also add nuts, like chopped walnuts or almonds. These add a nice crunch and flavor. Just use about half a cup of your favorite nuts. Mix them in with the cherries. Enjoy experimenting with flavors! For the full recipe, check [Full Recipe]. To keep your cherry coconut muffins fresh, store them in an airtight container. This prevents moisture loss and keeps them soft. Line the container with a paper towel to absorb excess moisture. Place the muffins in a single layer to avoid crushing them. If you stack them, add another paper towel between layers. Store them at room temperature for up to three days. Freezing muffins is a great way to enjoy them later. First, let the muffins cool completely. Then, wrap each muffin tightly in plastic wrap. After wrapping, place them in a freezer-safe bag or container. Label the bag with the date to track freshness. You can freeze them for up to three months. When you're ready to eat, just thaw them at room temperature. Reheating muffins properly is key to keeping them moist. To reheat, use the oven for the best results. Preheat your oven to 350°F (175°C). Place the muffins on a baking sheet. Heat them for about 10 minutes. You can also wrap muffins in a damp paper towel and microwave them for 15-20 seconds. This method helps retain moisture. Enjoy your muffins warm and fresh, just like when they came out of the oven! For the full recipe, check out Cherry Coconut Muffins. Yes, you can use frozen cherries. They work well in this recipe. Just make sure to thaw them first. Drain any excess liquid so your muffins do not get soggy. The cherry flavor stays bright and tasty, even with frozen fruit. You might notice a bit more juice in your muffins, but that adds to the flavor! To make egg-free muffins, use a simple substitute. You can replace one egg with 1/4 cup of unsweetened applesauce or a mashed banana. Both options keep the muffins moist and soft. You can also use flaxseed meal. Mix one tablespoon of flaxseed with three tablespoons of water. Let it sit for a few minutes to thicken before adding it to the batter. Cherry Coconut Muffins taste great on their own, but you can add extra treats. Serve them warm with a little butter or coconut cream. They pair nicely with a cup of coffee or tea. For a fun twist, top with whipped cream or yogurt for a light dessert. You can also enjoy them with fresh fruit or a sprinkle of powdered sugar for a sweet finish. In this post, we explored how to make delicious cherry coconut muffins. We covered ingredient selection, easy baking steps, and tips for the best results. Remember to use fresh cherries and enjoy experimenting with variations. Storing and reheating your muffins can help keep them tasty, too. Avoid common mistakes to ensure a great outcome every time. Baking is all about fun and trying new things, so don’t hesitate to explore! Enjoy your muffins, and share your creations with friends and family.](https://cookingwells.com/wp-content/uploads/2025/07/d8f92d30-00fc-487e-820c-a612d468b6dc.webp)
Ready to treat yourself to a delightful blend of flavors? This Cherry Coconut Muffins recipe is simple yet bursting with
![To make the best Pickle Ranch Chicken and Egg Salad, you need some key ingredients. Here’s what you will need: - 2 cups cooked chicken, shredded - 4 hard-boiled eggs, chopped - 1/2 cup dill pickles, finely chopped - 1/4 cup red onion, finely chopped - 1/2 cup celery, diced - 1 cup ranch dressing - 1 tablespoon Dijon mustard - 1 teaspoon garlic powder - Salt and pepper to taste These ingredients work together to create a tasty and creamy salad. The chicken gives protein, while the eggs add richness. Dill pickles bring a nice crunch and tang. You can make your salad even better with some simple garnishes. Here are some ideas: - Fresh dill for a pop of color and flavor - Sliced tomatoes for freshness - Crushed crackers for extra crunch Using these garnishes can make your salad look nice. They also add different flavors and textures. This salad offers a balanced mix of nutrients. Each serving has protein from the chicken and eggs. The celery and pickles add fiber and vitamins. Here’s a quick rundown: - Calories: About 350 per serving - Protein: Around 30 grams - Fat: About 20 grams - Carbohydrates: Roughly 10 grams If you want to make it healthier, you can swap the ranch dressing for a lighter option. You can also reduce the amount of mayo or mustard you use. For the full recipe, check out the [Full Recipe]. Start with 2 cups of cooked chicken. I like to use rotisserie chicken for ease. Shred the chicken into small pieces. Next, boil 4 eggs until hard. After they cool, chop them into small bits. Combine the shredded chicken and chopped eggs in a large bowl. Now, add 1/2 cup of finely chopped dill pickles. This will give your salad a nice crunch and tang. In another bowl, mix 1 cup of ranch dressing, 1 tablespoon of Dijon mustard, and 1 teaspoon of garlic powder. Stir until blended. Pour this mixture over the chicken and egg mix. Gently fold everything together. Make sure each piece is coated well. Taste your salad and add salt and pepper as needed. This is your chance to adjust the flavor. Once mixed, chill the salad in the fridge for at least 30 minutes. This helps the flavors blend. Serve it on fresh greens or as a filling in a sandwich. You can also add fresh dill as a garnish for a pop of color. Enjoy this easy and tasty dish any time of the day! For the full recipe, check the details above. You can make this salad your own. Try adding different veggies like bell peppers or cucumbers. Swap out the chicken for turkey or even tofu for a vegan twist. You can also mix in avocado for creaminess. If you love heat, add jalapeños or a dash of hot sauce. Each twist gives a new flavor and makes it fun! Chilling your salad is key for taste. After mixing, cover the bowl with plastic wrap or a lid. Refrigerate for at least 30 minutes. This time lets the flavors blend. For best results, chill it longer, up to two hours. This step makes the salad refreshing and tasty, perfect for hot days! One mistake is not seasoning enough. Always taste your salad before serving. If it needs salt or pepper, add it! Another mistake is skipping the chilling step. Serving it warm won't let the flavors shine. Lastly, don’t overmix; you want the eggs and chicken to stay chunky. Follow these tips for a great dish every time. For the complete recipe, check the Full Recipe. {{image_2}} You can change the taste of your pickle ranch chicken and egg salad easily. Try adding different herbs like parsley or chives for a fresh twist. If you love heat, a pinch of cayenne pepper or some diced jalapeños can spice things up. You can also use flavored ranch dressings, like buttermilk or spicy ranch, to give your salad a new kick. Adding some crumbled bacon brings a smoky flavor that many enjoy. If chicken isn't your thing, don't worry! You can use turkey instead. It works well and keeps the salad just as tasty. For a seafood twist, try canned tuna or crab meat. Both options add a unique flavor that pairs great with the pickles. If you have leftover roasted veggies, toss them in for a hearty vegetarian dish. Making a vegan version is simple too. Replace chicken with chickpeas or tofu for protein. You can mash the chickpeas to mimic the chicken texture. Use a vegan ranch dressing or make your own with cashews, lemon juice, and herbs. For the eggs, try using mashed avocado. It adds creaminess and healthy fats. This way, you can enjoy a delicious salad while keeping it plant-based. For the full recipe, refer to Pickle Ranch Chicken and Egg Salad. To store your Pickle Ranch Chicken and Egg Salad, place it in an airtight container. Make sure the lid seals tightly. This keeps the salad fresh and prevents odors from other foods. Store it in the refrigerator right away. You can enjoy it cold or let it warm slightly at room temperature before serving. When stored correctly, the salad lasts about 3 to 4 days in the fridge. Always check for any changes in smell or texture before eating. If you see any signs of spoilage, it's best to toss it out. The fresher you eat it, the better the taste will be. Freezing Pickle Ranch Chicken and Egg Salad is not ideal. The creamy dressing may separate when thawed. However, if you want to freeze it, leave out the dressing. Store the chicken and egg mixture in a freezer-safe bag. When ready to eat, thaw the mixture in the fridge overnight. Add fresh dressing before serving. Always remember, fresh is best! You can find the full recipe to guide you. Yes, you can make this salad ahead of time. It tastes even better after chilling. The flavors mix well when it sits. I recommend making it a day in advance. Just keep it in the fridge until you're ready to eat. You can use yogurt or sour cream as a ranch dressing substitute. For a lighter taste, try a vinaigrette. Some people like to mix mayonnaise with herbs for a creamy option. Choose what you enjoy most! Absolutely! This salad is great for meal prep. You can store it in containers. It stays fresh for a few days. Just be sure to keep it cold until you eat. It’s perfect for lunches or quick dinners. To make it healthier, use low-fat ranch dressing or Greek yogurt. You can add more veggies like bell peppers or spinach. Reducing the amount of chicken can also help. Focus on fresh, whole ingredients for a nutritious twist. For the full recipe, check the detailed instructions above. In this post, we explored the key ingredients and step-by-step process for making Pickle Ranch Chicken and Egg Salad. We discussed tips to customize your dish and avoid common mistakes. We also covered variations for different tastes and dietary needs, plus how to store leftovers effectively. Pickle Ranch Chicken and Egg Salad is simple and fun to make. You can adjust it to fit your flavor and protein choices. Now you’re ready to create your own tasty version! Enjoy your cooking adventure!](https://cookingwells.com/wp-content/uploads/2025/07/8c5fa1e5-7cdb-48e3-9500-0134fe435767.webp)
Looking for a tasty twist on a classic dish? My Pickle Ranch Chicken and Egg Salad is your answer! It

Are you craving a quick, nutritious snack? Cherry Almond Protein Balls are the perfect solution! Made with wholesome ingredients like
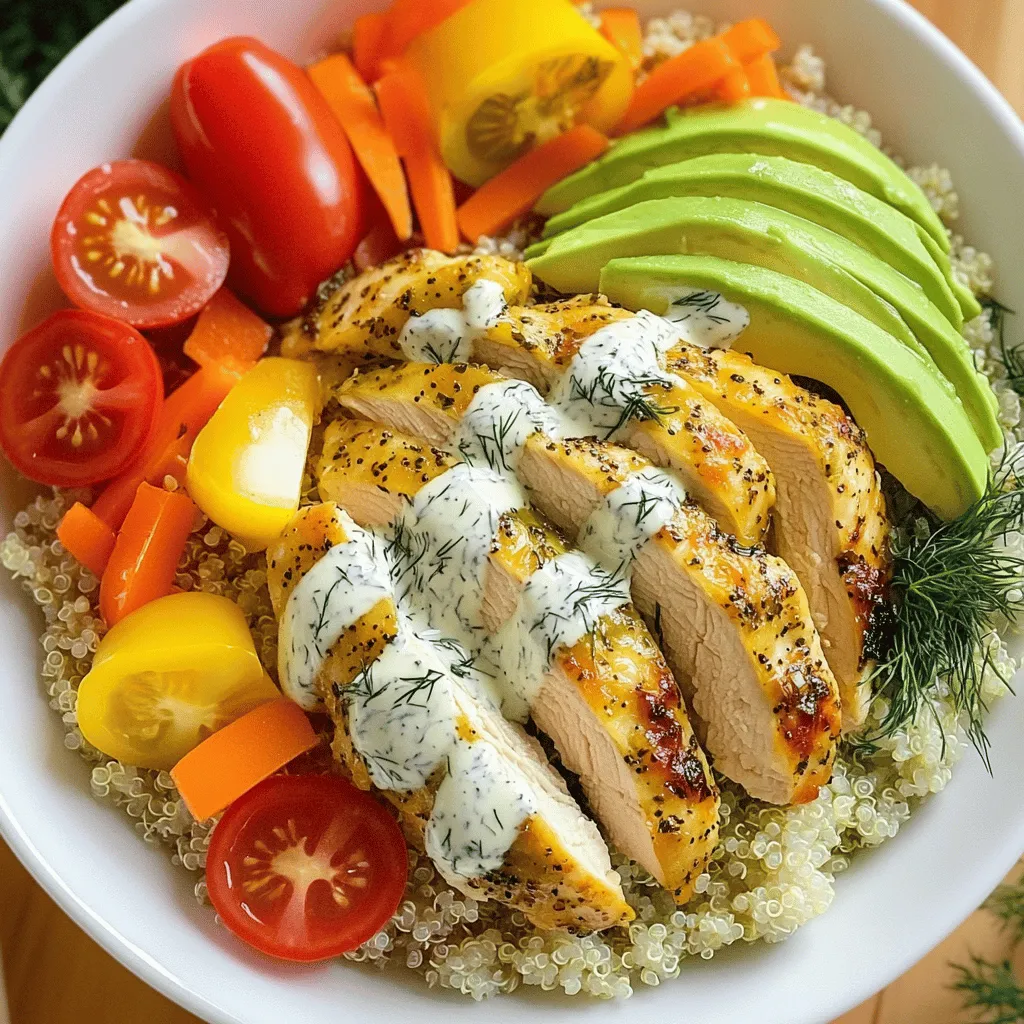
Are you ready to elevate your meal routine? In this blog, I’ll show you how to make Pickle Ranch Chicken
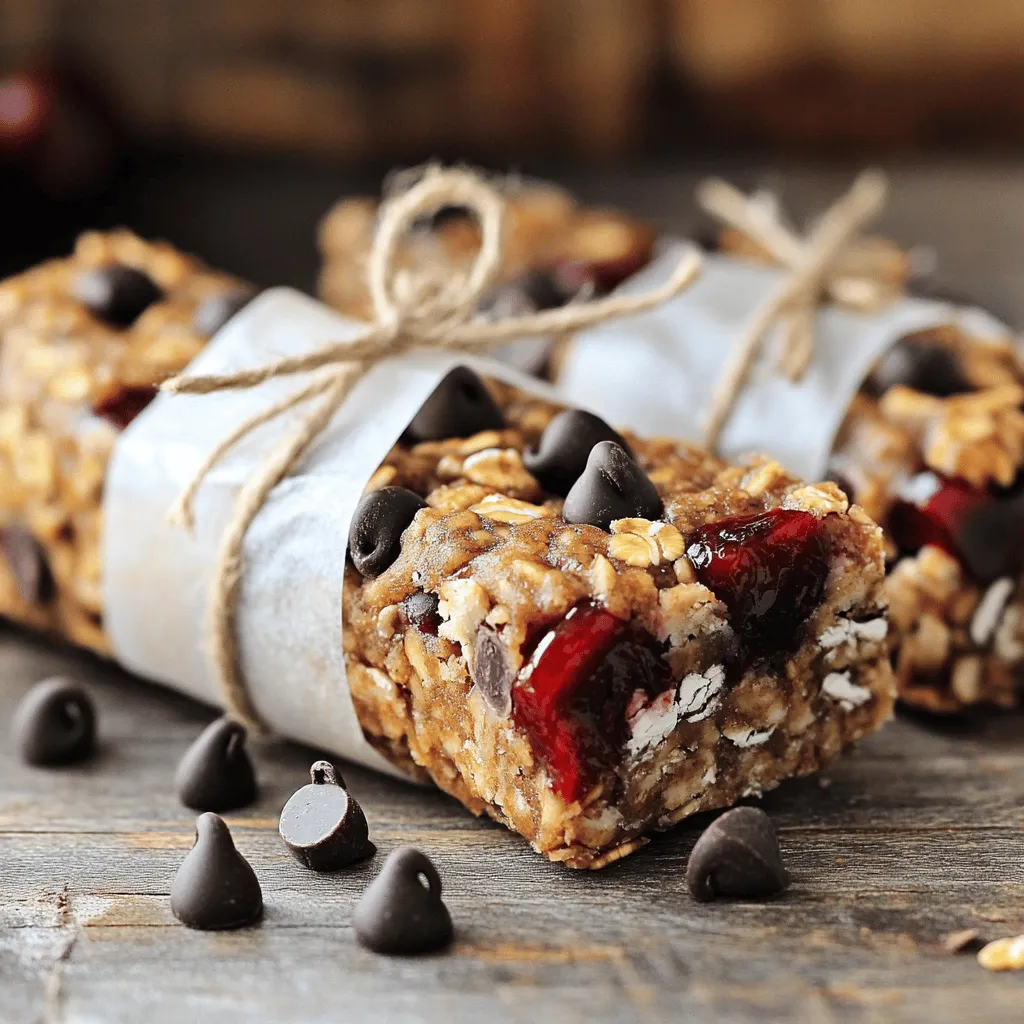
Looking for a quick, nutritious snack that satisfies your sweet tooth? Look no further! This Cherry Chocolate Protein Bars recipe
![- 2 medium zucchinis, thinly sliced - 1 cup panko bread crumbs - 1/2 cup grated Parmesan cheese - 1 teaspoon garlic powder - 1 teaspoon onion powder - 1/2 teaspoon paprika - 1/2 teaspoon salt - 1/4 teaspoon black pepper - 1 large egg, beaten - Cooking spray To make crispy air fryer zucchini chips, gather your ingredients first. Fresh zucchini is key for the best taste. I love using panko bread crumbs. They give a light, crispy texture that regular bread crumbs cannot match. Parmesan cheese adds a salty kick that enhances each bite. - Additional spices for flavor enhancement - Fresh herbs for garnish Feel free to add your favorite spices to the mix. A pinch of cayenne can add heat. You can also use fresh herbs for garnish. Basil or parsley brighten the dish and make it look appealing. Experiment with flavors. Each batch can be a little different. Don't hesitate to make it your own! For the full recipe, check the section above. Set your air fryer to 400°F (200°C). Preheating makes sure your chips cook evenly and get nice and crispy. In a shallow bowl, mix together the following ingredients: - 1 cup panko bread crumbs - 1/2 cup grated Parmesan cheese - 1 teaspoon garlic powder - 1 teaspoon onion powder - 1/2 teaspoon paprika - 1/2 teaspoon salt - 1/4 teaspoon black pepper Stir well until everything is combined. This mix gives your zucchini chips a great taste. In a separate bowl, beat 1 large egg. To coat the zucchini slices: 1. Dip each slice into the egg, letting the excess drip off. 2. Then, press the slice into the panko mix. Make sure to coat it well. This egg dip method helps the coating stick nicely to the zucchini. Arrange the coated zucchini slices in the air fryer basket. Make sure they are in a single layer and not touching. This allows the hot air to cook them evenly. Lightly spray the tops with cooking spray. This adds extra crispiness. Air fry for 10-12 minutes. Flip the chips halfway through cooking. They should be golden brown and crunchy. When done, take the zucchini chips out and let them cool on a wire rack. This keeps them crispy. For a fun presentation, arrange them on a decorative plate. You can garnish with fresh parsley or sprinkle some extra Parmesan on top. Serve your crispy zucchini chips with your favorite dipping sauce, like ranch or marinara. Enjoy this simple and tasty snack using the Full Recipe. To get zucchini chips nice and crispy, spacing is key. Place each chip in a single layer in the air fryer basket. If they overlap, they won’t cook evenly. The air needs room to flow around each piece. If you have a lot of zucchini, cook them in batches. This step pays off with a perfect crunch. Different air fryer models can cook at different speeds. Most take around 10-12 minutes, but check your chips often. If you have a newer model, they may cook faster. Flip the chips halfway through to ensure even cooking. Keep an eye on them to find your ideal crispiness. You can prep the zucchini chips ahead for a quick snack. Slice the zucchini and coat them in the mixture. Store them in the fridge for a few hours or overnight. When you’re ready, just pop them in the air fryer. This makes it easier to enjoy a snack on busy days. Check the [Full Recipe] for specific details on preparation. {{image_2}} To add a kick, try adding spices like cayenne or chili powder to the panko mix. This gives your chips a nice heat that balances well with the cheese. For cheese, you can use cheddar for a bold flavor or mozzarella for a milder taste. Mixing different cheeses can create a tasty blend. For a vegan twist, replace the egg with a flaxseed mixture. Mix one tablespoon of ground flaxseed with three tablespoons of water. Let it sit for a few minutes until it thickens. Instead of cheese, try nutritional yeast. It gives a cheesy flavor without dairy. Fresh herbs can brighten up your zucchini chips. Try adding chopped basil, oregano, or thyme to the panko mix. If you use dried herbs, remember to adjust the amount, as they are more potent. These herbs add great flavor and make your chips smell amazing. For the full recipe, check out the Crispy Air Fryer Zucchini Chips . To keep your leftover zucchini chips fresh, store them in an airtight container. This helps prevent moisture from making them soggy. You can also add a paper towel inside the container. The towel absorbs any extra moisture, keeping your chips crispy. Avoid stacking chips too high, as this can cause them to break. When you want to enjoy your leftover zucchini chips, reheating is key. The air fryer is the best choice for this. It will make them crispy again. Preheat the air fryer to 350°F (175°C) and heat the chips for about 5 minutes. You can also use an oven. Set it to 350°F (175°C) and bake for 8-10 minutes. Both methods work well, but the air fryer is quicker. Zucchini chips can last for about 3 days in the pantry. If you store them in the fridge, they stay fresh for about 5 days. Just remember, the longer they sit, the less crispy they become. Enjoy your chips while they are fresh for the best taste! Yes, you can use regular bread crumbs. However, they are finer and denser than panko. This means your zucchini chips may not get as crispy. Panko gives a lighter, crunchier texture. If you want a great bite, stick with panko. Soggy chips often come from too much moisture. Here are common mistakes to avoid: - Not drying zucchini: Make sure you pat the slices dry with paper towels. - Overcrowding the air fryer: Give chips space for air circulation. - Skipping the cooking spray: A light spray helps them crisp up. To achieve the best texture, follow these tips: - Slice zucchini thinly: Aim for about 1/4 inch thick. - Use panko bread crumbs: They create the best crunch. - Don’t skip the egg wash: This helps the crumbs stick well. - Air fry in batches: Avoid overcrowding for even cooking. Zucchini chips pair well with many dips. Here are some popular options: - Ranch dressing: A classic choice. - Marinara sauce: Great for a tangy taste. - Guacamole: Adds a creamy texture. - Tzatziki sauce: This yogurt dip is refreshing. Yes, you can easily adjust the serving size. For a larger group, double the ingredients. If you want fewer chips, halve the amounts. Just ensure your air fryer has enough space for the cooked chips. Absolutely! Many veggies work well. Here are some great suggestions: - Sweet potatoes: Slice them thin for sweet chips. - Carrots: They add a nice crunch and natural sweetness. - Eggplant: Try this for a different flavor. - Beets: They give a vibrant color and taste. For the full recipe, check out the detailed steps above to create these delicious snacks! In this post, we explored how to make crispy zucchini chips in an air fryer. We covered simple ingredients, easy steps, and tips for perfect results. You can customize these chips with spices or herbs to fit your taste. Storing leftovers and reheating them properly keeps snacks fresh too. Enjoy making these delicious, healthy chips, and share them with friends and family. With practice, you’ll master this tasty treat in no time!](https://cookingwells.com/wp-content/uploads/2025/07/84295885-58cf-43b5-a4b9-24eed5335532.webp)
Looking for a healthy snack that packs a crunch? Try these Crispy Air Fryer Zucchini Chips! Made with just a
