Skip to content
DisclaimerTerms Of UseGDPR PolicyCookie Policy

Cooking Wells

  • Home
  • Drinks
  • Appetizers
  • Dinner
  • Dessert
  • About
  • Contact
  • Privacy Policy
DisclaimerTerms Of UseGDPR PolicyCookie Policy

NO-ING-IMG

- Quinoa: This grain is a great source of protein. It has a light, nutty flavor and a fluffy texture. Quinoa cooks quickly and absorbs flavors well. Rinse it before cooking to remove any bitterness. - Vegetable Variety: You can use many colorful veggies. I like red bell pepper, zucchini, cherry tomatoes, and broccoli for this bowl. They add flavor, color, and nutrients. Roasting brings out their natural sweetness. - Honey Mustard Dressing Components: The dressing adds a sweet and tangy taste. It includes honey, Dijon mustard, apple cider vinegar, and garlic powder. This blend makes your bowl extra tasty. - Suggested Proteins: You can add proteins to make the meal heartier. Grilled chicken, chickpeas, or tofu work well. They provide extra nutrition and keep you full longer. - Additional Veggies or Greens: Feel free to mix in more veggies. Spinach, kale, or carrots can add crunch and variety. You can change the flavors based on what you like. - Kitchen Tools for Preparation: You need a cutting board, knife, and mixing bowls. These tools help you prep your ingredients easily. - Cooking Vessels: Use a medium saucepan for the quinoa and a baking sheet for roasting the veggies. These are essential for making this delicious dish. For the full recipe, check out the detailed instructions to create your Honey Mustard Veggie Bowls! To cook the quinoa, start by bringing the vegetable broth to a boil in a medium saucepan. This broth gives the quinoa great flavor. Once it's boiling, add the rinsed quinoa. Reduce the heat to low and cover the pot. Let it simmer for about 15 minutes. You’ll know it’s done when the liquid is absorbed. After cooking, remove it from the heat but keep it covered for 5 more minutes. This step helps it become fluffy. Finally, use a fork to fluff the quinoa gently. Roasting brings out the natural sweetness in vegetables. First, preheat your oven to 400°F (200°C). Next, prepare your veggies. Dice the red bell pepper and zucchini. Halve the cherry tomatoes and break the broccoli into florets. In a large bowl, toss these veggies with olive oil, salt, and pepper. Make sure they are well-coated. Spread them out evenly on a baking sheet. This helps them roast evenly. Roast in the oven for 20-25 minutes. Stir halfway through to get that perfect caramelization. Making the honey mustard dressing is quick and easy. In a small bowl, whisk together the honey, Dijon mustard, apple cider vinegar, and garlic powder. Whisk until smooth. If you like it sweeter, add more honey to taste. This dressing ties the whole bowl together, adding a sweet and tangy kick. Now that you have your quinoa, roasted veggies, and dressing ready, it’s time to build your Honey Mustard Veggie Bowls. For the complete recipe, check the Full Recipe section above. Enjoy your healthy and colorful meal! To make the best Honey Mustard Veggie Bowls, you need to know how to cook your veggies right. Different vegetables need different cooking times. For example, zucchini and cherry tomatoes roast well in about 20 minutes. Broccoli takes a bit longer, around 25 minutes, to get tender and caramelized. Always check for doneness by piercing them with a fork. Enhancing flavor is key. Use spices like smoked paprika or cumin to add depth. A sprinkle of onion powder can also bring out sweetness in your veggies. Don’t be shy to experiment with flavors. These bowls shine with a few tasty sides. A fresh green salad pairs nicely. You might also enjoy some crusty bread or a light soup. These options balance the meal and keep it light. For plating, keep it colorful. Start with the quinoa as a base. Layer the roasted veggies on top. Drizzle the honey mustard dressing over the veggies. Finally, add a sprinkle of fresh parsley for a pretty finish. This makes your dish pop! Storing leftovers is easy. Let your veggie bowls cool first. Then, place them in airtight containers. They can last in the fridge for about three days. For meal prep, consider glass containers. They are safe for heating and keep your food fresh. You can also pre-portion the quinoa and veggies for quick meals. Just add the dressing right before serving. This keeps everything tasty and fresh. For the full recipe, check the section above. Enjoy your cooking! {{image_2}} You can easily adapt this dish to fit your diet. For a vegan option, replace honey with maple syrup. This swap keeps the sweetness but makes it plant-based. To make it gluten-free, ensure your mustard is gluten-free. Most Dijon mustards are safe, but always check the label. Changing the mustard can bring a whole new taste. Try whole grain mustard for a rustic feel. If you like heat, add a pinch of cayenne or crushed red pepper to the dressing. The extra kick will make your taste buds dance! Using seasonal veggies can enhance your bowl. In spring, add asparagus or peas; in autumn, try roasted squash. You can also change the dressing based on what’s fresh. A citrus vinaigrette works great with summer vegetables. This keeps your meals exciting and fresh. For more details on making the Honey Mustard Veggie Bowls, check out the Full Recipe. To store leftovers from your honey mustard veggie bowls, place them in an airtight container. This keeps them fresh and stops smells from mixing. Your dish can last in the fridge for about three to four days. Make sure to let the bowls cool before sealing them up. Freezing the quinoa and veggies can be a great option. First, let the cooked quinoa cool completely. Spread it out on a baking sheet to freeze in a single layer. Once frozen, transfer it to a freezer bag. Roasted veggies can also freeze well. Store them in a separate bag. They last up to three months frozen. When you’re ready to eat, thaw them overnight in the fridge. When reheating, the best way is to use a microwave or oven. For the microwave, warm in short bursts, stirring often. This keeps the texture nice. If using the oven, cover with foil to prevent drying out. Heat at 350°F until warm throughout. Enjoy your flavorful meal just like the first time! Yes, you can use other grains. Brown rice, farro, or barley work well. Each grain has its own taste and texture. Choose one that fits your meal plan. Remember to adjust cooking times based on the grain you select. To add heat, use hot sauce or spices. Sriracha or cayenne pepper are great choices. You can also try adding crushed red pepper flakes. Start with a little, then taste and adjust. Spices can really boost the flavor of your veggie bowls. If you lack Dijon mustard, you have options. Yellow mustard or honey mustard can work as substitutes. For a unique twist, try using whole grain mustard. Each option will change the flavor, so choose what you like best. Yes, you can prep this recipe ahead. Cook the quinoa and roast the veggies in advance. Store them separately in the fridge. When ready to eat, just combine and add the dressing. This saves time on busy days. You can find the Full Recipe for Honey Mustard Veggie Bowls in the article above. It gives you all the detailed steps. Enjoy making this easy and tasty dish! This blog post covered how to make Honey Mustard Veggie Bowls. We explored the main ingredients, optional add-ins, and the tools you need. I shared step-by-step instructions on cooking quinoa, roasting vegetables, and mixing the honey mustard dressing. Tips for perfecting your dish and meal prep ideas were also included. Finally, remember to customize the recipe to fit your tastes and needs. Enjoy your cooking journey!

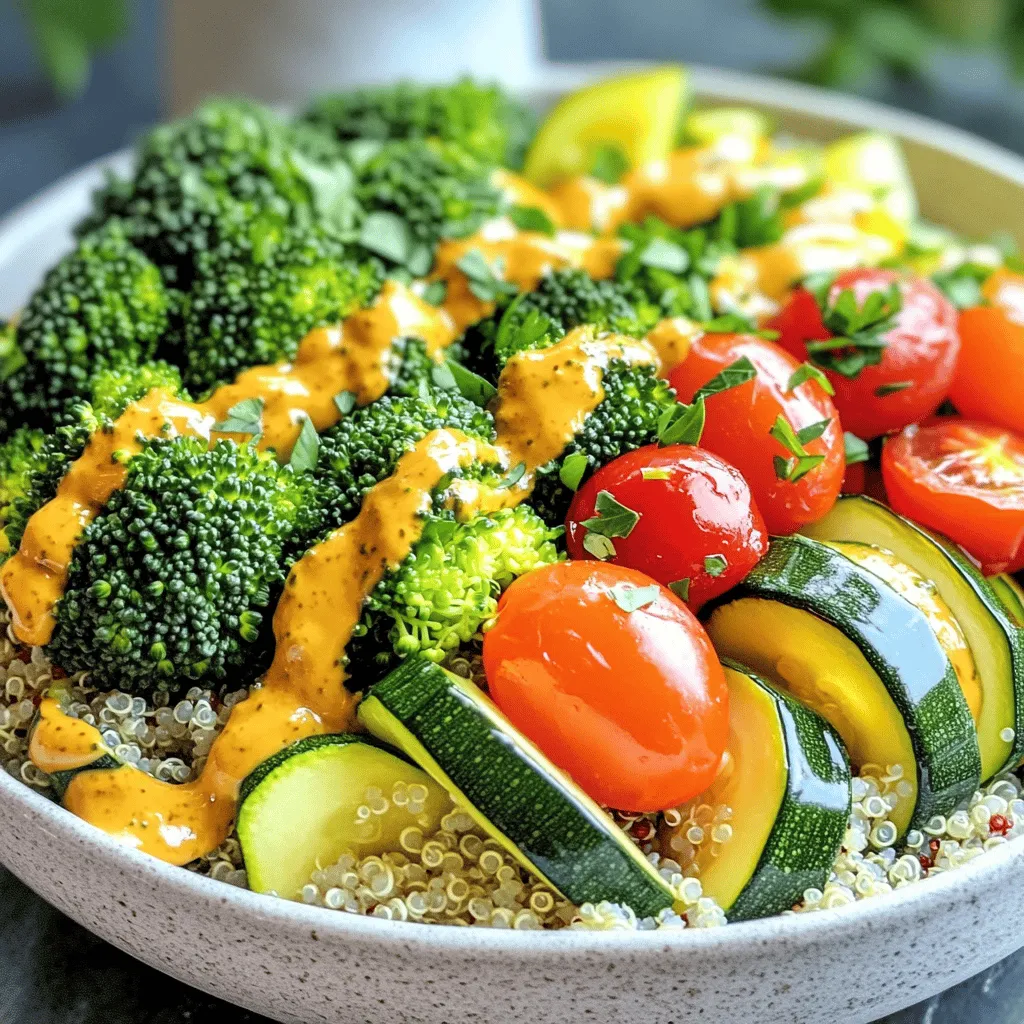
Honey Mustard Veggie Bowls Flavorful and Nutritious Meal

Looking for a tasty and healthy meal? Honey mustard veggie bowls are here to save your day! Packed with vibrant

To make Spinach Feta Egg Muffins, gather these easy ingredients: - 6 large eggs - 1 cup fresh spinach, chopped - 1/2 cup feta cheese, crumbled - 1/4 cup milk (dairy or dairy-free) - 1/4 cup red bell pepper, finely chopped - 1/4 cup onion, finely diced - 1 garlic clove, minced - 1/2 teaspoon salt - 1/4 teaspoon black pepper - 1/4 teaspoon red pepper flakes (optional) - Olive oil spray or muffin liners These muffins are packed with protein and nutrients. They fit well in many diets. They are low in carbs and gluten-free because they do not use flour. The use of dairy-free milk makes it a good choice for lactose-free diets. However, feta cheese contains dairy. Vegans should substitute eggs and cheese to make this dish work for them. You can swap out some ingredients if you want to try new flavors: - Use kale instead of spinach for a different green. - Swap feta cheese with goat cheese for a tangy twist. - Replace red bell pepper with zucchini for added moisture. - If you like spice, add diced jalapeños instead of red pepper flakes. - For a richer taste, try cream instead of milk. To explore the full recipe, check out the complete instructions for making these muffins. Start by preheating your oven to 350°F (175°C). This step is key for perfect muffins. Next, grab a 12-cup muffin tin. Use olive oil spray to coat each cup. If you prefer, line them with muffin liners. Either option helps with easy removal later. In a large bowl, crack 6 large eggs. Whisk them until smooth and combined. Next, add 1/4 cup of milk, 1/2 teaspoon of salt, and 1/4 teaspoon of black pepper. If you like a kick, throw in 1/4 teaspoon of red pepper flakes. Whisk again until everything mixes well. Now, stir in 1 cup of chopped spinach, 1/2 cup of crumbled feta, 1/4 cup of finely chopped red bell pepper, 1/4 cup of diced onion, and 1 minced garlic clove. Make sure these ingredients blend throughout the egg mixture. Carefully pour the egg mixture into the prepared muffin tin. Fill each cup about 3/4 full. Now, place the muffin tin in the oven. Bake for 18-20 minutes. You know they are done when they puff up and a toothpick comes out clean. Once baked, take them out and let them cool for a few minutes. Finally, gently remove the muffins from the tin. Enjoy them warm for a tasty breakfast or snack! You can find the Full Recipe for more details. To make your muffins fluffy, beat the eggs well. This adds air, which helps them rise. Use fresh eggs for the best results. Mixing the ingredients gently also keeps them light. Avoid overmixing; this can make them dense. Bake them at the right temperature of 350°F (175°C). To kick up the flavor, try adding fresh herbs. Chopped parsley or dill pairs well with spinach and feta. A dash of hot sauce can also spice things up. If you like a zestier taste, add lemon zest to the mix. You can swap out feta for goat cheese for a creamier bite. If your muffins sink, it might be due to overmixing. Be sure to fill each cup about 3/4 full. If they stick to the pan, grease it well with olive oil spray or use liners. For dry muffins, add a bit more milk or cheese. If you want to try something new, check out the Full Recipe for more ideas! {{image_2}} These muffins are great for vegetarians. You can easily add more veggies. Try mushrooms, zucchini, or cherry tomatoes. Just chop them small and mix them in. This adds color and flavor. You could also use different greens, like kale or Swiss chard. They all work well with feta. For a protein boost, add cooked meat. Crumbled bacon or diced ham will work. You can also add cooked sausage for extra flavor. If you want a meat-free option, try adding beans. Black beans or chickpeas can add protein and texture. Just remember to mash them a little before mixing. Feta is tasty, but you can switch it up. Try goat cheese for a tangy flavor. Cheddar adds a sharp taste. Mozzarella gives a nice stretch when melted. You can mix different cheeses too! Just keep the total amount the same as the feta in the full recipe. This way, your muffins stay fluffy and delicious. After enjoying your Spinach Feta Egg Muffins, store any leftovers in the fridge. Place them in an airtight container. They will stay fresh for about 4 to 5 days. To keep them tasty, make sure the container is sealed well. This helps prevent them from drying out. When you're ready to eat your muffins again, reheating is easy. You can use a microwave, oven, or toaster oven. If using a microwave, heat them for about 30 seconds. Check if they’re warm enough. If not, heat in 10-second bursts until they are hot. For the oven, preheat it to 350°F (175°C) and bake for about 10 minutes. This method helps keep them fluffy and delicious. If you want to save your muffins for a later date, freezing is a great option. First, let them cool completely after baking. Then, wrap each muffin tightly in plastic wrap. Place the wrapped muffins in a freezer-safe bag or container. They can last up to 3 months in the freezer. When you want to enjoy them, thaw in the fridge overnight. Reheat as mentioned above for the best taste. Spinach Feta Egg Muffins stay fresh for up to five days in the fridge. Keep them in an airtight container. If you want them to last longer, consider freezing them. Yes, you can make these muffins ahead of time. Bake them and store them in the fridge. You can also prep the mix the night before. Just pour it into the muffin tin and bake in the morning. These muffins pair well with fresh fruit or a light salad. You can also serve them with yogurt or a slice of whole-grain toast. For a heartier meal, add some turkey bacon or sausage on the side. You can find the full recipe for these muffins to try them out yourself! We explored how to make Spinach Feta Egg Muffins right from the ingredients to storage. You learned about ingredient choices, step-by-step instructions, and helpful tips for the best results. Remember, you can experiment with flavors and variations to suit your taste. Keep these muffins fresh by storing or freezing them. Baking can be simple and fun. Enjoy your kitchen time and share these tasty treats with friends!

Spinach Feta Egg Muffins Flavorful and Easy Recipe

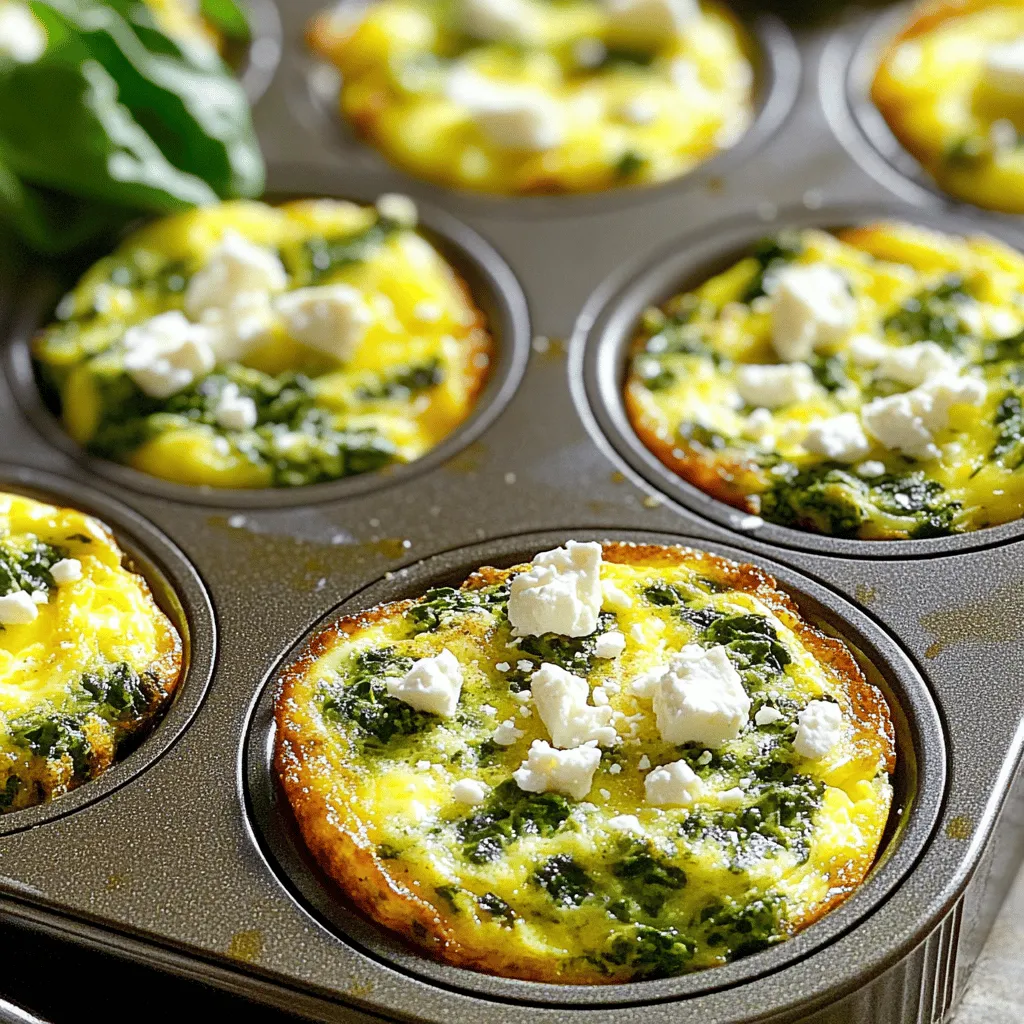
Looking for a quick and tasty breakfast option? Spinach Feta Egg Muffins are your answer! They pack nutrition in every

To make delicious sweet potato breakfast burritos, gather these simple items. Each ingredient adds great flavor and nutrition to your meal. - 2 medium sweet potatoes, peeled and diced - 1 tablespoon olive oil - Salt and pepper to taste - 1 teaspoon smoked paprika - 4 large eggs - ¼ cup milk (or milk alternative) - 1 cup black beans, rinsed and drained - ½ cup shredded cheese (cheddar or pepper jack) - 4 large whole wheat tortillas - ½ avocado, sliced - Fresh cilantro, chopped (for garnish) - Salsa (for serving) Using fresh sweet potatoes gives a natural sweetness. Olive oil helps to roast them perfectly. Smoked paprika adds a smoky taste, while cheese and beans make it hearty. The eggs add protein, and avocado gives a creamy finish. Fresh cilantro and salsa add brightness. For the full recipe, check out the instructions later. First, you need to preheat your oven to 400°F (200°C). This step gets the oven ready for roasting the sweet potatoes. Take two medium sweet potatoes and peel them. Dice them into small pieces. In a large bowl, mix the sweet potatoes with one tablespoon of olive oil, salt, pepper, and one teaspoon of smoked paprika. Spread them on a baking sheet. Roast for 25-30 minutes until they are tender and slightly caramelized. Flip them halfway to ensure even cooking. While the sweet potatoes roast, crack four large eggs into a bowl. Add a quarter cup of milk and a pinch of salt and pepper. Whisk this mixture well. Heat a non-stick skillet over medium heat. Pour in the egg mix and stir gently until the eggs are scrambled and fluffy. To warm the tortillas, you have two options. You can heat them in a dry skillet over low heat for about 30 seconds on each side. Or, you can wrap them in a damp paper towel and microwave for 20-30 seconds. This makes them soft and easy to fold. Now it’s time to build your burritos! Take a tortilla and lay it flat. Begin by adding some roasted sweet potatoes, scrambled eggs, and black beans on top. Then sprinkle some shredded cheese over these layers. Don't forget to add a few avocado slices for creaminess. To wrap the burritos, fold the sides of the tortilla in first. Then, roll it from the bottom up. Make sure to enclose the filling tightly. This keeps everything inside while you eat. Place the burritos seam side down on a plate. Garnish with fresh chopped cilantro for a pop of color. Serve with salsa on the side for a tasty dip. Enjoy your Sweet Potato Breakfast Burritos! For a detailed guide, refer to the Full Recipe. Roasting sweet potatoes brings out their natural sweetness. Start by cutting them into small, even pieces. This helps them cook evenly. Toss the diced potatoes with olive oil, salt, pepper, and smoked paprika. Spread them on a baking sheet in a single layer. Don't overcrowd the pan; this ensures they get crispy. Roast at 400°F for about 25-30 minutes. Flip them halfway for even browning. Keep an eye on them; you want a nice caramelization. For fluffy scrambled eggs, whisk the eggs well before cooking. Add a splash of milk for creaminess. Heat a non-stick skillet over medium heat. Pour in the egg mixture and stir gently with a spatula. Don't rush this step; slow cooking makes a big difference. Remove the eggs from the heat while still slightly runny. They will continue to cook off heat. This keeps them soft and creamy. To wrap your burritos neatly, warm the tortillas first. This makes them flexible and less likely to tear. Place your filling in the center, leaving space at the edges. Fold the sides in first, then roll from the bottom up. Tuck the filling as you roll to keep it secure. Practice makes perfect! A well-wrapped burrito is easier to eat and looks great on the plate. For the full recipe, check out the details above. {{image_2}} You can make these burritos vegetarian by skipping the eggs. Instead, use tofu or tempeh. Cook them in the same way as you would the eggs. Just scramble or cube them and add your spices. This keeps the protein while making it plant-based. To make this dish gluten-free, choose gluten-free tortillas. Many brands offer great options. All other ingredients in this recipe are already gluten-free. So, you can enjoy the same tasty flavors without worry. Feel free to get creative! Here are some ideas: - Spinach or Kale: Add some greens for extra nutrition. - Peppers and Onions: Sauté these for added sweetness and crunch. - Sour Cream or Greek Yogurt: Use as a creamy topping. - Hot Sauce: Add some heat if you like spicy. These variations can help you customize your sweet potato breakfast burritos to fit your taste. Check out the Full Recipe for more details! Store leftover burritos in an airtight container. You can keep them in the fridge for up to three days. Make sure they cool down before sealing. If you want to enjoy them later, consider cutting them in half for easier storage. To reheat, you can use the microwave or the oven. If using a microwave, place the burrito on a plate and cover it with a damp paper towel. Heat for about 1-2 minutes, checking often. For the oven, preheat to 350°F. Wrap the burrito in foil and bake for about 10-15 minutes. This keeps the tortilla soft and warm. Freezing is a great way to keep burritos fresh. Wrap each burrito tightly in plastic wrap, then place them in a freezer bag. They will stay good for up to three months. When you're ready to eat, thaw overnight in the fridge and reheat as mentioned. This method ensures you always have a tasty meal ready to go. Yes, you can make these burritos ahead of time. Prepare the filling first. Roast the sweet potatoes and scramble the eggs. Let them cool and store them in the fridge. You can assemble the burritos the night before. Wrap them tightly in foil or plastic wrap. In the morning, heat them in the oven or microwave. This saves time and gives you a quick breakfast. If you don’t have black beans, don’t worry! You can use pinto beans, kidney beans, or chickpeas. Each option adds a nice texture. Lentils are another great choice for a protein boost. Just make sure to rinse and drain them well before adding to your burrito. Absolutely! These burritos are perfect for meal prep. You can make a batch and freeze them. Just follow the recipe and wrap them well. When you want one, heat it straight from the freezer. This makes for a healthy and filling breakfast all week long. Yes, feel free to switch up the cheese. Cheddar and pepper jack are great, but you can try mozzarella or feta. Each cheese will give a different taste. Choose what you like best. You can also skip cheese for a dairy-free option. To add heat, consider adding jalapeños or hot sauce. You can mix spicy salsa into the filling. Another option is to use pepper jack cheese for an extra kick. Adjust the spice level to your taste. Enjoy experimenting with different flavors in your burritos! Sweet potato breakfast burritos are easy and fun to make. You learned about the ingredients, from sweet potatoes to avocado. I shared step-by-step instructions and handy tips for great results. You can try different variations and even store leftovers. Remember, cooking is about enjoying your food and experimenting. These burritos are delicious for breakfast or any time. So grab the ingredients and get cooking. Enjoy your tasty creation!

Sweet Potato Breakfast Burritos Easy and Flavorful Meal

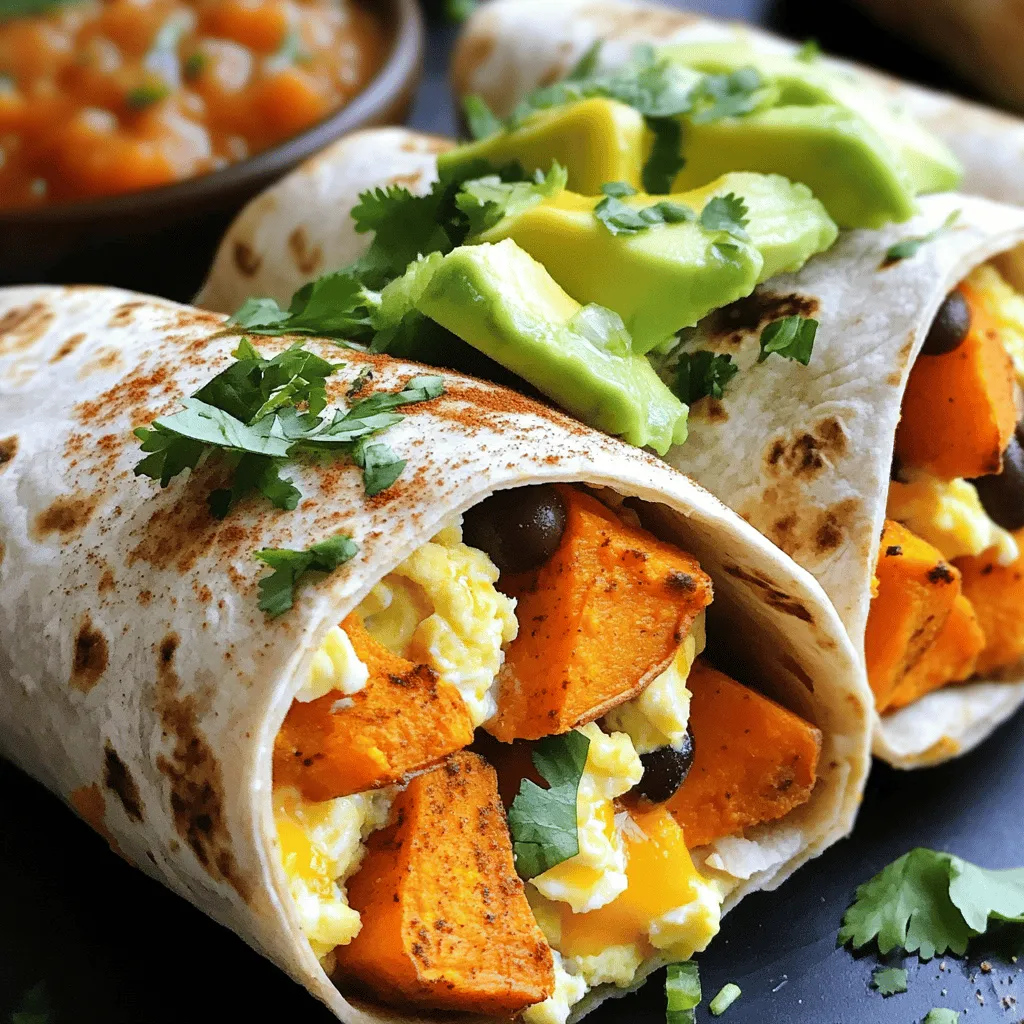
Looking for a fun and tasty way to start your day? These Sweet Potato Breakfast Burritos are here to save

- Ripe avocados - Canned chickpeas - Olive oil - Spices: smoked paprika, cumin, cayenne pepper - Seasoning: salt and black pepper - Bread options: whole grain or sourdough - Lemon juice - Fresh herbs: cilantro or parsley - Optional garnishes: red chili flakes To make my avocado toast with spicy chickpeas, gather the ingredients first. I love using ripe avocados. They add creaminess and flavor. Canned chickpeas are easy and quick. You can drain and rinse them for the best taste. Next, olive oil is a must. It adds richness and helps the spices stick. For spices, I use smoked paprika, cumin, and cayenne pepper. These give the chickpeas a warm kick. Don’t forget the salt and black pepper. They enhance all the flavors. When it comes to bread, I enjoy whole grain or sourdough. They provide a sturdy base. A squeeze of lemon juice adds brightness. Fresh herbs like cilantro or parsley bring freshness to the dish. If you like heat, sprinkle some red chili flakes on top. This ingredient list is simple yet packed with flavor. Each part plays a role in creating a tasty delight. For the complete recipe, check the section on step-by-step instructions. First, grab a medium bowl and add the chickpeas. Toss them with olive oil, smoked paprika, cumin, cayenne pepper, salt, and black pepper. Make sure every chickpea gets an even coating. This step is key for great flavor. If some chickpeas are not coated well, they will not roast evenly. Now, spread the chickpeas on a baking sheet lined with parchment paper. Set your oven to 400°F (200°C) and roast them for about 20 minutes. Halfway through, shake the pan to ensure even roasting. The goal is to get them crispy and golden. While the chickpeas roast, it’s time to toast your bread. You can use a toaster for convenience or grill it for a smoky flavor. Either way, aim for a golden brown finish. This adds a nice crunch to your toast, which pairs well with the creamy avocado. Next, take the ripe avocados and place them in a bowl. Mash them with a fork until you reach your desired texture. I like a chunky style, but you can make it smoother if you prefer. Add a splash of lemon juice, along with a pinch of salt and pepper. This brightens the flavor and helps stop browning. Once your bread is toasted, spread the mashed avocado generously over each slice. Make sure to cover every corner for a tasty bite. After that, take the roasted chickpeas and pile them on top of the avocado. This adds a spicy crunch that you will love. Now comes the fun part—garnishing! Sprinkle fresh cilantro or parsley over the top. If you like some heat, add a pinch of red chili flakes. This not only looks pretty but also adds extra flavor. Serve on a wooden board or a white plate for a beautiful presentation. For the full recipe, check the details provided. To find ripe avocados, look for a few signs. First, gently squeeze the avocado in your palm. It should feel slightly soft but not mushy. Next, check the color. A dark green or almost black skin often means it is ripe. If you are unsure, you can look under the stem. If it pops off easily and is green, the avocado is ready. For storage, keep unripe avocados at room temperature. Once they ripen, store them in the fridge. This slows down the ripening process and helps them last longer. You can spice up your chickpeas in many ways. Instead of smoked paprika, try garlic powder or curry powder. Both add great flavor. If you want a different texture, consider using lentils or black beans. They pair nicely with avocado and add more protein. Experiment and find what you like best! If you need gluten-free bread, many options are available. Look for gluten-free whole grain or sourdough. These still give you great taste and texture. When choosing your bread, think about flavors. A nutty bread can add depth to your dish, while a sourdough gives a nice tang. Pick the one that excites your taste buds! For the full recipe, check out the instructions above! {{image_2}} You might want to add more protein. Eggs are a great choice. A poached or fried egg works well on top. It adds creaminess and makes the dish filling. If you prefer plant-based options, try adding tofu or tempeh. Both give good texture and flavor. To spice things up, you can add more herbs and spices. Try fresh basil or dill for a twist. You might also enjoy a drizzle of sriracha or tahini sauce. Both add a nice kick and extra creaminess. Don't be afraid to experiment with flavors. If you want mini versions, cut the bread into smaller pieces. This makes for fun appetizers. You can also scale up the recipe. Just double the ingredients for meal prep. This way, you have tasty meals ready for the week. For the full recipe, check out the complete guide on Avocado Toast with Spicy Chickpeas! To keep your leftover avocado toast tasty, store it carefully. First, the bread can get soggy. To avoid this, separate the avocado from the bread. Place the toast in an airtight container. Wrap the avocado tightly in plastic wrap. This keeps it fresh. If you want to keep the chickpeas crispy, store them in a different container. You can freeze chickpeas for later use. Drain and rinse them first. Spread them on a baking sheet and freeze until firm. Then, transfer the chickpeas to a freezer bag. This way, they stay fresh for up to three months. To freeze avocados, mash them with lemon juice. This helps prevent browning. Place the mashed avocado in an airtight container. Fresh herbs last about a week in the fridge. Dried herbs can last much longer. Check the best-by dates on canned goods. Most canned chickpeas can stay good for years if unopened. Always store them in a cool, dry place. For the full recipe, check out the section above. To keep avocados fresh, store them properly. Here are some tips: - Use lemon juice: The acid slows browning. - Cover tightly: Wrap avocados in plastic wrap. - Store in the fridge: This slows oxidation. - Keep the pit: If you have half an avocado, leave the pit in the unused half. These methods help extend the life of your ripe avocados. Yes, you can! Here are some great alternatives: - Black beans: They add a rich flavor. - White beans: These are mild and creamy. - Lentils: Cooked lentils give a nice texture. Each option brings a unique taste and pairs well with the spices in this dish. Absolutely! Avocado toast is full of nutrients. Here’s why: - Avocados: They are packed with healthy fats and fiber. - Chickpeas: They provide protein and iron. - Whole grain bread: This option is high in fiber and vitamins. Together, these ingredients create a balanced meal that promotes health. Pair your avocado toast with these ideas for a complete meal: - Poached eggs: They add extra protein and richness. - Salad: A fresh side salad can add crunch. - Smoothies: A fruit smoothie complements the flavors well. These options create a colorful and satisfying meal experience. In this blog post, we explored how to make a tasty avocado toast topped with roasted chickpeas. We discussed key ingredients, preparation methods, and helpful tips for perfect results. Remember to choose ripe avocados and experiment with spices. You can customize your toast with different proteins and flavors. Whether for breakfast or a snack, this simple dish is both delicious and nutritious. Enjoy creating your unique version with the ideas we've shared!

Avocado Toast with Spicy Chickpeas Tasty Delight

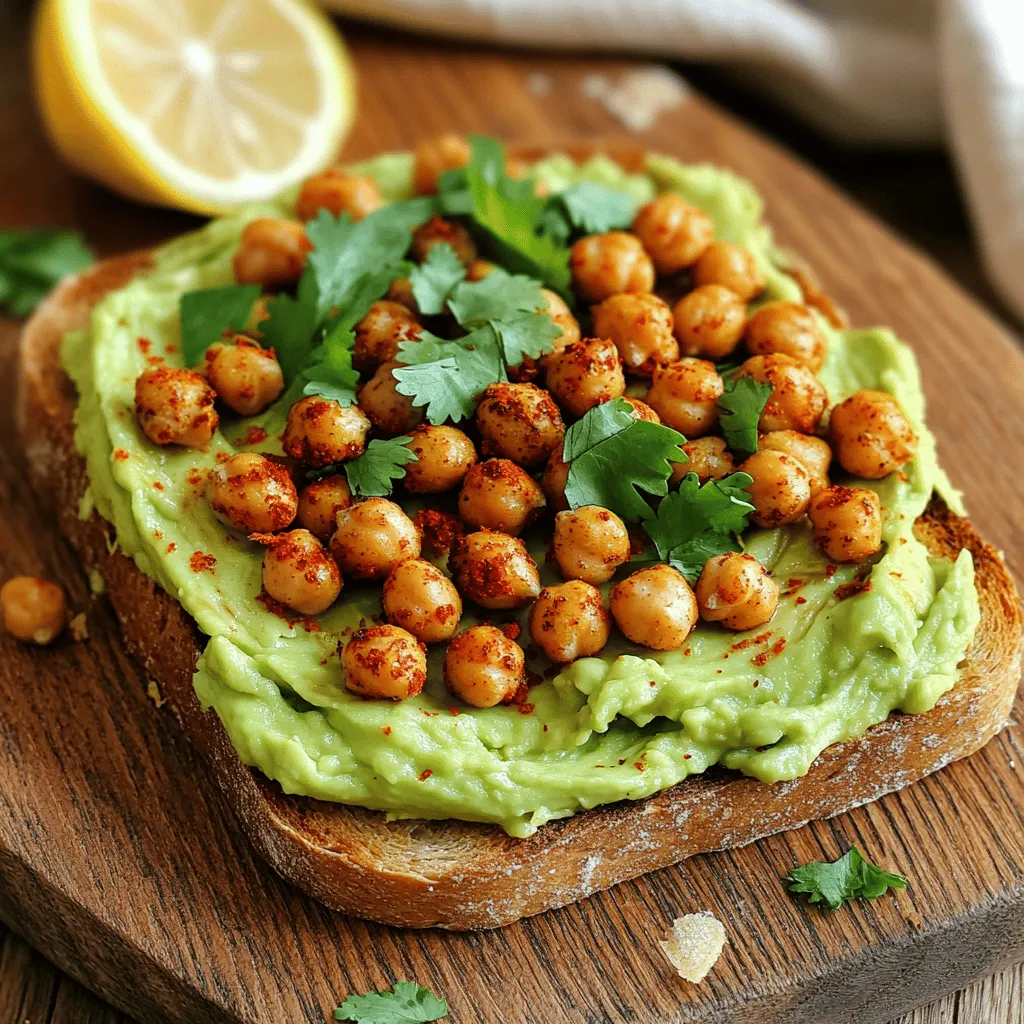
Are you ready to elevate your breakfast game? Avocado toast with spicy chickpeas is a tasty delight that combines creamy,

To make these tasty muffins, gather these simple ingredients: - 1 cup rolled oats - 1 cup whole wheat flour - 1/2 cup natural peanut butter - 1/2 cup honey or maple syrup - 1 large banana, mashed - 1 cup almond milk These ingredients form the base of the muffins. The oats give a nice texture. Whole wheat flour adds fiber. Peanut butter provides healthy fat and flavor. Honey or maple syrup sweetens the mix naturally. The banana adds moisture and a hint of sweetness. Almond milk keeps it dairy-free, but you can use any milk you like. You’ll also need a few baking essentials: - 2 teaspoons baking powder - 1/2 teaspoon baking soda - 1/4 teaspoon salt - 1/2 teaspoon cinnamon The baking powder and baking soda help the muffins rise. Salt enhances all the flavors. Cinnamon adds a warm spice that makes these muffins even better. Want to make your muffins extra special? Consider these optional add-ins: - 1/2 cup chocolate chips - 1/4 cup chopped nuts Chocolate chips offer a sweet surprise. Chopped nuts add crunch and richness. You can mix and match these add-ins based on your taste. For the full recipe, check out the details above. Enjoy your baking! - Preheat your oven to 350°F (175°C). - Prepare your muffin tin with liners or grease. This helps the muffins come out easily. - In a large bowl, combine: - 1 cup rolled oats - 1 cup whole wheat flour - 2 teaspoons baking powder - 1/2 teaspoon baking soda - 1/4 teaspoon salt - 1/2 teaspoon cinnamon - Mix the dry ingredients well. This ensures an even rise for your muffins. - In another bowl, blend: - 1 large banana, mashed - 1 cup almond milk - 1/2 cup natural peanut butter - 1/2 cup honey or maple syrup - Stir until smooth and well combined. This adds moisture and flavor. - Pour the wet ingredients into the dry ingredients. - Stir gently until just combined. Be careful not to overmix. - If you want, fold in 1/2 cup chocolate chips or 1/4 cup chopped nuts. This adds fun flavors and textures. - Spoon the batter into the prepared muffin tin. Fill each cup about 3/4 full. - Bake in the preheated oven for 18-22 minutes. Check if a toothpick comes out clean. - Let the muffins cool in the tin for 5 minutes. - Then, transfer them to a wire rack to cool completely. - For a nice touch, serve warm and dust with powdered sugar or drizzle with extra peanut butter. You can also add sliced banana on top for garnish. For the full recipe, check the details above. Enjoy your baking adventure! Measuring your ingredients right makes a big difference in baking. For flour and oats, use the spoon and level method. First, scoop your flour or oats into a measuring cup with a spoon. Then, level off the top with a straight edge, like a knife. This method prevents packing, which can make your muffins too dense. Mixing your muffin batter should be like a gentle hug. Combine the wet and dry ingredients until just mixed. If you see some dry flour or oats, that’s okay. Overmixing makes the muffins tough. A few lumps are fine; they will bake out. This way, your muffins stay light and fluffy. To boost your muffins, add spices or sweeteners. A pinch of nutmeg can add warmth. You can also try vanilla extract for extra flavor. If you want more sweetness, mix in a little brown sugar or agave syrup. For texture, consider adding chopped nuts or seeds. These simple tweaks can make your muffins even more delicious. For a full recipe of Peanut Butter Oatmeal Muffins, check out the full recipe. {{image_2}} To make these muffins vegan, swap honey for maple syrup. You can also use a flax egg instead of a regular egg. A flax egg is made by mixing one tablespoon of ground flaxseed with three tablespoons of water. Let it sit for a few minutes until it thickens. This will help bind the ingredients together. If you want a gluten-free version, use gluten-free oats and flour. Almond flour or oat flour works great in this recipe. You can also mix in some coconut flour for added texture. Be sure to check labels to ensure everything is gluten-free. To add different flavors, mix in chocolate chips, berries, or nuts. You can also try adding spices like nutmeg or ginger for warmth. For a tropical twist, fold in shredded coconut or diced pineapple. The options are endless, and you can create your signature muffin. For the full recipe, refer to the section above. Store your peanut butter oatmeal muffins in an airtight container. Keep them at room temperature for up to three days. For best taste, place a piece of parchment paper between layers. This helps keep them fresh and soft. You can freeze muffins for later enjoyment. Let them cool completely before freezing. Wrap each muffin in plastic wrap, then place them in a freezer bag. They stay good for up to three months. To reheat, take one out and microwave it for about 30 seconds. You can also let it thaw overnight in the fridge. These muffins will stay fresh for about three days at room temperature. If you freeze them, they last for three months. Enjoy them warm or at room temperature for the best flavor. For the full recipe, check the complete guide to making these tasty muffins. Yes, you can make these muffins without bananas. Some good alternatives include: - Unsweetened applesauce - Silken tofu - Pumpkin puree - Yogurt These options help keep the muffins moist and flavorful. To make the muffins less sweet, try these tips: - Reduce the honey or maple syrup by 1/4 cup. - Use less ripe bananas, as they are sweeter. - Add a little more salt or spices like cinnamon to balance the flavor. These changes will give you a less sweet muffin without losing taste. If you need a peanut butter substitute, consider these options: - Almond butter - Cashew butter - Sunflower seed butter - Soy nut butter These nut butters still provide a creamy texture and flavor. Each peanut butter oatmeal muffin has about 180-200 calories. This can vary based on the ingredients you choose. The serving size is one muffin. For a healthier choice, consider: - Using less sweetener - Adding more oats or nuts These adjustments can keep the calories in check while still being delicious. For more details, check the Full Recipe. These peanut butter oatmeal muffins are easy to make and tasty. We covered all the main ingredients, steps, and tips. You can tweak the recipe for vegan or gluten-free needs. Store them well for longer freshness. Enjoy these muffins as a quick snack or a healthy breakfast. Make them your own with fun add-ins. Start baking today and savor the delicious results!

Peanut Butter Oatmeal Muffins Flavorful and Nutritious

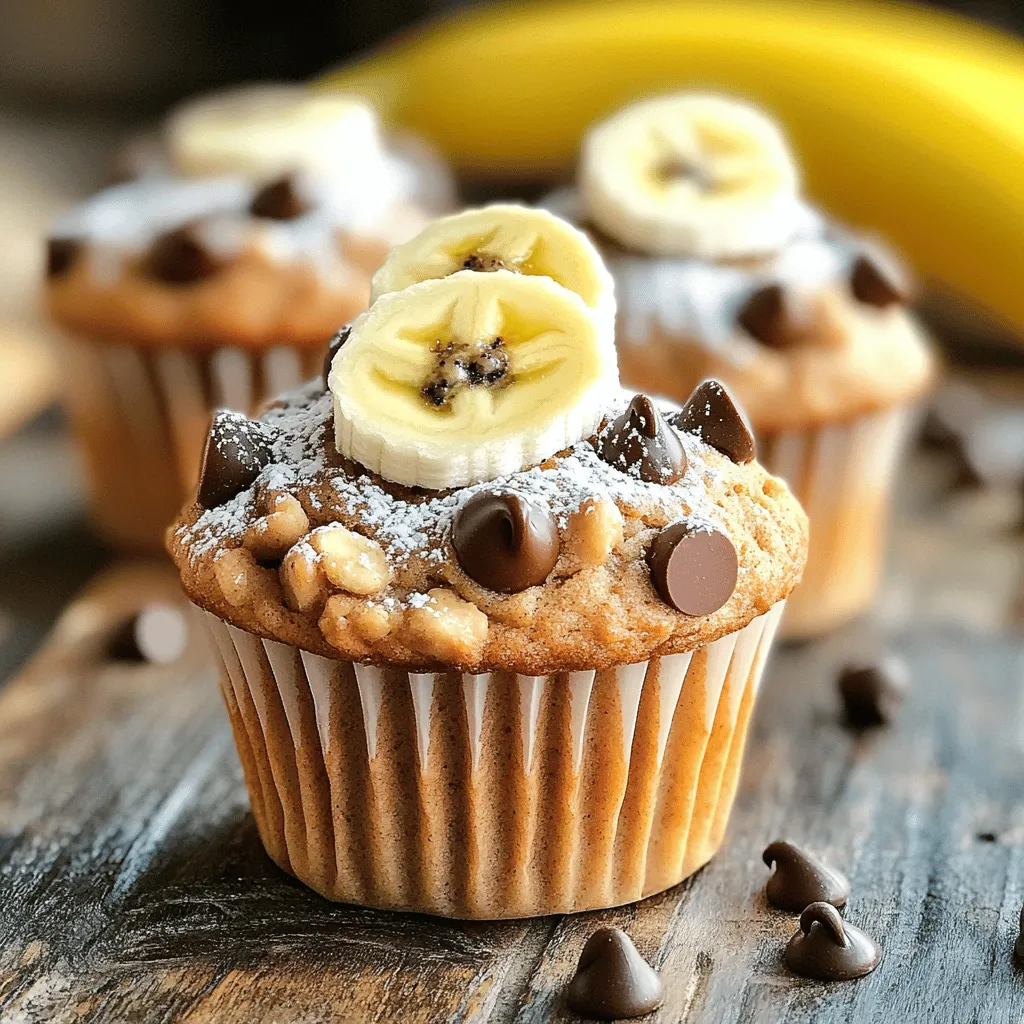
Looking for a tasty and healthy snack? Look no further! These Peanut Butter Oatmeal Muffins are packed with nourishing ingredients

- 4 medium-sized russet potatoes, washed and cut into wedges - 3 tablespoons olive oil - 2 tablespoons smoked paprika - 1 teaspoon cayenne pepper (adjust to taste) - 1 teaspoon garlic powder - 1 teaspoon onion powder - 1 teaspoon dried oregano - Salt and pepper to taste - Fresh cilantro or parsley for garnish - Baking sheet - Parchment paper - Mixing bowl - Knife and cutting board When making spicy roasted potato wedges, gathering your ingredients is key. I love using russet potatoes because they get crispy and fluffy. You will need a large mixing bowl to hold the wedges and the spice mix. Using olive oil helps the spices stick and adds great flavor. Smoked paprika gives a warm, smoky taste. Adjust the cayenne pepper based on how much heat you want. The garlic and onion powder add depth to the flavor. Dried oregano brings a nice herbal note. Don't forget the salt and pepper to enhance everything. Fresh cilantro or parsley adds a pop of color and freshness. For tools, a baking sheet lined with parchment paper makes cleanup easy. A sharp knife and cutting board help you cut the potatoes quickly. You can find the full recipe at the beginning of the article. - Preheat your oven to 425°F (220°C). - Prepare the baking sheet with parchment paper. - In a large bowl, combine: - 3 tablespoons olive oil - 2 tablespoons smoked paprika - 1 teaspoon cayenne pepper (adjust to taste) - 1 teaspoon garlic powder - 1 teaspoon onion powder - 1 teaspoon dried oregano - Salt and pepper to taste Mix well to create a spicy oil mixture. The smoky, spicy flavors will make your potato wedges pop. - Add 4 medium-sized russet potatoes, washed and cut into wedges, to the spicy oil mixture. - Toss until the wedges are evenly coated. Make sure every wedge gets the spicy love. - Place the coated potato wedges on the baking sheet in a single layer. - Roast them in the oven for 30-35 minutes. - Flip halfway through for even cooking. This step ensures they turn golden and crispy. Check them at the end of cooking. They should be crisp on the outside and tender inside. Enjoy your spicy roasted potato wedges! For the full recipe, refer to the earlier sections. To get the best crispiness, space the wedges well on the baking sheet. Leave space between each wedge. This allows hot air to flow around them. If you want a quicker method, try air frying. The air fryer gives a nice crunch and cooks faster. If you like it spicy, add more cayenne pepper. For less heat, reduce the amount. You can also use other spices. Try chili powder for heat or smoked paprika for flavor. Fresh herbs like thyme or rosemary can also add a nice touch. Garnish your potato wedges for extra flavor. Fresh cilantro or parsley works great. You can also add a drizzle of lime juice for a fresh kick. Try serving them with sauces like chipotle mayo or zesty ranch. This adds both flavor and makes them fun to eat! {{image_2}} You can change the taste of your spicy roasted potato wedges in fun ways. Adding cheese makes them even more delicious. I suggest using shredded cheddar or mozzarella. Just sprinkle it on top during the last few minutes of baking. The cheese will melt and create a tasty crust. You can also play with herbs and spices. Try adding chili powder for a smoky kick or cumin for a warm flavor. Mixing in a bit of rosemary or thyme can add freshness to your dish. Experiment with what you love. Each combination gives a new twist. Want to make these wedges even faster? Use an air fryer. Set it to 400°F (200°C) and cook for about 20 minutes. Shake the basket halfway through for even crispiness. They will come out crunchy on the outside and tender inside. If you're enjoying the summer sun, grilling is a great option. Toss the potato wedges in the spicy oil mixture as usual. Then, place them on the grill over medium heat. Cook for about 15-20 minutes, turning occasionally. This method gives a nice char and smoky flavor. These spicy roasted potato wedges are not just a snack; they are great as a side dish too. Serve them alongside burgers or grilled chicken for a complete meal. They also pair well with fresh salads, adding a nice crunch. For dipping, you can’t go wrong with classic options. Try chipotle mayo for a spicy kick or zesty ranch for cooling balance. You can also mix up a simple garlic aioli for a creamy dip. These tasty additions make the dish even more enjoyable. For the full recipe, check out the details above! To keep your spicy roasted potato wedges fresh, cool them first. After they cool, place them in an airtight container. This helps keep them crispy for longer. Store the container in the fridge. They should last about 3 to 5 days. To enjoy your leftovers, reheating them is key. The oven works best for keeping their crunch. Preheat it to 400°F (200°C). Spread the wedges out on a baking sheet. Heat for about 10 to 15 minutes. Flip them halfway for even warmth. If you use a microwave, they may get soft. For a quick fix, heat them in 30-second bursts. Yes, you can freeze cooked potato wedges! To do this, let them cool completely. Arrange them in a single layer on a baking sheet and freeze for 1 to 2 hours. Once firm, transfer them to a freezer bag. They can last up to 3 months. When ready to eat, bake them straight from the freezer. Adjust the baking time as needed for perfect warmth. For the full recipe, check out the Spicy Roasted Potato Wedges section. Yes, you can use different potatoes! While russet potatoes work well, other types can add unique flavors. Here are some good options: - Yukon Gold: Creamy texture and buttery flavor. - Red Potatoes: Slightly sweet and hold their shape well. - Sweet Potatoes: Adds a sweet twist and vibrant color. Keep in mind that cooking times may vary. Thin potatoes may cook faster, while thicker ones need more time. Adjust your cooking time based on the type you use. These spicy roasted potato wedges pair great with many dishes. Consider serving them with: - Grilled chicken or steak for a hearty meal. - Tacos or burritos for a fun twist. - Fresh salads, like a Caesar or garden salad, to balance the spice. For a tasty side, try dipping sauces like chipotle mayo or ranch dressing. They add a creamy touch and enhance the flavor. You can keep leftover wedges for about 3 to 5 days in the fridge. Store them in an airtight container. To keep them crisp, avoid stacking them too closely. If you want to save them for longer, you can freeze the wedges. They can last up to 3 months in the freezer. Just make sure to cool them completely before packing them away. This blog post covers how to make spicy roasted potato wedges. We discussed the ingredients needed, from russet potatoes to spices. You learned step-by-step instructions for preparation and tips for perfect crispiness. We explored variations, storage tips, and answers to common questions. Try these easy wedges for your next meal. They make a great side dish and adapt well to your taste. Enjoy experimenting with different flavors and spices to find your perfect combination.

Spicy Roasted Potato Wedges Crispy and Flavorful Snack

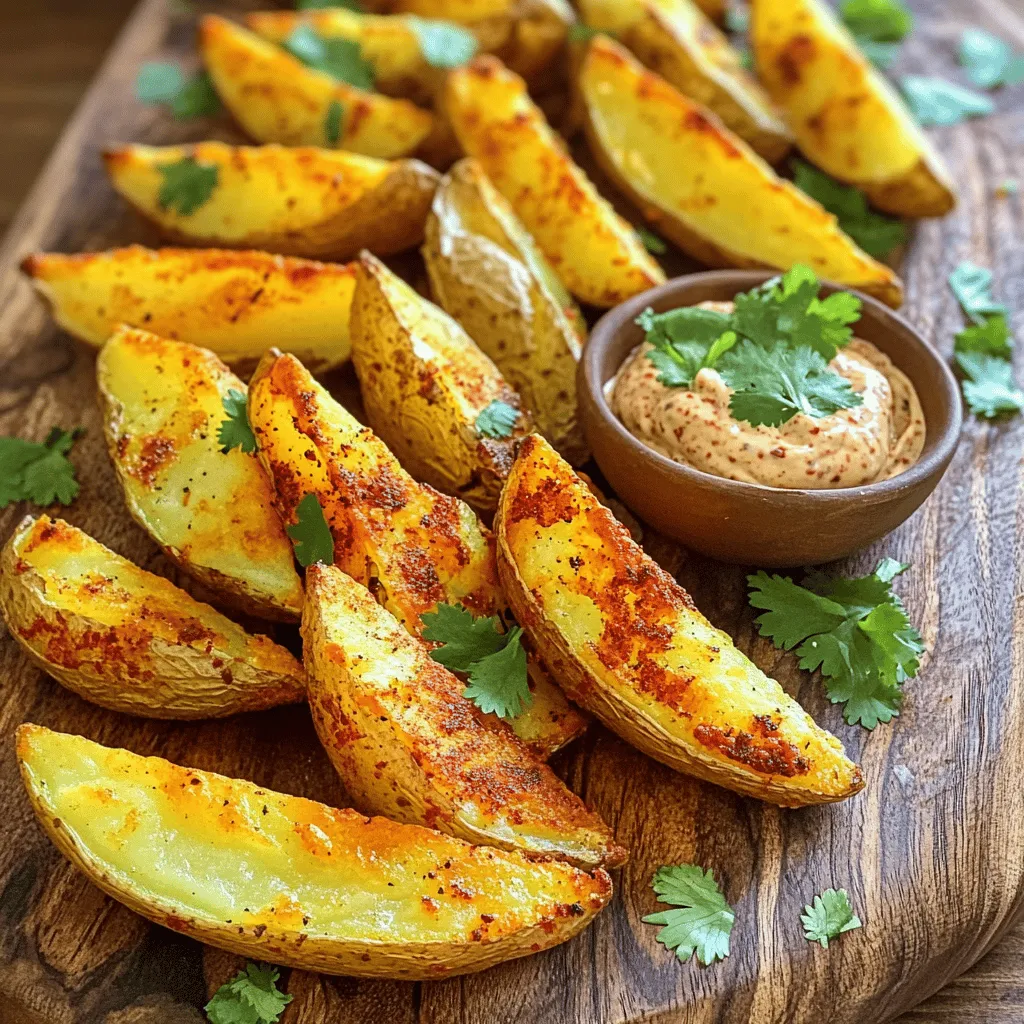
Craving a snack that packs a punch? These Spicy Roasted Potato Wedges are crispy, flavorful, and easy to make! Packed

To make the perfect lemon blueberry chia pudding, gather these simple ingredients: - 1 cup almond milk (or any milk of choice) - 1/4 cup chia seeds - 2 tablespoons maple syrup (or honey) - Zest and juice of 1 lemon - 1/2 teaspoon vanilla extract - 1 cup fresh blueberries - Pinch of salt If you want to switch things up, here are some great substitutes: - Milk: Use coconut milk for a creamier texture. Oat milk is also a good choice. - Sweetener: Try agave syrup or brown sugar instead of maple syrup or honey. - Lemon: Use lime juice if you want a different citrus flavor. Gather these tools before starting your cooking adventure: - Medium bowl or jar for mixing - Whisk to combine ingredients - Clear glasses or bowls for serving These tools make the process easy and fun. You’ll enjoy preparing this delightful dessert! For the full recipe, check out the details above. To make Lemon Blueberry Chia Pudding, start by gathering your ingredients. You will need almond milk, chia seeds, maple syrup, lemon zest, lemon juice, vanilla extract, and fresh blueberries. In a medium bowl or jar, combine: - 1 cup almond milk (or any milk of choice) - 1/4 cup chia seeds - 2 tablespoons maple syrup (or honey) - Zest and juice of 1 lemon - 1/2 teaspoon vanilla extract - Pinch of salt Whisk them together until smooth. Let the mixture sit for about 10 minutes. This allows the chia seeds to soak up the liquid and expand. After 10 minutes, whisk again to break up any clumps. This step ensures a creamy texture. Now, cover your bowl or jar. Place it in the fridge for at least 4 hours. You can also leave it overnight for the best results. Chilling is key to thickening the pudding. Once the pudding is set, stir it again. If it feels too thick, add a splash of almond milk to get your desired texture. When ready to serve, layer the chia pudding in bowls or clear glasses. This shows off the beautiful layers. Add fresh blueberries between the layers for a pop of color. For a final touch, sprinkle some lemon zest on top. You can also add mint leaves for a fresh look. This adds extra flavor and makes your dish look stunning. Enjoy your Lemon Blueberry Chia Pudding! To get chia seeds spread out well, mix them in the liquid right away. Stir the mixture for at least a minute until you see no dry seeds. After ten minutes, whisk again to break up any clumps. This helps each seed soak up the liquid fully. If you skip this step, you might end up with lumps in your pudding. To boost the flavor, use fresh ingredients. Choose ripe blueberries and fresh lemon juice. The zest adds a nice kick, so don’t skip it! For a sweeter taste, adjust maple syrup or honey to your liking. You could also add a pinch of cinnamon for a warm touch. Always taste as you go! One common mistake is not letting the pudding chill long enough. Four hours is best, but overnight is even better. This gives chia seeds time to thicken. Another mistake is not whisking enough. If you skip whisking after the seeds swell, the pudding can be clumpy. Lastly, remember to check the consistency before serving. If it seems too thick, just add a bit of almond milk to loosen it up. {{image_2}} You can change up the lemon blueberry chia pudding in fun ways. Try using other fruits like strawberries, raspberries, or mangoes. Each fruit brings its own unique taste. You can also add spices like cinnamon or nutmeg for warmth. For a tropical twist, you might mix in coconut milk and pineapple. The options are endless! This recipe is easy to adapt for different diets. It is already vegan if you use maple syrup. If you want it gluten-free, you are all set since chia seeds are naturally gluten-free. You can also use any plant-based milk, like oat or soy milk, for added variety. This makes the pudding friendly for many diets. Serving your pudding can be just as fun as making it! Layer the chia pudding in clear glasses with more fresh fruit. This creates a beautiful parfait. You could also blend it with ice for a smoothie. If you want to impress, add whipped coconut cream on top. Each way you serve it looks lovely and tastes great! For the full recipe, check out the Lemon Blueberry Chia Delight 🫐. Store your leftover lemon blueberry chia pudding in a clean, airtight container. This helps keep it fresh. Make sure the lid is tight to avoid odors from other foods. It is best to use glass jars or plastic containers. Clear jars let you see the layers, which is a nice touch. The pudding lasts about 3 to 5 days in the fridge. After that, the texture may change. Always check for any off smells or unusual looks before eating. If it looks or smells strange, it's better to toss it out. You can freeze the pudding for longer storage. Freeze it in small portions to make thawing easy. To thaw, move it to the fridge for a few hours or overnight. You can also microwave it for a few seconds. Stir well after thawing to restore its creamy texture. Enjoy your tasty pudding even after some time! Chia seeds are tiny but mighty! They pack a big punch of nutrients. First, they are high in fiber. This helps with digestion and keeps you full. They also have omega-3 fatty acids, which are good for your heart. Plus, chia seeds are rich in protein, calcium, and antioxidants. When you eat them, they can help support energy and overall health. Yes, you can make this pudding ahead of time. In fact, I recommend it! Making it the night before gives the chia seeds time to soak and swell. This helps create that perfect pudding texture. You can store it in the fridge for up to three days. Just remember to stir it well before serving! Yes, refrigerating the pudding is key. Chilling helps the chia seeds absorb the liquid. This makes the pudding thick and creamy. It also enhances the flavors of the lemon and blueberries. If you skip this step, the pudding may not set properly. So, always remember to chill it for at least four hours or overnight for the best results. In this blog post, we explored how to make Lemon Blueberry Chia Pudding. We covered the ingredients needed and shared possible substitutes. I also detailed the preparation steps and suggestions for serving. Tips helped avoid common mistakes, and we discussed different flavor variations. Lastly, we reviewed proper storage methods. Chia pudding is a fun and healthy treat. Experiment with flavors and enjoy your creation!

Lemon Blueberry Chia Pudding Quick and Tasty Recipe

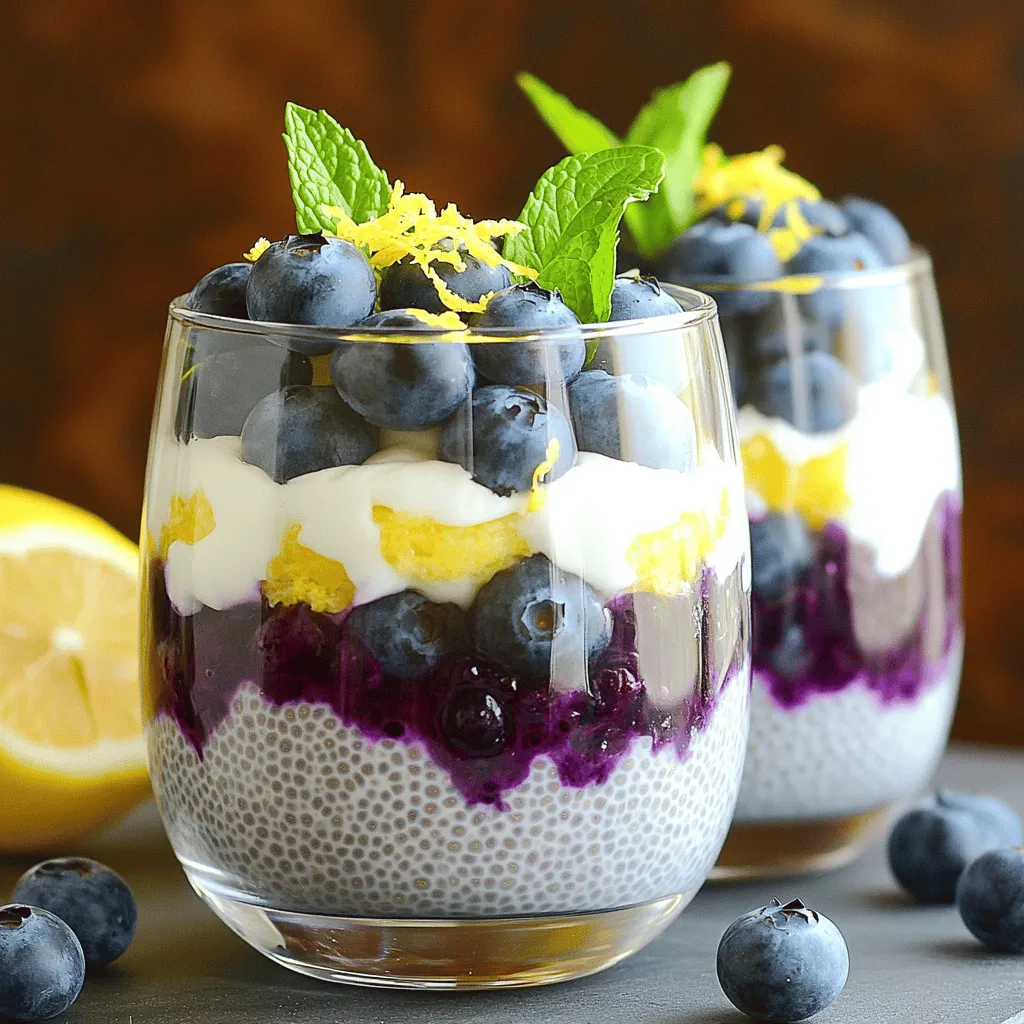
Looking for a quick and tasty recipe that bursts with flavor? This Lemon Blueberry Chia Pudding is your answer! Packed

To make your chocolate fudge mug cake, gather these simple ingredients: - 4 tablespoons all-purpose flour - 4 tablespoons granulated sugar - 2 tablespoons unsweetened cocoa powder - 1/8 teaspoon baking powder - A pinch of salt - 3 tablespoons milk (or non-dairy milk) - 2 tablespoons vegetable oil (or melted butter) - 1/4 teaspoon vanilla extract - 2 tablespoons chocolate chips (optional for extra fudginess) Each ingredient plays a key role in creating a rich and moist cake. The all-purpose flour gives structure, while sugar adds sweetness. Cocoa powder gives that deep chocolate flavor. Baking powder makes the cake rise, and salt balances the sweetness. You can customize your mug cake with milk or a non-dairy alternative. The vegetable oil or melted butter keeps it moist. Vanilla extract enhances the flavor. If you want a gooey treat, toss in chocolate chips. Make sure to measure each ingredient carefully. This ensures you get the best texture and taste. The fun part is that you can easily swap ingredients based on what you have at home. Each choice can change your cake in a unique way! {{ingredient_image_1}} - Mixing the dry ingredients In a large microwave-safe mug, add 4 tablespoons of all-purpose flour, 4 tablespoons of granulated sugar, 2 tablespoons of unsweetened cocoa powder, 1/8 teaspoon of baking powder, and a pinch of salt. Stir well until everything is combined. This mix gives your cake a light and fluffy base. - Adding wet ingredients Now, pour in 3 tablespoons of milk and 2 tablespoons of vegetable oil. Add 1/4 teaspoon of vanilla extract for flavor. Mix these wet ingredients into the dry ones. Stir until the batter is smooth and free of lumps. This step is key for a good texture. - Incorporating chocolate chips If you want extra fudginess, now is the time to fold in 2 tablespoons of chocolate chips. Make sure they are evenly mixed throughout the batter. This adds little bursts of chocolate flavor to every bite. - Microwaving the cake Place the mug in the microwave and cook on high for about 1 minute and 30 seconds. Cooking time may vary based on your microwave's wattage. Watch the cake rise; it should look set in the center and still moist. - Checking doneness After microwaving, check if the cake is done. It should be firm but not dry. If it needs more time, microwave in 10-second bursts until it is perfect. Once done, let the mug cake cool for a minute before you dig in. Enjoy your delicious treat! To get a moist texture in your mug cake, use fresh ingredients. Old flour can dry out your cake. When you mix the wet and dry ingredients, stir gently. This keeps air in the batter. If you overmix, your cake may turn out tough. Adjusting the microwave time is key. Most microwaves are different. My microwave cooks this cake in about 1 minute and 30 seconds. If yours is more powerful, start with 1 minute. Keep an eye on it. The cake should rise and look set, but still moist. One common mistake is overmixing the batter. Mix just until combined. This helps keep the cake light and fluffy. Another issue is using too much flour. Always measure carefully. Too much flour makes the cake dry and dense. Stick to the recipe for the best results. Pro Tips Use a larger mug: A larger mug allows the cake to rise without spilling over, ensuring an even cook. Check microwave wattage: Microwaves vary in power; adjust the cooking time based on your appliance for perfect results. Add a pinch of espresso powder: This can enhance the chocolate flavor, making your mug cake even more decadent. Experiment with toppings: Try adding nuts, fruit, or flavored whipped cream for a personalized touch to your mug cake. {{image_2}} You can change some ingredients in your chocolate fudge mug cake. For a gluten-free option, try using almond flour or a gluten-free blend. They work well and keep the cake moist. If you want to make it dairy-free, use almond milk or coconut milk instead of regular milk. You can also switch the vegetable oil for melted coconut oil. Want to add a twist? Toss in some nuts or dried fruit. Walnuts or pecans give a nice crunch. Dried cherries or raisins add sweetness. You can also use different extracts to change the flavor. Almond extract gives a nice nutty touch, while mint extract adds a refreshing taste. Try these options to create your perfect mug cake! To store leftover cake, let it cool down first. Then, cover the mug with plastic wrap. You can also transfer it to an airtight container. This keeps the cake fresh. Avoid leaving it open to the air, as it will dry out. When you want to eat it again, reheating is easy. Just pop the mug back in the microwave. Heat it for about 15 to 30 seconds. Check if it is warm enough. If not, add a few more seconds. The cake lasts about 2 days at room temperature. If you place it in the fridge, it can stay fresh for about a week. Just remember, the longer it sits, the drier it may become. Can I make this recipe without a microwave? Yes, you can! You can bake the mug cake in a regular oven. Preheat your oven to 350°F (175°C). Pour the batter into an oven-safe mug. Bake for about 15 to 20 minutes. Check if it’s done by inserting a toothpick. If it comes out clean, it's ready. How do I make multiple servings? To make more than one mug cake, just multiply the ingredients. Use the same amounts for each mug. You can mix the batter in a bowl first. Then, pour equal amounts into each mug. Cook in batches if your microwave is small. Can I double the recipe in a larger mug? Yes, you can double the recipe if your mug is big enough. Just remember that cooking time may change. Start with 2 to 3 minutes and check for doneness. The cake should rise and be set in the middle. Is it possible to use less sugar? Absolutely! You can reduce the sugar by a tablespoon or two. This will still give you a tasty cake, but it may taste less sweet. You can also add a bit of fruit or chocolate chips for natural sweetness. This blog post guided you through making a quick and tasty mug cake. We covered the key ingredients needed, mixing methods, cooking steps, and tips to get the best texture. You learned how to customize your cake and store it properly. Remember, it’s all about having fun and experimenting with flavors. Make this cake your own, and enjoy each bite!

Chocolate Fudge Mug Cake Simple and Quick Recipe

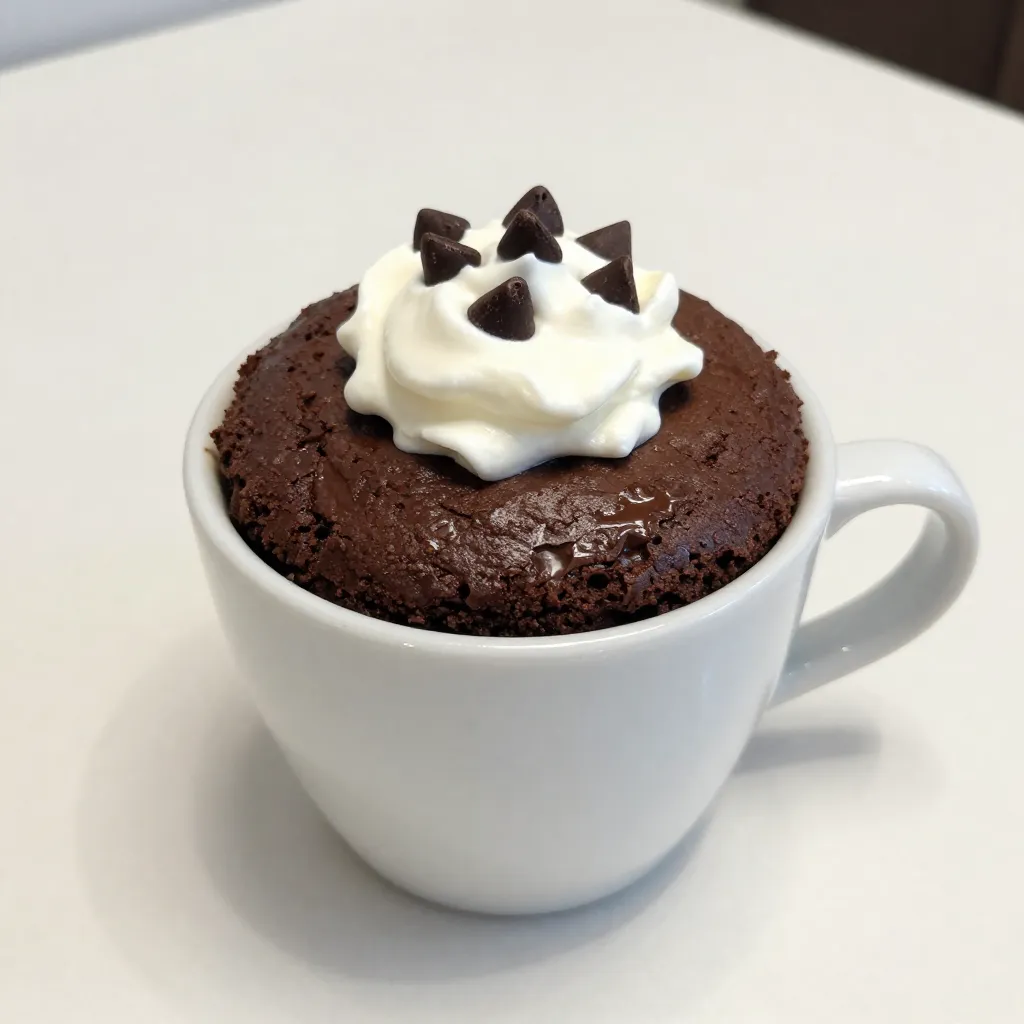
Craving something sweet but short on time? You’re in luck! This Chocolate Fudge Mug Cake recipe is simple and quick,

To make crispy teriyaki tofu, you need a few key ingredients. Here’s what you’ll gather: - 1 block (14 oz) firm tofu, pressed and drained - ¼ cup soy sauce (low sodium preferred) - 2 tablespoons maple syrup - 1 tablespoon rice vinegar - 1 tablespoon sesame oil - 2 cloves garlic, minced - 1 teaspoon fresh ginger, grated - 1 tablespoon cornstarch Each component adds flavor and helps create that crispy texture you crave. Cooking oils play a big role in achieving a crispy finish. For this recipe, you'll need: - 2 tablespoons vegetable oil (for frying) This oil helps fry the tofu to golden perfection without sticking. Garnishes not only make your dish look great but also add a burst of flavor. Consider these options for your crispy teriyaki tofu: - Sesame seeds for garnish - Green onions, sliced (for garnish) These simple additions elevate your dish and give it a pop of freshness. For the full recipe, check out the details above! Start with a block of firm tofu. Press it well to get rid of extra water. This helps the tofu absorb flavor better. Cut the tofu into 1-inch cubes. Make sure they are uniform in size for even cooking. Pat the cubes dry with a paper towel. This step is key for getting that crispy texture later. Next, you will create a tasty marinade. In a small bowl, combine soy sauce, maple syrup, rice vinegar, sesame oil, minced garlic, and grated ginger. Whisk them all together until mixed well. Place the tofu cubes in a shallow dish and pour the marinade over them. Ensure all sides of the tofu are coated. Let it marinate for at least 30 minutes. For more flavor, let it sit in the fridge for up to 2 hours. The longer, the better! Now it's time to fry the tofu. First, toss the marinated cubes in cornstarch. This will help create a nice crispy layer. Heat vegetable oil in a non-stick skillet over medium-high heat. Carefully add the tofu cubes to the skillet. Don’t overcrowd them; this can make them soggy. Fry each side for about 3-4 minutes until they are golden brown. Once done, remove the tofu and let it drain on paper towels. This will soak up any extra oil. For a finishing touch, return the reserved marinade to the skillet. Bring it to a simmer for 2-3 minutes to thicken. Add the crispy tofu back in and toss gently to coat. Now you're ready to serve! Enjoy your crispy teriyaki tofu with steamed rice or quinoa. To get the best crispy texture, start with firm tofu. Press the tofu well to remove water. Moisture leads to soggy tofu. Cut the tofu into even cubes for uniform cooking. Tossing the cubes in cornstarch is key. The cornstarch forms a nice crust. Fry the tofu in hot oil, but do not overcrowd the pan. This helps each piece cook evenly. Allow the tofu to fry undisturbed. This way, each side gets golden brown. A common mistake is not pressing the tofu enough. If you skip this step, your tofu will not crisp well. Another mistake is marinating too briefly. Aim for at least 30 minutes. Too much marinade can also make the tofu soggy. Make sure to dry the cubes after marinating. Lastly, avoid cooking on too low heat. Moderate to high heat is best for crispy results. For this recipe, use a non-stick skillet. It helps with easy flipping and prevents sticking. A spatula with a flat edge is great for flipping the tofu. You might also want a mixing bowl for the marinade. A cutting board and a sharp knife will make cutting the tofu easy. Lastly, a paper towel can help drain excess oil after frying. These tools will make your cooking process smooth and enjoyable. For the full recipe, check out the complete guide. {{image_2}} You can make this dish vegetarian by using plant-based sauces. For example, swap soy sauce with a mushroom soy sauce for a richer flavor. If you need it vegan, the recipe is already vegan-friendly. Just ensure all sauces are free from any animal products. To make the marinade gluten-free, use tamari instead of soy sauce. Tamari tastes similar but has no wheat. Always check labels to ensure the other ingredients are gluten-free. Maple syrup, rice vinegar, and sesame oil are usually gluten-free, making them safe choices. You can add more flavor by including different ingredients. Try adding some chili flakes for heat. Fresh herbs like cilantro or basil can also brighten the dish. You might enjoy adding vegetables such as bell peppers or snap peas during frying. These options create extra texture and color, making your dish even more appealing. Try these variations for a fun twist! For the full recipe, refer back to the beginning. To store leftover crispy teriyaki tofu, let it cool first. Place the tofu in an airtight container. Always keep it in the fridge. This will keep the tofu fresh for a longer time. You can enjoy it later in salads or rice bowls. When you reheat tofu, you want to keep it crispy. For the best results, use an oven or an air fryer. Set the oven to 375°F (190°C). Place the tofu on a baking sheet and heat for 10-15 minutes. This method helps revive the crunch. If you use a microwave, the tofu may turn soft. So, avoid that if you can. Marinated tofu can last in the fridge for about 3-5 days. Make sure to keep it in a sealed container. If you freeze marinated tofu, it can last for up to 3 months. However, freezing may change its texture. It may become a bit spongy after thawing. For the best taste, use marinated tofu within a week. You can bake or air-fry the tofu instead of frying it. To bake, preheat your oven to 400°F (200°C). After marinating, coat the tofu in cornstarch as usual. Place the tofu cubes on a baking sheet lined with parchment paper. Bake for 25-30 minutes, flipping halfway for even crispiness. For air-frying, set your air fryer to 375°F (190°C) and cook the tofu for about 15-20 minutes, shaking the basket halfway through. Both methods give you crispy tofu with less oil, keeping it lighter and healthier. Yes, you can use different types of tofu. Silken tofu works for a softer dish, but it won't get crispy. Firm tofu is best for a nice crunch. Extra-firm tofu is even better, as it has less moisture. This helps it crisp up nicely. If you prefer a plant-based option, check for tofu labeled as "super firm." It will maintain its shape and texture during cooking. Serve your crispy teriyaki tofu over steamed rice or quinoa. This adds a nice base and balances the flavors. You can also add stir-fried veggies for extra color and nutrients. Try broccoli, bell peppers, or snap peas for a fresh crunch. Drizzle some extra teriyaki sauce on top for added flavor. Garnish with sesame seeds and green onions for a beautiful touch. For a fun twist, wrap the tofu in lettuce leaves for a tasty taco-style meal. You can find the full recipe for Crispy Teriyaki Tofu above! You learned how to make Crispy Teriyaki Tofu step-by-step. We covered key ingredients, cooking methods, and tips for perfect texture. You can swap for vegan or gluten-free options too. Remember to store leftovers right to keep them crispy. My final thought? Enjoy experimenting with flavors. Make this dish your own, and share it with friends. They will love it!

Crispy Teriyaki Tofu Flavorful and Easy Recipe Guide

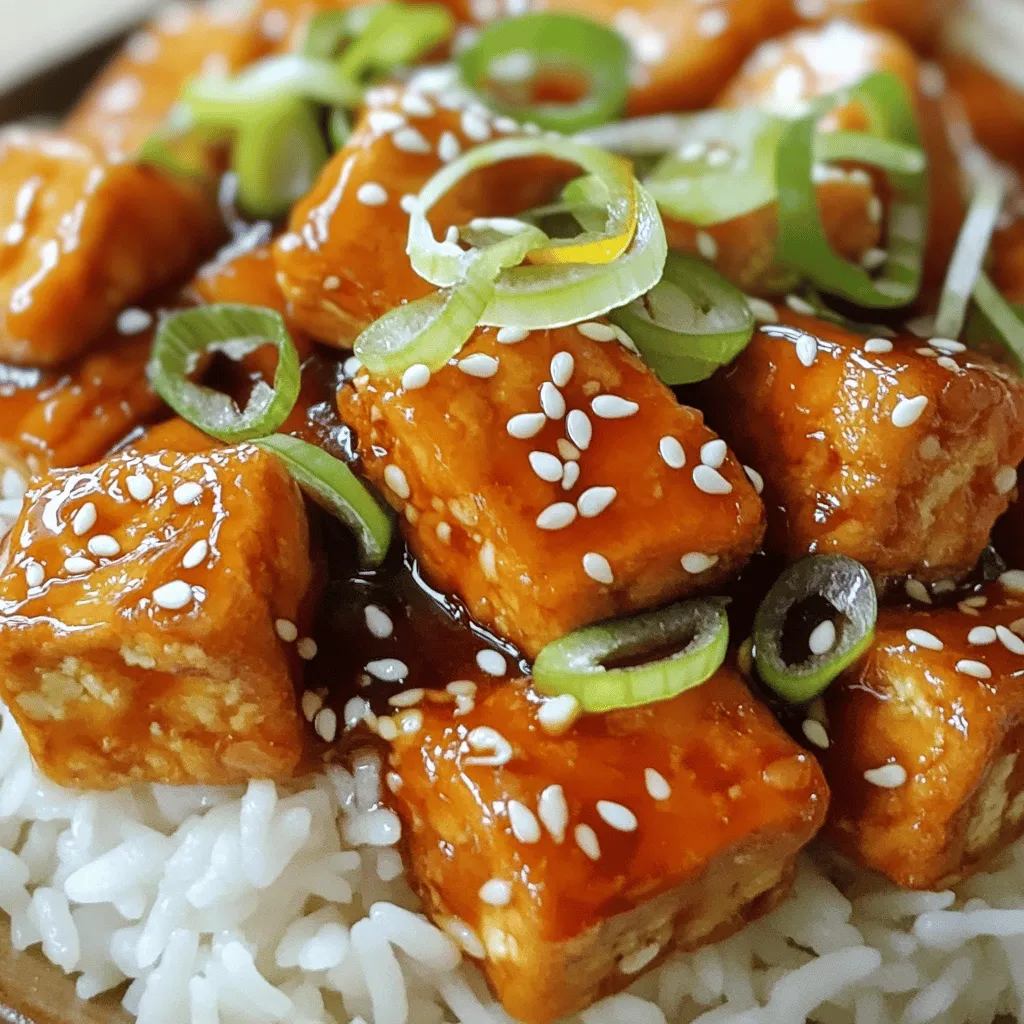
Welcome to your new favorite meal: Crispy Teriyaki Tofu! In this guide, I’ll show you how to make a tasty

To make One-Pot Lasagna Soup, gather these items: - 1 tablespoon olive oil - 1 onion, diced - 3 cloves garlic, minced - 1 pound ground beef or turkey - 1 can (28 ounces) crushed tomatoes - 4 cups chicken or vegetable broth - 2 teaspoons dried oregano - 1 teaspoon dried basil - 1/2 teaspoon red pepper flakes - 8 lasagna noodles, broken into bite-sized pieces - 1 cup ricotta cheese - 2 cups fresh spinach - 1 cup shredded mozzarella cheese - Salt and pepper to taste - Fresh basil leaves for garnish You can swap some items for others. If you want a lighter soup, use ground turkey. For a vegetarian version, try mushrooms or lentils instead of meat. You can replace ricotta with cottage cheese for a similar texture. If you don’t have fresh spinach, frozen spinach works well too. Use vegetable broth if you want to keep it meat-free. Fresh ingredients will make your soup taste better. When choosing vegetables, look for firm onions and bright green spinach. Fresh herbs like basil should smell strong and sweet. If you can, buy organic tomatoes for richer flavor. Always check the expiration dates on canned goods. For the best taste, use high-quality olive oil. To make One-Pot Lasagna Soup, first gather all your ingredients. This makes cooking easier and more fun. Here’s what you need: - 1 tablespoon olive oil - 1 onion, diced - 3 cloves garlic, minced - 1 pound ground beef or turkey - 1 can (28 ounces) crushed tomatoes - 4 cups chicken or vegetable broth - 2 teaspoons dried oregano - 1 teaspoon dried basil - 1/2 teaspoon red pepper flakes - 8 lasagna noodles, broken into bite-sized pieces - 1 cup ricotta cheese - 2 cups fresh spinach - 1 cup shredded mozzarella cheese - Salt and pepper to taste - Fresh basil leaves for garnish Next, prepare your vegetables. Dice the onion and mince the garlic. This will make your soup full of flavor. Now, let’s start cooking! In a large pot, heat the olive oil over medium heat. Add the diced onion and cook for about 3-4 minutes. It should be soft and clear. Then, add the minced garlic and cook for one more minute. Next, add the ground beef or turkey. Break it apart with a spatula. Cook until it is brown and no longer pink, about 5-7 minutes. If there is too much fat, drain it. Now it’s time for flavor! Stir in the crushed tomatoes and broth. Add the oregano, basil, and red pepper flakes. Season with salt and pepper. Bring the mixture to a boil. Once it’s boiling, add the broken lasagna noodles. Lower the heat and let it simmer for about 10-12 minutes. Stir occasionally until the noodles are tender. While the noodles cook, mix the ricotta cheese with a pinch of salt and pepper in a small bowl. This will add creaminess to your soup. Add the fresh spinach to the pot and stir. Let it wilt for 1-2 minutes. To serve, ladle the soup into bowls. Add a generous dollop of the ricotta mixture on top. Sprinkle with shredded mozzarella cheese. For an extra touch, garnish with fresh basil leaves and more red pepper flakes if you like it spicy. This One-Pot Lasagna Soup is hearty and comforting. It's perfect for a cozy night in. For the full recipe, check the earlier section! Enjoy every bite! To make your One-Pot Lasagna Soup really shine, focus on building layers of taste. Start by sautéing the onion and garlic in olive oil. This step adds a nice base flavor. Don't skip the herbs! Dried oregano and basil are key. Add them early for better infusion. Adjust the red pepper flakes for your spice level. A pinch adds warmth without overwhelming the dish. Use pre-chopped onions and garlic to cut down on prep time. You can also buy ground meat that is already seasoned. Instead of breaking lasagna noodles, buy no-boil noodles. They save time and work just as well. Keep your ingredients close by. This helps you move quickly through the cooking steps. You can serve this soup in many fun ways. For a creamy touch, swirl in more ricotta cheese. Want a crunch? Top with crunchy croutons or toasted bread. For added color, sprinkle fresh herbs on top. Serve it with a side salad for a complete meal. This recipe is flexible, so feel free to explore. Check out the Full Recipe for more ideas on how to enjoy this dish! {{image_2}} You can make a great vegetarian version of this soup. Just swap the meat for mushrooms or lentils. I love using a mix of diced zucchini and bell peppers too. These veggies add flavor and texture. Use vegetable broth instead of chicken broth for a full veggie experience. Don’t forget to add more spinach! You can even try adding chickpeas for extra protein. To make this soup gluten-free, choose gluten-free lasagna noodles. There are many good brands available now. Make sure to read the labels. I also suggest using quinoa or rice for a fun twist. Just cook them separately and mix them in at the end. This keeps them from getting too mushy. If you like heat, you can spice up your One-Pot Lasagna Soup. Add more red pepper flakes, or even some chopped jalapeños. You can also try a dash of hot sauce. For a smoky flavor, include some smoked paprika. This adds depth to the dish. It’s a simple way to make your meal exciting. Feel free to check out the Full Recipe for more cooking tips and ideas! Store any leftover One-Pot Lasagna Soup in an airtight container. Make sure it cools to room temperature first. Place it in the fridge. It will stay fresh for up to 3 days. If you want to keep it longer, freezing is a good option. To reheat, use a pot on the stove over low heat. Stir often to avoid sticking. You can also use a microwave. Heat in 30-second intervals, stirring in between. Add a splash of broth if it seems thick. For freezing, pour the cooled soup into freezer-safe containers. Leave some space at the top for expansion. It will last in the freezer for about 3 months. When ready to eat, let it thaw overnight in the fridge. Reheat as mentioned above. Enjoy the warm comfort of your One-Pot Lasagna Soup! One-Pot Lasagna Soup lasts about 3 to 4 days in the fridge. Store it in an airtight container to keep it fresh. If you want to enjoy it longer, consider freezing it. When ready to eat, just thaw and reheat. Yes, you can use other types of meat. Ground turkey or chicken works well. For a richer flavor, try Italian sausage. You can even go meatless and use mushrooms or lentils for a plant-based option. For extra flavor, add fresh herbs like parsley or thyme. You can also stir in a splash of balsamic vinegar. A little parmesan cheese on top adds a nice touch too. Don't forget about a dash of hot sauce for some heat! For the complete dish, check the Full Recipe. This article shared the key ingredients for a delicious One-Pot Lasagna Soup. We discussed substitutions, tips for using fresh items, and ways to enhance the flavor. The step-by-step guide walked you through the cooking process and serving ideas. We also covered time-saving tricks and variations for dietary needs. Lastly, you learned how to store leftovers and reheat them. I hope this helps you enjoy making this tasty soup! With practice, you’ll create meals everyone loves.

One-Pot Lasagna Soup Hearty and Comforting Recipe

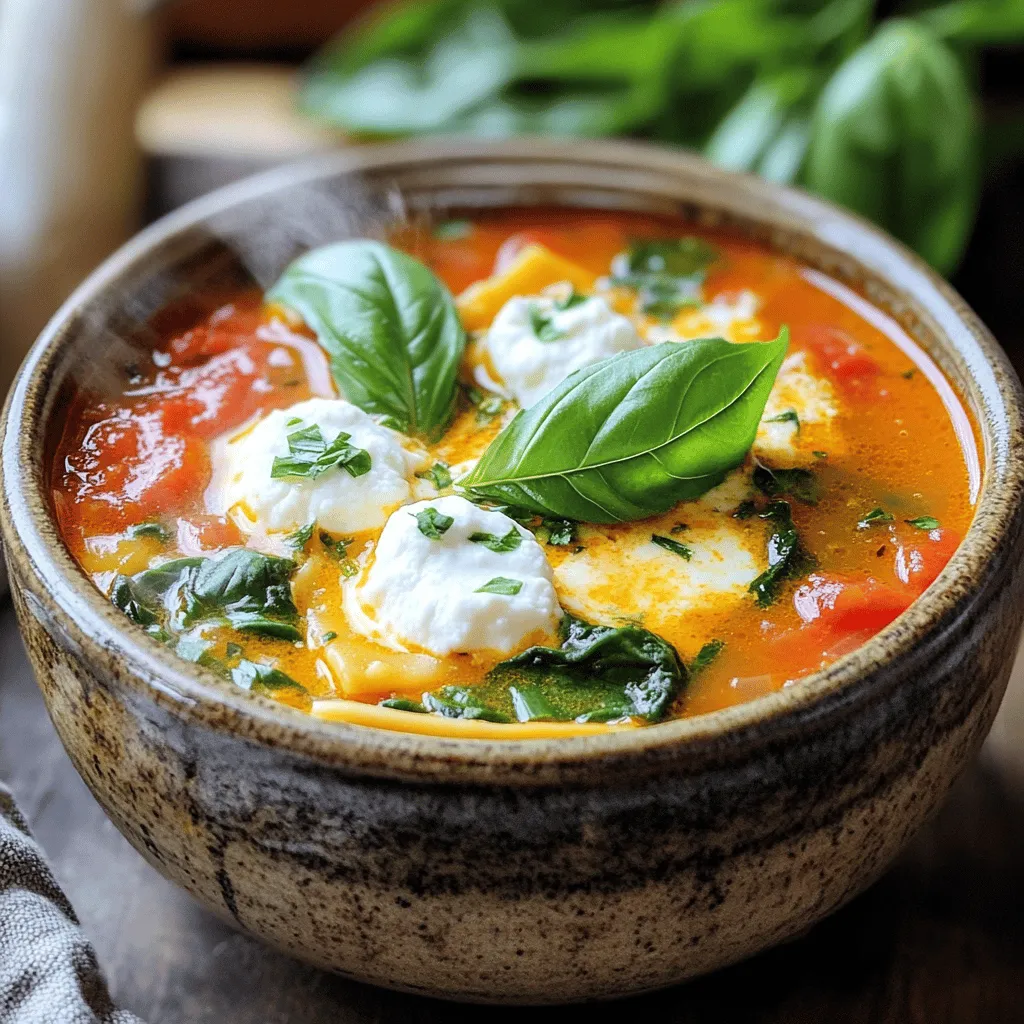
If you love lasagna but want a quicker, easier way to enjoy it, you’re in the right place. One-Pot Lasagna

Older posts
Newer posts
← Previous Page1 … Page55 Page56 Page57 … Page86 Next →

dsad

© 2026 Cooking Wells • Built with GeneratePress

Our Policies

  • Copyright Policy
  • Cookie Policy
  • GDPR Policy
  • Privacy Policy
  • Disclaimer
  • Terms Of Use

More Information

  • Home
  • About
  • Contact
  • Appetizers
  • Dessert
  • Dinner
  • Drinks
©2026, Cooking Wells About Back To Top