Skip to content
DisclaimerTerms Of UseGDPR PolicyCookie Policy

Cooking Wells

  • Home
  • Drinks
  • Appetizers
  • Dinner
  • Dessert
  • About
  • Contact
  • Privacy Policy
DisclaimerTerms Of UseGDPR PolicyCookie Policy

NO-ING-IMG

To make fresh tomato bruschetta, you need a few key ingredients: - 4 ripe heirloom tomatoes, finely diced - 1/2 cup fresh basil leaves, chopped - 2 cloves garlic, minced - 1/4 cup mozzarella balls, halved - 2 tablespoons balsamic glaze - 1 tablespoon olive oil - Salt and pepper to taste - 1 baguette, sliced - Optional: A sprinkle of crushed red pepper flakes for heat When choosing tomatoes, look for smooth skin and rich color. Ripe tomatoes feel firm but yield slightly to gentle pressure. Avoid any that look bruised or have soft spots. Heirloom tomatoes offer unique flavors. Their sweet and juicy taste shines in bruschetta. Choose a mix for varied colors and textures. Fresh herbs elevate your bruschetta. Basil adds a fragrant layer. Its bright green leaves bring freshness to the dish. Use whole leaves or chop them for a stronger flavor. Garden-fresh herbs taste better than dried ones. They make your bruschetta taste like summer in every bite. To start, gather your ingredients. You will need ripe heirloom tomatoes, fresh basil, garlic, mozzarella, balsamic glaze, olive oil, salt, and pepper. In a mixing bowl, combine the diced tomatoes, chopped basil, minced garlic, and halved mozzarella balls. This mix gives your bruschetta its fresh taste. Next, drizzle in the balsamic glaze and olive oil. Gently toss all the ingredients until they blend well. This step is key for flavor. Season with salt and pepper to taste. If you prefer some heat, add crushed red pepper flakes now. Preheat your oven to 400°F (200°C). While it heats, prepare your baguette. Slice it into even pieces, about one inch thick. Arrange the slices on a baking sheet and lightly brush them with olive oil. This helps them get crispy. Bake the slices in the oven for about 5-7 minutes. Keep an eye on them. You want them golden and crunchy, not burnt. Once done, let them cool slightly before topping. Now comes the fun part—assembly! Take each toasted baguette slice and spoon on the tomato mixture. Make sure each slice gets a good amount. For a beautiful finish, drizzle extra balsamic glaze on top. Serve your bruschetta right away. It’s best warm and fresh. For a lovely presentation, arrange them on a rustic platter and add whole basil leaves. Enjoy this tasty and simple appetizer with friends or family! For the full recipe, check out Bursts of Summer Tomato Bruschetta. To make the best bruschetta, start with ripe heirloom tomatoes. Their sweet taste shines through in every bite. Dicing the tomatoes finely helps mix the flavors well. Fresh basil adds a bright note, so chop it just before use. Use fresh garlic for a strong aroma. Mince it finely to release its oils. For a creamy texture, add mozzarella balls. They balance the acidity of the tomatoes. Remember to season with salt and pepper. This enhances all the flavors, making each bite a delight. Serve your bruschetta on a rustic wooden platter. This presentation adds warmth to any table. You can garnish with whole basil leaves. They give a pop of color and freshness. For a twist, drizzle extra balsamic glaze on top. This adds a tangy sweetness that elevates the dish. Pair bruschetta with a glass of chilled white wine. A crisp Sauvignon Blanc complements the fresh flavors. You can also enjoy it as an appetizer at gatherings. It’s a crowd-pleaser and easy to share. To boost the flavor, try adding crushed red pepper flakes. They add a nice kick without overpowering the dish. If you like a bit of zest, squeeze fresh lemon juice over the top. This brightens the flavors and adds a refreshing touch. Experiment with different herbs, like oregano or thyme. Each herb brings a new layer of taste. You can also mix in other veggies, like diced bell peppers. This adds color and crunch, making your bruschetta even more fun. For the full recipe, check the Bursts of Summer Tomato Bruschetta . Each step helps you create a delicious and vibrant appetizer that everyone will love. {{image_2}} Bruschetta is easy to adapt to vegetarian and vegan diets. The base recipe is already vegetarian. To make it vegan, simply skip the mozzarella. You can add extra nuts or seeds for creaminess. Try using avocado or hummus instead. These swaps will keep your bruschetta fresh and tasty. You can mix and match flavors to create your own bruschetta. For a tangy twist, add diced olives or capers. Fresh peppers can also add crunch. If you like herbs, try parsley or chives in the mix. You can even add diced fruits like peaches for a sweet touch. The combinations are endless! Seasonal ingredients can elevate your bruschetta. In summer, use ripe tomatoes and fresh basil. In fall, consider roasted squash or apples with sage. Winter is great for citrus fruits like oranges or grapefruits. These changes keep your dish exciting and fresh all year. For the full recipe, check out Bursts of Summer Tomato Bruschetta . To keep your bruschetta fresh, store it in a sealed container. Place the tomato mixture in one container and the toasted baguette slices in another. This way, the bread stays crispy. Make sure to add a layer of plastic wrap over the tomato mixture. It helps keep the flavors strong. When you want to enjoy your leftover baguette, preheat your oven to 350°F (175°C). Place the slices on a baking sheet. Heat them for about 5-7 minutes. This will make them warm and crispy again. Avoid using a microwave, as it makes the bread soggy. The tomato mixture stays good for about 3 days in the fridge. After that, it may lose freshness and flavor. Make sure to check for any off smells or changes in color before using it. Using fresh ingredients helps maintain its taste. For the best experience, use it within those 3 days. You can find the full recipe for a delicious bruschetta above to guide you. Yes, you can prepare the tomato mix early. Just keep it in the fridge. The bread should be toasted fresh. If you add the tomato mix too soon, the bread will get soggy. Use a good baguette for bruschetta. It should be crusty outside and soft inside. You can also try ciabatta or sourdough. These breads hold up well under the toppings. To prevent soggy bruschetta, toast your bread right before serving. You can brush olive oil on your bread slices and bake them until golden. This helps create a barrier. Keep the tomato mix separate until you are ready to serve. - Full Recipe: Bursts of Summer Tomato Bruschetta Bruschetta is simple and fun to make. It starts with fresh ingredients, like ripe tomatoes and herbs. I shared step-by-step instructions to help you prepare your bruschetta. You learned how to choose the best bread and create delicious variations. Remember, storing leftovers right keeps them tasty for later. Now it's time for you to try the recipe. Make your own bursts of summer flavor today! Enjoy your bruschetta journey and impress your friends.

Fresh Tomato Bruschetta Tasty and Simple Appetizer

Get ready to impress your guests with a simple yet delicious appetizer: Fresh Tomato Bruschetta! I’ll share my favorite tips

The base of these muffins is simple and healthy. Here’s what you need: - 1 cup grated zucchini (about 1 medium zucchini) - 1 cup grated carrots (about 2 medium carrots) - 1/2 cup whole wheat flour - 1/2 cup rolled oats - 1/2 teaspoon baking soda - 1 teaspoon baking powder - 1 teaspoon ground cinnamon - 1/4 teaspoon nutmeg - 1/4 teaspoon salt - 1/2 cup honey or maple syrup - 1/4 cup unsweetened applesauce - 2 large eggs - 1 teaspoon vanilla extract - 1/4 cup chopped walnuts or pecans (optional) These ingredients work well together to make muffins that are soft and flavorful. The zucchini and carrots add moisture and nutrients, while the whole wheat flour and oats provide fiber. You can personalize these muffins to your taste. Consider adding: - 1/4 cup of raisins or dried cranberries for sweetness - 1/4 cup of shredded coconut for texture - A handful of chocolate chips for a fun twist Feel free to mix and match these add-ins. They can change the flavor and make your muffins even more special. Not all ingredients have to be set in stone. Here are some easy swaps: - You can replace whole wheat flour with almond flour for a gluten-free option. - Instead of honey, use agave syrup or another sweetener. - If you need a vegan option, substitute the eggs with flaxseed meal mixed with water (1 tablespoon flaxseed meal + 2.5 tablespoons water = 1 egg). These substitutions still keep the texture and taste of the muffins delicious. Check out the Full Recipe for more details on making these healthy treats! First, gather your ingredients for the Healthy Carrot Zucchini Muffins. Start by preheating your oven to 350°F (175°C). This ensures a nice bake. Line a muffin tin with paper liners or grease it lightly. In a medium bowl, combine 1 cup of grated zucchini and 1 cup of grated carrots. Squeeze out any extra moisture with a clean towel. This step keeps your muffins from being soggy. Next, in a large bowl, mix 1/2 cup of whole wheat flour, 1/2 cup of rolled oats, 1/2 teaspoon of baking soda, 1 teaspoon of baking powder, 1 teaspoon of ground cinnamon, 1/4 teaspoon of nutmeg, and 1/4 teaspoon of salt. Stir until well combined. This dry mix is the base of your muffins. In another bowl, whisk together 1/2 cup of honey (or maple syrup), 1/4 cup of unsweetened applesauce, 2 large eggs, and 1 teaspoon of vanilla extract. Mix until smooth. Combine the wet ingredients with the dry ones. Stir until just combined; do not overmix. Finally, fold in the grated zucchini and carrots, and any chopped nuts if you want. Now, divide the batter evenly among the muffin cups. Fill each cup about 2/3 full to allow room for rising. Place the muffin tin in your preheated oven and bake for 18-20 minutes. Check the muffins with a toothpick. If it comes out clean, they are done. If not, give them a few more minutes. Take the muffins out of the oven once they are golden brown. Let them cool in the pan for about 5 minutes. Then, transfer them to a wire rack to cool completely. These muffins are great warm! Serve them with a dollop of Greek yogurt and a sprinkle of cinnamon on top for an even tastier treat. Enjoy your Healthy Carrot Zucchini Muffins! For these muffins, grating zucchini and carrots is key. Use a box grater or food processor for quick results. Aim for fine grates; this helps them blend well into the batter. After grating, squeeze out excess moisture with a clean towel. This keeps the muffins from getting soggy. To get the best muffin texture, mix dry and wet ingredients separately. Combine them only until just mixed; overmixing makes muffins tough. Fill each muffin cup about two-thirds full for even baking. Use a toothpick to check doneness. It should come out clean when muffins are done. You can boost flavor by adding spices like ginger or cloves. Try mixing in dark chocolate chips for a sweet twist. Adding nuts gives crunch and healthy fats. For a fruity touch, fold in raisins or dried cranberries. These small changes make your muffins unique and tasty. For the complete recipe, check the Full Recipe. {{image_2}} If you want a nut-free option, simply leave out the walnuts or pecans. You can also replace them with seeds like pumpkin or sunflower seeds. These seeds add crunch without nuts. They provide healthy fats and protein. You can enjoy all the flavor without worry. To make these muffins gluten-free, switch the whole wheat flour with a gluten-free flour blend. You can use almond flour, coconut flour, or a mix of both. Adjust the liquid in the recipe as needed. Gluten-free flours can absorb more moisture. Always check if your oats are gluten-free if you use them. Want to spice things up? Try adding extra cinnamon or a pinch of cloves for depth. You can mix in some raisins or cranberries for sweetness. Dark chocolate chips can add a fun twist too. Each of these options enhances flavor and makes your muffins unique. Explore different combinations to find your favorite! For the full recipe, check the details above. To keep your muffins fresh, store them in an airtight container. Place parchment paper between layers if you stack them. This keeps them from sticking together. You can store them at room temperature for up to three days. For longer storage, consider refrigeration. Freezing is a great way to save your muffins for later. First, let them cool completely. Then, wrap each muffin tightly in plastic wrap. Place the wrapped muffins in a resealable bag. They can last in the freezer for up to three months. When you're ready to enjoy, just remove as many as you need. Reheating muffins is simple and quick. For the best taste, use an oven or toaster oven. Preheat it to 350°F (175°C). Place the muffins on a baking sheet for about 10 minutes. You can also microwave them for 15-20 seconds. Add a bit of butter or yogurt on top for extra flavor! Enjoy your Healthy Carrot Zucchini Muffins warm for the best experience. For the full recipe, see above. Yes, you can use different flours. Almond flour or oat flour works well. If you want a gluten-free option, try using a gluten-free all-purpose flour blend. Just remember that each flour has its own texture and taste. This may change how your muffins turn out. These muffins stay fresh for about 3 to 5 days at room temperature. Store them in an airtight container to keep them moist. If you want them to last longer, you can freeze them. They can stay fresh in the freezer for up to 3 months. Carrots are rich in beta-carotene, which helps with eye health. They also have fiber, which aids digestion. Zucchinis are low in calories and high in vitamins A and C. They help keep your skin healthy and boost your immune system. Together, they make these muffins nutritious and tasty. Yes, you can make mini muffins! Just adjust the baking time. Bake them for about 10 to 15 minutes. Check for doneness by inserting a toothpick. If it comes out clean, they are ready. Mini muffins are perfect for snacks or lunchboxes. Healthy carrot zucchini muffins are simple and tasty. We covered key ingredients, step-by-step baking, and helpful tips. You learned about variations like nut-free and gluten-free options, plus storage tips to keep muffins fresh. In my view, these muffins are a perfect snack for any time. Enjoy experimenting in your kitchen with this easy recipe. The health benefits of carrots and zucchinis truly shine in these delightful baked goods.

Healthy Carrot Zucchini Muffins Quick and Tasty Snack

Looking for a quick and tasty snack? You’ll love these Healthy Carrot Zucchini Muffins! Packed with flavor and nutrition, these

- 1 loaf of brioche or challah bread, cut into 1-inch cubes - 6 large eggs - 2 cups whole milk - 1 cup heavy cream - 1/2 cup chopped pecans or walnuts - Powdered sugar, for dusting - Fresh berries for garnish For the best French toast casserole, choose brioche or challah. These breads soak up the egg mixture well. Their soft texture creates a rich, fluffy dish. You can also use whole grain bread for a healthier twist. If you're looking for dairy alternatives, try almond milk or oat milk. They work great in this recipe and keep the flavor rich. A combination of these will give you good results. When choosing nuts, pecans add a nice crunch while walnuts offer a slightly milder taste. You can find the full recipe for this delicious casserole at the end of the article. 1. Start by preheating your oven to 350°F (175°C). This ensures even baking. 2. Grease a 9x13-inch baking dish with butter or cooking spray. This helps prevent sticking. 3. In a large bowl, whisk together the eggs, whole milk, heavy cream, and sugar. 4. Add vanilla extract, ground cinnamon, nutmeg, and salt to the egg mixture. Whisk until it’s smooth. 1. Now, take your cubed brioche or challah bread. Place it evenly in the greased baking dish. 2. Pour the egg mixture over the bread. Press down gently so the bread soaks up the liquid. 3. If you like nuts, sprinkle chopped pecans or walnuts on top for crunch. This adds great flavor. 1. Cover the dish with plastic wrap and place it in the fridge. Let it chill for at least two hours or overnight. This helps the bread absorb the mixture. 2. When ready to bake, take the casserole out of the fridge. Let it sit for about 15 minutes at room temperature. 3. Bake uncovered for 45-50 minutes. Look for a puffed and golden brown top. You can cover it with foil in the last 15 minutes if it browns too much. 4. Once baked, let it cool slightly. Dust with powdered sugar before serving warm. Enjoy with maple syrup and fresh berries! For the full recipe, check out the details above. To get the best texture, you need to soak the bread well. Soaking helps the bread absorb the egg mixture. Aim for at least two hours in the fridge. Overnight soaking is even better. This makes your casserole soft and rich. To prevent dryness, make sure you use enough liquid. The mix of milk, cream, and eggs keeps the bread moist. If you find your casserole is too dry, consider using more cream or milk next time. A good balance of liquid is key. For toppings, think about fresh fruits and maple syrup. Berries like strawberries and blueberries are great options. A dusting of powdered sugar adds a nice touch. You might also want to try nuts for crunch. They add flavor and texture. Pair your casserole with a side of bacon or sausage. This adds protein and balances the meal. For drinks, serve coffee or fresh juice. These make a lovely brunch spread. One common mistake is misjudging the baking time. Keep an eye on your casserole while it bakes. You want it puffed and golden brown. If it looks too dark, cover it with foil to prevent burning. Using the wrong type of bread is another issue. Soft breads like brioche or challah work best. They soak up the liquid well. Avoid using dry or crusty breads. They won't give you the soft texture you want in this classic dish. {{image_2}} You can make classic French toast casserole even more fun. Try adding chocolate chips for a sweet surprise. Fresh fruits like berries or bananas add color and taste. You can also change the spices to match your mood. Try adding a pinch of cardamom or ginger for a warm twist. Each change gives a new flavor to enjoy. Want a gluten-free version? Use gluten-free bread. There are many tasty options available. For a dairy-free dish, swap out the milk and cream for almond or oat milk. You can also use coconut cream instead of heavy cream. These simple swaps keep the casserole delicious for everyone. For special occasions, add festive flavors. Use pumpkin spice for a cozy autumn vibe. During the winter, try peppermint extract for a holiday treat. Citrus zest can brighten up the dish for spring. These twists create a fun way to celebrate with family and friends. To keep your French toast casserole fresh, start by cooling it. Once it’s cool, cover the dish tightly with plastic wrap or aluminum foil. You can also transfer the leftovers to an airtight container. Store it in the fridge for up to three days. When you want to enjoy it again, reheat it in the oven at 350°F (175°C) for about 15-20 minutes. This keeps it warm and tasty. You can freeze the casserole if you want to save it for later. To freeze before baking, assemble the casserole, then cover it tightly with plastic wrap and foil. You can freeze it for up to three months. When you are ready to bake it, thaw it in the fridge overnight. Bake it as usual at 350°F (175°C). If you've already baked it, let it cool before freezing. Wrap it tightly and reheat it from frozen or thawed for about 30-40 minutes. In the fridge, your casserole lasts about three days. If frozen, it can stay good for up to three months. Just remember that freezing may change the texture a bit, but it will still taste great. Enjoy your Classic French Toast Casserole whenever you want a delightful treat! For the full recipe, check out the details above. The best bread for French toast casserole is brioche or challah. These breads are soft and fluffy. They soak up the egg mixture well. This helps create a rich and creamy texture. Other options include sourdough or whole wheat bread. However, they may not be as sweet or soft. If you like a bit of crunch, add some crusty French bread. Just remember, the softer the bread, the better the casserole. Yes, you can easily make this casserole ahead of time. To do this, prepare the casserole and cover it with plastic wrap. Place it in the fridge for at least two hours, or overnight for the best flavor. This soaking time allows the bread to absorb the egg mixture well. When you are ready to bake, take it out and let it sit for about 15 minutes at room temperature. This helps it bake evenly. You will know the casserole is done when it is puffed and golden brown. This usually takes about 45-50 minutes at 350°F (175°C). The center should not jiggle when you gently shake the dish. If it looks too brown on top, cover it with aluminum foil. This will prevent it from burning while it finishes cooking. After baking, let it cool a bit before serving. It will be delicious! Enjoy this delightful breakfast treat with maple syrup and fresh berries. You can find the full recipe in the earlier sections. You now have the tools to make a tasty French toast casserole. We covered key ingredients, step-by-step instructions, and helpful tips. You learned how to achieve the best texture and avoid common mistakes. Plus, we shared delicious variations and storage options. With all this knowledge, you can impress your loved ones at breakfast or brunch. Enjoy making this dish and let your creativity shine!

Classic French Toast Casserole Delightful Breakfast Treat

Wake up to pure delight with my Classic French Toast Casserole! This dish combines soft, fluffy bread soaked in a

To make tasty roasted cauliflower tacos, gather these main ingredients: - 1 large head of cauliflower, cut into bite-sized florets - 2 tablespoons olive oil - 1 teaspoon smoked paprika - 1 teaspoon ground cumin - 1 teaspoon garlic powder - ½ teaspoon chili powder - Salt and pepper to taste - 8 small corn or flour tortillas These ingredients form the base of your dish. The cauliflower brings a nice texture, while the spices add rich flavor. Feel free to add these optional ingredients to make your tacos unique: - 1 avocado, sliced - ½ cup red cabbage, finely shredded - ¼ cup cilantro, chopped - 1 lime, cut into wedges - Hot sauce for serving These extras give your tacos color and freshness. You can mix and match based on your taste. Beyond the basic spices, you can try different seasonings for a twist: - Add chili flakes for heat. - Use taco seasoning for more flavor. - Experiment with lime zest for brightness. Changing up the seasonings can make each taco night fun and exciting. You might find a new favorite! For the full recipe, check out the details above. First, set your oven to 425°F (220°C). This high heat is key for crispy cauliflower. Next, cut a large head of cauliflower into bite-sized florets. Toss these florets in a large bowl with olive oil, smoked paprika, ground cumin, garlic powder, chili powder, salt, and pepper. Make sure every piece is well-coated for the best flavor. Spread the seasoned florets on a baking sheet. Lay them out in a single layer. This helps them roast evenly. Place the sheet in your hot oven. Roast the cauliflower for 25-30 minutes. Toss it halfway through to ensure even browning. You want them golden and crispy, not mushy. While the cauliflower roasts, it’s time to warm the tortillas. You can do this in a dry skillet over medium heat. Heat each tortilla for about 30 seconds on each side. If you prefer, wrap them in foil and place them in the oven for the last 5 minutes of roasting. This keeps them soft and ready for the tacos. With these steps, your roasted cauliflower tacos will be flavorful and easy to make. For the complete cooking process, check out the Full Recipe. To get crispy roasted cauliflower, start with dry florets. Moisture makes them steam, not roast. After cutting the cauliflower, pat it with a clean towel. This step is key. Use enough oil to coat the florets. I suggest two tablespoons of olive oil for one large head. The oil helps crisp the edges. Don't crowd the baking sheet. Give each piece space to roast evenly. Toss the florets halfway through cooking to ensure they brown nicely. When serving your roasted cauliflower tacos, think fresh! I like to add creamy avocado slices. They add a rich flavor and smooth texture. Shredded red cabbage brings a nice crunch. For a pop of green, sprinkle chopped cilantro on top. You can also squeeze fresh lime juice over the tacos. This adds brightness and balances the flavors. If you like heat, a drizzle of hot sauce is a great idea. These tacos pair well with a variety of sides. I recommend a light salad or some Spanish rice for balance. You can also serve them with a zesty salsa or a cool yogurt dip. Dips made from avocado or yogurt add creaminess and flavor. A side of black beans will add protein and fiber. They make the meal more filling. Enjoy your delicious roasted cauliflower tacos with these tasty sides! {{image_2}} If you want to keep your tacos vegan, skip the dairy. Use plant-based yogurt or cashew cream. These options add creaminess without any dairy. You can also add a sprinkle of nutritional yeast for a cheesy taste. It pairs well with the roasted cauliflower. To make these tacos gluten-free, choose corn tortillas. They are tasty and safe for those avoiding gluten. Check labels on store-bought tortillas to ensure they are gluten-free. You can also use lettuce leaves as a wrap for a fresh twist. Get creative with flavors! Try adding mango salsa for a sweet touch. Roasted peppers can add a smoky flavor. You can also mix in some black beans for protein and texture. Experiment with different toppings like pickled onions or jalapeños. Each bite can bring a new taste adventure. Check out the Full Recipe for ideas on how to combine flavors! To keep leftover roasted cauliflower fresh, let it cool first. Place it in an airtight container. Store it in the fridge for up to four days. If you want to freeze it, use a freezer-safe bag. It can last for about three months in the freezer. When storing in the fridge, keep the cauliflower separate from the tortillas. This prevents the tortillas from getting soggy. Make sure to label your containers with the date. This helps you know how long it has been stored. Reheat the cauliflower in the oven for best results. Set your oven to 350°F (175°C). Spread the cauliflower on a baking sheet and heat for about 10-15 minutes. You can also use a microwave. Heat it for 1-2 minutes, but the oven gives better texture and taste. Enjoy your roasted cauliflower tacos with fresh toppings from the Full Recipe! You can use several vegetables instead of cauliflower. Broccoli works well and has a similar texture. You can also try sweet potatoes or butternut squash. These veggies roast nicely and add great taste. If you want a different flavor, use mushrooms. They give a nice umami touch. Just remember to adjust cooking times based on the veggie you choose. Yes, you can prep these tacos ahead of time. Roast the cauliflower and store it in the fridge. It stays fresh for up to three days. When you’re ready to eat, just reheat it in the oven for a few minutes. You can also warm the tortillas again. Assemble the tacos right before serving for a great taste. To add heat, you have many options. First, increase the chili powder in the recipe. You can also add diced jalapeños when assembling the tacos. If you like sauces, drizzle on some hot sauce. Another idea is to mix in a bit of cayenne pepper with the seasoning. Experiment to find your perfect spice level! Roasted cauliflower tacos are tasty and easy to make. You learned the main ingredients and how to customize your tacos. We discussed roasting techniques and warming tortillas. The tips ensure your cauliflower has great texture. Don't forget about vegan and gluten-free options. Storing leftovers can keep your tacos fresh for later. Try these tips in your kitchen. Enjoy the flavors and fun of making your tacos!

Roasted Cauliflower Tacos Flavorful and Easy Recipe

Craving a fresh, tasty meal? Try my Roasted Cauliflower Tacos! They’re packed with flavor and easy to make. Whether you’re

To make Easy Cheesy Corn Casserole, you need the following ingredients: - 2 cups sweet corn (fresh or canned) - 1 cup creamed corn - 1 cup shredded cheddar cheese - 1/2 cup sour cream - 1/4 cup milk - 1/2 cup cornmeal - 1/4 cup sugar - 1 teaspoon baking powder - 1 teaspoon salt - 1/2 teaspoon black pepper - 1/4 cup chopped green onions (for garnish) - 1 tablespoon butter (for greasing dish) If you don’t have sweet corn, try using frozen corn. Just thaw it first. For the cheese, feel free to use a mix of cheddar and Monterey Jack. It adds a nice flavor twist. If you're out of sour cream, plain yogurt works great too. You can switch milk with a non-dairy option if needed. Enjoy playing with these options! They can make your dish even more delightful. 1. Preheat the oven to 350°F (175°C). This helps the casserole cook evenly. 2. Grease a 9x9-inch baking dish with 1 tablespoon of butter. This keeps the casserole from sticking. 3. In a large bowl, mix the wet ingredients: 2 cups of sweet corn, 1 cup of creamed corn, 1 cup of shredded cheddar cheese, 1/2 cup of sour cream, and 1/4 cup of milk. Stir until it blends well. 4. In another bowl, whisk together dry ingredients: 1/2 cup of cornmeal, 1/4 cup of sugar, 1 teaspoon of baking powder, 1 teaspoon of salt, and 1/2 teaspoon of black pepper. 5. Fold the dry mixture into the wet corn mixture. Mix gently until just combined. This keeps the texture light. 6. Pour the batter into your greased baking dish. Use a spatula to smooth the top. 1. Bake the casserole in the preheated oven for about 30-35 minutes. 2. Look for signs of doneness: the casserole should be golden brown, and a toothpick inserted in the center should come out clean. This means it’s ready to enjoy. You can find the full recipe for more details. To get the best texture in your cheesy corn casserole, follow these tips. First, mix the wet ingredients well. This helps all the flavors blend nicely. Use fresh corn for a sweet crunch, but canned corn works too. When mixing in the dry ingredients, do not overmix. A few lumps are okay; they keep the casserole light. For seasonings, I love to add a pinch of smoked paprika or cayenne. This gives a nice kick. You can also try adding garlic powder for extra flavor. Don't forget to taste your mixture before baking. This way, you can adjust the salt or sugar to your liking. Corn casserole pairs well with many side dishes. Try serving it with a fresh green salad or roasted vegetables. It also goes great with grilled chicken or ribs. These options balance the rich cheese and corn nicely. For leftovers, store your casserole in an airtight container. It will last for about three days in the fridge. If you want to save it longer, freeze it. Just wrap it tightly. To reheat, bake it in the oven until hot. This keeps the texture nice and creamy. For the full recipe, check out the Easy Cheesy Corn Casserole guide. {{image_2}} You can make this Easy Cheesy Corn Casserole even more fun with simple changes. Adding proteins like crispy bacon or tender chicken gives it a heartier touch. Just cook the bacon until it’s crispy, then crumble it into the mix. For chicken, use leftover rotisserie chicken or sauté some diced breast. Both options add great flavor! You can also play with cheese. While cheddar is classic, try using Monterey Jack or pepper jack for a spicy kick. Mixing different cheeses creates a rich taste. Adding veggies can also enhance the dish. Consider diced bell peppers, chopped spinach, or even jalapeños for a twist. They brighten the casserole and add color. If you need gluten-free options, this casserole is easy to modify! Use gluten-free cornmeal instead of regular cornmeal. This keeps the texture nice while making it safe for gluten-free diets. For a vegan version, swap the sour cream with a plant-based alternative like cashew cream or coconut yogurt. Use non-dairy milk instead of regular milk. You can replace cheese with vegan cheese or nutritional yeast for a cheesy flavor. These changes make the dish accessible to everyone while keeping it delicious. Feel free to explore these variations and make the casserole your own! Check out the Full Recipe for more ideas. To keep your Easy Cheesy Corn Casserole fresh, store it in an airtight container. Let it cool to room temperature before you cover it. This helps prevent moisture build-up. Place it in the refrigerator if you plan to eat it within a few days. For longer storage, you can freeze it. Just wrap it tightly in plastic wrap, then foil. This keeps it from freezer burn. When you are ready to eat it again, thaw it in the fridge overnight. Reheat it in the oven at 350°F (175°C) for about 20 minutes. You can also microwave it for a quick heat-up. Just cover it to keep it moist. In the refrigerator, the casserole lasts about 3 to 5 days. If you freeze it, expect it to stay good for 2 to 3 months. After that, it may lose its taste and texture. Always check for signs of spoilage like off smells or changes in color before you eat it. Enjoy this dish fresh for the best taste! How to make Easy Cheesy Corn Casserole ahead of time? You can prepare the casserole a day early. Just mix all the ingredients and place them in the baking dish. Cover it and store it in the fridge. When you are ready to bake, take it out and let it sit for about 30 minutes. Then, bake as directed. This makes it easy for busy days! Can you use frozen corn instead of fresh? Yes, you can use frozen corn! It works just as well as fresh corn. Just thaw it and drain any excess water before mixing it in. This saves time and is often easier to find. What can you pair with this casserole for a complete meal? This casserole goes well with many sides. You can serve it with grilled chicken or a fresh salad. It also pairs nicely with roasted vegetables. For a heartier meal, add some chili or pulled pork on the side. These options create a well-rounded dinner. Don't forget to check out the Full Recipe for more tips! This article covered all you need to know about making Easy Cheesy Corn Casserole. We reviewed the ingredients, with alternatives, and shared step-by-step instructions. You found tips for perfect texture and ideas for serving. Variations let you customize flavors and meet dietary needs. I also explained how to store leftovers and answered common questions. Now, you can enjoy your casserole with confidence. Happy cooking!

Easy Cheesy Corn Casserole Simple and Delicious Dish

Looking for a simple and tasty dish that will impress your family and friends? Let me introduce you to Easy

To make the Spicy Curry Zucchini Soup, gather these ingredients: - 4 medium zucchinis, chopped - 1 medium onion, diced - 3 cloves garlic, minced - 1 tablespoon fresh ginger, grated - 1 tablespoon red curry paste - 1 can (14 oz) coconut milk - 4 cups vegetable broth - 2 tablespoons olive oil - 1 teaspoon turmeric powder - 1 teaspoon ground cumin - Salt and pepper to taste - Fresh cilantro, for garnish - Lime wedges, for serving If you have dietary needs, here are some easy swaps you can try: - Use low-sodium vegetable broth for less salt. - Swap coconut milk with almond milk for a lighter option. - Replace red curry paste with yellow curry paste for less heat. - Choose zucchini noodles for a low-carb version or if you want a fun twist. Each bowl of this soup is not just tasty; it’s also healthy. Here’s what you get: - Calories: About 250 - Protein: 4g - Carbohydrates: 16g - Fiber: 5g - Fat: 20g This soup is packed with vitamins from the zucchini and nutrients from the spices. Enjoy it knowing you’re making a healthy choice. For the full recipe, check out the sections before. 1. Start by heating 2 tablespoons of olive oil in a large pot over medium heat. 2. Add 1 medium diced onion. Sauté for about 5 minutes until it turns translucent. 3. Next, stir in 3 minced cloves of garlic and 1 tablespoon of grated ginger. Cook for 1 minute until fragrant. 4. Add 4 medium chopped zucchinis to the pot. Stir well and cook for 5-7 minutes until they soften. 5. Now, mix in 1 tablespoon of red curry paste, 1 teaspoon of turmeric, and 1 teaspoon of cumin. Coat the veggies well. 6. Pour in 4 cups of vegetable broth. Bring the mixture to a boil, then reduce the heat. Let it simmer for 15-20 minutes until the zucchini is tender. 7. Remove the pot from heat. Use an immersion blender to puree the soup until smooth. If you don't have one, let the soup cool slightly. Blend it in a countertop blender in batches. 8. Return the pot to low heat. Stir in 1 can of coconut milk. Season with salt and pepper to taste. Heat for another 5 minutes. 9. Serve hot, garnished with fresh cilantro and lime wedges on the side. To get a creamy texture, blend the soup well. If your soup is too thick, add more broth or water. If it’s too thin, let it simmer longer to thicken. You can make this soup in a slow cooker. Just sauté the onion, garlic, and ginger first. Then add all other ingredients to the slow cooker. Cook on low for 6-8 hours or high for 3-4 hours. If you use an Instant Pot, sauté the onion, garlic, and ginger on the sauté setting. Add the rest of the ingredients, seal the lid, and cook on high pressure for 10 minutes. Let it naturally release for 10 minutes before blending. For the full recipe, check out the complete steps and details. To boost the flavor of your soup, use fresh herbs. Fresh cilantro adds a nice touch. Add a squeeze of lime for brightness. You can also try a pinch of red pepper flakes for extra heat. If you want a deeper flavor, consider adding a dash of soy sauce or tamari. Experiment with spices like coriander or cardamom. These can bring unique notes to your dish. One mistake is adding too much salt too early. It can make your soup too salty. Taste as you go to avoid this. Another common error is not cooking the onions long enough. They should be soft and sweet before adding other ingredients. Also, don’t skip blending the soup. It helps create a smooth texture. Lastly, remember to let the soup simmer. This allows the flavors to meld beautifully. Start by washing all your vegetables well. Cut the zucchini into even pieces for uniform cooking. When chopping onions, use a sharp knife for safety and ease. Mince the garlic finely to release its full flavor. Grate fresh ginger instead of using powdered ginger. Fresh ginger adds a bright taste. When measuring spices, level off the spoon to ensure accuracy. For the full recipe, check out the complete guide. {{image_2}} You can easily make this soup vegan and gluten-free. The main ingredients are already plant-based. Just use vegetable broth and coconut milk, which are both vegan-friendly. Avoid dairy-based toppings like sour cream. Instead, add more fresh herbs or vegan yogurt for creaminess. To change the spice level, adjust the amount of red curry paste. Use less if you prefer a milder soup. You can also add a splash of lime juice for a zesty kick. For extra heat, add some chopped fresh chili or a pinch of cayenne pepper. If you want to switch it up, try yellow curry paste or even a dash of curry powder. You can make this soup heartier by adding extra vegetables. Try carrots, bell peppers, or spinach. For proteins, add chickpeas or cooked lentils. These will boost the nutrition and make the soup filling. Just remember to adjust the cooking times to ensure everything cooks evenly. For the complete recipe of Spicy Curry Zucchini Soup, check out the Full Recipe link. You can store leftover Spicy Curry Zucchini Soup in an airtight container. Let the soup cool down first. This helps keep the flavor and texture fresh. If you have a large batch, consider dividing it into smaller containers. This way, you can grab just what you need. To freeze the soup, pour it into freezer-safe bags or containers. Leave some space at the top since liquids expand when frozen. Label the bags with the date. When you want to eat it, thaw the soup in the fridge overnight. To reheat, pour the soup into a pot. Heat on low until warm, stirring often. You can also use a microwave if you prefer. In the fridge, the soup lasts about 3 to 4 days. If you freeze it, it will be good for up to 3 months. After that, the soup may lose quality, but it will still be safe to eat. Always check for any off smells or changes in color before enjoying your leftover soup. You can enjoy this soup with warm bread. A crusty baguette or naan works well. You can also serve it with a fresh salad. A simple green salad adds a nice crunch. For extra protein, pair it with grilled chicken. Rice or quinoa can make the meal more filling. I love to top it with fresh herbs. Cilantro or basil adds a burst of flavor. Yes, you can make this soup ahead of time. It stores well in the fridge for up to three days. Just let it cool before placing it in a container. When you reheat, add a splash of coconut milk for creaminess. This soup also freezes nicely. Store it in freezer-safe bags or containers. Thaw overnight in the fridge before reheating. To make this soup milder for kids, reduce the curry paste. Start with half a tablespoon instead of a full one. You can also skip the red curry paste altogether. Add more coconut milk for creaminess and sweetness. Serve the soup with lime wedges for extra zing. Kids can add lime to their own bowls. This way, they control the flavor balance. This blog post covered how to make Spicy Curry Zucchini Soup. We reviewed all the ingredients, cooking steps, and tips to improve flavor. You learned ways to adapt the recipe for dietary needs and various cooking methods. Lastly, we discussed storage and answered common questions. Enjoy making this soup, and feel free to experiment. You can create a dish that suits your taste and diet. Happy cooking!

Spicy Curry Zucchini Soup Flavorful and Easy Recipe

Ready to spice up your dinner routine? This Spicy Curry Zucchini Soup is not only flavorful but also super easy

- 3 medium zucchinis, sliced into half-moons - 2 large tomatoes, diced - 1 red onion, thinly sliced - 3 cloves garlic, minced - 2 tablespoons olive oil - 1 teaspoon dried oregano - 1 teaspoon red pepper flakes (optional for heat) - Salt and pepper to taste - Fresh basil leaves for garnish - 1/4 cup feta cheese, crumbled When making this dish, I love using fresh, vibrant ingredients. Zucchini and tomatoes shine in this recipe. The zucchinis bring a lovely crunch, while tomatoes add a juicy burst of flavor. The red onion gives a sweet touch, and garlic adds depth. Don’t skip the olive oil; it helps bring all the flavors together. For seasoning, dried oregano offers a classic taste that pairs well with our core ingredients. If you like a little kick, the red pepper flakes are perfect. Lastly, fresh basil and feta cheese can elevate the dish. The basil adds a fresh note, and feta gives a creamy contrast. You can find the full recipe for this tasty Zucchini and Tomato Skillet above! First, gather your ingredients for the Zucchini and Tomato Skillet. You need 3 medium zucchinis, 2 large tomatoes, 1 red onion, and 3 cloves of garlic. Slice the zucchinis into half-moons. Dice the tomatoes and thinly slice the red onion. Mince the garlic. Heat 2 tablespoons of olive oil in a large skillet over medium heat. Once the oil is hot, add the sliced red onion. Sauté for about 3-4 minutes until it turns translucent. Then, stir in the minced garlic and cook for another minute. The aroma will fill your kitchen! Next, add the sliced zucchinis to the skillet. Season with salt, pepper, and 1 teaspoon of dried oregano. If you like some heat, toss in 1 teaspoon of red pepper flakes. Cook for about 5-7 minutes, stirring often. You want the zucchinis to be tender and a bit browned. After that, gently incorporate the diced tomatoes into the skillet. Stir and cook for another 3-4 minutes. This lets the tomatoes soften and release their juices. Now, it's time to taste your dish. Adjust the seasoning if needed, adding more salt or pepper. Remove the skillet from the heat. If you want a bit of creaminess, sprinkle 1/4 cup of crumbled feta cheese on top. Finish with fresh basil leaves for a burst of flavor. You can serve this warm right from the skillet. Check out the Full Recipe for more details! To make your zucchini and tomato skillet shine, you can adjust the spices. If you like more heat, add more red pepper flakes. For a milder taste, skip them altogether. You can also play with herbs. Fresh basil adds a bright taste. Dried oregano gives a warm flavor. Taste as you go. This helps you find the right balance. Preparation can be quick and easy. Slice your zucchinis and tomatoes ahead of time. You can also chop the onion and garlic in advance. Store them in the fridge until you are ready to cook. This way, you save time when you’re hungry. The key to great zucchini is cooking it just right. Sauté it until it's tender but still crisp. If you cook it too long, it becomes mushy. I recommend stirring occasionally to get even cooking. When you sauté, start with the onion. This builds a strong base flavor. Once it’s translucent, add garlic. Garlic adds depth, but don't let it burn. After that, toss in the zucchinis and let them brown. This step enhances their taste and makes them delicious. Zucchini and tomato skillet pairs well with many toppings. Crumbled feta adds creaminess. Fresh basil gives a lift. You can also serve it with rice or quinoa for a full meal. For a crunch, add toasted pine nuts or walnuts on top. This adds texture and flavor. Enjoy it warm or at room temperature; it’s tasty either way. For the full recipe, check the details above. {{image_2}} You can switch zucchini and tomatoes for other tasty veggies. Consider using bell peppers, eggplant, or summer squash. Each swap brings a new flavor. For a sweeter touch, add corn or peas. These choices can keep your dish fresh and exciting all season long. Want to make this dish vegan? Simply skip the feta cheese. The flavors from the garlic, herbs, and veggies stand strong on their own. You can also make it gluten-free by ensuring all spices are certified gluten-free. This way, everyone can enjoy it. If you want a smoky flavor, try grilling the veggies. Brush them with olive oil and season before grilling. Alternatively, you can roast the veggies in the oven. This method caramelizes their natural sugars, giving you a rich, deep taste. Both methods add a unique spin to your zucchini and tomato skillet. For the full recipe, check the instructions above. To store leftovers, let the dish cool first. Place it in an airtight container. Store it in the fridge for up to three days. This helps keep the flavors fresh. When you want to eat it, just reheat it on the stove or in the microwave. For long-term storage, you can freeze the Zucchini and Tomato Skillet. Use freezer-safe bags or containers. Make sure to remove as much air as possible. It will last up to three months in the freezer. To reheat, thaw it overnight in the fridge. Then, warm it on the stove until heated through. The shelf life of the Zucchini and Tomato Skillet varies. When stored in the fridge, it stays good for about three days. If frozen, it can last up to three months. Always check for any signs of spoilage before use. Enjoy this easy dish at its best with proper storage! For the full recipe, check the main article. You can enjoy this dish with many different options. Here are some ideas: - Grilled chicken for a protein boost. - Quinoa or rice to add a grain. - Crusty bread to soak up juices. - A crisp green salad for freshness. Yes, you can prepare it in advance. Here’s how: - Cook the dish and let it cool. - Store it in an airtight container in the fridge. - Reheat in the skillet over low heat. - Add a splash of olive oil to keep it moist. Definitely! This dish is packed with nutrients. Here are some benefits: - Zucchini is low in calories and high in fiber. - Tomatoes provide vitamins A and C. - Olive oil offers healthy fats for your heart. - You can add feta cheese for extra flavor and protein. You can easily change the spice level. Here are some tips: - Add more or less red pepper flakes. - Try a pinch of cayenne for more heat. - Use sweet paprika for a milder flavor. - Taste as you go to get it just right. You can find the full recipe [here](#). Enjoy making this simple and tasty dish! This blog post walked through making a simple zucchini and tomato skillet. We explored key ingredients, preparation steps, and ways to adjust flavors. Remember, you can swap veggies or adjust spices to fit your taste. Storing leftovers is easy too, whether in the fridge or freezer. Cooking can be fun and flexible. Enjoy trying new ideas and share them with friends to inspire creativity in the kitchen!

Zucchini and Tomato Skillet Flavorful Easy Dish

Looking for a quick and tasty dish that highlights fresh veggies? This Zucchini and Tomato Skillet is the answer! You

- 3 ripe peaches, peeled and sliced - 1 cup fresh blueberries - 2 cups vanilla pudding (store-bought or homemade) - 1 cup whipped cream - 4 cups angel food cake, cubed - 2 tablespoons honey (optional) - Fresh mint leaves for garnish The key to a great peach and blueberry trifle lies in using fresh ingredients. The ripe peaches bring a sweet and juicy flavor that shines through every layer. Blueberries add a burst of tangy goodness, making each bite exciting. For the pudding, you can use store-bought or make it at home. Homemade pudding often tastes better and allows you to control the sweetness. I like to whip my cream to add a light and airy texture. The angel food cake is perfect for soaking up the pudding and fruit juices. If you want a hint of sweetness, drizzle honey on the cake layers. Finish your trifle with a sprinkle of mint leaves. This not only adds a pop of color but also a fresh taste that brightens the dessert. Check out the Full Recipe for more details on how to put this delightful dish together. To make the pudding, you can choose store-bought or homemade. If you go for store-bought, simply follow the package instructions. It’s quick and easy. For homemade vanilla pudding, gather these items: - 2 cups milk - 1/2 cup sugar - 1/4 cup cornstarch - A pinch of salt - 1 teaspoon vanilla extract 1. In a saucepan, mix the milk, sugar, cornstarch, and salt. 2. Cook over medium heat. Stir well until it thickens. 3. Remove from heat and add the vanilla extract. 4. Let it cool before using in your trifle. Now, let’s prepare the angel food cake. This cake is light and fluffy, perfect for our trifle. 1. Take your angel food cake and place it on a cutting board. 2. Use a serrated knife to cut it into bite-sized cubes. 3. Aim for about 4 cups of cake cubes. This helps with even layers in the trifle. Layering is key to a beautiful trifle. 1. In a large trifle dish or individual cups, start with a layer of cake cubes at the bottom. 2. Next, spoon a layer of your prepared vanilla pudding over the cake. 3. Add a layer of sliced peaches and a handful of blueberries. If you want, drizzle a bit of honey on top for extra sweetness. 4. Repeat the layers: cake, pudding, peaches, and blueberries. Finish with a layer of whipped cream on top. Chilling your trifle is very important. - Cover the dish with plastic wrap. - Refrigerate for at least 1 hour. This time helps the flavors blend and the dessert to set. Finally, let’s make it pretty! 1. Before serving, take a moment to garnish. 2. Top your trifle with fresh blueberries, sliced peaches, and mint leaves. This adds a pop of color and freshness. This Peach and Blueberry Trifle is ready to impress! Enjoy the layers of flavor and texture in every bite. For the full recipe, check the details above. For the best pudding, keep it thick and smooth. If it is too runny, your trifle will not hold its shape. Make sure to chill the pudding well before layering it. This helps it set nicely. Choosing ripe peaches is key for great taste. Look for peaches that yield slightly to gentle pressure. They should smell sweet and fragrant. Avoid any hard or overly soft peaches, as they may not taste good. You can serve your trifle in two ways. For a big gathering, a large trifle dish works well. It looks great and feeds many people. For smaller servings, use individual cups or jars. This makes it easy to grab and enjoy. To avoid soggy layers, make sure the fruit is dry. Excess juice can make the cake mushy. You might also want to layer quickly. If you wait too long, the cake can absorb too much liquid. Even distribution of flavors is crucial. When layering, spread the pudding and fruit evenly. This way, every bite is packed with flavor. Don’t skip this step; it makes a big difference in taste! {{image_2}} You can change the fruits in this trifle for fun. Try adding strawberries or raspberries. These fruits bring fresh flavors and bright colors. Strawberries add a sweet, juicy bite, while raspberries give a little tartness. Mixing these fruits keeps your trifle exciting and tasty. Want to boost the flavors? Try adding almond extract to your pudding. Just a few drops can make a big difference. Almond extract has a lovely nutty taste that pairs well with peaches and blueberries. You can also use vanilla bean or lemon zest. These flavors can make your trifle even more delightful. If you need a gluten-free option, use gluten-free angel food cake. There are many brands available now. Just check the label to ensure it meets your needs. For a dairy-free pudding, coconut milk works great. You can also find dairy-free puddings at most stores. These swaps keep your trifle delicious and inclusive. To keep your Peach and Blueberry Trifle fresh, store it in the fridge. Use a tight-fitting lid or plastic wrap to cover it. This prevents the trifle from absorbing other smells in your fridge. Make sure the trifle stays cold and does not sit out for too long. This helps keep the flavors bright and the textures nice. You can freeze Peach and Blueberry Trifle, but it is not ideal. The texture changes when thawed. The whipped cream may become watery, and the cake can get soggy. If you still want to freeze it, do so before adding whipped cream. Layer the pudding and fruit, then cover it well. Thaw it in the fridge before serving, and add the whipped cream fresh. The trifle lasts about 3 to 4 days in the fridge. After that, the fruit can start to break down. You may notice the cake layers get soggy, too. So, it is best to enjoy the trifle within a few days for the best taste and texture. Always check for freshness before serving any leftovers. You can use several cake options in place of angel food cake. Here are a few: - Pound cake - Sponge cake - Ladyfingers These cakes add a nice texture and flavor to the trifle. Choose what you like best! Yes, you can prepare the Peach and Blueberry Trifle a day early. Just follow these steps: - Layer the cake, pudding, and fruit as usual. - Cover the trifle well with plastic wrap. - Store it in the fridge overnight. This allows the flavors to blend beautifully! Yes, you can make a vegan Peach and Blueberry Trifle. Here are some swaps: - Use a vegan sponge cake or ladyfingers. - Replace vanilla pudding with a plant-based version. - Use coconut whipped cream instead of regular whipped cream. These changes keep the dessert tasty and vegan-friendly! A typical serving of Peach and Blueberry Trifle has around 300 calories. The calories can vary based on the cake and pudding you use. You can check the Full Recipe for more specific details on calories based on your ingredients. This blog covered a delightful peach and blueberry trifle. We looked at ingredients, instructions, and tips for success. You learned how to prepare fresh fruit, pudding, and angel food cake. We explored fun variations and storage ideas. Enjoy making this tasty dessert. It’s perfect for gatherings or a sweet treat. With fresh flavors and easy steps, you can delight everyone. Trust that your trifle will be a crowd-pleaser!

Peach and Blueberry Trifle Delightful and Easy Recipe

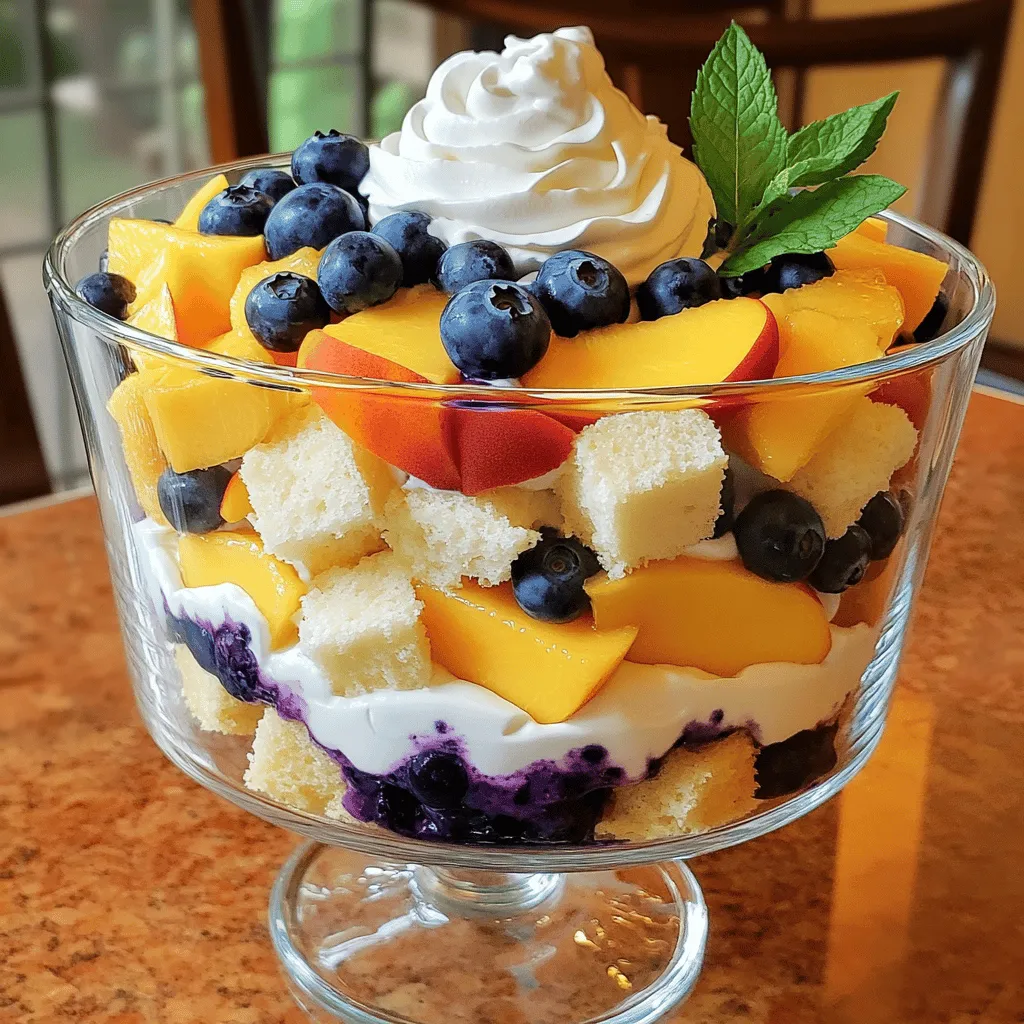
Indulge in the sweet, summery goodness of a Peach and Blueberry Trifle! This dessert is delicious, colorful, and very easy

To make crispy air fryer zucchini fries, gather these simple ingredients: - 2 medium zucchinis, cut into fries - 1 cup whole wheat bread crumbs - 1/2 cup grated Parmesan cheese - 1 teaspoon garlic powder - 1 teaspoon onion powder - 1/2 teaspoon smoked paprika - 1/2 teaspoon salt - 1/4 teaspoon black pepper - 2 large eggs, beaten - Olive oil spray Using fresh zucchinis makes a big difference. They should feel firm and heavy. Fresh zucchinis have better taste and texture. Whole wheat bread crumbs add a nice crunch. They also boost fiber content. Always choose high-quality Parmesan cheese. It adds flavor and richness to the fries. Spices should be fresh, too. Old spices lose flavor and aroma. Good ingredients lead to a better dish. If you are gluten-free, use gluten-free bread crumbs. They work well and keep the fries crispy. For a dairy-free option, try nutritional yeast instead of Parmesan. It gives a cheesy flavor without dairy. If you want a vegan recipe, skip the eggs. Use a mixture of ground flaxseed and water instead. This will help the crumbs stick to the zucchini. These swaps keep the dish tasty for everyone! To start, grab two medium zucchinis. Wash them well to remove any dirt. Cut each zucchini into fries, aiming for 1/4-inch thick pieces. This helps them cook evenly. Try to make them as uniform as possible. Uniform sizes mean they will fry at the same rate. Lay the fries on a towel to absorb extra moisture. This step ensures they become crispy later. Next, prepare your breading. In a shallow bowl, mix the whole wheat bread crumbs, grated Parmesan cheese, garlic powder, onion powder, smoked paprika, salt, and black pepper. Stir well so all the spices mix together. In another bowl, beat the two large eggs until well mixed. Now, take each zucchini fry and dip it in the beaten egg. Let any extra egg drip off. Then, coat the fry in the breadcrumb mixture. Press gently to make sure the crumbs stick well. Now it’s time for air frying! Preheat your air fryer to 400°F (200°C). This should take about 3 to 5 minutes. While it preheats, lightly spray the air fryer basket with olive oil spray. Arrange the zucchini fries in a single layer in the basket. Make sure not to overcrowd them; they need space to cook. Lightly spray the tops of the fries with more olive oil. Air fry for 10 to 12 minutes. Shake the basket halfway through to ensure even cooking. The fries should turn golden brown and crispy. Once done, carefully remove them and let them cool for a moment before you dig in. For extra flavor, serve with marinara sauce or garlic aioli. Enjoy your crispy air fryer zucchini fries! Check the [Full Recipe] for more details. To make your zucchini fries super crispy, follow these tips: - Use fresh zucchini: Fresh zucchini holds less water. This helps keep your fries crisp. - Cut evenly: Make sure all fries are the same size. This ensures they cook at the same rate. - Dry the zucchini: After cutting, pat the fries with a paper towel to remove moisture. - Coat well: Press the zucchini into the breadcrumb mix. This helps the coating stick better. Preheating your air fryer is key for crispiness. Here are the steps: - Set the right temperature: Always preheat to 400°F (200°C). - Time it right: Preheat for 3-5 minutes. This gets the air fryer hot before you add food. - Use olive oil spray: Lightly spray the basket before adding fries. This helps them crisp up. Avoid these mistakes for the best results: - Overcrowding the basket: Lay fries in a single layer. Too many fries can lead to steaming, not crisping. - Skipping the spray: Forgetting to spray olive oil can result in soggy fries. - Not shaking the basket: Shaking halfway through helps fries cook evenly. By following these tips and tricks, your crispy air fryer zucchini fries will turn out perfect every time. Check the Full Recipe for all the details! {{image_2}} You can boost the flavor of your zucchini fries easily. Try adding spices like cayenne pepper for heat. Or mix in Italian herbs like oregano and basil for a fresh taste. You can also use a blend of cumin and coriander for a warm, earthy flavor. Just sprinkle these spices into the bread crumb mix before coating the zucchini. If you want to switch up the cheese, there are great options. You can use nutritional yeast for a cheesy flavor without dairy. Or try crumbled feta for a tangy twist. For a rich taste, opt for aged cheddar or smoked gouda. Each choice will give your fries a unique flavor while keeping them crispy. Making a vegan version of zucchini fries is simple. Instead of eggs, use flaxseed meal mixed with water. Use two tablespoons of flaxseed meal with six tablespoons of water. Let it sit for a few minutes until it thickens. You can also skip cheese or use a vegan cheese alternative. This way, you still get that crispy, tasty snack without any animal products. For the full recipe, check out the detailed steps above. To keep leftover zucchini fries fresh, place them in an airtight container. Make sure they cool down before sealing. Store them in the fridge for up to three days. This method helps maintain their texture and flavor. When you're ready to enjoy your leftover fries, use the air fryer for reheating. Set it to 350°F (175°C). Place the fries in the basket in a single layer. Heat them for about 5-7 minutes. This will help them regain their crunch. To freeze zucchini fries, first, let them cool completely. Arrange them in a single layer on a baking sheet. Freeze for 1-2 hours until solid. Once frozen, transfer them to a freezer bag. Label the bag and store them for up to three months. When you’re ready to eat, cook them straight from the freezer, adjusting the time as needed. For the full recipe, follow the steps outlined above. You can serve air fryer zucchini fries with many tasty dips. Marinara sauce is a classic choice. It adds a nice tangy flavor. You can also try garlic aioli for a creamy touch. Ranch dressing works well too, giving a cool contrast to the fry's crunch. Fresh herbs like parsley or basil can brighten up the dish. Pairing these fries with a side salad can add freshness and balance. Using frozen zucchini is not ideal for this recipe. Frozen zucchini has more water, so it can get soggy. Fresh zucchini is best for keeping fries crispy. If you only have frozen, you can try it, but expect a different texture. Thaw the zucchini first and pat it dry with paper towels. This step helps reduce moisture before breading and cooking. Zucchini fries are done when they turn golden brown and crispy. Check them at about 10 minutes into cooking. If they look pale, give them a couple more minutes. You can also use a fork to test. If it goes through easily, they are ready. Remember, shaking the basket halfway through helps them cook evenly. Enjoy your crispy fries! You learned about the key ingredients for zucchini fries and their quality. I shared step-by-step instructions for preparing, breading, and air frying them. I also included tips for extra crispiness and common mistakes to avoid. You can explore flavor variations, storage tips, and reheating methods. Now, you can enjoy delicious, crispy zucchini fries anytime. With these steps, you will impress everyone with this simple dish. Use fresh ingredients, follow the tips, and make it your own! Enjoy every bite.

Crispy Air Fryer Zucchini Fries Simple and Tasty Snack

Craving a snack that’s crispy, tasty, and easy to make? Look no further! I’m excited to share my recipe for

- Cucumbers - Red onion - Cherry tomatoes - Fresh parsley - Fresh mint leaves For this zesty lemon cucumber salad, fresh ingredients are key. You want to use crisp cucumbers as the base. They add a cool crunch. Slice them thin for the best texture. The red onion gives a mild bite. Cherry tomatoes add sweetness and color. Fresh parsley and mint bring bright flavors. They make the salad taste fresh and lively. - Lemon juice - Extra-virgin olive oil - Honey (optional) The dressing is simple but packed with flavor. You’ll need fresh lemon juice for a tangy kick. It balances the salad nicely. Extra-virgin olive oil adds richness. It brings all the ingredients together. If you like a hint of sweetness, add honey. This will round out the flavors and make each bite delightful. - Salt and pepper to taste Salt and pepper are essential for enhancing taste. They bring out the natural flavors in the cucumbers and tomatoes. Just sprinkle a bit on, then taste. You can always add more if needed. This simple step makes a big difference in overall flavor. For the full recipe, check out the instructions section. You’ll find everything you need to make this refreshing salad. First, wash your cucumbers under cold water. Make sure they are clean. Next, slice the cucumbers into thin rounds or half-moons. I prefer half-moons for a nice shape. Place them in a large mixing bowl. Now, take your red onion. Slice it thinly, just like the cucumbers. The thin slices will mix well. Then, halve the cherry tomatoes and add them to the bowl. The colors will look great together. Now it's time to combine everything. In your large bowl, mix the cucumbers, red onion, and cherry tomatoes. This will create a fresh base. Next, sprinkle in the chopped parsley and mint. These herbs add a burst of flavor. For the dressing, grab a small bowl. Whisk together the lemon juice, olive oil, and honey if you want a touch of sweetness. Season it with salt and pepper to taste. This dressing will tie everything together. Pour the dressing over the mixed vegetables. Gently toss everything until each piece is coated. This step is key for great flavor. Let the salad sit for about 10 minutes. This allows the flavors to meld. Just before serving, give the salad another stir. Taste it and adjust the seasoning if needed. Your Lemon Cucumber Salad is now ready to enjoy! For the full recipe, check the Full Recipe section. - Use the juice of 1 large lemon. This adds a bright, tangy taste. - Fresh herbs like parsley and mint boost the salad's flavor. They add a nice touch of freshness. - Serve the salad in a clear glass bowl. This shows off the colorful ingredients. - Garnish with extra mint leaves or a sprinkle of feta cheese. This makes your dish look appealing and fancy. - Prepare the salad ahead of time. This gives the flavors time to mix. - Adjust the ingredients to fit your taste. You can add more lemon or herbs if you like. For the complete recipe, check out the Full Recipe section. {{image_2}} You can easily change up the flavors in this salad. Adding feta cheese makes it creamier and adds a salty bite. Just crumble some feta over the top just before serving. It pairs well with the lemon and cucumber. Incorporating bell peppers adds crunch and color. Use red, yellow, or orange bell peppers for sweetness. Slice them thin and mix them into the salad. This twist makes the dish more colorful and exciting. While the lemon dressing is fresh, you can try other dressings for variety. A balsamic vinaigrette adds a sweet tang that blends well with the cucumber. Cream-based dressings, like ranch or yogurt-based dressings, also work. They add a rich creaminess that can be quite enjoyable. Feel free to experiment until you find your favorite! Using seasonal vegetables can make your salad even better. In summer, add fresh corn for sweetness. In fall, try diced apples for crunch and a slight sweetness. You can also modify this salad for holiday themes. For example, in winter, add pomegranate seeds for color and a festive touch. These small changes keep the salad fresh and fun! You can find the full recipe for this delicious salad in the earlier section. Store any leftover lemon cucumber salad in an airtight container. This keeps the flavors fresh and vibrant. I like to use glass containers, as they help me see what's inside. They also do not stain or retain odors. A good lid ensures no air gets in. This way, the salad stays crisp and tasty for longer. To keep your ingredients fresh, store cucumbers separately. They last longer when not mixed with the dressing. You can also wrap cucumbers in a damp paper towel. Place them in a plastic bag to keep them moist. For longer storage, consider freezing the herbs. Just chop them, mix with olive oil, and freeze in an ice cube tray. This way, you can have fresh herbs ready for your next meal. The salad will stay fresh in the fridge for about 2 to 3 days. After that, the cucumbers may get soggy. Look for signs of spoilage, like a mushy texture or off smell. If the salad starts to smell sour, it's best to toss it out. Enjoy your lemon cucumber salad while it's at its best! For salads, I recommend using English cucumbers or Persian cucumbers. They have fewer seeds and a thin skin, which makes them perfect for fresh dishes. English cucumbers are long and straight, while Persian cucumbers are smaller and crunchier. Both add a crisp texture and a refreshing taste to your salad. Yes, you can make this salad ahead of time. However, it’s best to keep the dressing separate if you plan to store it. Mix the salad ingredients and store them in the fridge. Just add the dressing right before serving. This keeps the vegetables crunchy and fresh. You can store lemon cucumber salad in the fridge for up to two days. After that, the cucumbers may become soggy. Always check for signs of spoilage, like a bad smell or a slimy texture. For the best taste, enjoy it fresh! This blog post shared a fresh and vibrant cucumber salad recipe. We discussed the key ingredients, preparation steps, and tips to enhance flavor. You learned how to mix and present your salad beautifully. Remember, you can adjust ingredients to match your taste or season. Embrace variations to keep it exciting, and follow our storage tips for lasting freshness. Making this salad is easy, enjoyable, and perfect for any meal. Try it, and you'll savor the freshness every time!

Lemon Cucumber Salad Fresh and Flavorful Delight

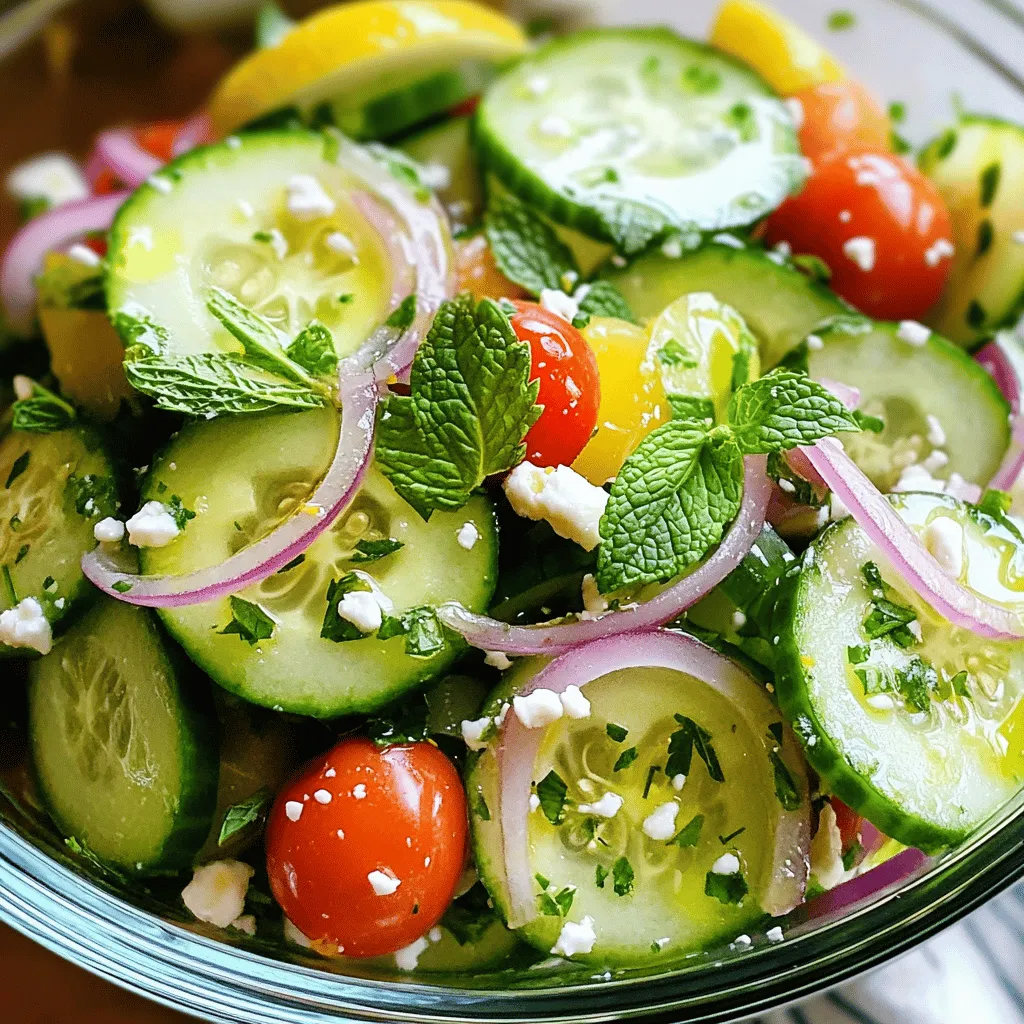
Are you ready to brighten up your meals with a refreshing twist? This Lemon Cucumber Salad is the perfect way

Older posts
Newer posts
← Previous Page1 … Page57 Page58 Page59 … Page86 Next →

dsad

© 2026 Cooking Wells • Built with GeneratePress

Our Policies

  • Copyright Policy
  • Cookie Policy
  • GDPR Policy
  • Privacy Policy
  • Disclaimer
  • Terms Of Use

More Information

  • Home
  • About
  • Contact
  • Appetizers
  • Dessert
  • Dinner
  • Drinks
©2026, Cooking Wells About Back To Top